- 1one piece_娜美_01_one piece hentai
- 2CrossOver软件2023破解激活码_crossover-wine注册
- 3Spring Boot(四):Thymeleaf 使用详解_spring thymeleaf
- 4NX+Ubuntu18.04+ROS Realsense(RealSenseD435i )的安装与使用_realsense安装
- 5记录:rosdep update
- 6js通过a标签的方式下载文件并对其重命名的完整方案_a标签下载文件重命名
- 7JavaScript中的Array.prototype.forEach()方法(简介+重写)_js array.prototype.foreach
- 8leetcode 94 二叉树的中序遍历(java)_lecode中树的输入root = [1,null,3,2,4,null,5,6]是怎么转化成节点的
- 9R语言入门笔记2.1
- 10c#--正则表达式(项目常用)_c# 正则表达式 数字
国产uos安装nfs
赞
踩
统信uos安装nfs
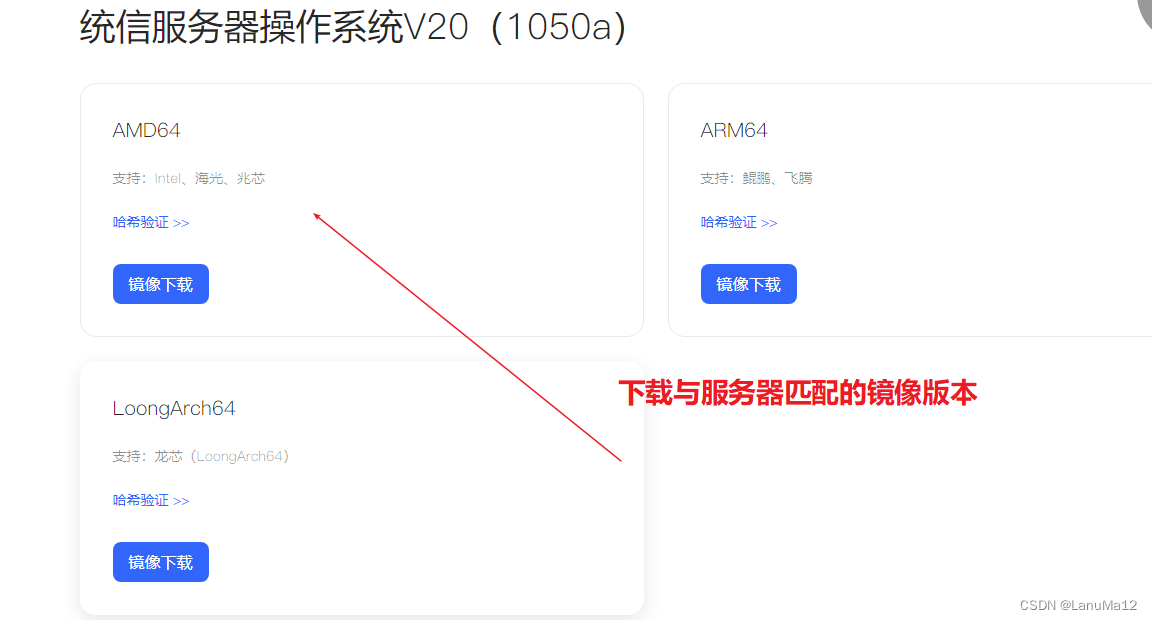
一、下载镜像
下载地址:
https://www.chinauos.com/resource/download-server
下载版本要与系统镜像版本一致:
二、上传服务器并挂载
1、上传服务器
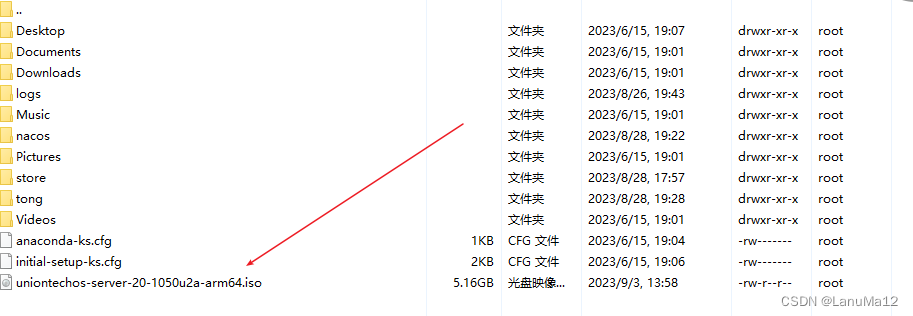
2、挂载并搭建yum源
(1)新建挂载目录
mkdir -p /mnt/uos-20
(2)挂载
mount /root/uniontechos-server-20-1050u2a-arm64.iso /mnt/uso-20/
(3)查看是否挂载成功。
进入到/mnt/uso-20
ls -l
![]()
目录下有上述文件说明挂载成功。
(4)配置yum源
cd /etc/yum.repos.d
并编辑(没有.repo)新建即可。
vim zhuo.repo
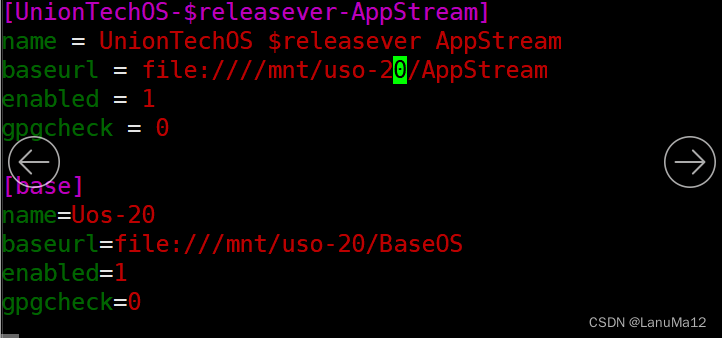
i esc
:wq
(5)清空仓库
yum clean all
(6)更新仓库
yum update --allowerasing
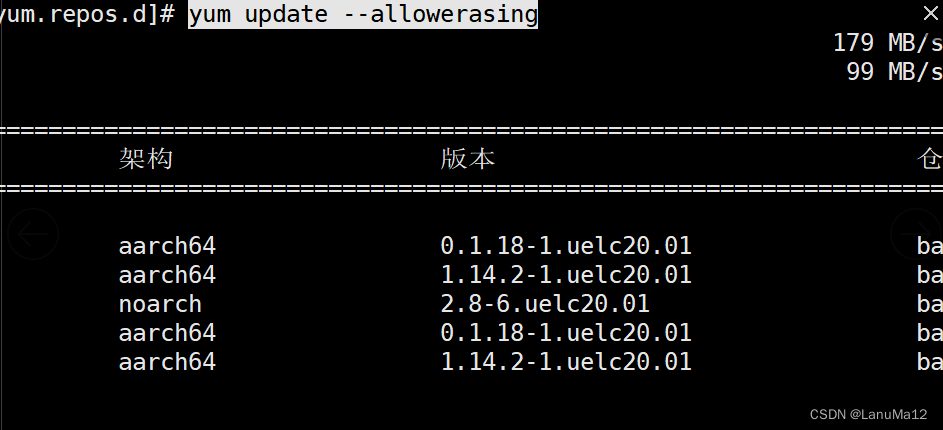
(7)清理yum 源缓存。
yum makecache

三、安装nfs
1、查找nfs , yum search nfs

yum -y install 安装上述软件
2、查看是否安装nfs 或rpc
netstat -ntlp(未发现)
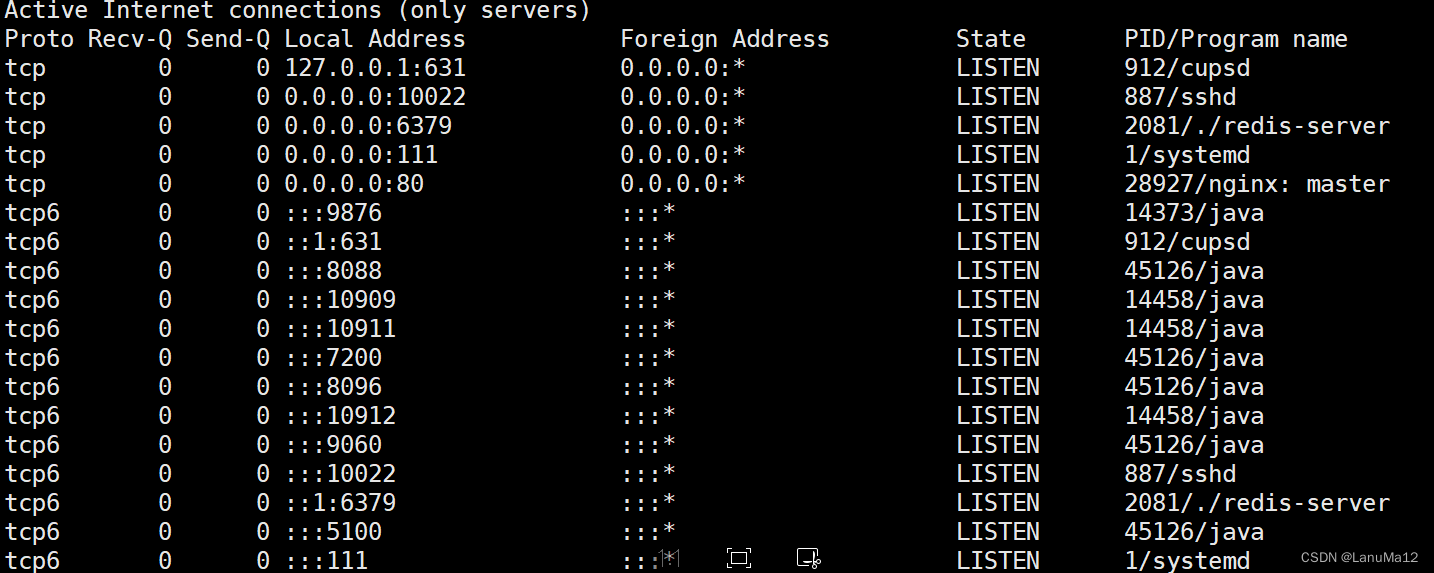
3、安装
进入:
cd /mnt/uso-20/BaseOS/Packages
yum search nfs 可以看到有 nfs-utils
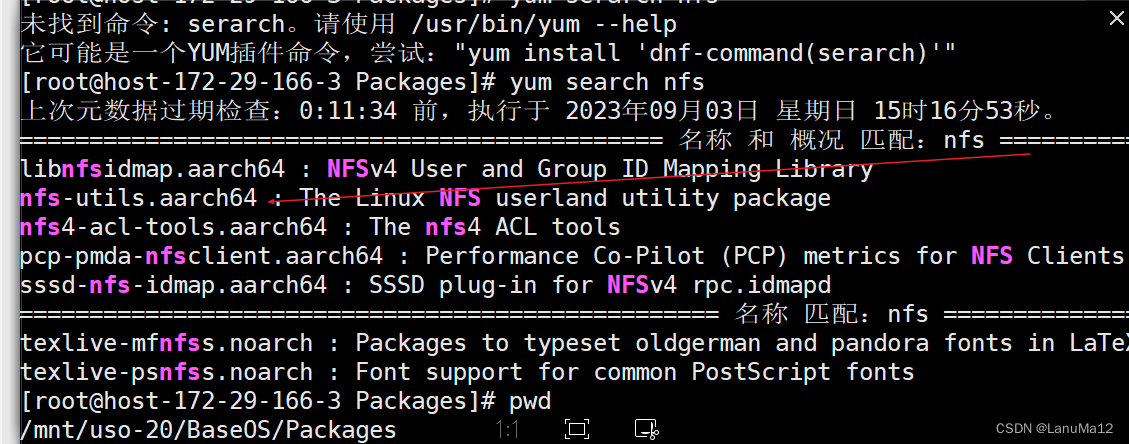
安装:yum install -y nfs-utils


查看是否安装成功:
rpm -qa nfs-utils
![]()
查看是否安装rpc.
rpm -qa rpcbind

四、启动nfs
- 查看是否有nfs启动
netstat -ntlp

2、启动rpcbind(一般都是自启动的,忽略)
查看启动状态
systemctl status rpcbind
3、启动nfs
(1)查看是否启动:
systemctl status nfs-server

(2)启动
systemctl status nfs-server

4、添加nfs开机自启动。
五、服务器端配置
- 创建共享目录
mkdir /data/teasbase/
2、指定要共享的目录及权限
修改/etc/exports文件
vim /etc/exports
/data/teasbase ip1/24(rw,sync,insecure,no_subtree_check,no_root_squash)
/data/teasbase ip2/24(rw,sync,insecure,no_subtree_check,no_root_squash)
rw,(读写)
sync,(同步写入文件到内存和硬盘中)
insecure,
no_subtree_check,
no_root_squash
3、查看服务器共享的目录
exports -v
4、配置完后重启nfs
systemctl restart nfs
systemctl status nfs
六、客户端挂载
1、查看服务器共享
showmount -e nfs-server ip
2、挂载
mount -t nfs 服务ip:/opt/share/ /mnt/
将服务器端的/opt/share 下的所有文件,映射到客户端下mnt目录下。
3、查看是否挂载成功
Lsblk或查看mnt目录下是否有nfs服务端的目录。


