- 1Linux内存占用过高排查过程_anonpages
- 2Vite静态资源处理——动态引入图片_vite 动态图片
- 3vue2.0+Element UI 实现动态增加删除多个表单(点击按钮增删一排输入框)_vue 点击按钮增加一段form表单
- 4vue + element-UI 实现深色模式和主题色动态切换_vue-element-admin 深色主题
- 5OpenCV_10 傅里叶变换:频域滤波+CV的应用_opencv的bandpass filter
- 6小白保姆级NoteExpress_and_NVivo安装教程_nvivo20下载安装教程
- 7明年3月前CCF人工智能会议截稿汇总--ICCV, IJCAI, SIGIR等13条_ijcai2024截稿日期
- 8强推8款基于GPT的满分AI实用工具,用过的都说好_gpt工具推荐
- 9STM32单片机启动流程分析_main函数,是单片机运行的第一个函数吗?
- 10linux外接光驱下载文件,Linux 从光驱拷贝文件以及加载新的硬盘
html+css_html+=
赞
踩
HTML
超链接
超链接标签的作用(不会自动换行)
		【1】实现不同页面之间的跳转
		     href:指定跳转到目标资源的位置
		     target:打开网页的方式
		【2】实现锚点功能
- 1
- 2
- 3
- 4
<body>
	<a href="#bottom" name="top">返回底部</a>
	<br />
	<!--跳转到本地的资源位置-->
	<a href="02body中常用小标签.html" target="_blank">02小标签测试</a>
	<!--跳转到网络的位置-->
	<a href="http://www.bjsxt.com">北京尚学堂</a>
	<br />
	<br />
	<br />
	<a href="#top" name="bottom">返回顶部</a>
</body>
- 1
- 2
- 3
- 4
- 5
- 6
- 7
- 8
- 9
- 10
- 11
- 12
表格
table>tr*3>th*3 : 声明3行3列的表格

table表格的自适应能力(align="center")整个表格整体居中

使用cellpadding:内容和单元格的距离

cellspacing:单元格和单元格的距离

colspan:列合并
rowspan:行合并
- 1
- 2
- 3
- 4
- 5
- 6
- 7
- 8
- 9
- 10
表单标签
https://www.baidu.com/s?键1=值1&键2=值2

action:表单提交的位置

method(get/post):表单提交的方式
get:(1)参数会依附于url地址之后,(2)利用get方式提交数据,数据的长度有限制(3)利用get方式提交数据,是不安全的

post(1)请求不会依附于地址,(2)利用post处理参数不受限制(3)post提交数据比较安全
- 1
- 2
- 3
- 4
- 5
- 6
- 7
- 8
<form action="01body中的常用标签.html" method="get">
	<!--普通文本框-->
	<input type="text"  name="wd"/>
	<input type="submit" value="百度一下" />
</form>
- 1
- 2
- 3
- 4
- 5
		<form>
			<!--普通文本框  value:文本框中值-->
			账号: <input type="text"  name="zh" value="123" /> <br />

			密码:<input type="password" name="pwd" value="123" /><br />

			<!--单选框  实现单选的效果必须指定同一个name属性   checked:默认的选择-->

		   男:<input type="radio"  name="sex"  value="1" checked="checked"/>
		   女:<input type="radio"  name="sex" value="0"/>	<br />

		   <!--多选框-->

		    抽烟:<input type="checkbox"  value="1" checked="checked">

		    喝酒:<input type="checkbox" />

		    烫头:<input type="checkbox" /><br />

		    <!--多行文本框-->

		    个人介绍: <textarea rows="15" cols="20" value="">你好</textarea><br />

		    <!--文件选择框-->
		    <input type="file" name="file" /><br />

		    <!--隐藏框-->

		    <input type="hidden" name="sno" value="20180607" /><br />

		    <!--下拉框  selected:默认的选择-->

		    <select name="ch">

		    	<option value="1">中国</option>

		    	<option value="2" selected="selected">美国</option>

		    	<option value="3">日本</option>

		    	<option value="4">新加坡</option>

		    </select> <br />

		    <!--提交按钮-->
		    <input type="submit" value="提交" /> <br />

		    <!--清除按钮,清空写好的内容-->

		    <input type="reset" value="清除" />

		    <!--普通的按钮  没有提交数据的功能-->
		    <input type="button" value="提交" />

		</form>
- 1
- 2
- 3
- 4
- 5
- 6
- 7
- 8
- 9
- 10
- 11
- 12
- 13
- 14
- 15
- 16
- 17
- 18
- 19
- 20
- 21
- 22
- 23
- 24
- 25
- 26
- 27
- 28
- 29
- 30
- 31
- 32
- 33
- 34
- 35
- 36
- 37
- 38
- 39
- 40
- 41
- 42
- 43
- 44
- 45
- 46
- 47
- 48
- 49
- 50
- 51
- 52
- 53
- 54
- 55

Iframe标签
<body>
		<ul>
			<li><a href="http://www.baidu.com" target="ifm">百度</a></li>
			<li><a href="http://www.taobao.com" target="ifm">淘宝</a></li>
			<li><a href="http://www.jd.com" target="ifm">京东</a></li>
		</ul>
		<!--框架学习  width:宽度  height:高度  src:默认路径 -->
		<iframe width="1000px" height="550px" name="ifm" src="http://www.baidu.com"></iframe>
	</body>
- 1
- 2
- 3
- 4
- 5
- 6
- 7
- 8
- 9

Frameset标签
一般使用Frameset去搭建前端的基础框架
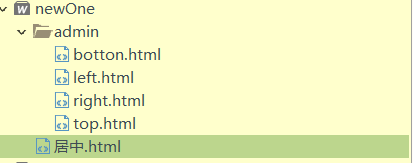
居中.html
<html>
	<head>
		<meta charset="UTF-8">
		<title></title>
	</head>
		 <frameset rows="150px,*,100px">

	 	<!--顶部部分-->
	 	 <frame  src="admin/top.html" noresize="noresize"/>
	 	<!--中间的部分-->

	 	<frameset cols="10%,*">
	 		<!--左侧部分-->
	 		<frame  src="admin/left.html"/>
	 		<!--右侧部分-->
	 		<frame  src="admin/right.html" name="rig"/>
	 	</frameset>

	 	<!--底部部分-->
	 	<frame  src="admin/botton.html"/>

	 </frameset>
</html>
- 1
- 2
- 3
- 4
- 5
- 6
- 7
- 8
- 9
- 10
- 11
- 12
- 13
- 14
- 15
- 16
- 17
- 18
- 19
- 20
- 21
- 22
- 23
botton.html right.html top.html 均为以下格式
	<body>
		<h1> botton.html</h1>
	</body>
- 1
- 2
- 3
left.html
<body>
	<h1>left.html</h1>

	<ul>
		<li><a href="http://www.baidu.com" target="rig">百度</a></li>
		<li><a href="http://www.taobao.com" target="rig">淘宝</a></li>
		<li><a href="https://www.layui.com/" target="rig">layui</a></li>
	</ul>
</body>
- 1
- 2
- 3
- 4
- 5
- 6
- 7
- 8
- 9
运行结果


div
div本身是没有任何的含义

div:作用就是把网页进行模块化的划分
- 1
- 2
- 3
html 表单增强标签
H5中表单增强的属性

placeholder

autofocus:自动的获得焦点

max:最大值

min:最小值

minlength:最小长度

maxlength:最大长度
- 1
- 2
- 3
- 4
- 5
- 6
- 7
- 8
- 9
- 10
- 11
- 12
- 13
<body>
		<form>
			<p>
				账号:<input type="text"  placeholder="手机号/邮箱/账号" autofocus/>
			</p>

			<p>
				密码:<input type="number" max="130" min="0" />
			</p>

			<p>
				密码:<input type="password"  minlength="2" maxlength="4" />
			</p>
			<p>
				<input type="submit" value="提交" />
				<input type="reset" value="清空" />
			</p>
		</form>
	</body>
- 1
- 2
- 3
- 4
- 5
- 6
- 7
- 8
- 9
- 10
- 11
- 12
- 13
- 14
- 15
- 16
- 17
- 18
- 19

标签
	<!--引入音频的标签-->
		<audio src="img/1.mp3" controls="controls">
		</audio>

		<audio>

			<source src="img/1.mp3"></source>

		</audio>

		<!--引入视频的标签-->
		<video src="img/movie.mp4" controls="controls" width="300px" height="300px"></video>

		<video>

			<source src="img/movie.mp4"></source>

			<source src="img/movie.ogg"></source>

		</video>

		<hr />

		<!--多媒体标签 -->
		<embed src="img/1.mp3"></embed>


		<embed src="img/movie.mp4" width="500px" height="500px">
		</embed>
- 1
- 2
- 3
- 4
- 5
- 6
- 7
- 8
- 9
- 10
- 11
- 12
- 13
- 14
- 15
- 16
- 17
- 18
- 19
- 20
- 21
- 22
- 23
- 24
- 25
- 26
- 27
- 28
- 29
在img标签下,figcaption标签可以向图片底部添加文字,起到注解文字的效果
		<figure>

			<img src="img/1.jpg" />

			<figcaption>IT程序员</figcaption>

		</figure>
- 1
- 2
- 3
- 4
- 5
- 6
- 7
有相同效果的代码有:
		<dl>
			<dd>
				<img src="img/1.jpg" />

			</dd>
			<dd>
				IT程序员

			</dd>

		</dl>
- 1
- 2
- 3
- 4
- 5
- 6
- 7
- 8
- 9
- 10
- 11

下滑选项效果的实现
 		<details>

			<summary>请选择</summary>
			<p>中国1</p>
			<p><mark>中国2</mark></p>
			<p>中国3</p>
			<p>中国4</p>

		</details>
- 1
- 2
- 3
- 4
- 5
- 6
- 7
- 8
- 9
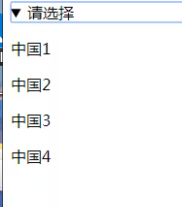
有类似效果的有画布标签 canvas
		<datalist id="city">

			<option value="IBM">IBM</option>
			<option value="IBM1">IBM1</option>
			<option value="IBM2">IBM2</option>
			<option value="IBM3">IBM3</option>

		</datalist>
- 1
- 2
- 3
- 4
- 5
- 6
- 7
- 8
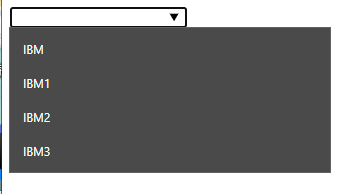
这种是可以删除的选项

CSS
导入外部css文件
<link rel="stylesheet" type="text/css" href="css/css1.css"/>
- 1
rel:是指引入文件和当前文件的关系–stylesheet风格表
href:引入文件的路径
CSS引入方式的顺序:就近原则
CSS 中三种引入方式遵循的就近原则不相同的样式会进行样式的叠加 ,相同的样式会采用就近一致 的原则。样式跟随距离自己近的风格。
CSS 引入的三种方式 行内样式 外部样式(链接式) 内嵌样式(内部样式)
选择器的优先级
ID>类选择器>元素选择器>通用选择器
也有:
id选择器>class选择器>标签选择器(元素选择器)
<style>
			/*通用选择器  *代表该页面中的所有的元素 */
			*{
				color: red;

				background-color: black;
			}
			/*元素选择器*/
			div{

				width: 200px;

				height: 200px;
				/*背景颜色*/
				background-color: blue;

				/*边框的粗细   边框的风格  边框的颜色 */
				border: 1px solid red;

			}
			/*ID选择器 #id的名称 id的名称保证唯一

			 * ID的命名: 数字、字母、下划线、中划线组成,不能用数字开头
			 * */
			#div1{

				background-color: green;

			}

			/*class类选择器*/

			.div_1{

				background-color: pink;

			}
</style>
- 1
- 2
- 3
- 4
- 5
- 6
- 7
- 8
- 9
- 10
- 11
- 12
- 13
- 14
- 15
- 16
- 17
- 18
- 19
- 20
- 21
- 22
- 23
- 24
- 25
- 26
- 27
- 28
- 29
- 30
- 31
- 32
- 33
- 34
- 35
- 36
- 37
- 38
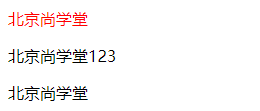
后代选择器 子选择器 兄弟选择器 伪类选择器
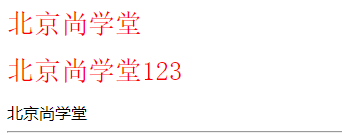
后代选择器
在下面的例子里,只要是在 div后的span,都有效,只要包含该标签对象即可
	 <style type="text/css">
	 	div span{
				font-size: 27px;
				font-family: 宋体;
				color: red;
			}
	 </style>
	<body>
		<div>
			<span>北京尚学堂</span>
			<p>
				<span>北京尚学堂123</span>
			</p>
		</div>
				<span>北京尚学堂</span>
	</body>
- 1
- 2
- 3
- 4
- 5
- 6
- 7
- 8
- 9
- 10
- 11
- 12
- 13
- 14
- 15
- 16
子选择器
只对直系子标签起作用
<style type="text/css">
		div>span{
				color: red;
		   }
	 </style>
	<body>
		<div>
			<span>北京尚学堂</span>
			<p>
				<span>北京尚学堂123</span>
			</p>
		</div>

		<span>北京尚学堂</span>
	</body>
- 1
- 2
- 3
- 4
- 5
- 6
- 7
- 8
- 9
- 10
- 11
- 12
- 13
- 14
- 15
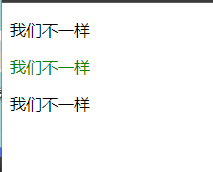
兄弟选择器的两种方式
只会改变下面相邻的元素
 <style type="text/css">
		#p1+p{
		  	color: green;
		  }
	 </style>
	<body>
		<p id="p1">我们不一样</p>
		<p>我们不一样</p>
		<p>我们不一样</p>
	</body>
- 1
- 2
- 3
- 4
- 5
- 6
- 7
- 8
- 9
- 10
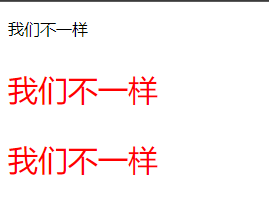
后面的所有兄弟对象都会改变
 <style type="text/css">
		#p1~p{
		 	color: red;
		 	font-size: 30px;
		 }
	 </style>
	<body>
		<p id="p1">我们不一样</p>
		<p>我们不一样</p>
		<p>我们不一样</p>
	</body>
- 1
- 2
- 3
- 4
- 5
- 6
- 7
- 8
- 9
- 10
- 11
伪类选择器
鼠标放到超链接上时,链接变为红色
 <style type="text/css">
		a:hover{
				color: red;
			}
	 </style>
	<body>
		<a href="">京东网址</a>
	</body>
- 1
- 2
- 3
- 4
- 5
- 6
- 7
- 8
CSS常用属性
 	 <style>

			.top{
				width: 100%;
				height: 100px;
				border: 1px solid  red;
			}

			.top_a{
				/*字体的颜色*/
				color: gray;
				/*字体的大小*/
				font-size: 12px;
				/*
				/*字体的加粗*/
				/*font-weight: bold;*/
				/*字体的风格*/
			    /*font-family: 宋体;*/
				/*字体倾斜*/
				/*font-style: italic;*/

				/*去除下划线*/
				text-decoration: none;
			}

			a:hover{
				color: red;
				/*下划线展示*/
				text-decoration: underline;
			}

			.tips{
				width: 100%;
				height: 40px;
				border:  1px dotted indianred;
				/*背景颜色*/
				background-color: pink;
				/*文本居中*/
				text-align: center;
				/*行高  行高的高度和div外面的高度一致这时候里面的内容就会垂直居中*/
				line-height: 40px;
			}

			.center{
				width: 100%;
				height: 500px;
				border: 1px  solid  red;
               /*设置背景图片*/
                background-image: url("https://www.itbaizhan.cn/public/new/images/logo_course.png");
				/*设置背景图片不重复*/
				background-repeat: no-repeat;
				/*调整背景图片的位置   X   Y*/
				background-position: center;
				/*调整背景图片的大小   宽  高  */
				/*background-size: 300px  500px;*/
				/*背景颜色    red   #f0000  rgb(255,0,0)  rgba(255,0,0,.5){包含透明度} */
				background-color: rgba(255,0,0,.5);
			}
		</style>
	</head>
	<body>
		<!--顶部的位置-->
		<div class="top">
		  <a href="" class="top_a">登录页面,调查问卷</a>
		</div>

		<!--中间的提示操作-->
		<div class="tips">
			<span>依据《网络安全法》,为保障您的账户安全和正常使用,请尽快完成手机号验证!
				 新版《京东隐私政策》已上线,将更有利于保护您的个人隐私。</span>
		</div>
		<div class="center">

		</div>
	</body>
- 1
- 2
- 3
- 4
- 5
- 6
- 7
- 8
- 9
- 10
- 11
- 12
- 13
- 14
- 15
- 16
- 17
- 18
- 19
- 20
- 21
- 22
- 23
- 24
- 25
- 26
- 27
- 28
- 29
- 30
- 31
- 32
- 33
- 34
- 35
- 36
- 37
- 38
- 39
- 40
- 41
- 42
- 43
- 44
- 45
- 46
- 47
- 48
- 49
- 50
- 51
- 52
- 53
- 54
- 55
- 56
- 57
- 58
- 59
- 60
- 61
- 62
- 63
- 64
- 65
- 66
- 67
- 68
- 69
- 70
- 71
- 72
- 73
- 74
- 75

border的属性值有:color style width
border出现双边框的样式:double
字体:
   /*字体的颜色*/
			color: gray;
			/*字体的大小*/
			font-size: 12px;
			/*
			/*字体的加粗*/
			/*font-weight: bold;*/
			/*字体的风格*/
		    /*font-family: 宋体;*/
			/*字体倾斜*/
			/*font-style: italic;*/


text
            /*下划线展示*/
			text-decoration: underline;
           /*去除下划线*/
			text-decoration: none;
           /*文本居中*/
			text-align: center;

行高
            line-height: 40px;


背景
            /*设置背景图片*/
            background-image: url("http://img30.360buyimg.com/da/jfs/t22399/154/765213112/96035/f94f9605/5b17512dN2de9d722.jpg");

			/*设置背景图片不重复*/

			background-repeat: no-repeat;

			/*调整背景图片的位置   X   Y*/
			background-position: center;

			/*调整背景图片的大小   宽  高  */
			/*background-size: 300px  500px;*/
			/*背景颜色    red   #f0000  rgb(255,0,0)  rgba(255,0,0,.5){包含透明度} */
			background-color: rgba(255,0,0,.5);
- 1
- 2
- 3
- 4
- 5
- 6
- 7
- 8
- 9
- 10
- 11
- 12
- 13
- 14
- 15
- 16
- 17
- 18
- 19
- 20
- 21
- 22
- 23
- 24
- 25
- 26
- 27
- 28
- 29
- 30
- 31
- 32
- 33
- 34
- 35
- 36
- 37
- 38
- 39
- 40
- 41
常用属性2
行内元素:(多个标签位于同一行)

span  font  小标签   img  a  等

块元素:(标签可以自动换行的元素是块元素)

div   h1-h6  ul    p    等
- 1
- 2
- 3
- 4
- 5
- 6
- 7
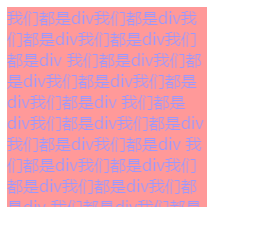
设置div的透明度
	 	<style>
			.div_1{
				width: 200px;
				height: 200px;
				background-color: rgba(255,0,0);
				color: rgba(0,0,255);
				/*调整透明度的属性  0-1*/
				opacity: 0.4;
				/*超出隐藏  hidden*/
				overflow: hidden;
			}
		</style>
	</head>
	<body>
		<div class="div_1">
			我们都是div我们都是div我们都是div我们都是div我们都是div
			我们都是div我们都是div我们都是div我们都是div我们都是div
			我们都是div我们都是div我们都是div我们都是div我们都是div
			我们都是div我们都是div我们都是div我们都是div我们都是div
			我们都是div我们都是div我们都是div我们都是div我们都是div
		</div>
	</body>
- 1
- 2
- 3
- 4
- 5
- 6
- 7
- 8
- 9
- 10
- 11
- 12
- 13
- 14
- 15
- 16
- 17
- 18
- 19
- 20
- 21
- 22
如何将行内元素转为块内元素
转化前:
	 <style>
		#span_1{
			width: 100px;
			height: 100px;
			border: 1px solid red;
		}
	</style>
<body>
		<hr />
		<span id="span_1">1234</span>
		<hr />

	</body>
- 1
- 2
- 3
- 4
- 5
- 6
- 7
- 8
- 9
- 10
- 11
- 12
- 13

转化为块内元素
#span_1{
			width: 100px;
			height: 100px;
			border: 1px solid red;
			/*行内元素转块级元素   inline   block  none(隐藏)*/
			display: block;
		}
- 1
- 2
- 3
- 4
- 5
- 6
- 7
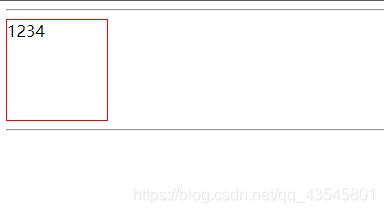
css定位
绝对定位:
	absolute  :定位离开之后释放的之前的位置   基于外层父级标签来说
	也就是说,当div1进行绝对定位之后,他原来的位置消失,下一个div会自动
	移动到div1的位置,div1的位置由绝对定位之后的top和left等方位元素决定

相对定位:
 	relative: 定位离开之后之前的位置没有释放
 	相对定位是基于之前的位置来说

固定定位:
 	fixed :始终是基于浏览器的左上角定位    适合做广告

默认定位:
	 static   :初始的定位的操作
- 1
- 2
- 3
- 4
- 5
- 6
- 7
- 8
- 9
- 10
- 11
- 12
- 13
- 14
最初的两个div:

绝对定位:
<style>
			.div_1{
				width: 200px;
				height: 200px;
				background-color: red;
				/*绝对定位*/
				position: absolute;
				top: 300px;
				left:300px;

			}

			.div_2{
				width: 200px;
				height: 200px;
				background-color: green;
			}
		</style>

	</head>
	<body>
		<div class="div_1"></div>

		<div class="div_2"></div>

	</body>
- 1
- 2
- 3
- 4
- 5
- 6
- 7
- 8
- 9
- 10
- 11
- 12
- 13
- 14
- 15
- 16
- 17
- 18
- 19
- 20
- 21
- 22
- 23
- 24
- 25
- 26

相对定位:
.div_2{
				width: 200px;
				height: 200px;
				background-color: green;

				/*相对定位*/
				 position: relative;
				top: 300px;
				left: 300px;
			}
- 1
- 2
- 3
- 4
- 5
- 6
- 7
- 8
- 9
- 10

固定定位 --fixed:
div2固定于页面固定位置,当滚动条下滑时,不随着页面的上移而运动
- 1
.div_1{
				width: 200px;
				height: 200px;
				background-color: red;

				/*固定定位*/
				position: fixed;
		        top: 150px;
		        left: 150px;
			}
- 1
- 2
- 3
- 4
- 5
- 6
- 7
- 8
- 9
- 10

absolute不占用文档流 基于父元素进行定位。
盒子模型
/*清除浏览器的留白*/
		body,html{margin: 0px;padding: 0px;}

		.div_1{

			width: 200px;

			height: 200px;

			background-color: red;

			/*内边距  真是div和border之间的距离*/
			/*padding: 50px;*/
			/*   上下的距离    左右的距离*/
			/*padding: 30px  50px;*/
			/* 上 右 下 左*/
			/*padding: 10px  20px  30px  40px;*/

			/*padding-top: 30px;*/

			/*外边距  给盒子进行定位*/
			/*margin: 50px;*/

			/*margin-left: 80px;

			margin-top: 70px;*/

		    /*外边距 垂直的方向回去较大的值*/
			margin-bottom: 40px;
			/*外边距  水平方向会合并*/
			margin-right: 40px;

		}
- 1
- 2
- 3
- 4
- 5
- 6
- 7
- 8
- 9
- 10
- 11
- 12
- 13
- 14
- 15
- 16
- 17
- 18
- 19
- 20
- 21
- 22
- 23
- 24
- 25
- 26
- 27
- 28
- 29
- 30
- 31
- 32
- 33
css3中常用的选择器
		<style>
			/*获得class名称是div1下面的第一个子元素*/
			.div1>p:first-child{
				color: red;
			}

		  .div1>p:last-child{
			color:aqua;
		  }
		</style>
	</head>
	<body>
		<div class="div1">
			<p>1</p>
			<p>2</p>
			<p>3</p>
			<p></p>
			<p>4</p>
			<p>5</p>
		</div>
	</body>
- 1
- 2
- 3
- 4
- 5
- 6
- 7
- 8
- 9
- 10
- 11
- 12
- 13
- 14
- 15
- 16
- 17
- 18
- 19
- 20
- 21

		<style>
		  /*获得具体的某一个子元素*/
		  .div1>p:nth-child(2){
		  	background-color: palegreen;
		  }

		   /*获得空的元素对象*/
		  .div1>p:empty{
		  	  height: 50px;
		  	  background-color: darkmagenta;
		  }

		</style>
	</head>
	<body>
		<div class="div1">
			<p>1</p>
			<p>2</p>
			<p>3</p>
			<p></p>
			<p>4</p>
			<p>5</p>
		</div>
	</body>
- 1
- 2
- 3
- 4
- 5
- 6
- 7
- 8
- 9
- 10
- 11
- 12
- 13
- 14
- 15
- 16
- 17
- 18
- 19
- 20
- 21
- 22
- 23
- 24

伪对象选择器是在指定的对象之前 before 或者之后 after 插入内容
		<style>
		 /*双行是什么颜色*/
		  .div1>p:nth-child(even){
		  	background-color: red;
		  }
		  /*单行是什么颜色*/
		  .div1>p:nth-child(odd){
		  	 background-color: green;
		  }
		</style>
	</head>
	<body>
		<div class="div1">
			<p>1</p>
			<p>2</p>
			<p>3</p>
			<p></p>
			<p>4</p>
			<p>5</p>
		</div>
	</body>
- 1
- 2
- 3
- 4
- 5
- 6
- 7
- 8
- 9
- 10
- 11
- 12
- 13
- 14
- 15
- 16
- 17
- 18
- 19
- 20
- 21

伪对象选择器,又叫伪元素选择器
一般用于实现一些细小的样式填充


我们进行基础的实验:
		<style>
			/*
			 *  伪对象选择器是在指定的对象之前(或者之后)插入内容
			 * */
			.div1:before{
				/*content: "我们的祖国是花园";*/
				content: url(img/数字0.JPG);
			}
			.div1:after{

			}
		</style>
	</head>
	<body>
		<div class="div1">你好</div>
	</body>
- 1
- 2
- 3
- 4
- 5
- 6
- 7
- 8
- 9
- 10
- 11
- 12
- 13
- 14
- 15
- 16

属性选择器
 选择器的种类:

   【1】基础选择器

       *   id   class   标签

   【2】关系选择器

        >   +   ~

   【3】伪类选择器

       hover

   【4】伪对象选择器

      before  \after

   【5】属性选择器

     input[type='text']
- 1
- 2
- 3
- 4
- 5
- 6
- 7
- 8
- 9
- 10
- 11
- 12
- 13
- 14
- 15
- 16
- 17
- 18
- 19
- 20
- 21
		<style>
		 	/*属性选择器*/
			input[type='text']{

				width: 300px;

				height: 40px;

			}
		</style>

	</head>
	<body>
		<p>
		  账号:	<input type="text" name="fom_zh" id="" value="" />
		</p>

		<p>
		密码:	<input type="password" name="fom_pwd" id="" value="" />
		</p>

		<p>
		邮箱:	<input type="email" name="fom_email" id="" value="" />
		</p>

		<p>
		 年龄:	<input type="number" name="age" />
		</p>
	</body>
- 1
- 2
- 3
- 4
- 5
- 6
- 7
- 8
- 9
- 10
- 11
- 12
- 13
- 14
- 15
- 16
- 17
- 18
- 19
- 20
- 21
- 22
- 23
- 24
- 25
- 26
- 27
- 28
- 29

属性 ^用fom开头的对象 $
	input[name^='fom']{

			width: 300px;

			height: 40px;
		}
- 1
- 2
- 3
- 4
- 5
- 6
运行效果:

本章要点:明确关系选择器,属性选择器,伪类选择器,伪元素选择器的区别
参考网址:
https://blog.csdn.net/qq_44170340/article/details/97884753
CSS3内的一些属性
我们用一个案例来说明:
案例:使用CSS3创建一个运动的心形
一: 创建三个正方形div,设置一个淡一些的背景颜色
		<style>

			body{
				background-color:#F4F4F4;
			}

			.cen{
				width: 200px;
				height: 200px;
				background-color: #d5093c;
			}

		</style>

	</head>
	<body>

		<div class="cen lef" >1</div>

		<div class="cen c">2</div>

		<div class="cen rig">3</div>
	</body>
- 1
- 2
- 3
- 4
- 5
- 6
- 7
- 8
- 9
- 10
- 11
- 12
- 13
- 14
- 15
- 16
- 17
- 18
- 19
- 20
- 21
- 22
- 23
注意class=“cen lef” 这种class的属性值的方式,这是给div取了两个名字,可以对带有cen的class所属的div进行操作,也可以对cen 的lef子名称进行单独操作
效果图:

二:将div1修改为一个圆
			.lef{
				/*倒圆角指令*/
				border-radius: 100px;

			}
- 1
- 2
- 3
- 4
- 5

我们使用绝对定位,将这个div1的圆移动到页面的某个位置
			.lef{
				/*倒圆角指令*/
				border-radius: 100px;

				/*绝对定位*/
				position: absolute;
				top: 200px;
				left: 200px;

			}
- 1
- 2
- 3
- 4
- 5
- 6
- 7
- 8
- 9
- 10

对于div3,我们进行同样的设置,将其移动到div1的左面,组成心形的上半部分
			.rig{

				border-radius: 100px;

				position: absolute;
				top: 200px;
				left: 341px;
			}
- 1
- 2
- 3
- 4
- 5
- 6
- 7
- 8

将div2旋转一定的角度,移动到div1 和 div3的下方,组成一个心形
			.c{
				/*旋转角度*/
				transform: rotate(45deg);

				position: absolute;

				top: 269px;

				left: 271px;

			}
- 1
- 2
- 3
- 4
- 5
- 6
- 7
- 8
- 9
- 10
- 11

为心形添加阴影背景
 .cen{

	 width: 200px;
	 height: 200px;
	 background-color: #d5093c;

	 /*阴影: 水平方向的偏移  垂直方向的偏移  模糊度 阴影的颜色*/
	  box-shadow: 0px 0px 70px #D5093C;

	 }
- 1
- 2
- 3
- 4
- 5
- 6
- 7
- 8
- 9
- 10

三:添加动画效果
	 .cen{

		 width: 200px;
		 height: 200px;
		 background-color: #d5093c;

		 /*阴影   水平方向的偏移  垂直方向的偏移  模糊度 阴影的颜色*/
		 box-shadow: 0px 0px 70px #D5093C;

		 /*执行动画的调用*/
		 /*确定动画执行时间  确认执行的动画名称  infinite--无限循环执行*/
		 animation: 1s aj infinite;

		 }
		/*CSS3的动画*/
	 @keyframes aj{
		 0%{transform: scale(1)rotate(45deg);}

         50%{transform: scale(1.1)rotate(45deg);}

         100%{transform: scale(1)rotate(45deg);}
		}
- 1
- 2
- 3
- 4
- 5
- 6
- 7
- 8
- 9
- 10
- 11
- 12
- 13
- 14
- 15
- 16
- 17
- 18
- 19
- 20
- 21
- 22
- 23
效果如下:

小结:
CSS3中常用的属性
         	/*倒圆角指令*/
			border-radius: 100px;
			/* 左上右下   右上左下 */
			/*border-radius:10px  60px;*/

			/*border-radius:10px 20px 30px 40px;*/


           /*旋转角度*/
			transform: rotate(45deg);
			/*放大的倍数*/
			/*transform: scale(1.3);*/
			/* X:水平的位移   Y  :垂直的位移  负数:上*/
		    /*transform: translate(0px,-5px);*/
		    /*2D角度的旋转  X  Y*/
		     transform: skew(40deg,45deg);

           /*阴影   水平方向的偏移  垂直方向的偏移  模糊度 阴影的颜色*/
			 box-shadow: 0px 0px 70px #D5093C;


			CSS3中的动画标签
			@-moz-keyframes name{
					/*从什么状态到什么状态*/
					from{}
					to{}
				}
		}

		@-ms-keyframes name{
			0%{}

			50%{}


			100%{}
		}
- 1
- 2
- 3
- 4
- 5
- 6
- 7
- 8
- 9
- 10
- 11
- 12
- 13
- 14
- 15
- 16
- 17
- 18
- 19
- 20
- 21
- 22
- 23
- 24
- 25
- 26
- 27
- 28
- 29
- 30
- 31
- 32
- 33
- 34
- 35
- 36
- 37


