- 1Android进程间通讯——多进程共用SharedPreferences_android sharedpreferences多进程
- 2腾讯offer是什么样子_阿里员工求助:年包200+,拿到腾讯11级offer,跳不跳
- 3【Git】多个托管平台Git账户配置
- 4docker安装与配置docker镜像加速器_配置docker镜像家属器
- 5scanf设置精度、域宽易错点_若scanf域宽
- 6SprongBoot内置tomcat配置调优_springboot集成的tomcat配置优化
- 7JAVA数据库操作二(多个数据库操作+Spring data + jpa)_java实现同时修改两个数据库
- 800_Python—猜字游戏while-if基础版_#猜字游戏编写 #目的:掌握if分支(选择)结构、while循环结构的程序设计 #大部分源
- 9Midjourney的--seed 解释,并附有例子_midjourney seed
- 10密钥或者消息的CMAC计算_cmac_ctx_new
Install Microsoft Endpoint Configuration Manager
赞
踩
Overview
In my last article about Attack Surface Reduction, I didn’t care enough to go through all the documentation and went for a long detour to install Microsoft Endpoint Configuration Manager for Attack Surface Reduction configurations. It turned out that, all I need is Group Policy.
So, this article, I moved the part of installing Microsoft Endpoint Configuration Manager here as a stand-alone for later reference.
Install Microsoft Endpoint Configuration Manager
The process is dauting, if you would kindly be patient and follow along.
Test is performed on Windows Server 2019 VM machine in Active Directory environment with SQL server installed (required by Configuration Manager).
Download and install according to official document. For test purposes, we can ignore step 5 through 17, and make sure you have MSSQL Server standard or enterprise edition installed, others won’t work (though I found that DEV edition will work, follow along).
Some steps are explained next.
Pre-Installation
SQL Server Instance
In order to successfully install Configuration Manager, we have to have a SQL server instance running, and we have to add an database for the admin site (on how to install and configure SQL server, refer to my other article, section “安装 SQL Server 2019 Express”).
NOTE: Make sure to join a domain first, then install SQL Server as Administrator user, also refer to my other article, section “添加 Windows Server 到域”. And, the SQL Server used in that article is SQL Express, which is not supported by Configuration Manager. You should go to this official site, and download the Developer edition.

And other steps are just the same.
After installing SQL Server Developer Edition and SQL Server Management Studio. Open SQL Server Management Studio 18.
Click Connect.
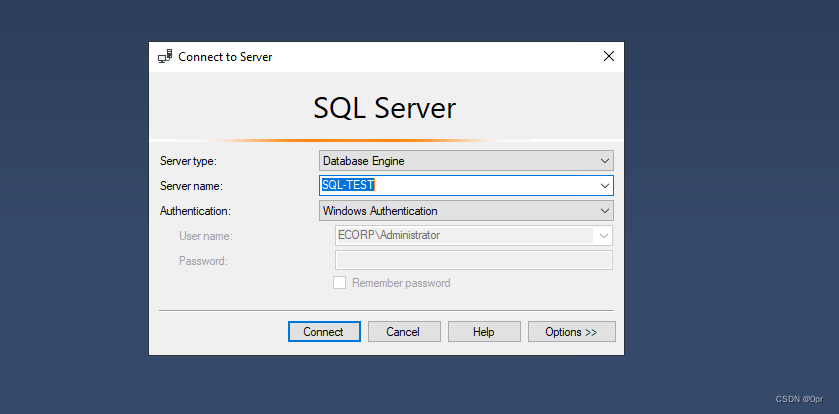
Right click on Databases and select New Database….
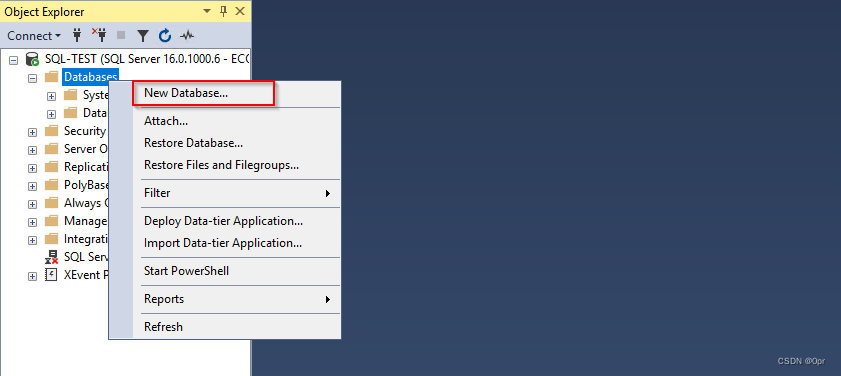
Use CM_MEM (default Configuration Manager database name) as database name and click OK.
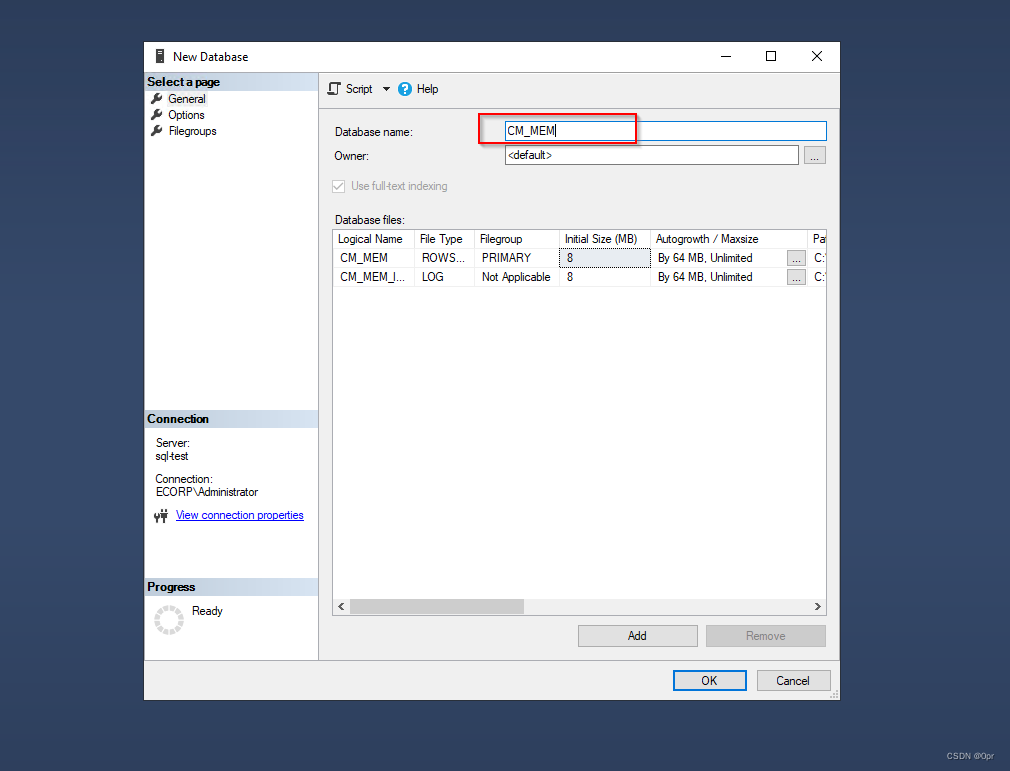
Then, right click on the instance and select New Query.
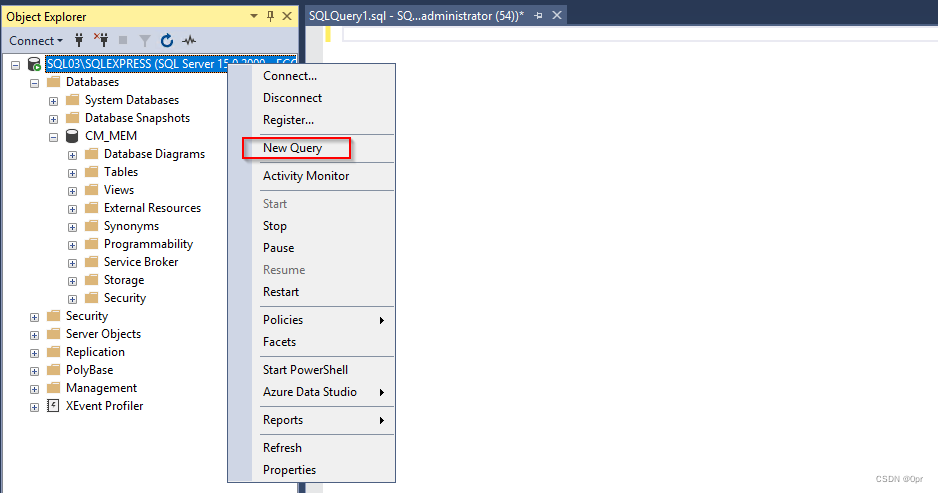
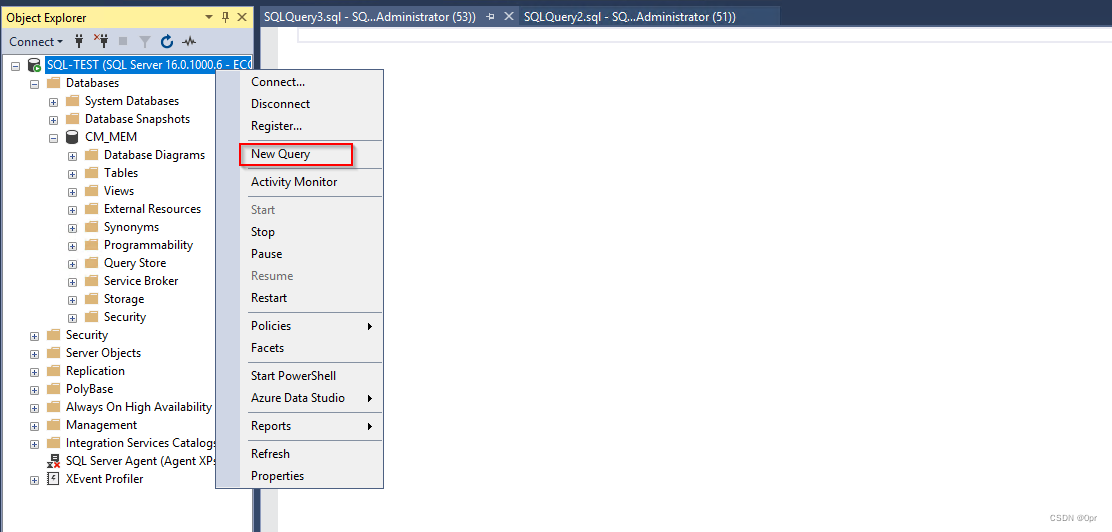
And run the following query.
USE master;

CREATE ENDPOINT BrokerEndpoint
    STATE = STARTED
    AS TCP ( LISTENER_PORT = 4022 )
    FOR SERVICE_BROKER ( AUTHENTICATION = WINDOWS ) ;
- 1
- 2
- 3
- 4
- 5
- 6
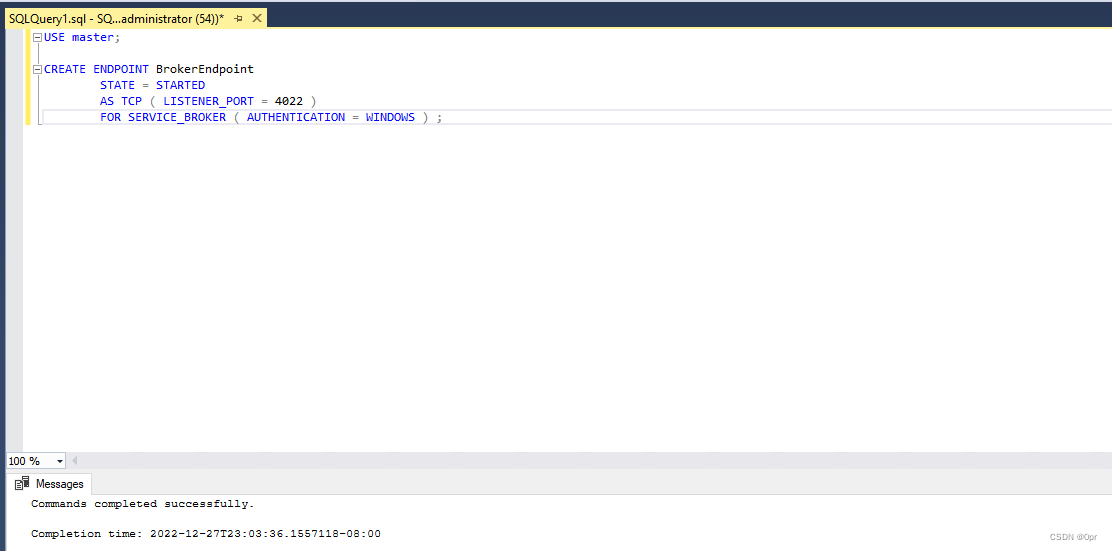
Check that the port is listening.

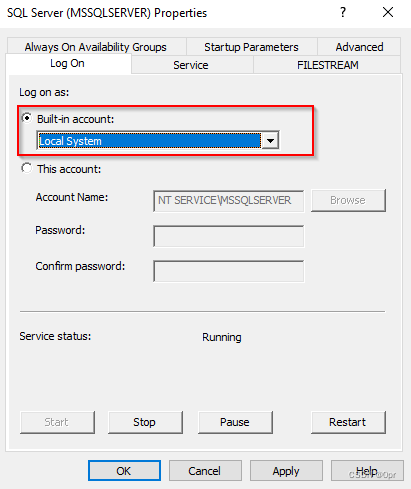
Then, open SQL Server Configuration Manager. Right click on SQL Server instance, select Properties. We are going to change the user who’s running SQL server as Configuration Manager won’t allow local service account to run SQL instance.

Click Built-in account and select Local System.
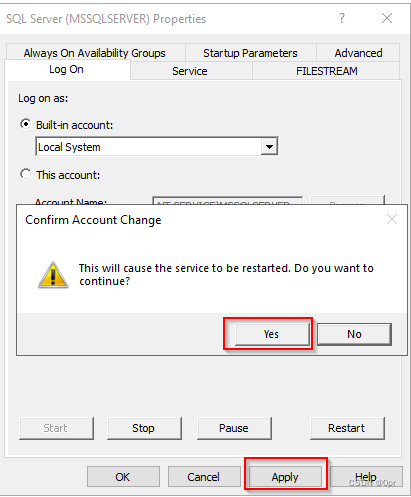
Click Apply and Yes.
Check services, make sure that SQL Server is running as Local System.

Install RDC Library
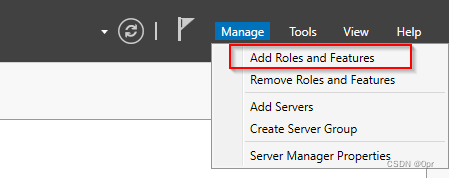
Go to Server Manager -> Add Roles and Features.
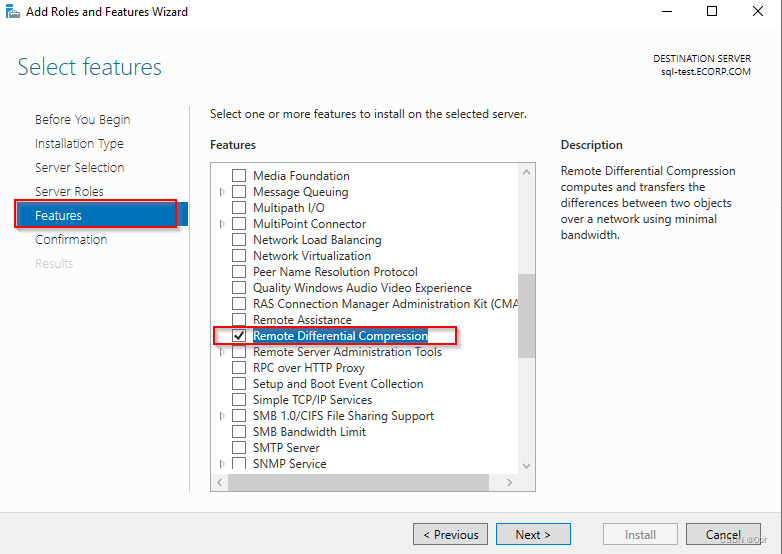
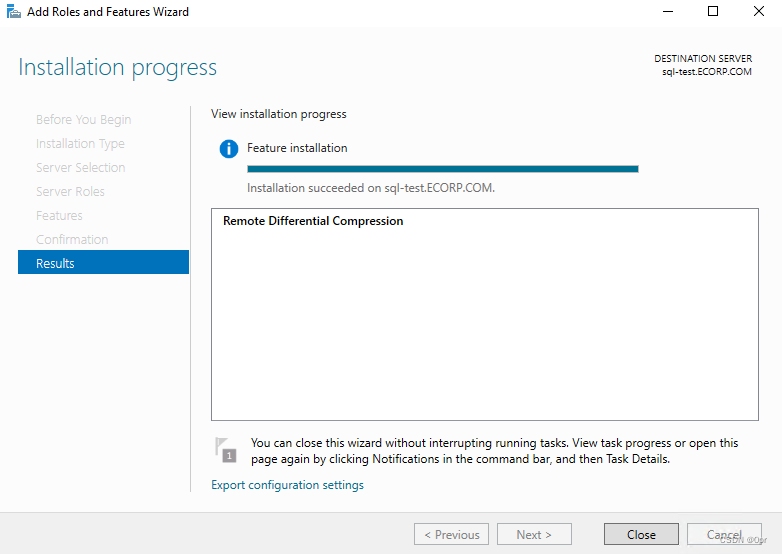
Next all the way till you reach Features, and check Remote Differential Compression.
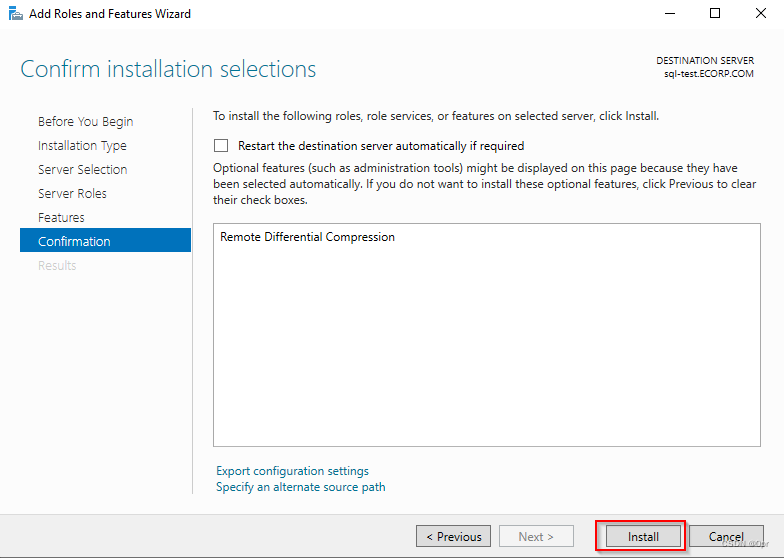
Click Next and Install.
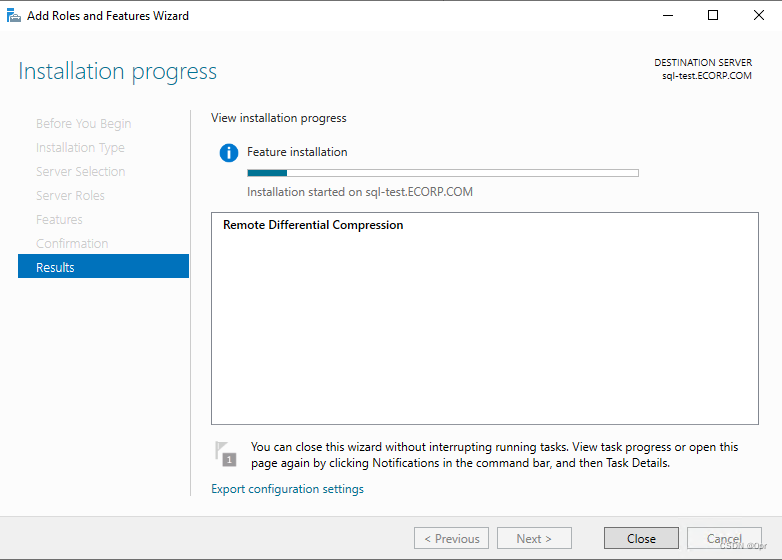
Wait for the process to finish.
Install Windows ADK
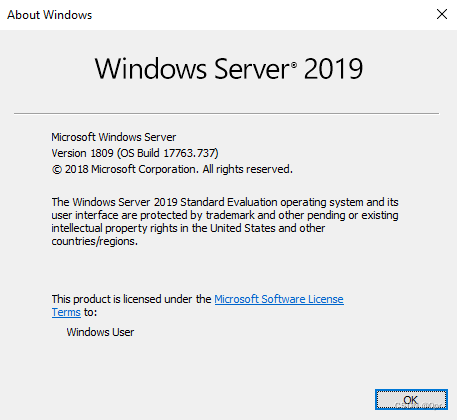
Click on this link to download Windows ADK for Windows Build 1809 (my Windows Server 2019 is of Build 1809 too, so compatible).
Double click to install.

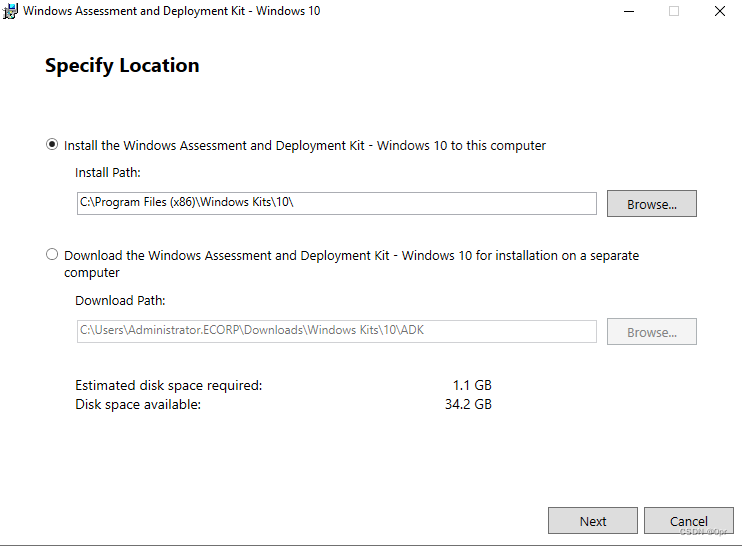
Next All the way to finish installation.
SQL Server Instance Static TCP Port
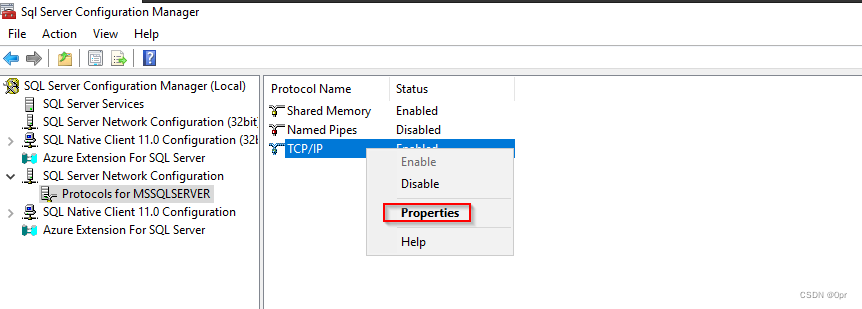
Open SQL Server Configuration Manager. Under SQL Server Network Configuration -> Protocols for MSSQLSERVER, TCP/IP is Enabled.
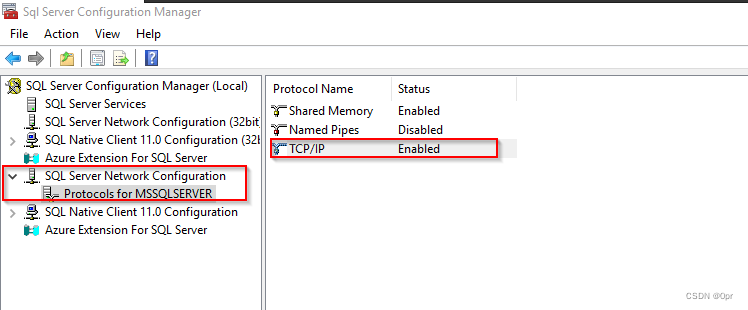
Then, right click on TCP/IP, select Properties.
Under, IP Addresses tab, make sure all TCP Dynamic Ports are blank, and TCP Port are all configured to 1433.
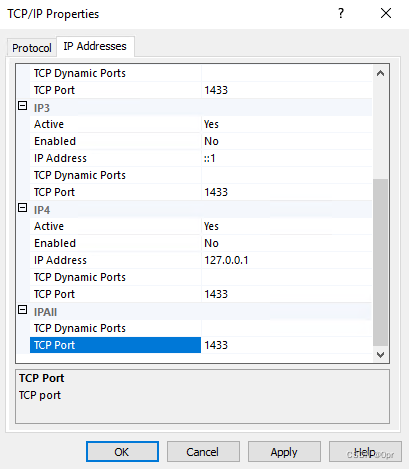
Click Apply and restart SQL server instance.
Install WIndows-PE (Windows Pre-Installation Environment)
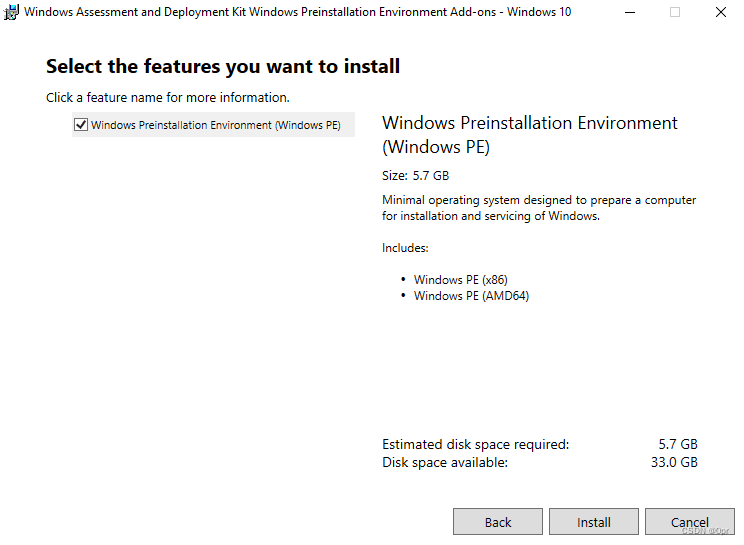
Go to this link to download Windows Preinstallation Environment. Double click to install.

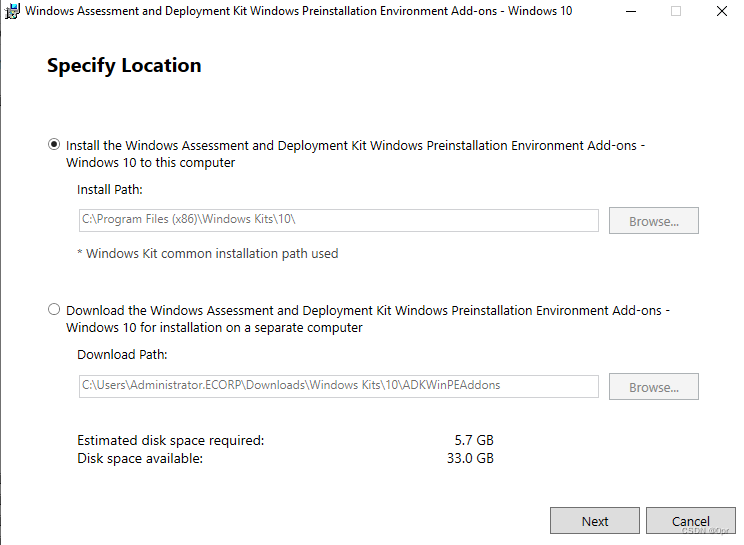
Next all the way to install.
Install Microsoft Endpoint Configuration Manager
As all pre-requisites are done, we can proceed to installing Microsoft Endpoint Configuration Manager.
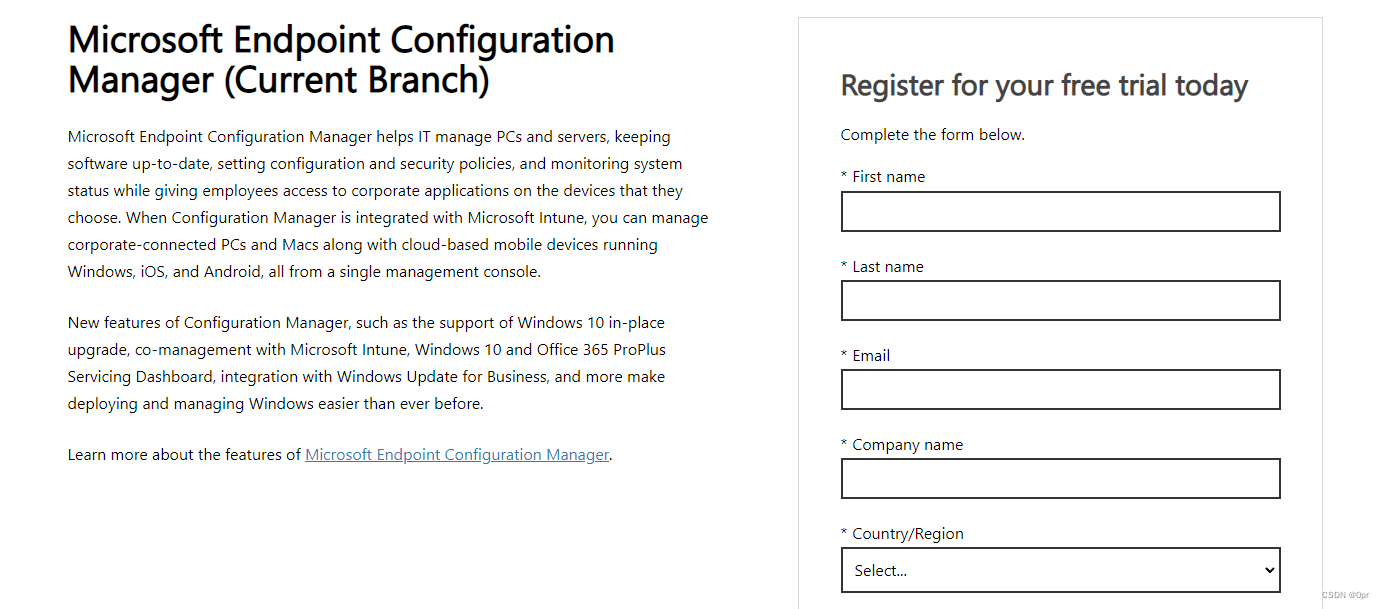
Go to Microsoft official site to download the latest Microsoft Endpoint Configuration Manager for ASR configuration.

Fill in your information.

Extract to whichever location you want.
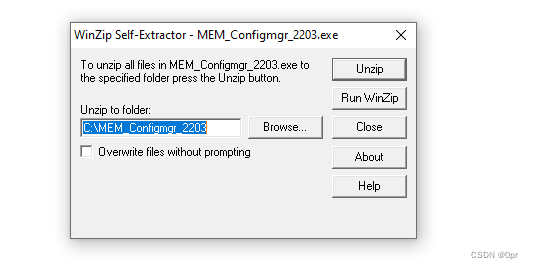
Run the installer.
C:\MEM_Configmgr_2203\SMSSETUP\BIN\X64\Setup.exe
- 1
If you encounter this .NET package error.
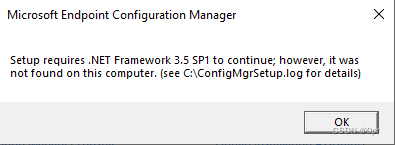
Issue the following command in Admin command prompt.
DISM /Online /Enable-Feature /FeatureName:NetFx3 /All
- 1
Run the installer again.
C:\MEM_Configmgr_2203\SMSSETUP\BIN\X64\Setup.exe
- 1
Use most of the default settings as the following.
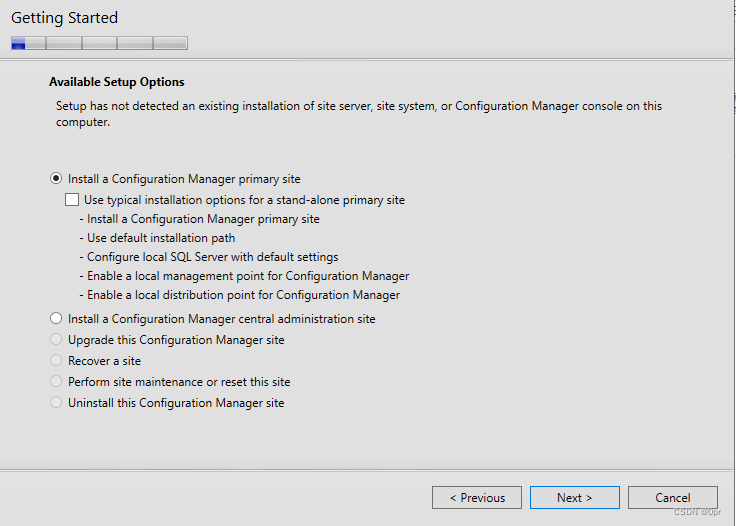
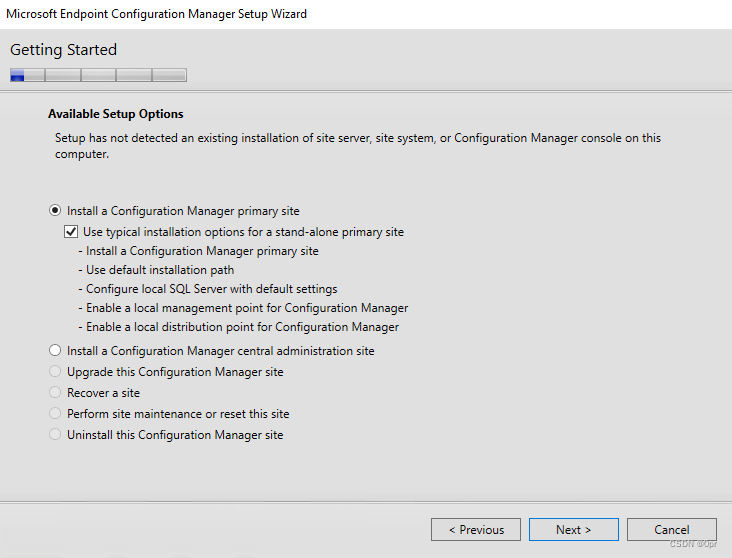
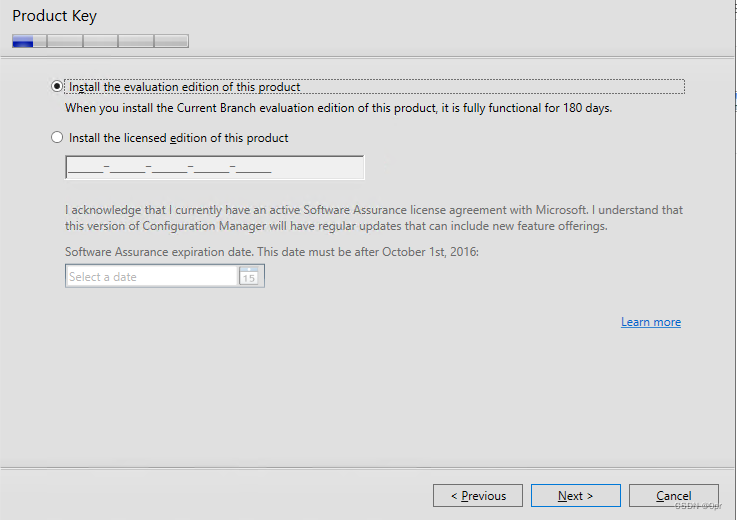
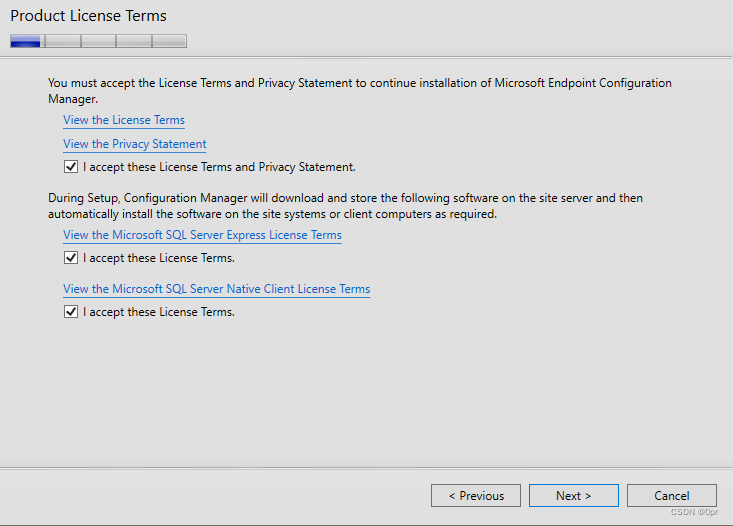
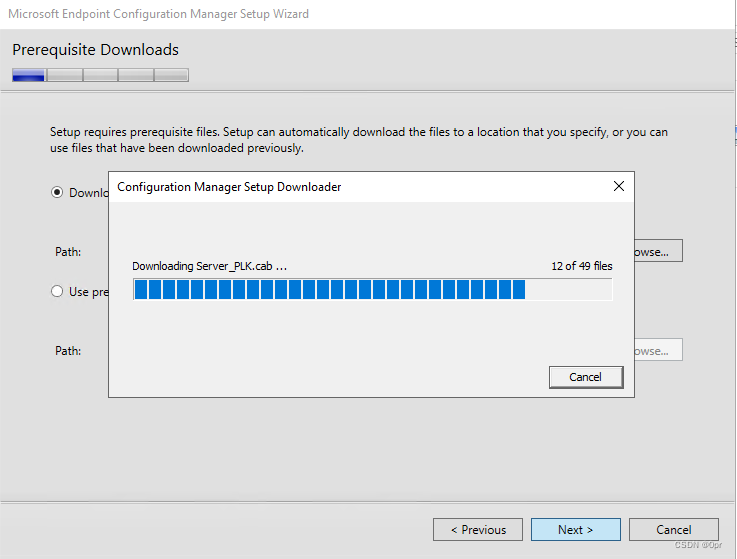
Use Downloads folder for downloaded files.
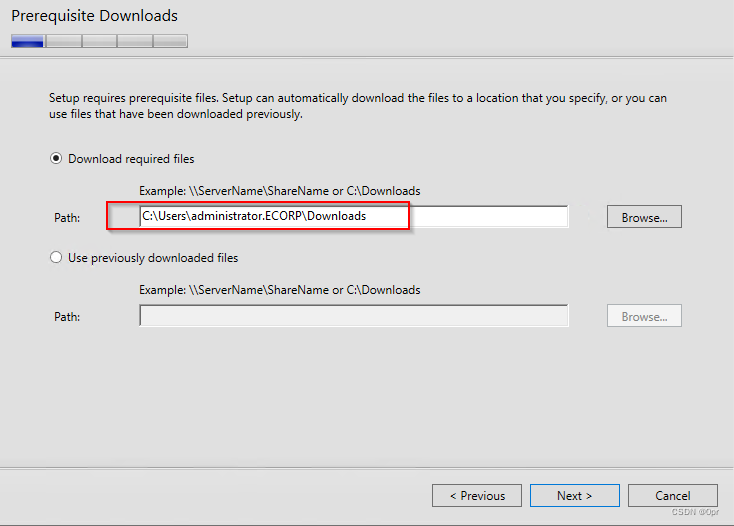
Then Next to install. The whole process may take an hour or so.
Select server language.
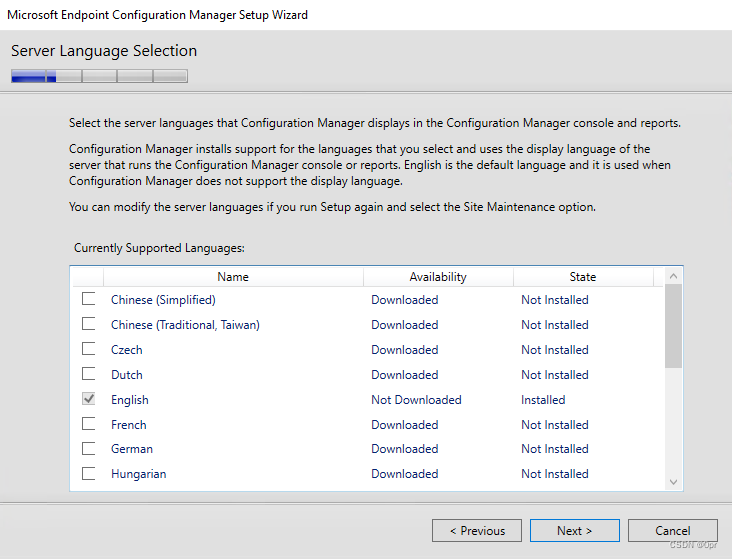
Choose client language.

Specify some names.
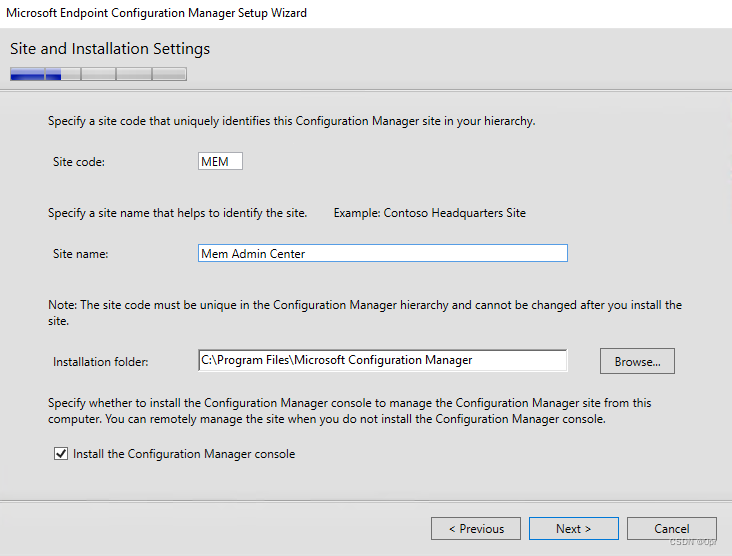
In this case, we are going to install the site as a stand-alone site.

Back to installation guide.
Put some more configurations there.
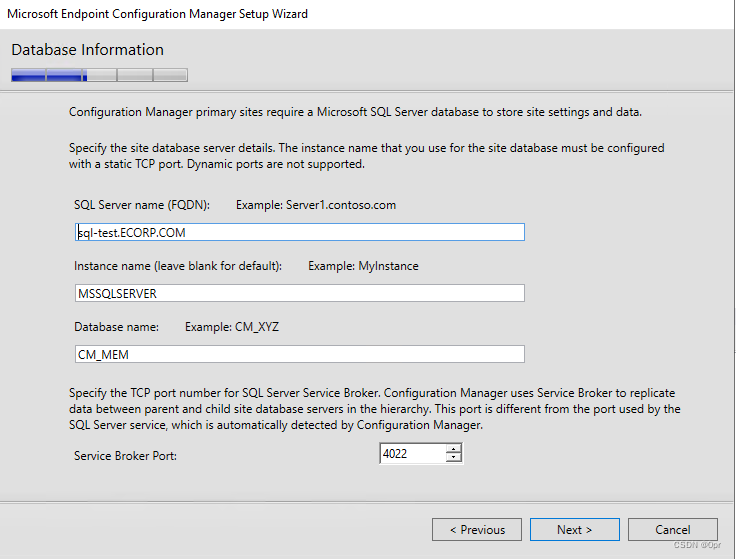
Hit Next to continue.
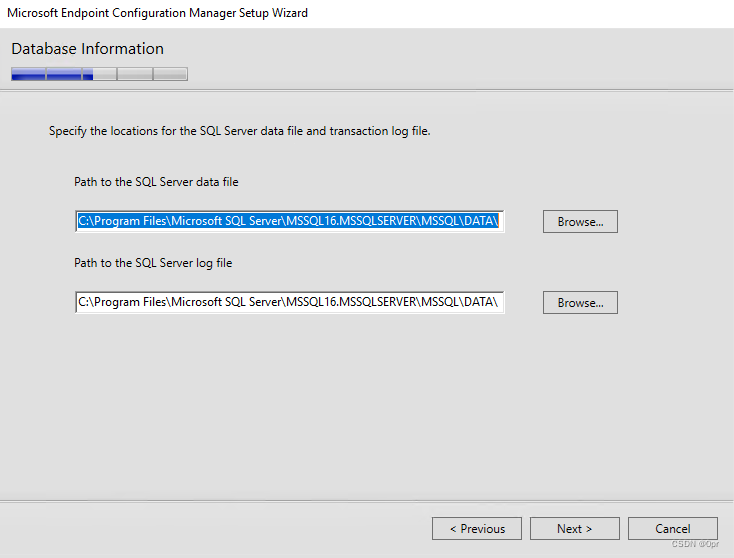
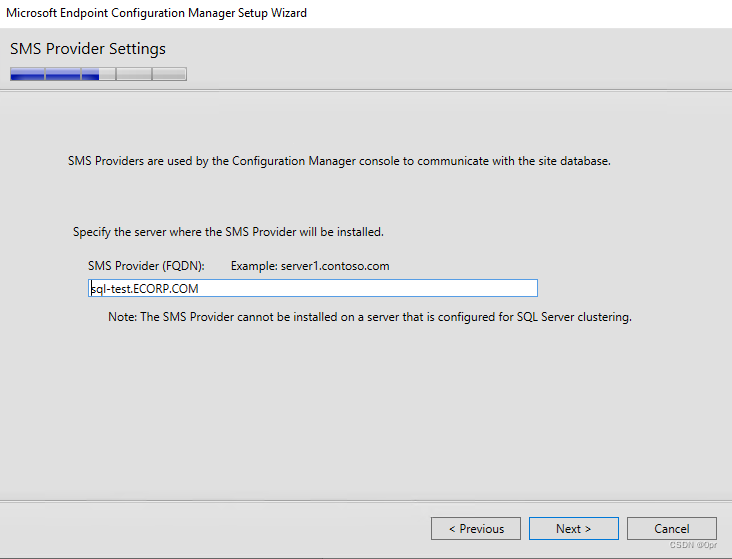
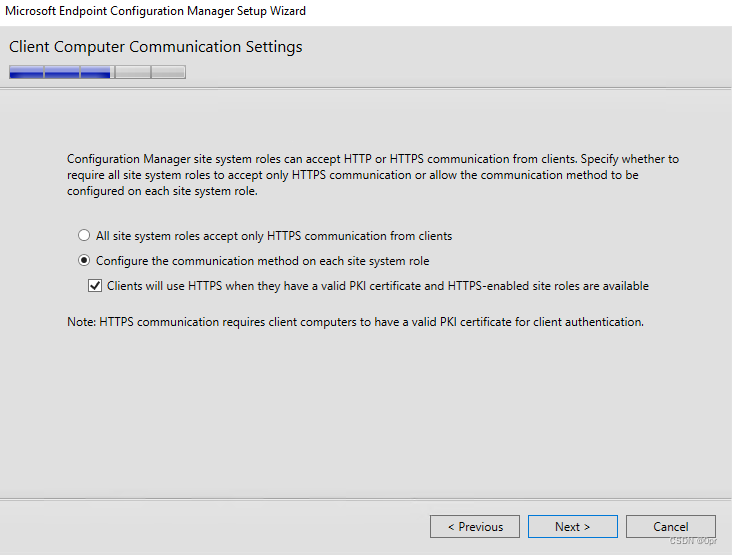
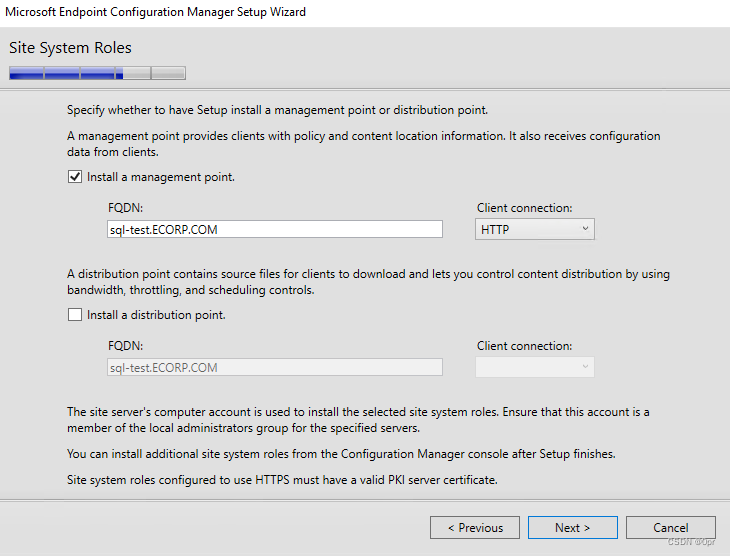
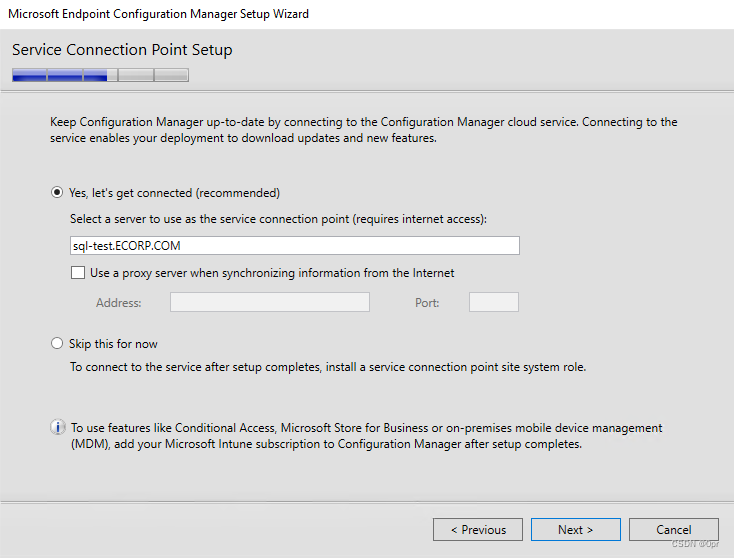
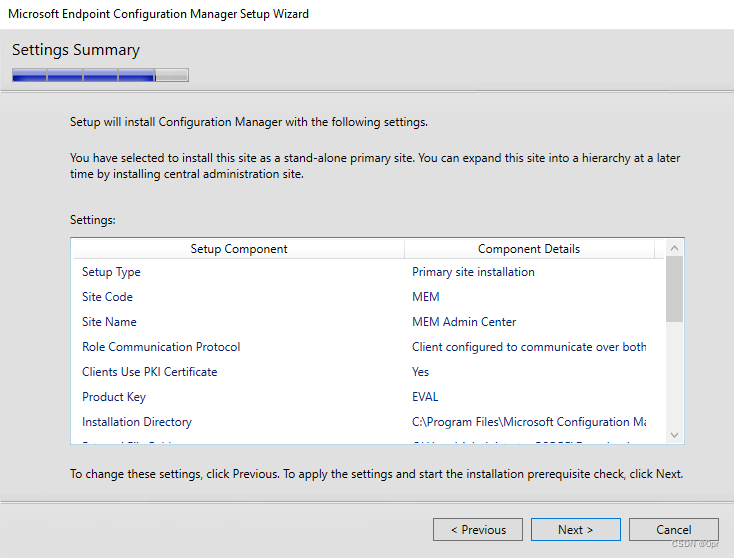
Let the installer run the check.
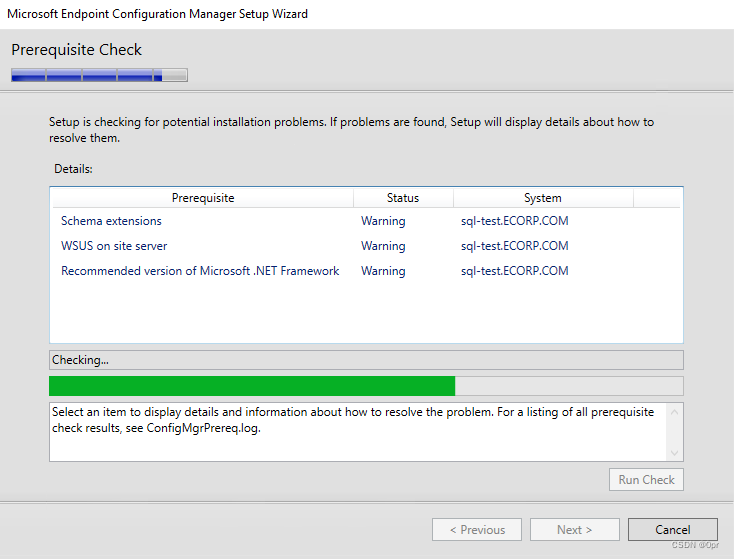
Warning is fine, Failed entries mean you have something missing, refer to pre-installation section if you saw one.
Click Begin Install to start the installation process.
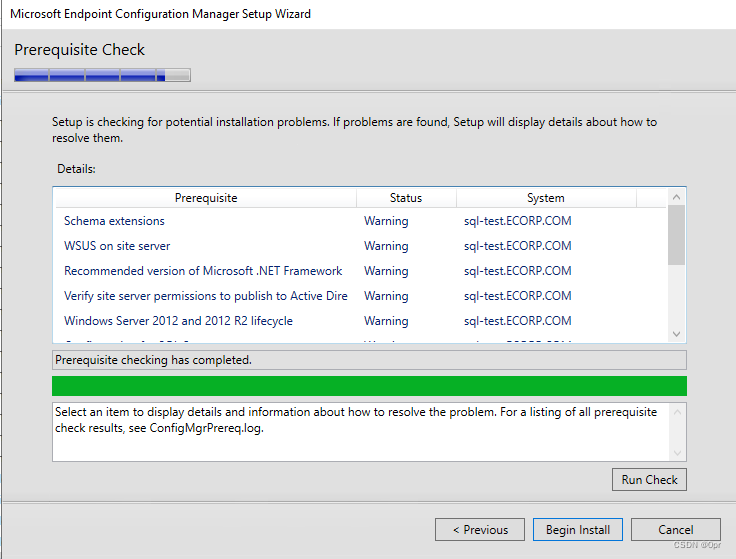
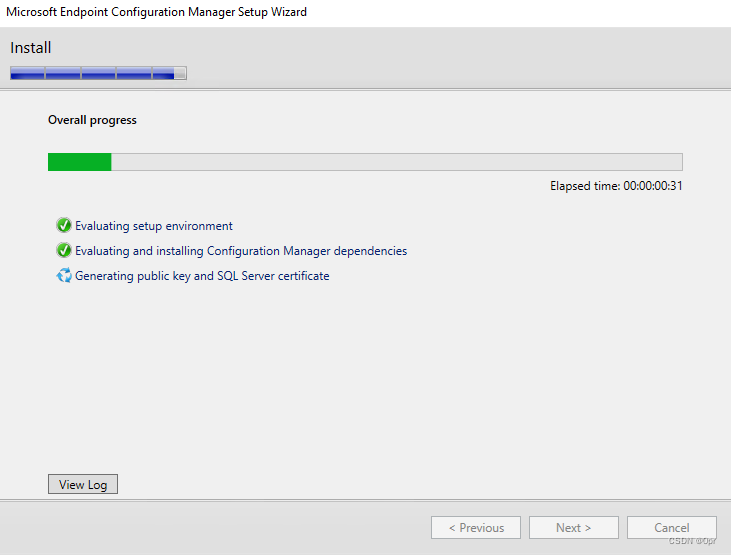
After about 20 minutes, the installation finished.
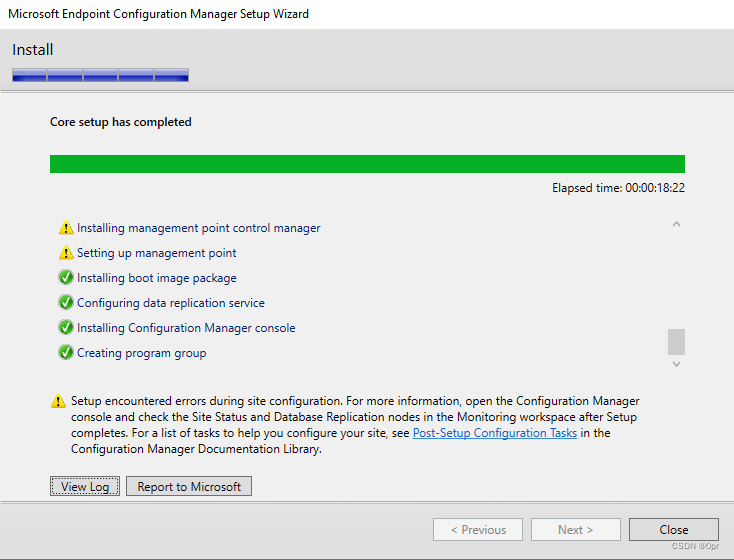
Some warnings are proved to be OK.
Let’s open Microsoft Endpoint Configuration Manager and start exploring ASR.
Implementation of Attack Surface Reduction
Go to Assets and Compliance -> Exdpoint Protection -> Windows Defender Exploit Guard.
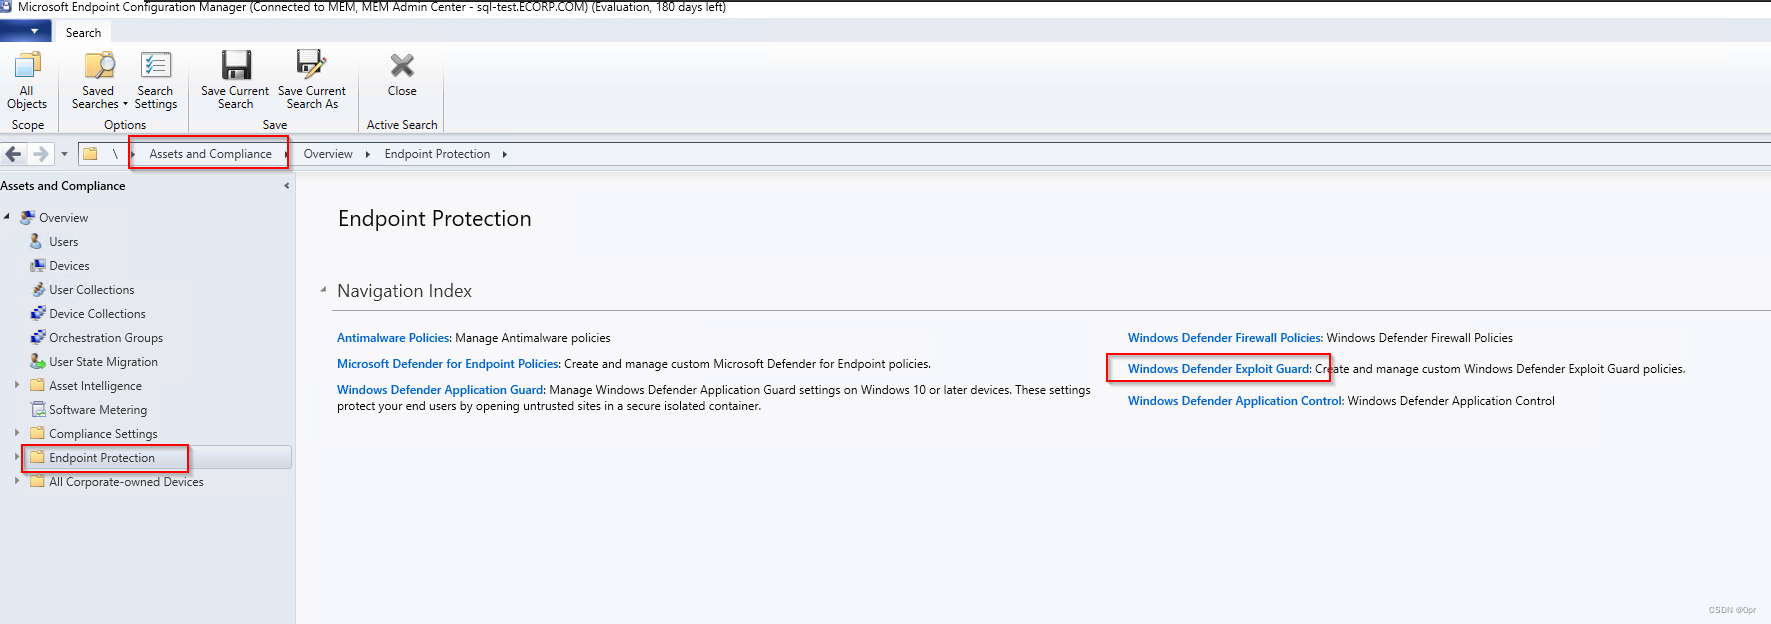
Right click anywhere on the blank space and select Create Exploit Guard Policy.

Give the rules whatever name you want, leave the options as default
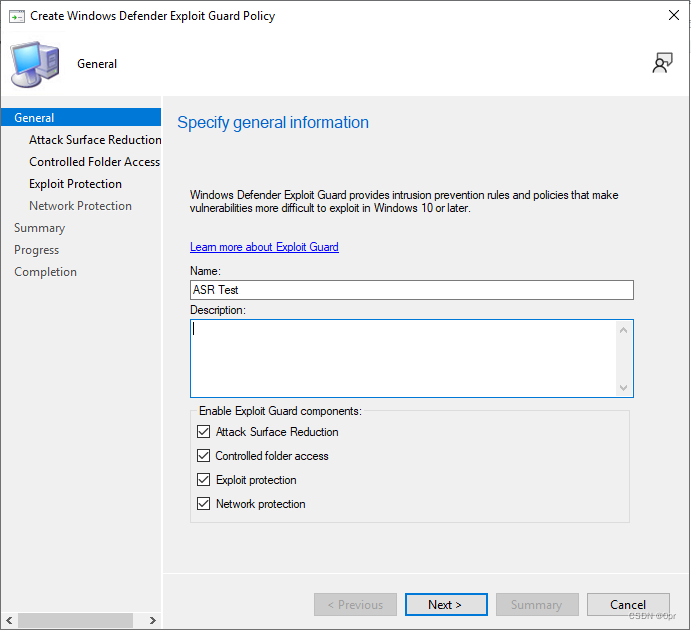
Click Next and we can see what threats we want to block.
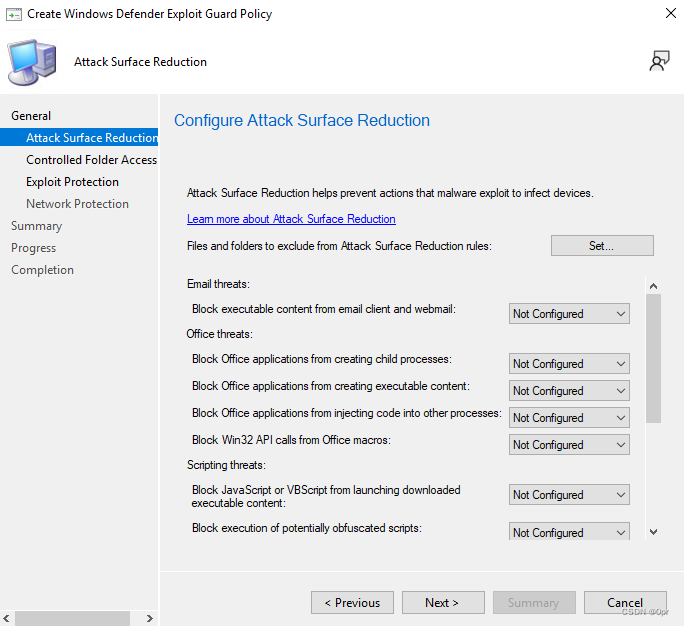
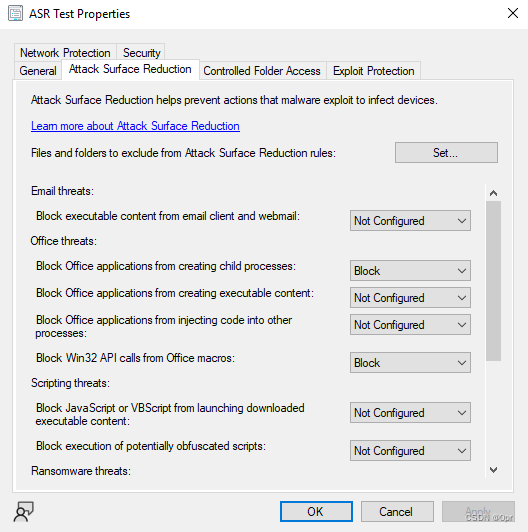
For test purposes, we are going to block Office applications from creating child processes, and block Office macros from calling Win32 APIs, which will limit the success of phishing attacks.

Plus, we are going to turn on lsass protection to prevent credential stealing.

Click Next.
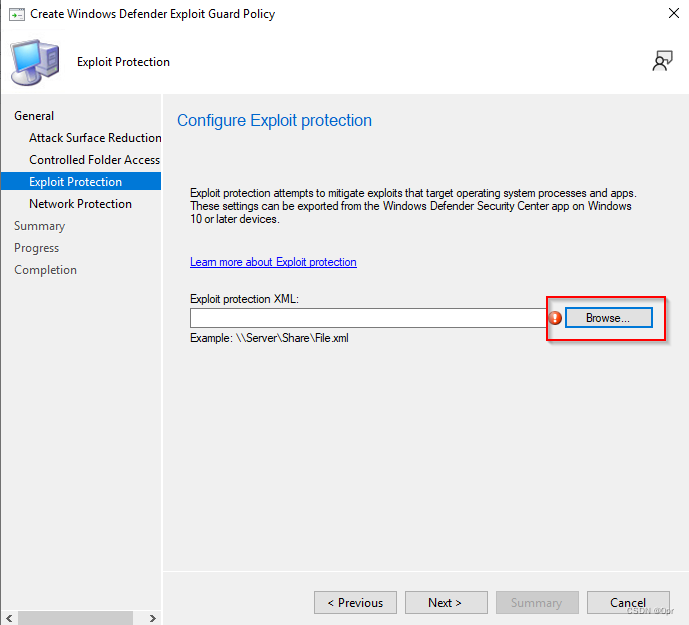
Now, we have to create an exploit protection XML.
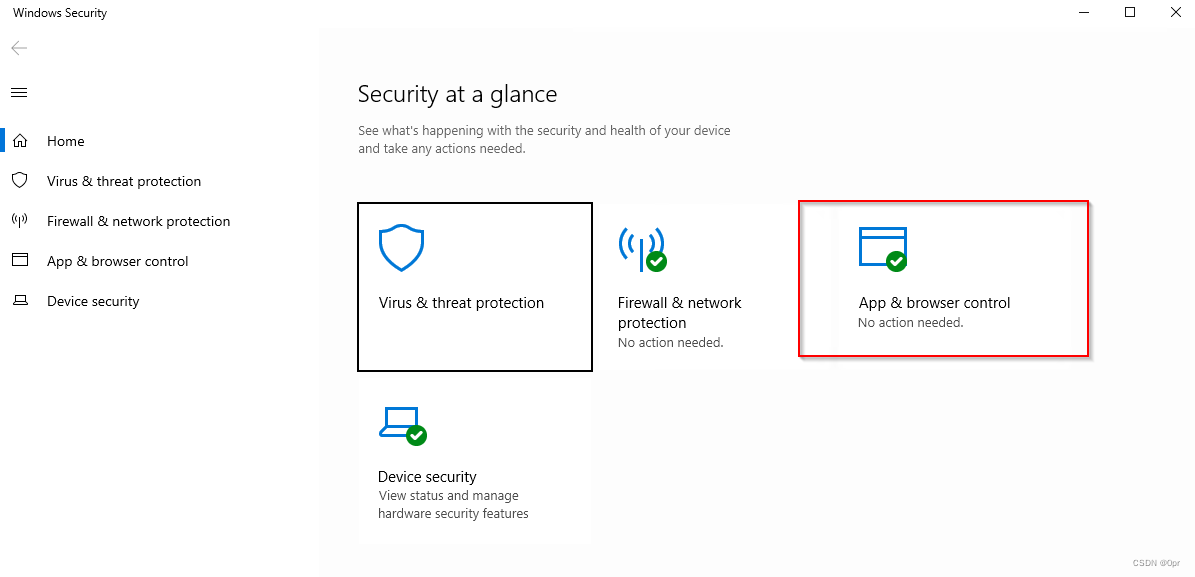
Open Windows Security Center, select App & browser control.
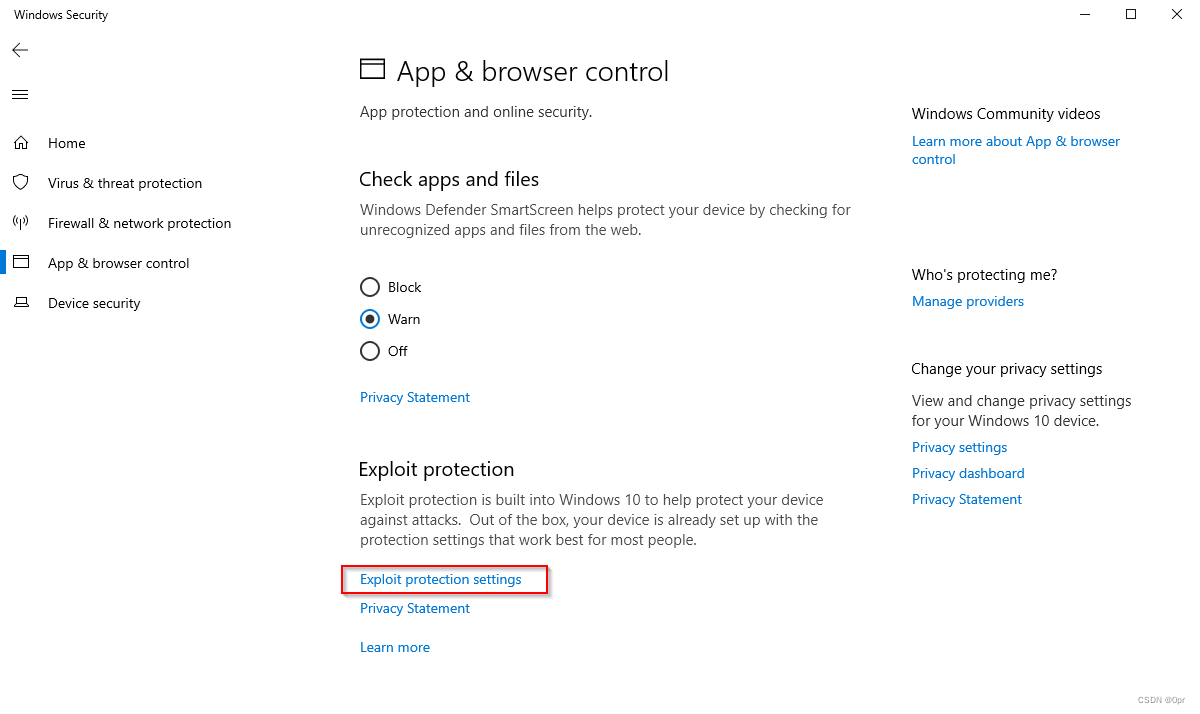
Then, select **Exploit protection settings**.
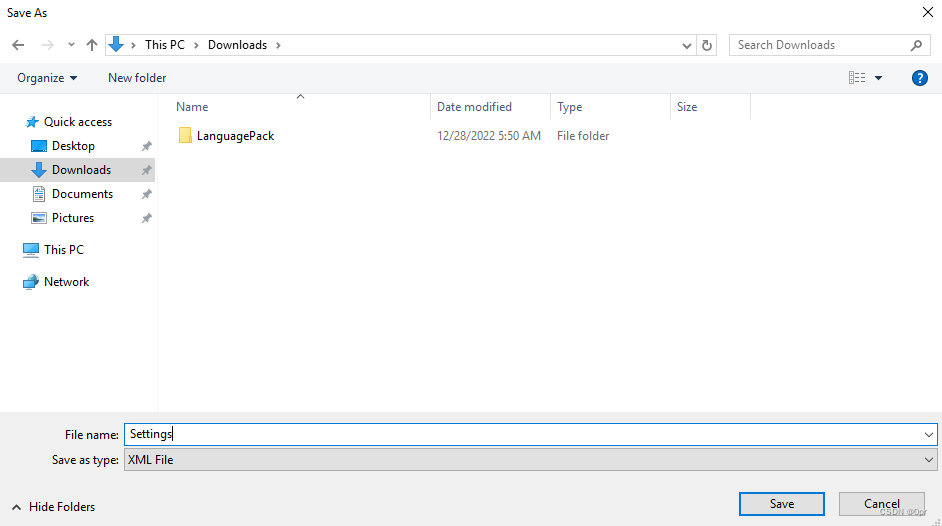
Choose **Export settings** at the bottom.
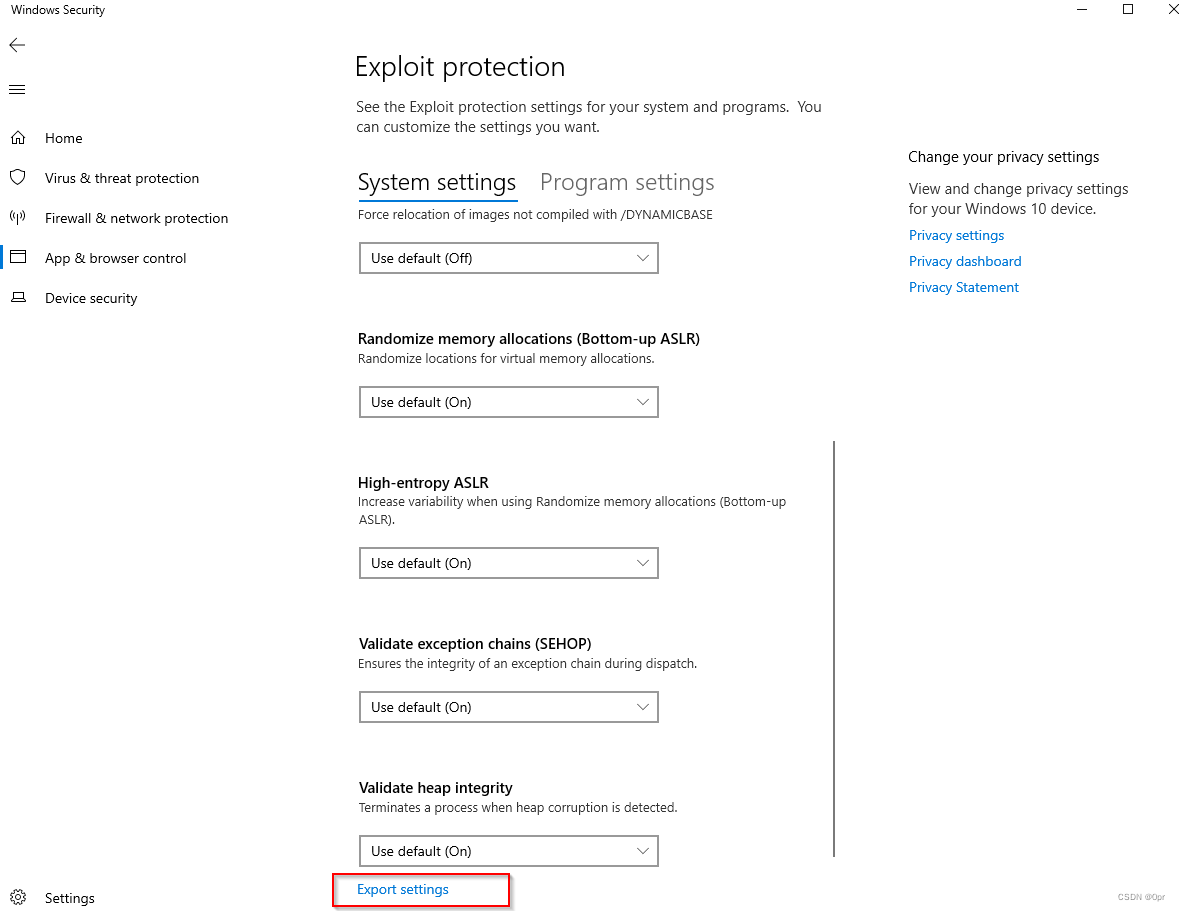
Save the file to a location.
Import the XML file.
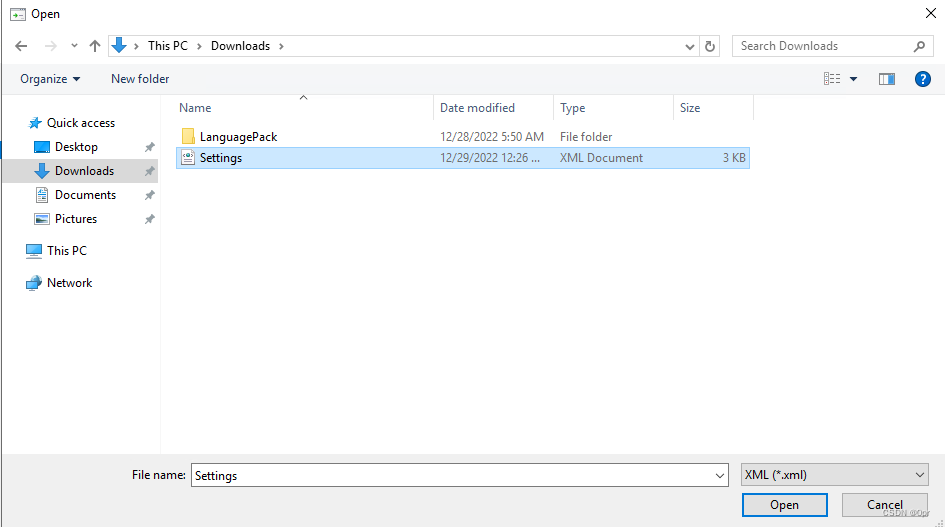
Choose the XML file.
Then click **Next**.
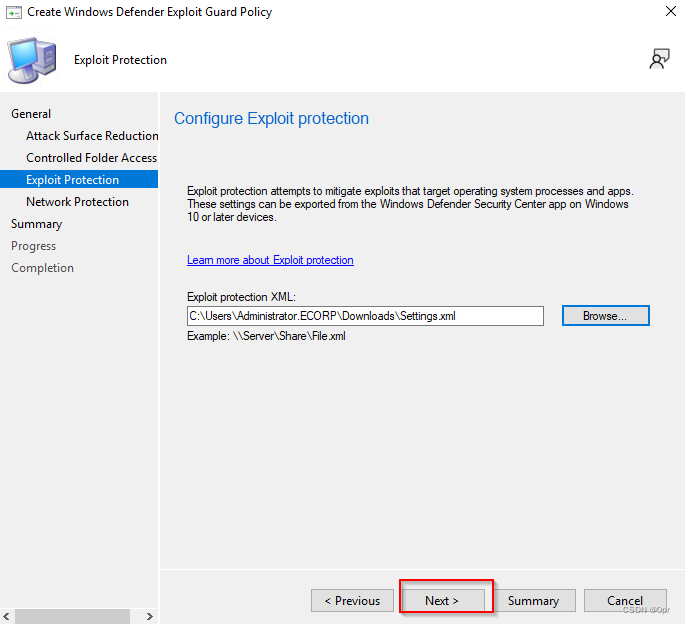
**Next** all the way to complete the implementation.
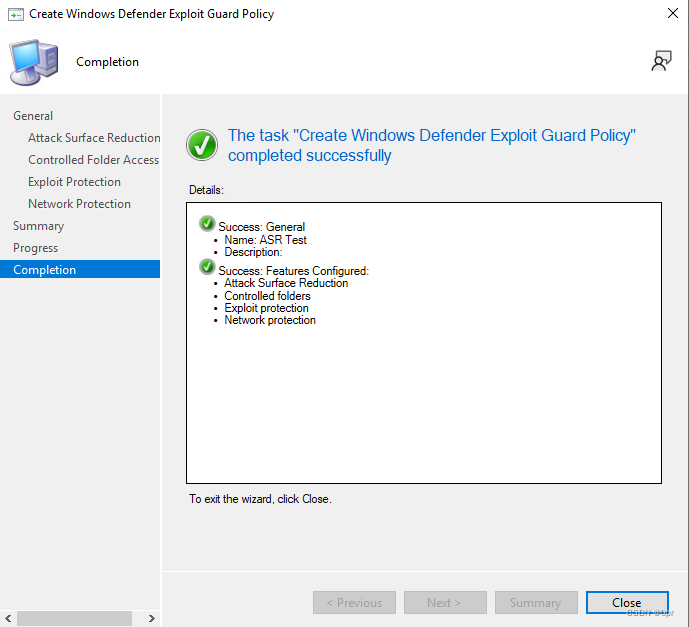
Now, we have created our protection rules, but not deployed yet.
Right click on the entry, and select Deploy.


And you can always change the settings in the **Attack Surface Reduction** tab by right click and choose **Properties**.
Summary
This article provides step by step guide on how to install Microsoft Endpoint Configuration Manager and use it to setup Attack Surface Reduction Rules.
References
- https://learn.microsoft.com/en-us/microsoft-365/security/defender-endpoint/attack-surface-reduction?view=o365-worldwide
- https://learn.microsoft.com/en-us/microsoft-365/security/defender-endpoint/attack-surface-reduction?view=o365-worldwide
- https://learn.microsoft.com/en-us/microsoft-365/security/defender-endpoint/enable-attack-surface-reduction?view=o365-worldwide
- https://www.microsoft.com/en-us/evalcenter/evaluate-microsoft-endpoint-configuration-manager
- https://learn.microsoft.com/en-us/windows/deployment/windows-10-poc-sc-config-mgr#install-microsoft-configuration-manager
- https://support.solarwinds.com/SuccessCenter/s/article/Install-NET-3-5-on-Windows-Server-2019?language=en_US
- https://learn.microsoft.com/en-us/mem/configmgr/protect/deploy-use/use-device-guard-with-configuration-manager
- https://social.technet.microsoft.com/wiki/contents/articles/36617.sccm-2016-troubleshooting-resolve-sql-server-service-account-issue-during-setup.aspx
- https://social.technet.microsoft.com/Forums/windows/en-US/faf7cab5-2e76-4d46-8ee6-e65a38b69116/i-am-installing-sccm-2016-but-getting-the-error-message?forum=systemcenterdeployment
- https://learn.microsoft.com/en-us/windows-hardware/get-started/adk-install
- https://answers.microsoft.com/en-us/windows/forum/all/microsoft-removed-windows-pe-folders-from-windows/db7a37a3-4dc1-4c66-8cbb-daf9525c6ae2
KEEP CALM AND HACK AWAY!


