- 1树莓派中python文件开机自启动方法_树莓派.py文件如何开机自启动
- 220221119-实例HI3516A底板PowerTree提取_pcb生成power tree
- 3【GPT】如何拥有离线版本的GPT以及部署过程中的问题_离线部署gpt3
- 4PandaWallet :Web3.0世界的入口
- 5顺序表的基本操作--不使用额外辅助空间去重合并两个顺序表_有两个递增有序顺序表a和b,其中a的容量大于a+b。请把a和b按序合并后放在a中,a和b
- 6Ubuntu 安装 Mysql 8_ubuntu安装mysql8 csdn
- 7springboot-过滤器的页面跳转【重定向与请求转发】-异常报错_springboot过滤器跳转页面
- 8百度地图API的使用_百度api
- 9EasyExcel使用与详细说明,EasyExcel工具类_easyexcel用office
- 10基于python的餐厅点餐订餐系统饭店(mysql)-Django.VUE【数据库设计、开题报告】_mysql点餐管理的数据库设计报告
Ubuntu22.04安装中文输入法►由踩坑到上岸版◄_ubuntu 22.4 shurufa anzhuang
赞
踩
为了方便回忆和记录甚至后面继续重装系统,我还是写一下以便将来用到或参考~
了解
安装Ubuntu22.04(截至2023年08月26日11:02:58是最新版本),具体安装过程可参考我的博客或TA的博客
因为ubuntu系统没有中文输入,所以需要安装中文输入法,以下两款供我们选取:
ibus(系统自带);
fcitx。
入坑
经过ibus VS fcitx对比后,使用总结后,果断选择fcitx。
喜欢ibus的人可以参考Github这篇文章:
https://github.com/ibus/ibus
IBus - Input Bus

Introduction
===

IBus is an Intelligent Input Bus. It is a new input framework for Linux OS.
It provides full featured and user friendly input method user interface.
It also may help developers to develop input method easily.


How to build & test IBus
===

ibus-setup:
It is a gtk program to enable and configure ibus.

ibus:
It is ibus daemon.

hotkeys:
Super + Space: Change input method.

For more detail please refer to https://github.com/ibus/ibus/wiki/ReadMe .


Peng Huang <shawn.p.huang@gmail.com>
- 1
- 2
- 3
- 4
- 5
- 6
- 7
- 8
- 9
- 10
- 11
- 12
- 13
- 14
- 15
- 16
- 17
- 18
- 19
- 20
- 21
- 22
- 23
- 24
- 25
- 26
开始安装fcitx(准确来说应该是Fcitx5):
Ubuntu 设置中打开「区域与语言」—>「管理已安装的语言」,然后自动检查已安装语言是否完整。若不完整,根据提示安装:
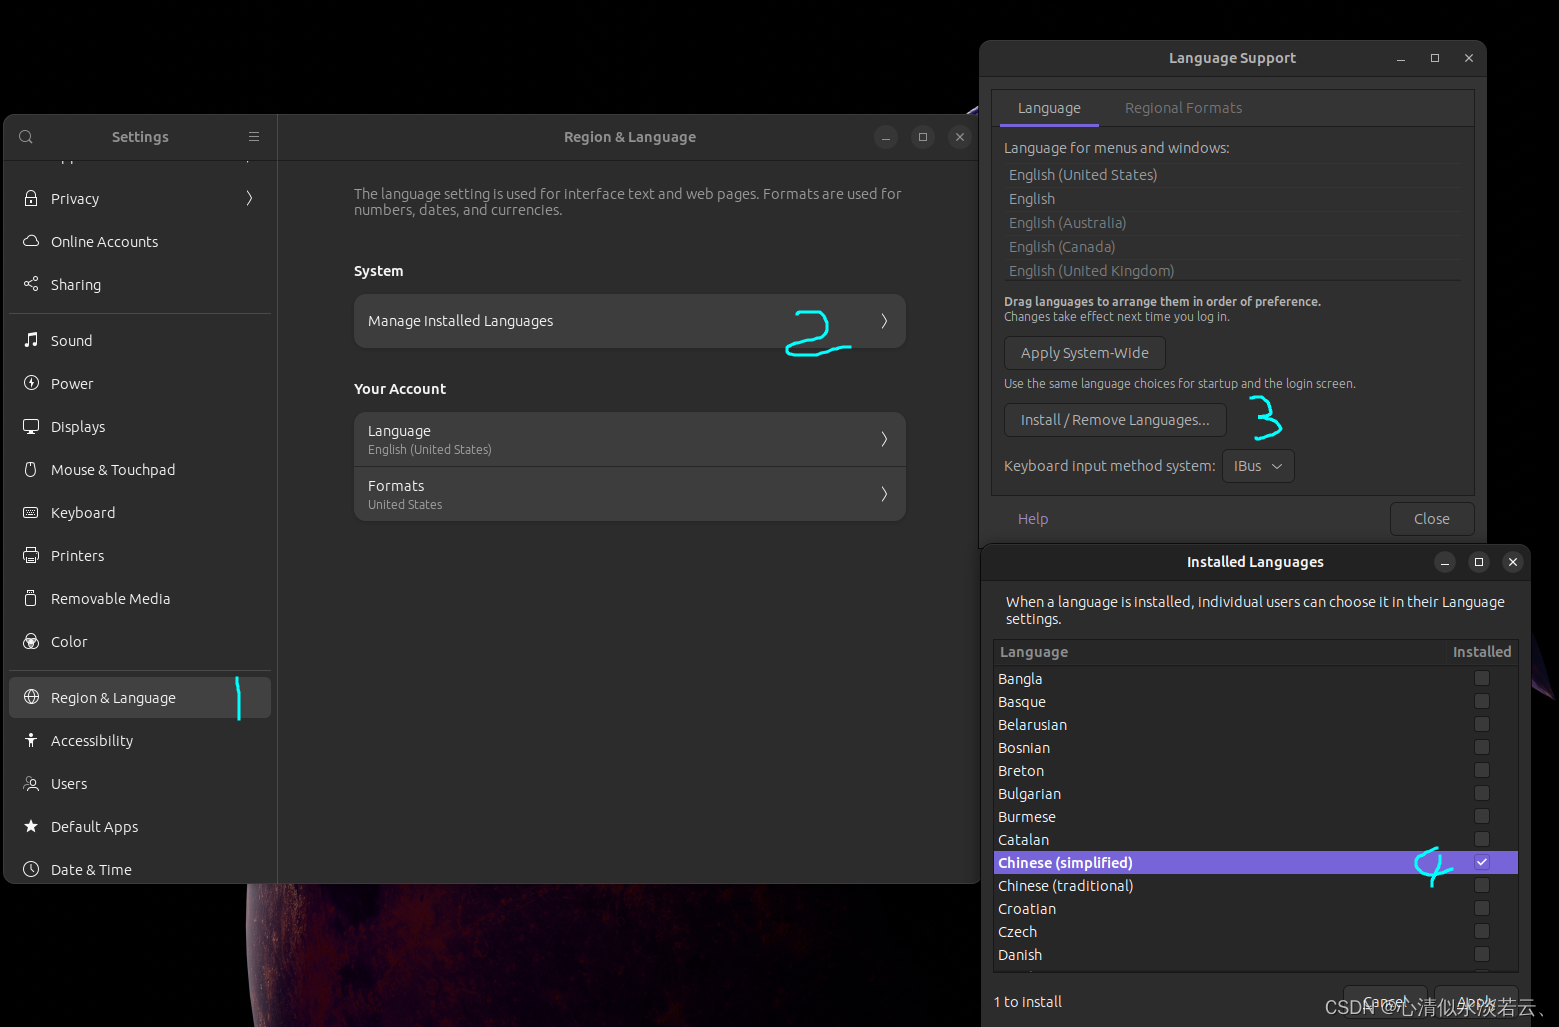
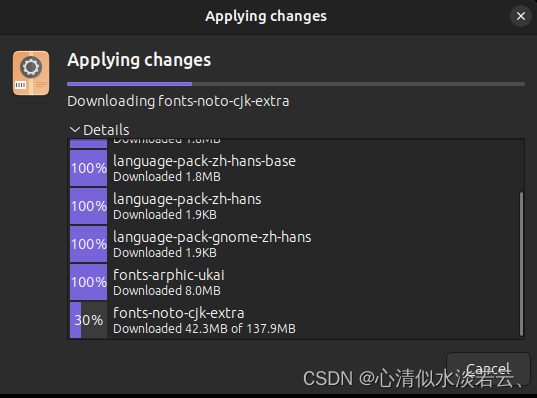
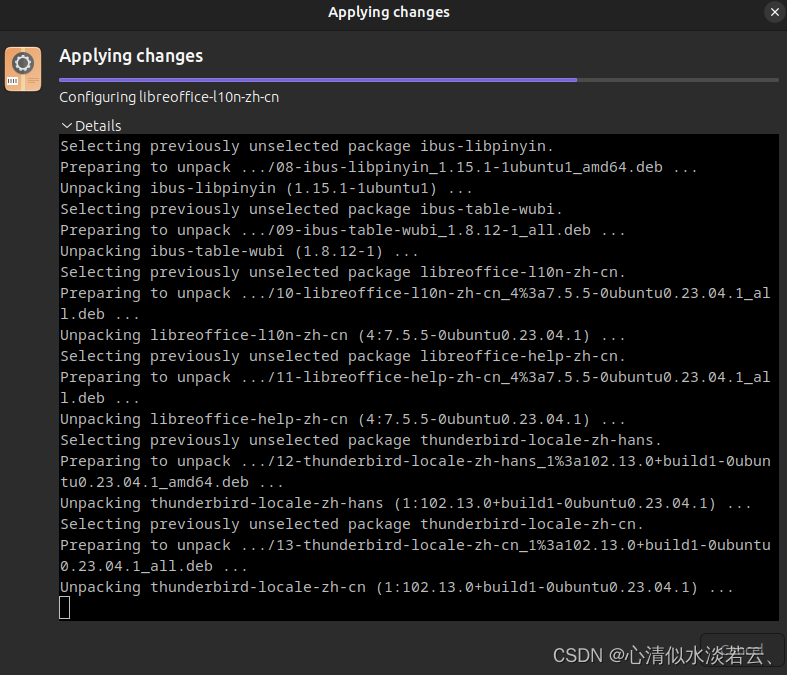
按照:1. Fcitx 5 主程序; 2.中文输入法引擎; 3.图形界面相关思路,可以直接使用 apt 进行安装:
sudo apt install fcitx5 fcitx5-chinese-addons fcitx5-frontend-gtk3 fcitx5-frontend-gtk2 fcitx5-frontend-qt5 kde-config-fcitx5
- 1
然后说是安装维基百科中文拼音词库,下载最新的.dict 文件:
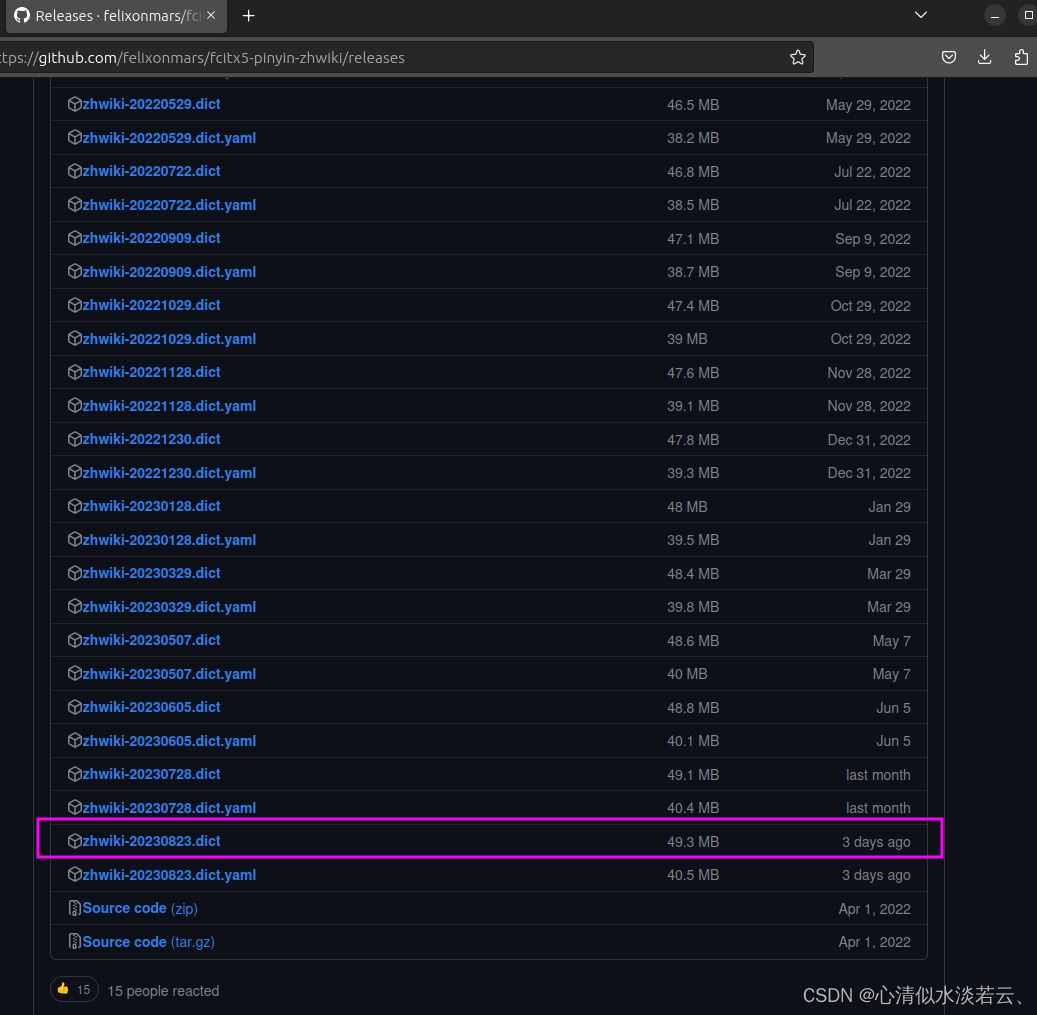
使用命令:
# 下载词库文件
wget https://github.com/felixonmars/fcitx5-pinyin-zhwiki/releases/download/0.2.4/zhwiki-20230823.dict
# 创建存储目录
mkdir ~/.local/share/fcitx5/pinyin/dictionaries/
# 移动词库文件至该目录
mv zhwiki-20230823.dict ~/.local/share/fcitx5/pinyin/dictionaries/
- 1
- 2
- 3
- 4
- 5
- 6
设置默认输入法:
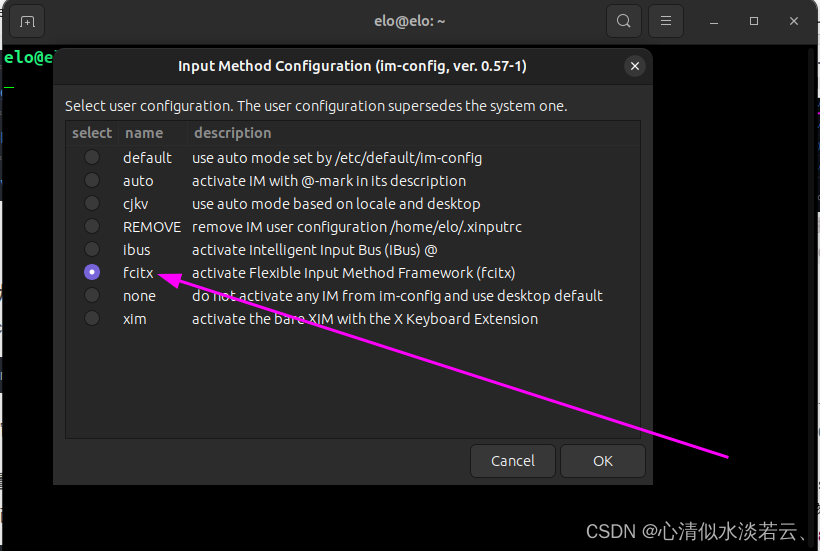
不得不说还是挺有用的…
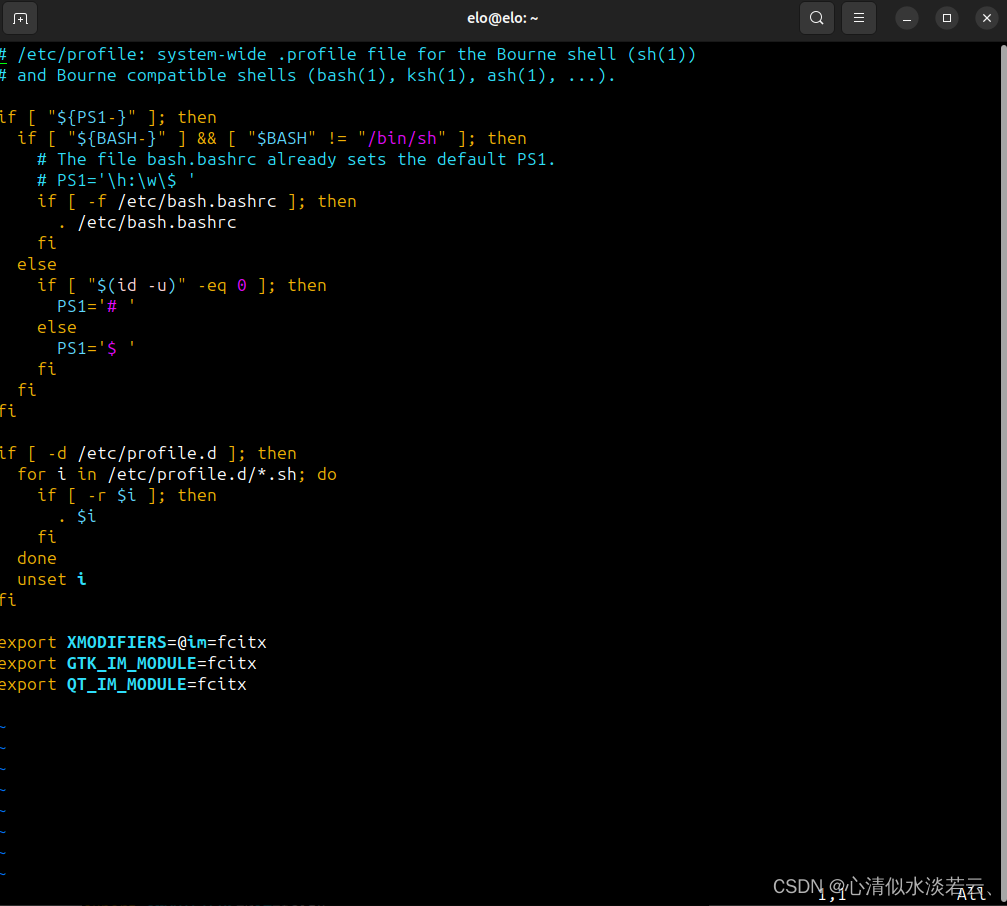
利用命令sudo vim /etc/profile设置环境变量:
export XMODIFIERS=@im=fcitx
export GTK_IM_MODULE=fcitx
export QT_IM_MODULE=fcitx
- 1
- 2
- 3
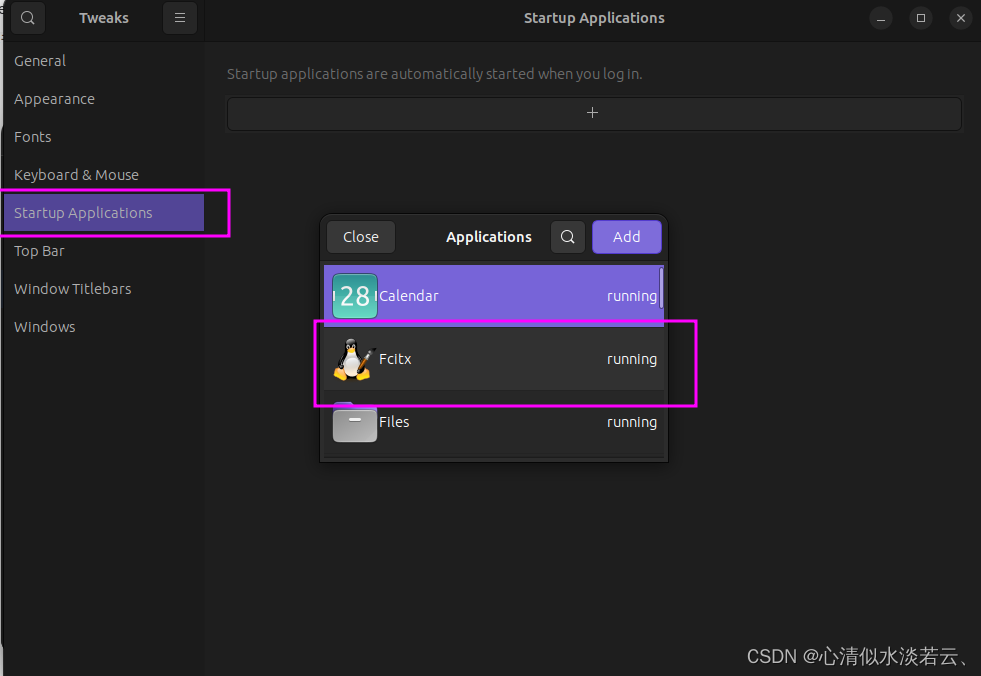
可以安装tweaks:sudo apt install gnome-tweaks设置开机自启动,
最后说的是配置:
- 在应用程序列表中打开「Fcitx 配置」
- 在 Fcitx 托盘上右键打开「设置」
- 命令行命令 fcitx5-configtool
这三种方法都可以打开Fcitx 5 :
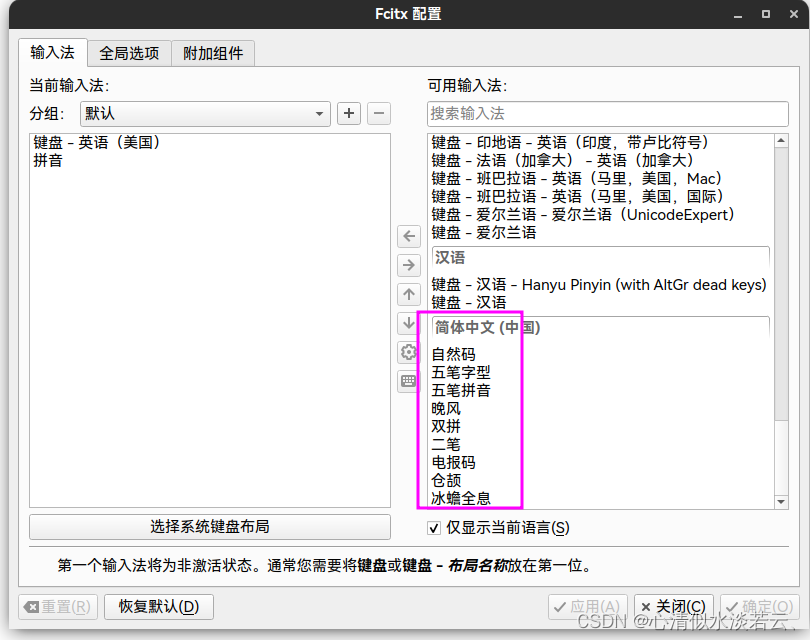
一打开我就傻了,这个界面很陌生,能用的只有“双拼”…
而且界面很拉垮,安装的皮肤我还没搞定,感兴趣的同志可以参考:fcitx-skins
感悟就是:
没办法同时输入多个文字,界面很拉跨,字体很小,序号较乱,输入的字体总不是我想要的等等…
因为卸载了所以看不了详细的图片:
上岸
引用某个博主的原话:
之前一直用的是搜狗输入法,因为20.04取消qt4了没装成,就去尝试别的输入法。后发现谷歌输入法用起来极舒服,比sougou for linux好用。谷歌的中文输入法主要是北京分部在做,对google cn的好感度飙升!!!(部分赞同~)
- Ctrl+Alt+T打开终端,输入:
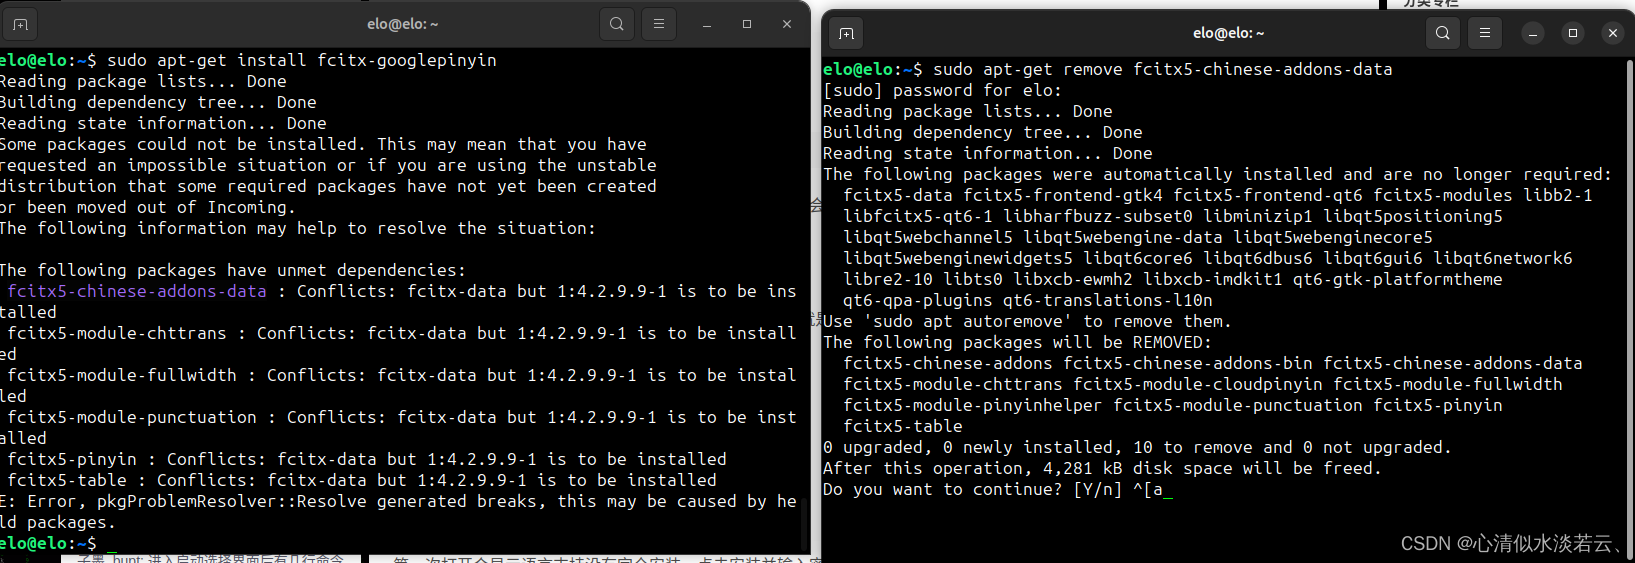
sudo apt-get install fcitx-googlepinyin
- 1

安装fcitx-googlepinyin。
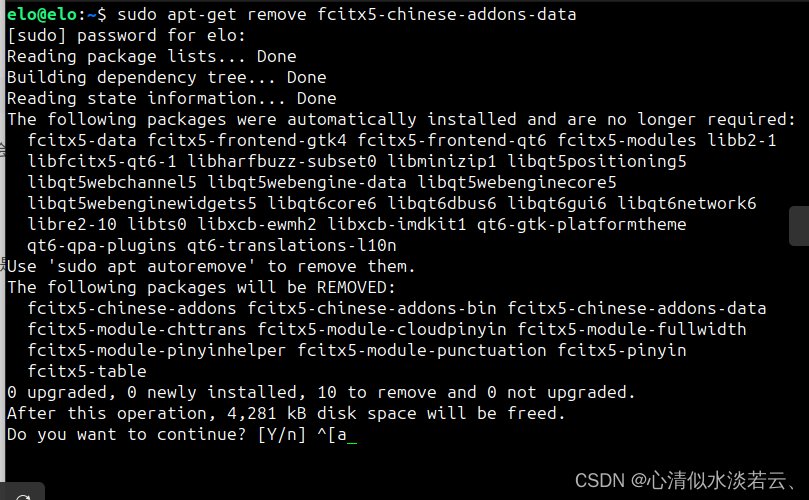
PS:这边如果有其他的输入法,要先干掉:
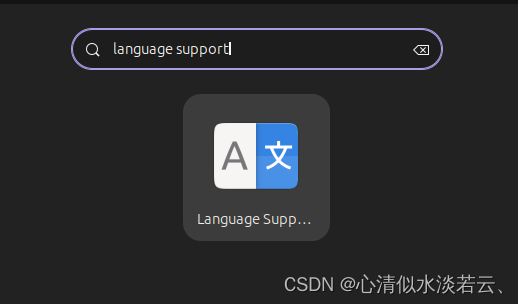
- 安装完成后打开菜单栏,键盘输入Language support并打开:
其实就是跟上面一样:
设置—>「区域与语言」—>「管理已安装的语言」
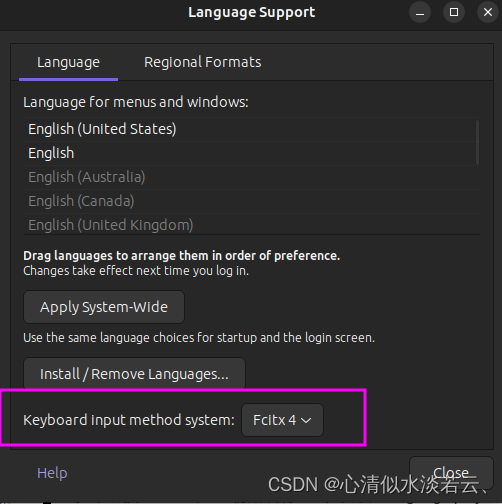
- 配置输入法:
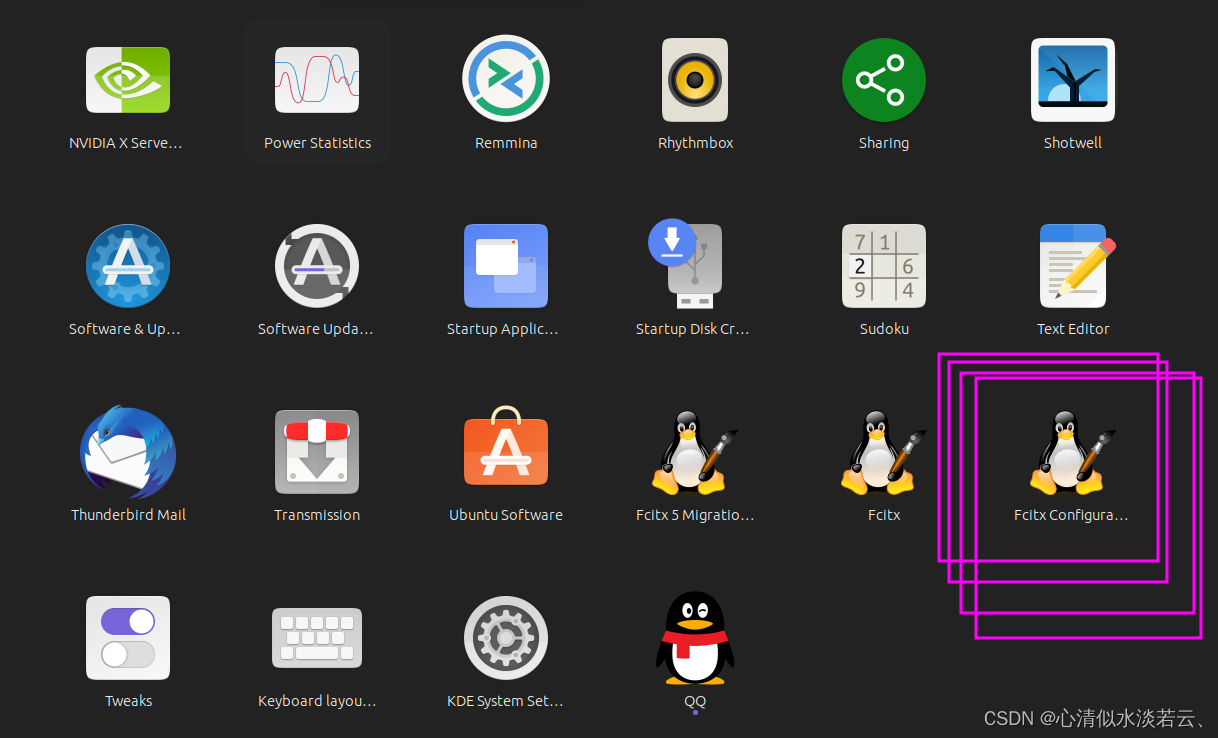
打开后才是熟悉的页面:
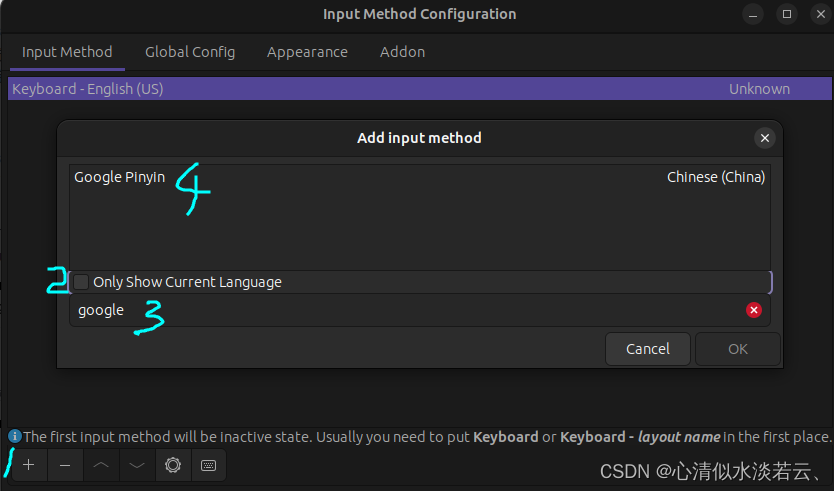
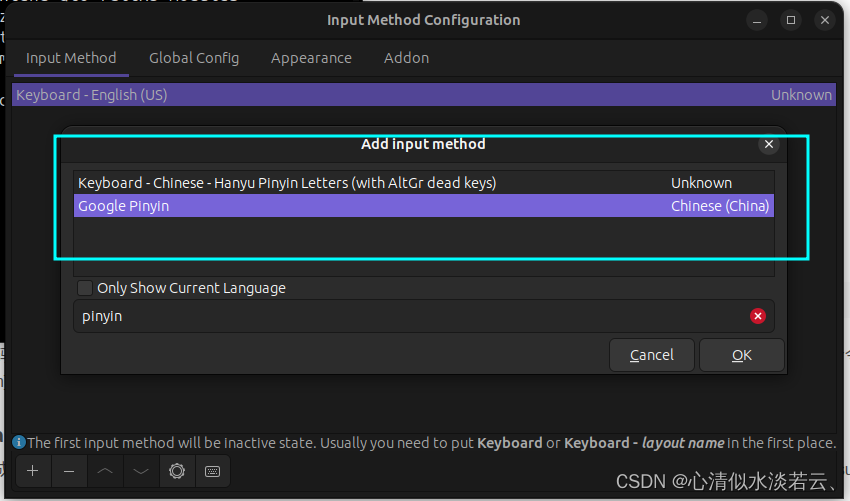
关闭设置,谷歌输入法配置完成。可以点击右上角状态栏的键盘图片切换到谷歌输入法:
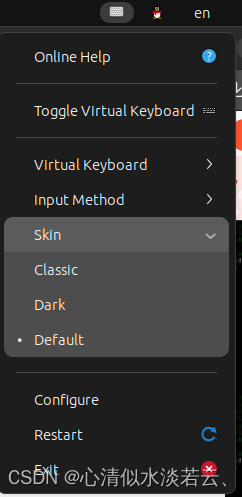
切换输入法的快捷键是ctrl+space,可以在刚关闭的输入方法设置界面里第二项Global Config里修改快捷键。
熟悉的界面:

更新一发:Gedit中文乱码问题的解决
解决ubuntu利用gedit编辑出现中文乱码的情况(这是因为我在用Halcon导入文本的时候发现的):
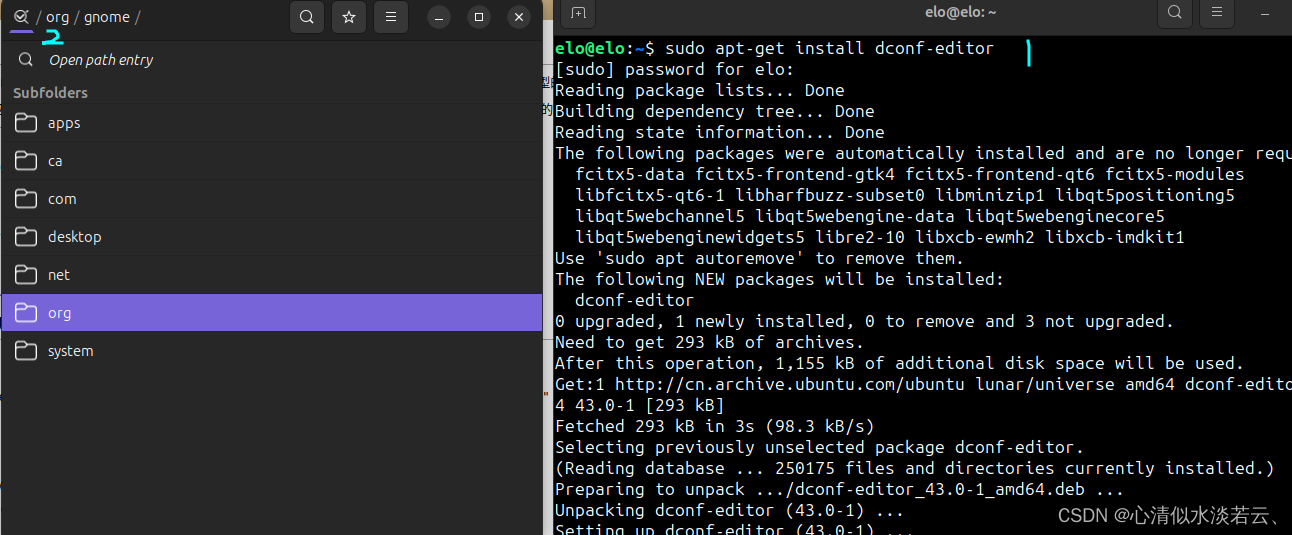 (适用于Ubuntu 11.10及以后),即Gedit 3.x 版本设置:
- 首先安装dconf-editor:
sudo apt-get install dconf-editor
- 1
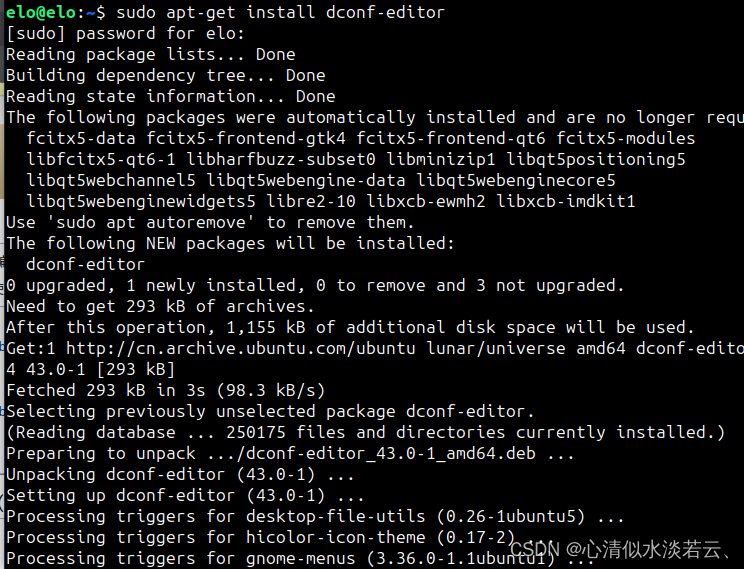 再运行:
再运行:
dconf-editor
- 1
- 然后展开/org/gnome/gedit/preferences/encodings:
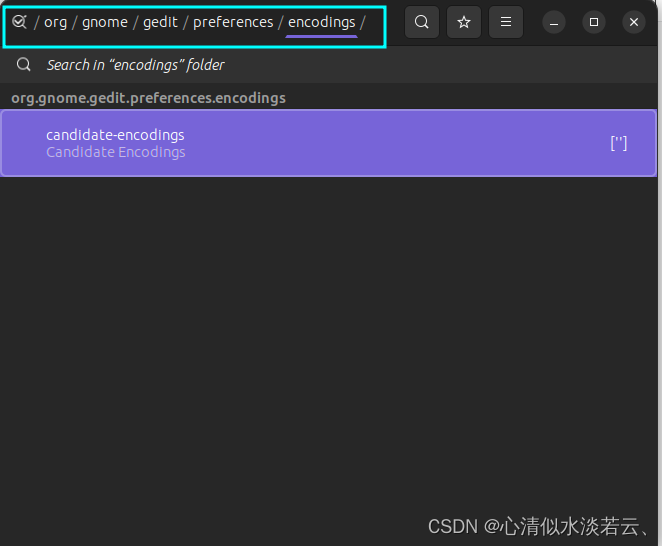
- candidate-encodings 的Value中加入 ‘GB18030’ ,加在UTF-8前面;
也可以直接使用命令:
gsettings set org.gnome.gedit.preferences.encodings candidate-encodings "['GB18030', 'UTF-8', 'CURRENT', 'ISO-8859-15', 'UTF-16']"
- 1
参考:Gedit中文乱码


