热门标签
热门文章
- 1ArcGIS中子类型和属性域的应用_arccatalog尝试为“yunnan.mdb”数据库设置属性域和子类型,如在“云南道路pr
- 2STM32CubeMX | 利用KEIL将代码下载能进内存(SRAM)实现RAM启动调试代码、解除读保护(Read Protection)功能_keil 写保护
- 3李兴华JavaWeb开发笔记
- 4什么是人工智能领域的 Foundation Model?
- 5SpringBoot集成ShardingSphere(手工配置)_springboot创建shardingspere
- 6Flutter完整开发实战详解(一、Dart语言和Flutter基础) | 掘金技术征文
- 7LeetCode 刷题 [C++] 第3题.无重复字符的最长子串
- 8django+mysql在线音乐网站-计算机毕业设计源码13633
- 9C++链接报错:which may bind externally can not be used when making a shared object; recompile with -fPIC
- 10UINavigationBar 导航栏背景设置_self.navigationbar.setbackgroundimage无效
当前位置: article > 正文
deep learning with pytorch(一)
作者:花生_TL007 | 2024-03-07 13:54:50
赞
踩
deep learning with pytorch(一)
1.create a basic nerual network model with pytorch
数据集 Iris UCI Machine Learning Repository
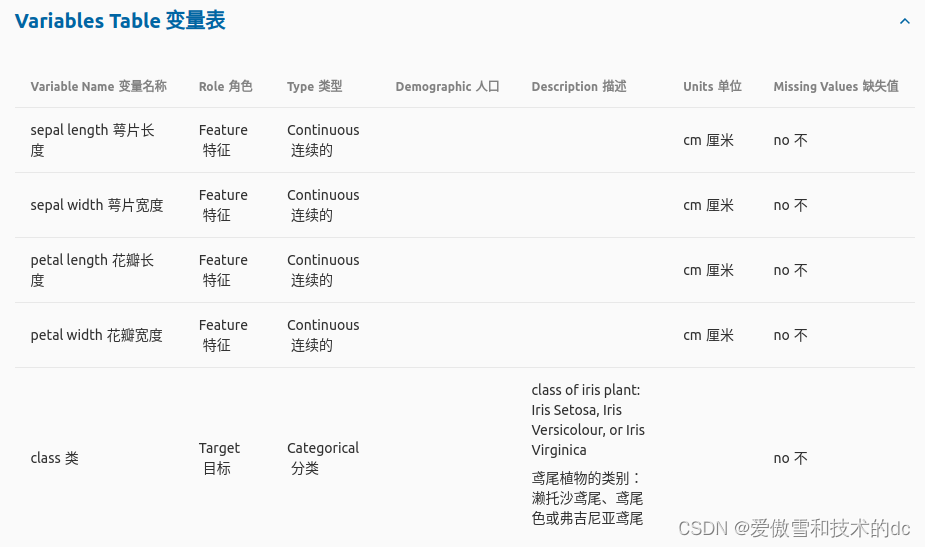
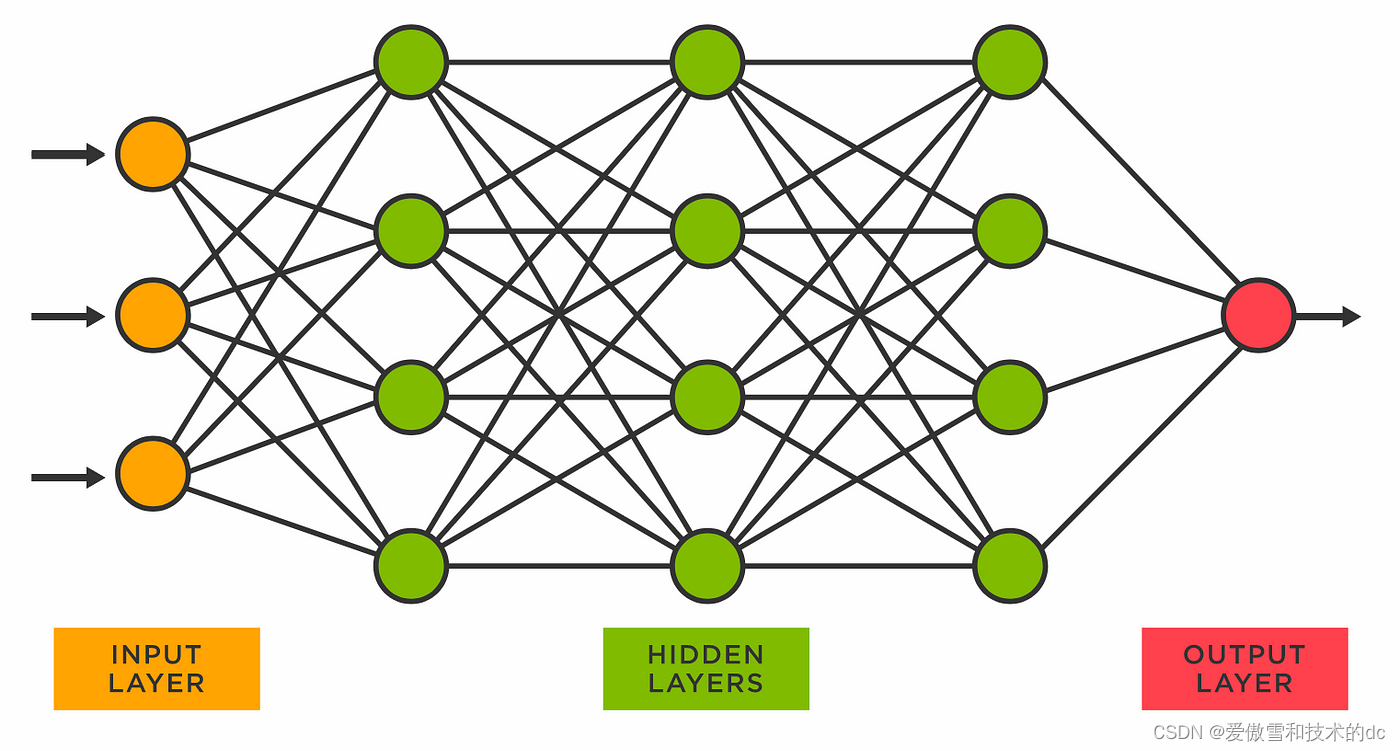
fully connected
目标:创建从输入层的代码开始,向前移动到隐藏层,最后到输出层


- # %%
- import torch
- import torch.nn as nn
- import torch.nn.functional as F
-
- # %%
- # create a model class that inherits nn.Module 这里是Module 不是model
- class Model(nn.Module):
- #input layer (4 features of the flower) -->
- # Hidden layer1 (number of neurons) -->
- # H2(n) --> output (3 classed of iris flowers)
- def __init__(self, in_features = 4, h1 = 8, h2 = 9, out_features = 3):
- super().__init__() # instantiate out nn.Module 实例化
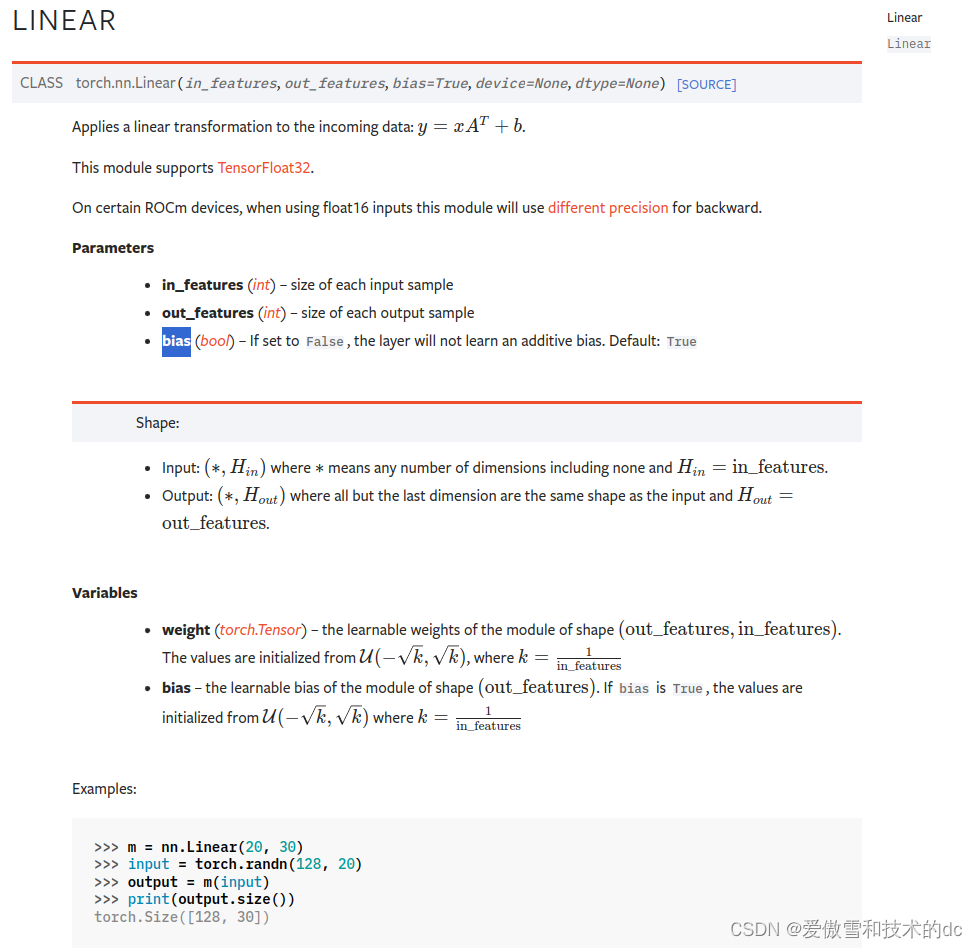
- self.fc1 = nn.Linear(in_features= in_features, out_features= h1)
- self.fc2 = nn.Linear(in_features= h1, out_features= h2)
- self.out = nn.Linear(in_features= h2, out_features= out_features)
-
- # moves everything forward
- def forward(self, x):
- # rectified linear unit 修正线性单元 大于0则保留,小于0另其等于0
- x = F.relu(self.fc1(x))
- x = F.relu(self.fc2(x))
- x = self.out(x)
-
- return x
-
-
- # %%
- # before we turn it on we need to create a manual seed, because networks involve randomization every time.
- # say hey start here and then go randomization, then we'll get basically close to the same outputs
-
- # pick a manual seed for randomization
- torch.manual_seed(seed= 41)
- # create an instance of model
- model = Model()
-
-

2.load data and train nerual network model
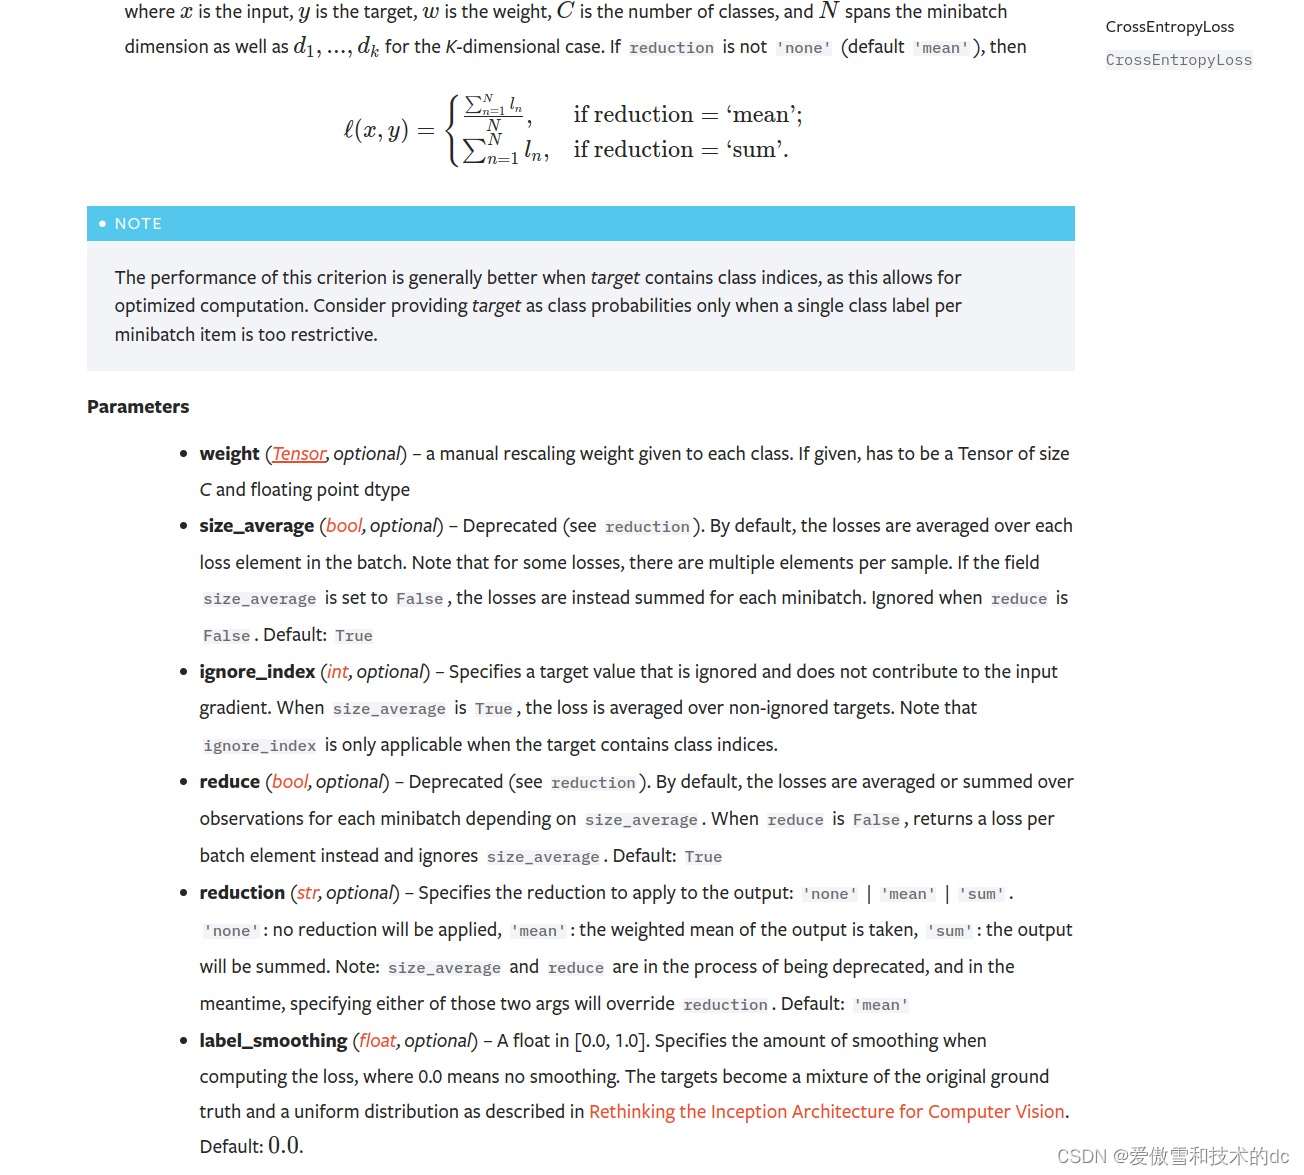
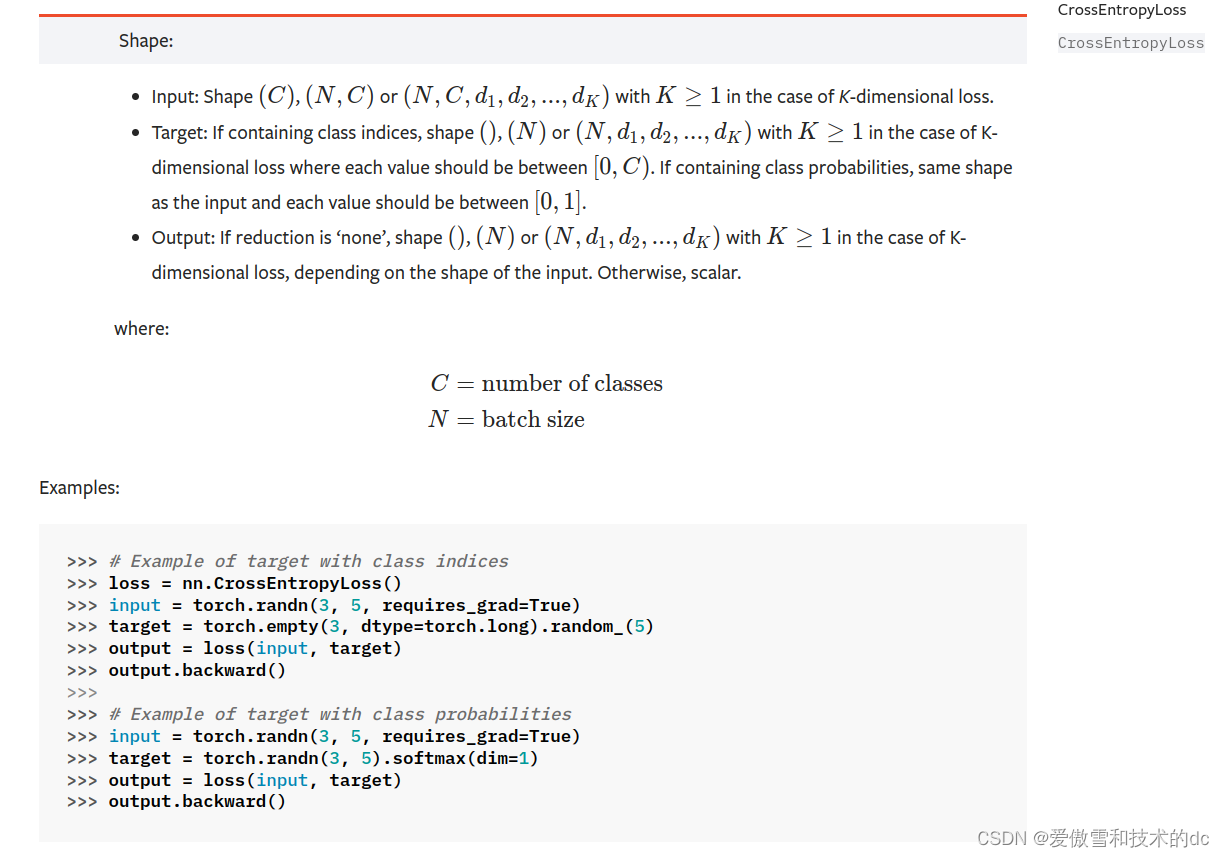
torch.optim
torch.optim — PyTorch 2.2 documentation
1. optimizer.zero_grad()
-
作用: 清零梯度。在训练神经网络时,每次参数更新前,需要将梯度清零。因为如果不清零,梯度会累加到已有的梯度上,这是PyTorch的设计决策,目的是为了处理像RNN这样的网络结构,它们在一个循环中多次计算梯度。
-
原理: PyTorch在进行反向传播(
backward)时,会累计梯度,而不是替换掉当前的梯度值。因此,如果不手动清零,梯度值会不断累积,导致训练过程出错。
2. loss.backward()
-
作用: 计算梯度。这一步会根据损失函数对模型参数进行梯度的计算。在神经网络中,损失函数衡量的是模型输出与真实标签之间的差异,通过反向传播算法,可以计算出损失函数关于模型各个参数的梯度。
-
原理: 反向传播是一种有效计算梯度的算法,它首先计算输出层的梯度,然后逆向逐层传播至输入层。这个过程依赖于链式法则,是深度学习训练中的核心。
3. optimizer.step()
-
作用: 更新参数。基于计算出的梯度,更新模型的参数。这一步实际上是在执行优化算法(如SGD、Adam等),根据梯度方向和设定的学习率调整参数值,以减小损失函数的值。
-
原理: 优化器根据梯度下降(或其它优化算法)更新模型参数。梯度指示了损失函数增长最快的方向,因此通过向相反方向调整参数,模型的预测误差会逐渐减小。
-
- # %%
- import pandas as pd
- import matplotlib.pyplot as plt
- %matplotlib inline
- # %%
- # url = 'https://gist.githubusercontent.com/curran/a08a1080b88344b0c8a7/raw/0e7a9b0a5d22642a06d3d5b9bcbad9890c8ee534/iris.csv'
- my_df = pd.read_csv('dataset/iris.csv')
- # %%
- # change last column from strings to integers
- my_df['species'] = my_df['species'].replace('setosa', 0.0)
- my_df['species'] = my_df['species'].replace('versicolor', 1.0)
- my_df['species'] = my_df['species'].replace('virginica', 2.0)
- my_df
- # my_df.head()
- # my_df.tail()
- # %%
- # train test split ,set X,Y
- X = my_df.drop('species', axis = 1) # 删除指定列
- y = my_df['species']
- # %%
- #Convert these to numpy arrays
- X = X.values
- y = y.values
- # X
- # %%
- # train test split
- from sklearn.model_selection import train_test_split
- X_train, X_test, y_train, y_test = train_test_split(X, y, test_size= 0.2, random_state= 41)
- # %%
- # convert X features to float tensors
- X_train = torch.FloatTensor(X_train)
- X_test = torch.FloatTensor(X_test)
- #convert y labels to long tensors
- y_train = torch.LongTensor(y_train)
- y_test = torch.LongTensor(y_test)
- # %%
- # set the criterion of model to measure the error,how far off the predicitons are from the data
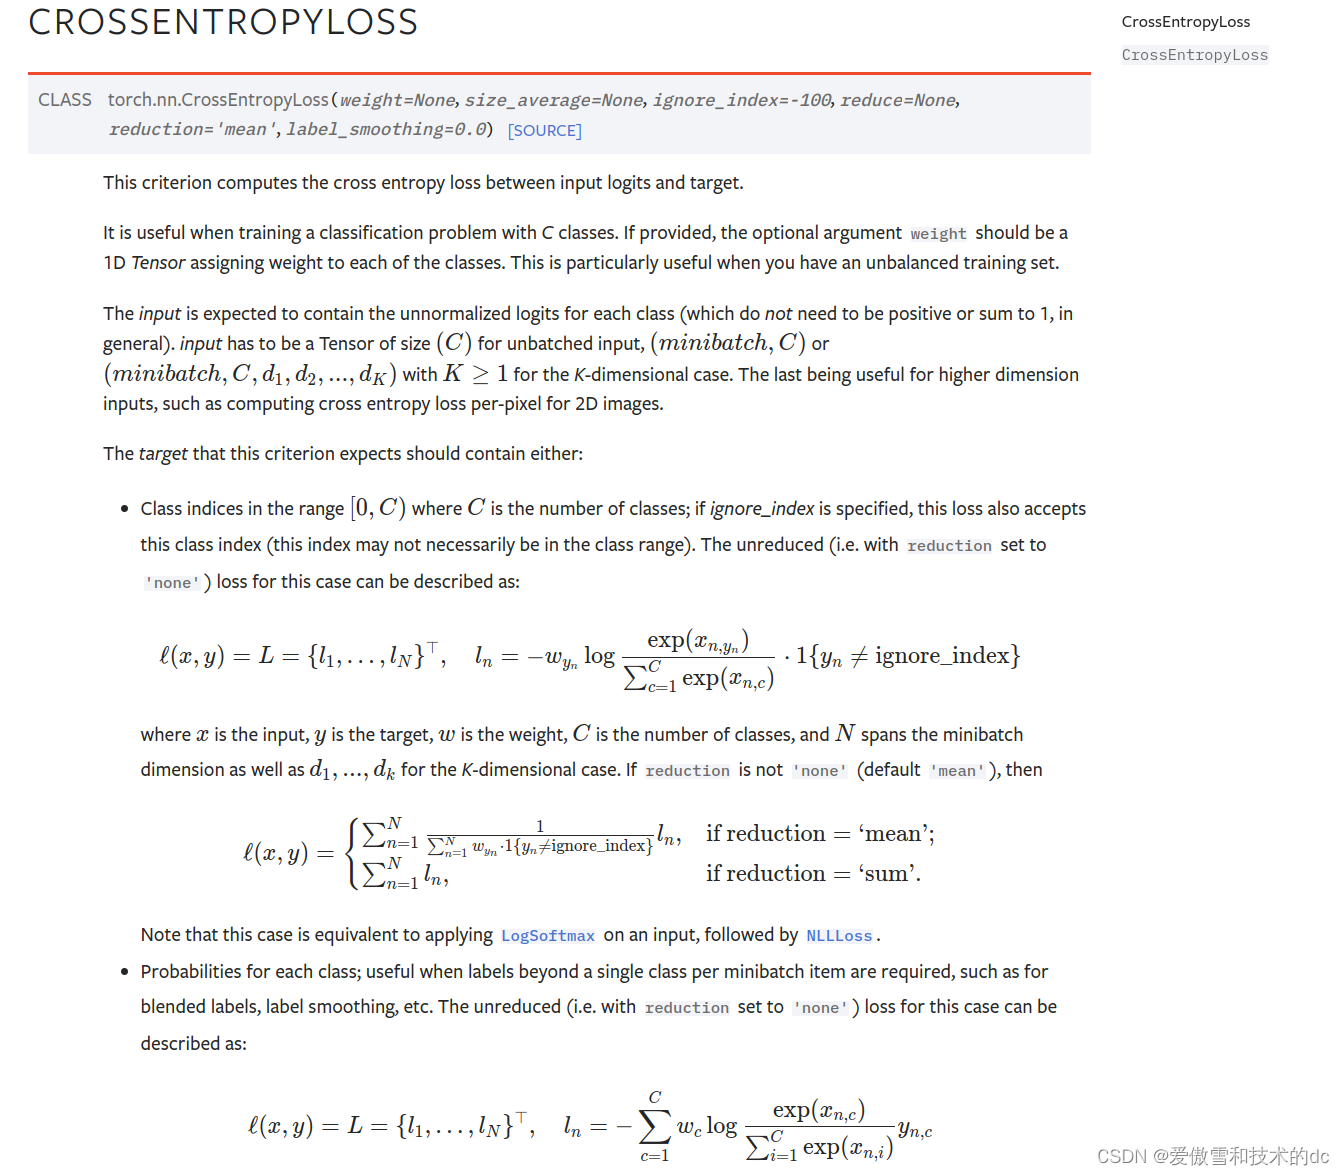
- criterion = nn.CrossEntropyLoss()
- # choose Adam optimizer, lr = learing rate (if error does not go down after a bunch of
- # iterations(epochs), lower our learning rate),学习率越低,学习所需时间越长
- optimizer = torch.optim.Adam(model.parameters(), lr= 0.01)
- # 传进去的参数包括fc1, fc2, out
- # model.parameters
- # %%
- # train our model
- # epochs? (one run through all the training data in out network )
- epochs = 100
- losses = []
- for i in range(epochs):
- # go forward and get a prediction
- y_pred = model.forward(X_train) # get a predicted results
- #measure the loss/error, gonna be high at first
- loss = criterion(y_pred, y_train) # predicted values vs y_train
- # keep track of our losses
- #detach()不再跟踪计算图中的梯度信息,numpy(): 这个方法将PyTorch张量转换成NumPy数组。因为NumPy数组在Python科学计算中非常普遍,很多库和函数需要用到NumPy数组作为输入。
- losses.append(loss.detach().numpy())
- #print every 10 epoches
- if i % 10 == 0:
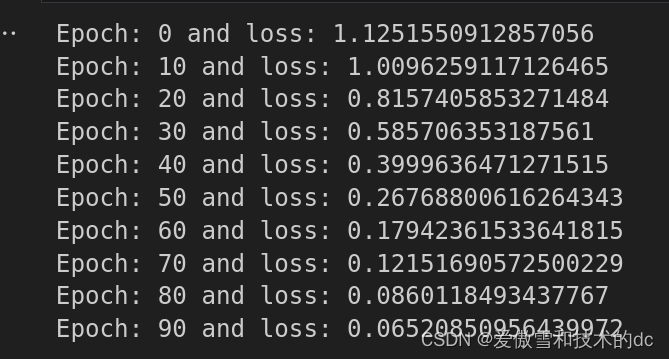
- print(f'Epoch: {i} and loss: {loss}')
- # do some back propagation: take the error rate of forward propagation and feed it back
- # thru the network to fine tune the weights
- # optimizer.zero_grad() 清零梯度,为新的梯度计算做准备。
- # loss.backward() 计算梯度,即对损失函数进行微分,获取参数的梯度。
- # optimizer.step() 更新参数,根据梯度和学习率调整参数值以最小化损失函数。
- optimizer.zero_grad()
- loss.backward()
- optimizer.step()
- # %%
- # graph it out
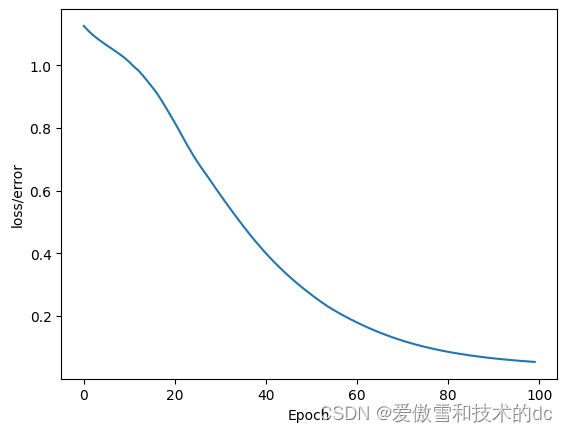
- plt.plot(range(epochs), losses)
- plt.ylabel("loss/error")
- plt.xlabel("Epoch")

-
声明:本文内容由网友自发贡献,不代表【wpsshop博客】立场,版权归原作者所有,本站不承担相应法律责任。如您发现有侵权的内容,请联系我们。转载请注明出处:https://www.wpsshop.cn/w/花生_TL007/article/detail/205995
推荐阅读
相关标签


