
热门标签
热门文章
- 1HCIA H12-211题库解析_如下图所示,主机a和主机b不能通信。
- 2求无向图中的三元环个数_枚举三元环
- 3python系列之炫酷新年烟花秀_importpygamefromrandomimportrandint,uniform,choice
- 4【Android辟邪】之:gradle——在项目间共享依赖关系版本
- 5RuntimeError: There were no tensor arguments to this function (e.g., you passed an empty list of Ten_notimplementederror: there were no tensor argument
- 6小米9开源linux内核,发布即开源:小米开源新机Mi 11内核源码
- 7如何写好大模型提示词?来自大赛冠军的经验分享(基础篇)_大模型帮忙写小结 提示词
- 8Android开发面试经——常见人事面试问题_android面试技术总监问什么
- 9中国人工智能城市排名榜TOP 10公布;宁德时代将授权现代摩比斯使用CTP技术 | 美通社头条...
- 10MVC、MVP、MVVM模式的概念与区别_mvc mvp mvvm区别
当前位置: article > 正文
Ubuntu 20.04 开机执行自定义脚本_ubuntu 22 启动脚本目录
作者:程序代码艺术家 | 2024-02-02 11:25:00
赞
踩
ubuntu 22 启动脚本目录
#1、切换至root,建立rc-local.service文件
vim /etc/systemd/system/rc-local.service
#2、在里面写入如下内容
- [Unit]
- Description=/etc/rc.local Compatibility
- ConditionPathExists=/etc/rc.local
-
- [Service]
- Type=forking
- ExecStart=/etc/rc.local start
- TimeoutSec=0
- StandardOutput=tty
- RemainAfterExit=yes
- SysVStartPriority=99
-
- [Install]
- WantedBy=multi-user.target
#3、然后创建文件:rc.local
vim /etc/rc.local
#4、里面写入下面内容(就是开机所要执行的脚本)
- #!/bin/sh -e
- ## rc.local
-
- # This script is executed at the end of each multiuser runlevel.
- # Make sure that the script will "exit 0" on success or any other
- # value on error.
- # In order to enable or disable this script just change the execution bits.
- # By default this script does nothing.
-
- #start script
-
- sudo -H -u user1 /bin/bash -c "vncserver :11 -localhost no -geometry 1440x900"
- sudo -H -u user2 /bin/bash -c "vncserver :12 -localhost no -geometry 1440x900"
-
- #end script
-
- echo "added sucessfully!" > /tmp/added_script.log
-
- exit 0

#5、加上权限
chmod +x /etc/rc.local
#6、启动服务
systemctl enable rc-local
#7、开启服务
systemctl start rc-local.service
#8、查看状态
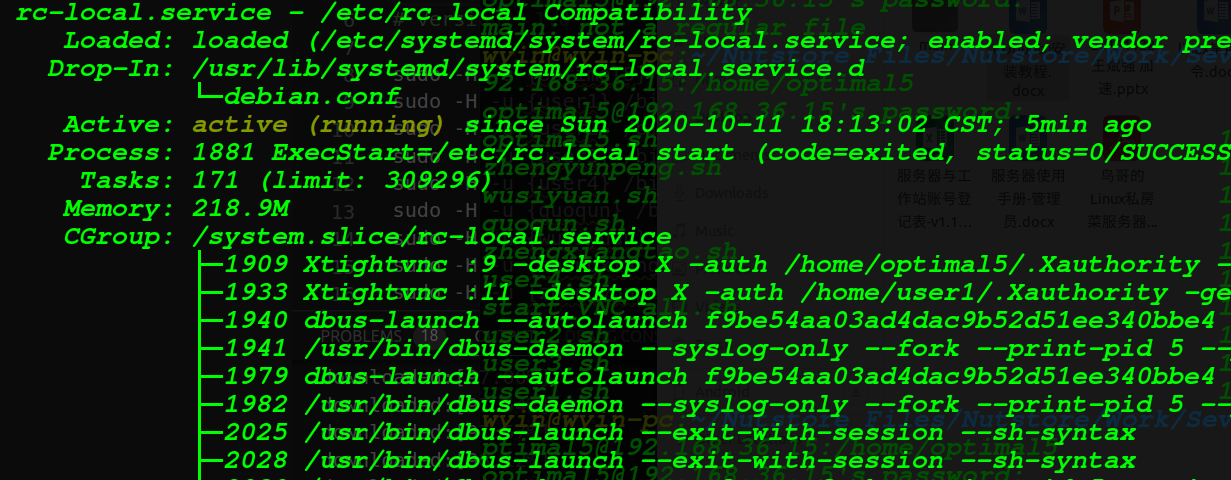
systemctl status rc-local.service
部分内容如下:(注意active (running))
#9、重启并检查test.log文件
vim /tmp/added_script.log
#10、如果里面有内容(added sucessfully!),则自启动脚本安装成功。
声明:本文内容由网友自发贡献,不代表【wpsshop博客】立场,版权归原作者所有,本站不承担相应法律责任。如您发现有侵权的内容,请联系我们。转载请注明出处:https://www.wpsshop.cn/blog/article/detail/55056
推荐阅读
- 基于Ubuntu22.04搭建PXE服务器,支持IPv4,IPv6网络,支持Legacy,UEFI启动模式。_ubuntupxeubuntupxe基于Ubuntu22.04搭建PXE服务器,支持IPv4,IPv6网络,支持Legacy,UE... [详细]
赞
踩
- 本地主要需要一个VNC客户端,用来远程连接服务器端的VNC(在不安装Web版本VNC情况下)。_ubuntuvnc客户端ubuntuvnc客户端一、本地VNC客户端本地主要需要一个VNC客户端,用来远程连接服务器端的VNC(在不安装Web版... [详细]
赞
踩
- Ubuntu2022来啦,VMware虚拟机安装Ubuntu2022最新版详细图文安装教程(VMware虚拟机安装+Ubuntu下载+VMware虚拟机配置),数千字图文详解,一步步教会你如何安装、配置、运行虚拟机及Ubuntu。_vmwa... [详细]
赞
踩
- 通过按照上述步骤,您可以成功地设置NFS共享,并在客户端上访问共享的文件系统。NFS提供了一种方便的方式来在网络上共享文件,使多台计算机可以共享和访问相同的文件。如果您的Ubuntu系统上启用了防火墙(如UFW),您需要确保已配置适当的防火... [详细]
赞
踩
- 因为项目现场的服务器无法连接互联网,只有内网环境,但是需要安装redis和nginx,所以需要安装gccg++make等依赖包。_ubuntu离线安装gccubuntu离线安装gcc1.离线安装背景因为项目现场的服务器无法连接互联网,只有内... [详细]
赞
踩
- Win10版本的:https://build.openvpn.net/downloads/releases/tap-windows-9.24.7-I601-Win10.exe。-driveif=none,file=ubuntu-20.04.... [详细]
赞
踩
- article
Ubuntu 启动错误:The virtual machine ‘win7‘ has terminated unexpectedly during startup with exit code 1_the virtual machine 'wlan_ac_base' has terminated
Ubuntu启动错误:Thevirtualmachine'win7'hasterminatedunexpectedlyduringstartupwithexitcode1(0x1).ResultCode:NS_ERROR_FAILURE(0... [详细]赞
踩
- article
不能为虚拟电脑 ubuntu16 打开一个新任务. The virtual machine ‘ubuntu16‘ has terminated unexpectedly during startup_the virtual machine 'ubuntu' has terminated unexpe
不能为虚拟电脑ubuntu16打开一个新任务.Thevirtualmachine‘ubuntu16’hasterminatedunexpectedlyduringstartupwithexitcode1(0x1).Moredetailsma... [详细]赞
踩
- article
Ubuntu下VirtualBox 无法打开,不能为虚拟电脑 openfiler 打开一个新任务_the virtual machine 'ubuntu' has terminated unexpe
虚拟机启动时报如下错误:不能为虚拟电脑openfiler打开一个新任务.Thevirtualmachine'openfiler'hasterminatedunexpectedlyduringstartupwithexitcode1.返回代码... [详细]赞
踩
- 使用virtualbox报错:不能为虚拟电脑ubuntu3打开一个新任务.Thevirtualmachine'ubuntu3'hasterminatedunexpectedlyduringstartupwithexitcode1(0x1).... [详细]
赞
踩
- 1.virtualbox无法打开虚拟机虚拟机莫名其妙崩溃Thevirtualmachine‘Ubuntu14.04’hasterminatedunexpectedlyduringstartupwithexitcode1(0x1).2.解决办... [详细]
赞
踩
- wxWidgetswxWidgets是一个程序开发框架/库,允许你在Windows、Mac、Linux中使用相同的代码跨平台开发。它主要用C++写成,但也可以与其他语言绑定比如Python、Perl、Ruby。本教程中我将向你展示如何在基于... [详细]
赞
踩
- Ubuntu18.04配置网卡聚合绑定与桥接单网卡配置ip和多网卡配置ip在之前的博客已经写过了,这里写一下进阶的一些配置吧。Ubuntu配置ip博客:https://blog.csdn.net/liuhaoy/article/detail... [详细]
赞
踩
- 今天2013.1.4用了好几周了不想说了用户体验极差bugN多啊还有那个全局菜单你学apple大哥你学全啊今天2013.1.9从unity回到gnome后感觉蛮好的没有再出现假死的问题了顺便推荐下IDEhttp://www.jetbrain... [详细]
赞
踩
- 今天2013.1.4用了好几周了不想说了用户体验极差bugN多啊还有那个全局菜单你学apple大哥你学全啊今天2013.1.9从unity回到gnome后感觉蛮好的没有再出现假死的问题了顺便推荐下IDEhttp://www.jetbrain... [详细]
赞
踩
- [Ubuntu]Ubuntu16.04+win10+联想Y7000+显卡+WIFI装机成功前言之前装spss的时候win10引导崩了,用大白菜修复后,ubuntu的引导没了,正好考虑到扩大Ubuntu的内存分布+丢失了网卡+以后发展可能需要... [详细]
赞
踩
- 在「软件和更新」的「附加驱动」里面,更新了显卡驱动,重启后不仅nvidia-smi没反应,而且wifi图标也没了。_ubuntu安装显卡驱动后无法联网ubuntu安装显卡驱动后无法联网一、问题描述1、问题在「软件和更新」的「附加驱动」里面,... [详细]
赞
踩
- 笔者的笔记本安装好ubuntu18.04后,输出源是未知的,后面也能成功安装nvidia显卡驱动,CUDA也能安装,软件程序也用调用显卡来计算。但是在HDMI扩展上,一直没成功。后来发现当ubuntu系统是20.04的时候(2023年官网下... [详细]
赞
踩
- 目录一、先找到无线网卡型号二、进网站找linux系统的intel无线网卡驱动(找到对应型号)三、重点:下载前,需要先确定系统内核版本四、下载驱动并解压五、重启,无线网卡驱动安装成功一、先找到无线网卡型号方法一:lspci|grep-inet... [详细]
赞
踩
- 参考博客:https://blog.csdn.net/bb_iot/article/details/107869060亲测可行_ubuntu20.04无wifiadapterubuntu20.04无wifiadapter参考博客:https... [详细]
赞
踩
相关标签

