
热门标签
热门文章
- 1每天五分钟机器学习:基于梯度检验判断神经网络梯度计算的准确性_如何判定神经网络梯度可导
- 2图论之各种找环
- 3系列文章:如何利用PaddleDetection做一个完整的项目_paddledetection实战项目
- 4AES C语言实现
- 5Android基础-SharedPreferences详解_android sharedpreferences
- 6STM32内存分配解析及变量的存储位置_stm32 mmu
- 7spring-mvc底层实现-1_spring mvc基于servlet接口实现
- 8python安装tensorflow_python安装tensorflow教程
- 9Java语法学习集合
- 10Python 形参和实参,局部变量和全局变量的含义理解及使用_形参、实参、变量
当前位置: article > 正文
SpringBoot集成Redis Cluster集群(附带Linux部署Redis Cluster高可用集群)_springboot2 redis集群
作者:代码吟游诗人 | 2024-02-03 19:21:58
赞
踩
springboot2 redis集群
一、前言
这里会使用到spring-boot-starter-data-redis包,spring boot 2的spring-boot-starter-data-redis中,默认使用的是lettuce作为redis客户端,也推荐使用lettuce,Redis使用哨兵集群,这里会通过lettuce连接到哨兵获取对应Redis节点地址从而操作Redis。
Linux部署Redis Cluster高可用集群:https://blog.csdn.net/weixin_44606481/article/details/134052367
二、集成配置
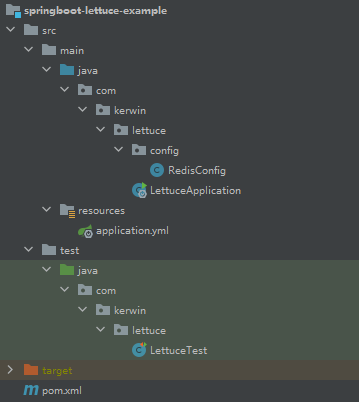
工程结构
2.1、POM
    <parent>
        <groupId>org.springframework.boot</groupId>
        <artifactId>spring-boot-starter-parent</artifactId>
        <version>2.3.12.RELEASE</version>
    </parent>

    <dependencies>
        <dependency>
            <groupId>org.springframework.boot</groupId>
            <artifactId>spring-boot-starter</artifactId>
        </dependency>
        <!--springboot中的redis依赖-->
        <dependency>
            <groupId>org.springframework.boot</groupId>
            <artifactId>spring-boot-starter-data-redis</artifactId>
        </dependency>
        <!-- lettuce pool 缓存连接池-->
        <dependency>
            <groupId>org.apache.commons</groupId>
            <artifactId>commons-pool2</artifactId>
        </dependency>
        <!-- 使用jackson作为redis数据序列化 -->
        <dependency>
            <groupId>com.fasterxml.jackson.core</groupId>
            <artifactId>jackson-databind</artifactId>
            <version>2.11.4</version>
        </dependency>
		<!-- SpringBoot测试包 -->
        <dependency>
            <groupId>org.springframework.boot</groupId>
            <artifactId>spring-boot-starter-test</artifactId>
            <scope>test</scope>
        </dependency>
    </dependencies>

- 1
- 2
- 3
- 4
- 5
- 6
- 7
- 8
- 9
- 10
- 11
- 12
- 13
- 14
- 15
- 16
- 17
- 18
- 19
- 20
- 21
- 22
- 23
- 24
- 25
- 26
- 27
- 28
- 29
- 30
- 31
- 32
- 33
- 34
2.2、添加配置文件application.yml
因为我们用的spring-boot-starter-data-redis包会自动配置redis连接,在配置文件中添加对应配置即可
spring:
  #redis配置信息
  redis:
    ## Redis数据库索引(默认为0)
    database: 0
    ## Redis服务器连接密码(默认为空)
    password: 123456
    ## 连接超时时间(毫秒)
    timeout: 5000
    ## 集群配置
    cluster:
      ### 集群中所有节点
      nodes:
        - 172.16.8.186:7001
        - 172.16.8.186:7002
        - 172.16.8.186:7003
        - 172.16.8.186:7004
        - 172.16.8.186:7005
        - 172.16.8.186:7006
      ### 最大重定向数,最好为集群节点数,比如第一台挂了,连第二台,第二台挂了连第三台,这个是重新连接的最大数量
      max-redirects: 6
    lettuce:
      pool:
        ## 连接池最大连接数(使用负值表示没有限制)
        max-active: 8
        ## 连接池最大阻塞等待时间(使用负值表示没有限制)
        max-wait: -1
        ## 连接池中的最大空闲连接
        max-idle: 8
        ## 连接池中的最小空闲连接
        min-idle: 1
      ## 集群配置
      cluster:
        refresh:
          # 支持集群拓扑动态感应刷新,自适应拓扑刷新是否使用所有可用的更新,默认false关闭,类似nacos定时刷新服务列表
          adaptive: true
          # 定时刷新时间 毫秒
          period: 2000

# 打印lettuce debug日志,方便查看读写分离效果
logging:
  pattern:
    console: '%date{yyyy-MM-dd HH:mm:ss.SSS} | %highlight(%5level) [%green(%16.16thread)] %clr(%-50.50logger{49}){cyan} %4line -| %highlight(%msg%n)'
  level:
    root: info
    io.lettuce.core: debug
    org.springframework.data.redis: debug
- 1
- 2
- 3
- 4
- 5
- 6
- 7
- 8
- 9
- 10
- 11
- 12
- 13
- 14
- 15
- 16
- 17
- 18
- 19
- 20
- 21
- 22
- 23
- 24
- 25
- 26
- 27
- 28
- 29
- 30
- 31
- 32
- 33
- 34
- 35
- 36
- 37
- 38
- 39
- 40
- 41
- 42
- 43
- 44
- 45
- 46
- 47
2.3、编写配置文件
import com.fasterxml.jackson.annotation.JsonAutoDetect;
import com.fasterxml.jackson.annotation.PropertyAccessor;
import com.fasterxml.jackson.databind.ObjectMapper;
import io.lettuce.core.ReadFrom;
import org.apache.commons.pool2.impl.GenericObjectPoolConfig;
import org.springframework.boot.autoconfigure.data.redis.RedisProperties;
import org.springframework.context.annotation.Bean;
import org.springframework.context.annotation.Configuration;
import org.springframework.data.redis.connection.RedisConnectionFactory;
import org.springframework.data.redis.connection.RedisSentinelConfiguration;
import org.springframework.data.redis.connection.lettuce.LettuceConnectionFactory;
import org.springframework.data.redis.connection.lettuce.LettucePoolingClientConfiguration;
import org.springframework.data.redis.core.*;
import org.springframework.data.redis.serializer.Jackson2JsonRedisSerializer;
import org.springframework.data.redis.serializer.StringRedisSerializer;

import java.util.HashSet;

@Configuration
public class RedisConfig{
    /**
     * retemplate相关配置,配置自定义序列化规则为jackson
     */
    @Bean
    public RedisTemplate<String, Object> redisTemplate(RedisConnectionFactory factory) {
        RedisTemplate<String, Object> template = new RedisTemplate<>();
        // 配置连接工厂
        template.setConnectionFactory(factory);
        //使用Jackson2JsonRedisSerializer来序列化和反序列化redis的value值(默认使用JDK的序列化方式)
        Jackson2JsonRedisSerializer jacksonSeial = new Jackson2JsonRedisSerializer(Object.class);
        ObjectMapper om = new ObjectMapper();
        // 指定要序列化的域,field,get和set,以及修饰符范围,ANY是都有包括private和public
        om.setVisibility(PropertyAccessor.ALL, JsonAutoDetect.Visibility.ANY);
        // 指定序列化输入的类型,类必须是非final修饰的,final修饰的类,比如String,Integer等会跑出异常
        om.enableDefaultTyping(ObjectMapper.DefaultTyping.NON_FINAL);
        jacksonSeial.setObjectMapper(om);
        // 值采用json序列化
        template.setValueSerializer(jacksonSeial);
        //使用StringRedisSerializer来序列化和反序列化redis的key值
        template.setKeySerializer(new StringRedisSerializer());
        // 设置hash key 和value序列化模式
        template.setHashKeySerializer(new StringRedisSerializer());
        template.setHashValueSerializer(jacksonSeial);
        template.afterPropertiesSet();
        return template;
    }
}
- 1
- 2
- 3
- 4
- 5
- 6
- 7
- 8
- 9
- 10
- 11
- 12
- 13
- 14
- 15
- 16
- 17
- 18
- 19
- 20
- 21
- 22
- 23
- 24
- 25
- 26
- 27
- 28
- 29
- 30
- 31
- 32
- 33
- 34
- 35
- 36
- 37
- 38
- 39
- 40
- 41
- 42
- 43
- 44
- 45
- 46
- 47
2.4、编写启动类
import org.springframework.boot.SpringApplication;
import org.springframework.boot.autoconfigure.SpringBootApplication;

@SpringBootApplication
public class LettuceApplication {
    public static void main(String[] args) {
        SpringApplication.run(LettuceApplication.class);
    }
}
- 1
- 2
- 3
- 4
- 5
- 6
- 7
- 8
- 9
2.5、编写测试类测试是否连接成功
import org.junit.Test;
import org.junit.runner.RunWith;
import org.springframework.beans.factory.annotation.Autowired;
import org.springframework.boot.test.context.SpringBootTest;
import org.springframework.data.redis.core.RedisTemplate;
import org.springframework.test.context.junit4.SpringRunner;

@RunWith(SpringRunner.class)
@SpringBootTest(classes =  LettuceApplication.class)
public class LettuceTest {
    @Autowired
    private RedisTemplate<String,Object> redisTemplate;
    @Test
    public void t1(){
        String key = "key1";
        System.out.println("插入数据到redis");
        redisTemplate.opsForValue().set(key,"value1");
        Object value = redisTemplate.opsForValue().get(key);
        System.out.println("从redis中获取到值为 "+value);
        Boolean delete = redisTemplate.delete(key);
        System.out.println("删除redis中值 "+delete);
    }
}
- 1
- 2
- 3
- 4
- 5
- 6
- 7
- 8
- 9
- 10
- 11
- 12
- 13
- 14
- 15
- 16
- 17
- 18
- 19
- 20
- 21
- 22
- 23
本文内容由网友自发贡献,转载请注明出处:https://www.wpsshop.cn/blog/article/detail/57809
推荐阅读
- 主要功能包括管理员:首页、个人中心、图书分类管理、回收类别管理、新书榜管理、特价区管理、旧书回收管理、用户管理、订单评价管理、回收预约管理、图书回收管理、管理员管理、系统管理、订单管理。前台使用:首页、新书榜、特价区、旧书回收、公告资讯、个... [详细]
赞
踩
- 随着科学技术的飞速发展,社会的方方面面、各行各业都在努力与现代的先进技术接轨,通过科技手段来提高自身的优势,狗粮销售信息管理系统当然也不能排除在外。狗粮销售信息管理系统是以实际运用为开发背景,运用软件工程原理和开发方法,采用java技术构建... [详细]
赞
踩
- article
springBoot + netty搭建高性能 websocket 服务 & 性能测试(包含python 测试脚本)_netty websocket 和netty-websocket 性能对比
springBootnettywebsocket性能测试_nettywebsocket和netty-websocket性能对比nettywebsocket和netty-websocket性能对比一、前言1、如果我们的app类似于股票这种,数... [详细]赞
踩
- 前面是站在后台员工的角度,现在站在消费者的角度,当客户从移动端选择通过验证码登录APP,需要调用云服务器的短信功能(厂商短信服务API),后端要做的就是生成验证码并发送,并针对请求中客户收到的验证码与后端发送的进行比对,确保一致后成功登录_... [详细]
赞
踩
- Docker是一个开源的应用容器引擎,可以自动化部署、扩展应用程序。它可以帮助开发人员将应用程序及其依赖项打包到一个可移植的容器中,然后在任何环境中运行。Redis是一个开源的内存数据结构存储系统,它可以用作数据库、缓存和消息代理。它支持多... [详细]
赞
踩
 传统办法管理信息首先需要花费的时间比较多,其次数据出错率比较高,而且对错误的数据进行更改也比较困难,最后,检索数据费事费力。因此,在计算机上安装美妆购物网站软件来发挥其高效地信息处理的作用,可以规范信息管理流程,让管理工作可以系统化和程序化... [详细]
赞
踩
- 在网络信息发展时代,众多的软件被开发出来,给用户带来了很大的选择余地,而且人们越来越追求更个性的需求。在这种时代背景下,平台只能以用户为导向,按项目分类组织,以项目的持续创新作为平台最重要的竞争手段。系统采用了B/S结构,将所有模块采用以浏... [详细]
赞
踩
- 现代经济快节奏发展以及不断完善升级的信息化技术,让传统数据信息的管理升级为软件存储,归纳,集中处理数据信息的管理方式。本手机销售网站就是在这样的大环境下诞生,其可以帮助管理者在短时间内处理完毕庞大的数据信息,使用这种软件工具可以帮助管理人员... [详细]
赞
踩
- Springboot@Test给Controller接口写单元测试_controller怎么测试controller怎么测试前言最近有小伙伴问到怎么给controller的接口写单元测试。 单元测试是开发必不可少的一个环节。既然有... [详细]
赞
踩
- 方法2,清缓存前确保redis-server.exe进程已经启动,然后打开redis-cli.exe,跳出的CMD里面输入flushall,显示OK就可以了。2、执行./redis-cli或者./redis-cli-h127.0.0.1-p... [详细]
赞
踩
- 基于docker搭建redis_docker安装redisdocker安装redis一、Redis简介Redis,英文全称是RemoteDictionaryServer(远程字典服务),是一个开源(BSD许可),内存存储的数据结构服务器,可... [详细]
赞
踩
- 需求分析:系统分析:在实际饭堂中,学生可以拿饭卡到各个窗口(终端)消费,为了安全,学生还可以修改自己饭卡的密码、查询饭卡的余额和还应该要有查询消费记录,但充值、挂失等必须到管理员处才能办理。而管理员必须能看到系统里的所有记录,还能实现充值、... [详细]
赞
踩
- Centos8使用docker安装软件教程:jdk、nginx、nacos、redis、SentinelDashboard_centos8jdkcentos8jdk目录一、安装软件(1)全部安装命令(2)安装:jdk(3)安装:nginx&... [详细]
赞
踩
- Quartz是OpenSymphony开源组织在Jobscheduling领域又一个开源项目,它可以与J2EE与J2SE应用程序相结合也可以单独使用。Quartz可以用来创建简单或为运行十个,百个,甚至是好几万个Jobs这样复杂的程序。Jo... [详细]
赞
踩
- kubeadmjoin_errorexecutionphasecheck-etcd:etcdclusterisnothealthy:failedtodiaerrorexecutionphasecheck-etcd:etcdclusteris... [详细]
赞
踩
- 大概了解到这个程度差不多了,如果想要深入了解还是需要掌握挺多内容的。用简单的话来总结下SpringDeferredResult:如果返回值类型是DeferredResult则表明其是异步请求,tomcat线程不会等到应用程序处理完或者超时,... [详细]
赞
踩
- article
" href="/blog/article/detail/41312" target="_blank">Dubbo 的集群容错模式:Broadcast Cluster_<dubbo:service cluster="broadcast" />
赞
踩
- 文章目录前言BroadcastCluster作用BroadcastClusterBroadcastClusterInvoker前言cluster可选策略mock=org.apache.dubbo.rpc.cluster.support.wr... [详细]
赞
踩
- article
" href="/blog/article/detail/41315" target="_blank"><em>dubbo</em> - 智能容错_<<em>dubbo</em>:<em>service</em> <em>cluster</em>=<em>"</em><em>broadcast</em><em>"</em> />
赞
踩
- 个人公众号原文:Dubbo的集群容错模式:FailoverCluster_dubbofailoverclusterdubbofailovercluster集群容错系列文章:FailoverCluster失败自动切换FailfastClust... [详细]
赞
踩
相关标签

