- 1java8新特性_18_新时期与日期API_本地时间和时间戳_18may20java
- 2【Pytorch】torchtext终极安装方法及常见问题_torchtext安装
- 3rasa.core.agent - Could not load model due to No NLU or Core data for unpacked model at: '/tmp/tmpc...
- 4光标 与 输入法 之 android:imeOptions属性_代码设置 android:imeoptions="actionsearch
- 5鸿蒙开发学习教程大全:从入门到精通的全攻略_鸿蒙开发教程
- 6Linux 搭建 JumpServer 堡垒机_linux搭建jumpserver
- 7AI > 语音识别开源项目列举_ai语音识别开发
- 8数据结构——双向循环链表
- 9LTP4.2.0 哈工大分词 库python使用踩坑_安装ltp哈工大
- 10【开题报告】基于SpringBoot的社区老人健康跟踪管理系统设计与实现_基于springboot的养老服务平台的设计与实现的开题报告在,写
latex 问题汇总_spring latex模版sn-basic参考文献中journal会议名称不显示
赞
踩
1.图片插入后标题改为Fig.而不是Figure.并加粗,在代码最前部分添加 \captionsetup[figure]{labelfont={bf},labelformat={default},labelsep=period,name={Fig.}} \usepackage[font=small,labelfont=bf,labelsep=none]{caption}
2. 图片不在自己想要的位置,老师乱跑 加入这个包 \usepackage{floatrow} 并在图片的代码处使用H \begin{figure}[H]
\centering
\includegraphics[width=0.98\linewidth]{./Figure/Fig1}
\caption{Structure of MCF-CP-NET.}
\end{figure}

3公式,使用网站在线识别,
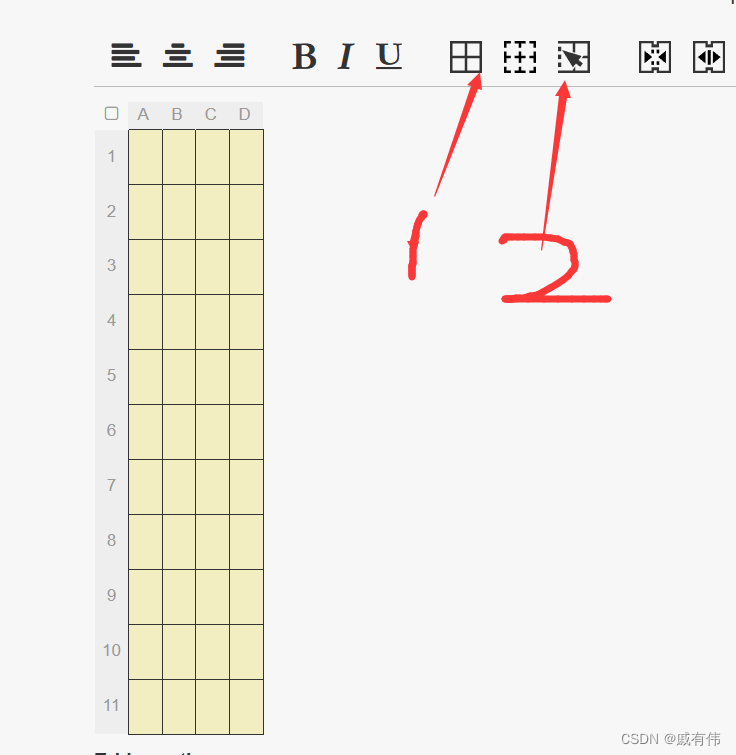
4.表格:将word转为latex表格,使用网站 Create LaTeX tables online – TablesGenerator.com

 按住shift可以整行去除实线,达三线标的目
 还可以加入标题
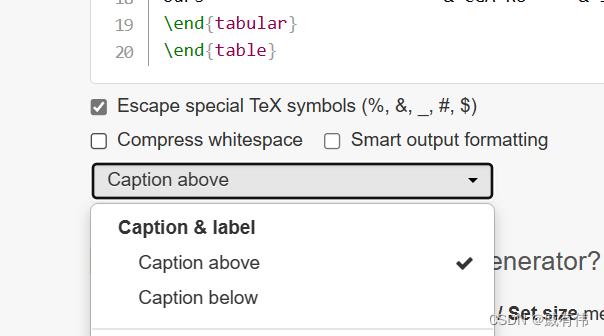
让表格Table,和文字分成两行,并加粗table,且让标题处于上方而不是下方
在代码最前部分加入 \floatsetup[table]{capposition=top,captionskip=0pt}
\captionsetup[table]{
labelsep=newline,%换行
labelfont=bf,
singlelinecheck=false,
justification=raggedright
}
\captionsetup{margin=0cm} %%这部分控制table的页边距
\caption{Detection results of ablation for feature fusion sub-network.}
\label{tab:my-table}
\begin{tabular}{p{6cm}p{5cm}p{4.5cm}} %%这边部分控制每一列的距离

如果需要每一列等宽,,则 {*{4}{p{.23\textwidth}}} %%4代表由4列
5.引用部分,先用mendeley把所有文献导入进去,在右击导出bib,bib要和代码一个目录,然后使用软件打开,\bibliographystyle{elsarticle-harv}
\bibliography{export.bib}
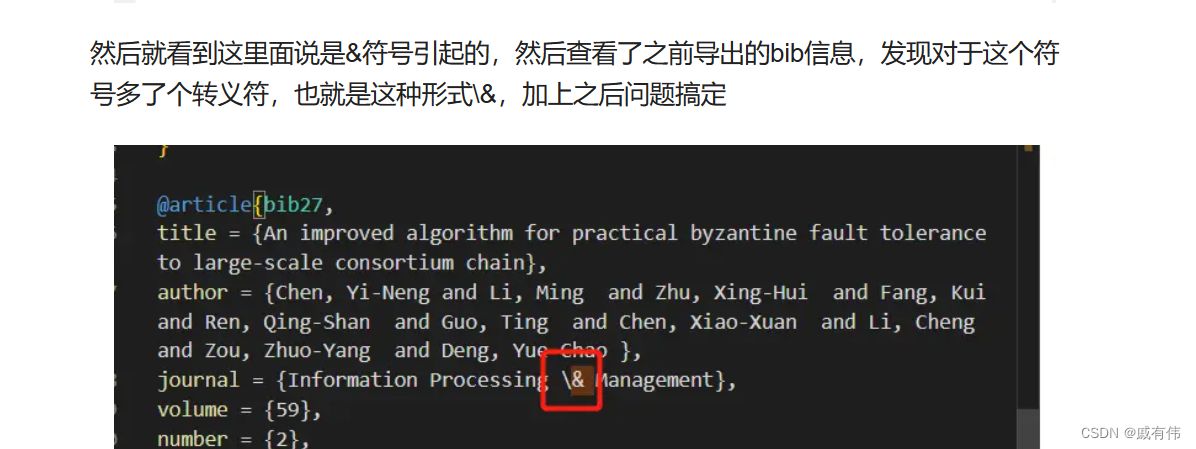
其中export为之前bib的名称,elsar----为模板名称。编译之前要在 begin thebibliography上面输入\cite{*},然后会有报错,但依旧可以继续使用,
解决报错的方法,点击错误点《然后看见有“$”在$前面加入\即可》
插入文献则在需要插入的地方输入
其中55是自定义该bib文献 中的名称
自行修改成能方便记住的
6.作者信息部分
\author[adress]{作者2的名称\corref{cor}} %通讯作者即加入、corref{cor} adress引用的下面设置的adress地址
\ead{@163.com} %邮箱
\cortext[cor]{Corresponding author}
\author[adress]{作者1的名称}
\ead{@qq.com}
\author[adress]{作者3的名称}
\ead{@qq.com}
\address[adress]{地址}
7.mendeley导出bib格式,会议名称也显示journal。导致不显示会议名称,将bib文件里面的会有文献中journal改成booktitle

让图标,图片限制在本章节之内
\usepackage[section]{placeins}


