热门标签
热门文章
- 1类的C语言模拟实现_c实现类
- 2Kubernetes的Pod生命周期_phase=success
- 39 个实用的 VSCode 扩展插件,让你的开发工作更轻松
- 4免费使用GPT-4的N种方法_gpt4免费安装使用
- 5Docker仓库
- 6HarmonyOS学习路之开发篇—设备管理(设置项)
- 7Ubuntu 18.04安装docker-compose_ubuntu 1804 apt docker docker-compose install
- 8【华为od机试】约瑟夫问题-Python3_蓝球(5v5)比赛,每个球员拥有一个战斗力,每个队伍所有球员战斗力之和薇该队伍的总
- 9深度学习中RGB影像图的直方图均衡化python代码and对图片中指定部分做基于掩模的特定区域直方图均衡化
- 10软件工程 学生信息管理系统 结构化的需求分析_学生信息管理系统软件工程
当前位置: article > 正文
Vue + element-ui 背景图片设置_element背景图片
作者:2023面试高手 | 2024-02-15 18:54:25
赞
踩
element背景图片
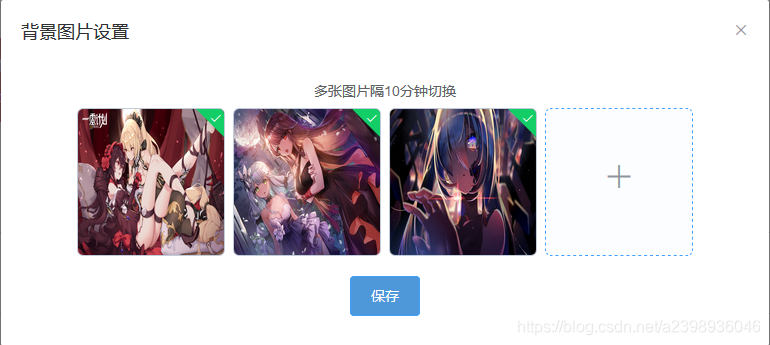
实现效果


以下是如何实现:
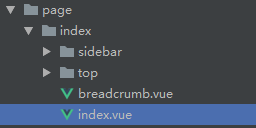
找到你想要设置背景图片的页面

data里设置url
data() {
      return {
        url: '',
        urlList: [],
        timer: null
      }
    },
- 1
- 2
- 3
- 4
- 5
- 6
- 7
设置背景图片绑定url,并填满页面
<div class="pull-height animated" :class="{'zoomOutUp': isLock}" :style="{backgroundImage:'url('+url+')'}" style="background-size: 100% 100%">
</div>
- 1
- 2
将子组件用div包裹,设置子组件透明度
<div class="index">
</div>
- 1
- 2
.index {
    filter:alpha(Opacity=85);
    -moz-opacity:0.85;
    opacity: 0.85;
    }
- 1
- 2
- 3
- 4
- 5
这样背景图片就设置好了,只要将url替换成图片连接即可
接下来用element-ui的upload组件来设置url
在父组件设置监听事件,监听子组件传值,也可以用vuex实现
<top v-on:listenToChildEvent="setBackground"></top>
- 1
子组件设置数据
 data() {
      return {
        uploadFile: {
          dialogVisible: false,
          uploadImageList: [],
          uploadMedia: []
        },
        dialogFormVisible: false
      }
    },
- 1
- 2
- 3
- 4
- 5
- 6
- 7
- 8
- 9
- 10
点击弹出图片上传界面
<el-tooltip class='item' effect='dark' content='背景图片设置' placement='bottom'>
      <div style="font-size: 14px;margin-right: 20px" @click='dialogFormVisible = true'>
        背景设置
      </div>
      </el-tooltip>
- 1
- 2
- 3
- 4
- 5
绑定数据
<el-dialog v-dialogDrag :visible.sync="dialogFormVisible" width="40%" title="背景图片设置">
      <div style="text-align: center;margin-bottom: 10px">
        <span>多张图片隔10分钟切换</span>
      </div>
      <el-upload style="text-align: center" action="你的上传图片接口" list-type="picture-card" ref="uploadImages" :multiple="true" :limit="4"
                 :file-list="uploadFile.uploadImageList" :autoUpload="true" :on-remove="handleUploadRemove" :onPreview="handlePictureCardPreview"
                 :onSuccess="handleUploadSuccess" :onExceed="()=>{$message.error('背景图片不能超过四张')}">
        <i class="el-icon-plus"></i>
      </el-upload>
      <div style="text-align: center;margin-top: 10px">
        <el-button type="primary" @click='saveImage'>保存</el-button>
      </div>
    </el-dialog>
- 1
- 2
- 3
- 4
- 5
- 6
- 7
- 8
- 9
- 10
- 11
- 12
- 13
handleUploadSuccess(response, file, fileList) { // 上传图片成功后的回调
        this.uploadFile.uploadImageList = fileList
        this.$message.success('上传成功')
        console.log('上传图片回调')
      },
      handleMidiaUploadSuccess(response, file, fileList) { // 上传媒体成功后的回调
        this.uploadFile.uploadMedia = fileList
      },
      handleUploadRemove(file, fileList) { // 删除图片callback
        this.uploadFile.uploadImageList = fileList
      },
      handleMediaRemove(response, file, fileList) {
        this.uploadFile.uploadMedia = fileList
      },
      handlePictureCardPreview(file) { // 预览图片
        this.uploadFile.dialogImageUrl = file.url
        this.uploadFile.dialogVisible = true
      },
- 1
- 2
- 3
- 4
- 5
- 6
- 7
- 8
- 9
- 10
- 11
- 12
- 13
- 14
- 15
- 16
- 17
- 18
点击保存按钮后触发的事件,这时父组件能接收到uploadImageList
saveImage() {
        this.$emit('listenToChildEvent', this.uploadFile.uploadImageList)
        this.dialogFormVisible = false
      },
- 1
- 2
- 3
- 4
父组件修改背景图片的值,并将图片连接存入localStorage,这样页面刷新图片不会丢失
setData() {
        console.log(this.urlList.length)
        var imageMax = this.urlList.length - 1
        var imageMin = 0
        var imageNumber = parseInt(Math.random() * (imageMax - imageMin + 1) + imageMin)
        this.url = this.urlList[imageNumber]
        console.log(imageNumber)
        console.log(this.url)
      },
setBackground(data) {
        console.log(data)
        if (data.length === 0) {
          this.url = ''
          this.urlList = []
          localStorage.setItem('mydata', JSON.stringify(this.urlList))
        } else {
          this.url = ''
          this.urlList = []
          for (let i = 0; i < data.length; i++) {
            this.urlList.push(
              data[i].response.data
            )
          }
          this.setData()
          localStorage.setItem('mydata', JSON.stringify(this.urlList))
        }
      }
- 1
- 2
- 3
- 4
- 5
- 6
- 7
- 8
- 9
- 10
- 11
- 12
- 13
- 14
- 15
- 16
- 17
- 18
- 19
- 20
- 21
- 22
- 23
- 24
- 25
- 26
- 27
页面初始化的时候从localStorage取数据
创建线程每隔10分钟更换背景图片
mounted() {
      this.timer = setInterval(this.setData, 600000)
      var imgList = JSON.parse(localStorage.mydata)
      this.urlList = imgList
      this.setData()
    },
- 1
- 2
- 3
- 4
- 5
- 6
页面被销毁时触发事件,清空定时器
beforeDestroy() {
      clearInterval(this.timer)
      this.timer = null
    },
- 1
- 2
- 3
- 4
这样写完,图片改变时页面会闪烁
在设置背景图片的div上,加上v-cloak 防止页面闪烁
<div v-cloak class="pull-height animated" :class="{'zoomOutUp': isLock}" :style="{backgroundImage:'url('+url+')'}" style="background-size: 100% 100%">
</div>
- 1
- 2
在style里配置
[v-cloak] {
    display: none;
  }
- 1
- 2
- 3
声明:本文内容由网友自发贡献,转载请注明出处:【wpsshop】
推荐阅读
相关标签


