- 1gitlab-ssl证书过期,以及更换ssl证书_gitlab ca 证书更新
- 2yolov5和Fasterrcnn统一画P-R曲线_yolo生成pr曲线
- 3Uos内核编译,升级,驱动模块安装_uos安装4.10内核
- 4[markdown] .md文件 - 换行_md换行
- 5基于Python爬虫江西南昌天气预报数据可视化系统设计与实现(Django框架) 研究背景与意义、国内外研究现状
- 6网络状态和防火墙状态查看命令:netstat、ifconfig、iptables_怎么看iptables状态
- 7SpringBoot集成ShardingSphere(自动配置)_shardingsphere 自动配置类是哪个
- 8【 简单就好 】不连线 arduino 实验_arduino ath10
- 9FPGA高端项目:解码索尼IMX327 MIPI相机转USB3.0 UVC 输出,提供FPGA开发板+2套工程源码+技术支持_mipi转usb
- 101,华为 LiteOS-m移植STM32F103C8T6(固件库类型)_liteos-m内核移植
本地用AIGC生成图像与视频
赞
踩
最近AI界最火的话题,当属Sora了。遗憾的是,Sora目前还没开源或提供模型下载,所以没法在本地跑起来。但是,业界有一些开源的图像与视频生成模型。虽然效果上还没那么惊艳,但还是值得我们体验与学习下的。
Stable Diffusion(SD)是比较流行的开源方案,可用于文生图、图生图及图像修复。Stability AI最近发布了Stable Diffusion 3,采用的是与Sora类似的Diffusion Transformer(DiT)技术。另外,Stable Video Diffusion(SVD)将图像升级到视频,可用于文生视频和图生视频。
下面介绍下如何在本地机器上运行SD和SVD。首先假定有一台带GPU的机器(本人用的RTX 4070),并装好Python和CUDA基本环境。
Stable Diffusion
最简单的方式是用Python脚本运行。我们可以用diffusers库来运行。该库集成了各种diffusion pipeline。注意脚本可能尝试从hugging-face官方下载模型。如果下载失败,可以设置下面的环境变量:
export HF_ENDPOINT=https://hf-mirror.com
- 1
按官方文档(https://hf-mirror.com/runwayml/stable-diffusion-v1-5)运行Stable diffusion 1.5:
from diffusers import StableDiffusionPipeline
import torch

model_id = "runwayml/stable-diffusion-v1-5"
pipe = StableDiffusionPipeline.from_pretrained(model_id, torch_dtype=torch.float16)
pipe = pipe.to("cuda")

prompt = "a photo of an astronaut riding a horse on mars"
image = pipe(prompt).images[0]

image.save("astronaut_rides_horse.png")
- 1
- 2
- 3
- 4
- 5
- 6
- 7
- 8
- 9
- 10
- 11
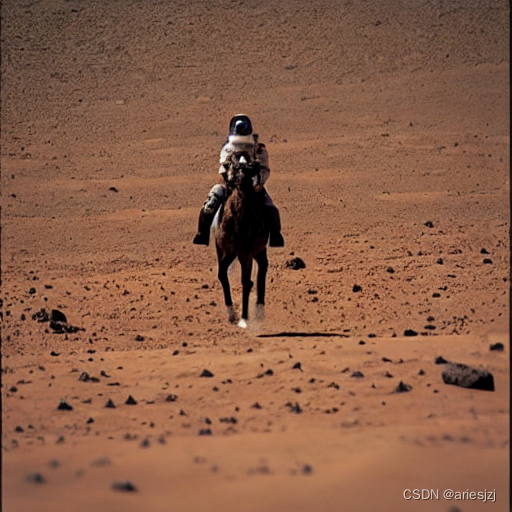
运行上面脚本,结果:

运行Stable Diffusion 2.1也是类似的。运行官方例子:
import torch
from diffusers import StableDiffusionPipeline, DPMSolverMultistepScheduler

model_id = "stabilityai/stable-diffusion-2-1"

# Use the DPMSolverMultistepScheduler (DPM-Solver++) scheduler here instead
pipe = StableDiffusionPipeline.from_pretrained(model_id, torch_dtype=torch.float16)
pipe.scheduler = DPMSolverMultistepScheduler.from_config(pipe.scheduler.config)
pipe = pipe.to("cuda")

prompt = "a photo of an astronaut riding a horse on mars"
image = pipe(prompt).images[0]

image.save("astronaut_rides_horse.png")
- 1
- 2
- 3
- 4
- 5
- 6
- 7
- 8
- 9
- 10
- 11
- 12
- 13
- 14
结果:

以上是文生图。图生图,图像修补的使用可参见:
- https://hf-mirror.com/docs/diffusers/en/using-diffusers/img2img
- https://hf-mirror.com/docs/diffusers/en/using-diffusers/inpaint
对结果不太满意可以调节参数。
Stable Diffusion XL(SDXL)是一个更为强大的生成模型。用法可参见:https://hf-mirror.com/docs/diffusers/en/using-diffusers/sdxl。比如文生图的例子:
from diffusers import AutoPipelineForText2Image
import torch

pipeline_text2image = AutoPipelineForText2Image.from_pretrained(
    "stabilityai/stable-diffusion-xl-base-1.0", torch_dtype=torch.float16, variant="fp16", use_safetensors=True
).to("cuda")

prompt = "a photo of an astronaut riding a horse on mars"
image = pipeline_text2image(prompt=prompt).images[0]

image.save("astronaut_rides_horse.png")
- 1
- 2
- 3
- 4
- 5
- 6
- 7
- 8
- 9
- 10
- 11
结果:

如果想用TensorRT加速的话可参见:https://github.com/NVIDIA/TensorRT/tree/release/8.6/demo/Diffusion。在此不再累述。
Stable Video Diffusion
Stable Video Diffusion(SVD)可用于生成视频。使用方法可参见:https://hf-mirror.com/docs/diffusers/en/using-diffusers/text-img2vid。如官方中的例子:
import torch
from diffusers import StableVideoDiffusionPipeline
from diffusers.utils import load_image, export_to_video

pipeline = StableVideoDiffusionPipeline.from_pretrained(
    "stabilityai/stable-video-diffusion-img2vid", torch_dtype=torch.float16, variant="fp16"
)
pipeline.enable_model_cpu_offload()

image = load_image("https://hf-mirror.com/datasets/huggingface/documentation-images/resolve/main/diffusers/svd/rocket.png")
image = image.resize((1024, 576))

generator = torch.manual_seed(42)
frames = pipeline(image, decode_chunk_size=8, generator=generator).frames[0]
export_to_video(frames, "generated.mp4", fps=7)
- 1
- 2
- 3
- 4
- 5
- 6
- 7
- 8
- 9
- 10
- 11
- 12
- 13
- 14
- 15
由于stable-video-diffusion-img2vid-xt在我的4070卡上貌似会OOM,因此换成stable-video-diffusion-img2vid。
结果:
Stable Diffusion web UI
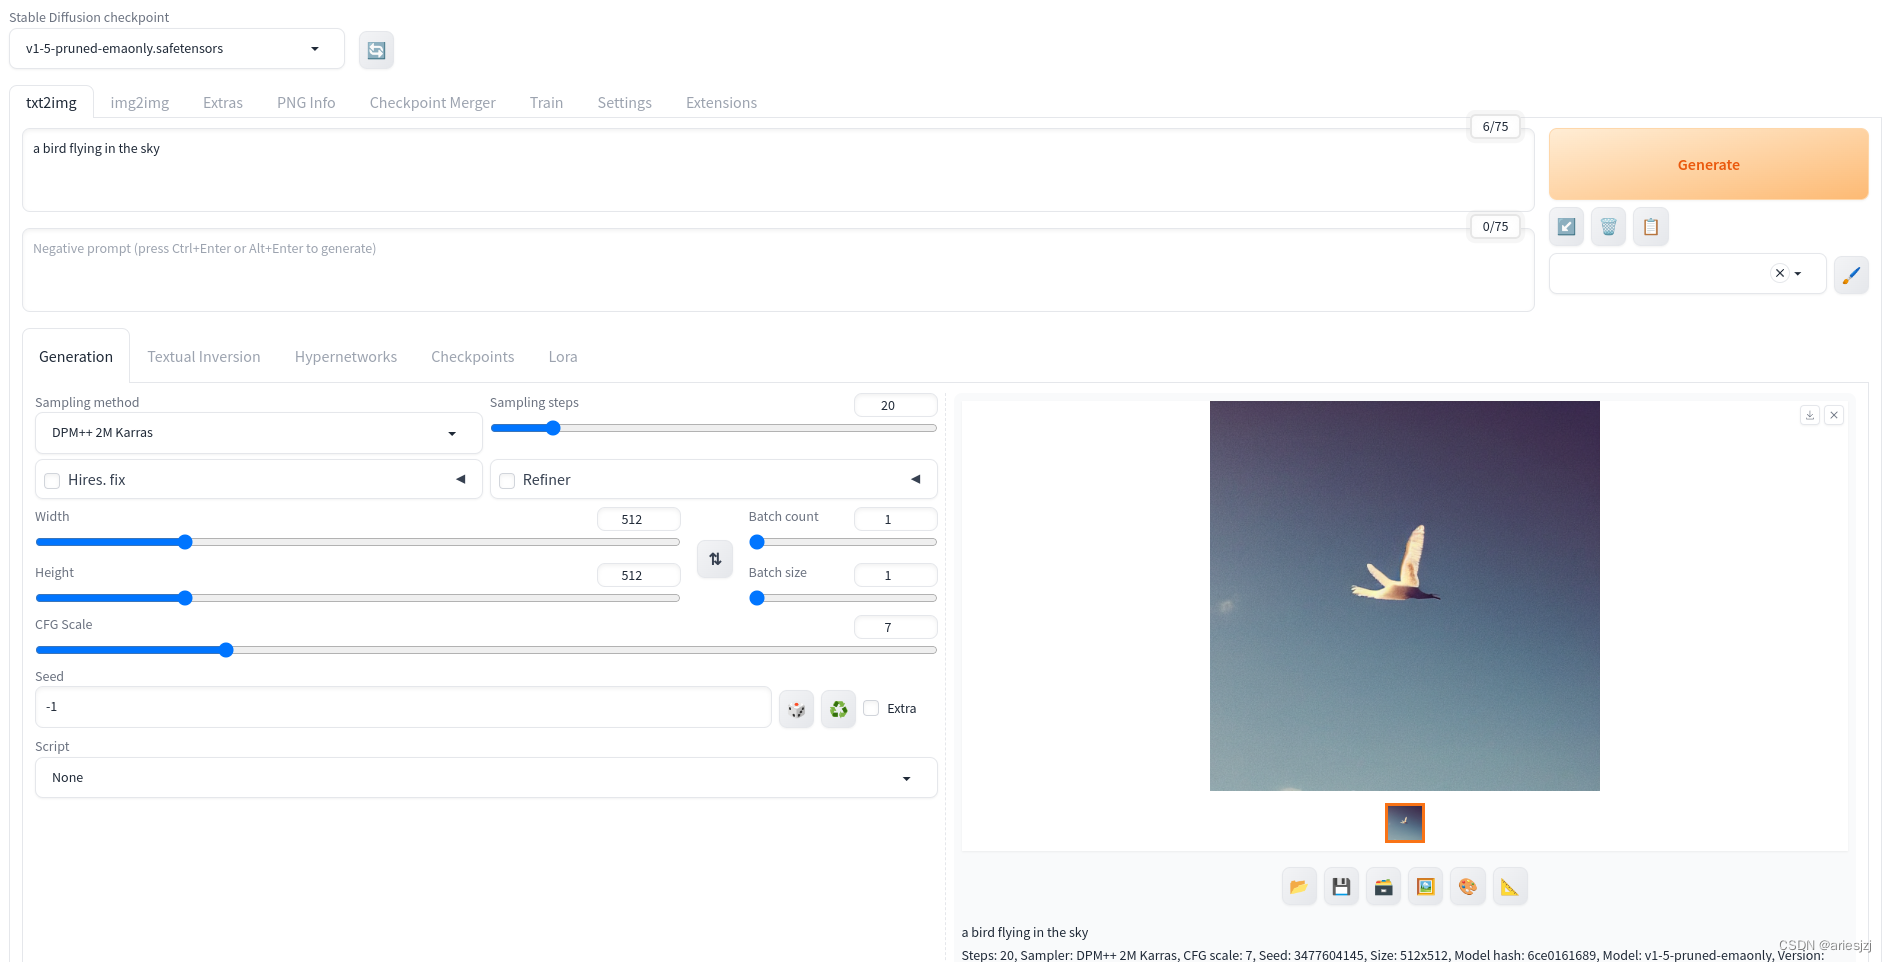
前面都是用的Python脚本。要调模型的各种参数需要改调用参数,不太易用和直观。接下来看看怎么基于Diffusion模型构建App。
stable-diffusion-webui是用Gradio库实现的Stable Diffusion的web接口。在Linux环境可以按照以下文档搭环境:
https://github.com/AUTOMATIC1111/stable-diffusion-webui?tab=readme-ov-file#automatic-installation-on-linux
如果在执行webui.sh的过程碰到下面问题:
stderr: ERROR: Could not find a version that satisfies the requirement tb-nightly (from versions: none)
ERROR: No matching distribution found for tb-nightly
- 1
- 2
可以换成阿里的pip源:
pip config set global.index-url https://mirrors.aliyun.com/pypi/simple
- 1
另外脚本中会尝试从hugging-face官网下载,无法下载的话可以将地址替换成:
diff --git a/modules/sd_models.py b/modules/sd_models.py
index 9355f1e1..bf5dbba5 100644
--- a/modules/sd_models.py
+++ b/modules/sd_models.py
@@ -150,7 +150,7 @@ def list_models():
     if shared.cmd_opts.no_download_sd_model or cmd_ckpt != shared.sd_model_file or os.path.exists(cmd_ckpt):
         model_url = None
     else:
-        model_url = "https://huggingface.co/runwayml/stable-diffusion-v1-5/resolve/main/v1-5-pruned-emaonly.safetensors"
+        model_url = "https://hf-mirror.com/runwayml/stable-diffusion-v1-5/resolve/main/v1-5-pruned-emaonly.safetensors"

     model_list = modelloader.load_models(model_path=model_path, model_url=model_url, command_path=shared.cmd_opts.ckpt_dir, ext_filter=[".ckpt", ".safetensors"], download_name="v1-5-pruned-emaonly.safetensors", ext_blacklist=[".vae.ckpt", ".vae.safetensors"])
- 1
- 2
- 3
- 4
- 5
- 6
- 7
- 8
- 9
- 10
- 11
- 12
脚本执行完,顺利的话就可以看到UI界面了。随便输入点啥点Generate按钮就可以出图了。

比起脚本,这里参数的调节就直观得多,使用上傻瓜得多。
ComfyUI
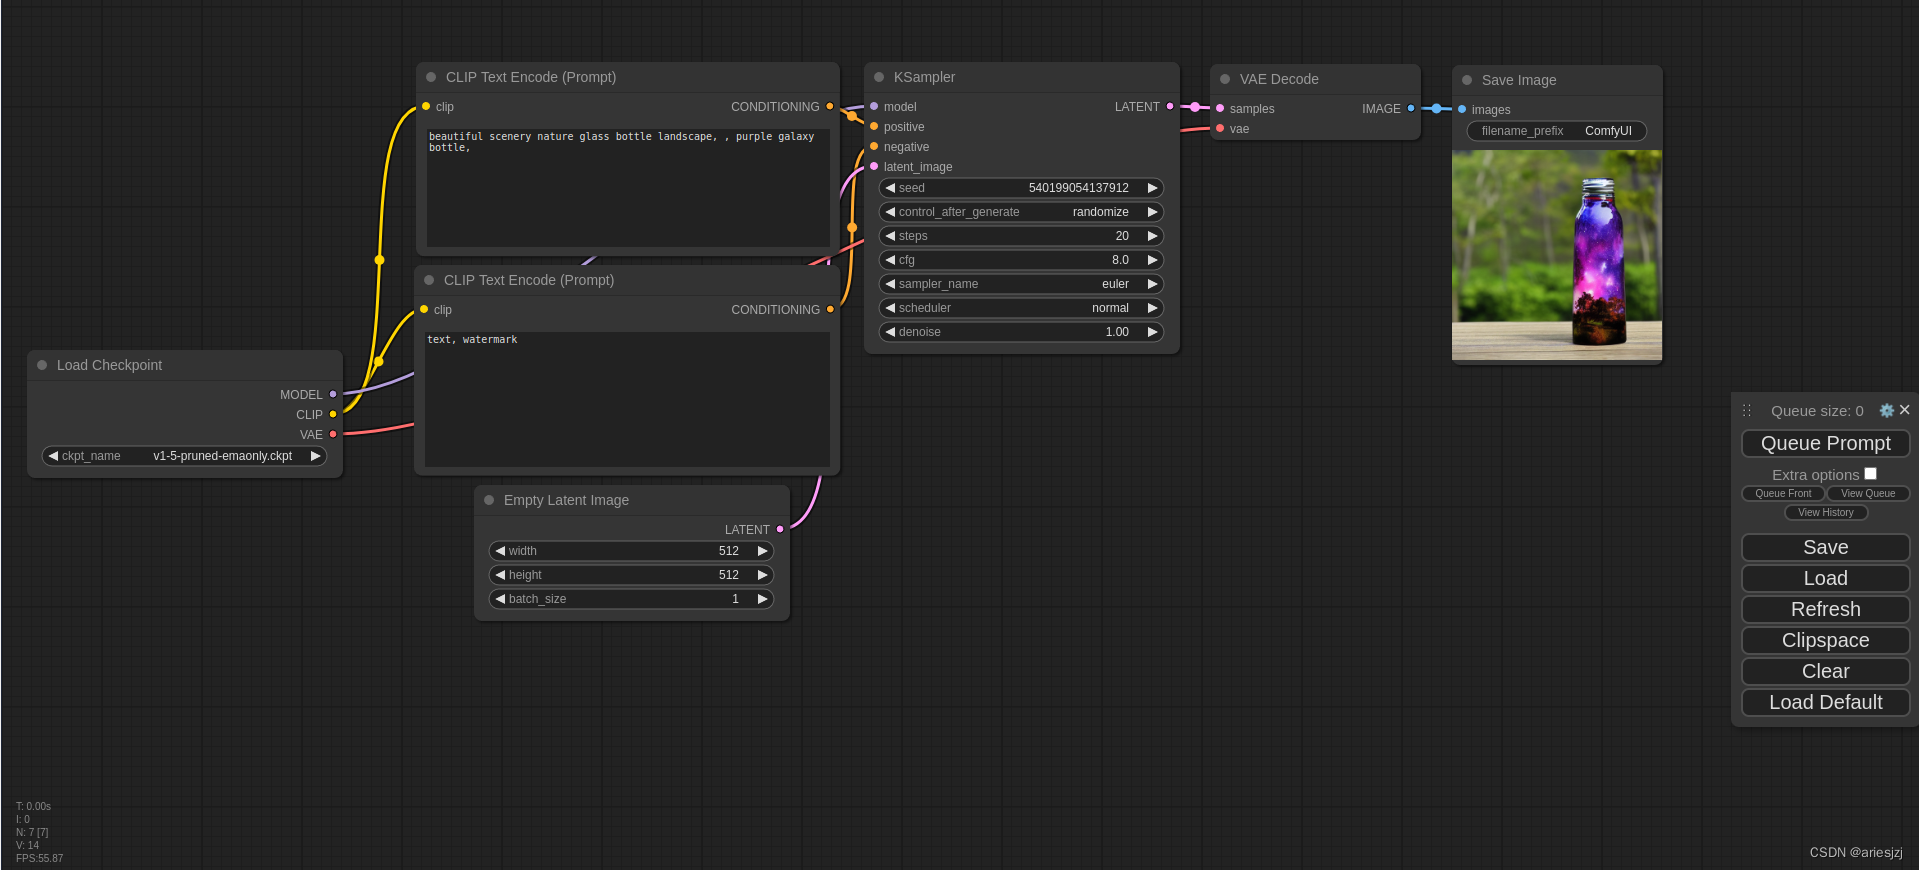
ComfyUI是图形化、模块化的Diffusion模型工作流构建工具。此外它还支持插件扩展。可以按照https://github.com/comfyanonymous/ComfyUI?tab=readme-ov-file#nvidia搭建环境,最后运行:
python main.py
- 1
运行成功后,打开http://127.0.0.1:8188,就可以看到UI界面:

接下来准备模型:
cd models/checkpoints
wget https://hf-mirror.com/runwayml/stable-diffusion-v1-5/resolve/main/v1-5-pruned-emaonly.ckpt
- 1
- 2
然后在UI中选择该模型后点Queue Prompt按钮,默认的例子就可以跑通了。整个过程图形化,很直观。

基本环境搭好后,接下来就可以试试官方的其它例子:https://comfyanonymous.github.io/ComfyUI_examples。比如用于视频生成的SVD(介绍可参见https://blog.comfyui.ca/comfyui/update/2023/11/24/Update.html)。根据说明:https://comfyanonymous.github.io/ComfyUI_examples/video,先下载所需模型:
cd models/checkpoints
wget https://hf-mirror.com/stabilityai/stable-video-diffusion-img2vid/resolve/main/svd.safetensors
wget https://hf-mirror.com/stabilityai/stable-video-diffusion-img2vid-xt/resolve/main/svd_xt.safetensors
https://hf-mirror.com/stabilityai/stable-diffusion-xl-base-1.0/resolve/main/sd_xl_base_1.0.safetensors?download=true
- 1
- 2
- 3
- 4
然后运行。这是图生视频的效果:
这是文生图再生视频的效果:


