- 1索引知识二:联合索引、覆盖索引和索引下推详解_覆盖索引 和索引
- 2算法沉淀——动态规划之子序列问题(上)(leetcode真题剖析)_构建子序列算法题
- 3主业外的第二副业选什么比较好,适合普通人的坚持之路_抖客 收益
- 4终端安全加强
- 5基于java教室自习室预约系统 (springboot框架)开题答辩常规问题和如何回答_自习室管理系统答辩
- 6有趣的代码注释
- 7Vue3 exceljs库实现前端导入导出Excel_vue exceljs
- 8知识图谱-构建:知识图谱构建流程【本体构建、知识抽取(实体抽取、 关系抽取、属性抽取)、知识表示、知识融合、知识存储】_知识图谱构建过程
- 9java高级篇 Mybatis-Plus_assign_id
- 10linux 内核参数 rss,容器内核参数
Dokcer创建MySQL容器,并在宿主机或mysql可视化工具中连接mysql容器的数据库_dockers下的mysql如何可视化
赞
踩
本文将总结如何通过docker创建mysql容器,并且通过宿主机或mysql可视化工具连接mysql容器的数据库(中间有遇到问题,并最终成功解决了)
- 报错1:
ERROR 2013 (HY000): Lost connection to MySQL server at 'reading initial communication packet', system error: 2 - 报错2:
ERROR 2002 (HY000): Can't connect to local MySQL server through socket '/var/run/mysqld/mysqld.sock' (2)
说明:
我使用的是docker desktop for windows,并且是基于WSL2 后端的,并且WSL2分发使用的是Ubuntu,下面演示示例中,大部分命令都是通过Ubuntu来访Docker的。
一、Docker 创建 MySQL容器
1. 拉取 MySQL 镜像
拉取最新版本的mysql
docker pull mysql
- 1
或
拉取指定版本的mysql(如 5.7)
docker pull mysql:5.7
- 1
如下,使用docker images mysql查看已拉取的mysql镜像
root@GC:~# docker images mysql
REPOSITORY   TAG       IMAGE ID       CREATED       SIZE
mysql        latest    99afc808f15b   4 weeks ago   577MB
mysql        5.7       92034fe9a41f   5 weeks ago   581MB
root@GC:~#
- 1
- 2
- 3
- 4
- 5
2. 创建并运行 MySQL 容器
使用docker run创建并运行mysql容器
使用docker ps查看正在运行的容器
root@GC:~# docker run -d --name mysql5.7 -p 33065:33065 -e MYSQL_ROOT_PASSWORD=1234qwer mysql:5.7
10124d6b026e8442e7250196a1c979ff3fdd7ad5021fc50865cb871cfa662ee6
root@GC:~# docker ps
CONTAINER ID   IMAGE       COMMAND                  CREATED              STATUS              PORTS                                           NAMES
10124d6b026e   mysql:5.7   "docker-entrypoint.s…"   About a minute ago   Up About a minute   3306/tcp, 33060/tcp, 0.0.0.0:33065->33065/tcp   mysql5.7
- 1
- 2
- 3
- 4
- 5
docker run:创建并运行容器
-d:后台运行方式
--name mysql5.7:给创建的容器起个名字,如果不指定则随机生成一个默认的
-p 33065:33065:将容器的端口映射到宿主机的端口(前者是宿主机的端口,后者是mysql容器暴露的端口)
-e MYSQL_ROOT_PASSWORD=1234qwer:给容器设置一个环境变量(设置myslq的root用户密码)
mysql:5.7:指定用来创建容器的镜像的名称和tag,也可以用image id代替
注意:这里使用的"-p 33065:33065"是有问题的,后面会说。
(这也是我自己造了一个坑,把自己困了一天。。。)
3. 创建并运行 MySQL 容器(目录映射)
在实际使用中,需要将docker容器中的数据、日志、配置文件等重要目录,映射到宿主机本地,防止docker容器被删除后数据丢失的问题。
映射到Windows目录方式:
docker run -d -p 3306:3306 --name mysql5.7 ^
-v /e/mysql/docker-mysql/my.cnf:/etc/my.cnf ^
-v /e/mysql/docker-mysql/logs:/var/log/mysql ^
-v /e/mysql/docker-mysql/data:/var/lib/mysql ^
-e MYSQL_ROOT_PASSWORD=1234qwer ^
mysql:5.7
- 1
- 2
- 3
- 4
- 5
- 6
映射到Linux目录方式:
docker run -d -p 3306:3306 --name mysql \
-v /mydata/mysql/log:/var/log/mysql \
-v /mydata/mysql/data:/var/lib/mysql \
-v /mydata/mysql/my.cnf:/etc/my.cnf \
-e MYSQL_ROOT_PASSWORD=1234qwer \
mysql:5.7
- 1
- 2
- 3
- 4
- 5
- 6
上述命令中,冒号
:前面的部分都是宿主机的配置信息,后面的部分都是容器的配置信息。
二、连接 MySQL 数据库
1. 在 MySQL 容器内,连接MySQL
进入MySQL容器,并在容器内连接mysql
root@GC:~# docker exec -it mysql5.7 /bin/bash
bash-4.2# mysql -u root -p
Enter password:
Welcome to the MySQL monitor.  Commands end with ; or \g.
Your MySQL connection id is 2
Server version: 5.7.43 MySQL Community Server (GPL)

Copyright (c) 2000, 2023, Oracle and/or its affiliates.

Oracle is a registered trademark of Oracle Corporation and/or its
affiliates. Other names may be trademarks of their respective
owners.

Type 'help;' or '\h' for help. Type '\c' to clear the current input statement.

mysql> exit
Bye

bash-4.2#
- 1
- 2
- 3
- 4
- 5
- 6
- 7
- 8
- 9
- 10
- 11
- 12
- 13
- 14
- 15
- 16
- 17
- 18
- 19
如上,可以在mysql容器内,正常连接mysql数据库。
2. 在宿主机连接 MySQL(遇到问题及解决方案)
root@GC:~# mysql -h 127.0.0.1 -P 33065 -u root -p
Enter password:
ERROR 2013 (HY000): Lost connection to MySQL server at 'reading initial communication packet', system error: 2
- 1
- 2
- 3
这个问题困扰我一天了,在网上通过搜索关键词【ERROR 2013 (HY000): Lost connection to MySQL server at ‘reading initial communication packet’, system error: 2】,找了N多相关文章,都没有能解决问题。
尝试过的方案(失败)
(虽然都没有解决我的问题,我这里还是列出来):
1)给mysql的root用户授权外网访问权限;
root@GC:~# docker exec -it mysql5.7 /bin/bash
bash-4.2# mysql -u root -p
mysql> GRANT ALL PRIVILEGES ON *.* TO 'root'@'%' IDENTIFIED BY '1234qwer' WITH GRANT OPTION;
mysql> FLUSH PRIVILEGES;
- 1
- 2
- 3
- 4
其实这个有些多余,mysql容器创建完成后,已经默认给了这个权限
(通过如下sql语句,查看得知,注意mysql容器创建完后未执行上面的grant命令,查看结果如下)
mysql> select user,host from mysql.user;
+---------------+-----------+
| user          | host      |
+---------------+-----------+
| root          | %         |
| mysql.session | localhost |
| mysql.sys     | localhost |
| root          | localhost |
+---------------+-----------+
4 rows in set (0.00 sec)

mysql>
- 1
- 2
- 3
- 4
- 5
- 6
- 7
- 8
- 9
- 10
- 11
- 12
2)修改my.cnf配置文件
(一般位置为:/etc/my.cnf或/etc/mysql/my.cnf)
在配置文件中注释掉bind-address = 127.0.0.1,同时在[mysqld]配置下新增skip-name-resolve
这个方案对我也无效,因为我的配置下,本来就没有bind-address = 127.0.0.1,同时在[mysqld]下默认已有skip-name-resolve配置了
如下是我的my.cnf默认配置:
bash-4.2# cat /etc/my.cnf
# For advice on how to change settings please see
# http://dev.mysql.com/doc/refman/5.7/en/server-configuration-defaults.html

[mysqld]
#
# Remove leading # and set to the amount of RAM for the most important data
# cache in MySQL. Start at 70% of total RAM for dedicated server, else 10%.
# innodb_buffer_pool_size = 128M
#
# Remove leading # to turn on a very important data integrity option: logging
# changes to the binary log between backups.
# log_bin
#
# Remove leading # to set options mainly useful for reporting servers.
# The server defaults are faster for transactions and fast SELECTs.
# Adjust sizes as needed, experiment to find the optimal values.
# join_buffer_size = 128M
# sort_buffer_size = 2M
# read_rnd_buffer_size = 2M
skip-host-cache
skip-name-resolve
datadir=/var/lib/mysql
socket=/var/run/mysqld/mysqld.sock
secure-file-priv=/var/lib/mysql-files
user=mysql

# Disabling symbolic-links is recommended to prevent assorted security risks
symbolic-links=0

#log-error=/var/log/mysqld.log
pid-file=/var/run/mysqld/mysqld.pid
[client]
socket=/var/run/mysqld/mysqld.sock

!includedir /etc/mysql/conf.d/
!includedir /etc/mysql/mysql.conf.d/
- 1
- 2
- 3
- 4
- 5
- 6
- 7
- 8
- 9
- 10
- 11
- 12
- 13
- 14
- 15
- 16
- 17
- 18
- 19
- 20
- 21
- 22
- 23
- 24
- 25
- 26
- 27
- 28
- 29
- 30
- 31
- 32
- 33
- 34
- 35
- 36
- 37
3)关闭mysql容器所在的宿主机的防火墙
(我这里是通过Windows docker desktop(Use the WSL 2 based engine),Linux默认分发是Ubuntu)
我把Windows的防火墙关闭了(Ubuntu 压根没有启动 防火墙),再通过Windows的cmd,或Ubuntu的bash,访问mysql -h 127.0.0.1 -P 33065 -u root -p,都是报错:Lost connection to MySQL server at 'reading initial communication packet'。
所以关闭防火墙的方案对我来说也是无效的。
4)重启 MySQL 服务
网上还有说重启mysql服务就好了。
但是我这里重启了mysql容器,甚至重启了Windows系统,都不好使
还尝试了一些其他方案,现在已不记得了,总之折腾了一天。
最终解决问题的方案(成功)
当我吃完晚饭后,重新创建了一个mysql容器后,这个容器的mysql竟然可以从 window cmd 或 ubuntu bash 连接。
下面是问题根源及解决方案:
这个新创建的mysql容器与最开始创建的那个区别在哪里?
重点是:端口、端口、端口!!!
最开始的mysql容器的创建命令:
root@GC:~$ docker run -d --name mysql5.7 -p 33065:33065 -e MYSQL_ROOT_PASSWORD=1234qwer mysql:5.7
- 1
后来创建的mysql容器创建命令:
root@GC:~$ docker run -d --name mysql5.7-2 -p 33062:3306 -e MYSQL_ROOT_PASSWORD=1234qwer mysql:5.7
- 1
重点是-p <宿主机端口>:<容器的端口> 参数。
<容器的端口> 一定要指定为mysql监听的端口,默认为3306;
<宿主机端口> 这个可以是任意端口号(只要未被其他程序占用即可);
在mysql内,可以通过show variables like 'port';语句查看mysql监听端口
root@GC:~$ mysql -h 127.0.0.1 -P 33062 -uroot -p

mysql> show variables like 'port';
+---------------+-------+
| Variable_name | Value |
+---------------+-------+
| port          | 3306 |
+---------------+-------+
1 row in set (0.00 sec)
- 1
- 2
- 3
- 4
- 5
- 6
- 7
- 8
- 9
假如你修改了mysql容器的监听端口,如下(删掉了部分注释),在[mysqld]下指定了port=33065(默认没有port这个字段配置,mysql服务默认会监听3306端口)
root@GC:~$ docker exec -it mysql5.7 /bin/bash
bash-4.2# vim /etc/my.cnf
bash-4.2# cat /etc/my.cnf
[mysqld]
port=33065
skip-host-cache
skip-name-resolve
datadir=/var/lib/mysql
socket=/var/run/mysqld/mysqld.sock
secure-file-priv=/var/lib/mysql-files
user=mysql

symbolic-links=0

#log-error=/var/log/mysqld.log
pid-file=/var/run/mysqld/mysqld.pid
[client]
socket=/var/run/mysqld/mysqld.sock

!includedir /etc/mysql/conf.d/
!includedir /etc/mysql/mysql.conf.d/
- 1
- 2
- 3
- 4
- 5
- 6
- 7
- 8
- 9
- 10
- 11
- 12
- 13
- 14
- 15
- 16
- 17
- 18
- 19
- 20
- 21
修改完后,重启mysql容器。
然后再查看mysql监听的端口,已经改为了33065
root@GC:~$ docker restart mysql5.7
root@GC:~$ docker exec -it mysql5.7 /bin/bash
bash-4.2# mysql -uroot -p
mysql> show variables like 'port';
+---------------+-------+
| Variable_name | Value |
+---------------+-------+
| port          | 33065 |
+---------------+-------+
1 row in set (0.00 sec)

mysql>
- 1
- 2
- 3
- 4
- 5
- 6
- 7
- 8
- 9
- 10
- 11
- 12
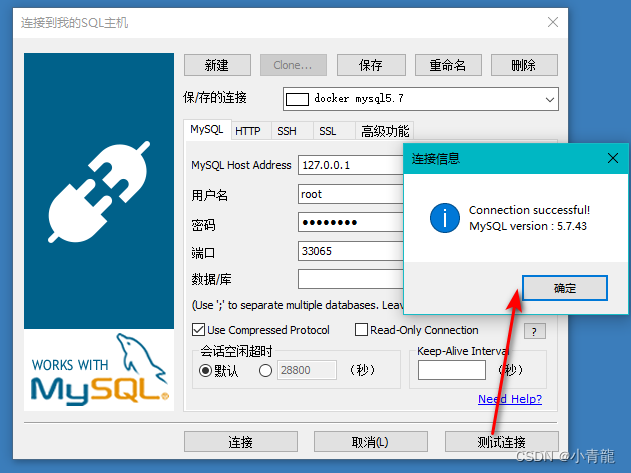
这时候再通过 window cmd 或 ubuntu bash 或 远程连接工具 就可以连接到 最开始创建的 -p 33605:33605 那个mysql容器的mysql数据库了。
root@GC:~$ mysql -h127.0.0.1 -P33065 -uroot -p
Enter password:
Welcome to the MySQL monitor.  Commands end with ; or \g.
Your MySQL connection id is 2
Server version: 5.7.43 MySQL Community Server (GPL)

Copyright (c) 2000, 2023, Oracle and/or its affiliates.

Oracle is a registered trademark of Oracle Corporation and/or its
affiliates. Other names may be trademarks of their respective
owners.

Type 'help;' or '\h' for help. Type '\c' to clear the current input statement.

mysql> show databases;
+--------------------+
| Database           |
+--------------------+
| information_schema |
| mysql              |
| performance_schema |
| sys                |
+--------------------+
4 rows in set (0.00 sec)

mysql>
- 1
- 2
- 3
- 4
- 5
- 6
- 7
- 8
- 9
- 10
- 11
- 12
- 13
- 14
- 15
- 16
- 17
- 18
- 19
- 20
- 21
- 22
- 23
- 24
- 25
- 26

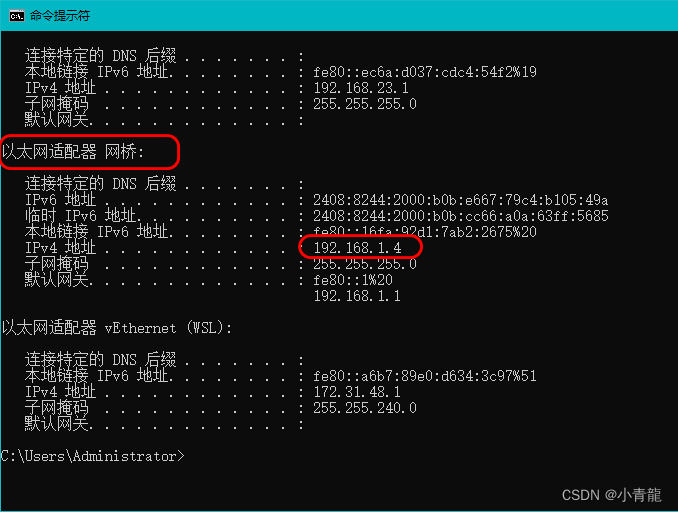
注意:一定要指定-h参数,并且值为127.0.0.1或<宿主机的网桥IP地址>

另外一个连接报错
在宿主机连接mysql容器时,如果未指定-h参数,或者指定了-h localhost,那么将会报错如下:
root@GC:~$ mysql -P33065 -uroot -p
Enter password:
ERROR 2002 (HY000): Can't connect to local MySQL server through socket '/var/run/mysqld/mysqld.sock' (2)
- 1
- 2
- 3
cyinl@GC:~$ mysql -hlocalhost -P33065 -uroot -p
Enter password:
ERROR 2002 (HY000): Can't connect to local MySQL server through socket '/var/run/mysqld/mysqld.sock' (2)
- 1
- 2
- 3
这是因为在缺省-h参数(或-h localhost)时,MySQL客户端默认使用Unix Socket文件方式来连接本地数据库服务器,而mysql容器暴露端口是tcp协议的,使用127.0.0.1或<宿主机的网桥IP地址>作为主机名可以强制MySQL客户端使用TCP/IP方式连接而不是Unix Socket文件方式连接,因此可连接成功。
最后总结,之所以遇到上述问题,就是我想当然的以为通过-p <宿主机端口>:<容器端口>,<容器端口>指定为33065,那么创建并运行的mysql就会监听33065端口,而且整个排错过程中,都没有想着查看一下mysql监听的是哪个端口。(现在想想真的挺傻的)


