- 1我的书签菜单_聚bt网址
- 2SLA(服务等级协议)_服务可用性sla
- 3Baidu Comate——基于AI的智能代码生成让你的编码更快、更好、更简单!_指新用户在ide中安装comate插件,并在问答区有技术类的提问,或者在编码区有采纳行
- 4Java|IDEA 运行和打包报错解决_java: java.lang.nosuchfielderror: class com.sun.to
- 5Github 2024-05-21 开源项目日报 Top10
- 6Android Studio Gradle
- 7Openlayers的交互功能(六)——编辑图斑_openlayer modify
- 8CSDN上传付费资源需要创作者等级Lv3,我的升级之路_csdn 的 综合贡献分
- 9Endnote 保姆级攻略:参考文献插入与删除、Style修改、文档格式转化(转载)_endnote插入引文 参考文献格式
- 10人工智能 ai java_人工智能需要java吗
修改android.jar教程,Android JAR组件安装打包教程
赞
踩
Android JAR组件安装打包教程
本篇为您介绍如何将Android开发的组件打包成JAR安装包,通过封闭成JAR包,可以重复利用,非常有利于扩展和减少工作重复性,下面开始:
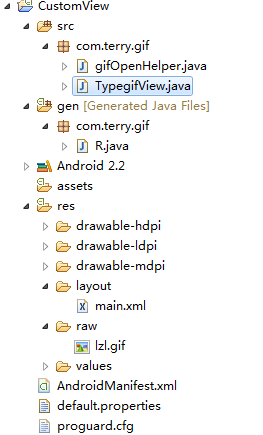
首先Android 工程的基本面貌是这样的:

当然对应的Activity 文件被我删除了,因为当编译成jar 包我们并不需要Activity 文件。
以上面这个工程为例,我们将它打包成JAR包步骤为:
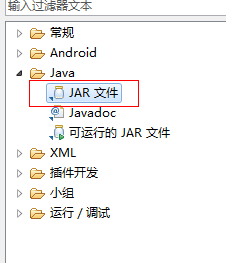
右键工程选择导出:

选择导出目标为:java->JAR文件:

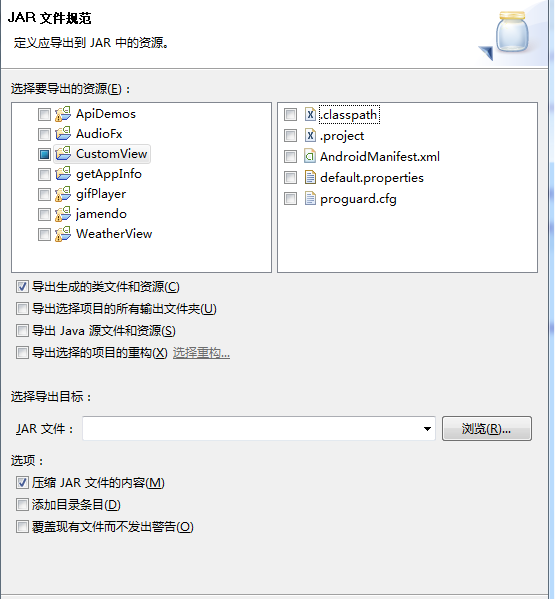
把一些不必要的文件勾选掉,如下图:

到了这一步,己经基本完成,浏览选择jar 文件导出路径即可。
导出完成后,我们就可以像使用其他JAR文件一样使用我们自己的自定义控件包了。下面给出一个小DEMO介绍如何使用这个JAR包。
步骤一:
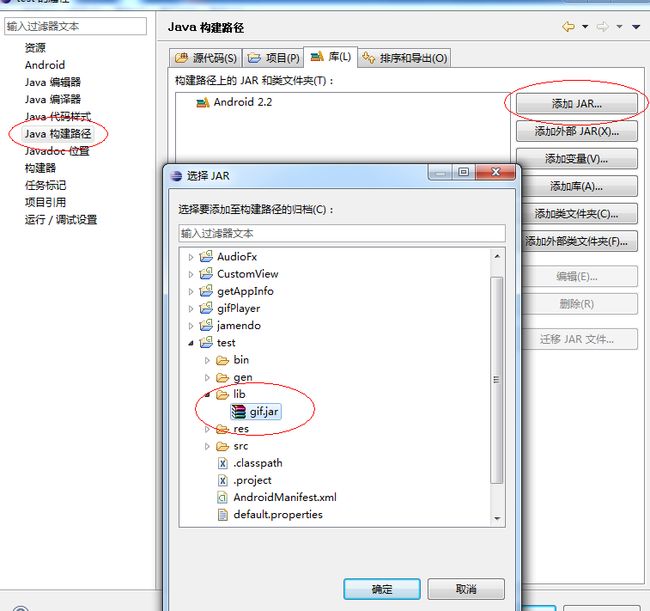
新建文件夹lib,将jar 包放入。
步骤二:
关联JAR包,如下图:

步骤三,使用JAR包:
如下代码:
xmlns:gif
="http://schemas.android.com/apk/res/com.terry.jarTest"
android:id
="@+id/layout"
android:orientation
="vertical"
android:layout_width
="fill_parent"
android:layout_height
="fill_parent"
>
<
Button
android:text
="停止"
android:id
="@+id/Button01"
android:layout_width
="wrap_content"
android:layout_height
="wrap_content"
>
Button
>
<
Button
android:text
="开始"
android:id
="@+id/Button02"
android:layout_width
="wrap_content"
android:layout_height
="wrap_content"
>
Button
>
<
com.terry.gif.TypegifView
android:layout_width
="fill_parent"
android:id
="@+id/gifView1"
gif:stop
="true"
android:layout_height
="wrap_content"
gif:delay
="1"
>
com.terry.gif.TypegifView
>
LinearLayout
>

有一个不好的就是如果你项目中存在使用属性,必须也把属性一起复制到你要使用的项目中,要不然会识别不了。
所以大伙自己在使用时,要多善于思考!!!


