热门标签
热门文章
- 1电脑在cmd命令行下快速切换目录文件_cmd切换目录
- 2Python + Selenium —— 三种等待方式!
- 3docker装LibreELEC_瞎弄 篇一:J3455NUC虚拟机安装LibreELEC核显直通HDMI输出
- 4Pytorch——报错解决:RuntimeError: Expected all tensors to be on the same device, but found at least two_when checking argument for argument target in meth
- 5python的range()函数用法_python range写在一行
- 6阿里云试用服务器幻兽帕鲁开服(使用内存溢出的解决方案,2核4G就可满足四人游玩)_2核4g幻兽帕鲁
- 7细说 TCP 内核参数_tcp_synack_retries
- 8用树莓派4b构建深度学习应用(九)Yolo篇_yolo树莓派
- 9六月集训(16)队列_程序解决要为每个队员发入场卷,入场卷分别有a、c、m三种,每个人可以任意 拿其中的
- 10随笔-Unity在编辑器下运行Update_unity editorapplication.update
当前位置: article > 正文
JDK8 升级至JDK19
作者:Gausst松鼠会 | 2024-02-27 17:27:50
赞
踩
JDK8 升级至JDK19
优质博文IT-BLOG-CN
目前部分项目使用JDK8,部分项目使用JDK19因此,环境变量中还是保持JDK8,只需要下载JDK19免安装版本,通过配置IDEA就可以完成本地开发。
一、IDEA 环境设置
【1】通过快捷键CTRL + SHIFT + ALT + S或者File->Project Structure...设置SDK和Language level,不存在JDK19时可通过Edit添加

【2】设置下方的Modules中的Sources模块和Dependencies模块


【3】设置下方的Platform Setting中的SDKs模块

【4】设置File->Settings...中的Build,Excepotion,Deployment下的Builder Tools->Maven->Runner模块
 【5】设置
【5】设置File->Settings...中的Build,Excepotion,Deployment下的Compiler->Java Compiler模块
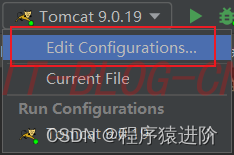
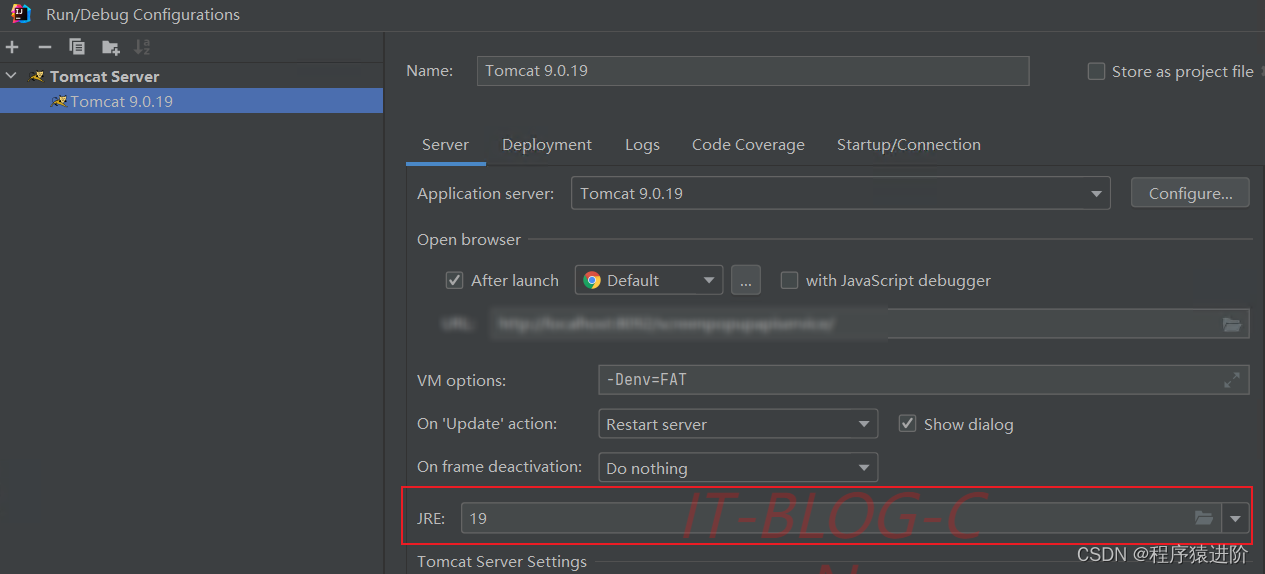
 【6】如果使用了
Tomcat点击Edit Configurations...后,设置JRE模块

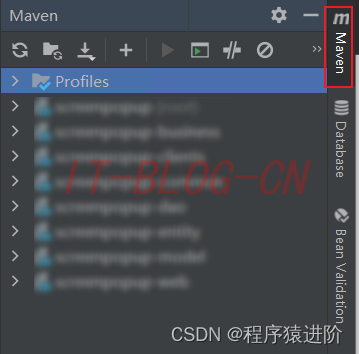
 【7】设置完成后通过
Maven插件进行编译,因为通过控制台执行mvn命令时使用的是本地环境变量中配置的JDK版本,而Maven插件使用的是IDEA中配置的JDK版本。

二、POM依赖修改
在项目父模块的pom.xml中添加如下plugin
<properties>
        <maven.compiler.plugin.version>3.10.1</maven.compiler.plugin.version>
        <java.version>19</java.version>
</properties>
<build>
        <pluginManagement>
            <plugins>
                <plugin>
                    <groupId>org.apache.maven.plugins</groupId>
                    <artifactId>maven-compiler-plugin</artifactId>
                    <version>${maven.compiler.plugin.version}</version>
                    <configuration>
                        <source>${java.version}</source>
                        <target>${java.version}</target>
                        <compilerArgument>--enable-preview</compilerArgument>
                        <compilerVersion>${java.version}</compilerVersion>
                    </configuration>
                </plugin>
                <plugin>
                    <groupId>org.apache.maven.plugins</groupId>
                    <artifactId>maven-surefire-plugin</artifactId>
                    <version>2.12.4</version>
                    <configuration>
                        <argLine>
                            --add-opens java.base/java.lang=ALL-UNNAMED
                            --add-opens java.base/java.lang.reflect=ALL-UNNAMED
                            --add-opens java.base/sun.reflect.annotation=ALL-UNNAMED
                            --add-opens java.base/java.math=ALL-UNNAMED
                            --add-opens java.base/java.util=ALL-UNNAMED
                            --add-opens java.base/sun.util.calendar=ALL-UNNAMED
                            --add-opens java.base/java.io=ALL-UNNAMED
                            --add-opens java.base/java.net=ALL-UNNAMED
                            --add-opens java.xml/com.sun.org.apache.xerces.internal.jaxp.datatype=ALL-UNNAMED
                        </argLine>
                    </configuration>
                </plugin>
                <plugin>
                    <groupId>org.apache.maven.plugins</groupId>
                    <artifactId>maven-war-plugin</artifactId>
                    <version>3.3.1</version>
                </plugin>
            </plugins>
        </pluginManagement>
    </build>
- 1
- 2
- 3
- 4
- 5
- 6
- 7
- 8
- 9
- 10
- 11
- 12
- 13
- 14
- 15
- 16
- 17
- 18
- 19
- 20
- 21
- 22
- 23
- 24
- 25
- 26
- 27
- 28
- 29
- 30
- 31
- 32
- 33
- 34
- 35
- 36
- 37
- 38
- 39
- 40
- 41
- 42
- 43
- 44
后面遇到最多的就是项目包的冲突问题,依次解决就好
声明:本文内容由网友自发贡献,不代表【wpsshop博客】立场,版权归原作者所有,本站不承担相应法律责任。如您发现有侵权的内容,请联系我们。转载请注明出处:https://www.wpsshop.cn/w/Gausst松鼠会/article/detail/154830?site
推荐阅读
Copyright © 2003-2013 www.wpsshop.cn 版权所有,并保留所有权利。


