- 1数字IC前端设计怎么学?薪资前景好吗?_数字ic前端设计需要学什么
- 2数据结构2——链表_在链表中有r->next=newnode->next,r=newnode
- 3开源模型应用落地-chatglm3-6b模型小试-入门篇(三)
- 4五种主流数据库:集合运算
- 5使用java.security.SecureRandom安全生成随机数和随机字符串工具类_java.security 随机数
- 6开源模型应用落地-chatglm3-6b模型小试-入门篇(二)_qwen-7b和chatglm3-6b
- 7livox mid360使用
- 8Description Resource Path Location Type Cannot change version of project fac(导入maven项目出现红叉问题)...
- 9RAID 5实训
- 10openlayers 入门教程(十):style 篇_openlayers style circlestyle
YOLOv8目标检测:使用ONNX模型进行推理_树莓派yolov8 onnx部署
赞
踩
基于COCO数据集的YOLOv8目标检测onnx模型推理
在本博客中,我们将探讨如何使用YOLOv8目标检测模型进行推理,包括图片,视频文件,摄像头实时检测,特别是ONNX在不同大小(YOLOv8n, YOLOv8s, YOLOv8m, YOLOv8l, YOLOv8x)的模型上进行的实验。我们还将讨论所需的环境配置,代码实现,以及如何展示推理结果。
环境配置
在详细描述环境配置和安装步骤之前,请确保您的系统已经安装了Python和pip。下面是详细的环境配置步骤,适用于基于YOLOv8模型进行目标检测的项目。
1. 安装必要的Python库
pip install onnxruntime-gpu==1.13.1 opencv-python==4.7.0.68 numpy==1.24.1 Pillow==9.4.0 -i https://pypi.tuna.tsinghua.edu.cn/simple/
- 1
如果您没有GPU或者不打算使用GPU,可以安装onnxruntime而不是onnxruntime-gpu:
pip install onnxruntime==1.13.1 opencv-python==4.7.0.68 numpy==1.24.1 Pillow==9.4.0 -i https://pypi.tuna.tsinghua.edu.cn/simple/
- 1
2. 验证安装
安装完成后,您可以通过运行Python并尝试导入安装的包来验证是否成功安装了所有必要的库:
import onnxruntime
import cv2
import numpy
import PIL
- 1
- 2
- 3
- 4
如果上述命令没有引发任何错误,那么恭喜您,您已成功配置了运行环境。
小贴士
- 如果您在安装过程中遇到任何问题,可能需要更新pip到最新版本:
pip install --upgrade pip。 - 对于使用NVIDIA GPU的用户,确保您的系统已安装CUDA和cuDNN。
onnxruntime-gpu要求系统预装这些NVIDIA库以利用GPU加速。
按照这些步骤,您应该能够成功配置环境并运行基于YOLOv8的目标检测项目了。
权重下载
YOLOv8模型的权重可以通过以下百度网盘链接下载:
请确保下载适合您需求的模型版本。
代码实现
以下是进行目标检测的整体代码流程,包括模型加载、图像预处理、推理执行、后处理及结果展示的步骤。
import cv2
import onnxruntime as ort
from PIL import Image
import numpy as np

# 置信度
confidence_thres = 0.35
# iou阈值
iou_thres = 0.5
# 类别
classes = {0: 'person', 1: 'bicycle', 2: 'car', 3: 'motorcycle', 4: 'airplane', 5: 'bus', 6: 'train', 7: 'truck',
           8: 'boat', 9: 'traffic light', 10: 'fire hydrant', 11: 'stop sign', 12: 'parking meter', 13: 'bench',
           14: 'bird', 15: 'cat', 16: 'dog', 17: 'horse', 18: 'sheep', 19: 'cow', 20: 'elephant', 21: 'bear',
           22: 'zebra', 23: 'giraffe', 24: 'backpack', 25: 'umbrella', 26: 'handbag', 27: 'tie', 28: 'suitcase',
           29: 'frisbee', 30: 'skis', 31: 'snowboard', 32: 'sports ball', 33: 'kite', 34: 'baseball bat',
           35: 'baseball glove', 36: 'skateboard', 37: 'surfboard', 38: 'tennis racket', 39: 'bottle',
           40: 'wine glass', 41: 'cup', 42: 'fork', 43: 'knife', 44: 'spoon', 45: 'bowl', 46: 'banana', 47: 'apple',
           48: 'sandwich', 49: 'orange', 50: 'broccoli', 51: 'carrot', 52: 'hot dog', 53: 'pizza', 54: 'donut',
           55: 'cake', 56: 'chair', 57: 'couch', 58: 'potted plant', 59: 'bed', 60: 'dining table', 61: 'toilet',
           62: 'tv', 63: 'laptop', 64: 'mouse', 65: 'remote', 66: 'keyboard', 67: 'cell phone', 68: 'microwave',
           69: 'oven', 70: 'toaster', 71: 'sink', 72: 'refrigerator', 73: 'book', 74: 'clock', 75: 'vase',
           76: 'scissors', 77: 'teddy bear', 78: 'hair drier', 79: 'toothbrush'}
# 随机颜色
color_palette = np.random.uniform(100, 255, size=(len(classes), 3))

# 判断是使用GPU或CPU
providers = [
    ('CUDAExecutionProvider', {
        'device_id': 0,  # 可以选择GPU设备ID,如果你有多个GPU
    }),
    'CPUExecutionProvider',  # 也可以设置CPU作为备选
]

def calculate_iou(box, other_boxes):
    """
    计算给定边界框与一组其他边界框之间的交并比(IoU)。

    参数:
    - box: 单个边界框,格式为 [x1, y1, width, height]。
    - other_boxes: 其他边界框的数组,每个边界框的格式也为 [x1, y1, width, height]。

    返回值:
    - iou: 一个数组,包含给定边界框与每个其他边界框的IoU值。
    """

    # 计算交集的左上角坐标
    x1 = np.maximum(box[0], np.array(other_boxes)[:, 0])
    y1 = np.maximum(box[1], np.array(other_boxes)[:, 1])
    # 计算交集的右下角坐标
    x2 = np.minimum(box[0] + box[2], np.array(other_boxes)[:, 0] + np.array(other_boxes)[:, 2])
    y2 = np.minimum(box[1] + box[3], np.array(other_boxes)[:, 1] + np.array(other_boxes)[:, 3])
    # 计算交集区域的面积
    intersection_area = np.maximum(0, x2 - x1) * np.maximum(0, y2 - y1)
    # 计算给定边界框的面积
    box_area = box[2] * box[3]
    # 计算其他边界框的面积
    other_boxes_area = np.array(other_boxes)[:, 2] * np.array(other_boxes)[:, 3]
    # 计算IoU值
    iou = intersection_area / (box_area + other_boxes_area - intersection_area)
    return iou

def custom_NMSBoxes(boxes, scores, confidence_threshold, iou_threshold):
    # 如果没有边界框,则直接返回空列表
    if len(boxes) == 0:
        return []
    # 将得分和边界框转换为NumPy数组
    scores = np.array(scores)
    boxes = np.array(boxes)
    # 根据置信度阈值过滤边界框
    mask = scores > confidence_threshold
    filtered_boxes = boxes[mask]
    filtered_scores = scores[mask]
    # 如果过滤后没有边界框,则返回空列表
    if len(filtered_boxes) == 0:
        return []
    # 根据置信度得分对边界框进行排序
    sorted_indices = np.argsort(filtered_scores)[::-1]
    # 初始化一个空列表来存储选择的边界框索引
    indices = []
    # 当还有未处理的边界框时,循环继续
    while len(sorted_indices) > 0:
        # 选择得分最高的边界框索引
        current_index = sorted_indices[0]
        indices.append(current_index)
        # 如果只剩一个边界框,则结束循环
        if len(sorted_indices) == 1:
            break
        # 获取当前边界框和其他边界框
        current_box = filtered_boxes[current_index]
        other_boxes = filtered_boxes[sorted_indices[1:]]
        # 计算当前边界框与其他边界框的IoU
        iou = calculate_iou(current_box, other_boxes)
        # 找到IoU低于阈值的边界框,即与当前边界框不重叠的边界框
        non_overlapping_indices = np.where(iou <= iou_threshold)[0]
        # 更新sorted_indices以仅包含不重叠的边界框
        sorted_indices = sorted_indices[non_overlapping_indices + 1]
    # 返回选择的边界框索引
    return indices


def draw_detections(img, box, score, class_id):
    """
    在输入图像上绘制检测到的对象的边界框和标签。

    参数:
            img: 要在其上绘制检测结果的输入图像。
            box: 检测到的边界框。
            score: 对应的检测得分。
            class_id: 检测到的对象的类别ID。

    返回:
            无
    """

    # 提取边界框的坐标
    x1, y1, w, h = box
    # 根据类别ID检索颜色
    color = color_palette[class_id]
    # 在图像上绘制边界框
    cv2.rectangle(img, (int(x1), int(y1)), (int(x1 + w), int(y1 + h)), color, 2)
    # 创建标签文本,包括类名和得分
    label = f'{classes[class_id]}: {score:.2f}'
    # 计算标签文本的尺寸
    (label_width, label_height), _ = cv2.getTextSize(label, cv2.FONT_HERSHEY_SIMPLEX, 0.5, 1)
    # 计算标签文本的位置
    label_x = x1
    label_y = y1 - 10 if y1 - 10 > label_height else y1 + 10
    # 绘制填充的矩形作为标签文本的背景
    cv2.rectangle(img, (label_x, label_y - label_height), (label_x + label_width, label_y + label_height), color, cv2.FILLED)
    # 在图像上绘制标签文本
    cv2.putText(img, label, (label_x, label_y), cv2.FONT_HERSHEY_SIMPLEX, 0.5, (0, 0, 0), 1, cv2.LINE_AA)


def preprocess(img, input_width, input_height):
    """
    在执行推理之前预处理输入图像。

    返回:
        image_data: 为推理准备好的预处理后的图像数据。
    """

    # 获取输入图像的高度和宽度
    img_height, img_width = img.shape[:2]
    # 将图像颜色空间从BGR转换为RGB
    img = cv2.cvtColor(img, cv2.COLOR_BGR2RGB)
    # 将图像大小调整为匹配输入形状
    img = cv2.resize(img, (input_width, input_height))
    # 通过除以255.0来归一化图像数据
    image_data = np.array(img) / 255.0
    # 转置图像,使通道维度为第一维
    image_data = np.transpose(image_data, (2, 0, 1))  # 通道首
    # 扩展图像数据的维度以匹配预期的输入形状
    image_data = np.expand_dims(image_data, axis=0).astype(np.float32)
    # 返回预处理后的图像数据
    return image_data, img_height, img_width

def postprocess(input_image, output, input_width, input_height, img_width, img_height):
    """
    对模型输出进行后处理,提取边界框、得分和类别ID。

    参数:
        input_image (numpy.ndarray): 输入图像。
        output (numpy.ndarray): 模型的输出。
        input_width (int): 模型输入宽度。
        input_height (int): 模型输入高度。
        img_width (int): 原始图像宽度。
        img_height (int): 原始图像高度。

    返回:
        numpy.ndarray: 绘制了检测结果的输入图像。
    """

    # 转置和压缩输出以匹配预期的形状
    outputs = np.transpose(np.squeeze(output[0]))
    # 获取输出数组的行数
    rows = outputs.shape[0]
    # 用于存储检测的边界框、得分和类别ID的列表
    boxes = []
    scores = []
    class_ids = []
    # 计算边界框坐标的缩放因子
    x_factor = img_width / input_width
    y_factor = img_height / input_height
    # 遍历输出数组的每一行
    for i in range(rows):
        # 从当前行提取类别得分
        classes_scores = outputs[i][4:]
        # 找到类别得分中的最大得分
        max_score = np.amax(classes_scores)
        # 如果最大得分高于置信度阈值
        if max_score >= confidence_thres:
            # 获取得分最高的类别ID
            class_id = np.argmax(classes_scores)
            # 从当前行提取边界框坐标
            x, y, w, h = outputs[i][0], outputs[i][1], outputs[i][2], outputs[i][3]
            # 计算边界框的缩放坐标
            left = int((x - w / 2) * x_factor)
            top = int((y - h / 2) * y_factor)
            width = int(w * x_factor)
            height = int(h * y_factor)
            # 将类别ID、得分和框坐标添加到各自的列表中
            class_ids.append(class_id)
            scores.append(max_score)
            boxes.append([left, top, width, height])
    # 应用非最大抑制过滤重叠的边界框
    indices = custom_NMSBoxes(boxes, scores, confidence_thres, iou_thres)
    # 遍历非最大抑制后的选定索引
    for i in indices:
        # 根据索引获取框、得分和类别ID
        box = boxes[i]
        score = scores[i]
        class_id = class_ids[i]
        # 在输入图像上绘制检测结果
        draw_detections(input_image, box, score, class_id)
    # 返回修改后的输入图像
    return input_image

def init_detect_model(model_path):
    # 使用ONNX模型文件创建一个推理会话,并指定执行提供者
    session = ort.InferenceSession(model_path, providers=providers)
    # 获取模型的输入信息
    model_inputs = session.get_inputs()
    # 获取输入的形状,用于后续使用
    input_shape = model_inputs[0].shape
    # 从输入形状中提取输入宽度
    input_width = input_shape[2]
    # 从输入形状中提取输入高度
    input_height = input_shape[3]
    # 返回会话、模型输入信息、输入宽度和输入高度
    return session, model_inputs, input_width, input_height

def detect_object(image, session, model_inputs, input_width, input_height):
    # 如果输入的图像是PIL图像对象,将其转换为NumPy数组
    if isinstance(image, Image.Image):
        result_image = np.array(image)
    else:
        # 否则,直接使用输入的图像(假定已经是NumPy数组)
        result_image = image
    # 预处理图像数据,调整图像大小并可能进行归一化等操作
    img_data, img_height, img_width = preprocess(result_image, input_width, input_height)
    # 使用预处理后的图像数据进行推理
    outputs = session.run(None, {model_inputs[0].name: img_data})
    # 对推理结果进行后处理,例如解码检测框,过滤低置信度的检测等
    output_image = postprocess(result_image, outputs, input_width, input_height, img_width, img_height)
    # 返回处理后的图像
    return output_image
if __name__ == '__main__':
    # 模型文件的路径
    model_path = "yolov8n.onnx"
    # 初始化检测模型,加载模型并获取模型输入节点信息和输入图像的宽度、高度
    session, model_inputs, input_width, input_height = init_detect_model(model_path)
    # 三种模式 1为图片预测,并显示结果图片;2为摄像头检测,并实时显示FPS; 3为视频检测,并保存结果视频
    mode = 1
    if mode == 1:
        # 读取图像文件
        image_data = cv2.imread("street.jpg")
        # 使用检测模型对读入的图像进行对象检测
        result_image = detect_object(image_data, session, model_inputs, input_width, input_height)
        # 将检测后的图像保存到文件
        cv2.imwrite("output_image.jpg", result_image)
        # 在窗口中显示检测后的图像
        cv2.imshow('Output', result_image)
        # 等待用户按键,然后关闭显示窗口
        cv2.waitKey(0)
    elif mode == 2:
        # 打开摄像头
        cap = cv2.VideoCapture()  # 0表示默认摄像头,如果有多个摄像头可以尝试使用1、2等
        # 检查摄像头是否成功打开
        if not cap.isOpened():
            print("Error: Could not open camera.")
            exit()
        # 初始化帧数计数器和起始时间
        frame_count = 0
        start_time = time.time()
        # 循环读取摄像头视频流
        while True:
            # 读取一帧
            ret, frame = cap.read()
            # 检查帧是否成功读取
            if not ret:
                print("Error: Could not read frame.")
                break
            # 使用检测模型对读入的帧进行对象检测
            output_image = detect_object(frame, session, model_inputs, input_width, input_height)
            # 计算帧速率
            frame_count += 1
            end_time = time.time()
            elapsed_time = end_time - start_time
            fps = frame_count / elapsed_time
            print(f"FPS: {fps:.2f}")
            # 将FPS绘制在图像上
            cv2.putText(output_image, f"FPS: {fps:.2f}", (10, 30), cv2.FONT_HERSHEY_SIMPLEX, 1, (255, 255, 255), 2, cv2.LINE_AA)
            # 在窗口中显示当前帧
            cv2.imshow("Video", output_image)
            # 按下 'q' 键退出循环
            if cv2.waitKey(1) & 0xFF == ord('q'):
                break
        # 释放摄像头资源
        cap.release()
        # 关闭窗口
        cv2.destroyAllWindows()
    elif mode == 3:
        # 输入视频路径
        input_video_path = 'kun.mp4'
        # 输出视频路径
        output_video_path = 'kun_det.mp4'
        # 打开视频文件
        cap = cv2.VideoCapture(input_video_path)
        # 检查视频是否成功打开
        if not cap.isOpened():
            print("Error: Could not open video.")
            exit()
        # 读取视频的基本信息
        frame_width = int(cap.get(3))
        frame_height = int(cap.get(4))
        fps = cap.get(cv2.CAP_PROP_FPS)
        # 定义视频编码器和创建VideoWriter对象
        fourcc = cv2.VideoWriter_fourcc(*'mp4v')  # 根据文件名后缀使用合适的编码器
        out = cv2.VideoWriter(output_video_path, fourcc, fps, (frame_width, frame_height))
        # 初始化帧数计数器和起始时间
        frame_count = 0
        start_time = time.time()
        while True:
            ret, frame = cap.read()
            if not ret:
                print("Info: End of video file.")
                break
            # 对读入的帧进行对象检测
            output_image = detect_object(frame, session, model_inputs, input_width, input_height)
            # 计算并打印帧速率
            frame_count += 1
            end_time = time.time()
            elapsed_time = end_time - start_time
            if elapsed_time > 0:
                fps = frame_count / elapsed_time
                print(f"FPS: {fps:.2f}")
            # 将处理后的帧写入输出视频
            out.write(output_image)
            #(可选)实时显示处理后的视频帧
            cv2.imshow("Output Video", output_image)
            if cv2.waitKey(1) & 0xFF == ord('q'):
                break
        # 释放资源
        cap.release()
        out.release()
        cv2.destroyAllWindows()
    else:
        print("输入错误,请检查mode的赋值")
- 1
- 2
- 3
- 4
- 5
- 6
- 7
- 8
- 9
- 10
- 11
- 12
- 13
- 14
- 15
- 16
- 17
- 18
- 19
- 20
- 21
- 22
- 23
- 24
- 25
- 26
- 27
- 28
- 29
- 30
- 31
- 32
- 33
- 34
- 35
- 36
- 37
- 38
- 39
- 40
- 41
- 42
- 43
- 44
- 45
- 46
- 47
- 48
- 49
- 50
- 51
- 52
- 53
- 54
- 55
- 56
- 57
- 58
- 59
- 60
- 61
- 62
- 63
- 64
- 65
- 66
- 67
- 68
- 69
- 70
- 71
- 72
- 73
- 74
- 75
- 76
- 77
- 78
- 79
- 80
- 81
- 82
- 83
- 84
- 85
- 86
- 87
- 88
- 89
- 90
- 91
- 92
- 93
- 94
- 95
- 96
- 97
- 98
- 99
- 100
- 101
- 102
- 103
- 104
- 105
- 106
- 107
- 108
- 109
- 110
- 111
- 112
- 113
- 114
- 115
- 116
- 117
- 118
- 119
- 120
- 121
- 122
- 123
- 124
- 125
- 126
- 127
- 128
- 129
- 130
- 131
- 132
- 133
- 134
- 135
- 136
- 137
- 138
- 139
- 140
- 141
- 142
- 143
- 144
- 145
- 146
- 147
- 148
- 149
- 150
- 151
- 152
- 153
- 154
- 155
- 156
- 157
- 158
- 159
- 160
- 161
- 162
- 163
- 164
- 165
- 166
- 167
- 168
- 169
- 170
- 171
- 172
- 173
- 174
- 175
- 176
- 177
- 178
- 179
- 180
- 181
- 182
- 183
- 184
- 185
- 186
- 187
- 188
- 189
- 190
- 191
- 192
- 193
- 194
- 195
- 196
- 197
- 198
- 199
- 200
- 201
- 202
- 203
- 204
- 205
- 206
- 207
- 208
- 209
- 210
- 211
- 212
- 213
- 214
- 215
- 216
- 217
- 218
- 219
- 220
- 221
- 222
- 223
- 224
- 225
- 226
- 227
- 228
- 229
- 230
- 231
- 232
- 233
- 234
- 235
- 236
- 237
- 238
- 239
- 240
- 241
- 242
- 243
- 244
- 245
- 246
- 247
- 248
- 249
- 250
- 251
- 252
- 253
- 254
- 255
- 256
- 257
- 258
- 259
- 260
- 261
- 262
- 263
- 264
- 265
- 266
- 267
- 268
- 269
- 270
- 271
- 272
- 273
- 274
- 275
- 276
- 277
- 278
- 279
- 280
- 281
- 282
- 283
- 284
- 285
- 286
- 287
- 288
- 289
- 290
- 291
- 292
- 293
- 294
- 295
- 296
- 297
- 298
- 299
- 300
- 301
- 302
- 303
- 304
- 305
- 306
- 307
- 308
- 309
- 310
- 311
- 312
- 313
- 314
- 315
- 316
- 317
- 318
- 319
- 320
- 321
- 322
- 323
- 324
- 325
- 326
- 327
- 328
- 329
- 330
- 331
- 332
- 333
- 334
- 335
- 336
- 337
- 338
- 339
- 340
- 341
- 342
- 343
- 344
- 345
- 346
- 347
- 348
- 349
- 350
- 351
请根据您的需求调整置信度阈值、IOU阈值以及模型和mode的值(1为图片预测;2为摄像头检测; 3为视频检测)。
结果展示
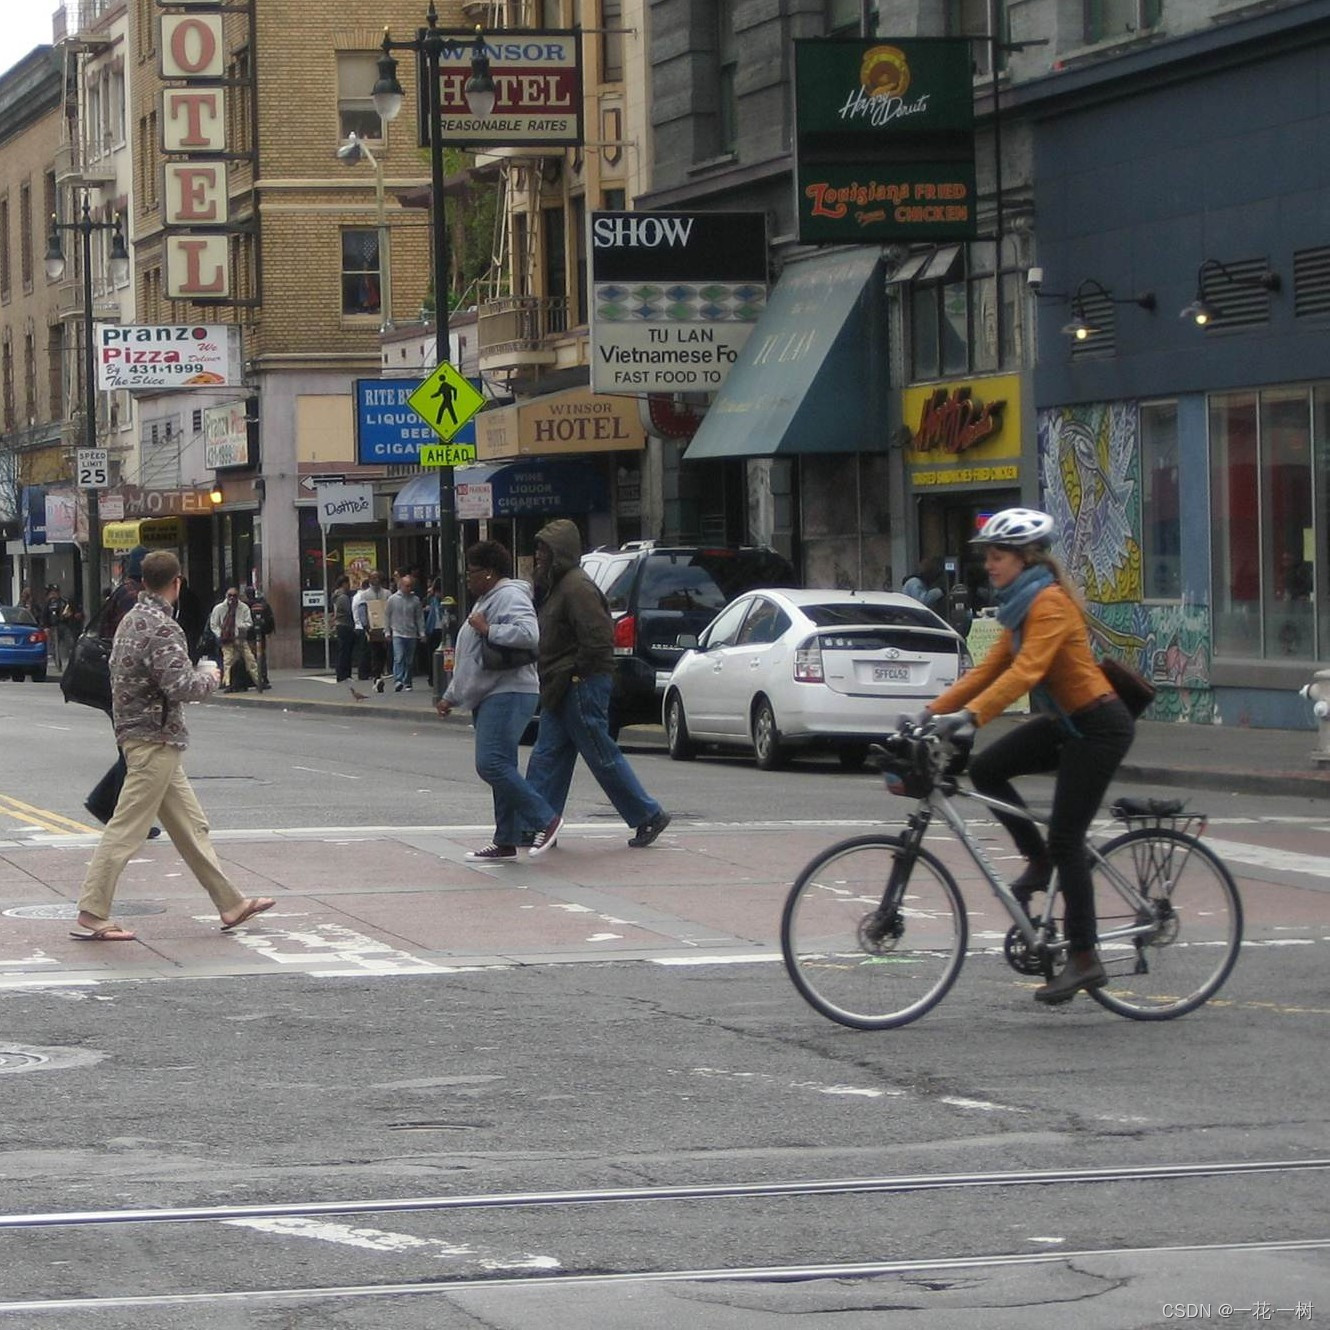
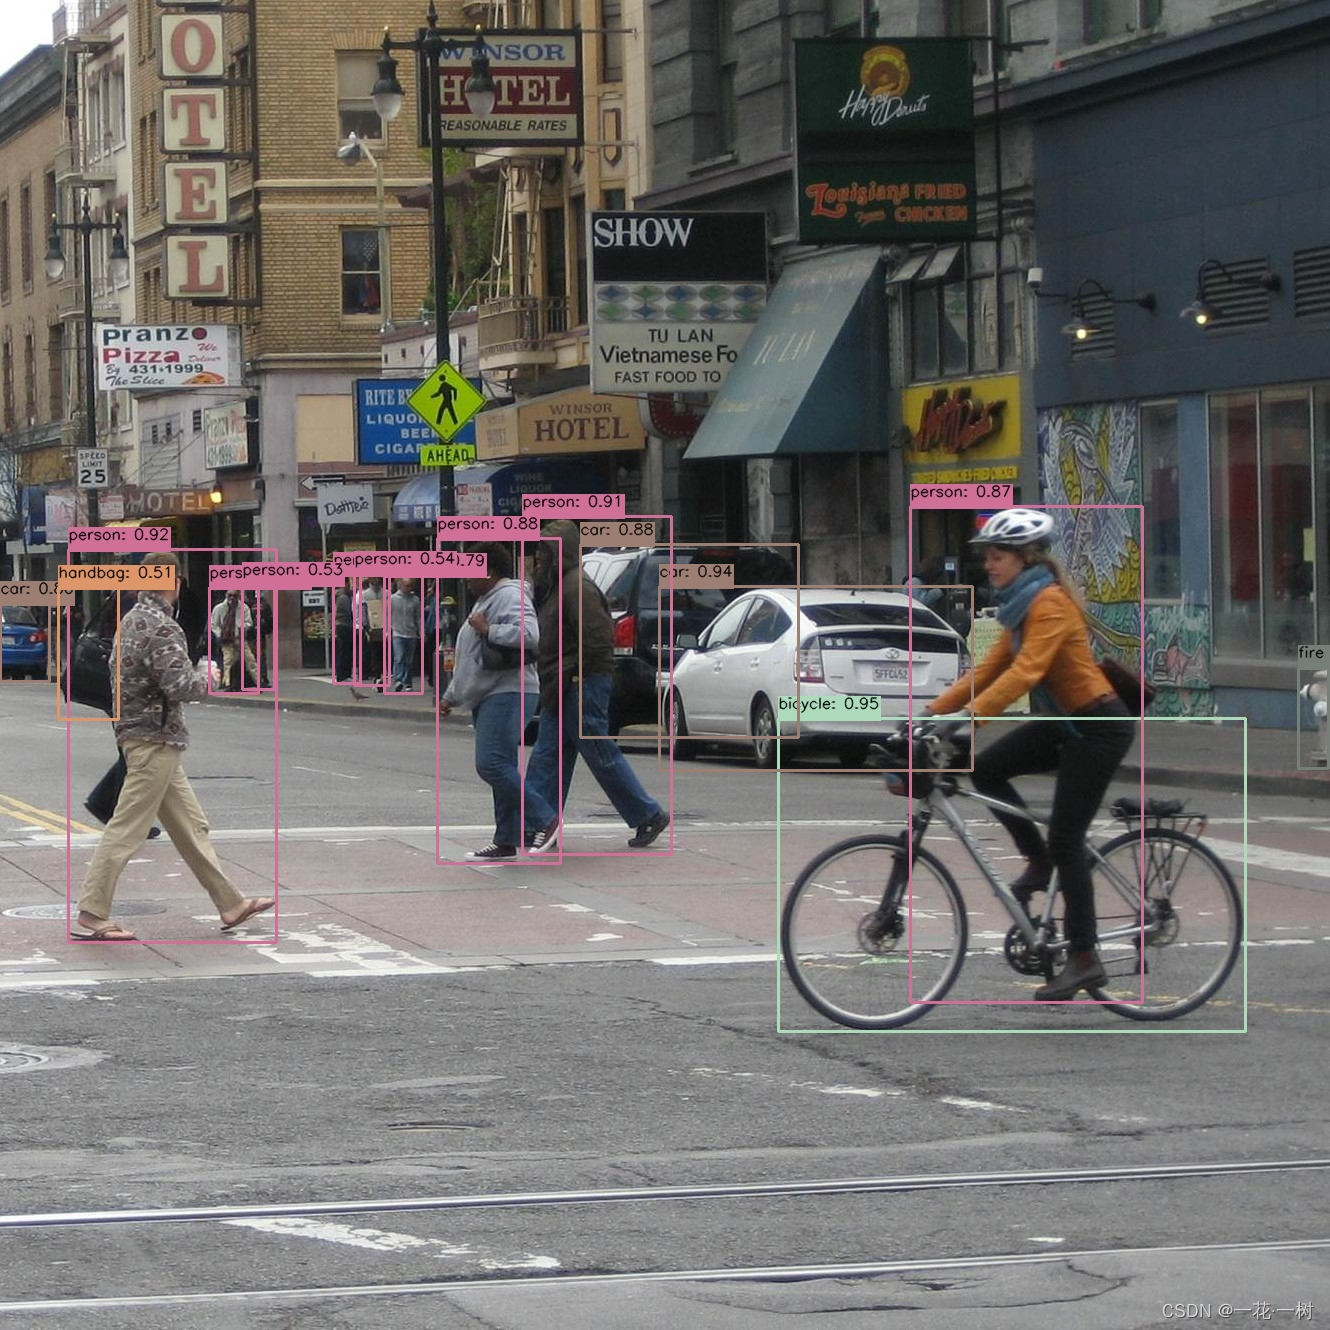
推理完成后,您可以查看处理后的图像,如下所示:
-
原始图片:

-
检测后的图片:

请替换为您自己的图像路径来查看效果;或者其他两种模式(摄像头实时检测、视频文件检测)进行尝试。
总结
通过以上步骤,我们展示了如何使用YOLOv8进行目标检测的完整流程,从环境配置到代码实现和结果展示。此过程适用于YOLOv8目标检测任意模型进行检测任务。
希望这篇博客能够帮助您理解和实现基于YOLOv8的目标检测项目。如果有任何问题或需要进一步的帮助,请随时留言讨论。


