- 1ICode国际青少年编程竞赛- Python-1级训练场-基础训练2_国际青少年编程基础训练二答案
- 2Hadoop 3.0磁盘均衡器(diskbalancer)功能及使用介绍
- 3【Linux】进程间通信 - 管道
- 4微信小程序报错:WAServiceMainContext.js?t=wechat&s=1684052115130&v=2.31.1:1 wx.chooseAddress need to be_waservicemaincontext.js:1 [wxapplib]] backgroundfe
- 5pdf转换成ppt乱码怎么办?那是你没用对方法!
- 6微信小程序使用本地存储方法wx.setStorageSync()和wx.getStorageSync()
- 7Hadoop集群配置_hdfs-site.xml
- 8Linux spring boot项目远程部署 遇到的问题以及解决_linux 发布springboot项目,用域名无法访问
- 9Shell守护进程_shell 守护进程
- 10SDC文件常用时序约束语句_时钟约束语句
Spring AI教程(二)Chat API之Prompts模板语法_spring ai中如何设置prompt
赞
踩
Prompts 模板语法
上节我们介绍了提示词工程,并通过设定SystemMessage获得了一个会骂人的AI。而本节介绍的内容仍然与提示词有关。
Spring AI为我们提供了提示词模板,允许我们通过一些模板,快速地动态生成提示词并发起提问。除此之外,我们还能使用Spring AI为我们提供的输出解析器将AI回复的内容解析为Bean对象。
5.1 PromptTemplate
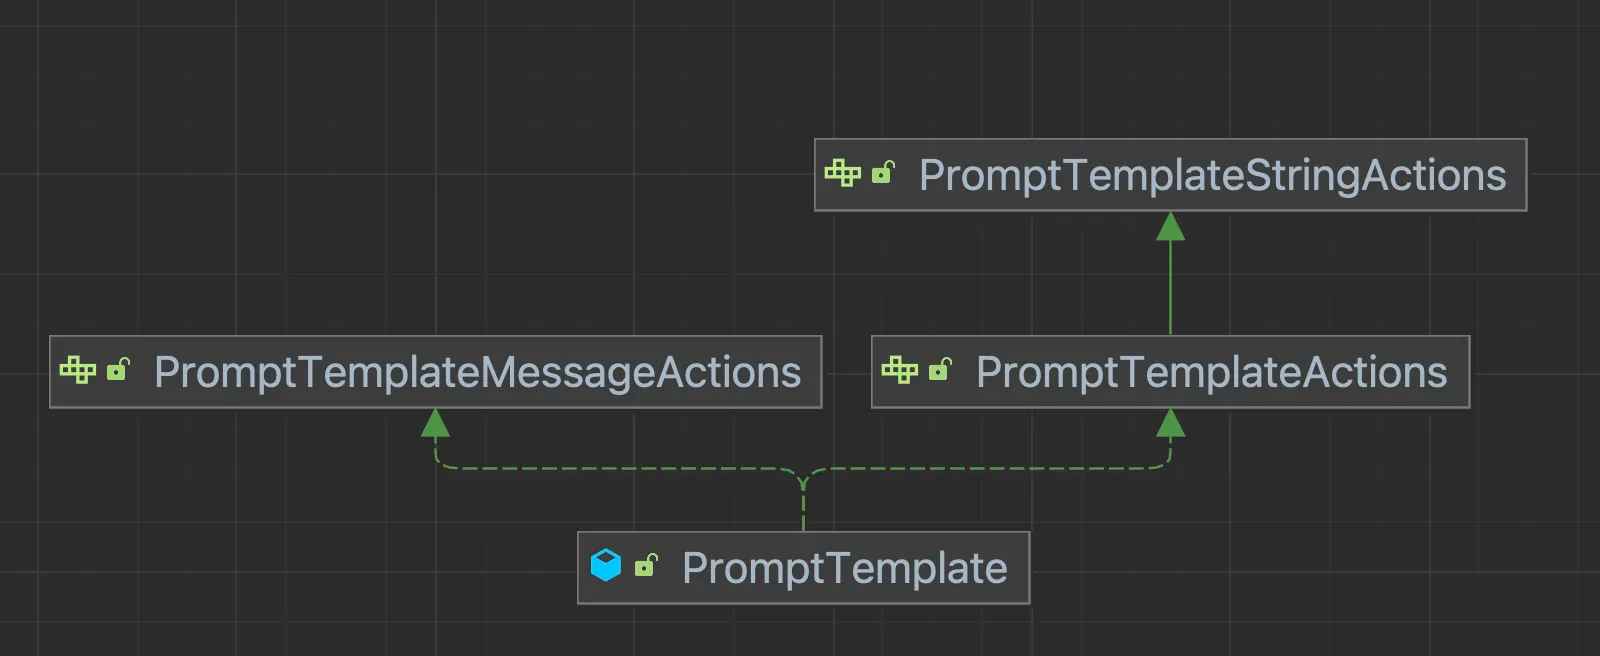
PromptTemplate能够帮助我们创建结构化提示词,是Spring AI提示词工程中的关键组件,该类实现了三个接口:PromptTemplateStringActions、PromptTemplateActions和PromptTemplateMessageActions,这些接口的主要功能也有所不同:
PromptTemplateStringActions: 主要用于创建和渲染提示词字符串,接口的返回值类型均是String类型,这是提示词的基本形式。PromptTemplateActions: 主要用于创建Prompt对象,该对象可直接传递给ChatClient以生成响应。PromptTemplateMessageActions:主要用于创建Message对象,这允许我们针对Message对象进行其他的相关操作。
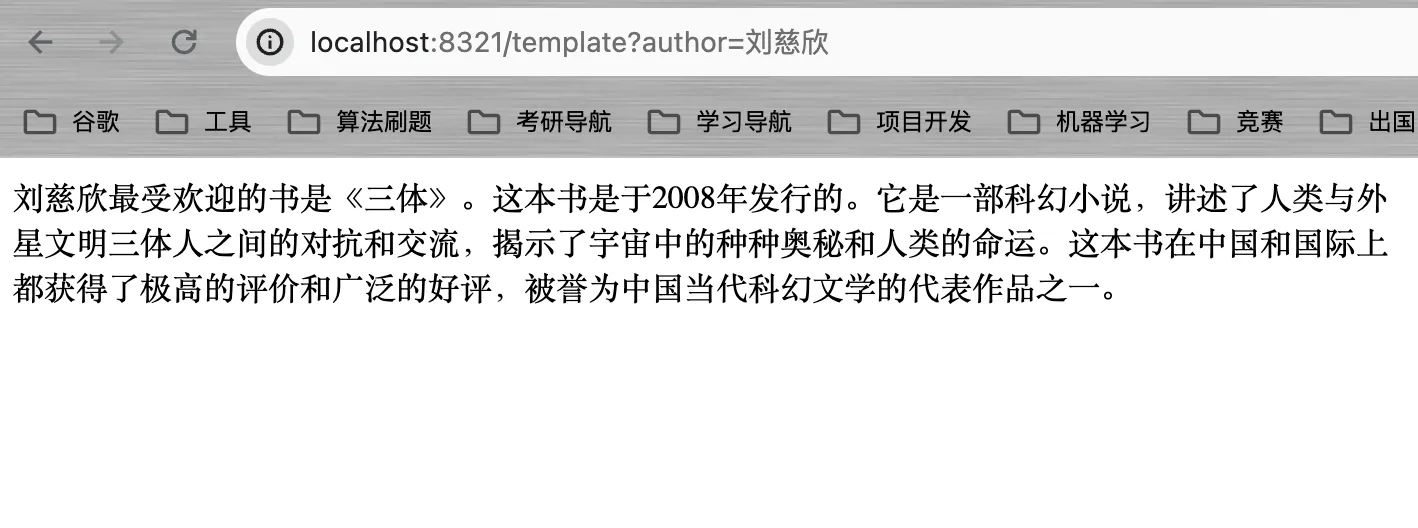
例如,我们想定义一个这样的提示词:提供作者姓名,返回该作者最受欢迎的书,出版时间和书的内容概述。
    @GetMapping("/template")
    public String promptTemplate(String author){
        // 提示词
        final String template = "请问{author}最受欢迎的书是哪本书?什么时候发布的?书的内容是什么?";
        PromptTemplate promptTemplate = new PromptTemplate(template);
        // 动态地将author填充进去
        Prompt prompt = promptTemplate.create(Map.of("author", author));

        ChatResponse chatResponse = chatClient.call(prompt);

        AssistantMessage assistantMessage = chatResponse.getResult().getOutput();
        return assistantMessage.getContent();
    }
- 1
- 2
- 3
- 4
- 5
- 6
- 7
- 8
- 9
- 10
- 11
- 12
- 13
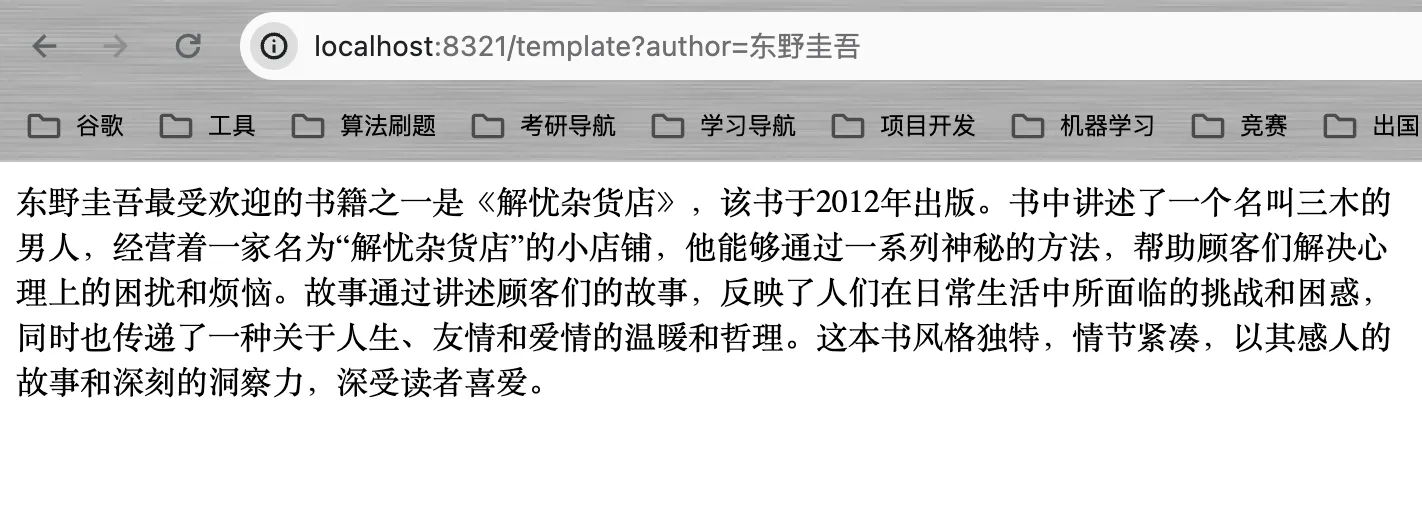
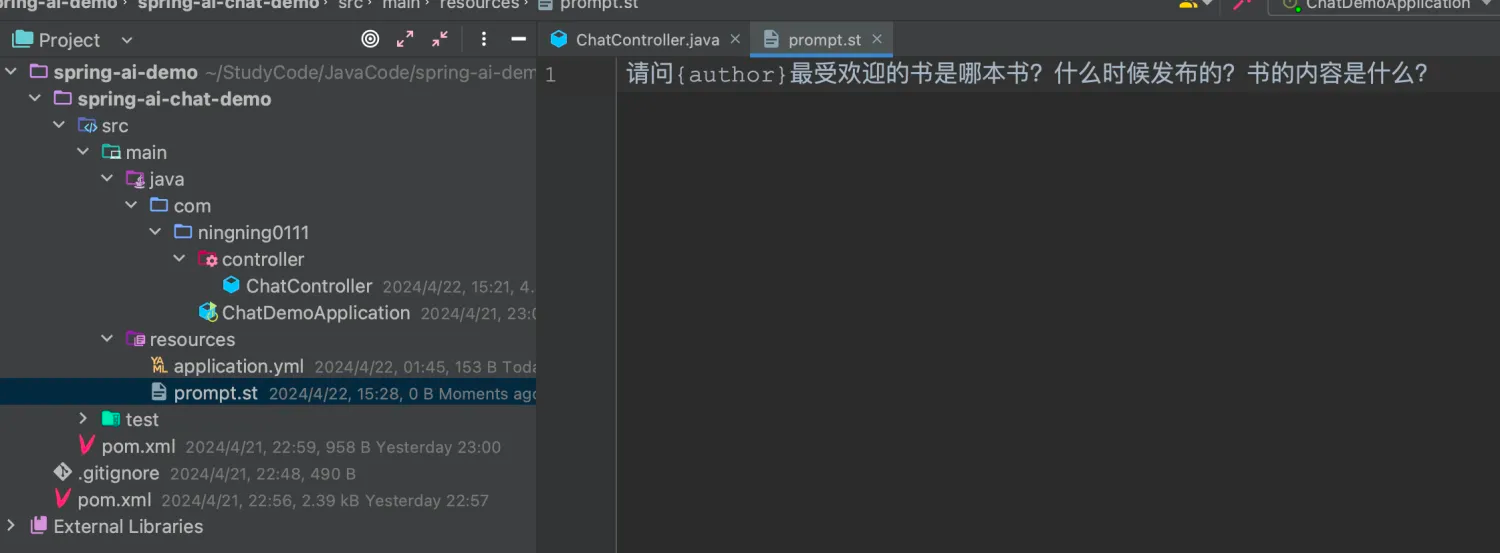
我们除了可以通过定义字符串加载Template以外,我们还可以以Resource的形式加载Template,例如,我们在resouces下创建prompt.st(文件后缀名合理即可),将刚刚的提示词模板写入到该文件中。
package com.ningning0111.controller;

import org.springframework.ai.chat.ChatClient;
import org.springframework.ai.chat.ChatResponse;
import org.springframework.ai.chat.messages.AssistantMessage;
import org.springframework.ai.chat.prompt.Prompt;
import org.springframework.ai.chat.prompt.PromptTemplate;
import org.springframework.beans.factory.annotation.Value;
import org.springframework.core.io.Resource;
import org.springframework.web.bind.annotation.GetMapping;
import org.springframework.web.bind.annotation.RestController;

import java.util.Map;

@RestController
public class ChatController {

    private final ChatClient chatClient;

    @Value("classpath:prompt.st")
    private Resource templateResource;


    public ChatController(ChatClient chatClient) {
        this.chatClient = chatClient;
    }

    @GetMapping("/template")
    public String promptTemplate(String author){
        // 提示词
        PromptTemplate promptTemplate = new PromptTemplate(templateResource);
        // 动态地将author填充进去
        Prompt prompt = promptTemplate.create(Map.of("author", author));
        ChatResponse chatResponse = chatClient.call(prompt);
        AssistantMessage assistantMessage = chatResponse.getResult().getOutput();
        return assistantMessage.getContent();
    }

}
- 1
- 2
- 3
- 4
- 5
- 6
- 7
- 8
- 9
- 10
- 11
- 12
- 13
- 14
- 15
- 16
- 17
- 18
- 19
- 20
- 21
- 22
- 23
- 24
- 25
- 26
- 27
- 28
- 29
- 30
- 31
- 32
- 33
- 34
- 35
- 36
- 37
- 38
- 39
- 40
5.2 实现代码生成器
上面已经将Prompt的使用介绍得比较清楚了,接着我们可以使用Prompt来创建一个代码生成器的接口,通过传入描述消息、语言信息和方法名称来得到响应代码。提示词模板code.st文件内容如下:
/**
  * @language {language}
  * @method {methodName}
  * @describe {description}
  *
  */
- 1
- 2
- 3
- 4
- 5
- 6
接口代码如下:
    @Value("classpath:code.st")
    private Resource codeTemplate;

    @GetMapping("/code")
    public String generateCode(@RequestParam String description, @RequestParam String language, @RequestParam String methodName) {
        PromptTemplate promptTemplate = new PromptTemplate(codeTemplate);
        Prompt prompt = promptTemplate.create(
                Map.of("description", description, "language", language, "methodName", methodName)
        );
        ChatResponse chatResponse = chatClient.call(prompt);
        AssistantMessage assistantMessage = chatResponse.getResult().getOutput();
        return assistantMessage.getContent();
    }
- 1
- 2
- 3
- 4
- 5
- 6
- 7
- 8
- 9
- 10
- 11
- 12
- 13
- 14
效果如下:

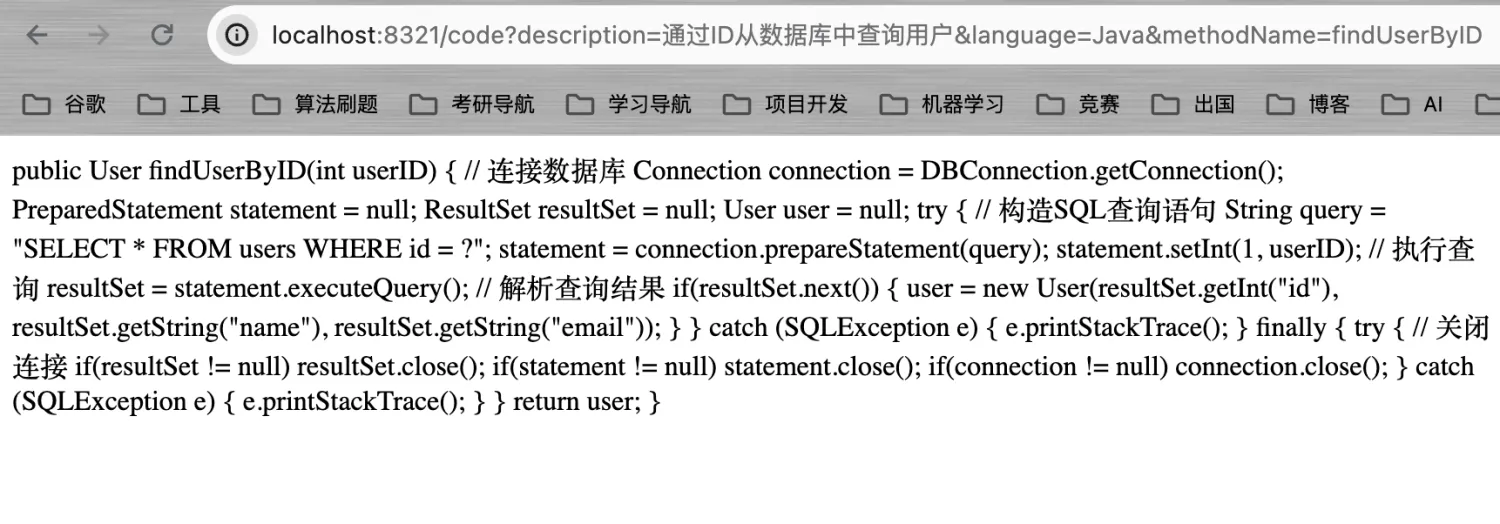
在设计代码生成器接口时,我们还可以提供我们项目代码的上下文信息,这样,AI就能根据我们项目里的代码信息,更加准确的生成我们可使用的业务代码了。
5.3 OutputParser 生成解析器
Spring AI不仅为我们提供了PromptTemplate让我们快速的构建用于输入AI的提示词,还为我们提供了OutputParser解析器,该解析器可以将AI生成的内容解析为Java Bean对象。该解析器类似于ORM框架中的Mapper,将AI的生成内容映射为Java对象。
OutputParser结合了Parser<T>和FormatProvider。
FormatProvider接口用于提供一些文本指令,来限制AI的输出格式,这里就用到了提示词,我们可以通过阅读源码来查看Spring AI内部设定的相关提示词:
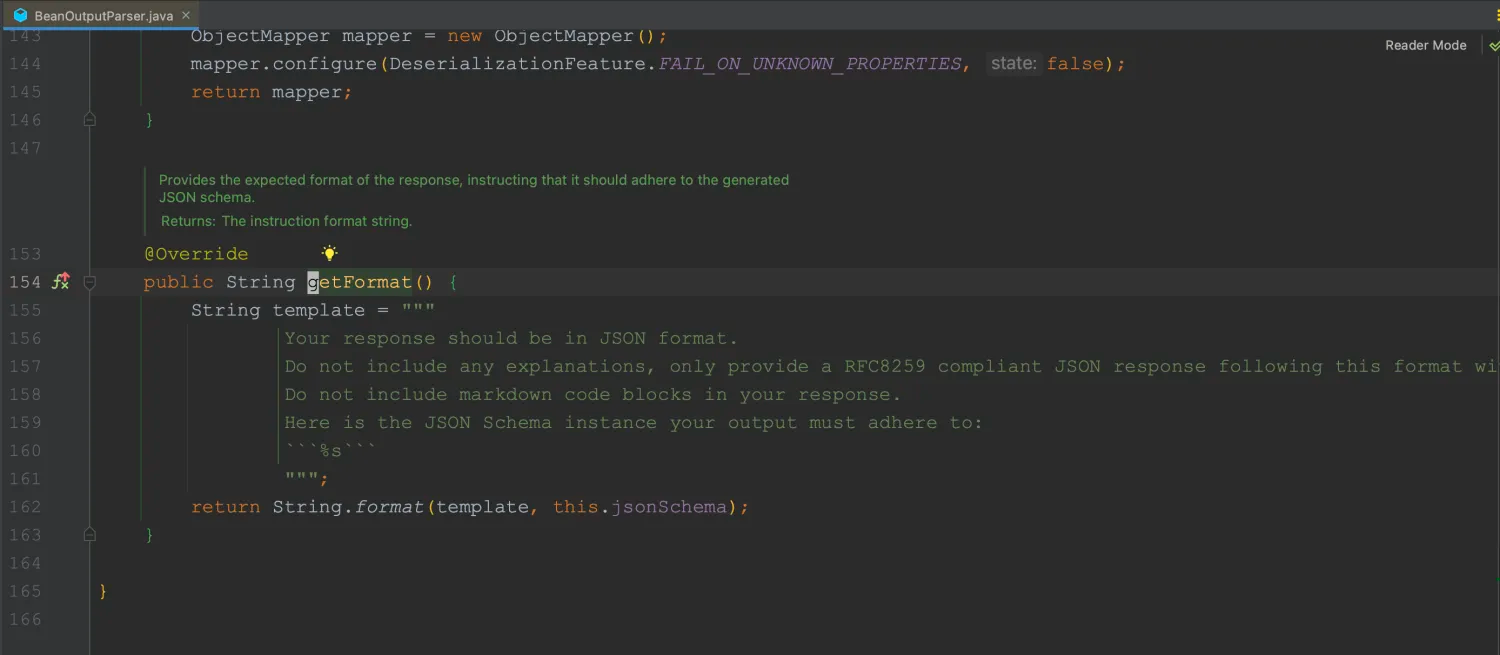
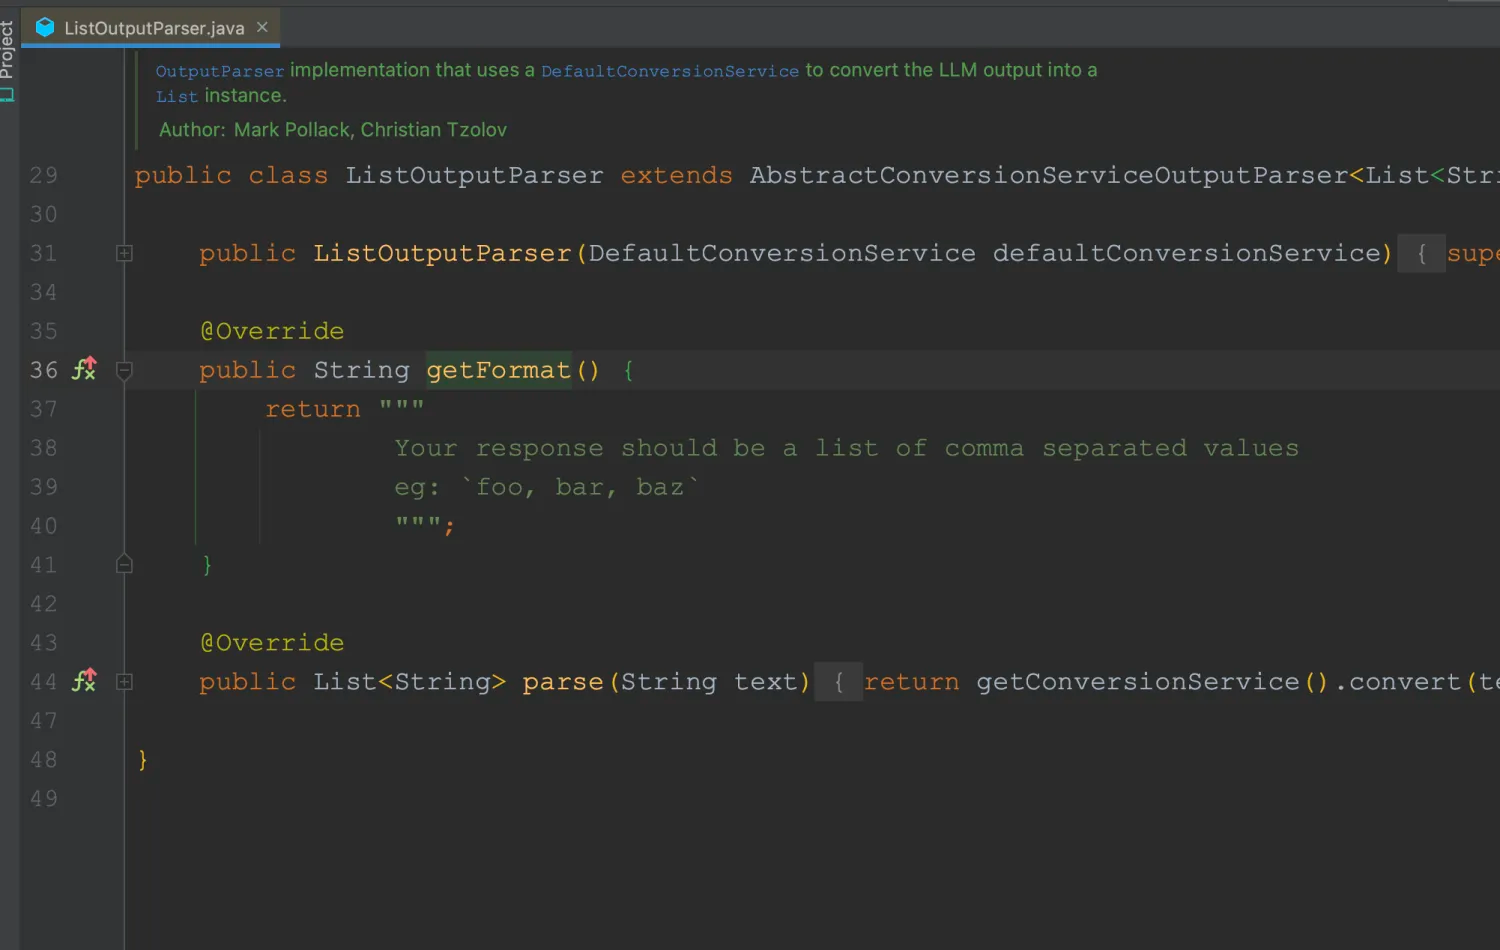
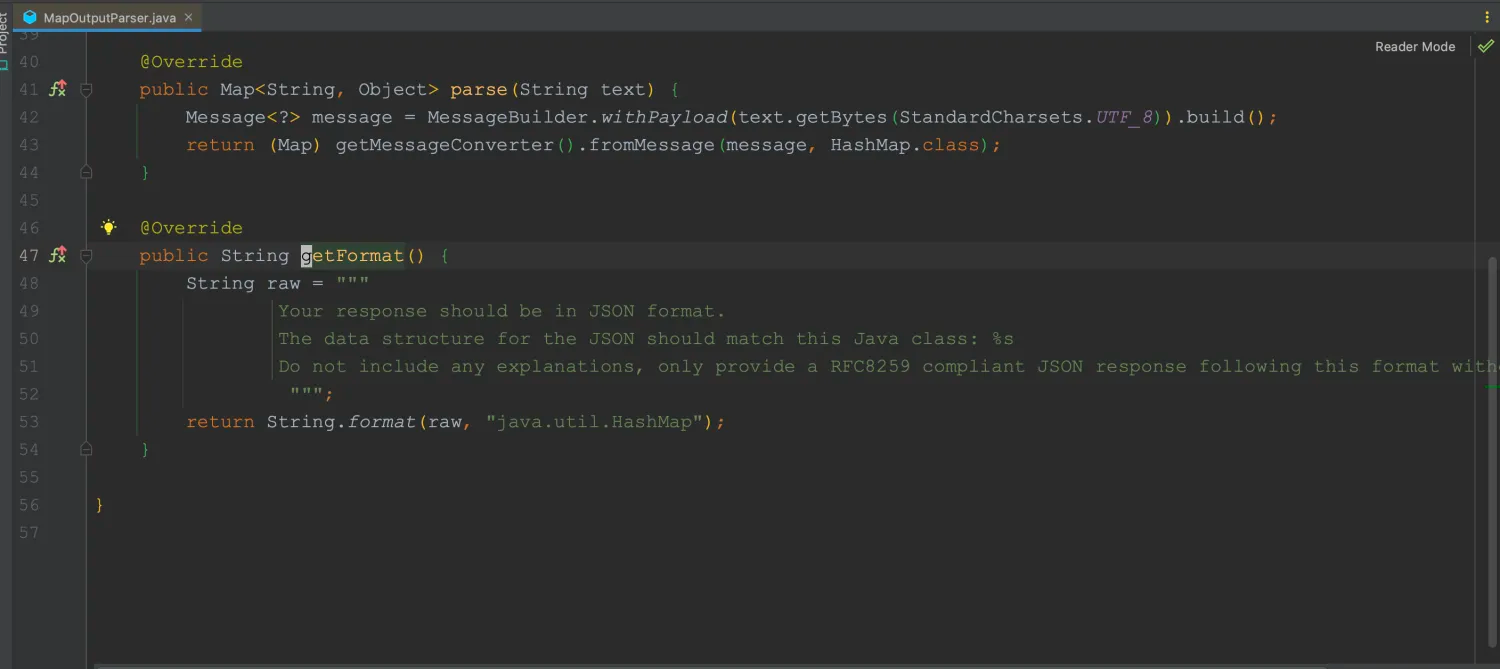
Parser<T>接口用于解析AI生成的内容并将其转换为Java对象返回。
在Spring AI中,OutputParser接口有三个具体的实现类:
BeanOutputParser: 通过让AI生成JSON格式的文本,然后通过JSON反序列化为Java对象返回;MapOutputParser: 与BeanOutputParser的功能类似,但会将JSON反序列化为Map对象;ListOutputParser: 让AI生成以逗号分隔的列表;
一般的,我们会先使用**FormatProvider**获取输出限制的提示词对AI生成的文本格式进行限制,然后用**Parser<T>**来解析我们生成的内容作为一个Bean对象。
接下来将主要演示下BeanOutputParser解析器的使用。
5.4 OutputParser解析器示例
功能描述:通过传入作者名称,返回包含作者名、该作者最受欢迎的书的名称,出版时间以及书中内容描述的Java对象。
定义一个Book类,创建构造器和相关Get、Set方法:
package com.ningning0111.model;

public class Book {
    private String author;
    private String bookName;
    private String publishedDate;
    private String description;
    public Book(){};

    public String getBookName() {
        return bookName;
    }

    public void setBookName(String bookName) {
        this.bookName = bookName;
    }

    public Book(String author, String publishedDate, String description, String bookName) {
        this.author = author;
        this.publishedDate = publishedDate;
        this.description = description;
        this.bookName = bookName;
    }

    public String getAuthor() {
        return author;
    }

    public String getPublishedDate() {
        return publishedDate;
    }

    public String getDescription() {
        return description;
    }

    public void setAuthor(String author) {
        this.author = author;
    }

    public void setPublishedDate(String publishedDate) {
        this.publishedDate = publishedDate;
    }

    public void setDescription(String description) {
        this.description = description;
    }
}
- 1
- 2
- 3
- 4
- 5
- 6
- 7
- 8
- 9
- 10
- 11
- 12
- 13
- 14
- 15
- 16
- 17
- 18
- 19
- 20
- 21
- 22
- 23
- 24
- 25
- 26
- 27
- 28
- 29
- 30
- 31
- 32
- 33
- 34
- 35
- 36
- 37
- 38
- 39
- 40
- 41
- 42
- 43
- 44
- 45
- 46
- 47
- 48
- 49
接口代码:
    @GetMapping("/bean")
    public Book getBookByAuthor(String author) {
        final String template = """
                        请告诉我{author}最受欢迎的书是哪本?什么时间出版的?书的内容描述了什么?
                        {format}
                """;
        // 定义一个输出解析器
        OutputParser<Book> bookParser = new BeanOutputParser<>(Book.class);
        PromptTemplate promptTemplate = new PromptTemplate(template);
        Prompt prompt = promptTemplate.create(Map.of("author", author, "format", bookParser.getFormat()));
        ChatResponse chatResponse = chatClient.call(prompt);
        AssistantMessage assistantMessage = chatResponse.getResult().getOutput();
        // 解析为一个Bean对象
        Book book = bookParser.parse(assistantMessage.getContent());
        return book;

    }
- 1
- 2
- 3
- 4
- 5
- 6
- 7
- 8
- 9
- 10
- 11
- 12
- 13
- 14
- 15
- 16
- 17
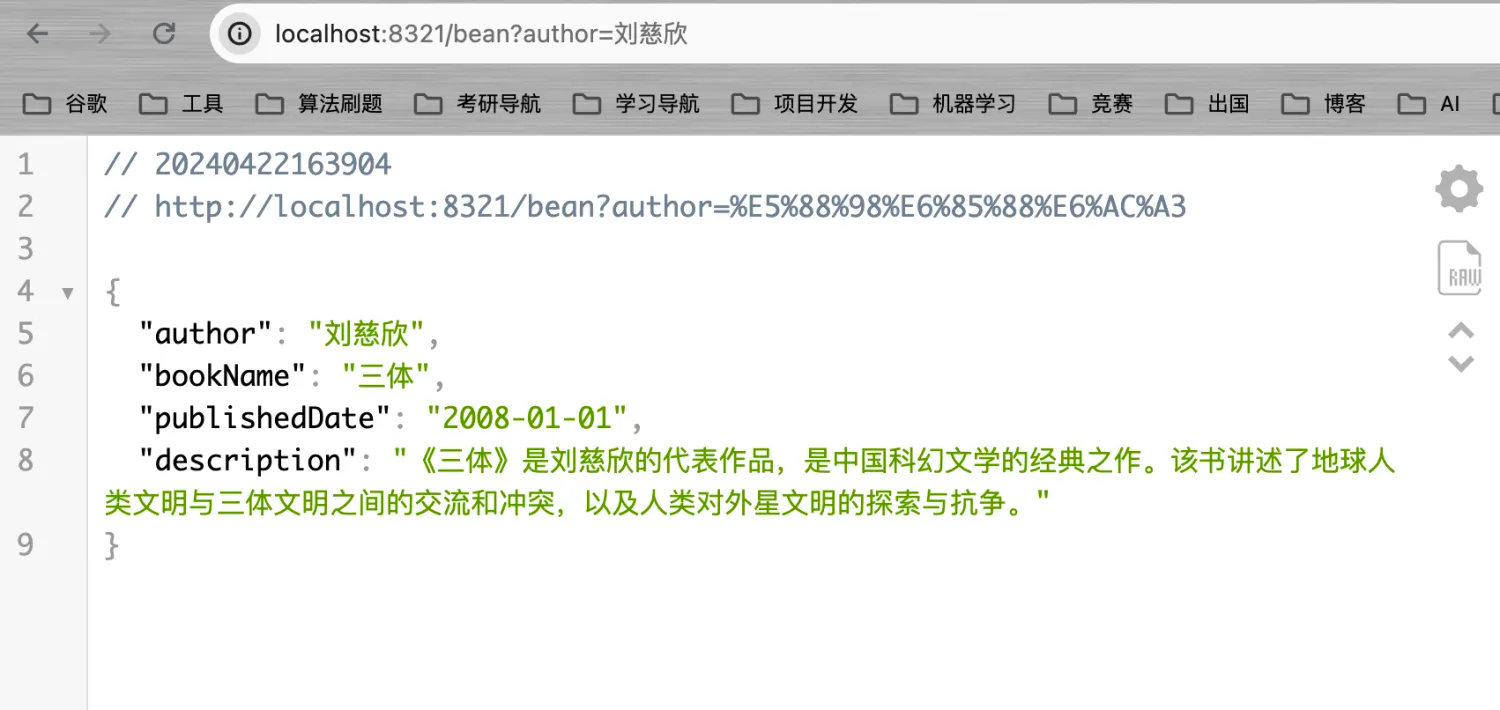
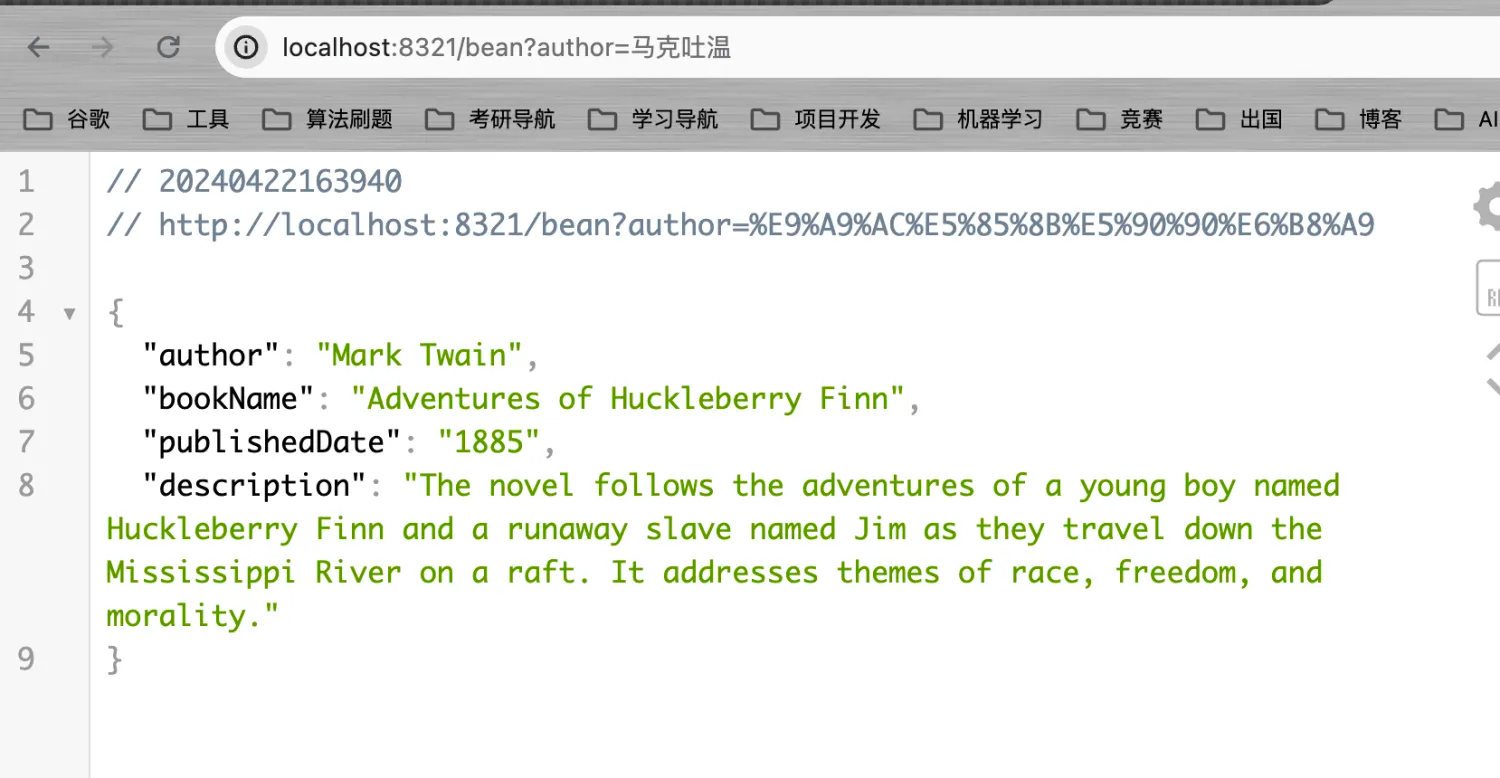
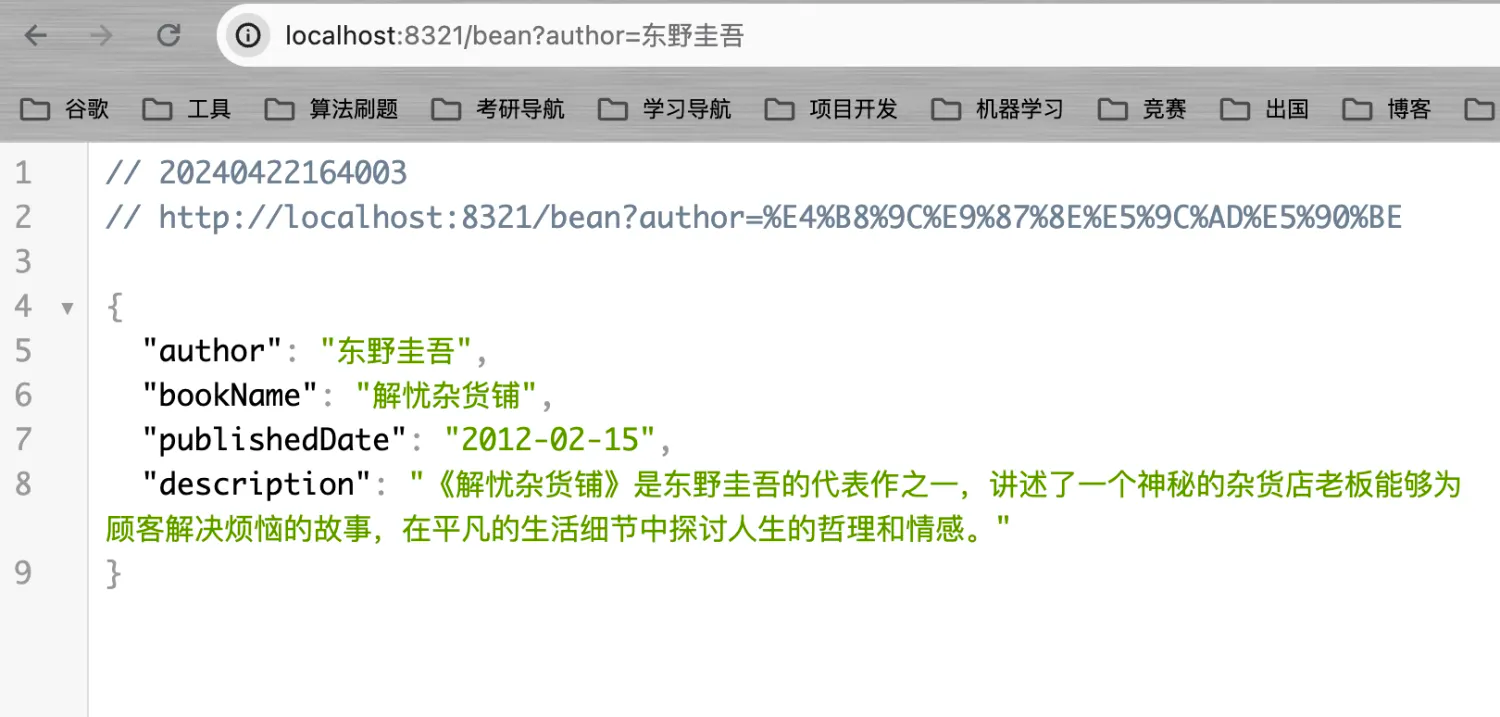
可以看到,我们通过提示词对AI生成的内容格式进行限制后,就能很轻松地将输出内容转换为Java对象供我们使用了。


