
- 1IOS自动化测试环境搭建(Python & Java)_python ios 自动化测试
- 2大模型时代,目标检测任务会走向何方?
- 3SpringBoot-03 | SpringBoot自动配置_springboot3.0外部自动配置类
- 4312. 戳气球(区间dp)_打气球区间dp
- 5IT入门知识第七部分《移动开发》(7/10)
- 6苹果系统macOS 中安装 StableDiffusionWebUI 的终极指南_mac stable-diffusion-webui
- 7自动化测试基础——Pytest测试框架_pytest框架
- 8html 引入vue Element ui 的方式_vue 开发实战二十一:html 项目中引入 elementui 的实现
- 9Qwen2大语言模型微调、导出、部署实践
- 108254初始化编程例题
OAuth2.0第三方微信登录_微信auth2.0
赞
踩
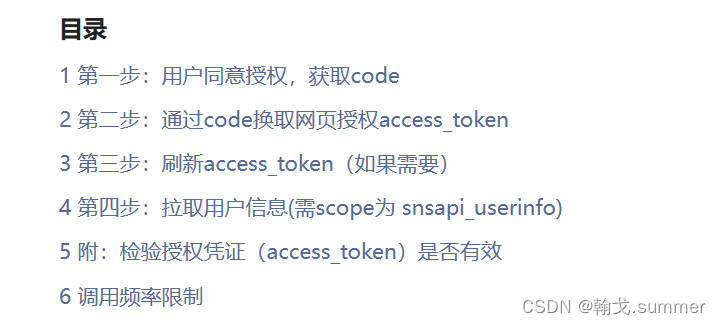
目录
拉取用户信息(需scope为 snsapi_userinfo)
OAuth2.0第三方微信登录
为什么要第三方登录
提升用户体验
第三方登录简单便捷,对于不同平台存在不同用户名和密码的问题,第三方登录正好解决,几乎可以使用一个第三方账号搞定所有的登录问题。
第三方登录可以将用户在第三方应用中的个人信息同步到登录应用中,不需要再次填写个人资料信息。
第三方登录使用的个人信息都是公用的非敏感信息,例如头像和昵称。一些敏感信息,如手机号和邮箱,第三方应用是不会对外提供的。
有利于应用发展
更加便捷的应用登录注册方式,给用户提供满意的使用体验,在一定程度上保证了应用的用户量。
第三方平台登录的介入,让应用可以直接获取用户的头像和昵称等信息,降低了应用的开发成本。
目前市面上的短信验证码费用在0.05元每条左右,用户使用第三方平台登录,能有效降低应用登录的成本。
推广第三方平台
增加用户对第三方平台的依赖性,用户使用第三方平台登录应用的次数越多,代表着该平台对用户的粘性越高。
获得更广泛的影响力,只要用户使用提供第三方平台登录的应用,那么这个第三方平台就会被用户浏览,有利于平台拉取新用户和促进用户活跃度。
OAuth2.0是什么
OAuth(Open Authotization)是一个关于授权的开放网络标准,允许用户授权第三方应用访问存储在另外的服务提供者上的信息,而且不需要将用户名和密码提供给第三方应用。OAuth在全世界得到广泛应用,目前的版本是2.0版本。
协议特点:
简单:不论是OAuth服务的提供者还是应用的开发者,都是很容易理解和使用的。
安全:没有涉及到用户的敏感信息,安全性高。
开放:任何的服务提供商都可以实现OAuth,任何的软件开发商都可以使用OAuth。
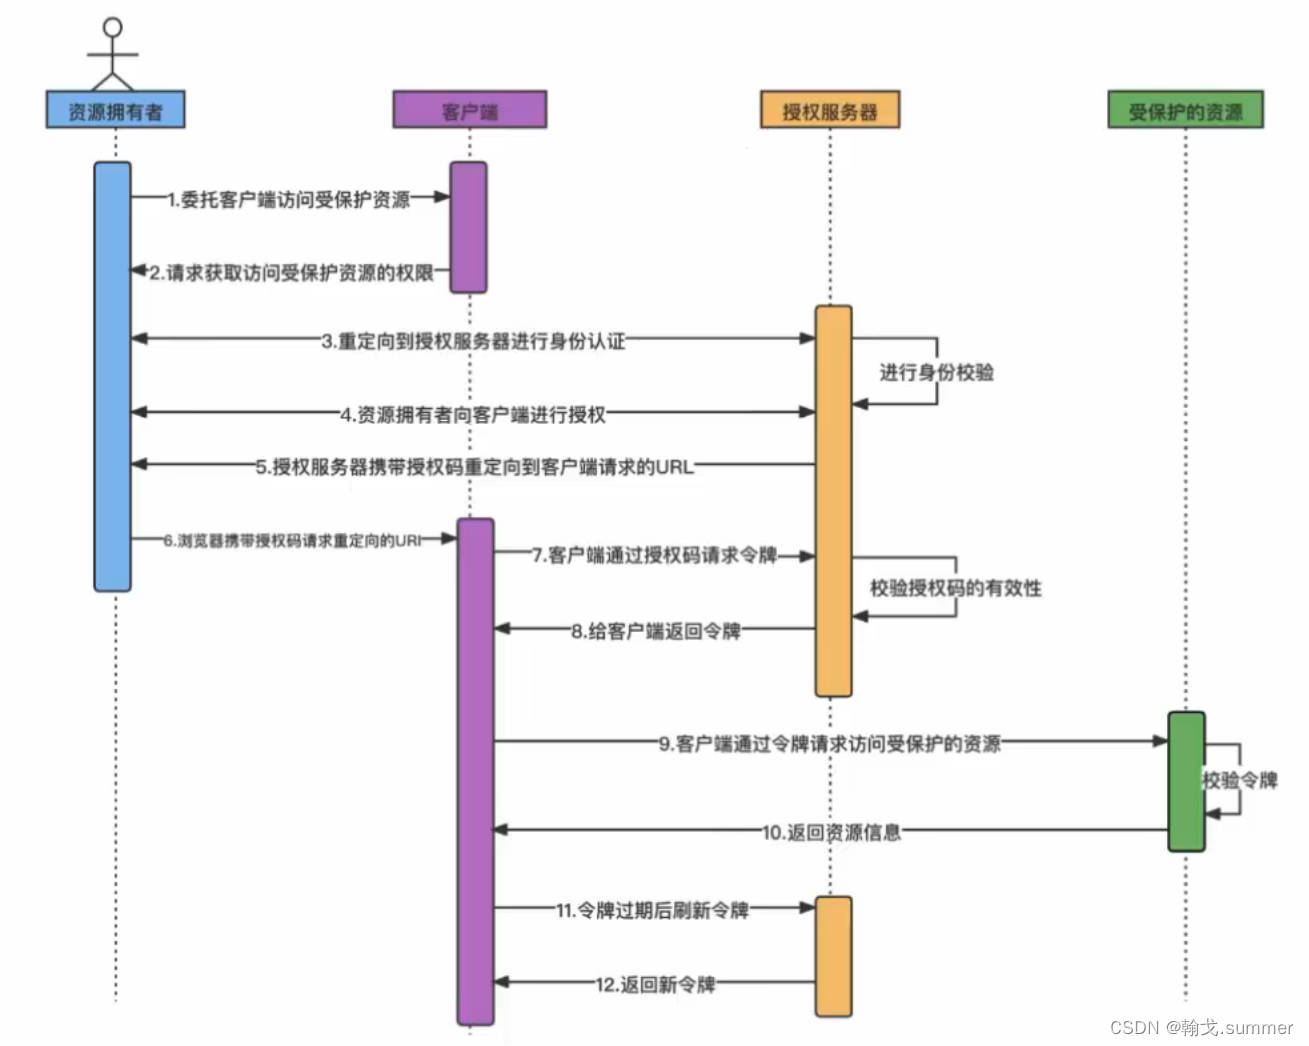
OAuth2.0角色说明
客户端:本身不存储资源,需要通过资源拥有者授权去请求资源服务器的资源。
资源拥有者:通常为用户,也可以是应用程序,即资源的拥有者。
授权服务器:用于服务提供商对资源拥有者的身份进行认证、对访问的资源进行授权,认证成功后会给客户端发放令牌,作为客户端访问资源服务器的凭证。
资源服务器:存储资源的服务器,例如微信端存储的用户信息。
OAuth2.0授权模式
OAuth2.0有四种授权模式:授权码模式、隐式授权模式、用户名密码模式、客户端模式。
其中授权码模式是OAuth2.0目前最安全、最复杂也是最常用的授权流程。
测试公众号申请
网址:
https://mp.weixin.qq.com/debug/cgi-bin/sandbox?t=sandbox/login
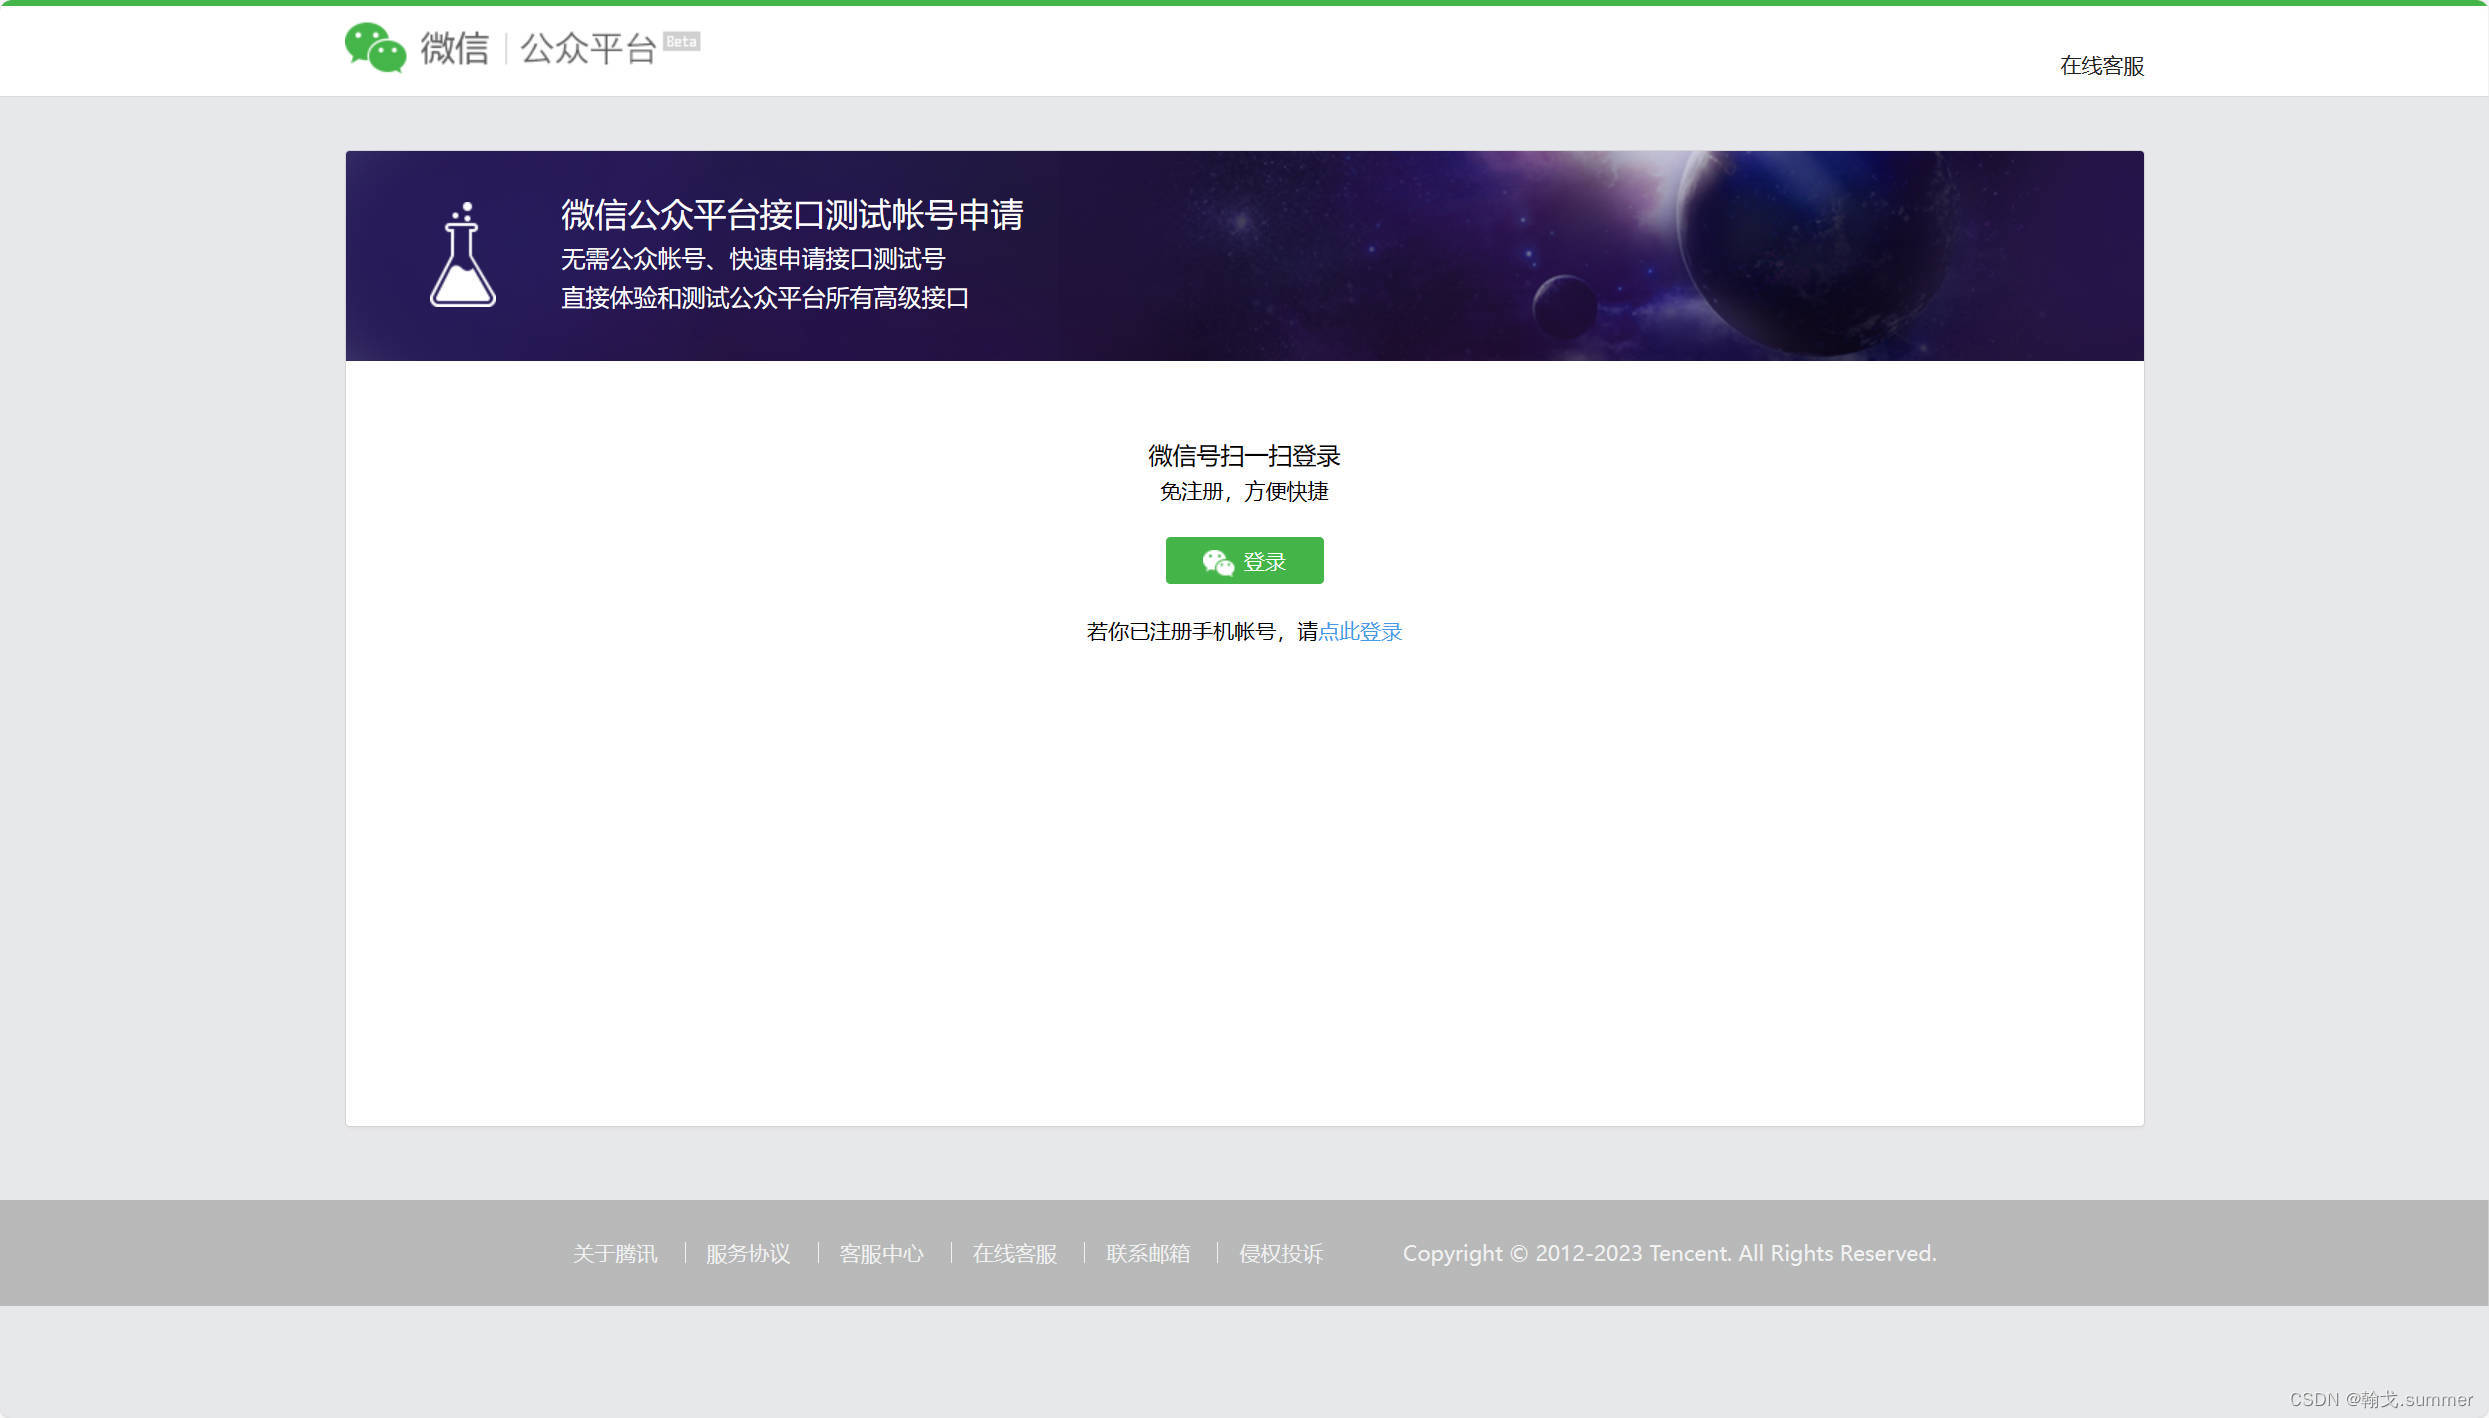
使用微信扫码登录,登录成功后微信会分配appID和appsecret。
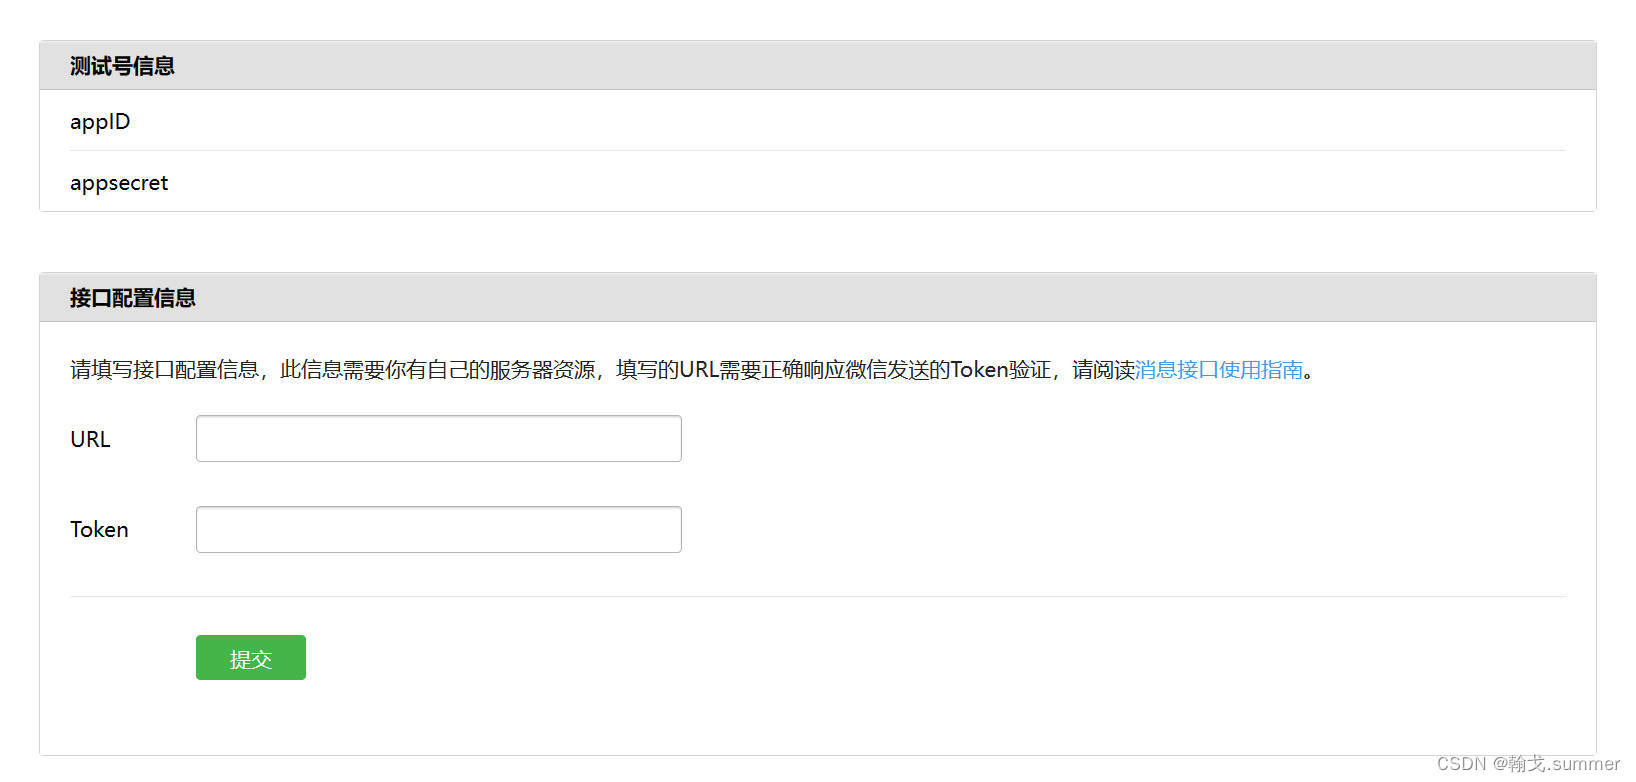
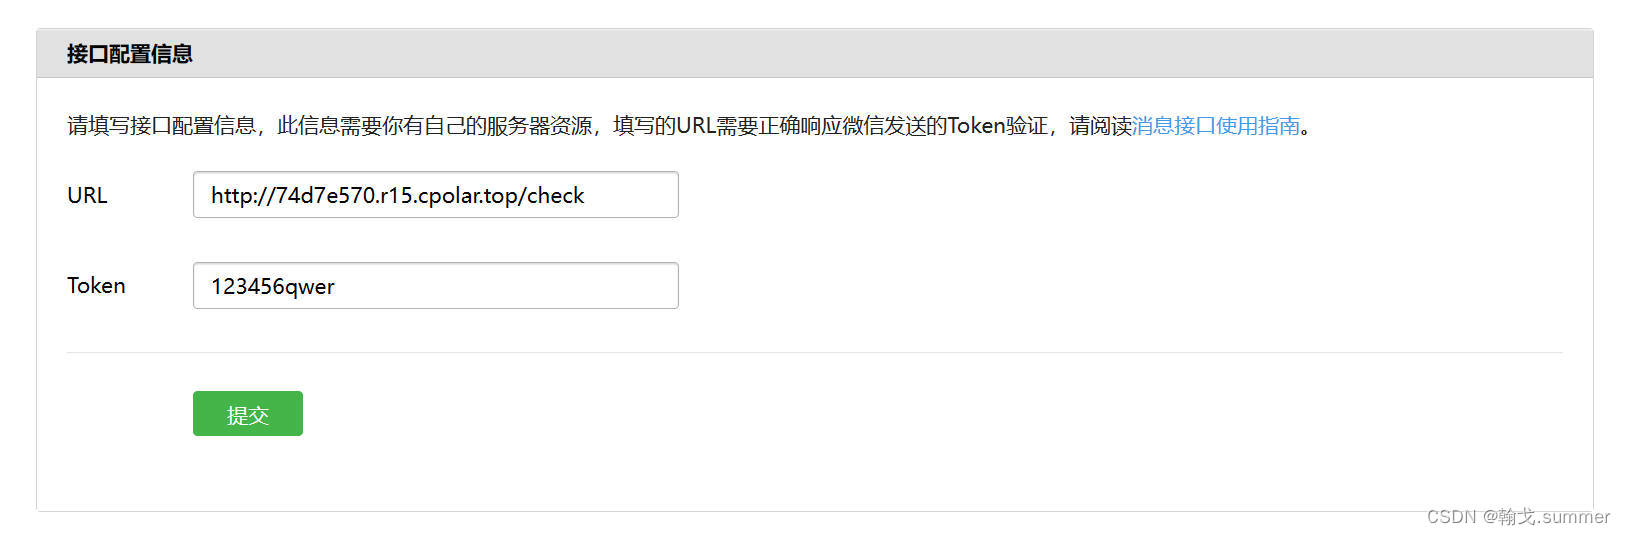
其中的URL填后端服务接口的访问URL,Token可以随便填。
当然我们直接填http://localhost:8080/check是不行的,微信访问不到。

需要用到内网穿透工具cploar
官网:
注册后,选择免费套餐,然后下载安装cploar。
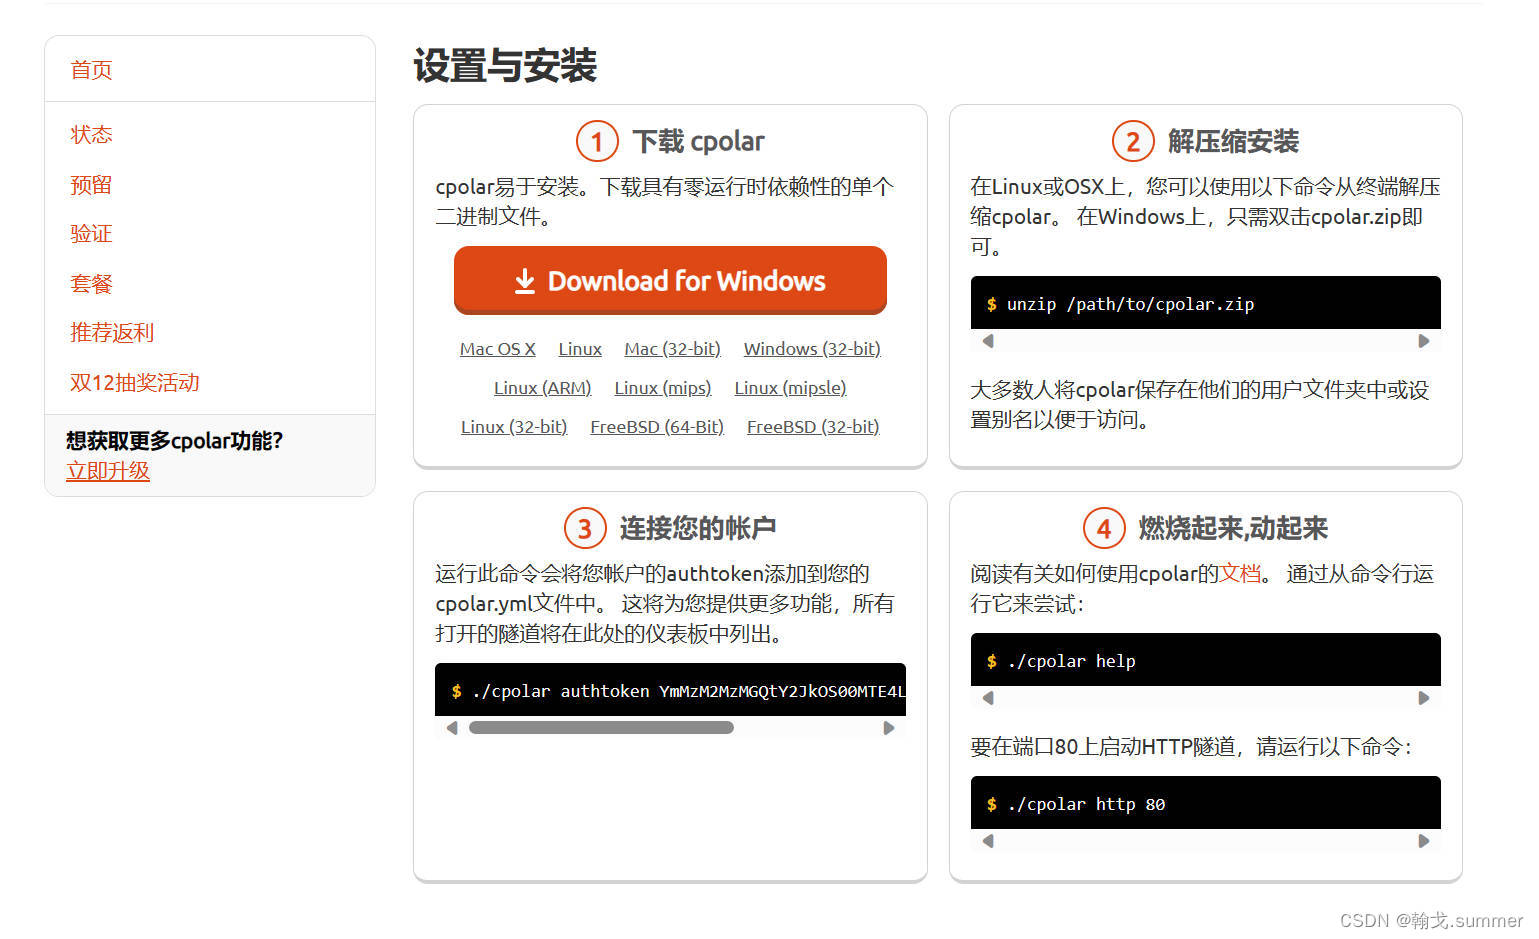
在安装目录里找到webui并打开,用注册的账号登录。
隧道名称随便填,协议填http,本地地址填后端服务的端口,然后点击创建。
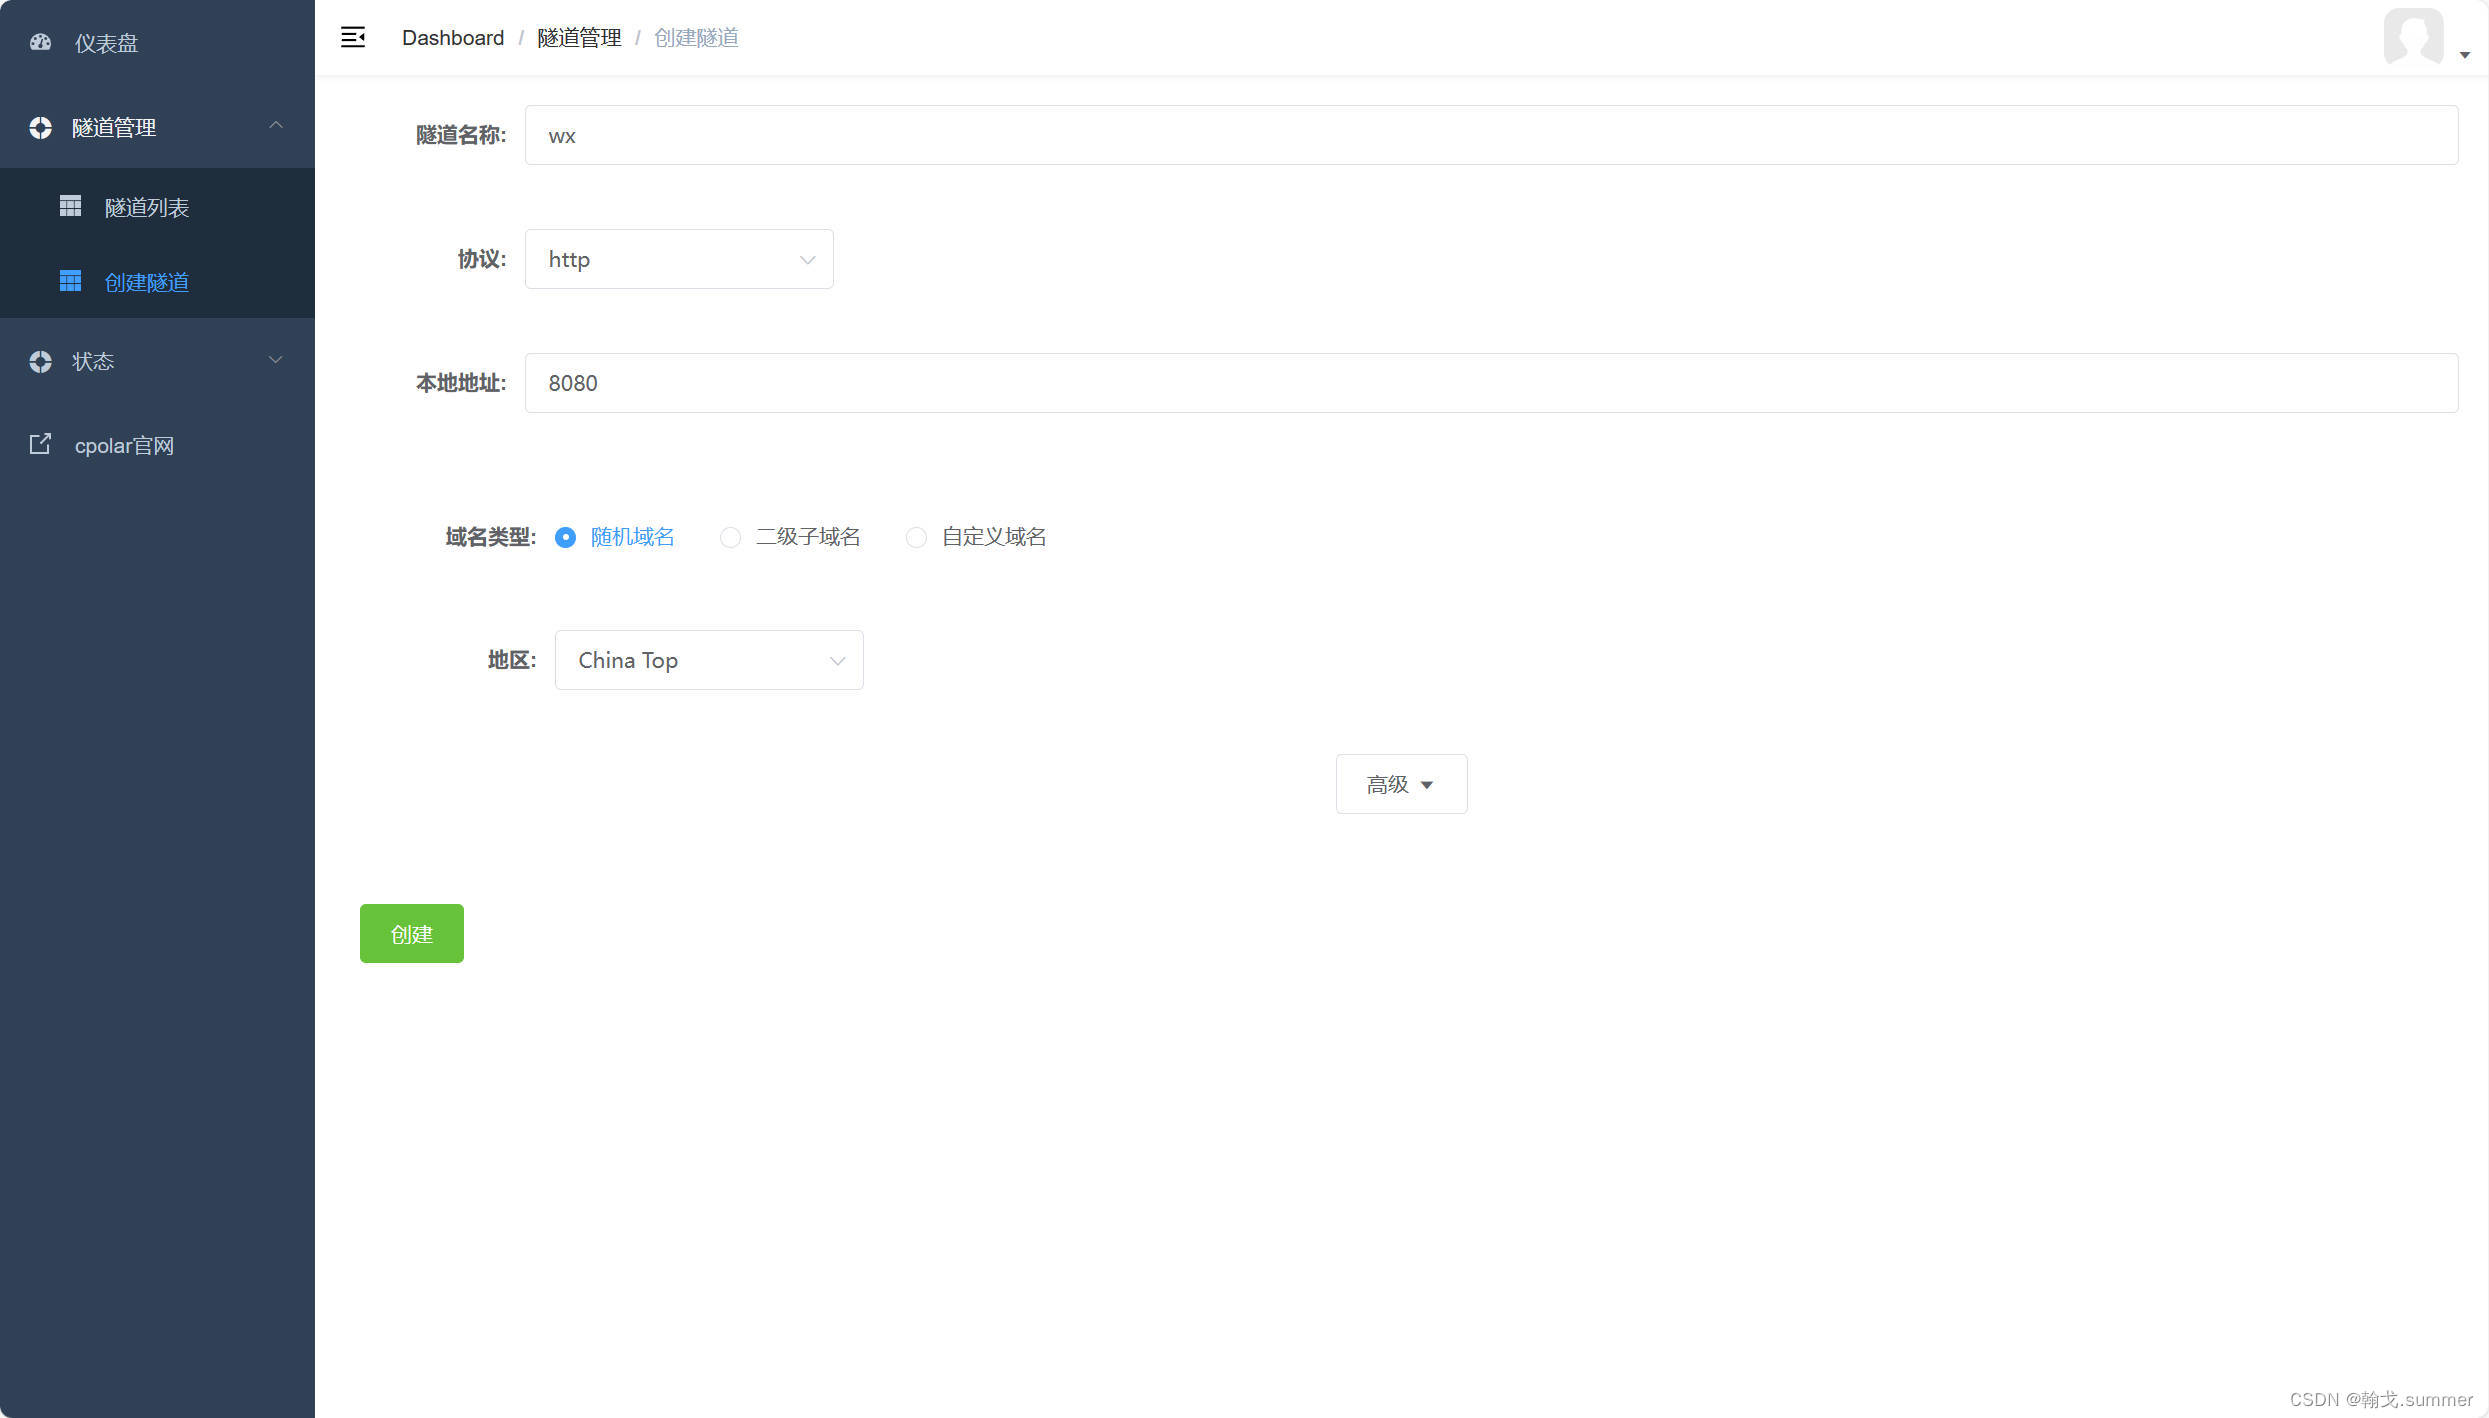
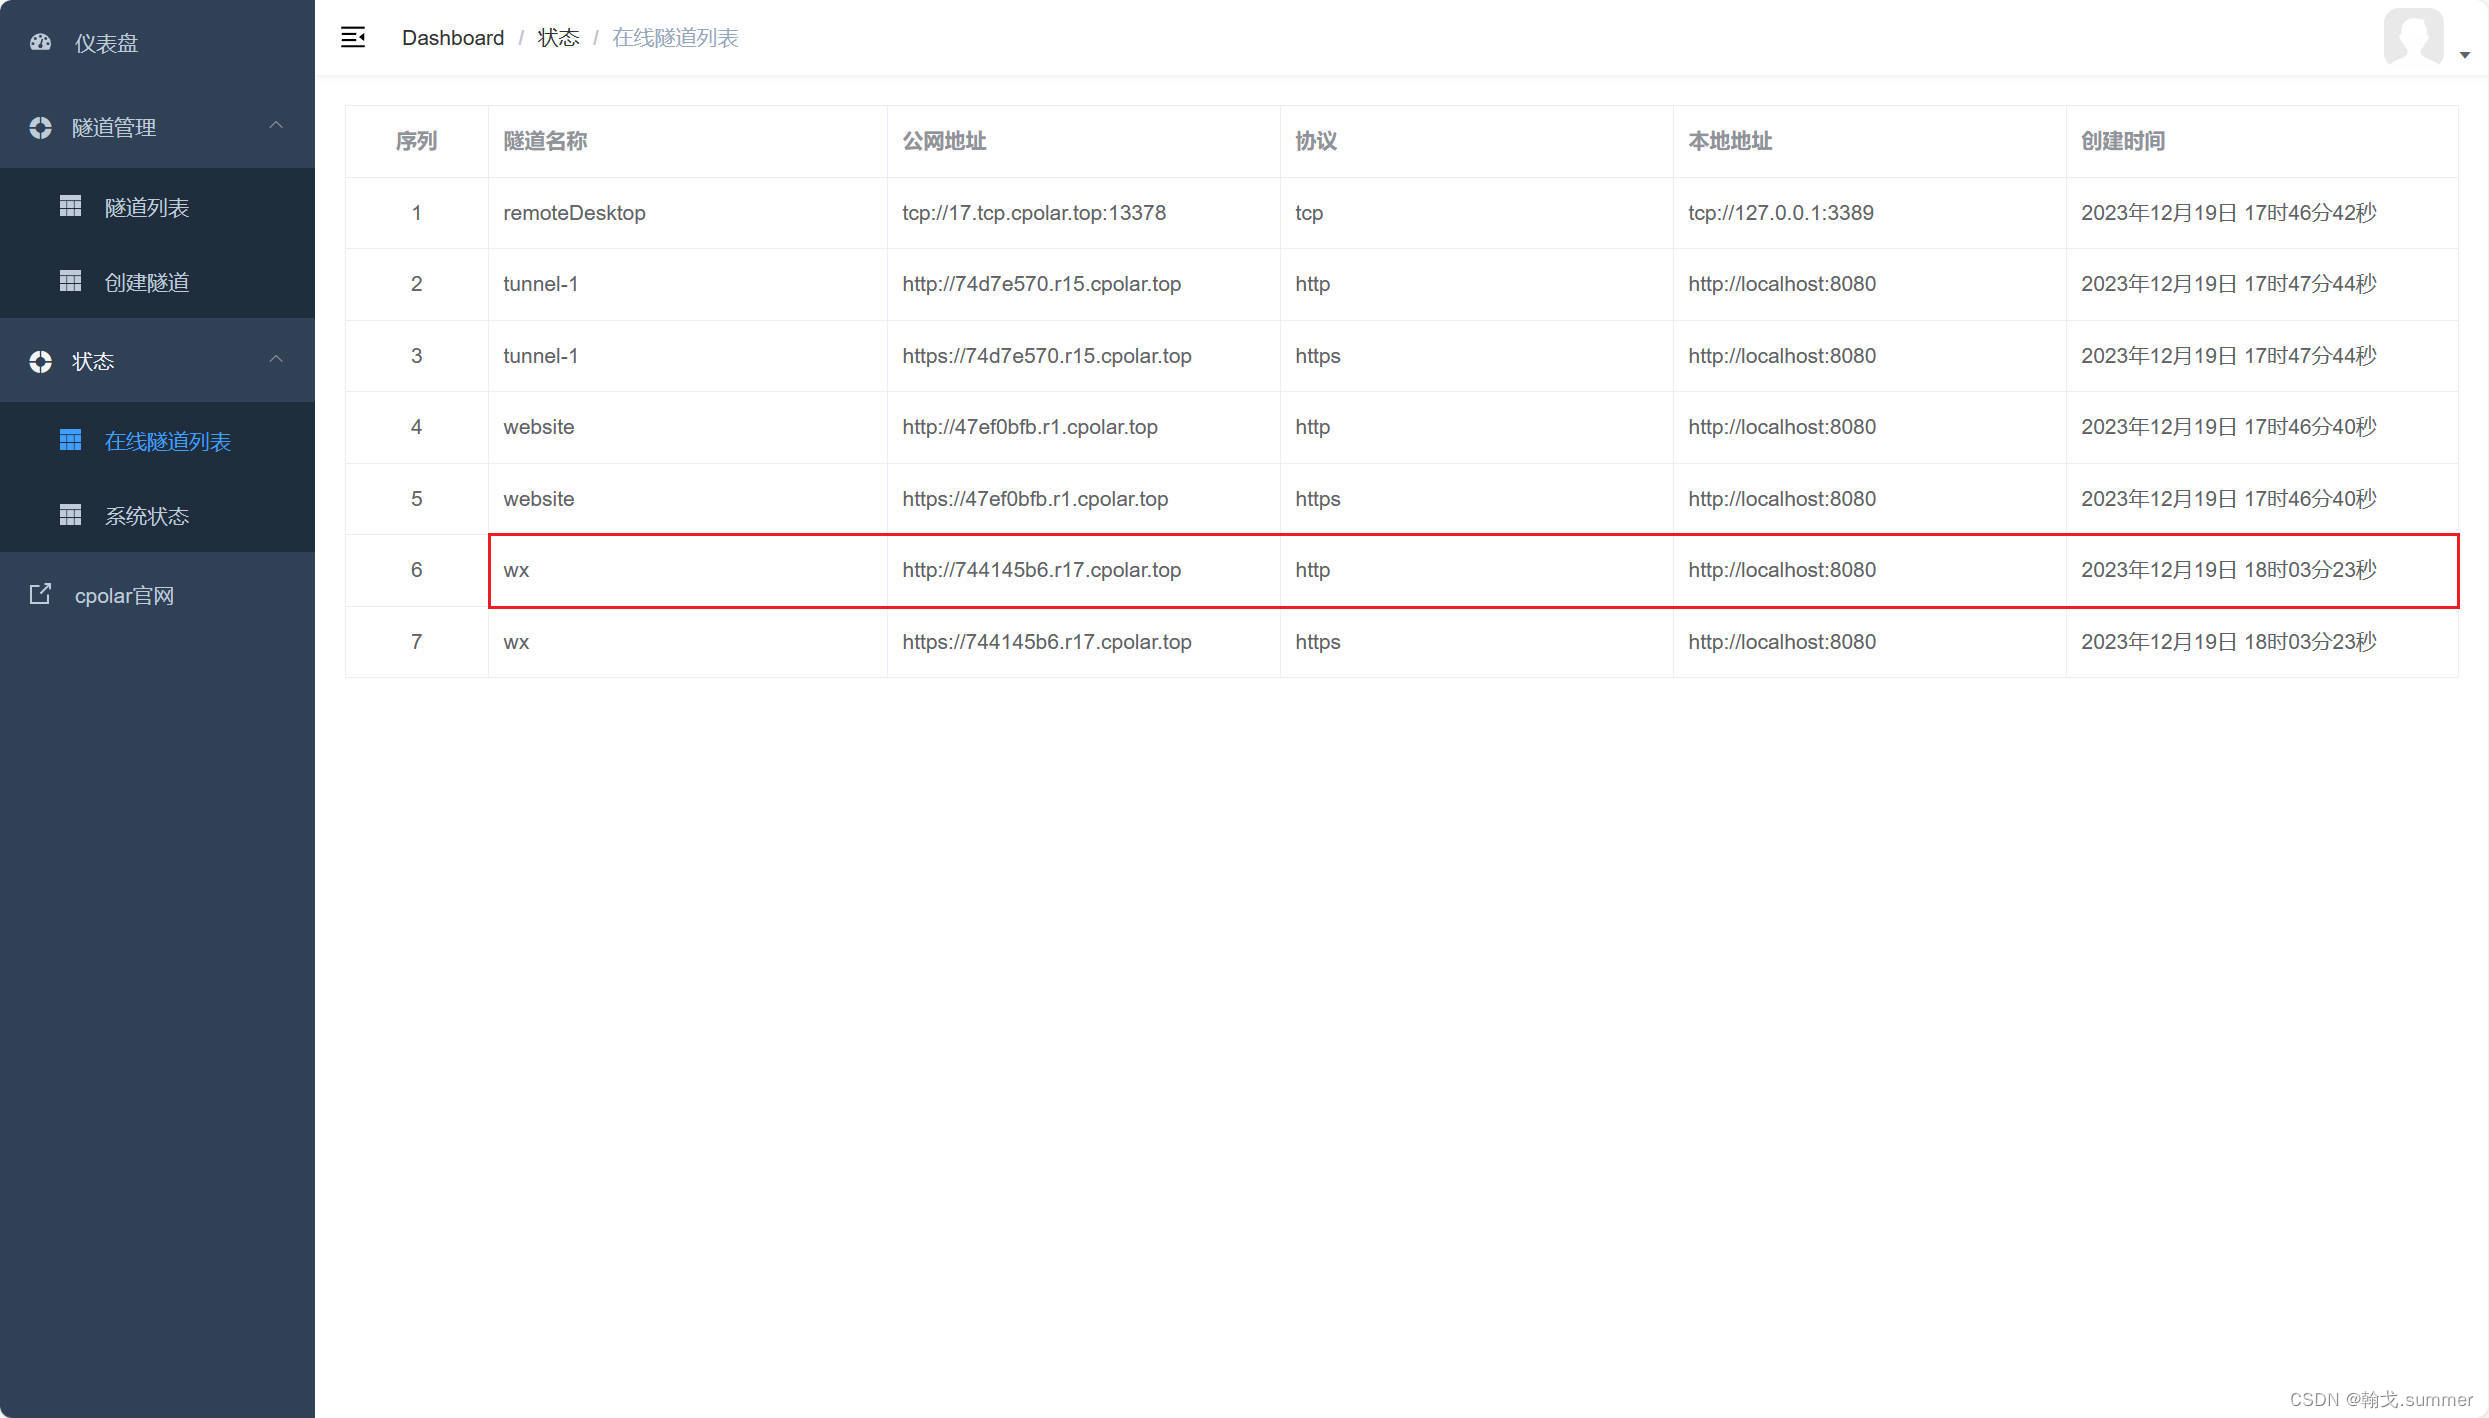
创建好后会给出对应的访问域名,使用这个域名微信才能成功访问到我们电脑上的后端服务。
微信官方的要求是:
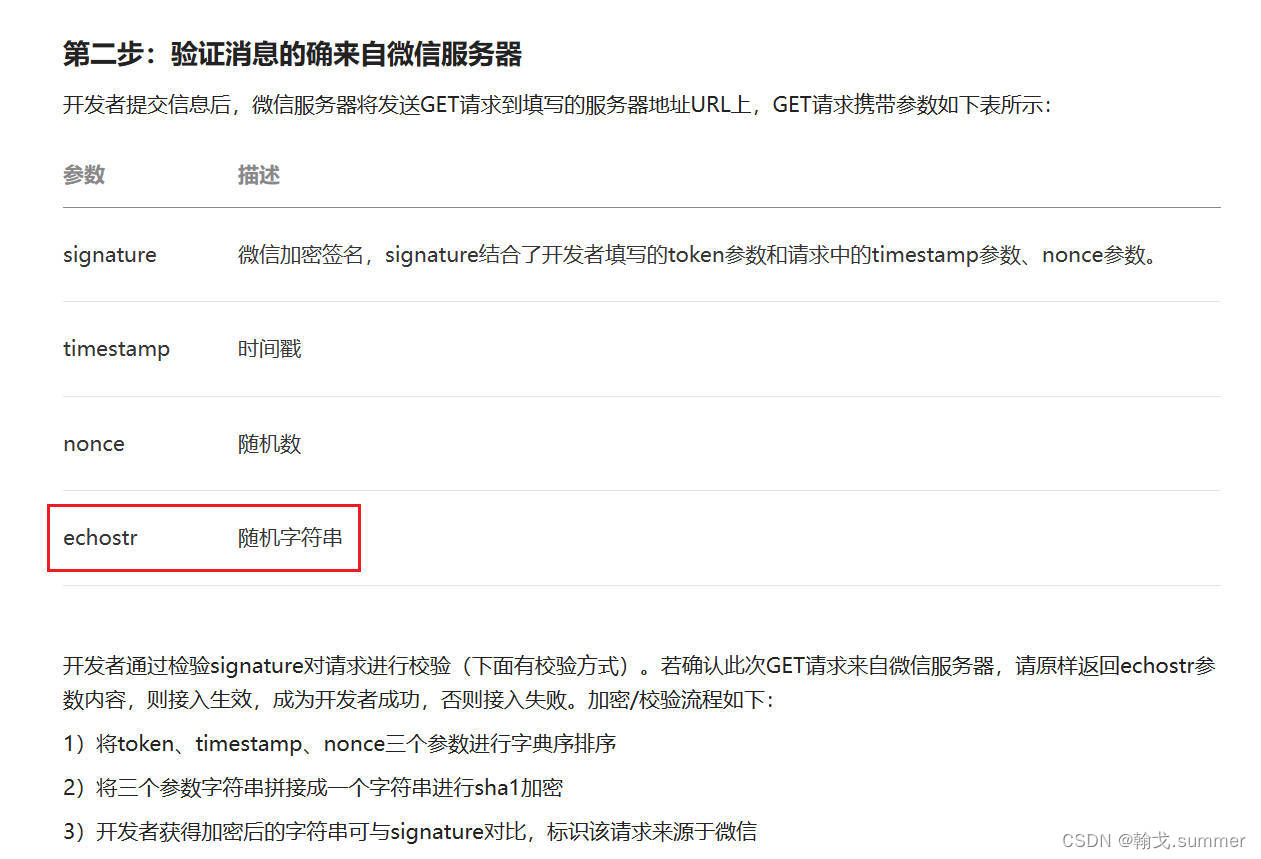
意思就是微信会去访问我们的后端服务,访问地址就是以下的URL。请求会传上面的四个参数,其中关键的是echostr参数,我们必须原样返回。
这里就不进行校验了,直接返回echostr。
- import org.springframework.web.bind.annotation.GetMapping;
- import org.springframework.web.bind.annotation.RestController;
-
- @RestController
- public class WxController {
-
- @GetMapping("/check")
- public String check(String signature, String timestamp, String nonce, String echostr) {
-
- // 校验
-
- return echostr;
- }
- }
点击提交,提示配置成功就可以了。
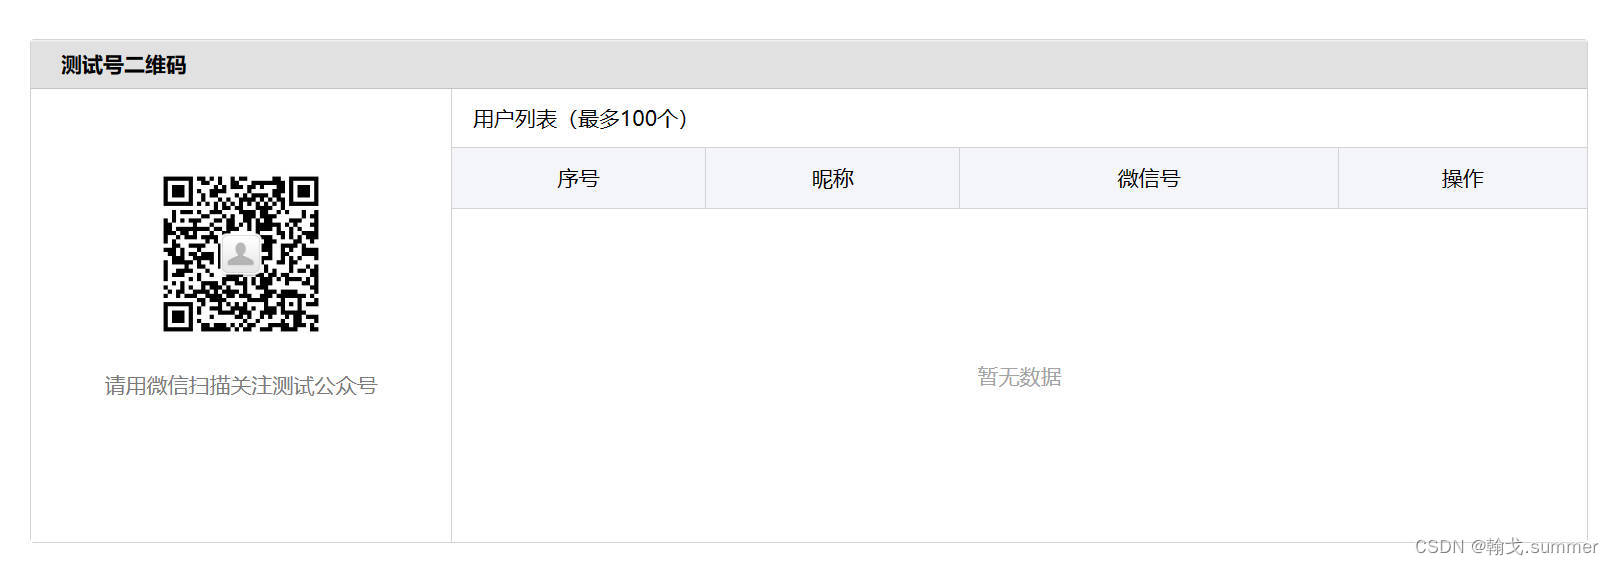
测试号二维码,用微信扫一下关注就行了。
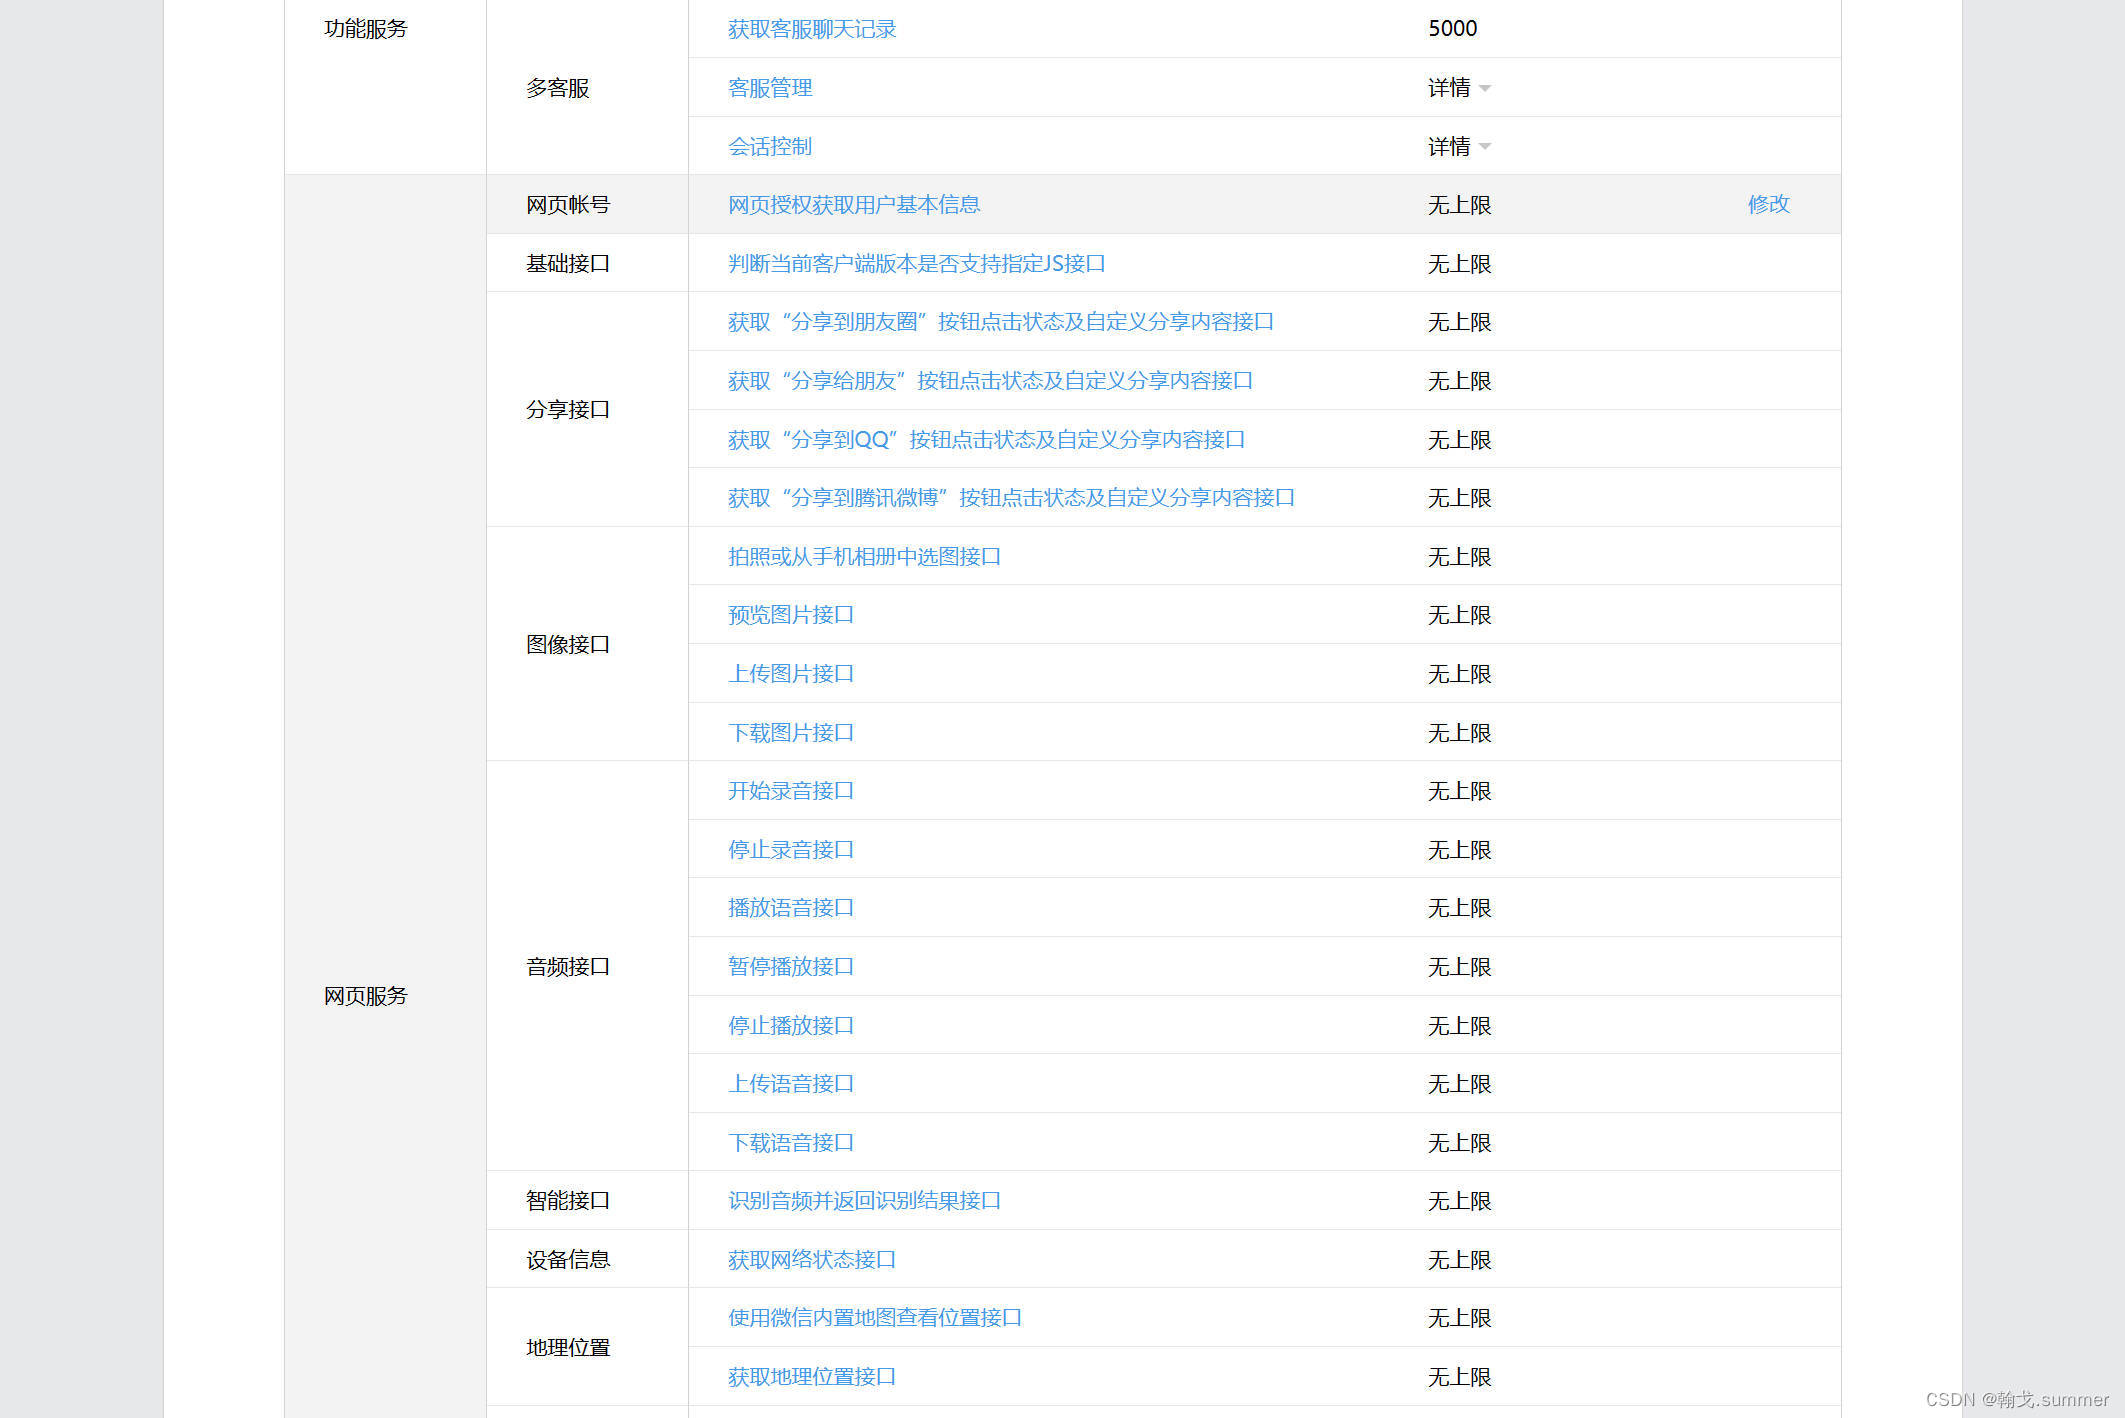
往下翻,找到网页服务 => 网页账号 => 修改。
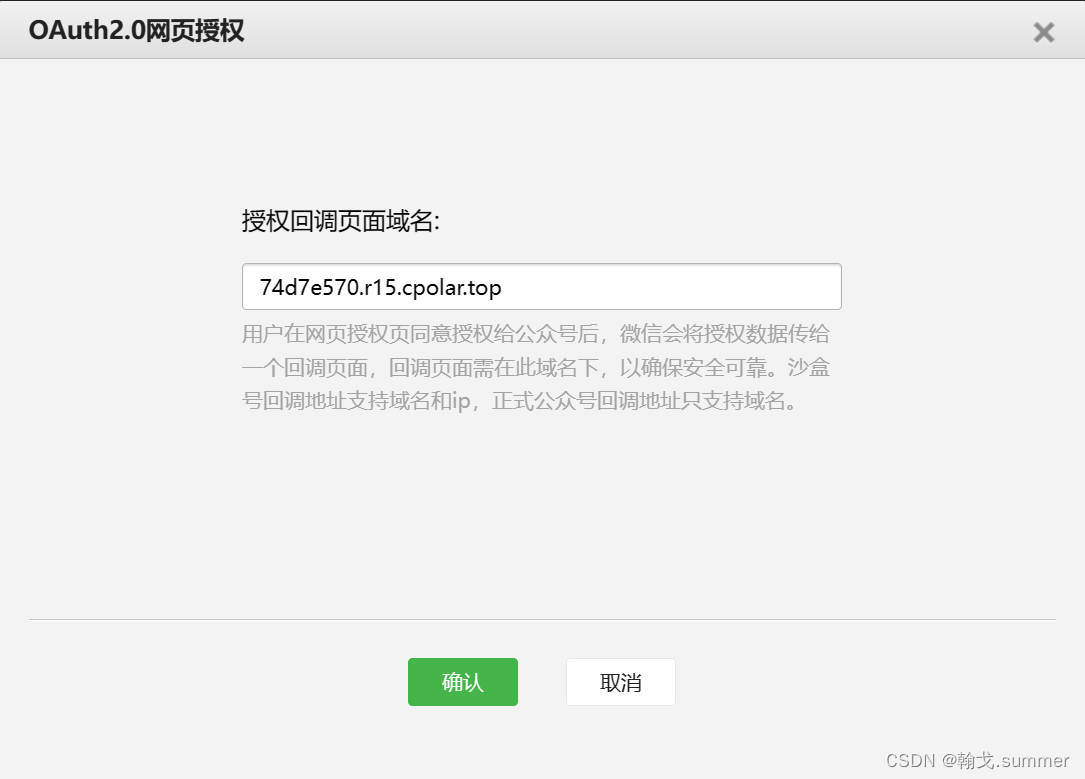
填回调域名
以下案例会用到的依赖:
- <dependency>
- <groupId>org.springframework.boot</groupId>
- <artifactId>spring-boot-starter-web</artifactId>
- </dependency>
-
- <dependency>
- <groupId>org.apache.httpcomponents</groupId>
- <artifactId>httpclient</artifactId>
- <version>4.5.13</version>
- </dependency>
-
- <dependency>
- <groupId>cn.hutool</groupId>
- <artifactId>hutool-all</artifactId>
- <version>5.8.23</version>
- </dependency>
-
- <dependency>
- <groupId>com.google.zxing</groupId>
- <artifactId>core</artifactId>
- <version>3.3.3</version>
- </dependency>
-
- <dependency>
- <groupId>com.alibaba</groupId>
- <artifactId>fastjson</artifactId>
- <version>1.2.83</version>
- </dependency>
-
- <dependency>
- <groupId>org.project-lombok</groupId>
- <artifactId>lombok</artifactId>
- <optional>true</optional>
- </dependency>
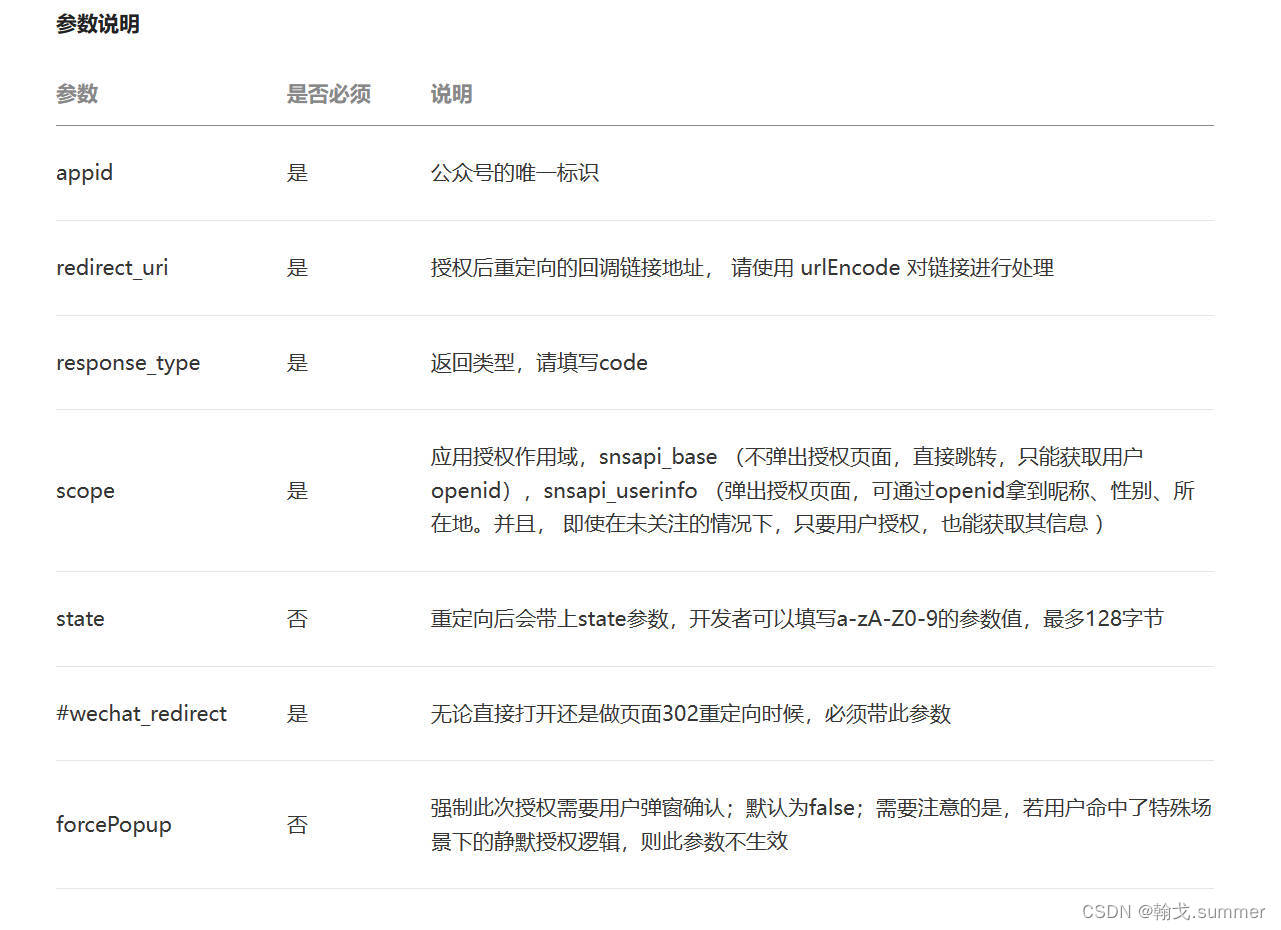
用户同意授权,获取code
在确保微信公众账号拥有授权作用域(scope参数)的权限的前提下(已认证服务号,默认拥有scope参数中的snsapi_base和snsapi_userinfo 权限),引导关注者打开如下页面:
https://open.weixin.qq.com/connect/oauth2/authorize?appid=APPID&redirect_uri=REDIRECT_URI&response_type=code&scope=SCOPE&state=STATE#wechat_redirect
用户在点击微信登录的时候,访问/wxLogin接口,展示登录二维码。
需要用到Hutool工具包来生成二维码
https://blog.csdn.net/qq_74312711/article/details/134885930?spm=1001.2014.3001.5502
- import cn.hutool.extra.qrcode.QrCodeUtil;
- import jakarta.servlet.http.HttpServletResponse;
- import lombok.RequiredArgsConstructor;
- import org.springframework.web.bind.annotation.GetMapping;
- import org.springframework.web.bind.annotation.RestController;
-
- import java.io.IOException;
- import java.net.URLEncoder;
- import java.nio.charset.StandardCharsets;
-
- @RestController
- @RequiredArgsConstructor
- public class WxController {
-
- private final HttpServletResponse response;
-
- @GetMapping("/wxLogin")
- public void wxLogin() throws IOException {
-
- // 回调地址
- String redirectUrl = URLEncoder.encode("http://74d7e570.r15.cpolar.top/wxCallBack", StandardCharsets.UTF_8);
- // 二维码地址
- String appid = "填自己的appID";
- String url = "https://open.weixin.qq.com/connect/oauth2/authorize" +
- "?appid=" + appid +
- "&redirect_uri=" + redirectUrl +
- "&response_type=code" +
- "&scope=snsapi_userinfo" +
- "&state=STATE#wechat_redirect";
- // 生成二维码并返回
- response.setContentType("image/png");
- QrCodeUtil.generate(url, 300, 300, "png", response.getOutputStream());
- }
-
- @GetMapping("/check")
- public String check(String signature, String timestamp, String nonce, String echostr) {
-
- // 校验
-
- return echostr;
- }
- }
通过code换取网页授权access_token
首先请注意,这里通过code换取的是一个特殊的网页授权access_token,与基础支持中的access_token(该access_token用于调用其他接口)不同。公众号可通过下述接口来获取网页授权access_token。如果网页授权的作用域为snsapi_base,则本步骤中获取到网页授权access_token的同时,也获取到了openid,snsapi_base式的网页授权流程即到此为止。
尤其注意:由于公众号的secret和获取到的access_token安全级别都非常高,必须只保存在服务器,不允许传给客户端。后续刷新access_token、通过access_token获取用户信息等步骤,也必须从服务器发起。
请求方法
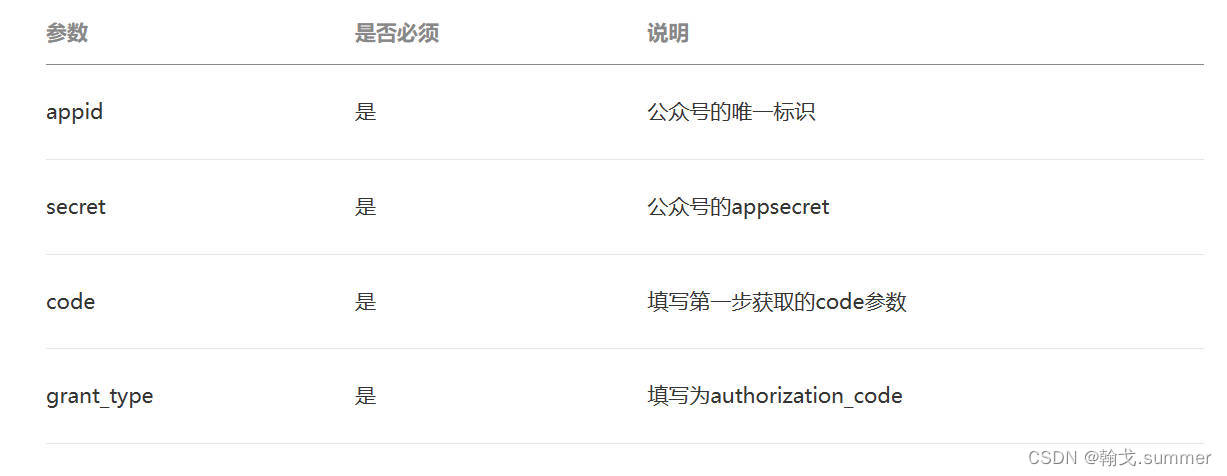
获取code后,请求以下链接获取access_token:
https://api.weixin.qq.com/sns/oauth2/access_token?appid=APPID&secret=SECRET&code=CODE&grant_type=authorization_code
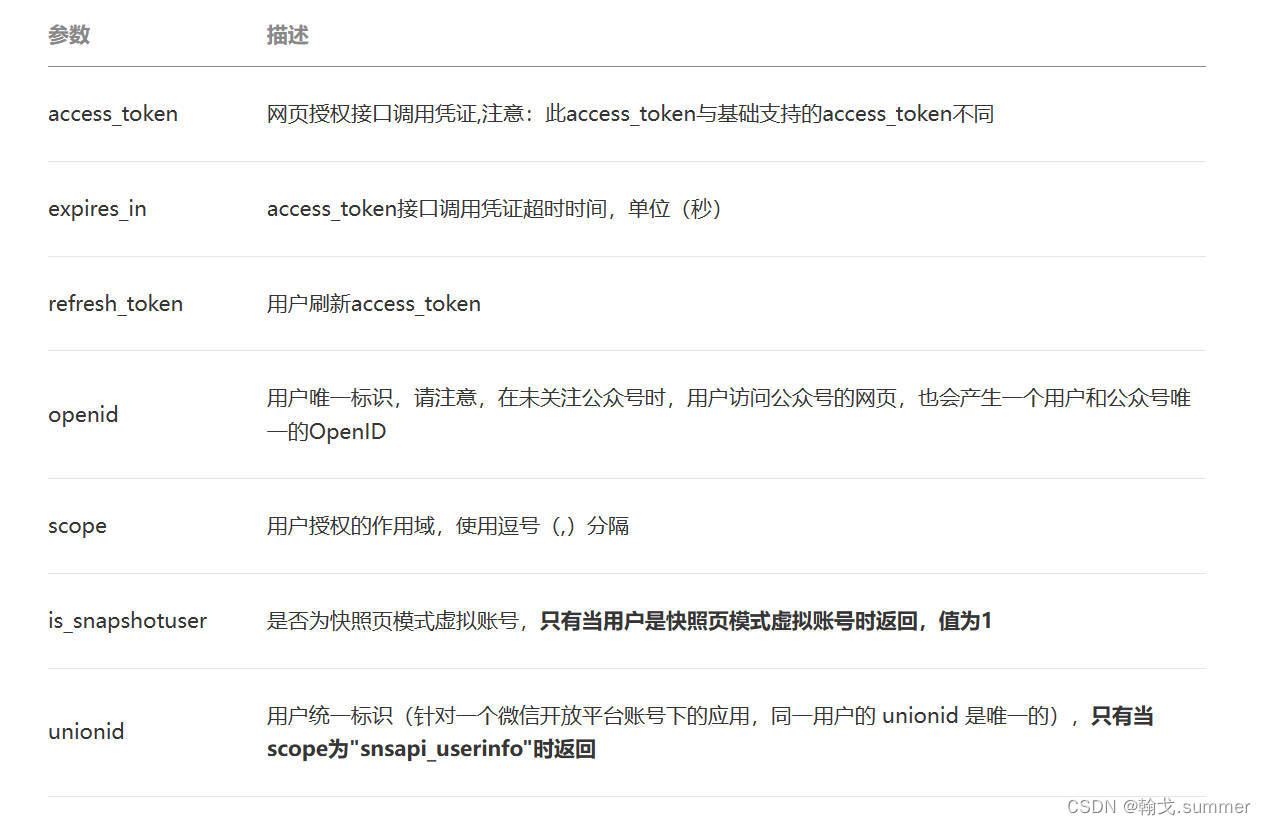
返回说明
正确时返回的JSON数据包如下:
- {
- "access_token":"ACCESS_TOKEN",
- "expires_in":7200,
- "refresh_token":"REFRESH_TOKEN",
- "openid":"OPENID",
- "scope":"SCOPE",
- "is_snapshotuser": 1,
- "unionid": "UNIONID"
- }
错误时微信会返回JSON数据包如下(示例为Code无效错误):
{"errcode":40029,"errmsg":"invalid code"}封装TokenInfo实体类:
- import lombok.AllArgsConstructor;
- import lombok.Data;
- import lombok.NoArgsConstructor;
-
- @AllArgsConstructor
- @Data
- @NoArgsConstructor
- public class TokenInfo {
- private String accessToken;
- private Integer expiresIn;
- private String refreshToken;
- private String openid;
- private String scope;
- private Integer isSnapshotuser;
- private String unionid;
- }
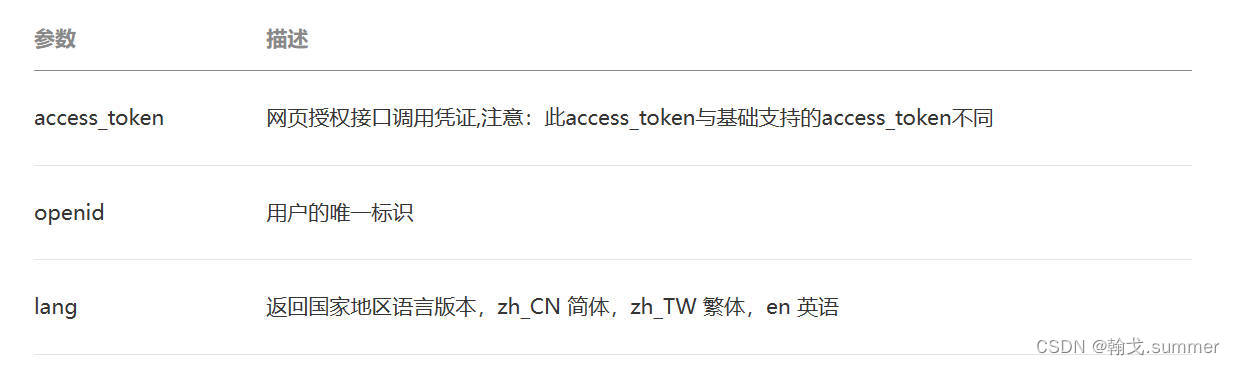
拉取用户信息(需scope为 snsapi_userinfo)
如果网页授权作用域为snsapi_userinfo,则此时开发者可以通过access_token和openid拉取用户信息了。
请求方法
http:GET(请使用https协议):
https://api.weixin.qq.com/sns/userinfo?access_token=ACCESS_TOKEN&openid=OPENID&lang=zh_CN
返回说明
正确时返回的JSON数据包如下:
- {
- "openid": "OPENID",
- "nickname": NICKNAME,
- "sex": 1,
- "province":"PROVINCE",
- "city":"CITY",
- "country":"COUNTRY",
- "headimgurl":"https://thirdwx.qlogo.cn/mmopen/g3MonUZtNHkdmzicIlibx6iaFqAc56vxLSUfpb6n5WKSYVY0ChQKkiaJSgQ1dZuTOgvLLrhJbERQQ4eMsv84eavHiaiceqxibJxCfHe/46",
- "privilege":[ "PRIVILEGE1" "PRIVILEGE2" ],
- "unionid": "o6_bmasdasdsad6_2sgVt7hMZOPfL"
- }

错误时微信会返回JSON数据包如下(示例为openid无效):
{"errcode":40003,"errmsg":" invalid openid "}封装WxUserInfo实体类:
- import lombok.AllArgsConstructor;
- import lombok.Data;
- import lombok.NoArgsConstructor;
-
- @AllArgsConstructor
- @Data
- @NoArgsConstructor
- public class WxUserInfo {
- private String openid;
- private String nickname;
- private Integer sex;
- private String province;
- private String city;
- private String country;
- private String headimgurl;
- private String privilege;
- private String unionid;
- }
回调接口/wxCallBack
- import cn.hutool.extra.qrcode.QrCodeUtil;
- import com.alibaba.fastjson.JSONObject;
- import jakarta.servlet.http.HttpServletResponse;
- import lombok.RequiredArgsConstructor;
- import org.springframework.web.bind.annotation.GetMapping;
- import org.springframework.web.bind.annotation.RestController;
-
- import java.io.IOException;
- import java.net.URLEncoder;
- import java.nio.charset.StandardCharsets;
-
- @RestController
- @RequiredArgsConstructor
- public class WxController {
-
- private final HttpServletResponse response;
-
- @GetMapping("/wxCallBack")
- public String wxCallBack(String code) throws IOException {
- WxUserInfo user = GetUserInfoUtils.getUser(code);
- return JSONObject.toJSONString(user);
- }
-
- @GetMapping("/wxLogin")
- public void wxLogin() throws IOException {
-
- // 回调地址
- String redirectUrl = URLEncoder.encode("http://74d7e570.r15.cpolar.top/wxCallBack", StandardCharsets.UTF_8);
- // 二维码地址
- String appid = "填自己的appID";
- String url = "https://open.weixin.qq.com/connect/oauth2/authorize" +
- "?appid=" + appid +
- "&redirect_uri=" + redirectUrl +
- "&response_type=code" +
- "&scope=snsapi_userinfo" +
- "&state=STATE#wechat_redirect";
- // 生成二维码并返回
- response.setContentType("image/png");
- QrCodeUtil.generate(url, 300, 300, "png", response.getOutputStream());
- }
-
- @GetMapping("/check")
- public String check(String signature, String timestamp, String nonce, String echostr) {
-
- // 校验
-
- return echostr;
- }
- }
GetUserInfoUtils
- import com.alibaba.fastjson.JSON;
- import org.apache.http.HttpResponse;
- import org.apache.http.client.methods.HttpGet;
- import org.apache.http.impl.client.CloseableHttpClient;
- import org.apache.http.impl.client.HttpClients;
- import org.apache.http.util.EntityUtils;
-
- import java.io.IOException;
-
- public class GetUserInfoUtils {
-
- public static WxUserInfo getUser(String code) throws IOException {
-
- // 构造HTTP请求
- CloseableHttpClient httpClient = HttpClients.createDefault();
- // 用code交换token
- String appid = "填自己的appID";
- String secret = "填自己的appsecret";
- String tokenUrl = "https://api.weixin.qq.com/sns/oauth2/access_token" +
- "?appid=" + appid +
- "&secret=" + secret +
- "&code=" + code +
- "&grant_type=authorization_code";
- // 发起请求
- HttpGet httpGet = new HttpGet(tokenUrl);
- String responseResult = "";
- // 接收返回的数据,转成utf-8编码
- HttpResponse response = httpClient.execute(httpGet);
- if (response.getStatusLine().getStatusCode() == 200) {
- responseResult = EntityUtils.toString(response.getEntity(), "utf-8");
- }
- // 封装到TokenInfo
- TokenInfo tokenInfo = JSON.parseObject(responseResult, TokenInfo.class);
-
- // 用access_token获取用户信息
- String userInfoUrl = "https://api.weixin.qq.com/sns/userinfo" +
- "?access_token=" + tokenInfo.getAccessToken() +
- "&openid=" + tokenInfo.getOpenid() +
- "&lang=zh_CN";
- // 发起请求
- HttpGet httpGet1 = new HttpGet(userInfoUrl);
- // 接收返回的数据,转成utf-8编码
- HttpResponse response1 = httpClient.execute(httpGet1);
- if (response.getStatusLine().getStatusCode() == 200) {
- responseResult = EntityUtils.toString(response1.getEntity(), "utf-8");
- }
- // 封装到WxUserInfo
- WxUserInfo wxUserInfo = JSON.parseObject(responseResult, WxUserInfo.class);
- return wxUserInfo;
- }
- }
开始测试
到此就可以开始测试了
打开浏览器,访问/wxLogin,出现二维码。用微信扫码登录,返回用户的信息则说明测试成功。

