- 1Installed Build Tools revision 31.0.0 is corrupted. Remove and install again using the SDK Manager
- 2升级鸿蒙系统后游戏数据会没吗,华为手机升级鸿蒙系统会清空数据吗
- 3【基础知识】extern 和 extern “C“详解_extern "c
- 4AndroidStudio的安装配置&&注意要点_android studio no windows desktop project configur
- 5android与mysql连接不上去_android – 通过LAN连接到mySQL数据库,而不使用网络服务器...
- 6最小二乘_最小二乘法范数
- 7AspectJ入门(一)
- 8埃森哲大中华区战略与咨询董事总经理陈继东:业务全面重塑,“人”要如何重塑?_埃森哲中国咨询公司董事长
- 9鸿蒙学习2-1,手机USB连接电脑实现本地模拟器功能_鸿蒙使用手机作为模拟器
- 1045个值得收藏的 CSS 形状_css长方形弯曲
K8S环境下配置SpringBoot健康检查(活性探针)_springboot 启用 liveness 和 readiness 探针
赞
踩
主要是通过
K8S的健康检查探针,对SpringBoot应用进行运行健康监控,检测pod是否存活,从而对pod进行重启之类的操作
k8s 探针配置:
kubernetes提供了三种探针(支持exec、tcp和http方式)来探测容器的状态:
LivenessProbe:容器存活性检查,用于判断容器是否健康,告诉 kubelet 一个容器什么时候处于不健康的状态。如果 LivenessProbe 探针探测到容器不健康,则 kubelet 将删除该容器,并根据容器的重启策略做相应的处理。如果一个容器不包含 LivenessProbe 探针,那么 kubelet 认为该容器的 LivenessProbe 探针返回的值永远是 Success;
ReadinessProbe:容器就绪性检查,用于判断容器是否启动完成且准备接收请求。如果ReadinessProbe探针探测到失败,Endpoint Controller 将从 Service 的 Endpoint 中删除包含该容器所在 Pod 的 IP 地址的Endpoint条目。如果容器不提供就绪态探针,则默认状态为 Success。
StartupProbe: 容器启动检查,指示容器中的应用是否已经启动。如果提供了启动探针,则所有其他探针都会被禁用,直到此探针成功为止。如果启动探测失败,kubelet 将杀死容器,而容器依其重启策略进行重启。 如果容器没有提供启动探测,则默认状态为 Success。
三种探针共有配置:
Probe有如下配置字段,可以使用这些字段精确的控制存活和就绪检测的行为:
initialDelaySeconds:容器启动后要等待多少秒后存活和就绪探测器才被初始化,默认是 0 秒,最小值是 0。
periodSeconds:执行探测的时间间隔(单位是秒)。默认是 10 秒。最小值是 1。
timeoutSeconds:探测的超时后等待多少秒。默认值是 1 秒。最小值是 1。
successThreshold:探测器在失败后,被视为成功的最小连续成功数。默认值是 1。 存活和启动探测的这个值必须是 1。最小值是 1。
failureThreshold:当探测失败时,Kubernetes 的重试次数。 存活探测情况下的放弃就意味着重新启动容器。 就绪探测情况下的放弃 Pod 会被打上未就绪的标签。默认值是 3。最小值是 1。
说明:
在 Kubernetes 1.20 版本之前,exec 探针会忽略 timeoutSeconds:探针会无限期地 持续运行,甚至可能超过所配置的限期,直到返回结果为止。这一缺陷在 Kubernetes v1.20 版本中得到修复。
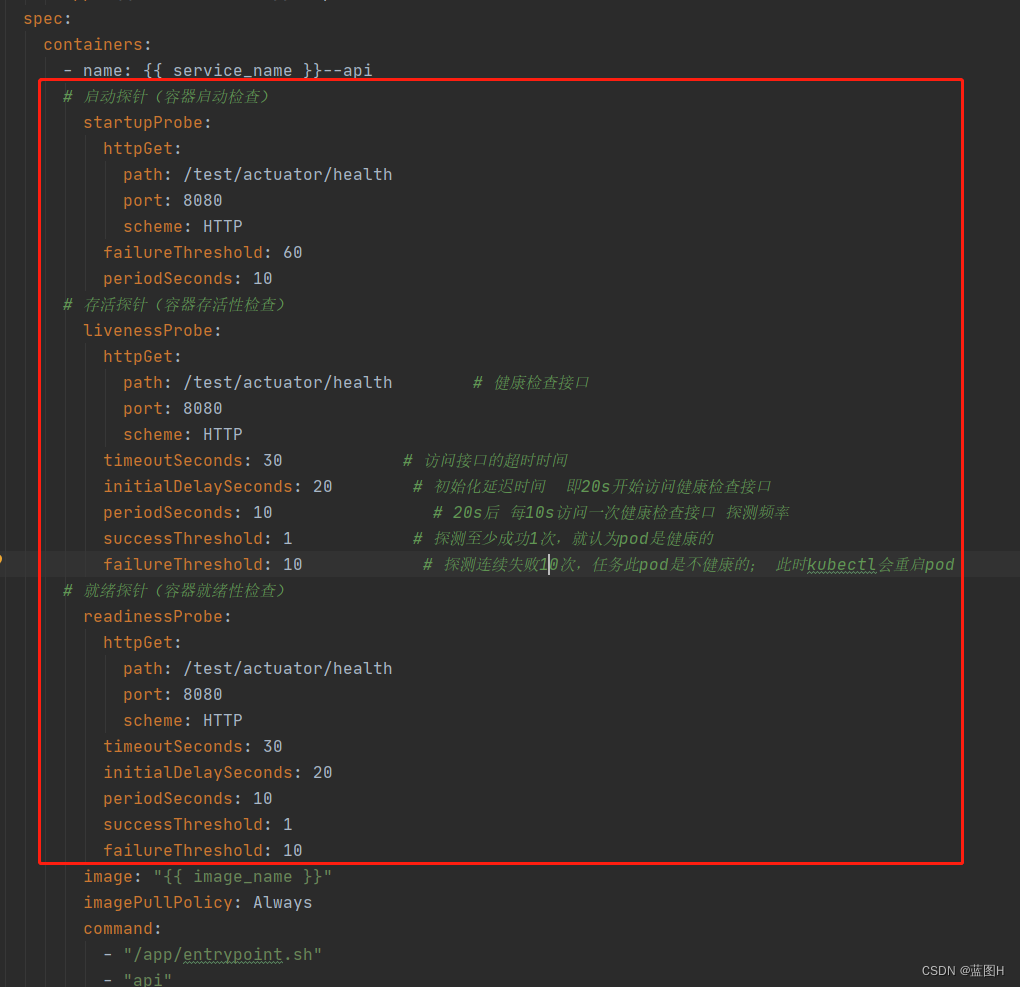
具体配置如下
推荐使用SpringBoot版本在2.3.2版本以上,这样才好的支持开启应用探针功能,所以先检查项目的版本号
<parent>
	<groupId>org.springframework.boot</groupId>
	<artifactId>spring-boot-starter-parent</artifactId>
	<version>2.3.2.RELEASE</version>
	<relativePath/>
</parent>
- 1
- 2
- 3
- 4
- 5
- 6
再引入pom依赖
<dependency>
	<groupId>org.springframework.boot</groupId>
	<artifactId>spring-boot-starter-actuator</artifactId>
</dependency>
- 1
- 2
- 3
- 4
在yml文件中加入以下配置
server:
  port: 8080
  shutdown: graceful				# 默认为IMMEDIATE,表示立即关机;GRACEFUL表示优雅关机
  servlet:
    context-path: /test

spring:
  lifecycle:
    timeout-per-shutdown-phase: 30s		# 停机过程超时时长设置30s,超过30s,直接停机
  application:
    name: test

management:							# 开启shutdown和health端点
  endpoint:
    health:
      probes:
        enabled: true
  health:
    livenessstate:
      enabled: true
    readynessstate:
      enabled: true
- 1
- 2
- 3
- 4
- 5
- 6
- 7
- 8
- 9
- 10
- 11
- 12
- 13
- 14
- 15
- 16
- 17
- 18
- 19
- 20
- 21
- 22
在k8s部署文件中加入以下配置

---
apiVersion: apps/v1
kind: Deployment
metadata:
  name: {{ service_name }}--api
spec:
  selector:
    matchLabels:
      app: {{ service_name }}--api
  replicas: {{ replicas }}		# Pod副本数
  strategy:
    type: RollingUpdate   		# 滚动更新策略
    rollingUpdate:
      maxSurge: 25%
      maxUnavailable: 25%
  template:
    metadata:
      name: {{ service_name }}--api
      labels:
        app: {{ service_name }}--api
    spec:
      containers:
        - name: {{ service_name }}--api
          # 启动探针(容器启动检查)
          startupProbe:
            httpGet:
              path: /test/actuator/health
              port: 8080
              scheme: HTTP
            failureThreshold: 60
            periodSeconds: 10
          # 存活探针(容器存活性检查)
          livenessProbe:
            httpGet:
              path: /test/actuator/health        # 健康检查接口
              port: 8080
              scheme: HTTP
            timeoutSeconds: 30            # 访问接口的超时时间
            initialDelaySeconds: 20        # 初始化延迟时间  即20s开始访问健康检查接口
            periodSeconds: 10                # 20s后 每10s访问一次健康检查接口 探测频率
            successThreshold: 1            # 探测至少成功1次,就认为pod是健康的
            failureThreshold: 10            # 探测连续失败10次,任务此pod是不健康的; 此时kubectl会重启pod
          # 就绪探针(容器就绪性检查)
          readinessProbe:
            httpGet:
              path: /test/actuator/health
              port: 8080
              scheme: HTTP
            timeoutSeconds: 30
            initialDelaySeconds: 20
            periodSeconds: 10
            successThreshold: 1
            failureThreshold: 10
          image: "{{ image_name }}"
          imagePullPolicy: Always
          command:
            - "/app/entrypoint.sh"
            - "api"
          volumeMounts:
            - name: config-envs
              mountPath: /etc/config/envs
              readOnly: true
            - name: secret-mysql-config
              mountPath: /etc/secrets/mysql/config
              readOnly: true
            - name: secret-redis-config
              mountPath: /etc/secrets/redis/config
              readOnly: true
            - name: secret-storage-sa
              mountPath: /etc/secrets/storage/sa
              readOnly: true
            - name: secret-storage-config
              mountPath: /etc/secrets/storage/config
              readOnly: true
          resources:								 # 容器资源管理
            limits:									 # 资源限制(监控使用情况)
              cpu: "{{ cpu_limits }}"
              memory: "{{ memory_limits }}"
            requests:								 # 最小可用资源(灵活调度)
              cpu: "{{ cpu_requests }}"
              memory: "{{ memory_requests }}"
      nodeSelector:
        {{ k8s_priority_node_pool }}
      affinity:							# 设置调度策略,采取多主机/多可用区部署
        podAntiAffinity:
          preferredDuringSchedulingIgnoredDuringExecution:
          - weight: 100
            podAffinityTerm:
              labelSelector:
                matchExpressions:
                  - key: app
                    operator: In
                    values:
                      - {{ service_name }}--api
              topologyKey: "kubernetes.io/hostname"
      volumes:
        - name: config-envs
          configMap:
            name: {{ service_name }}--config--envs
        - name: secret-mysql-config
          secret:
            secretName: {{ service_name }}--config--mysql
        - name: secret-redis-config
          secret:
            secretName: {{ service_name }}--config--redis
        - name: secret-storage-sa
          secret:
            secretName: {{ service_name }}--sa--storage
        - name: secret-storage-config
          secret:
            secretName: {{ service_name }}--config--storage
- 1
- 2
- 3
- 4
- 5
- 6
- 7
- 8
- 9
- 10
- 11
- 12
- 13
- 14
- 15
- 16
- 17
- 18
- 19
- 20
- 21
- 22
- 23
- 24
- 25
- 26
- 27
- 28
- 29
- 30
- 31
- 32
- 33
- 34
- 35
- 36
- 37
- 38
- 39
- 40
- 41
- 42
- 43
- 44
- 45
- 46
- 47
- 48
- 49
- 50
- 51
- 52
- 53
- 54
- 55
- 56
- 57
- 58
- 59
- 60
- 61
- 62
- 63
- 64
- 65
- 66
- 67
- 68
- 69
- 70
- 71
- 72
- 73
- 74
- 75
- 76
- 77
- 78
- 79
- 80
- 81
- 82
- 83
- 84
- 85
- 86
- 87
- 88
- 89
- 90
- 91
- 92
- 93
- 94
- 95
- 96
- 97
- 98
- 99
- 100
- 101
- 102
- 103
- 104
- 105
- 106
- 107
- 108
- 109
- 110
- 111
- 112
后续使用问题
更新:
用了一段时间后,在某一次服务器资源不够后,导致服务全部停止,然后多个pod陷入无限重启状态。原因是多个pod一直在探测是否有成功启动的pod,然后导致先后批次的pod都在等待对方启动完成,后面发现是重启的时间设置的不合理导致的。后续有时间专门出一篇文章细说一下。


