- 1ElementUI中遇到的问题_el-table 滚动条太小
- 2Android 使用模拟器模拟Linux操作系统_安卓linux模拟器
- 3NoSQL数据库如何选型_nosql选型
- 4软件开发过程全套文档模板(规格说明书+详细设计+测试计划+验收报告)_开发流程规范文档
- 5C语言文件读写操作详解:高效处理文件数据_c 读文件
- 6Ollama 介绍与使用_ollama 并发
- 7大模型面经之Agent介绍_agent 大模型 介绍
- 8POST注入
- 9vue2+element医院安全(不良)事件报告管理系统源代码_医院不良事件报告系统源码php下载
- 10【MySQL】MySQL连接池原理与简易网站数据流动是如何进行_mysql连接池怎么理解
超香,10 个超级常用的 Python 方法总结_python常用方法
赞
踩
大家好,今天我给大家总结了10个超级常用的Python方法,超级好用,备份方法来自群成员的分享。如果你喜欢,可以收藏、关注。
【注】文末提供技术交流群
推荐文章
1、发送邮件
有几个模块用于访问互联网以及处理网络通信协议。其中最简单的两个是用于处理从 urls 接收的数据的 urllib.request 以及用于发送电子邮件的 smtplib:
import smtplibsmtpObj = smtplib.SMTP( [host [, port [, local_hostname]]] )
- 1
参数说明:
-
host: SMTP 服务器主机。你可以指定主机的ip地址或者域名如: runoob.com,这个是可选参数。
-
port: 如果你提供了 host 参数, 你需要指定 SMTP 服务使用的端口号,一般情况下 SMTP 端口号为25。
-
local_hostname: 如果 SMTP 在你的本机上,你只需要指定服务器地址为 localhost 即可。
Python SMTP 对象使用 sendmail 方法发送邮件,语法如下:
SMTP.sendmail(from_addr, to_addrs, msg[, mail_options, rcpt_options])
- 1
参数说明:
-
from_addr: 邮件发送者地址。
-
to_addrs: 字符串列表,邮件发送地址。
-
msg: 发送消息
案例:
#!/usr/bin/python
# -*- coding: UTF-8 -*-

import smtplib
from email.mime.text import MIMEText
from email.header import Header

sender = 'from@runoob.com'
# 公众号:信息技术智库
receivers = ['429240967@qq.com']  # 接收邮件,可设置为你的QQ邮箱或者其他邮箱

# 三个参数:第一个为文本内容,第二个 plain 设置文本格式,第三个 utf-8 设置编码
message = MIMEText('Python 邮件发送测试...', 'plain', 'utf-8')
message['From'] = Header("西红柿大神", 'utf-8')   # 发送者
message['To'] =  Header("测试", 'utf-8')        # 接收者

subject = 'Python SMTP 邮件测试'
message['Subject'] = Header(subject, 'utf-8')


try:
    smtpObj = smtplib.SMTP('localhost')
    smtpObj.sendmail(sender, receivers, message.as_string())
    print "邮件发送成功"
except smtplib.SMTPException:
    print "Error: 无法发送邮件"

- 1
- 2
- 3
- 4
- 5
- 6
- 7
- 8
- 9
- 10
- 11
- 12
- 13
- 14
- 15
- 16
- 17
- 18
- 19
- 20
- 21
- 22
- 23
- 24
- 25
- 26
2、操作数据库:MySQLdb
安装 MySQLdb
请访问 http://sourceforge.net/projects/mysql-python
操作mysql查数据
import MySQLdb

# 连接数据库
conn = MySQLdb.connect(host='localhost',user='root',passwd='xxxx',db='test1')


# 获取cursor对象来进行操作
cursor = conn.cursor()

# 更多资料:https://t.1yb.co/zHJo
sql = "select * from world where someone like 'you' "


# 执行sql
cursor.execute(sql)
- 1
- 2
- 3
- 4
- 5
- 6
- 7
- 8
- 9
- 10
- 11
- 12
- 13
- 14
- 15
3、网络爬虫:requests
Requests 允许你发送纯天然的 HTTP/1.1 请求,无需手工劳动。你不需要手动为 URL 添加查询字串,也不需要对 POST 数据进行表单编码。Keep-alive 和 HTTP 连接池的功能是 100% 自动化的。
一个简单的爬虫样例:
import requestsheads = {}heads['User-Agent'] = 'Mozilla/5.0 ' \ '(Macintosh; U; Intel Mac OS X 10_6_8; en-us) AppleWebKit/534.50 ' \ '(KHTML, like Gecko) Version/5.1 Safari/534.50'response = requests.get('http://www.baidu.com',headers=headers)
- 1
4、操作excel:pandas
# -*- coding: utf-8 -*-
import xlrdimport xlwt
from datetime import date,datetime

def read_excel():
    # 打开文件
    workbook = xlrd.open_workbook(r'F:\demo.xlsx')
    # 获取所有sheet
    print workbook.sheet_names() # [u'sheet1', u'sheet2']
    sheet2_name = workbook.sheet_names()[1]

    # 根据sheet索引或者名称获取sheet内容
    sheet2 = workbook.sheet_by_index(1) # sheet索引从0开始
    sheet2 = workbook.sheet_by_name('sheet2')

    # sheet的名称,行数,列数
    print sheet2.name,sheet2.nrows,sheet2.ncols

    # 获取整行和整列的值(数组)
    rows = sheet2.row_values(3) # 获取第四行内容
    cols = sheet2.col_values(2) # 获取第三列内容
    print rows
    print cols

    # 获取单元格内容
    print sheet2.cell(1,0).value.encode('utf-8')
    print sheet2.cell_value(1,0).encode('utf-8')
    print sheet2.row(1)[0].value.encode('utf-8')

    # 获取单元格内容的数据类型
    print sheet2.cell(1,0).ctype

if __name__ == '__main__':
    read_excel()
- 1
- 2
- 3
- 4
- 5
- 6
- 7
- 8
- 9
- 10
- 11
- 12
- 13
- 14
- 15
- 16
- 17
- 18
- 19
- 20
- 21
- 22
- 23
- 24
- 25
- 26
- 27
- 28
- 29
- 30
- 31
- 32
- 33
- 34
5、操作系统接口
os模块提供了不少与操作系统相关联的函数。
>>> import os>>> os.getcwd() # 返回当前的工作目录'C:\\Python34'>>> os.chdir('/server/accesslogs') # 修改当前的工作目录>>> os.system('mkdir today') # 执行系统命令 mkdir 0
- 1
建议使用 “import os” 风格而非 “from os import *”。这样可以保证随操作系统不同而有所变化的 os.open() 不会覆盖内置函数 open()。
os常用命令
|
|
|
|
|
|
|
|
|
|
|
|
|
|
|
|
|
|
|
|
|
|
|
|
|
|
|
|
|
|
|
|
|
|
|
|
|
|
|
|
|
|
|
|
6、数据分析:numpy
NumPy 包含大量的各种数学运算的函数,包括三角函数,算术运算的函数,复数处理函数等。
NumPy 提供了多种排序的方法。这些排序函数实现不同的排序算法,每个排序算法的特征在于执行速度,最坏情况性能,所需的工作空间和算法的稳定性。下表显示了三种排序算法的比较。
三角函数
NumPy 提供了标准的三角函数:sin()、cos()、tan()。
import numpy as np

a = np.array([0,30,45,60,90])
print ('不同角度的正弦值:')
# 通过乘 pi/180 转化为弧度
print (np.sin(a*np.pi/180))
print ('\n')
print ('数组中角度的余弦值:')
print (np.cos(a*np.pi/180))
print ('\n')
print ('数组中角度的正切值:')
print (np.tan(a*np.pi/180))
- 1
- 2
- 3
- 4
- 5
- 6
- 7
- 8
- 9
- 10
- 11
- 12
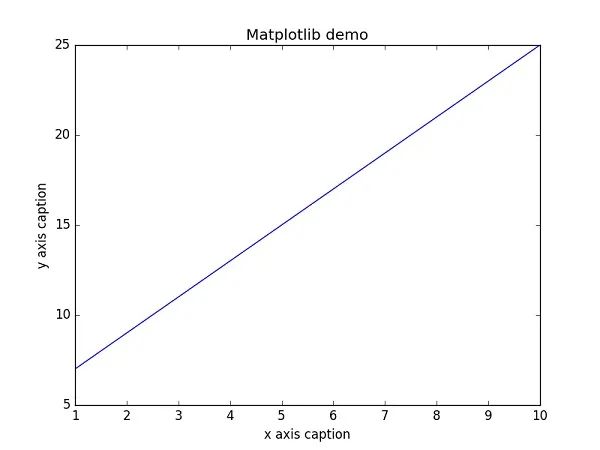
7、数据画图分析:Matplotlib
import numpy as np
from matplotlib import pyplot as plt

x = np.arange(1,11)
y =  2  * x +  5
plt.title("Matplotlib demo")
plt.xlabel("x axis caption")
plt.ylabel("y axis caption")
plt.plot(x,y)
plt.show()
- 1
- 2
- 3
- 4
- 5
- 6
- 7
- 8
- 9
- 10
以上实例中,np.arange() 函数创建 x 轴上的值。y 轴上的对应值存储在另一个数组对象 y 中。这些值使用 matplotlib 软件包的 pyplot 子模块的 plot() 函数绘制。
图形由 show() 函数显示。
8、字符串正则匹配
re模块为高级字符串处理提供了正则表达式工具。可以说是爬虫必备,对于复杂的匹配和处理,正则表达式提供了简洁、优化的解决方案:如果只需要简单的功能,应该首先考虑字符串方法,因为它们非常简单,易于阅读和调试:
>>> 'tea for too'.replace('too', 'two')'tea for two'
- 1
re.match函数
re.match 尝试从字符串的起始位置匹配一个模式,如果不是起始位置匹配成功的话,match()就返回none。
函数语法:
re.match(pattern, string, flags=0)
- 1
9、游戏开发:pygame
Pygame是一组跨平台的Python模块, 用于创建视频游戏。它由旨在与Python编程语言一起使用的计算机图形和声音库组成。Pygame由Pete Shinners正式编写, 以取代PySDL。
Pygame适合于创建客户端应用程序, 这些应用程序可以包装在独立的可执行文件中。
import pygame

pygame.init()
screen = pygame.display.set_mode((400, 500))
done = False

while not done:
    for event in pygame.event.get():
        if event.type == pygame.QUIT:
            done = True
    pygame.display.flip()
- 1
- 2
- 3
- 4
- 5
- 6
- 7
- 8
- 9
- 10
- 11
10、数据压缩
以下模块直接支持通用的数据打包和压缩格式:zlib,gzip,bz2,zipfile,以及 tarfile。
>>> import zlib
>>> s = b'witch which has which witches wrist watch'
>>> len(s)
41
>>> t = zlib.compress(s)
>>> len(t)
37
>>> zlib.decompress(t)
b'witch which has which witches wrist watch'
>>> zlib.crc32(s)
226805979
- 1
- 2
- 3
- 4
- 5
- 6
- 7
- 8
- 9
- 10
- 11
技术交流
欢迎转载、收藏、有所收获点赞支持一下!

目前开通了技术交流群,群友已超过2000人,添加时最好的备注方式为:来源+兴趣方向,方便找到志同道合的朋友
- 方式①、发送如下图片至微信,长按识别,后台回复:加群;
- 方式②、添加微信号:dkl88191,备注:来自CSDN
- 方式③、微信搜索公众号:Python学习与数据挖掘,后台回复:加群