热门标签
热门文章
- 1yolo v5显示中文标签乱码解决_yolo检测标签乱码与只显示编号
- 2JAVA项目【仿牛客网面试总结】【分章节】_仿牛客网面试笔记
- 3使用Qt Creator进行代码分析_qt 代码分析
- 4Unknown host ‘dl.google.com‘. You may need to adjust the proxy settings in
- 5def __init__(self)和def __init__(self, 参数1,参数2,···,参数n)的用法详解
- 6vue中如何使用富文本详细讲解_vue 富文本
- 7高中毕业从汽修转行自学Python,月薪翻了三倍,我有一份转行秘籍分享给你_高中毕业自学python
- 8python类型转换方法_Numpy数据类型转换astype,dtype的方法
- 9Java关键字大冒险:深入浅出地理解Java的精髓
- 10啥移动硬盘格式能更好兼容Windows和Mac系统 NTFS格式苹果电脑不能修改 paragon ntfs for mac激活码_mac os 和windows系统都能用的硬盘格式
当前位置: article > 正文
Cocos Creator制作一个虚拟摇杆_h5 实现王者荣耀虚拟摇杆
作者:代码探险家 | 2024-07-04 15:06:43
赞
踩
h5 实现王者荣耀虚拟摇杆
1. 演示
版本:v2.4.3
语言:TS
演示GIF

2. 实现过程
素材



期望效果
- 类似于王者荣耀的那种小摇杆
- 摇杆中心位置为屏幕点击的位置
- 摇杆点击部分不会出界
过程
(1)摇杆跟随触摸
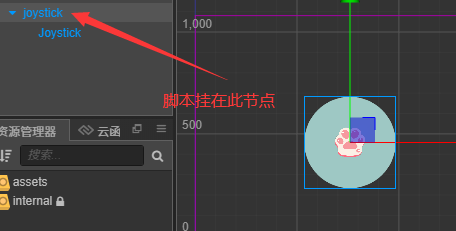
	this.Joystick = this.node.getChildByName("Joystick");
	// 此处监听的joystick为摇杆
    this.Joystick.on(cc.Node.EventType.TOUCH_MOVE, this.onTouchMove, this);
    onTouchMove(e: cc.Event.EventTouch) {
   		this.JoystickMove(e)
   	}
   	JoystickMove(e: cc.Event.EventTouch) {
        // 移动
        let delta = e.getDelta();
        let moveDistance = cc.v3(delta.x / this.node.scale, delta.y / this.node.scale)
        // 此处增加缩放参数为了方便,使用时可以直接缩放大小
        this.Joystick.setPosition(this.Joystick.position.add(moveDistance))
   	}
- 1
- 2
- 3
- 4
- 5
- 6
- 7
- 8
- 9
- 10
- 11
- 12
- 13
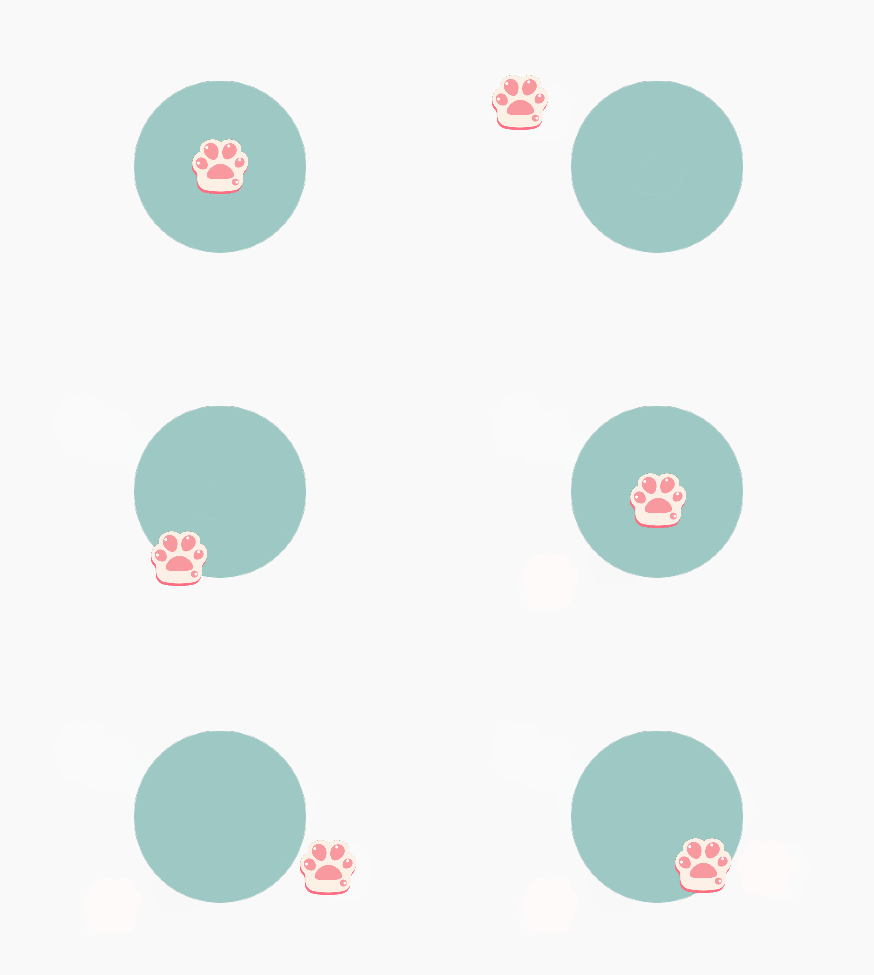
此时可以实现触摸点跟随手指或者鼠标移动。getDelta函数是获取触点距离上一次事件移动的距离对象,返回的是一个Vec2。但此时摇杆不会自动归位。
(2)摇杆自动归位
	this.Joystick.on(cc.Node.EventType.TOUCH_END, this.onTouchEnd, this);
	this.Joystick.on(cc.Node.EventType.TOUCH_CANCEL, this.onTouchCancel, this);
	onTouchEnd(e: cc.Event.EventTouch) {
	    this.JoystickReset()
	}
	onTouchCancel(e: cc.Event.EventTouch) {
	    this.JoystickReset()
	}
	JoystickReset() {
	    cc.tween(this.Joystick)
	        .to(0.05, {x: 0, y: 0})
	        .start()
	}
- 1
- 2
- 3
- 4
- 5
- 6
- 7
- 8
- 9
- 10
- 11
- 12
- 13
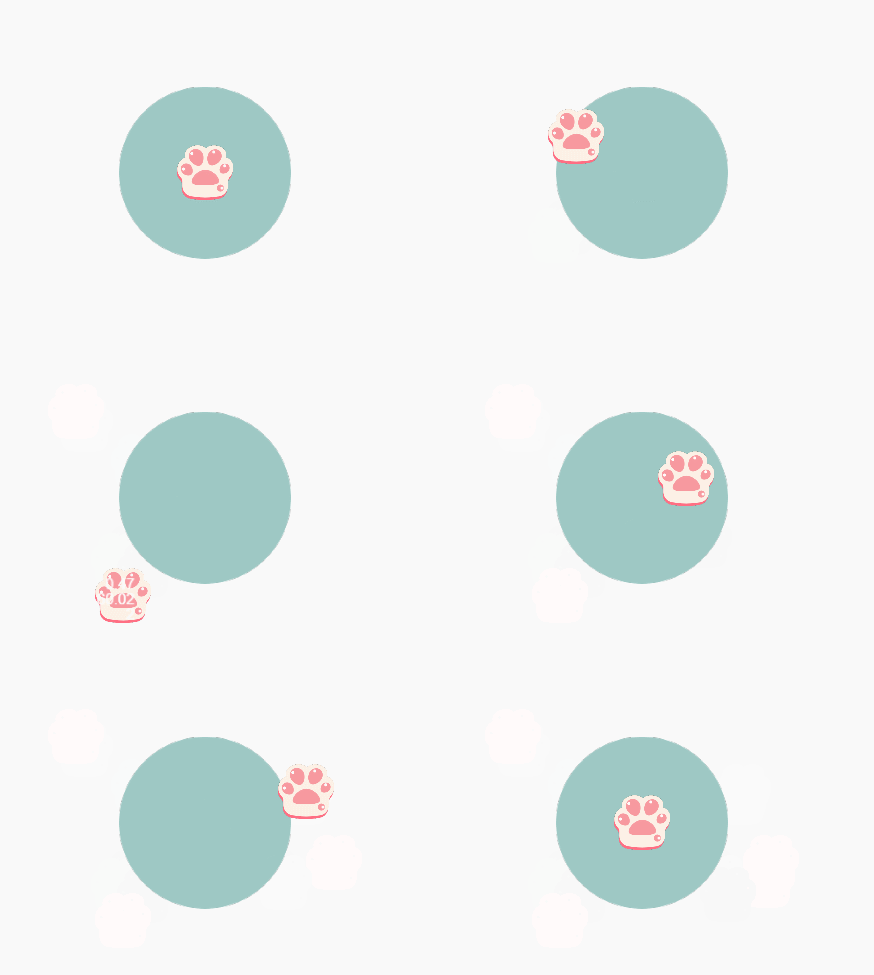
TOUCH_END, TOUCH_CANCEL代表的状态为当手指在目标节点区域内离开屏幕时,当手指在目标节点区域外离开屏幕时。使用缓动使动画更流畅。
(3)限制摇杆不出界
原理:
此处思路来源于CSDN章鱼仔,通过三角形的相似等比。
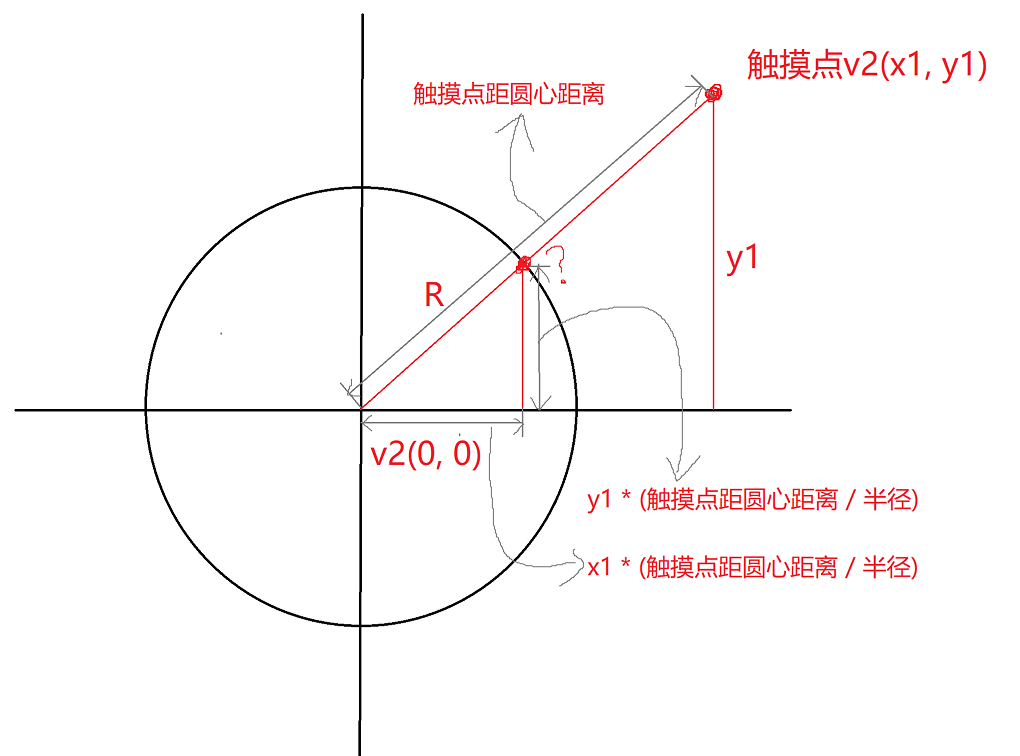
完善JoystickMove代码
JoystickMove(e: cc.Event.EventTouch) {
        // 移动
        let delta = e.getDelta();
        let moveDistance = cc.v3(delta.x / this.node.scale, delta.y / this.node.scale)
        // 加上缩放参数,更加方便实用
        this.Joystick.setPosition(this.Joystick.position.add(moveDistance))
        // 转换坐标
        let touchPos = e.getLocation();     // 以当前屏幕左下角为坐标系原点所获得的的位置
        let touchPosInNode = this.node.convertToNodeSpaceAR(touchPos)
        let distanceBetweenTouchPosToJoystick = touchPosInNode.mag() * this.node.scale; // 此处缩放参数作用与前边同理
        // 限制移动 < 半径
        if (distanceBetweenTouchPosToJoystick > this.radius) {
            let lengthScale = this.radius / distanceBetweenTouchPosToJoystick;
            this.Joystick.x = touchPosInNode.x * lengthScale;
            this.Joystick.y = touchPosInNode.y * lengthScale;
        }
    }
- 1
- 2
- 3
- 4
- 5
- 6
- 7
- 8
- 9
- 10
- 11
- 12
- 13
- 14
- 15
- 16
- 17
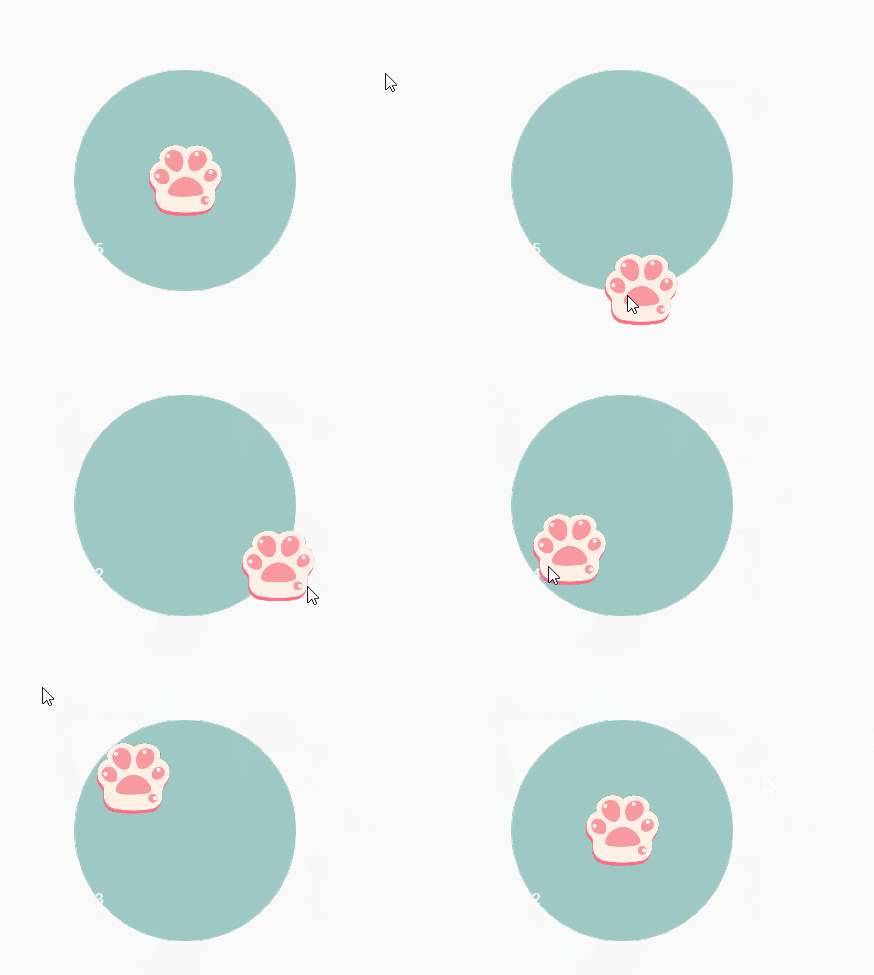
此时移动不会出界,而且可以任意调整缩放倍数都可以保持不出界状态!
注意getLocation()函数返回的坐标是以屏幕左下角为坐标中心的坐标,并不是世界坐标!
节点.convertToNodeSpaceAR(位置)返回的是这个位置在这个节点下的位置。
(4)添加箭头
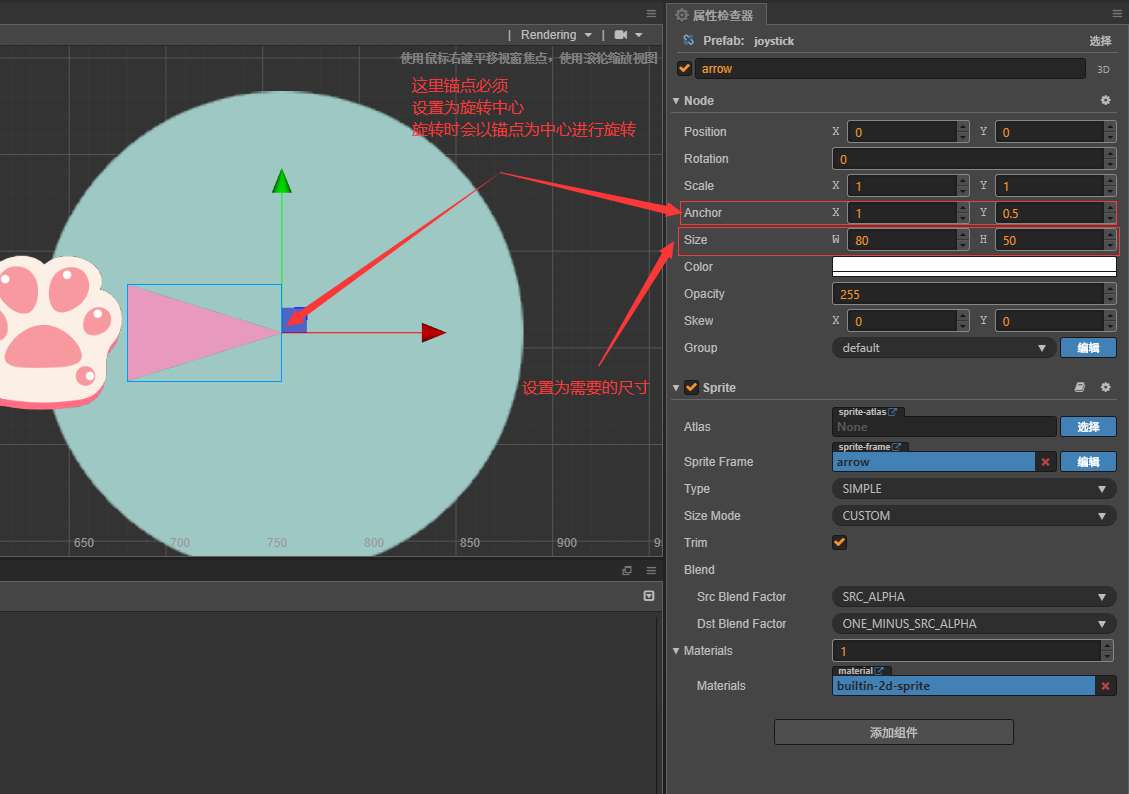
完善代码
	onTouchMove(e: cc.Event.EventTouch) {
        this.JoystickMove(e)
        this.arrowDirection()
    }
    arrowDirection() {
        // 设置箭头大小
        this.setArrowLength()
        // 计算夹角
        this.setArrow(cc.v2(this.Joystick.position))
    }
    setArrowLength() {
	    let arrowParamScale = this.Joystick.position.mag() * this.node.scale / this.radius;
	    this.arrow.width = this.arrowMaxLenth * arrowParamScale;    // 箭头长度
	    this.arrow.opacity = 255 * arrowParamScale;     // 箭头透明度
    }
    /**
     *
     * @param JoystickPos 摇杆节点坐标
     */
    setArrow(JoystickPos: cc.Vec2) {
        let dir = JoystickPos.sub(cc.v2(0, 0))
        let vec = cc.v2(0, 1);    // 水平向右的对比向量
        let radian = dir.signAngle(vec);    // 求方向向量与对比向量间的弧度
        let rotate = cc.misc.radiansToDegrees(radian);    // 将弧度转换为角度
        this.arrow.angle = -rotate - 90;    // ***此处rotate正负值以及减去的角度根据自己的图片去修改***
    }
- 1
- 2
- 3
- 4
- 5
- 6
- 7
- 8
- 9
- 10
- 11
- 12
- 13
- 14
- 15
- 16
- 17
- 18
- 19
- 20
- 21
- 22
- 23
- 24
- 25
- 26
再完善一下摇杆回弹时的动画,让箭头可以复原!
	JoystickReset() {
        let time: number = 0.05;
        let arrowReset = cc.tween(this.arrow).to(time, {width: 0, opacity: 0})

        cc.tween(this.Joystick)
            .call(() => {
                arrowReset.start()
            })
            .to(time, {x: 0, y: 0})
            .start()
    }
- 1
- 2
- 3
- 4
- 5
- 6
- 7
- 8
- 9
- 10
- 11
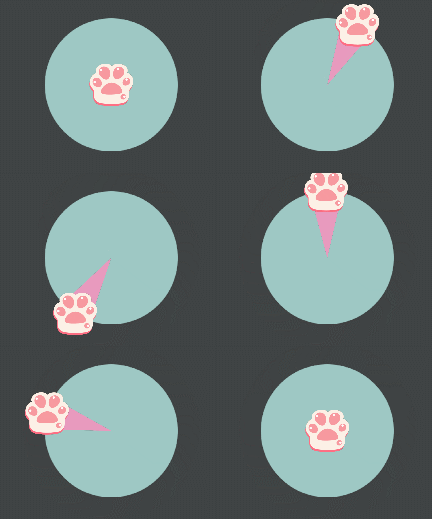
原理:
首先dir是摇杆的向量与摇杆中心的一个带方向的向量差,若是求向量夹角必须有另外一个参考向量,此处定义为(0, 1),求出的值为弧度所以需要将弧度转换为我们要的角度。
弧度转角度公式: 角度 = 弧度 * 180 / PI
cocos中可以直接使用cc.misc.radiansToDegrees()
singAngle()函数源码部分如下,如果对向量的叉乘、点乘的几何意义不熟悉可以看一下:
   /*
    * 带方向的夹角的弧度。该方法仅用做兼容 2D 计算。
    */
   signAngle (vector) {
       cc.warnID(1408, 'vec3.signAngle', 'v2.1', 'cc.v2(selfVector).signAngle(vector)');
       let vec1 = new Vec2(this.x, this.y);
       let vec2 = new Vec2(vector.x, vector.y);
       return vec1.signAngle(vec2);
   }
   /*
    * 带方向的夹角的弧度。
    */
   signAngle (vector: Vec2): number {
       let angle = this.angle(vector);
       return this.cross(vector) < 0 ? -angle : angle;
   }
   /*
    * 夹角的弧度。
    */
   angle (vector: Vec2): number {
       var magSqr1 = this.magSqr();
       var magSqr2 = vector.magSqr();

       if (magSqr1 === 0 || magSqr2 === 0) {
           console.warn("Can't get angle between zero vector");
           return 0.0;
       }

       var dot = this.dot(vector);
       var theta = dot / (Math.sqrt(magSqr1 * magSqr2));
       theta = misc.clampf(theta, -1.0, 1.0);
       return Math.acos(theta);	// 反余弦函数
   }
   /*
    * 当前向量与指定向量进行叉乘。
    */
   cross (vector: Vec2): number {
       return this.x * vector.y - this.y * vector.x;
   }

  /**
    *当前向量与指定向量进行点乘。
    */
   dot (vector: Vec2): number {
       return this.x * vector.x + this.y * vector.y;
   }
   /*
    * 限定浮点数的最大最小值。
    * 数值大于 max_inclusive 则返回 max_inclusive。
    * 数值小于 min_inclusive 则返回 min_inclusive。
    * 否则返回自身。
    */
   misc.clampf = function (value, min_inclusive, max_inclusive) {
       if (min_inclusive > max_inclusive) {
           var temp = min_inclusive;
           min_inclusive = max_inclusive;
           max_inclusive = temp;
       }
       return value < min_inclusive ? min_inclusive : value < max_inclusive ? value : max_inclusive;
   };
- 1
- 2
- 3
- 4
- 5
- 6
- 7
- 8
- 9
- 10
- 11
- 12
- 13
- 14
- 15
- 16
- 17
- 18
- 19
- 20
- 21
- 22
- 23
- 24
- 25
- 26
- 27
- 28
- 29
- 30
- 31
- 32
- 33
- 34
- 35
- 36
- 37
- 38
- 39
- 40
- 41
- 42
- 43
- 44
- 45
- 46
- 47
- 48
- 49
- 50
- 51
- 52
- 53
- 54
- 55
- 56
- 57
- 58
- 59
- 60
主脚本编写
(1)主脚本部分实现功能
- 更改触摸范围为全屏
- 跨脚本调用摇杆
- 移动物体
(2)演示
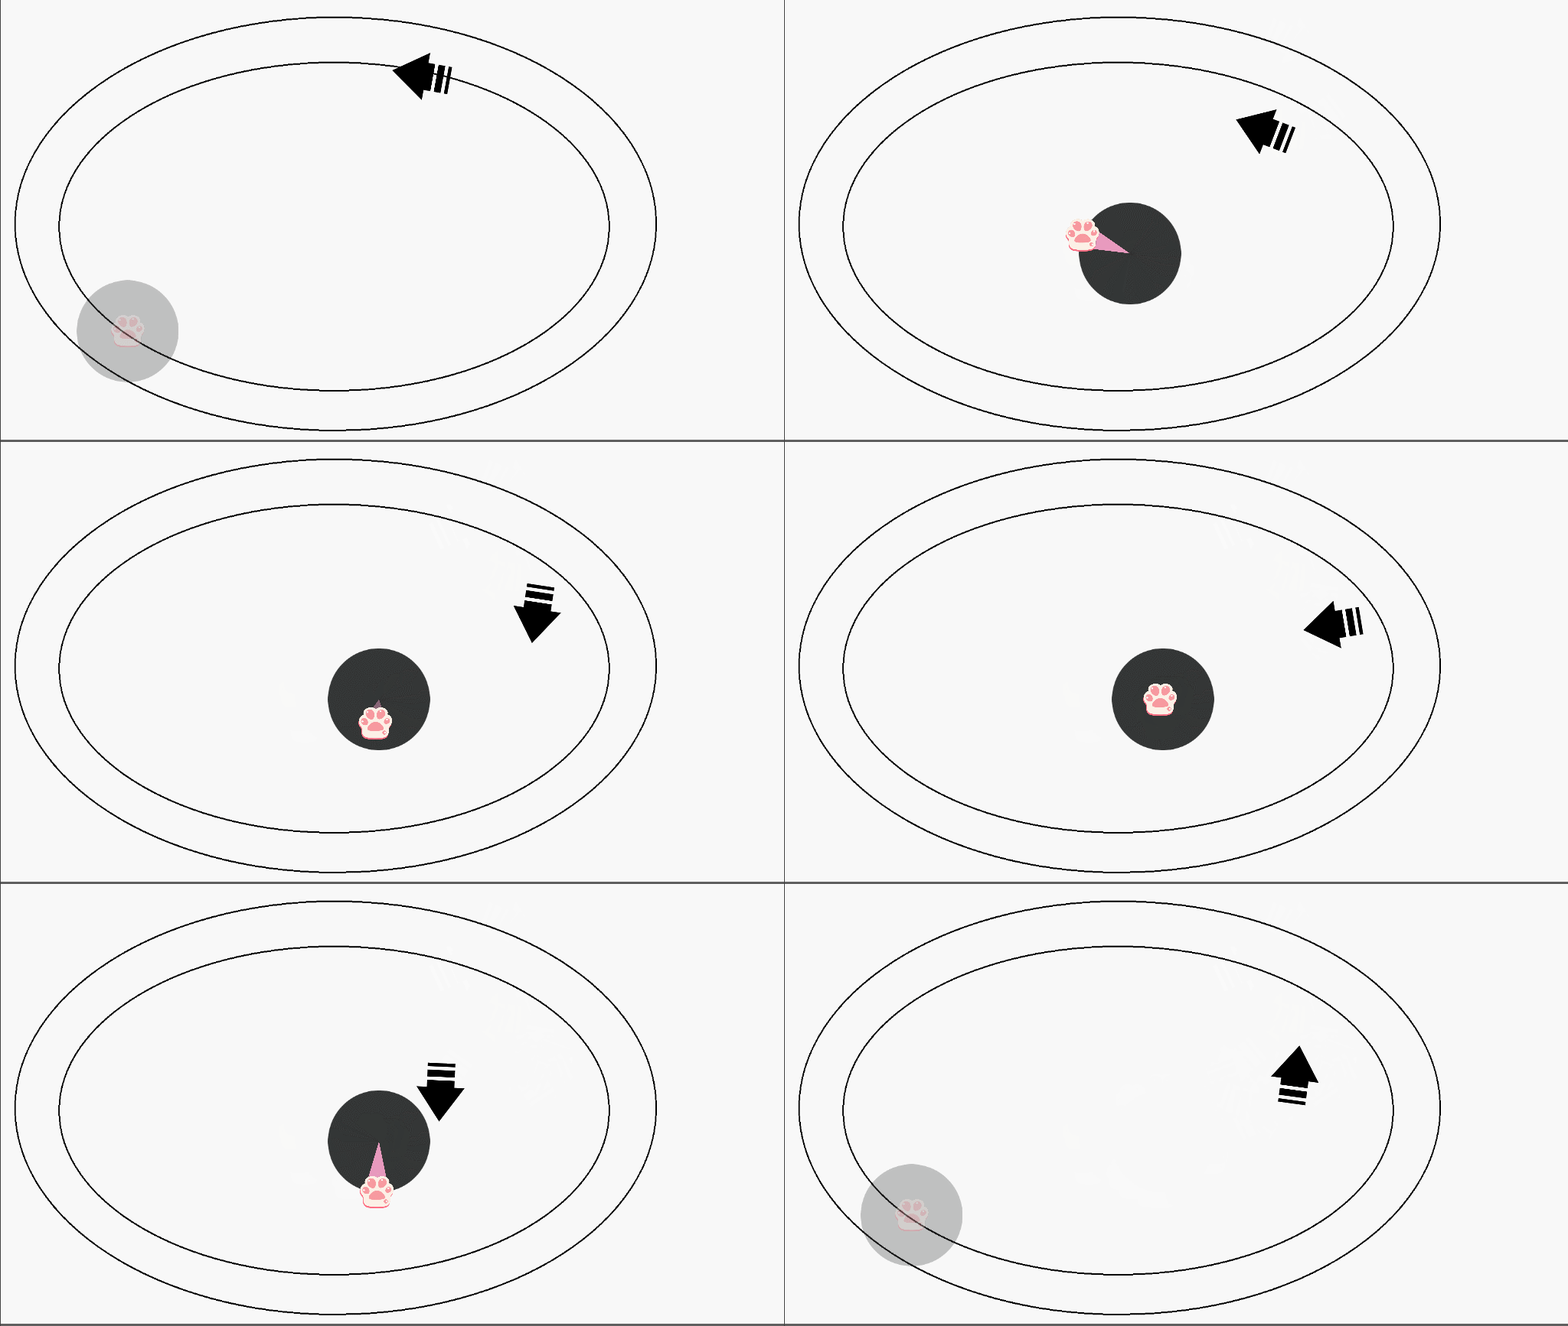
(3)实现
摇杆脚本部分
	// 返回给调用者需要用到的参数
	returnArrowAngle() {
        let radin = cc.misc.degreesToRadians(-this.arrow.angle - 90);
        cc.log(this.arrow.angle)
        let vec = cc.v2(0, 1);
        let targetVec = vec.rotate(-radin);

        let data = {
            angle: this.arrow.angle,    // 角度
            vec: targetVec,
            speedScale: this.arrow.width / this.arrowMaxLenth,
            moveState: this.Joystick.x != 0 && this.Joystick.y != 0 ? true : false,
        }

        return data;
    }
- 1
- 2
- 3
- 4
- 5
- 6
- 7
- 8
- 9
- 10
- 11
- 12
- 13
- 14
- 15
- 16
原理与计算朝向原理差不多,只是这次将角度转为弧度,再通过将参考的向量旋转指定弧度(radin)后,即可得出指定已知角度的向量!
主脚本部分
    @property({type: cc.Node, displayName: "可点击区域"})
    touchArea: cc.Node = null;
	@property({type: cc.Node, displayName: "摇杆"})
    joystick: cc.Node = null;
    @property({type: cc.Node, displayName: "移动物体"})
    thing: cc.Node = null;
    // 此脚本脚本全局函数区
    joystickCom: joystick;
    moveSpeed = 0.5;
    moveRotate: number;
    // 设置点击区域监听
    onLoad () {
        this.joystickCom = this.joystick.getComponent(joystick);
        this.touchArea.on(cc.Node.EventType.TOUCH_START, this.onTouchStart, this);
        this.touchArea.on(cc.Node.EventType.TOUCH_MOVE, this.onTouchMove, this);
        this.touchArea.on(cc.Node.EventType.TOUCH_END, this.onTouchEnd, this);
    }
	onTouchStart(e: cc.Event.EventTouch) {
        this.joystickCom.onTouchStart(e);
    }
    onTouchMove(e: cc.Event.EventTouch) {
        this.joystickCom.onTouchMove(e);
    }
    onTouchEnd(e: cc.Event.EventTouch) {
        this.joystickCom.onTouchEnd(e);
    }
	// 移动实现
    thingMove() {
        let joystickFun = this.joystickCom.returnArrowAngle()
        this.thing.angle = joystickFun.angle + 90;  // 自行调整
        if (joystickFun.moveState) {
            this.thing.setPosition(this.thing.position.add(
                cc.v3(
                    joystickFun.vec.x * 5 * joystickFun.speedScale,
                    joystickFun.vec.y * 5 * joystickFun.speedScale
                )
            ))
        }
    }
    update (dt) {
        this.thingMove();
    }
}
- 1
- 2
- 3
- 4
- 5
- 6
- 7
- 8
- 9
- 10
- 11
- 12
- 13
- 14
- 15
- 16
- 17
- 18
- 19
- 20
- 21
- 22
- 23
- 24
- 25
- 26
- 27
- 28
- 29
- 30
- 31
- 32
- 33
- 34
- 35
- 36
- 37
- 38
- 39
- 40
- 41
- 42
- 43
第一次发文章,若有错误望大佬们指正。
源码
密码: agzg
声明:本文内容由网友自发贡献,不代表【wpsshop博客】立场,版权归原作者所有,本站不承担相应法律责任。如您发现有侵权的内容,请联系我们。转载请注明出处:https://www.wpsshop.cn/w/代码探险家/article/detail/787333
推荐阅读
相关标签


