
热门标签
热门文章
- 1MySQL基础总结_mysql根据性别对员工进行分组
- 2Context Capture10.20 安装教程(附安装包)
- 3在线设计数据库表用Itbuilder,极简易用真香!!!_数据库表设计工具
- 4uniapp:完成商品分类页面(scroll-view),左侧导航,右侧商品_uniapp左侧导航右侧内容
- 5一篇文章教会你搭建Hive分布式集群_hive集群搭建
- 6数据库系统概述之数据库的安全性_]链路加密所需密码设备数量相对较少,容易被非法监听者发现并从中获取敏感信息
- 7【Android】保留elevation层级效果,舍弃阴影效果
- 8从零开始学习大模型-第一章-大模型是什么_大模型如何入门教程
- 9卷王之王---MySQL最强篇 面试必备_卷王 数据库
- 10计算机程序员的职业能力_程序员需要掌握的技能
当前位置: article > 正文
三、nginx代理功能_nginx转发squid请求
作者:你好赵伟 | 2024-06-12 03:42:52
赞
踩
nginx转发squid请求
SQUID代理服务器配置
安装squid
yum install squid -y
- 1
编辑squid配置文件
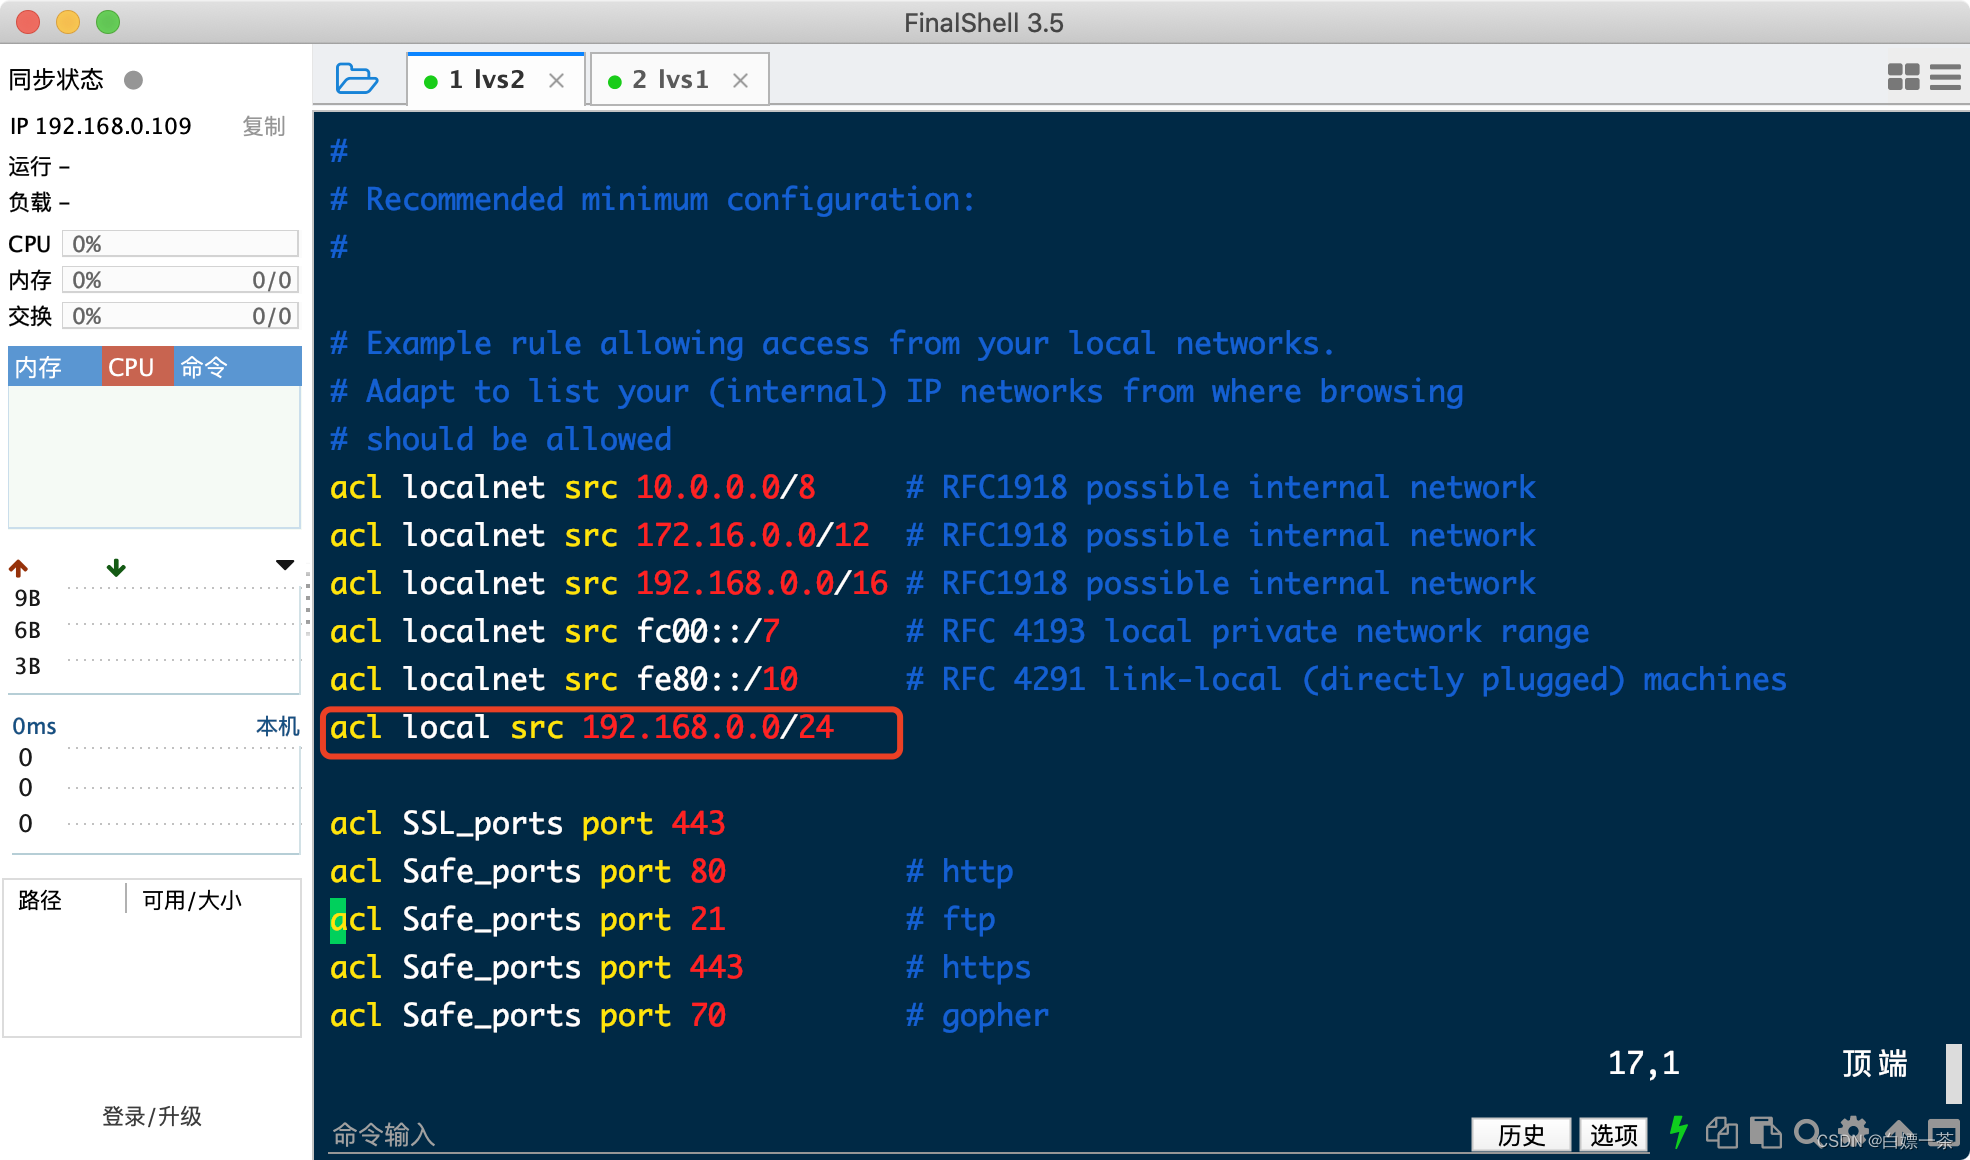
#vim /etc/squid/squid.conf
acl local src 192.168.0.0/24   	   //允许192.168.0.0/24网段内所有客户机访问代理服务器


http_access allow local 		  //该记录一定要添在deny all之前
http_port 3128
- 1
- 2
- 3
- 4
- 5
- 6
定义拒绝访问
# 这一行是定义
acl {定义名字} url_regex -i {关键字}
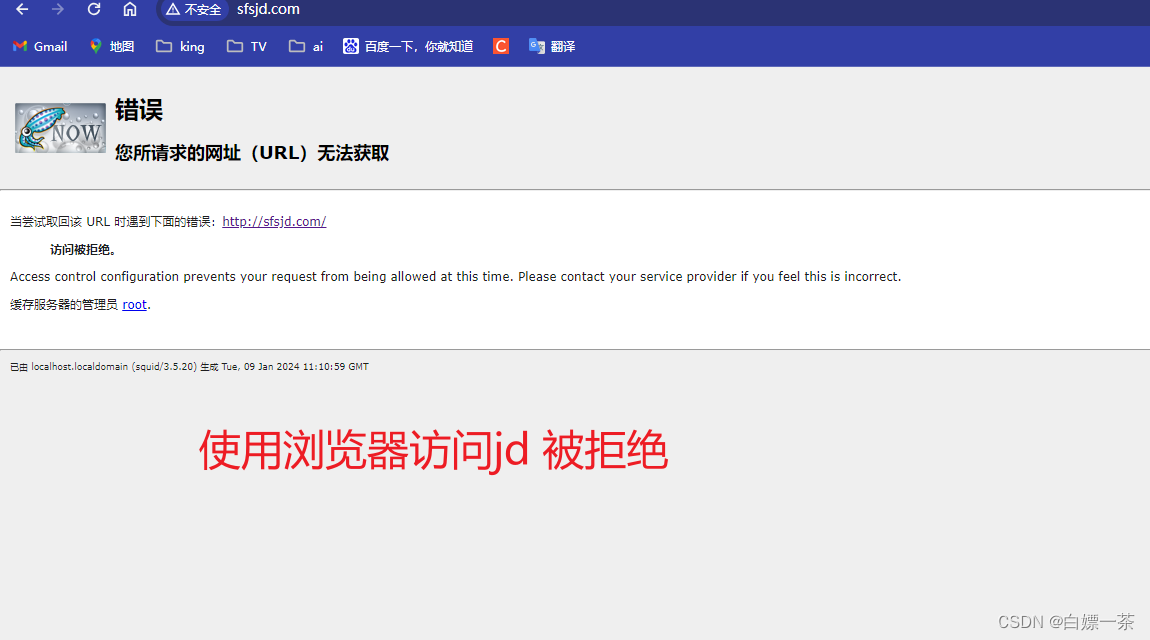
acl deny_keyword url_regex -i jd.com
# 这一行是调用自己定义的
http_access deny {定义名字}
http_access deny deny_keyword
# 定义好了 之后要重启 服务器
systemctl restart squid
- 1
- 2
- 3
- 4
- 5
- 6
- 7
- 8
- 9
- 10
- 11

启动squid服务
systemctl start squid
systemctl enable squid
- 1
- 2
linux客户端配置
linux客户端配置正向代理
export http_proxy=http://192.168.0.109:3128
export https_proxy=http://192.168.0.109:3128
echo "export http_proxy=http://192.168.0.109:3128" >>/etc/profile
echo "export https_proxy=http://192.168.0.109:3128" >>/etc/profile
- 1
- 2
- 3
- 4
- 5
测试http
wget http://www.jd.com/index.php
- 1
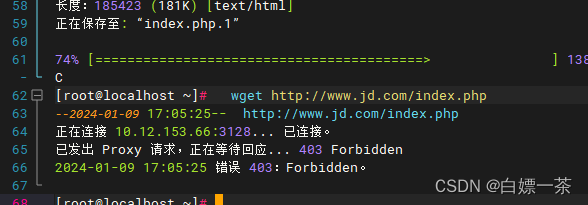
可以看到 403
代理服务器上查看日志/var/log/squid/access.log
cat /var/log/squid/access.log
- 1

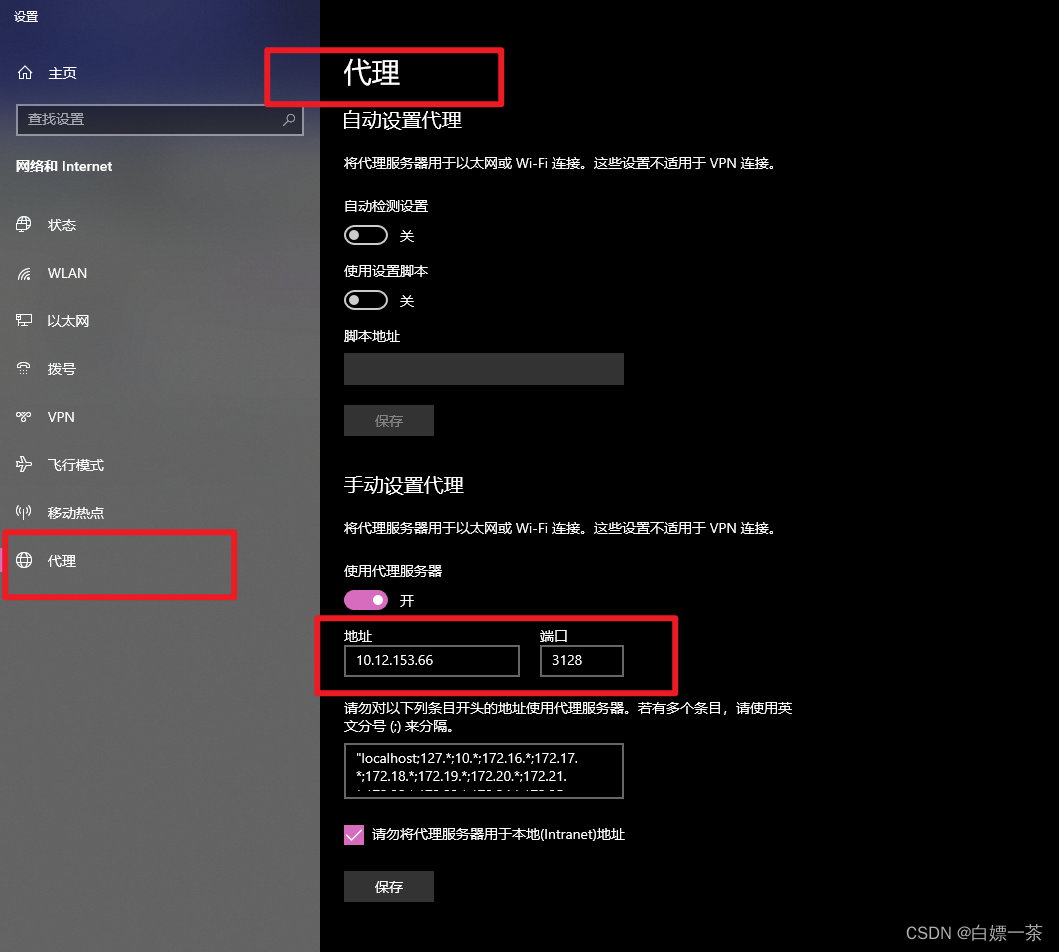
windows 也可以配置网页代理

本章完结
声明:本文内容由网友自发贡献,不代表【wpsshop博客】立场,版权归原作者所有,本站不承担相应法律责任。如您发现有侵权的内容,请联系我们。转载请注明出处:https://www.wpsshop.cn/w/你好赵伟/article/detail/706157
推荐阅读
相关标签

