- 1实现SpringMVC底层机制(三)
- 2NLP学习笔记(一)_prompt tokens
- 3数据结构:手撕图解双向循环链表_哨兵位的概念
- 4ElasticSearch设置密码Windows_windows elasticsearch 设置密码
- 5应用限流常用方案及项目实战
- 6AttributeError: partially initialized module ‘xxxx‘ has no attribute ‘xxxx‘ (most likely due to a .._partially initialized module 'warnings' has no att
- 7H5如何做页面下拉刷新和上拉加载_h5上滑刷新
- 8Codeforces Round 870 (Div. 2)题解(5/6)_piifog
- 9【机器学习】总结了九种机器学习集成分类算法(原理+代码)
- 10php mysql类_php数据库功能类-mysql类
baichuan7B/13B的原理与微调:从baichuan的SFT实现到baichuan2的RLHF实现_百川7b 13b
赞
踩
前言
国内众多开源模型中,现在比较有影响力的除了ChatGLM,就是baichuan了(当然,还有其他,后续我再关注)
而baichuan也在不断迭代,23年7月份出了第一代,23年9月份出了第二代,分别对应本文的第一部分、第二部分(即本文第一部分更新于7月份,第二部分更新于9月份)
第一部分 baichuan-7B/13B:与LLaMA的结构相同且表现优秀可商用
1.1 baichuan-7B
1.1.1 基于Transformer/RoPE/RMSNorm/SwiGLU + 1.2万亿训练数据/上下文窗口4096
baichuan-7B 是由百川智能(CEO为原搜狗创始人王小川)开发的一个开源可商用的大规模预训练语言模型
- 基于 Transformer 结构,采用了和 LLaMA 一样的模型设计(关于LLaMA结构的解读,请参见:LLaMA的解读与其微调:Alpaca-LoRA/Vicuna/BELLE/中文LLaMA/姜子牙/LLaMA 2),比如
. 位置编码:用的现阶段被大多模型采用的 rotary-embedding 方案,具有更好的外延效果(关于位置编码,详见一文通透位置编码:从标准位置编码、欧拉公式到旋转位置编码RoPE、ALiBi)
激活层:SwiGLU, Feedforward 变化为 8/3 倍的隐含层大小,即 11,008
Layer-Normalization: 基于 RMSNorm 的 Pre-Normalization
- 在大约 1.2 万亿 tokens 上训练的 70 亿参数模型,支持中英双语
- 上下文窗口长度为 4096
- 在标准的中文和英文权威 benchmark(C-EVAL/MMLU)上均取得同尺寸最好的效果
具体而言,C-Eval 数据集是一个全面的中文基础模型评测数据集,涵盖了 52 个学科和四个难度的级别
我们使用该数据集的 dev 集作为 few-shot 的来源,在 test 集上进行了 5-shot 测试
除了中文之外,作者团队也测试了模型在英文上的效果,MMLU 是包含 57 个多选任务的英文评测数据集,涵盖了初等数学、美国历史、计算机科学、法律等,难度覆盖高中水平到专家水平,是目前主流的LLM评测数据集
一句话总结,即是在C-EVAL/MMLU等数据集上的表现好于ChatGLM-6B (当然,ChatGLM2-6B又变更强了)
1.1.2 baichuan-7B相比LLaMA-7B的优势
虽然baichuan-7B采用了和LLaMA一样的模型设计,但他们在原本的 LLaMA 框架上进行诸多修改
比如为提升模型的效果以及解码效率,做了
- 分词改进
词表大小为64K ,而LLaMA词表大小为32K
具体而言,参考学术界方案使用 SentencePiece 中的 Byte-Pair Encoding (BPE) 作为分词算法,并且进行了以下的优化:
目前大部分开源模型主要基于英文优化,因此对中文语料存在效率较低的问题,使用 2000 万条以中英为主的多语言语料训练分词模型,显著提升对于中文的压缩率
对于数学领域,他们参考了 LLaMA 和 Galactica 中的方案,对数字的每一位单独分开,避免出现数字不一致的问题,对于提升数学能力有重要帮助
对于罕见字词(如特殊符号等),支持 UTF-8 characters 的 byte 编码,因此做到未知字词的全覆盖 - 数据集改进
使用了大约 1.2T 中英 tokens 进行训练(基于开源的中英文数据和自行抓取的中文互联网数据以及部分高质量知识性数据进行的数据清洗),而 LLaMA 7B 使用 1T 英文 tokens 进行训练
比如为提升训练时的吞吐,做了以下优化
- 算子优化技术:采用更高效算子,如 Flash-Attention,NVIDIA apex 的 RMSNorm 等。
- 算子切分技术:将部分计算算子进行切分,减小内存峰值。
- 混合精度技术:降低在不损失模型精度的情况下加速计算过程。
- 训练容灾技术:训练平台和训练框架联合优化,IaaS + PaaS 实现分钟级的故障定位和任务恢复。
- 通信优化技术,具体包括:
采用拓扑感知的集合通信算法,避免网络拥塞问题,提高通信效率
根据卡数自适应设置 bucket size,提高带宽利用率
根据模型和集群环境,调优通信原语的触发时机,从而将计算和通信重叠
基于上述的几个优化技术,使得在千卡 A800 显卡上达到了 7B 模型 182 TFLOPS 的吞吐,GPU 峰值算力利用率高达 58.3%
1.1.3 baichuan-7B的微调
本次微调参考项目:https://github.com/wp931120/baichuan_sft_lora
由于baichuan没有 supervised finetune 这一步,没有和人类意图进行对齐,经常听不懂你下达的指令。该项目遂利用belle 0.5M 指令微调数据,采用qlora的量化微调的方式对百川大模型进行人类意图对齐训练
如何训练呢?简单而言
- 首先,从huggingface 中下载baichuan7b 的模型权重 ,然后将 belle 数据集 train_0.5M_CN 下载到本地并放到项目目录下的dataset文件夹下,最后运行sft_lora.py 脚本
- 接着,将百川LLM 采用qlora的 nf4 和双重量化方式进行量化
- 最后,采用lora进行指令微调
更具体而言,本次微调baichuan-7B的步骤如下
- 微调之前的准备
下载项目仓库- git clone https://github.com/wp931120/baichuan_sft_lora.git
- cd baichuan_sft_lora
- conda create -n baichuan-7b python=3.9
- conda activate baichuan-7b
- pip install -r requirements.txt
sft 数据集采用的是belle 0.5M
下载地址:https://huggingface.co/datasets/BelleGroup/train_0.5M_CN/tree/main
将 belle 数据集 train_0.5M_CN 下载到本地并放到项目目录下的dataset文件夹下 - 将百川LLM 采用qlora的 nf4 和双重量化方式进行量化
- 再采用lora进行指令微调
wp931120x/baichuan_4bit_lora · Hugging Face - 修改并运行sft_lora.py文件
将sft_lora.py中的模型路径设置为自己的模型路径
执行python sft_lora.py (代码如下所示,来源:baichuan_sft_lora /sft_lora.py)- import os # 导入os模块,这个模块提供了一种方便的使用操作系统依赖功能的方式
- os.environ['CUDA_VISIBLE_DEVICES'] = '0' # 设置CUDA可见设备,'0'表示仅使用第一块GPU
- from datasets import load_dataset # 导入load_dataset函数,用于加载数据集
- import transformers # 导入transformers库,这是一个常用的NLP库
- # 导入Trainer和TrainingArguments,分别用于模型的训练和训练参数的设置
- from transformers import Trainer, TrainingArguments
- # 导入AutoTokenizer和AutoModelForCausalLM,分别用于自动化地从预训练模型中获取Tokenizer和模型
- from transformers import AutoTokenizer, AutoModelForCausalLM
- # 导入BitsAndBytesConfig,用于设置模型的量化配置
- from transformers import BitsAndBytesConfig
- # 导入一些特定的函数和配置类
- from peft import (
- LoraConfig,
- get_peft_model,
- prepare_model_for_kbit_training,
- set_peft_model_state_dict,
- )
- import torch # 导入PyTorch库,这是一个常用的深度学习库
- # 定义一些配置信息
- CUTOFF_LEN = 1024
- VAL_SET_SIZE = 2000
- DATA_PATH = "./dataset/Belle_open_source_0.5M.json"
- OUTPUT_DIR = "baichuansft"
- resume_from_checkpoint = "baichuansft"
- # 设置设备映射,""表示默认设备,0表示设备编号
- device_map = {"": 0}
- # 使用AutoTokenizer从预训练模型中获取Tokenizer
- tokenizer = AutoTokenizer.from_pretrained("./baichuan-7B",trust_remote_code=True)
- # 使用AutoModelForCausalLM从预训练模型中获取模型,并设置量化配置
- model = AutoModelForCausalLM.from_pretrained("./baichuan-7B",
- trust_remote_code=True,
- quantization_config=BitsAndBytesConfig(
- load_in_4bit=True,
- bnb_4bit_compute_dtype=torch.bfloat16,
- bnb_4bit_use_double_quant=True,
- bnb_4bit_quant_type='nf4'
- ),
- device_map=device_map)
- model = prepare_model_for_kbit_training(model) # 准备模型进行kbit训练
- # 导入bitsandbytes模块
- import bitsandbytes as bnb
- # 定义一个函数,用于找到模型中所有的线性层的名称
- def find_all_linear_names(model):
- cls = bnb.nn.Linear4bit
- lora_module_names = set()
- for name, module in model.named_modules(): # 遍历模型中的所有模块
- if isinstance(module, cls): # 如果模块是线性层
- names = name.split('.')
- lora_module_names.add(names[0] if len(names) == 1 else names[-1]) # 添加到线性层名称集合中
- if 'lm_head' in lora_module_names: # 如果'lm_head'在名称集合中,需要移除
- lora_module_names.remove('lm_head')
- return list(lora_module_names) # 返回线性层名称列表
- # 获取所有的线性层的名称
- modules = find_all_linear_names(model)
- # 设置LoRA配置
- config = LoraConfig(
- r=8,
- lora_alpha=16,
- lora_dropout=0.05,
- bias="none",
- target_modules=modules,
- task_type="CAUSAL_LM",
- )
- # 获取用于训练的模型
- model = get_peft_model(model, config)
- tokenizer.pad_token_id = 0 # 设置tokenizer的pad_token_id为0
- # 如果有设置从检查点恢复
- if resume_from_checkpoint:
- # 检查可用的权重并加载
- checkpoint_name = os.path.join(
- resume_from_checkpoint, "pytorch_model.bin"
- ) # 完整的检查点
- # 如果完整的检查点不存在,则加载LoRA模型的检查点
- if not os.path.exists(checkpoint_name):
- checkpoint_name = os.path.join(
- resume_from_checkpoint, "adapter_model.bin"
- ) # 仅LoRA模型 - 上面的LoRA配置必须匹配
- resume_from_checkpoint = (
- False # 所以训练器不会尝试加载状态
- )
- if os.path.exists(checkpoint_name):
- print(f"Restarting from {checkpoint_name}")
- adapters_weights = torch.load(checkpoint_name)
- set_peft_model_state_dict(model, adapters_weights) # 设置模型的状态字典
- else:
- print(f"Checkpoint {checkpoint_name} not found")
- # 加载数据集
- data = load_dataset("json", data_files=DATA_PATH)
- # 定义tokenize函数,用于将输入进行tokenize
- def tokenize(prompt, add_eos_token=True):
- # 这里是tokenize的具体操作
- result = tokenizer(
- prompt,
- truncation=True,
- max_length=CUTOFF_LEN,
- padding=False,
- return_tensors=None,
- )
- # 添加EOS token
- if (
- result["input_ids"][-1] != tokenizer.eos_token_id
- and len(result["input_ids"]) < CUTOFF_LEN
- and add_eos_token
- ):
- result["input_ids"].append(tokenizer.eos_token_id)
- result["attention_mask"].append(1)
- if add_eos_token and len(result["input_ids"]) >= CUTOFF_LEN:
- result["input_ids"][CUTOFF_LEN - 1] = tokenizer.eos_token_id
- result["attention_mask"][CUTOFF_LEN - 1] = 1
- # 输入和标签都是input_ids
- result["labels"] = result["input_ids"].copy()
- return result
- # 定义generate_and_tokenize_prompt函数,用于生成并tokenize输入
- def generate_and_tokenize_prompt(data_point):
- instruction = data_point['instruction']
- input_text = data_point["input"]
- input_text = "Human: " + instruction + input_text + "\n\nAssistant: "
- input_text = tokenizer.bos_token + input_text if tokenizer.bos_token != None else input_text
- target_text = data_point["output"] + tokenizer.eos_token
- full_prompt = input_text + target_text
- tokenized_full_prompt = tokenize(full_prompt)
- return tokenized_full_prompt
- # 划分训练集和验证集,并进行shuffle和map操作
- if VAL_SET_SIZE > 0:
- train_val = data["train"].train_test_split(
- test_size=VAL_SET_SIZE, shuffle=True, seed=42
- )
- train_data = train_val["train"].shuffle().map(generate_and_tokenize_prompt)
- val_data = train_val["test"].shuffle().map(generate_and_tokenize_prompt)
- else:
- train_data = data['train'].shuffle().map(generate_and_tokenize_prompt)
- val_data = None
- # 创建Trainer对象,用于进行训练
- trainer = Trainer(
- model=model,
- train_dataset=train_data,
- eval_dataset=val_data,
- args=TrainingArguments(
- num_train_epochs=1,
- per_device_train_batch_size=1,
- per_device_eval_batch_size=1,
- learning_rate=3e-4,
- gradient_accumulation_steps=4,
- evaluation_strategy="steps" if VAL_SET_SIZE > 0 else "no",
- save_strategy="steps",
- eval_steps=2000 if VAL_SET_SIZE > 0 else None,
- save_steps=2000,
- output_dir=OUTPUT_DIR,
- report_to = "tensorboard",
- save_total_limit=3,
- load_best_model_at_end=True if VAL_SET_SIZE > 0 else False,
- optim="adamw_torch"
- ),
- data_collator=transformers.DataCollatorForSeq2Seq(tokenizer,
- pad_to_multiple_of=8,
- return_tensors="pt",
- padding=True),
- )
- # 进行训练
- trainer.train(resume_from_checkpoint=False)
- # 保存预训练模型
- model.save_pretrained(OUTPUT_DIR)

1.2 baichuan-13B:1.4万亿tokens/上下文长度4096/可商用
1.2.1 模型的介绍、下载、推理
2023年7月11日,百川智能发布Baichuan-13B(这是其GitHub地址)
Baichuan-13B 是继 Baichuan-7B 之后开发的包含 130 亿参数的开源可商用的大规模语言模型,本次发布包含以下两个版本
- 预训练(Baichuan-13B-Base)
- 对齐(Baichuan-13B-Chat,July注:我看了下代码,这里的对齐指的是通过对话数据对齐,即只做了SFT,没做RLHF)
Baichuan-13B 有如下几个特点:
- 更大尺寸、更多数据
Baichuan-13B 在 Baichuan-7B 的基础上进一步扩大参数量到 130 亿,并且在高质量的语料上训练了 1.4 万亿 tokens,他们声称超过 LLaMA-13B 40%,是当前开源 13B 尺寸下训练数据量最多的模型
支持中英双语,使用 ALiBi 位置编码,上下文窗口长度为 4096
ALiBi是一个较新的位置编码技术,已经显示出了改进的外推性能
虽说大多数开源模型使用RoPE作为位置嵌入,毕竟优化的注意力实现(如Flash Attention)目前更适合于RoPE,因为RoPE是基于乘法的,绕过了将attention_mask传递给注意力操作的需要
但好在通过初步的实验,位置嵌入的选择并没有显著影响模型的性能
关于ALiBi的更多介绍, 详见:一文通透位置编码:从标准位置编码、欧拉公式到旋转位置编码RoPE、ALiBi - 同时开源预训练和对齐模型
预训练模型是适用开发者的『 基座 』,而广大普通用户对有对话功能的对齐模型具有更强的需求。因此本次开源我们同时发布了对齐模型(Baichuan-13B-Chat),具有很强的对话能力,开箱即用,几行代码即可简单的部署 - 更高效的推理
为了支持更广大用户的使用,我们本次同时开源了 int8 和 int4 的量化版本,相对非量化版本在几乎没有效果损失的情况下大大降低了部署的机器资源门槛,可以部署在如 Nvidia 3090 这样的消费级显卡上 - 开源免费可商用
Baichuan-13B 不仅对学术研究完全开放,开发者也仅需邮件申请并获得官方商用许可后,即可以免费商用
| 模型名称 | 隐藏层维度 | 层数 | 注意力头数 | 词表大小 | 总参数量 | 训练数据(tokens) | 位置编码 | 最大长度 |
| Baichuan-7B | 4,096 | 32 | 32 | 64,000 | 7,000,559,616 | 1.2 万亿 | RoPE | 4,096 |
| Baichuan-13B | 5,120 | 40 | 40 | 64,000 | 13,264,901,120 | 1.4 万亿 | ALiBi | 4,096 |
由于Baichuan-13B-Base、Baichuan-13B-Chat 推理所需的模型权重、源码、配置已发布在 Hugging Face,故可以使用下面命令将模型下载到本地,方便使用时直接加载(/data/sim_chatgpt/)
- git clone https://huggingface.co/baichuan-inc/Baichuan-13B-Base
- git clone https://huggingface.co/baichuan-inc/Baichuan-13B-Chat
至于模型推理,可以直接用 LLaMA-Efficient-Tuning 仓库中的环境
conda activate baichuan-7b- import torch
- from transformers import AutoModelForCausalLM, AutoTokenizer
- from transformers.generation.utils import GenerationConfig
- tokenizer = AutoTokenizer.from_pretrained("/data/sim_chatgpt/Baichuan-13B-Chat", use_fast=False, trust_remote_code=True)
- model = AutoModelForCausalLM.from_pretrained("/data/sim_chatgpt/Baichuan-13B-Chat", torch_dtype=torch.float16, trust_remote_code=True)
- model = model.quantize(4).cuda()
- model.generation_config = GenerationConfig.from_pretrained("/data/sim_chatgpt/Baichuan-13B-Chat")
- messages = []
- messages.append({"role": "user", "content": "世界上第二高的山峰是哪座"})
- response = model.chat(tokenizer, messages)
- print(response)
1.2.2 基于LoRA 微调Baichuan-13B-Chat过程(单轮)
本次微调参考:LLaMA-Efficient-Tuning
- 下载仓库
git clone https://github.com/hiyouga/LLaMA-Efficient-Tuning.git - 配置环境
- # 这里使用和 baichuan-7b 相同的环境
- conda create -n baichuan-7b python=3.10
- conda activate baichuan-7b
- cd LLaMA-Efficient-Tuning
- pip install -r requirements.txt
- 微调数据
这里直接使用 alpaca_gpt4_zh,也就是由GPT4生成的中文alpaca数据,在LLaMA-Efficient-Tuning /data目录下
数据格式如下:
instruction:任务指令,不能为空。
input:任务输入,可为空。如果不为空,项目内部处理训练数据时,会将 instruction、input 拼接在一起作为任务的输入
output:任务输出,不能为空
数据示例如下:
{
"instruction": "保持健康的三个提示。",
"input": "",
"output": "以下是保持健康的三个提示:\n\n1. 保持身体活动。每天做适当的身体运动,如散步、跑步或游泳,能促进心血管健康,增强肌肉力量,并有助于减少体重。\n\n2. 均衡饮食。每天食用新鲜的蔬菜、水果、全谷物和脂肪含量低的蛋白质食物,避免高糖、高脂肪和加工食品,以保持健康的饮食习惯。\n\n3. 睡眠充足。睡眠对人体健康至关重要,成年人每天应保证 7-8 小时的睡眠。良好的睡眠有助于减轻压力,促进身体恢复,并提高注意力和记忆力。"
},
{
"instruction": "三原色是什么?",
"input": "",
"output": "三原色通常指的是红色、绿色和蓝色(RGB)。它们是通过加色混合原理创建色彩的三种基础颜色。在以发光为基础的显示设备中(如电视、计算机显示器、智能手机和平板电脑显示屏), 三原色可混合产生大量色彩。其中红色和绿色可以混合生成黄色,红色和蓝色可以混合生成品红色,蓝色和绿色可以混合生成青色。当红色、绿色和蓝色按相等比例混合时,可以产生白色或灰色。\n\n此外,在印刷和绘画中,三原色指的是以颜料为基础的红、黄和蓝颜色(RYB)。这三种颜色用以通过减色混合原理来创建色彩。不过,三原色的具体定义并不唯一,不同的颜色系统可能会采用不同的三原色。"
}, - 微调的各个参数如下
显存占用约9个G,运行时间大概60小时
- CUDA_VISIBLE_DEVICES=0 # 设定CUDA设备ID为0,只使用第一块GPU进行训练
- nohup python src/train_bash.py \ # 使用nohup命令在后台运行训练脚本train_bash.py,保证终端关闭后任务仍在运行
- --do_train \ # 指定执行训练操作
- --model_name_or_path /data/sim_chatgpt/Baichuan-13B-Chat \ # 指定模型的名称或者模型文件的路径
- --template baichuan \ # 模型模板为"baichuan"
- --dataset alpaca_gpt4_zh \ # 使用名为"alpaca_gpt4_zh"的数据集进行训练
- --output_dir baichuan_lora_checkpoint \ # 训练过程中的输出目录
- --max_source_length 256 \ # 输入文本的最大长度
- --max_target_length 512 \ # 输出文本的最大长度
- --per_device_train_batch_size 1 \ # 每个设备的训练批次大小
- --gradient_accumulation_steps 1 \ # 梯度累计步骤,用于模拟更大的批次大小
- --lr_scheduler_type cosine \ # 使用余弦退火策略进行学习率调整
- --logging_steps 10 \ # 每10步记录一次日志
- --save_steps 10000 \ # 每10000步保存一次模型
- --learning_rate 5e-5 \ # 设置学习率
- --num_train_epochs 1.0 \ # 训练1个epoch
- --plot_loss \ # 绘制损失图
- --fp16 \ # 使用半精度浮点数进行训练,可以加速训练并减少内存使用
- --lora_target W_pack \ # LoRA的目标设置
- --lora_rank 8 \ # LoRA的秩设置
- --padding_side right \ # 在序列的右侧进行填充
- --quantization_bit 4 \ # 量化位数设置为4
- >> qlora_log.out 2>&1 & # 将标准输出和错误输出都重定向到qlora_log.out文件中,并在后台运行
 微调后生成的日志文件

在 baichuan_lora_checkpoint 路径下会生成微调后的模型文件,如下:
- 使用微调后的模型进行推理
详见我司类ChatGPT微调实战课上第7课杜老师的补充视频:Baichuan-13B推理及微调过程
第二部分 baichuan2-7B/13B的RLHF实现
23年九月,百川智能发布了Baichuan 2(其GitHub地址、其技术报告地址)的基础模型:baichuan-7B、Baichuan 2-13B,这两个模型都在2.6万亿tokens上进行了训练,下表对比了Baichuan 2与Baichuan 1的各个参数
| 模型名称 | 隐藏层维度 | 层数 | 注意力头数 | 词表大小 | 训练数据(tokens) | 位置编码 | 最大长度 |
| Baichuan-7B | 4,096 | 32 | 32 | 64,000 | 1.2 万亿 | RoPE | 4,096 |
| Baichuan-13B | 5,120 | 40 | 40 | 64,000 | 1.4 万亿 | ALiBi | 4,096 |
| Baichuan 2-7B | 4096 | 32 | 32 | 125,696 | 2.6万亿 | RoPE | 4096 |
| Baichuan 2-13B | 5120 | 40 | 40 | 125,696 | 2.6万亿 | ALiBi | 4096 |
2.1 训练数据
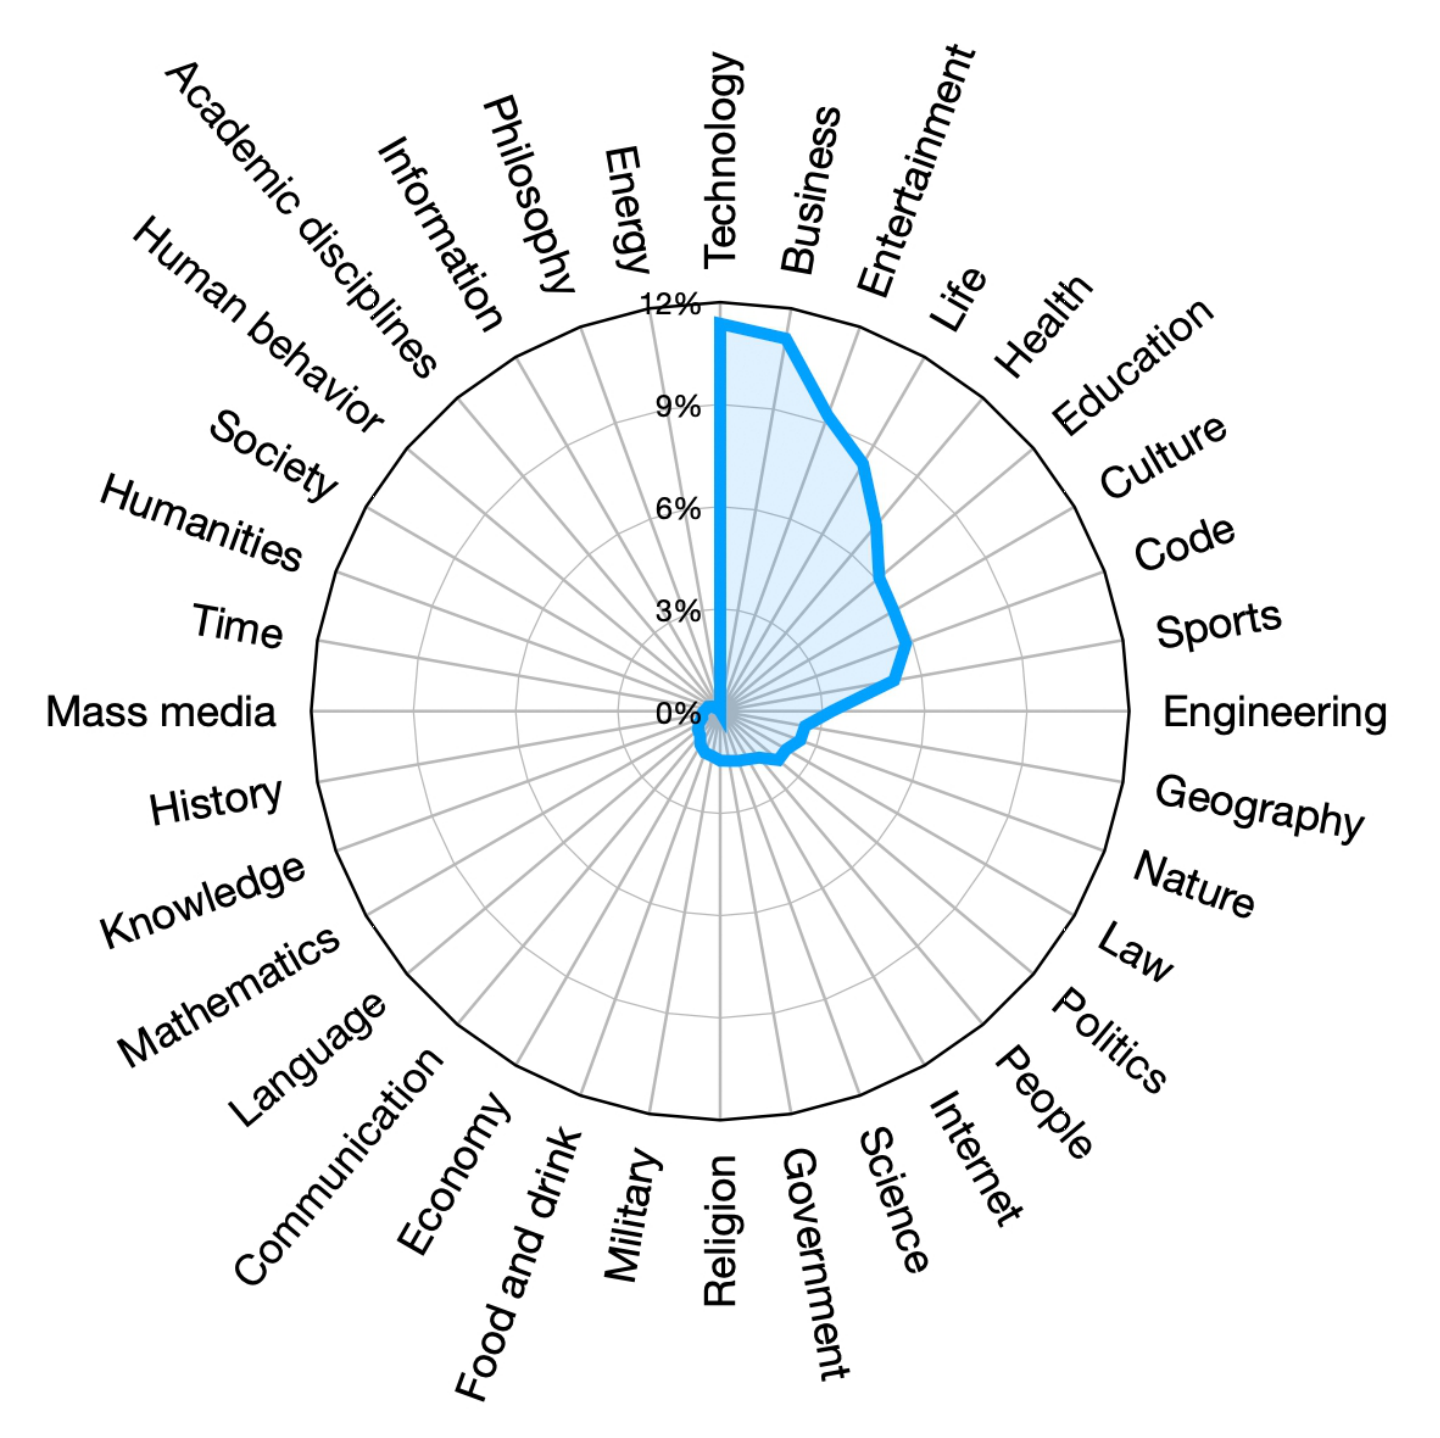
baichuan的训练数据包括一般的互联网网页、书籍、研究论文、代码库等,以构建一个广泛的通用知识体系,其训练语料库的组成如下图所示

接下来
- 构建了一个同时支持LSH类特征和密集嵌入特征的大规模去重和聚类系统。这个系统可以在数小时内对万亿级的数据进行聚类和去重(基于聚类,对单个文档、段落和句子进行去重和评分)
We builta large-scale deduplication and clustering systemsupporting both LSH-like features and denseembedding features.Based on the clustering, individual documents,paragraphs, and sentences are deduplicated andscored - 然后将这些分数用于预训练中的数据采样。数据处理不同阶段的训练数据大小如图

2.2 baichuan的模型结构
Baichuan 2的模型架构基于流行的Transformer 。但是,作者对其进行了若干修改。
2.2.1 分词器(Tokenizer):SentencePiece中的BPE
分词器需要平衡两个关键因素:高压缩率以实现高效的推断,以及适当大小的词汇表以确保每个词嵌入的充分训练。
- 为了平衡计算效率和模型性能,Baichuan 2的词汇表大小从Baichuan 1的64,000扩展到125,696

- 与其他模型相比,Baichuan 2的分词器的词汇大小和文本压缩率列在了一个表格中。其中,文本压缩率越低越好
- Baichuan 2使用SentencePiece (Kudo and Richardson, 2018)中的byte-pair encoding (BPE) (Shibata et al., 1999)来分词。具体来说,它不对输入文本应用任何规范化,并且不像Baichuan 1那样添加虚拟前缀。它将数字分割成单个数字以更好地编码数值数据。为了处理包含额外空格的代码数据,它在分词器中添加了仅空格的令牌。字符覆盖率设置为0.9999,稀有字符回退到UTF-8字节
2.2.2 位置编码:7B是RoPE、13B是ALiBi
Baichuan 2在其7B版本中采用了旋转位置嵌入 (Rotary Positional Embedding, RoPE)。而在其13B版本中,采用了ALiBi (由Press等人于2021年提出),这与Baichuan第一代的两个不同尺寸的模型保持一致
2.2.3 SwiGLU激活与RMSNorm归一化
- 和LLaMA/bc1一样,使用SwiGLU激活函数,这是GLU的一个变种。然而,SwiGLU有一个“双线性”层,包含三个参数矩阵,这与具有两个矩阵的传统Transformer前馈层不同,他们将隐藏大小从原来的4倍减少到隐藏大小的8/3倍,并进行适当的调整
We use SwiGLU (Shazeer, 2020) activationfunction, a switch-activated variant of GLU(Dauphin et al., 2017) which shows improvedresults. However, SwiGLU has a “bilinear” layerand contains three parameter matrices, differingfrom the vanilla Transformer’s feed-forward layerthat has two matrices, so we reduce the hidden sizefrom 4 times the hidden size to 83 hidden size androunded to the multiply of 128 - 对于baichuan 2的注意层,我们采用xformer2实现的内存高效注意力。通过利用xFormers优化的注意力和偏置力,且bc2 13B可以有效地结合整合ALiBi的基于偏置的位置编码,同时减少内存开销。这为baichuan2号的大规模训练提供了性能和效率上的好处
For the attention layer of Baichuan 2, weadopt the memory efficient attention (Rabe andStaats, 2021) implemented by xFormers2.Byleveraging xFormers’ optimized attention withbiasing capabilities, we can efficiently incorporate ALiBi’s bias-based positional encoding whilereducing memory overhead.This providesperformance and efficiency benefits for Baichuan2’s large-scale training - 至于归一化上,使用的RMSNorm实现
2.2.4 一系列优化:优化器、NormHead、Max-z损失、并行训练
- 优化器
超参数:
训练时使用了AdamW优化器,其中β1设置为0.9,β2设置为0.95
使用了0.1的权重衰减,并将梯度范数裁剪到0.5
模型的学习率首先经过2,000步的线性缩放预热到最大学习率,然后应用余弦衰减到最小学习率
且整个模型使用BFloat16混合精度进行训练。与Float16相比,BFloat16具有更好的动态范围,但其低精度在某些设置中会导致问题。因此,对于某些值敏感的操作(如位置嵌入),使用了全精度
- NormHead
由于output embedings容易不稳定,故为了稳定训练并提高模型性能,对output embeddings进行归一化
且对于KNN检索任务,我们发现语义信息主要由嵌入的余弦相似度编码,而不是L2距离。当前的线性分类器通过点积计算logits,这是L2距离和余弦相似度的混合。而NormHead减少了在计算logits时L2距离的干扰 - Max-z损失
使用deepspeed训练过程中会出现明显的logits变得非常大的情况,而由于repetition penalty的存在,largit logits会导致推理的时候存在问题,非常大的 logits 可以显着改变 softmax 之后的概率,使模型对重复惩罚超参数的选择敏感
基于NormSoftmax 的启发,百川团队提供了一个Max-z的辅助loss来解决这种情况 - 并行训练上
在大规模集群中,网络连接经常跨越多层交换机。我们战略性地安排了用于分布式训练的rank,以尽量减少跨不同交换机的频繁访问,从而减少延迟,从而提高整体训练效率
In large-scale clusters, network connections frequentlyspan multiple layers of switches. We strategicallyarrange the ranks for distributed trainingto minimize frequent access across differentswitches, which reduces latency and therebyenhances overall training efficiency
通过跨gpu划分参数,ZeRO3以额外的全采集通信为代价减少了内存消耗。为了解决这个问题,我们提出了一种混合和分层的划分方案。具体来说,我们的框架首先对所有gpu上的优化器状态进行分区,然后自适应地决定哪些层需要激活ZeRO3,以及是否分层划分参数
This approach would lead to a significantcommunication bottleneck when scaling to thousands of GPUs. Toaddress this issue, we propose a hybrid andhierarchical partitioning scheme. Specifically,our framework first partitions the optimizer statesacross all GPUs, and then adaptively decideswhich layers need to activate ZeRO3, andwhether partitioning parameters hierarchically
2.3 RLHF下的对齐技术:类比ChatGPT/DeepSpeed Chat
百川2还引入了对齐程序,产生了两种专门针对对话的模型:baichuan2 7b chat和baichuan2 13b chat。baichuan2的对齐过程和ChatGPT或deep speed chat一样,还是我们熟悉且“热爱”的三阶段训练方式:监督微调(SFT)、训练奖励模型RM、基于人类反馈的强化学习(RLHF)迭代策略
2.3.1 监督微调SFT
在监督微调阶段,使用人类标注者为从各种数据源收集的prompt进行标注。每个prompt都根据与Claude类似的关键原则被标记为有帮助或无害
为了验证数据质量,我们使用交叉验证(cross-validation)——权威标注者检查特定众包工作组注释的样本批次的质量,过滤低质量数据
至于数据上,SFT阶段总共使用了1万条SFT数据
2.3.2 训练奖励模型
- 我们为所有prompts设计了一个三层分类系统,由6个一级类别、30个二级类别和超过200个三级类别组成。从用户角度出发,我们的目标是分类体系全面覆盖所有类型的用户需求。从奖励模型训练的角度来看,提示在每个类别应具有足够的多样性,以确保奖励模型能够很好地泛化
- 在给定prompt下,Baichuan2通过不同规模和阶段(SFT、PPO)的模型生成response,增强response的多样性(值得注意的是,对于奖励模型的训练,一般是给定一个prompt,然后从同一个模型中采样4-9个答案,最后让人类评估员进行排序,所以baichuan2的技术报告中的这个表述很容易引发歧义)
RM训练只使用Baichuan2系列模型生成的response。因为来自其他开源数据集和专有模型的回复并不能提高奖励模型的准确性。这也从另一个角度强调了Baichuan 2系列的内在一致性
Given a prompt, responses are generated by Baichuan 2 models of different sizes and stages(SFT, PPO) to enhance response diversity.
Only responses generated by the Baichuan 2 model family are used in the RM training. Responses fromother open-source datasets and proprietary modelsdo not improve the reward model’s accuracy. Thisalso underscores the intrinsic consistency of the Baichuan 2 model series from another perspective - 训练得到的奖励模型表现出与LLaMA 2一致的表现,说明两个response的得分差异越大,奖励模型的判别准确率越高 (换言之,给到奖励模型的训练数据中,对同一个prompt的不同response之间的差异越大,最终训练出来的奖励模型效果越好,大白话就是奖惩规则越分明,HR对各员工各类行为的好坏上的判定则越准)
具体如表4所示
2.3.3 在奖励模型的指导下通过PPO算法进一步迭代模型的策略
在获得奖励模型后,使用PPO算法来进一步训练模型。和deepspeed chat一样,使用四个模型:
- actor模型(负责生成response)
theactor model (responsible for generating responses) - reference模型(用于计算具有固定参数的KL惩罚)
the reference model (used to compute the KL penalty with fixed parameters) - reward模型(为具有固定参数的整个response提供总体奖励)
the reward model(providing an overarching reward for the entire response with fixed parameters) - critic模型(旨在学习每个token的价值)
the critic model (designed to learn per-token values)
具体如下图所示

我本想再解析下Baichuan 2关于RLHF的代码实现,但巧的是,和ChatGLM类似,我在Baichuan 2公布的代码中,也没有看到这个RLHF实现的代码(没有像DSC对ChatGPT三阶段训练方式的代码实现,给的一目了然)..
此外,23年9.25日,百川发布了Baichuan2 53B的模型,但因暂未有对应的论文或技术报告发布,故暂不对其做技术解析
至于baichuan2的微调会放在:大模型项目开发线上营
// 待更..
附录A 复旦MOSS:开场备受关注 但恐后劲不足
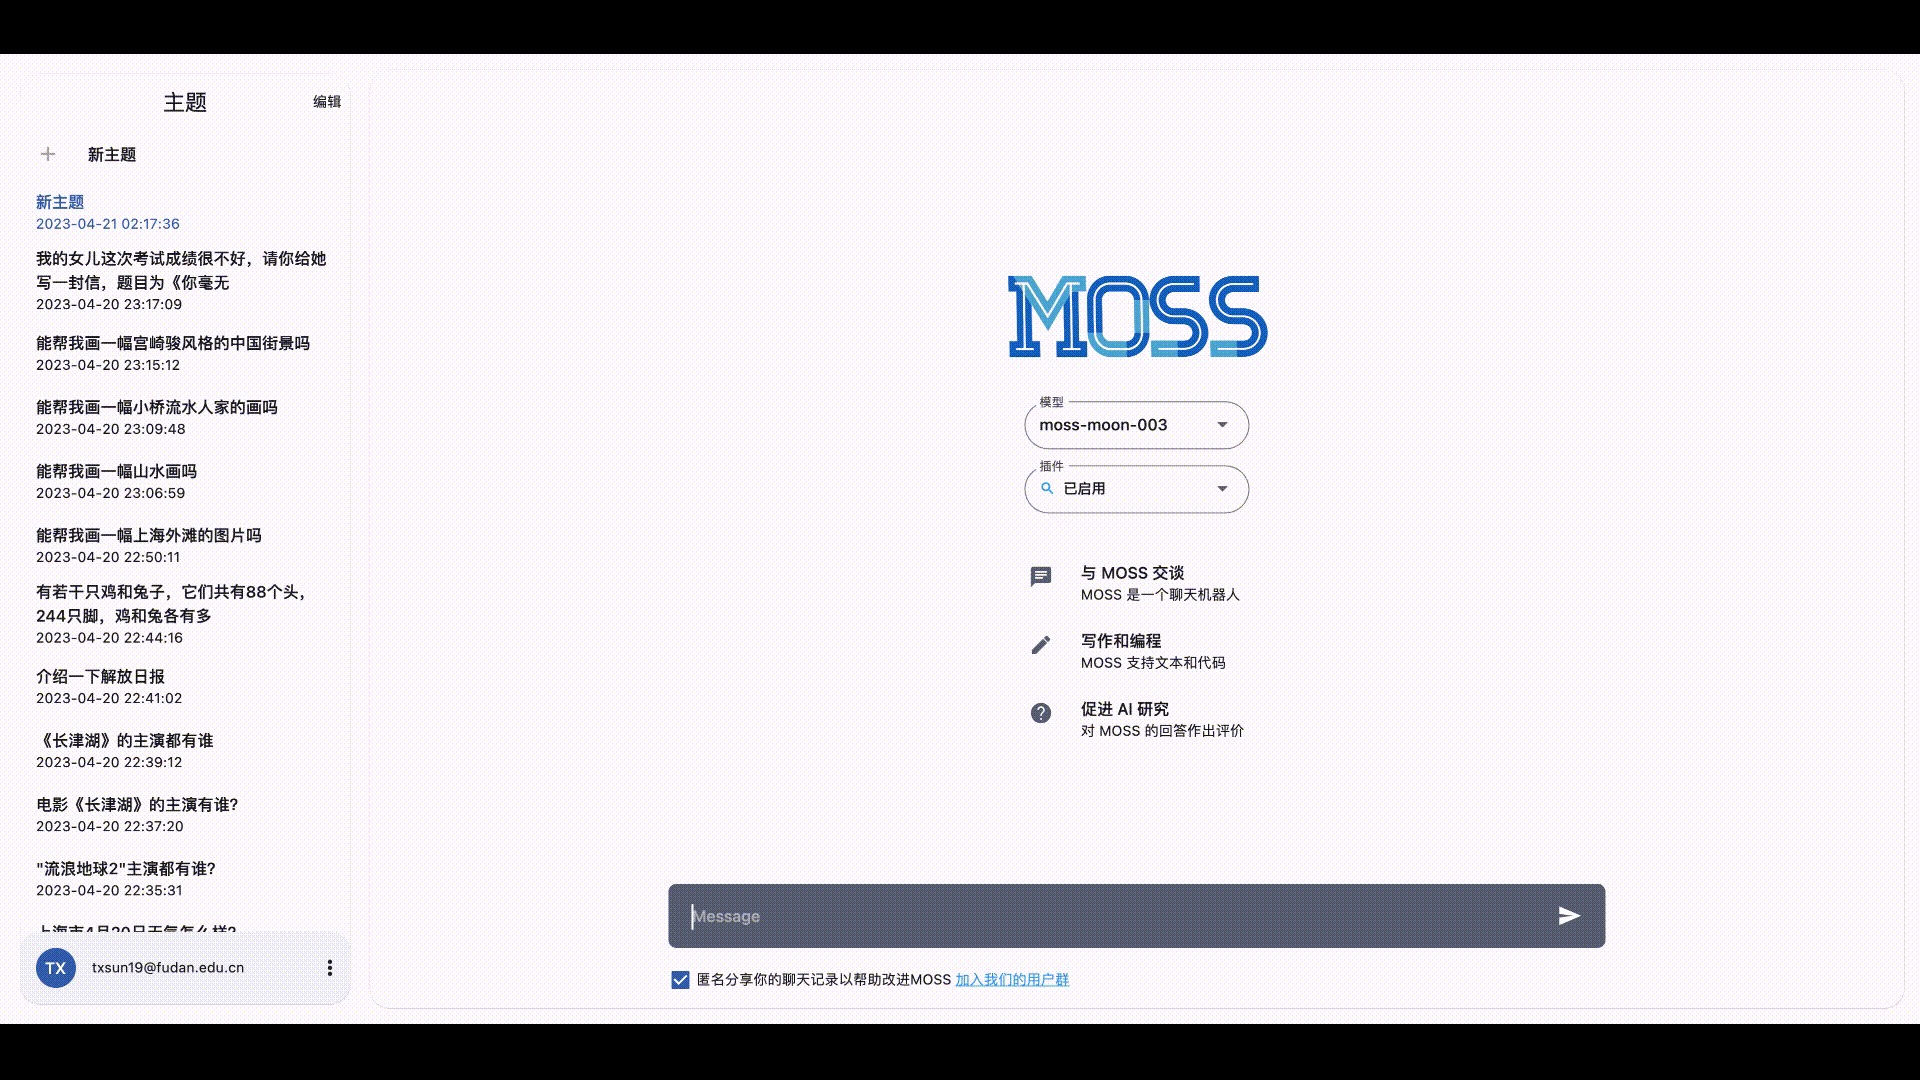
MOSS是复旦大学邱锡鹏团队推出的一个支持中英双语和多种插件的开源对话语言模型,moss-moon系列模型具有160亿参数,在FP16精度下可在单张A100/A800或两张3090显卡运行,在INT4/8精度下可在单张3090显卡运行
其基座语言模型在约七千亿中英文以及代码单词上预训练得到,后续经过对话指令微调、插件增强学习和人类偏好训练具备多轮对话能力及使用多种插件的能力

A.1 已开源的模型/数据
A.1.1 已开源的模型
- moss-moon-003-base: MOSS-003基座模型,在高质量中英文语料上自监督预训练得到,预训练语料包含约700B单词,计算量约6.67x10²²次浮点数运算。
- moss-moon-003-sft: 基座模型在约110万多轮对话数据上微调得到,具有指令遵循能力、多轮对话能力、规避有害请求能力。
- moss-moon-003-sft-plugin: 基座模型在约110万多轮对话数据和约30万插件增强的多轮对话数据上微调得到,在
moss-moon-003-sft基础上还具备使用搜索引擎、文生图、计算器、解方程等四种插件的能力。 - moss-moon-003-sft-int4: 4bit量化版本的
moss-moon-003-sft模型,约占用12GB显存即可进行推理。 - moss-moon-003-sft-int8: 8bit量化版本的
moss-moon-003-sft模型,约占用24GB显存即可进行推理。 - moss-moon-003-sft-plugin-int4: 4bit量化版本的
moss-moon-003-sft-plugin模型,约占用12GB显存即可进行推理。 - moss-moon-003-sft-plugin-int8: 8bit量化版本的
moss-moon-003-sft-plugin模型,约占用24GB显存即可进行推理。 - moss-moon-003-pm: 在基于
moss-moon-003-sft收集到的偏好反馈数据上训练得到的偏好模型,将在近期开源。 - moss-moon-003: 在
moss-moon-003-sft基础上经过偏好模型moss-moon-003-pm训练得到的最终模型,具备更好的事实性和安全性以及更稳定的回复质量,将在近期开源。 - moss-moon-003-plugin: 在
moss-moon-003-sft-plugin基础上经过偏好模型moss-moon-003-pm训练得到的最终模型,具备更强的意图理解能力和插件使用能力,将在近期开源。
A.1.2 已开源的数据
- moss-002-sft-data: MOSS-002所使用的多轮对话数据,覆盖有用性、忠实性、无害性三个层面,包含由
text-davinci-003生成的约57万条英文对话和59万条中文对话 - moss-003-sft-data:
moss-moon-003-sft所使用的多轮对话数据,基于MOSS-002内测阶段采集的约10万用户输入数据和gpt-3.5-turbo构造而成,相比moss-002-sft-data,moss-003-sft-data更加符合真实用户意图分布,包含更细粒度的有用性类别标记、更广泛的无害性数据和更长对话轮数,约含110万条对话数据。目前仅开源少量示例数据,完整数据将在近期开源 - moss-003-sft-plugin-data:
moss-moon-003-sft-plugin所使用的插件增强的多轮对话数据,包含支持搜索引擎、文生图、计算器、解方程等四个插件在内的约30万条多轮对话数据。目前仅开源少量示例数据,完整数据将在近期开源 - moss-003-pm-data:
moss-moon-003-pm所使用的偏好数据,包含在约18万额外对话上下文数据及使用moss-moon-003-sft所产生的回复数据上构造得到的偏好对比数据,将在近期开源
A.2 MOSS模型量化版部署过程
我司七月杜助教写了一篇部署MOSS的教程,详情请点击:MOSS模型量化版部署过程
// 待更


