- 1SQL Server 设置端口详解_sql server 端口
- 2保研项目解析手册 | 南京航空航天大学电子信息工程学院/集成电路学院_南京航空航天大学集成电路学院
- 3解决更新Android Studio后下载Gradle超时_android studio 下载gradle超时
- 4多约束的无人机动态路径规划算法研究_三维b样条曲线用于无人机
- 5linux 下配置mysql 主从_在linux环境配置mysql主从
- 6Java并发编程之线程池详解_java线程池 并发
- 72020氧化工艺考试及氧化工艺模拟考试_pta装置生产区域发生火灾可以用水扑灭吗
- 8Android开发最新面试题总结附答案(25个知识点600页)_android系统开发面试
- 9软件测试理论-测试用例和设计方法
- 1002-千兆(十兆、百兆、千兆自适应)以太网电路设计
【香橙派AiPro】基于VGG16的火灾检测模型预测_fire-detection-master
赞
踩

引言
终于收到一款心仪已久的板子了,收到货后来不及吃灰就赶紧测试了,不得不说性价比很高,真不愧是Orange Pi AI Pro,对比其他板子性价比绝对第一!

开发板介绍
Orange Pi AI Pro开发板是一款香橙派和华为联合精心打造的高性能AI开发板,搭载了昇腾AI处理器,可实现图像、视频等多种数据分析处理
OrangePi AIpro(8-12T)采用昇腾AI技术路线,具体为4核64位处理器+AI处理器,集成图形处理器,支持8-12TOPS AI算力,拥有8GB/16GB LPDDR4X,可以外接32GB/64GB/128GB/256GB eMMC模块,支持双4K高清输出。
Orange Pi AIpro引用了相当丰富的接口,包括两个HDMI输出、GPIO接口、Type-C电源接口、支持SATA/NVMe SSD 2280的M.2插槽、TF插槽、千兆网口、两个USB3.0、一个USB Type-C 3.0、一个Micro USB(串口打印调试功能)、两个MIPI摄像头、一个MIPI屏等,预留电池接口,可广泛适用于AI边缘计算、深度视觉学习及视频流AI分析、视频图像分析、自然语言处理、智能小车、机械臂、人工智能、无人机、云计算、AR/VR、智能安防、智能家居等领域,覆盖 AIoT各个行业。 Orange Pi AIpro支持Ubuntu、openEuler操作系统,满足大多数AI算法原型验证、推理应用开发的需求。
接口详情图

开发板使用
准备工作
工具文档
官方工具:点我下载
用户手册:点我下载
ubuntu镜像:点我下载
本次用到:读卡器、网线


拨码开关
开发板支持从TF卡、eMMC和SSD(支持NVMeSSD和 SATASSD)启动。具体从哪个设备启动是由开发板背面的两个拨码(BOOT1和BOOT2)开关来控制的。
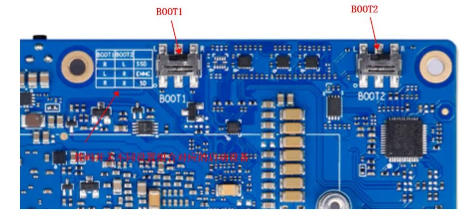

默认是通过TF卡启动的
体验评价:香橙派 AI Pro开发板通过其丰富的内置 API 和完善的文档支持,确实简化了开发流程并提高了易用性。这些特点使开发者能够更快速地进行应用程序的开发和调试,同时保证了开发过程的高效性和可靠性
镜像烧录
开发板出厂时,Sd卡已经有一个系统了,博主通电后发现SD卡上的小灯已亮了起来,官方原话给的是:
此绿灯由GPIO4_19控制其亮灭,可以作为SATA硬盘的指示灯或者其他需要的用途。目前发布的Linux系统默认在DTS中将其点亮。当看到此灯点亮后,至少可以说明Linux内核已经启动了。
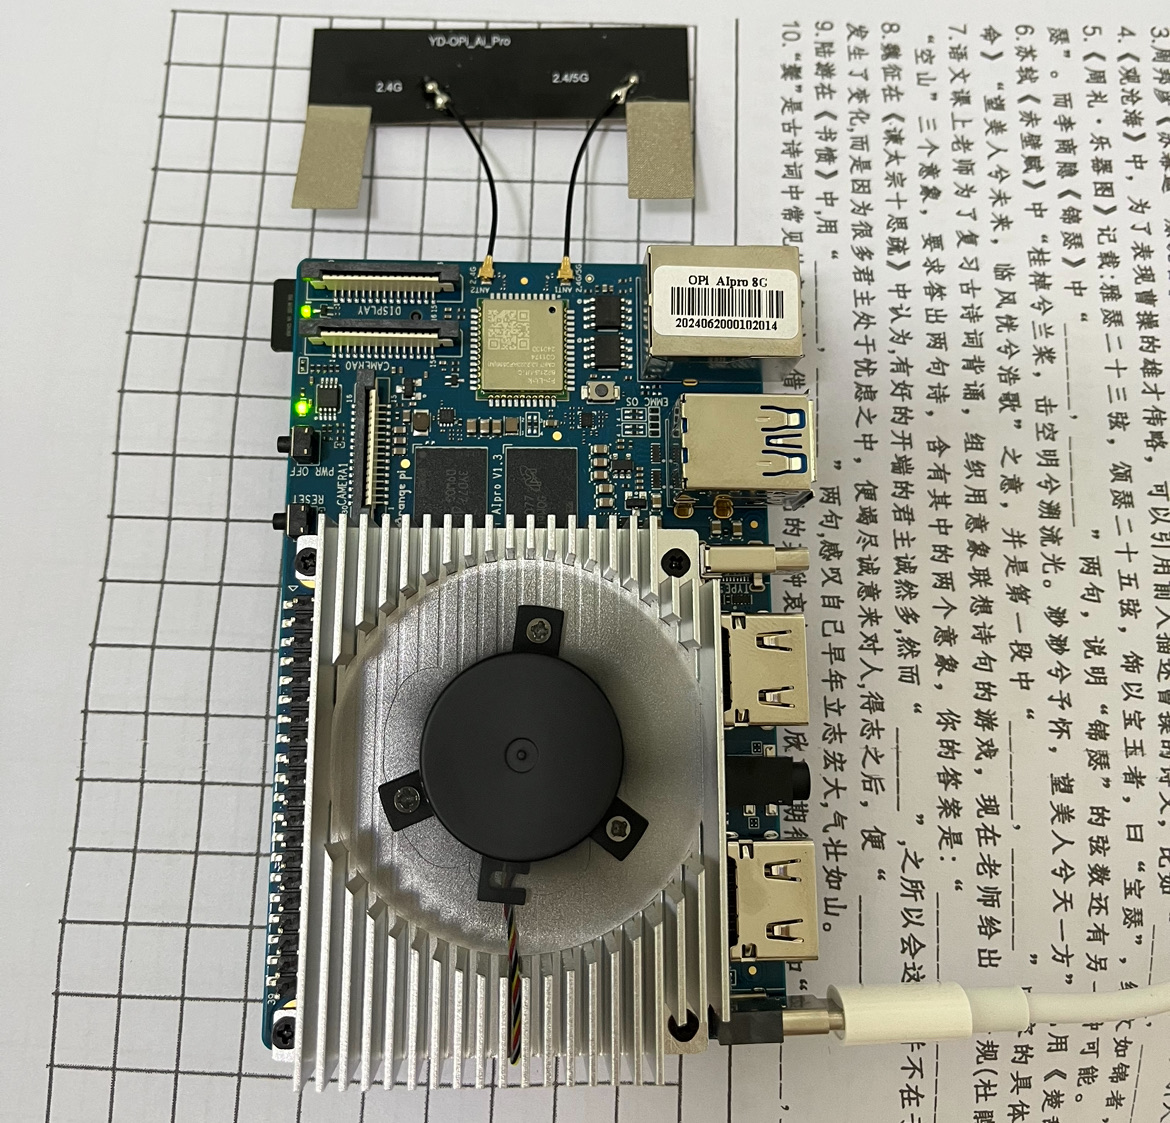
由于没有读卡器,博主还未烧录过系统,不过很简单,可以参考这里
基于WindowsPC将Linux镜像烧写到TF卡的方法-11页
连接开发板
官方文档写明可通过多种方式连接开发板,这里使用了网线进行连接,连接后如下图所示:
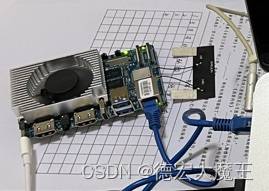
下载MobaXterm
可以去官方提供的工具包里面下载,也可以 快速下载

网线-SSH连接开发板
网线连接这种方式,适合还未连接WIFI的板子 以及 没有显示屏的同学,将网线和开发板网口以及电脑连接后,可以通过共享网络使电脑为板子分配IP地址

查找到ip地址后,打开MobaXterm进行SSH连接

| 账号 | 密码 |
|---|---|
| root | Mind@123 |
| HwHiAiUser | Mind@123 |
输入账号和密码登录,注意:Linux密码是不显示的,输入完成回车即可

 使用USB串口调试注意:
一定要确保USB数据线是否是能传输数据的,一般都是只能充电不能传输数据,可能插入后没有反应
- 1
- 2
设置WIFI连接
开发板带有WIFI模块,我们可以将开发板连接到家用路由器网络,这样就可以不需要网线连接了

WIFI-SSH连接开发板
通过nmcli命令连接WIFI
我们用的是网线连接开发板,使用SSH登录到了开发板,在终端界面输入
nmcli dev wifi
- 1

连接WIFI
sudo nmcli dev wifi connect 'Cloud' password '13988266448'
- 1
- 2
- 3

通过图形化方式连接WIFI
sudo nmtui
- 1

选择Activateaconnect后回车,选中后输入密码即可连接

确定开发板IP方法
目前可以将IP设置为静态,不让他自动分配,但是我认为,可以通过查看路由器上面的用户确定
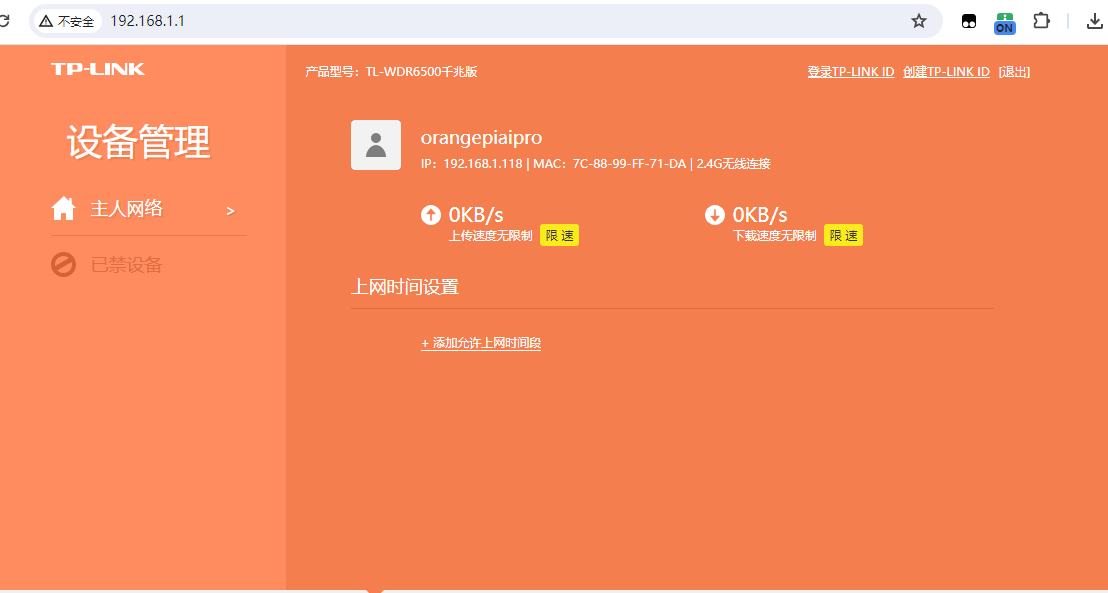
Vnc可视化
Windows
在windows上显示图形化桌面又没有屏幕和连接线,可以通过MobaXterm的vnc连接

弹出的窗口输入密码即可登录到系统

iPad
和开发板保持相同局域网内,下载软件RVNC Viewer
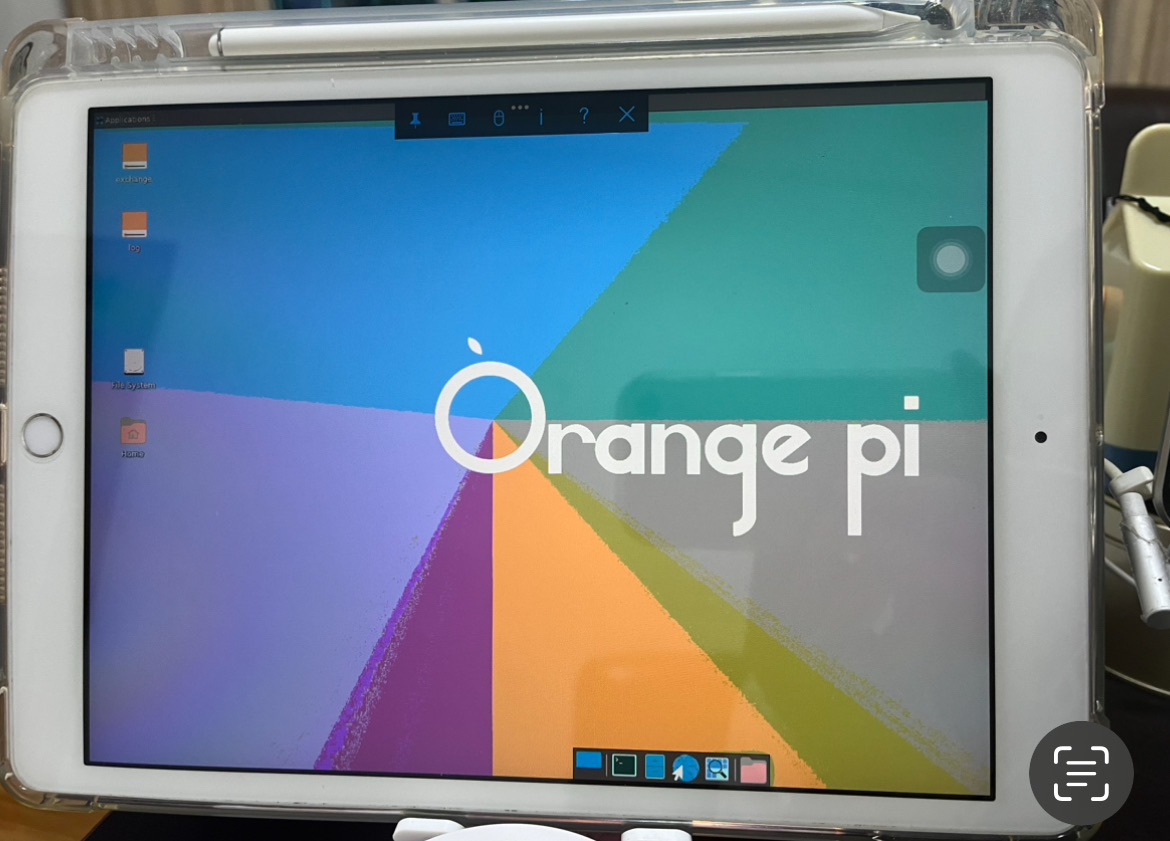
| IP | 端口 |
|---|---|
| 192.168.x.x | 5901 |
开发工具安装
下载pycharm社区版


找到文件所在位置解压,输入解压命令
tar -xzvf pycharm-community-2024.1.4-aarch64.tar.gz
- 1

运行pycharm

创建快捷方式,之后可以在左上角开发菜单栏中找到


散热风扇
使用的过程中发现板子很烫手,于是我设置了自定义转速
查询风扇当前模式命令
sudo npu-smi info -t pwm-mode
查询当前风扇转速
sudo npu-smi info -t pwm-duty-ratio
- 1
设置为手动模式并调整转速,0手动1自动
sudo npu-smi set -t pwm-mode -d 0
- 1
取值范围0-100
sudo npu-smi set -t pwm-duty-ratio -d 30
- 1

推荐设置30
基于VGG16的火灾检测模型预测
前面的基本配置搞定了,我们使用模型加载本地数据集并对其进行预处理,然后使用预训练的 VGG16 模型,并添加自定义的全连接层进行火灾检测。
最后,代码会在本地训练模型,并保存模型到本地文件系统,通过已训练的模型进行测试识别。
数据集准备
yolov5火灾检测数据集,共2000多张图片,标注fire,点我下载

目录结构
dataset/
 validation/
  fire/
    image1.jpg
    image2.jpg
    ...
 train/
  no_fire/

    image1.jpg
    image2.jpg
    ...
- 1
- 2
- 3
- 4
- 5
- 6
- 7
- 8
- 9
- 10
- 11
- 12
- 13
代码
创建一个名为main.py的Python脚本,内容如下:
import tensorflow as tf
from tensorflow.keras.preprocessing.image import ImageDataGenerator
from tensorflow.keras.applications import VGG16
from tensorflow.keras.layers import Dense, Flatten
from tensorflow.keras.models import Model
import os

# 数据预处理
train_dir = 'dataset/train'
validation_dir = 'dataset/validation'

train_datagen = ImageDataGenerator(
    rescale=1./255,
    rotation_range=20,
    width_shift_range=0.2,
    height_shift_range=0.2,
    shear_range=0.2,
    zoom_range=0.2,
    horizontal_flip=True,
    fill_mode='nearest'
)

test_datagen = ImageDataGenerator(rescale=1./255)

train_generator = train_datagen.flow_from_directory(
    train_dir,
    target_size=(150, 150),
    batch_size=32,
    class_mode='binary'
)

validation_generator = test_datagen.flow_from_directory(
    validation_dir,
    target_size=(150, 150),
    batch_size=32,
    class_mode='binary'
)

# 使用预训练的VGG16模型
base_model = VGG16(weights='imagenet', include_top=False, input_shape=(150, 150, 3))

# 添加自定义顶层
x = base_model.output
x = Flatten()(x)
x = Dense(128, activation='relu')(x)
predictions = Dense(1, activation='sigmoid')(x)

model = Model(inputs=base_model.input, outputs=predictions)

# 冻结VGG16的卷积层
for layer in base_model.layers:
    layer.trainable = False

# 编译模型
model.compile(optimizer='adam', loss='binary_crossentropy', metrics=['accuracy'])

# 训练模型
model.fit(
    train_generator,
    steps_per_epoch=train_generator.samples // train_generator.batch_size,
    validation_data=validation_generator,
    validation_steps=validation_generator.samples // validation_generator.batch_size,
    epochs=10
)

# 保存模型
model.save('fire_detection_model.h5')

# 评估模型
loss, accuracy = model.evaluate(validation_generator)
print(f"Validation Accuracy: {accuracy*100:.2f}%")
- 1
- 2
- 3
- 4
- 5
- 6
- 7
- 8
- 9
- 10
- 11
- 12
- 13
- 14
- 15
- 16
- 17
- 18
- 19
- 20
- 21
- 22
- 23
- 24
- 25
- 26
- 27
- 28
- 29
- 30
- 31
- 32
- 33
- 34
- 35
- 36
- 37
- 38
- 39
- 40
- 41
- 42
- 43
- 44
- 45
- 46
- 47
- 48
- 49
- 50
- 51
- 52
- 53
- 54
- 55
- 56
- 57
- 58
- 59
- 60
- 61
- 62
- 63
- 64
- 65
- 66
- 67
- 68
- 69
- 70
- 71
- 72
操作
SSH连接到开发板进行项目上传

等待上传完成(有点漫长…)

安装必要库
在Orange Pi AI Pro上安装所需的库
sudo apt-get update
sudo apt-get install python3-pip
pip3 install numpy pandas tensorflow keras opencv-python
- 1
- 2
- 3
安装模块中

错误的话,更新下pip
pip install --upgrade pip
- 1

继续报错:
(venv) (.venv) pip3 install tensorflow
      running build_ext
      Loading library to get build settings and version: libhdf5.so
      error: Unable to load dependency HDF5, make sure HDF5 is installed properly
      Library dirs checked: []
      error: libhdf5.so: cannot open shared object file: No such file or directory
      [end of output]

  note: This error originates from a subprocess, and is likely not a problem with pip.
  ERROR: Failed building wheel for h5py
Failed to build h5py
ERROR: ERROR: Failed to build installable wheels for some pyproject.toml based projects (h5py)
(venv) (.venv)
- 1
- 2
- 3
- 4
- 5
- 6
- 7
- 8
- 9
- 10
- 11
- 12
- 13
- 14
Orange Pi AI Pro默认Python环境3.9.9 更新pip后直接安装tensorflow当到h5py时候报错,尝试先安装h5py再安装tensorflow,版本号如下:
pip install h5py3.8.0
pip install tensorflow2.11.0
/root/Desktop/project/.venv/bin/python /root/Desktop/project/main.py
RuntimeError: module compiled against API version 0x10 but this version of numpy is 0xf
RuntimeError: module compiled against API version 0x10 but this version of numpy is 0xf
ImportError: numpy.core._multiarray_umath failed to import
ImportError: numpy.core.umath failed to import
Traceback (most recent call last):
  File "/root/Desktop/project/main.py", line 1, in <module>
    import tensorflow as tf
  File "/usr/local/lib64/python3.9/site-packages/tensorflow/__init__.py", line 37, in <module>
   packages/tensorflow/python/framework/dtypes.py", line 34, in <module>
    _np_bfloat16 = _pywrap_bfloat16.TF_bfloat16_type()
TypeError: Unable to convert function return value to a Python type! The signature was
	() -> handle
- 1
- 2
- 3
- 4
- 5
- 6
- 7
- 8
- 9
- 10
- 11
- 12
- 13
- 14
这个错误表明 TensorFlow 在导入过程中与 NumPy 版本之间存在不兼容的问题。这通常是由于 TensorFlow 和 NumPy 版本之间的API不匹配引起的。
可以尝试tensorflow==2.4.0

安装成功后运行即可
Found 100 images belonging to 2 classes.
Found 100 images belonging to 2 classes.
2024-07-16 16:57:17.388409: I tensorflow/core/platform/cpu_feature_guard.cc:193] This TensorFlow binary is optimized with oneAPI Deep Neural Network Library (oneDNN) to use the following CPU instructions in performance-critical operations:  AVX
To enable them in other operations, rebuild TensorFlow with the appropriate compiler flags.
3/3 [==============================] - 42s 20s/step - loss: 1.3637 - accuracy: 0.4265 - val_loss: 0.9231 - val_accuracy: 0.4531
4/4 [==============================] - 30s 7s/step - loss: 0.8841 - accuracy: 0.5000
Validation Accuracy: 70%
- 1
- 2
- 3
- 4
- 5
- 6
- 7

查看模型文件

使用模型文件进行预测
待检测图片

import tensorflow as tf
from tensorflow.keras.preprocessing import image
import numpy as np

# 加载已保存的模型
model = tf.keras.models.load_model('fire_detection_model.h5')

# 预处理单张图片的函数
def preprocess_image(img_path, target_size=(150, 150)):
    img = image.load_img(img_path, target_size=target_size)  # 加载图片并调整大小
    img_array = image.img_to_array(img)  # 将图片转换为数组
    img_array = np.expand_dims(img_array, axis=0)  # 增加一个维度
    img_array /= 255.0  # 归一化
    return img_array

# 图片路径
img_path = 'path_to_your_image.jpg'

# 预处理图片
img_array = preprocess_image(img_path)

# 进行预测
prediction = model.predict(img_array)

# 输出预测结果
if prediction[0] > 0.5:
    print(f"The image at {img_path} is predicted to be a fire with a probability of {prediction[0][0]*100:.2f}%.")
else:
    print(f"The image at {img_path} is predicted to be non-fire with a probability of {(1-prediction[0][0])*100:.2f}%.")
- 1
- 2
- 3
- 4
- 5
- 6
- 7
- 8
- 9
- 10
- 11
- 12
- 13
- 14
- 15
- 16
- 17
- 18
- 19
- 20
- 21
- 22
- 23
- 24
- 25
- 26
- 27
- 28
- 29
- 30

0bb3c0c6-744d-4b31-be3f-d0cdbc844de1.jpg处的图像被预测为非火灾,概率为86.67%。
如果训练数据继续增加会提高识别正确率
体验评价:Orange Pi AI Pro提供的内置工具以及模块,对于机器学习模型的开发和训练提供了便捷的环境。这些工具支持常见的深度学习框架,并且可以利用板载的NPU进行加速,有效提高了模型训练和推理的效率
安装宝塔
Orange Pi AI Pro 还可以搭建服务器,挂载个人网站或者脚本,我们部署宝塔在开发板里面
Ubuntu/Deepin安装脚本
wget -O install.sh https://download.bt.cn/install/install-ubuntu_6.0.sh && sudo bash install.sh ed8484bec
- 1


上传项目到文件夹

安装python3.7

新建项目


安装模块
| 模块名 | 版本 |
|---|---|
| tensorflow | 2.11.0 |
运行项目

体验评价:安装宝塔进行测试显示出了Orange Pi AI Pro在部署和管理网络应用时的灵活性和可扩展性。宝塔能够简化服务器的管理和配置,对于需要快速搭建和测试网络应用的场景非常有用。
训练中的开发板表现
负载方面
在测试时,我深刻感受到了开发板在应对复杂计算任务时的表现。首先,从负载管理的角度来看,VGG16作为一个相对深层的卷积神经网络,其对计算资源的需求不言而喻。令人欣慰的是,这款开发板凭借其强大的处理器和多核架构设计,展现出了出色的负载处理能力。即便是在连续进行高清图片流中的火灾特征提取与分类时,CPU的利用率始终保持在合理范围内,没有出现明显的卡顿或延迟现象,确保了火灾检测的实时性与准确性。
散热方面
该开发板定位就是Ai路线,在高速计算中会产生热量很正常,在散热方面,接入风扇后,开发板可自动根据自身温度调整转速,长时间高负载运行下,机身温度虽有上升,但得益于其精良的散热设计与高效的热传导材料,热量得以迅速分散并排出,避免了因过热而导致的性能下降或系统不稳定。
我注意到,即便是在封闭或较为温暖的环境中测试,开发板的温度控制依然保持在安全阈值以下,这一点对于需要持续稳定运行的工业级或安防级应用尤为重要。
最后
经过测试体验,我对这款开发板在火灾检测应用中的表现深感满意。
它不仅在技术上满足了高性能计算的需求,更在用户体验上给了我很多惊喜。特别是在面对高负载和长时间运行考验时,开发板展现出的稳定性与可靠性,让我对其在实际应用场景中的表现充满信心。
此外,其优秀的散热设计也让我感受到了设计者对细节的关注与追求,这种对产品质量的坚持,无疑为用户提供了更加安心和可靠的使用体验。
Orange Pi AI Pro在处理能力、专注AI应用和扩展性方面表现突出,适合于需要更高性能和复杂计算的应用。对比树莓派则以其成本效益、广泛的社区支持和适用于教育等广泛场景的特点而获得广泛认可。


