- 1C#中Winform使用OpenFileDialog选择文件打开并获取文件路径_通过openfiledialog选择文件路径
- 2react项目内存溢出,加大内存的方式之一 Ineffective mark-compacts near heap limit Allocation failed - JavaScript heap_vscode的react项目内存溢出
- 3Redis实现分布式锁的原理:常见问题解析及解决方案、源码解析Redisson的使用_分布式事务redis解决方案
- 42024永久免费版CrossOver软件下载及使用方法详细的步骤_crossover安装包
- 5guitar pro 8许可证忘记了怎么办 guitar pro8谱数字可以改吗
- 6基于微信学生新生报到小程序系统设计与实现
- 7ROS Motion Planning运动规划库安装方法及进阶使用方法详细介绍
- 8pom可视化idea_GitHub - haizlin-idea/rsbi-pom: 睿思BI-数据仪表盘,开源商业智能,数据可视化系统...
- 9在CDH集群安装Flink
- 10单片机学习笔记---独立按键控制LED亮灭_单片机按键控制led灯亮灭
从零开始之Dify源码部署篇_dify开源
赞
踩
从零开始之Dify源码部署篇
前言
Dify是一个对接大模型的脚手架,Dify对应的文档地址为:Dify传送门。本系列文章从零开始探索Dify的功能及搭建过程。本文的搭建流程是基于本地源码进行部署。之前基于Docker Compose的Dify部署:Dify Docker Compose部署篇传送门
一、工具列表
搭建Dify需要准备的工具列表有:
- windows11
- vmware
- centos
- docker
- docker-compose
- dify
- vscode
- python 3.10.x
- node.js 18.x
二、搭建流程
1.基础环境部署
vmware、centos、docker、docker-compose 部署可参考从零开始之Dify部署篇 搭建流程1-5步骤即可。
2.部署Dify中间件
1. 下载Dify
将Dify代码从github下载至服务器,或者通过http的方式下载Dify的代码的zip文件后,上传至服务器解压缩。
git clone https://github.com/langgenius/dify.git
- 1
2. 编排Dify
如果您的系统安装了 Docker Compose V2 而不是 V1,请使用 docker compose 而不是 docker-compose。通过$ docker compose version检查这是否为情况。
cd docker
docker compose -f docker-compose.middleware.yaml up -d
- 1
- 2
3. 服务检测
通过编排Dify的方式构建docker,如果通过如下方式端口通信正常则可跳过。
1 windows系统安装telnet工具
通过如下命令可以看到weaviate占用的端口为8080,postgres占用的端口为5432,redis占用的端口为6379。
docker ps -a
- 1

windows端通过telnet命令测试三个服务的端口的连通情况。
telnet 192.168.200.130 8080
telnet 192.168.200.130 5432
telnet 192.168.200.130 6379
- 1
- 2
- 3
如果不能连通,尝试通过手动docker启动的方式,重新安装容器。如下的命令是根据【dify程序主目录/api/.env】文件和【dify程序主目录/docker/docker-compose.middleware】提取获得。
docker stop 容器名或容器ID

docker rm 容器名或容器ID

docker run -d --name redis --restart=always -v ./volumes/redis/data:/data -p 6379:6379 redis:6-alpine redis-server --requirepass difyai123456

docker run -it --name postgres --restart always -e POSTGRES_PASSWORD='difyai123456' -e POSTGRES_DB='dify' -e PGDATA='/var/lib/postgresql/data/pgdata' -v ./volumes/db/data:/var/lib/postgresql/data -p 5432:5432 -d postgres:15-alpine

docker run -it --name weaviate --restart=always -v ./volumes/weaviate:/var/lib/weaviate -e QUERY_DEFAULTS_LIMIT=25 -e AUTHENTICATION_ANONYMOUS_ACCESS_ENABLED='false' -e PERSISTENCE_DATA_PATH='/var/lib/weaviate' -e DEFAULT_VECTORIZER_MODULE='none' -e  CLUSTER_HOSTNAME='node1' -e AUTHENTICATION_APIKEY_ENABLED='true' -e AUTHENTICATION_APIKEY_ALLOWED_KEYS='WVF5YThaHlkYwhGUSmCRgsX3tD5ngdN8pkih' -e AUTHENTICATION_APIKEY_USERS='hello@dify.ai' -e AUTHORIZATION_ADMINLIST_ENABLED='true' -e AUTHORIZATION_ADMINLIST_USERS='hello@dify.ai' -p 8080:8080 -d semitechnologies/weaviate:1.19.0
- 1
- 2
- 3
- 4
- 5
- 6
- 7
- 8
- 9
2 可视化端口测试
1 redis客户端
本文采用的是开源的redis客户端:another redis desktop manager详细安装传送门
Host: 192.168.200.130
Port: 6379
Password: difyai123456
- 1
- 2
- 3

2 postgres 客户端
本文采用的是navicat premium 15。本文的数据库的配置信息如下
主机:192.168.200.130
端口:5432
初始数据库:dify
用户名:postgres
密码:difyai123456
- 1
- 2
- 3
- 4
- 5

如果在连通过程中有如下提示
column "datlastsysoid" does not exist
- 1
可通过进入网站https://hexed.it/ 打开本地的libcc.dll 文件,更改libcc.dll 文件,搜索关键词“SELECT DISTINCT datlastsysoid”,把‘datlastsysoid’这几个字改成“dattablespace”解决
问题详细描述解决方案传送门
3.服务器部署
1. Python安装
本文选择的Python的版本为 3.10.11(最好选3.10.x的版本,不然后续会有其他很多问题)
Python安装流程传送门
2. VSCode安装
3. VSCode安装Python插件
需要安装Python的插件如下图

4. Python虚拟环境建立
首先进入dify源码的主工程目录

基于此目录进入命令终端窗口,输入如下命令即可进入VSCode
code .
- 1

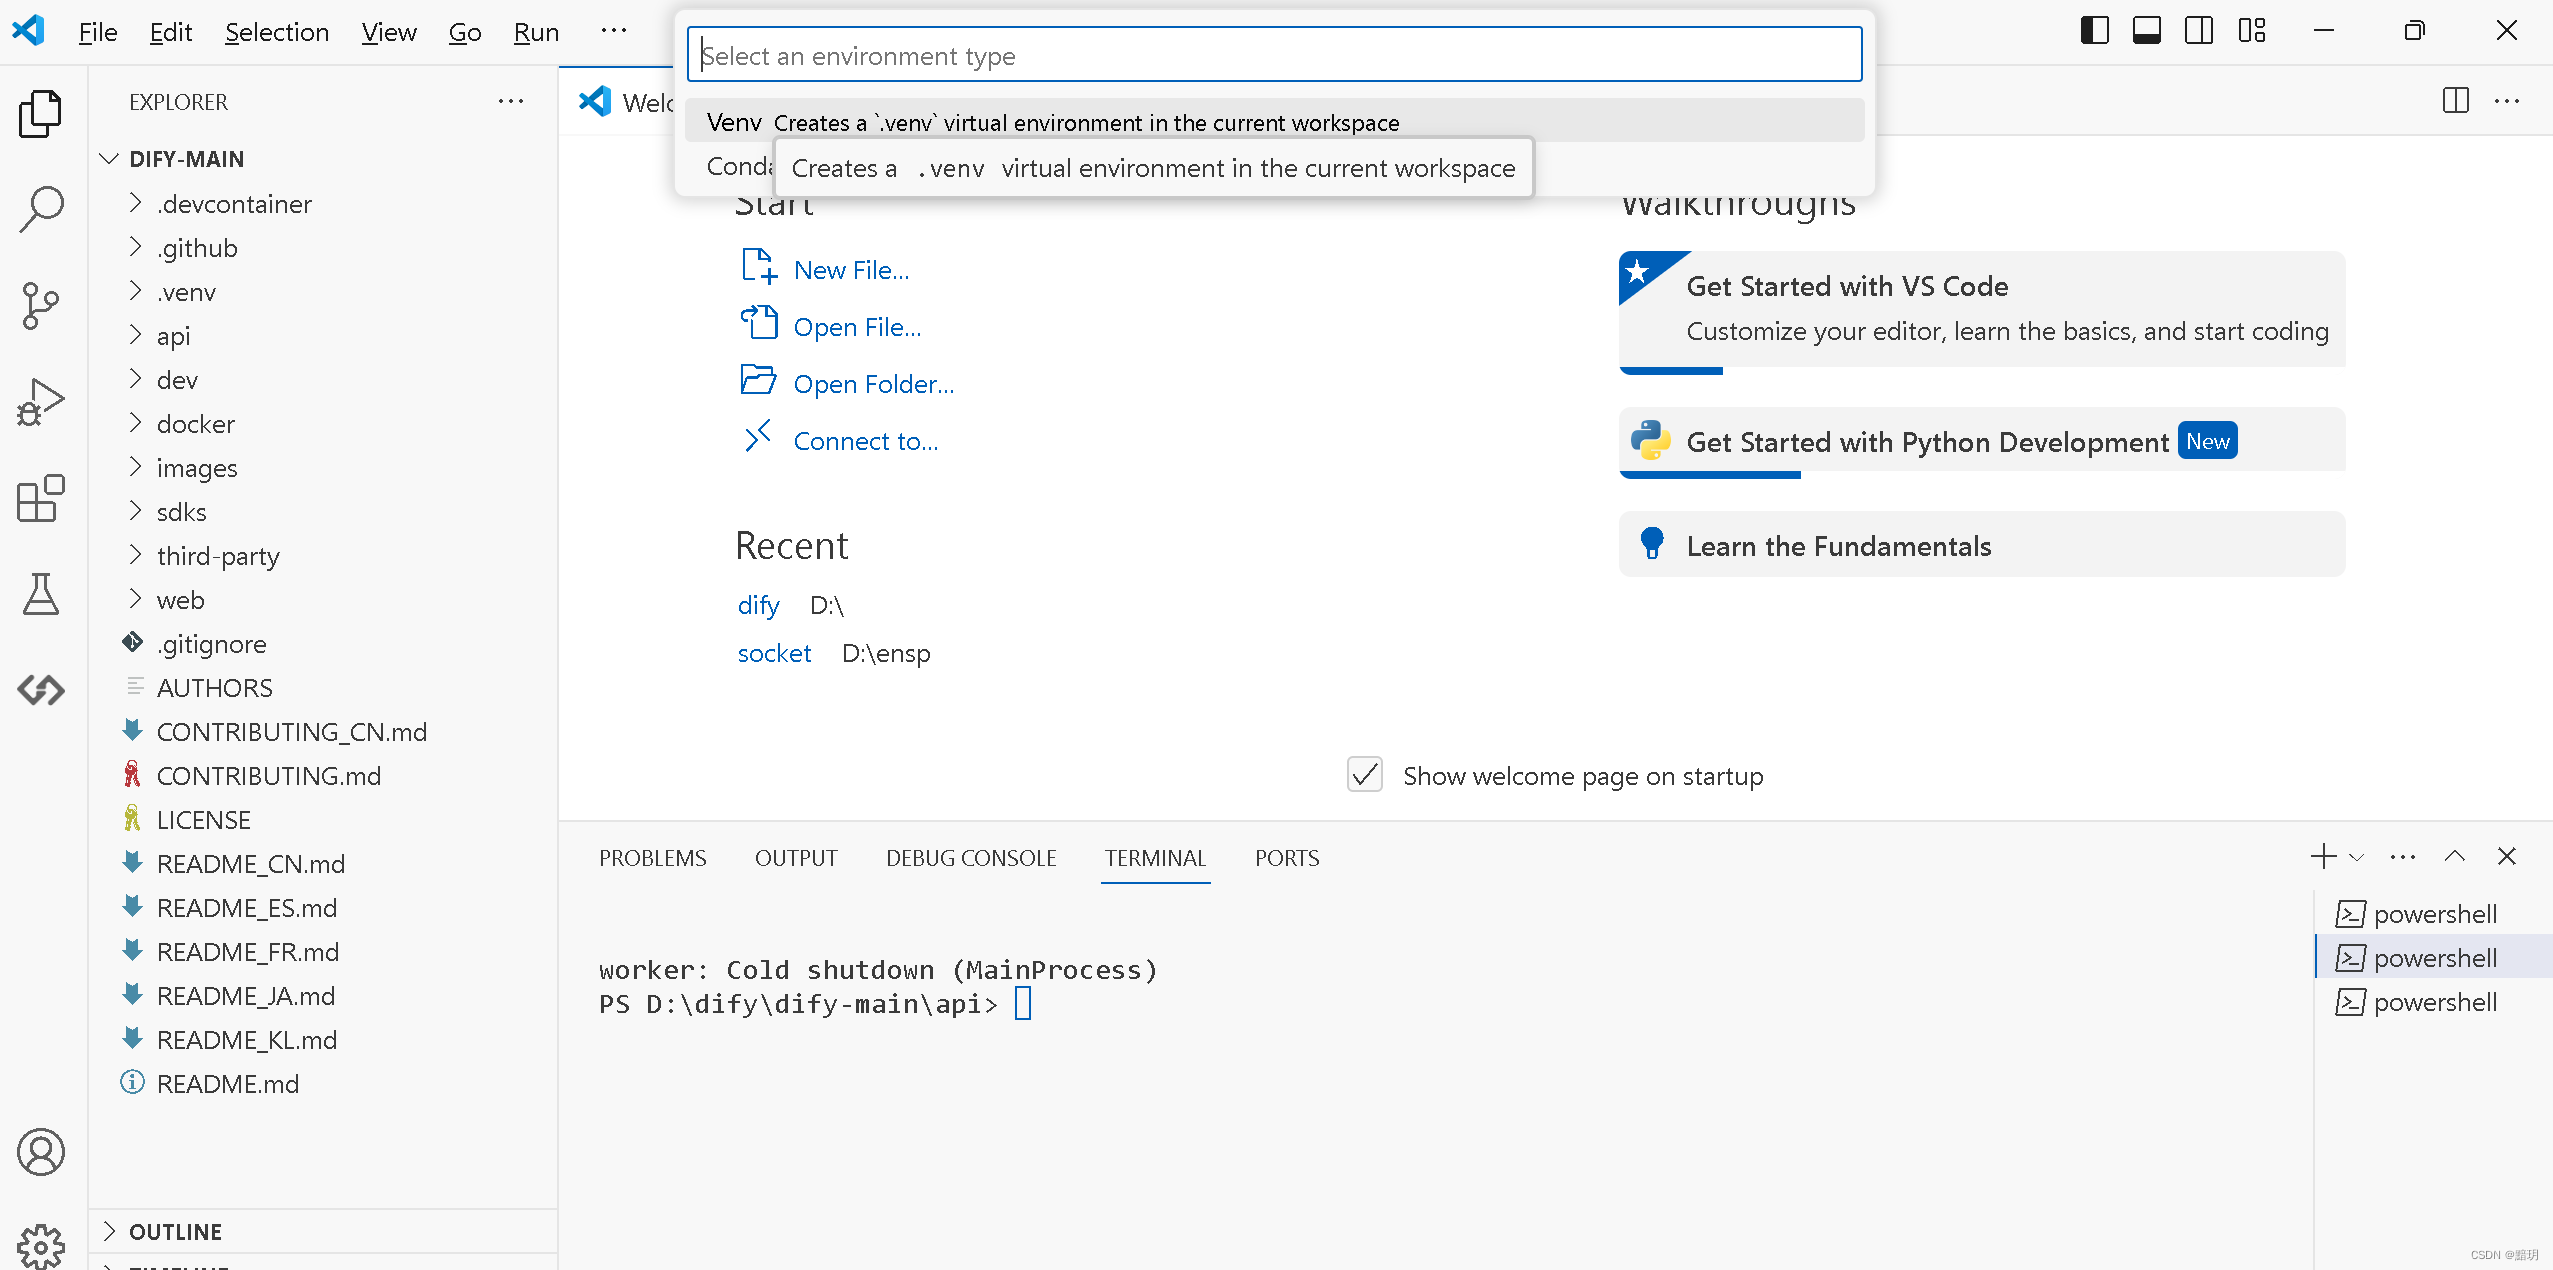
进入VSCode命令输入栏

选择后选择Python Create Environment,然后使用venv建立Python虚拟环境


点击后会在程序主目录下生成一个.venv目录。
5. openssl安装
6. 修改配置文件
进入dify程序的api目录下,复制一份.env.example 文件,并重命名为.env,生成随机密钥,并替换.env中的SECRET_KEY的值。
openssl rand -base64 42
sed -i 's/SECRET_KEY=.*/SECRET_KEY=<your_value>/' .env
- 1
- 2
celery配置、redis配置、PostgreSQL数据库、Weaviate向量数据库配置,更改为中间件所在服务器的地址。本文IP为192.168.200.130
# celery configuration
CELERY_BROKER_URL=redis://:difyai123456@192.168.200.130:6379/1
# redis configuration
REDIS_HOST=192.168.200.130
# PostgreSQL database configuration
DB_HOST=192.168.200.130
# Weaviate configuration
WEAVIATE_ENDPOINT=http://192.168.200.130:8080
- 1
- 2
- 3
- 4
- 5
- 6
- 7
- 8
7. 安装依赖包
在dify程序的主目录下执行如下命令,即可安装api程序需要的依赖包。Python镜像源推荐
.venv\Scripts\pip3 install -r api\requirements.txt -i https://pypi.tuna.tsinghua.edu.cn/simple
- 1
1 安装异常解决方案:
如果出现如下提示
no module named distutils....but distutils installed?
- 1
可通过安装setuptools解决
pip install setuptools
- 1
如果出现如下提示
distutils.errors.DistutilsPlatformError: Microsoft Visual C++ 14.0 or greater is required
- 1
可通过安装Microsoft c++对应的插件解决
问题详细描述解决方案传送门
如果出现如下提示
AttributeError: module 'pkgutil' has no attribute 'ImpImporter'. Did you mean: 'zipimporter'?
- 1
可通过降级至Python3.10.x解决问题
问题详细描述解决方案传送门
8. 执行数据库迁移
在【dify主程序目录/api】目录下执行如下命令,将数据库结构迁移至最新版本
..\.venv\Scripts\flask db upgrade
- 1
启动API服务
..\.venv\Scripts\flask run --host 0.0.0.0 --port=5001 --debug
- 1
正确输出
* Debug mode: on
INFO:werkzeug:WARNING: This is a development server. Do not use it in a production deployment. Use a production WSGI server instead.
 * Running on all addresses (0.0.0.0)
 * Running on http://127.0.0.1:5001
INFO:werkzeug:Press CTRL+C to quit
INFO:werkzeug: * Restarting with stat
WARNING:werkzeug: * Debugger is active!
INFO:werkzeug: * Debugger PIN: 695-801-919
- 1
- 2
- 3
- 4
- 5
- 6
- 7
- 8
9. 启动Worker服务
在【dify主程序目录】的目录下执行如下命令
.venv\Scripts\celery -A app.celery worker -P solo --without-gossip --without-mingle -Q dataset,generation,mail --loglevel INFO
- 1
正确输出
 -------------- celery@TAKATOST.lan v5.2.7 (dawn-chorus)
--- ***** -----
-- ******* ---- macOS-10.16-x86_64-i386-64bit 2023-07-31 12:58:08
- *** --- * ---
- ** ---------- [config]
- ** ---------- .> app:         app:0x7fb568572a10
- ** ---------- .> transport:   redis://:**@localhost:6379/1
- ** ---------- .> results:     postgresql://postgres:**@localhost:5432/dify
- *** --- * --- .> concurrency: 1 (gevent)
-- ******* ---- .> task events: OFF (enable -E to monitor tasks in this worker)
--- ***** -----
 -------------- [queues]
                .> dataset          exchange=dataset(direct) key=dataset
                .> generation       exchange=generation(direct) key=generation
                .> mail             exchange=mail(direct) key=mail

[tasks]
  . tasks.add_document_to_index_task.add_document_to_index_task
  . tasks.clean_dataset_task.clean_dataset_task
  . tasks.clean_document_task.clean_document_task
  . tasks.clean_notion_document_task.clean_notion_document_task
  . tasks.create_segment_to_index_task.create_segment_to_index_task
  . tasks.deal_dataset_vector_index_task.deal_dataset_vector_index_task
  . tasks.document_indexing_sync_task.document_indexing_sync_task
  . tasks.document_indexing_task.document_indexing_task
  . tasks.document_indexing_update_task.document_indexing_update_task
  . tasks.enable_segment_to_index_task.enable_segment_to_index_task
  . tasks.generate_conversation_summary_task.generate_conversation_summary_task
  . tasks.mail_invite_member_task.send_invite_member_mail_task
  . tasks.remove_document_from_index_task.remove_document_from_index_task
  . tasks.remove_segment_from_index_task.remove_segment_from_index_task
  . tasks.update_segment_index_task.update_segment_index_task
  . tasks.update_segment_keyword_index_task.update_segment_keyword_index_task

[2023-07-31 12:58:08,831: INFO/MainProcess] Connected to redis://:**@localhost:6379/1
[2023-07-31 12:58:08,840: INFO/MainProcess] mingle: searching for neighbors
[2023-07-31 12:58:09,873: INFO/MainProcess] mingle: all alone
[2023-07-31 12:58:09,886: INFO/MainProcess] pidbox: Connected to redis://:**@localhost:6379/1.
[2023-07-31 12:58:09,890: INFO/MainProcess] celery@TAKATOST.lan ready.
- 1
- 2
- 3
- 4
- 5
- 6
- 7
- 8
- 9
- 10
- 11
- 12
- 13
- 14
- 15
- 16
- 17
- 18
- 19
- 20
- 21
- 22
- 23
- 24
- 25
- 26
- 27
- 28
- 29
- 30
- 31
- 32
- 33
- 34
- 35
- 36
- 37
- 38
- 39
如果遇到如下提示
zoneinfo._common.ZoneInfoNotFoundError: 'No time zone found with key UTC'
- 1
则通过升级pytz、tzdata可解决。
问题详细描述解决方案传送门
4.前端页面部署
1 NVM安装
如果遇到nvm使用use命令失效的问题,可参考NVM的use命令失效解决方案传送门
如果npm安装各种依赖包的时候,下载速度慢,可通过更换npm源的方式解决。npm源切换详解
如果出现npm install 一直sill idealTree buildDeps问题。可参考解决方案 npm install一直sill idealTree buildDeps
npm cache clear --force

npm config set registry http://registry.npmjs.org/
- 1
- 2
- 3
2 配置前端
进入【dify主程序目录\web】目录下,用如下命令安装依赖包。
npm install
- 1
配置环境变量。在当前目录下创建文件 .env.local,并复制.env.example中的内容。根据需求修改这些环境变量的值:
# For production release, change this to PRODUCTION
NEXT_PUBLIC_DEPLOY_ENV=DEVELOPMENT
# The deployment edition, SELF_HOSTED or CLOUD
NEXT_PUBLIC_EDITION=SELF_HOSTED
# The base URL of console application, refers to the Console base URL of WEB service if console domain is
# different from api or web app domain.
# example: http://cloud.dify.ai/console/api
NEXT_PUBLIC_API_PREFIX=http://localhost:5001/console/api
# The URL for Web APP, refers to the Web App base URL of WEB service if web app domain is different from
# console or api domain.
# example: http://udify.app/api
NEXT_PUBLIC_PUBLIC_API_PREFIX=http://localhost:5001/api

# SENTRY
NEXT_PUBLIC_SENTRY_DSN=
NEXT_PUBLIC_SENTRY_ORG=
NEXT_PUBLIC_SENTRY_PROJECT=
- 1
- 2
- 3
- 4
- 5
- 6
- 7
- 8
- 9
- 10
- 11
- 12
- 13
- 14
- 15
- 16
- 17
构建代码
npm run build
- 1
启动 web 服务
npm run start
# or
yarn start
# or
pnpm start
- 1
- 2
- 3
- 4
- 5
如果npm run build时遇到cp不是内部命令错误
可用git bash来解决。问题详细描述解决方案传送门
5.测试
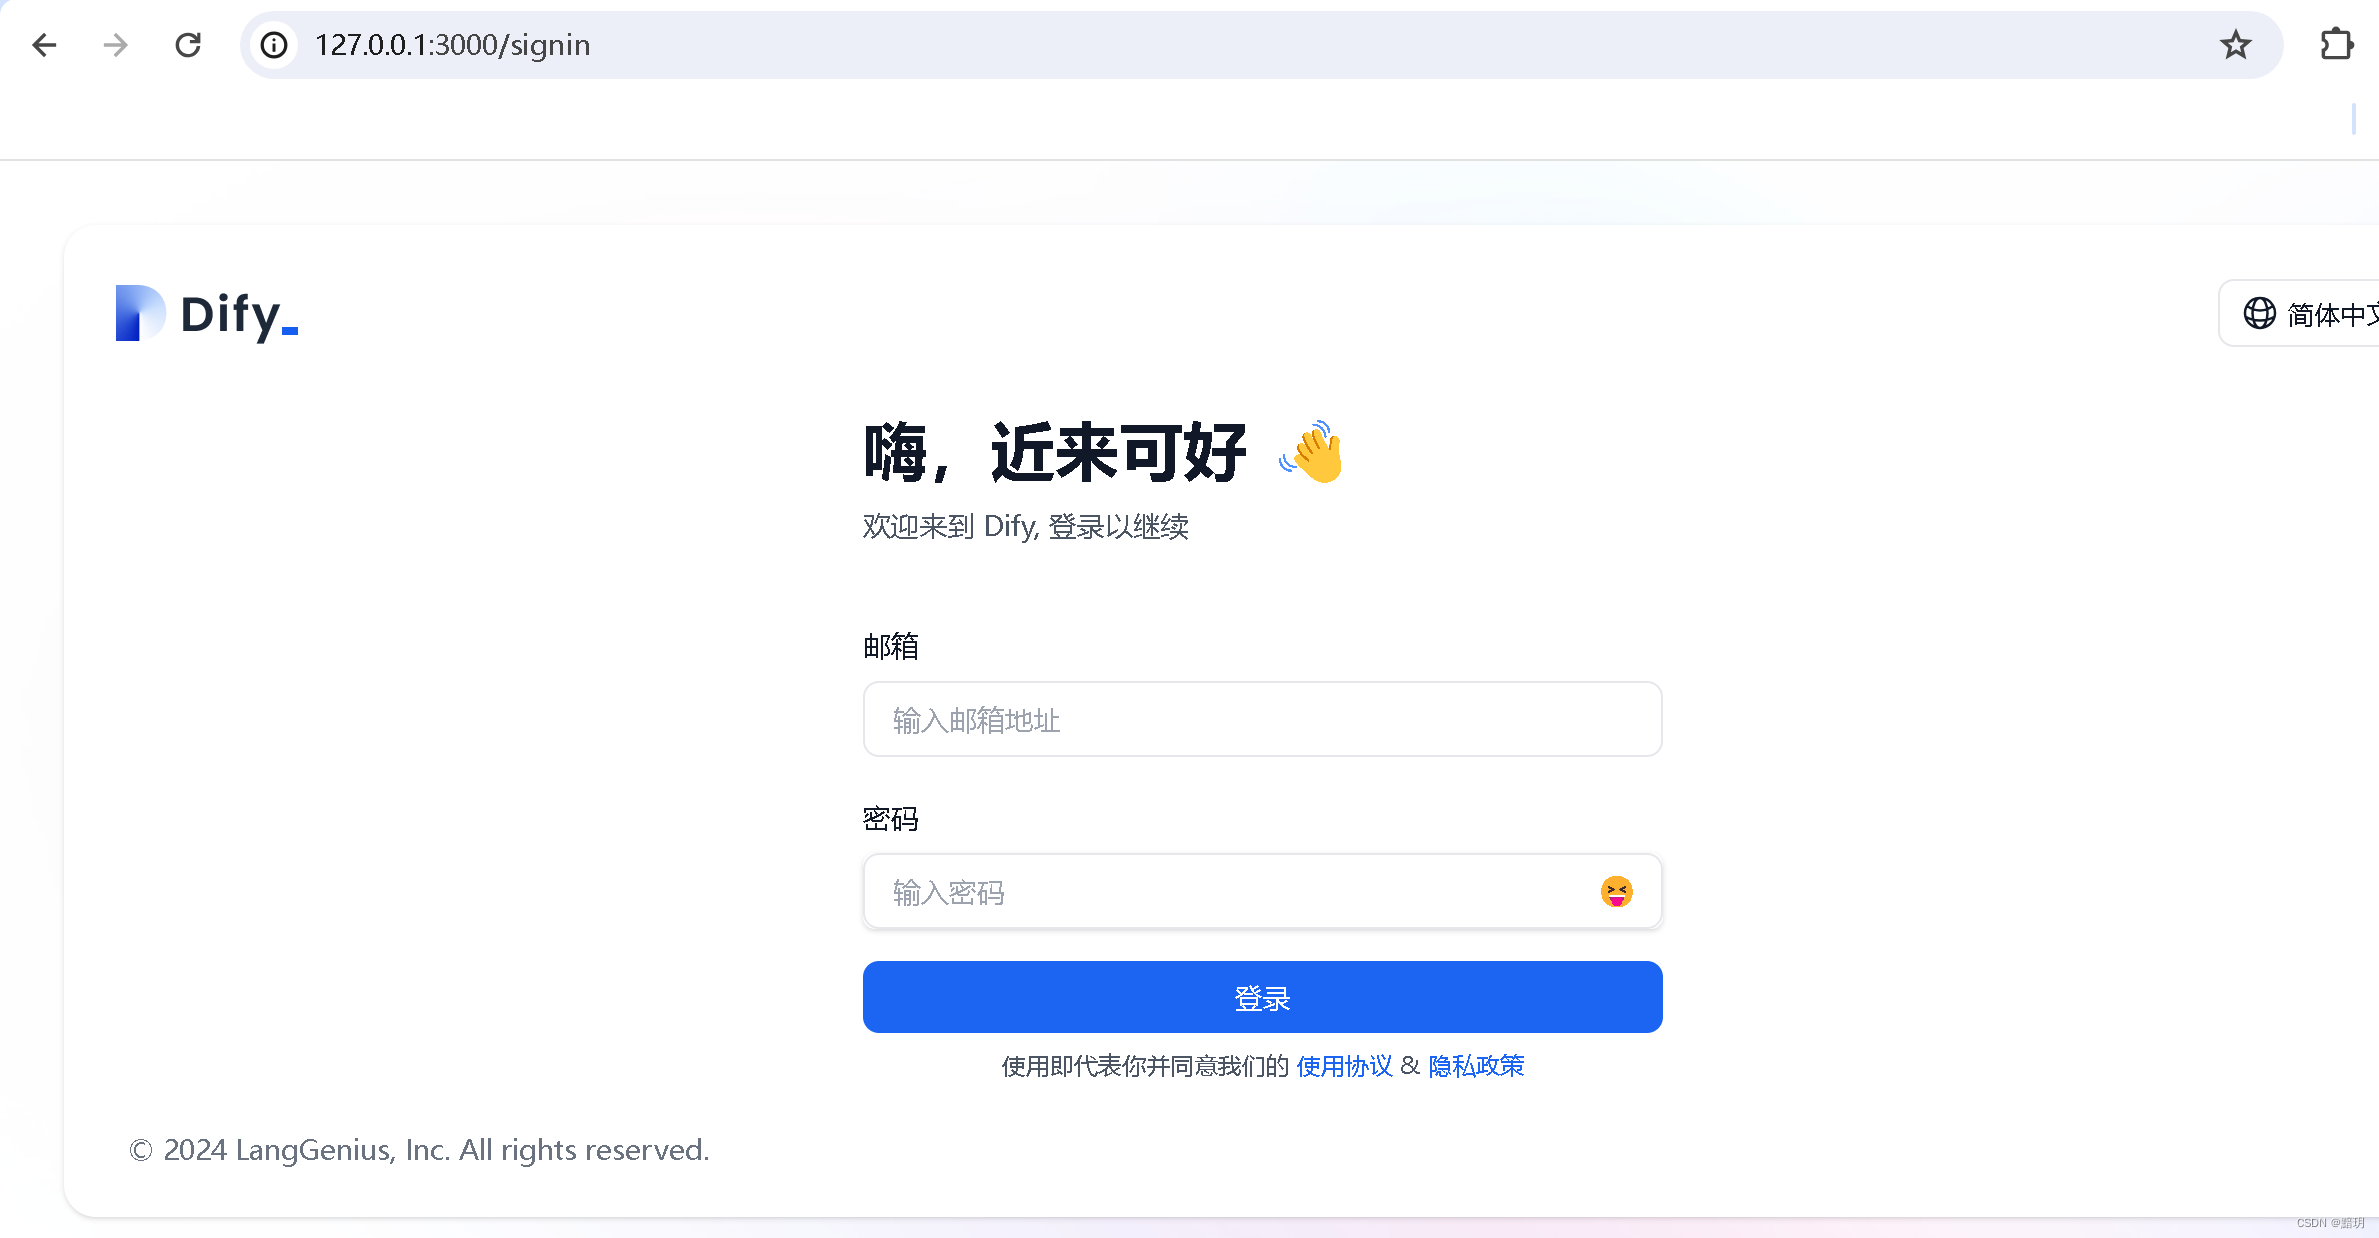
最后,访问 http://127.0.0.1:3000 即可使用本地部署的 Dify。


