
热门标签
热门文章
- 1CrossOver 是什么?好用吗?
- 2一个项目的简单开发流程——需求、数据库、编码
- 3零基础学编程系列,从入门到精通,中文编程开发语言工具下载,编程构件容器件之控制面板构件用法
- 4[html5技术]基于bootstrap制作的多标签页(tabs)#1024程序员福音来了_bootstrap tabs
- 5华为OD机试真题-部门人力分配-2024年OD统一考试(C卷)
- 6Docker部署Nacos(单机/集群)_nacos docker部署
- 7Linux 驱动开发基础知识——内核对设备树的处理与使用(十)
- 8算法的博客_算法 博客
- 9软件定义网络(Software Defined Network, SDN)
- 10微信自定义交易组件开发步骤(视频号加小程序实现直播带货) 你进来看不懂算我输!_视频号接口文档怎么做
当前位置: article > 正文
maven镜像源及代理配置
作者:小丑西瓜9 | 2024-02-15 21:49:16
赞
踩
maven镜像源
在公司使用网络一般需要设置代理,
我在idea中创建springboot工程时,发现依赖下载不了,原以为只要浏览器设置代理,其他的网络访问都会走代理,经过查资料设置了以下几个地方后工程创建正常,在此记录给大家参考。
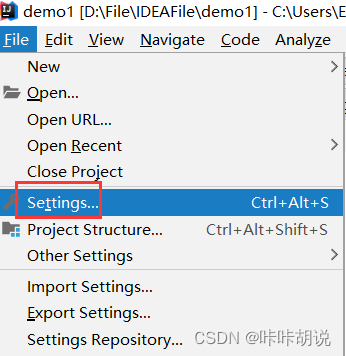
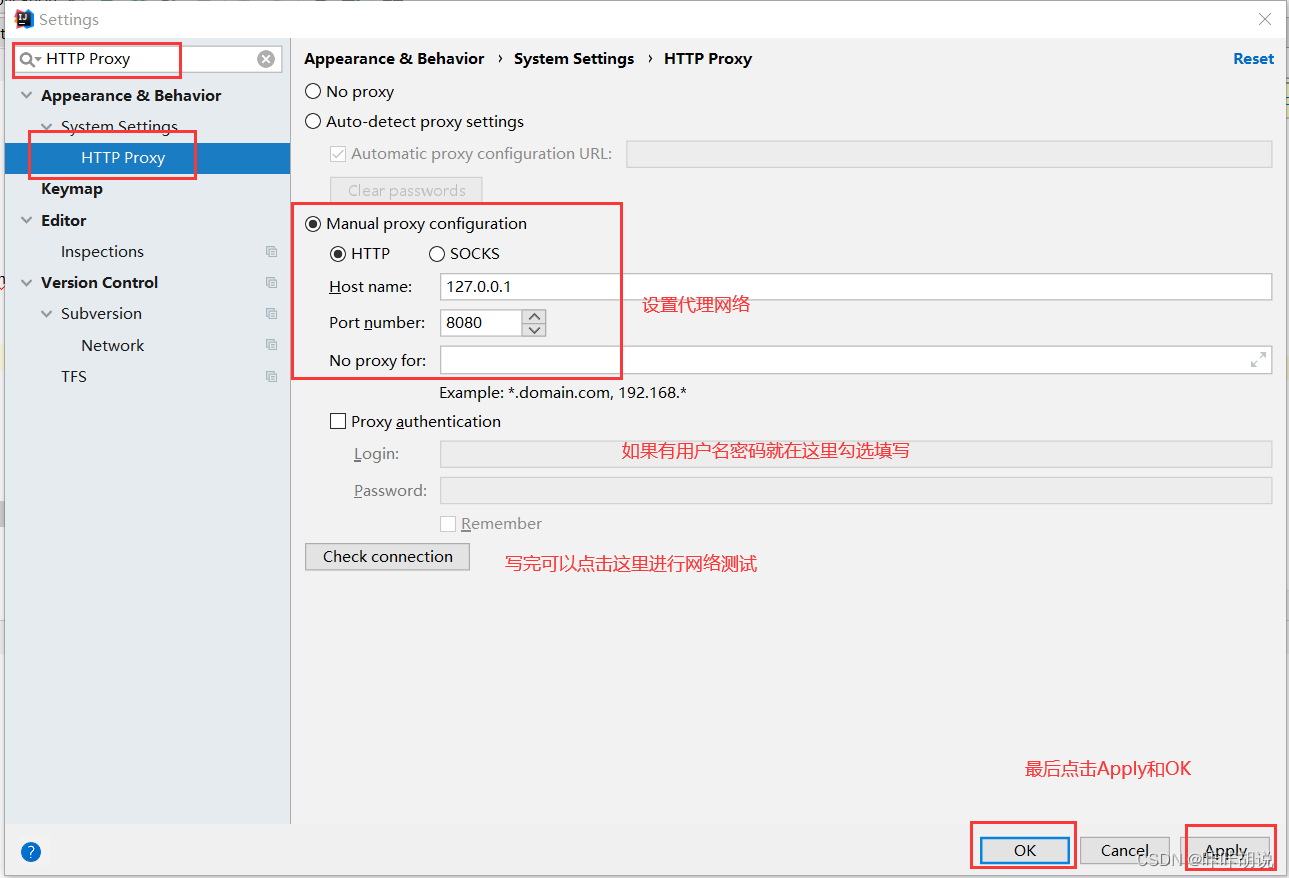
1、idea进行代理设置
File->Settings…->HTTP Proxy
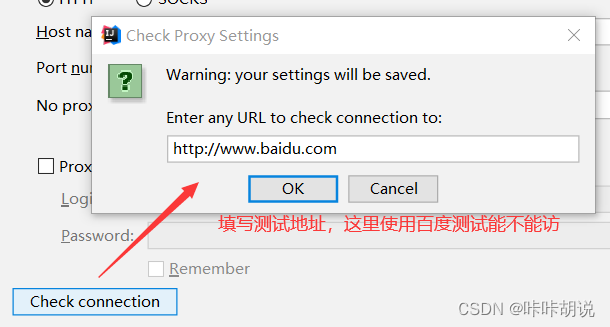
测试网络
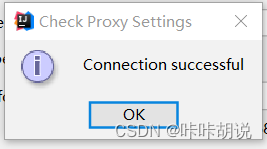
成功后会出现这个提示
2、如果使用的是自己下载的maven,要注意idea和maven版本的兼容性问题。下面是libin9iOak大佬对几个版本测试的结果
针对一些老项目 还是尽量采用 3.6.3版本,针对idea各个版本的兼容性就很兼容
1.IDEA 2022 兼容maven 3.8.1及之前的所有版本
2.IDEA 2021 兼容maven 3.8.1及之前的所有版本
3.IDEA 2020 兼容Maven 3.6.3及之前所有版本
4.IDEA 2018 兼容Maven3.6.1及之前所有版本
- 1
- 2
- 3
- 4
- 5
我使用的是IDEA2018,后面把maven版本降到apache-maven-3.5.4
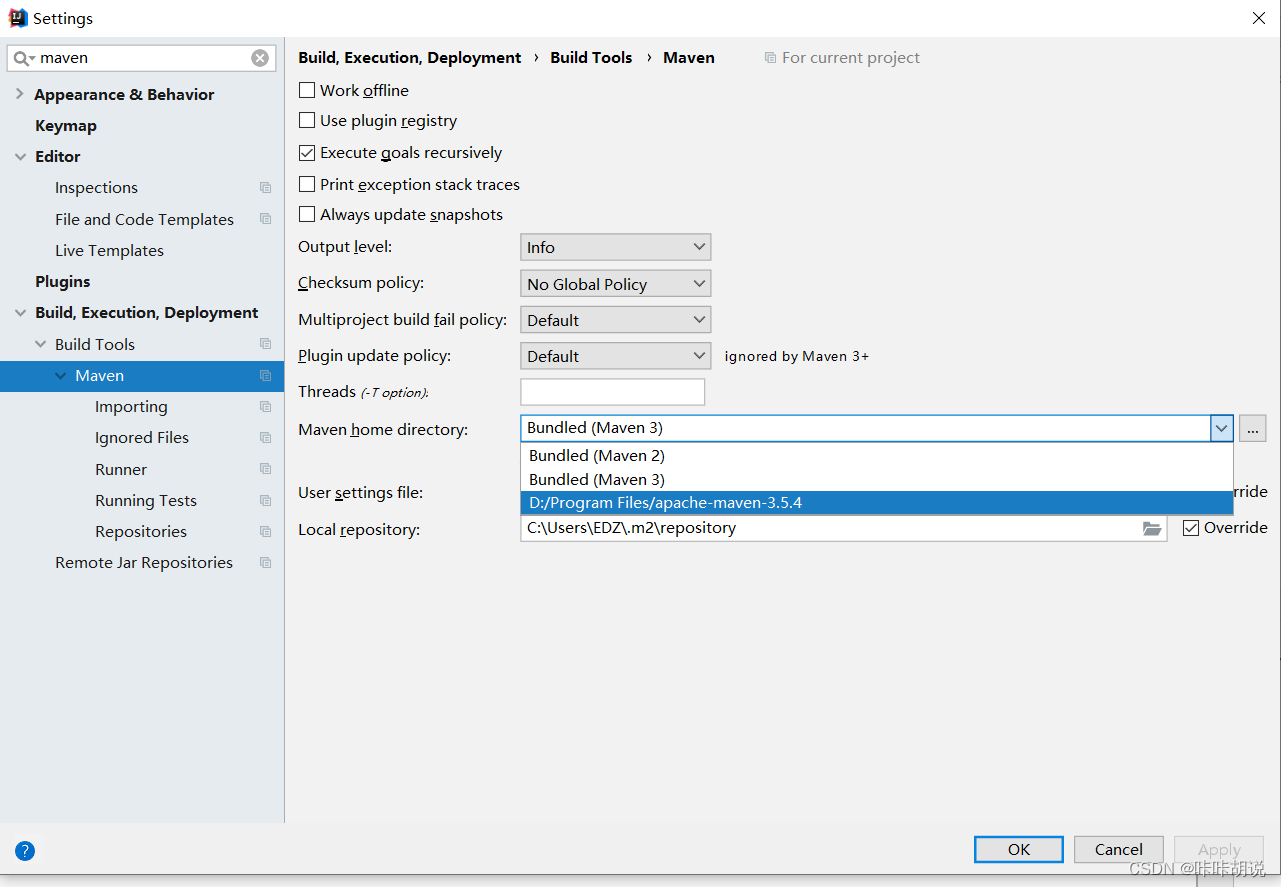
3、设置maven镜像源
我们知道大多数软件以及依赖库都是外国人搞的,如果从官网下载就需要访问国外网站,但是会很卡,网络不稳定也会导致下载依赖失败,所有我们修改成国内镜像。
打开idea设置,搜索maven ,在maven home directory中选择你要使用的maven,Bundled是idea自带的,最后一个是我自己的,选哪一个都行。
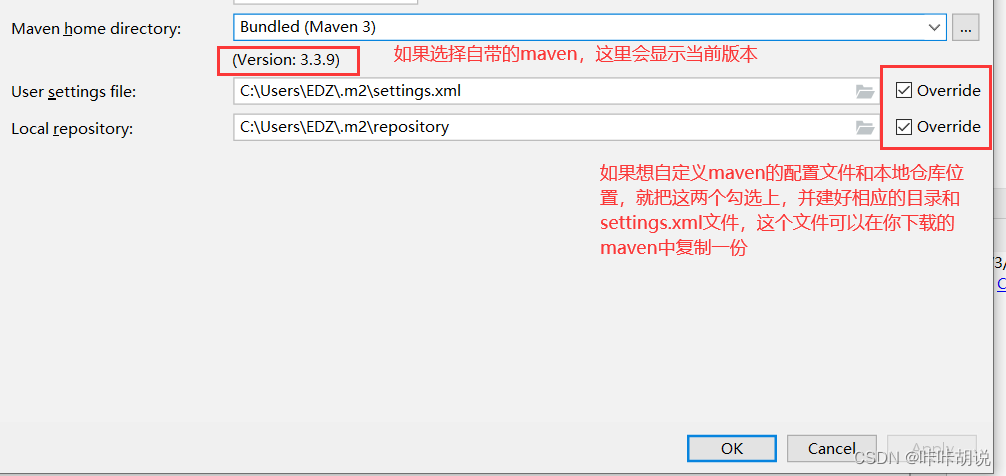
你的maven配置文件在conf目录下
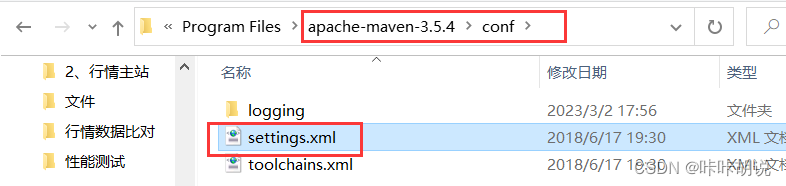
复制的settings.xml文件放到上面 Local repository中的目录下
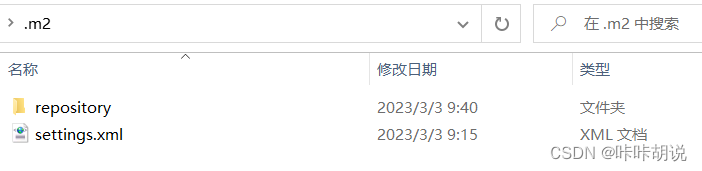
使用记事本或者任意文本编辑器打开settings.xml文件,搜素mirrors这个标签,将国内镜像源粘贴进去。
下面贴一下小瑾yes收集的镜像源,直接复制就行了
<mirrors>
	<mirror>
        <id>aliyun-public</id>
        <mirrorOf>*</mirrorOf>
        <name>aliyun public</name>
        <url>https://maven.aliyun.com/repository/public</url>
    </mirror>

    <mirror>
        <id>aliyun-central</id>
        <mirrorOf>*</mirrorOf>
        <name>aliyun central</name>
        <url>https://maven.aliyun.com/repository/central</url>
    </mirror>

    <mirror>
        <id>aliyun-spring</id>
        <mirrorOf>*</mirrorOf>
        <name>aliyun spring</name>
        <url>https://maven.aliyun.com/repository/spring</url>
    </mirror>

    <mirror>
        <id>aliyun-spring-plugin</id>
        <mirrorOf>*</mirrorOf>
        <name>aliyun spring-plugin</name>
        <url>https://maven.aliyun.com/repository/spring-plugin</url>
    </mirror>

    <mirror>
        <id>aliyun-apache-snapshots</id>
        <mirrorOf>*</mirrorOf>
        <name>aliyun apache-snapshots</name>
        <url>https://maven.aliyun.com/repository/apache-snapshots</url>
    </mirror>

    <mirror>
        <id>aliyun-google</id>
        <mirrorOf>*</mirrorOf>
        <name>aliyun google</name>
        <url>https://maven.aliyun.com/repository/google</url>
    </mirror>

    <mirror>
        <id>aliyun-gradle-plugin</id>
        <mirrorOf>*</mirrorOf>
        <name>aliyun gradle-plugin</name>
        <url>https://maven.aliyun.com/repository/gradle-plugin</url>
    </mirror>

    <mirror>
        <id>aliyun-jcenter</id>
        <mirrorOf>*</mirrorOf>
        <name>aliyun jcenter</name>
        <url>https://maven.aliyun.com/repository/jcenter</url>
    </mirror>

    <mirror>
        <id>aliyun-releases</id>
        <mirrorOf>*</mirrorOf>
        <name>aliyun releases</name>
        <url>https://maven.aliyun.com/repository/releases</url>
    </mirror>

    <mirror>
        <id>aliyun-snapshots</id>
        <mirrorOf>*</mirrorOf>
        <name>aliyun snapshots</name>
        <url>https://maven.aliyun.com/repository/snapshots</url>
    </mirror>

    <mirror>
        <id>aliyun-grails-core</id>
        <mirrorOf>*</mirrorOf>
        <name>aliyun grails-core</name>
        <url>https://maven.aliyun.com/repository/grails-core</url>
    </mirror>

    <mirror>
        <id>aliyun-mapr-public</id>
        <mirrorOf>*</mirrorOf>
        <name>aliyun mapr-public</name>
        <url>https://maven.aliyun.com/repository/mapr-public</url>
    </mirror>
  </mirrors>

- 1
- 2
- 3
- 4
- 5
- 6
- 7
- 8
- 9
- 10
- 11
- 12
- 13
- 14
- 15
- 16
- 17
- 18
- 19
- 20
- 21
- 22
- 23
- 24
- 25
- 26
- 27
- 28
- 29
- 30
- 31
- 32
- 33
- 34
- 35
- 36
- 37
- 38
- 39
- 40
- 41
- 42
- 43
- 44
- 45
- 46
- 47
- 48
- 49
- 50
- 51
- 52
- 53
- 54
- 55
- 56
- 57
- 58
- 59
- 60
- 61
- 62
- 63
- 64
- 65
- 66
- 67
- 68
- 69
- 70
- 71
- 72
- 73
- 74
- 75
- 76
- 77
- 78
- 79
- 80
- 81
- 82
- 83
- 84
- 85

4、设置maven代理
由于我们在公司使用的是代理,下面进行代理设置,在settings.xml中搜索proxies和repositories按照下面进行配置,代理写你公司的代理即可
<settings xmlns="http://maven.apache.org/SETTINGS/1.0.0"
  xmlns:xsi="http://www.w3.org/2001/XMLSchema-instance"
  xsi:schemaLocation="http://maven.apache.org/SETTINGS/1.0.0
                      http://maven.apache.org/xsd/settings-1.0.0.xsd">
  <localRepository/>
  <interactiveMode/>
  <usePluginRegistry/>
  <offline/>
  <pluginGroups/>
  <servers/>
  <proxies>
   <proxy>
      <id>http-proxy</id>
      <active>true</active>
      <protocol>http</protocol>
      <host>127.0.0.1</host>
      <port>7890</port>
      <!--  <username>proxyuser</username>
      <password>somepassword</password>
      <nonProxyHosts>www.google.com|*.example.com</nonProxyHosts>
      -->
      </proxy>
   <proxy>
      <id>https-proxy</id>
      <active>true</active>
      <protocol>https</protocol>
      <host>127.0.0.1</host>
      <port>7890</port>
      <!--  <username>proxyuser</username>
      <password>somepassword</password>
      <nonProxyHosts>www.google.com|*.example.com</nonProxyHosts>
      -->
      </proxy>
  </proxies>
  <activeProfiles/>
  <profiles>
    <profile>
        <repositories>
           <repository>
                <id>aliyunmaven</id>
                <name>aliyunmaven</name>
                <url>https://maven.aliyun.com/repository/public</url>
                <layout>default</layout>
                <releases>
                        <enabled>true</enabled>
                </releases>
                <snapshots>
                        <enabled>true</enabled>
                </snapshots>
            </repository>
            <repository>
                <id>MavenCentral</id>
                <url>http://repo1.maven.org/maven2/</url>
            </repository>
            <repository>
                <id>aliyunmavenApache</id>
                <url>https://maven.aliyun.com/repository/apache-snapshots</url>
            </repository>
        </repositories>
     </profile>
  </profiles>
</settings>
- 1
- 2
- 3
- 4
- 5
- 6
- 7
- 8
- 9
- 10
- 11
- 12
- 13
- 14
- 15
- 16
- 17
- 18
- 19
- 20
- 21
- 22
- 23
- 24
- 25
- 26
- 27
- 28
- 29
- 30
- 31
- 32
- 33
- 34
- 35
- 36
- 37
- 38
- 39
- 40
- 41
- 42
- 43
- 44
- 45
- 46
- 47
- 48
- 49
- 50
- 51
- 52
- 53
- 54
- 55
- 56
- 57
- 58
- 59
- 60
- 61
- 62
以上配置完成后,spring-boot工程就可以正常创建了
声明:本文内容由网友自发贡献,不代表【wpsshop博客】立场,版权归原作者所有,本站不承担相应法律责任。如您发现有侵权的内容,请联系我们。转载请注明出处:https://www.wpsshop.cn/w/小丑西瓜9/article/detail/87304
推荐阅读
相关标签

