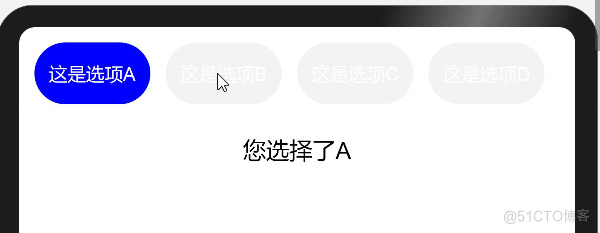
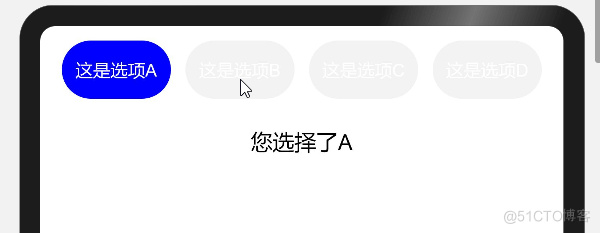
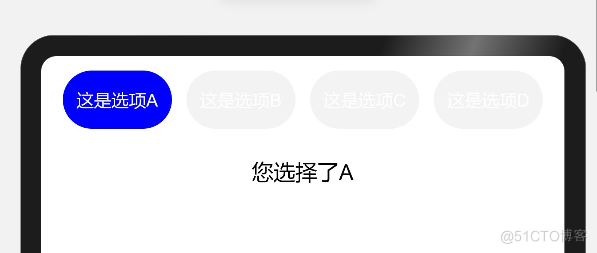
什么是单选组
熟悉web的小伙伴一定知道,在html中如果我们给radio表单设置相同的name,会视为一个单选组。
- <input type="radio" name="group" value="1"> 我是成员1
- <input type="radio" name="group" value="2"> 我是成员2
- <input type="radio" name="group" value="3"> 我是成员3
对于一个单选组,我们只需要知道这个组里,我们选中的表单值就好了。
- document.getElementsByName("group").forEach((v) => {
- v.addEventListener("change", function (e) {
- let value = e.currentTarget.value
- document.getElementById("result").innerText = "您选中了成员" + value
- }, false)
- })
单选组效果:

在OpenHarmony应用开发中,我们可以使用多个Toggle组件来实现。
OpenHarmony Toggle组件请参考: 【甜甜酱OH文档补充】OpenHarmony Toggle组件
来看看我们想要的一个效果吧。

现在先定义出一个新的组件RadioGroup。
- @Component
- struct RadioGroup {
- build(){}
- }
数据
要实现一个单选组组件,首先要知道我们需要什么。
-
单选项
一个单选项应该由两种数据构成。
-
单选项的
对应值 -
单选项要
显示文字。
那么我们先定义一个接口叫
Option。- interface Option {
- displayValue: string, //显示文字
- value: string | number //对应值
- }
-
-
单选组
一个单选组一定是由多个单选项组成的。那么
RadioGroup组件一定是需要获取一个单选项数组Option[]。private list: Option[] //一个Option数组 -
单选组值
对于一个单选组,永远会是有值的,因为总有一个选项是被选中的。
单选组值我们进行双向绑定。@Link value: string | number //类型与Option的value保持一致如果没有给定
单选组值,那么默认单选组值为第一个选项的对应值。- aboutToAppear() {
- if (!this.value) {
- this.value = this.list[0].value
- }
- }
现在我们先渲染一个基本的页面来看看效果吧。
- interface Option {
- displayValue: string,
- value: string | number
- }
-
- @Component
- struct RadioGroup {
- private list: Option[]
- @Link value: string | number
-
- aboutToAppear() {
- if (!this.value) {
- this.value = this.list[0].value
- }
- }
-
- build() {
- Flex({
- wrap: FlexWrap.Wrap
- }) {
- ForEach(this.list, (option: Option, index: number) => {
- Toggle({
- type: ToggleType.Button,
- isOn: false
- }) {
- Text(option.displayValue).fontSize(24).fontColor(Color.White)
- }
- .width(150)
- .height(80)
- .selectedColor(Color.Blue)
- })
- }
- }
- }
-
- @Entry
- @Component
- struct Index {
- private list: Option[] = [
- {
- displayValue: "这是选项A",
- value: "A"
- },
- {
- displayValue: "这是选项B",
- value: "B"
- },
- {
- displayValue: "这是选项C",
- value: "C"
- },
- {
- displayValue: "这是选项D",
- value: "D"
- }
- ]
-
- @State value: string | number = ''
-
- build() {
- Column() {
- RadioGroup({
- list: this.list,
- value: $value
- })
-
- Column(){
- Text(`您选择了${this.value}`).fontSize(30)
- }
- .height(100)
- .margin({ top: 40 })
- }
- .height('100%')
- .width('100%')
- .padding(20)
- }
- }
但是现在每个Toggle组件控制都是独立的。

状态管理
我们知道Toggle组件是靠isOn的值来渲染自己当前的状态,现在我们为单选组建立一个状态管理数组。
@State _state: boolean[] = [] //状态管理数组现在按照索引为每个选项组件建立好自己的状态数据。
- 选项默认状态为关闭
false 单选组值对应的选项状态为开启true
- if (!this.value) {
- this.value = this.list[0].value
- }
-
- this.list.forEach((option, index) => {
- let state = false
-
- if (option.value == this.value) { //单选组值对应选项
- state = true
- }
-
- this._state[index] = state
- })

当我们每次修改单选组值value后,应该刷新状态管理数组_state。
我们定义一个刷新状态的方法refresh。
- private refresh(){
- this.list.forEach((option, index) => {
- let state = false
-
- if (option.value == this.value) {
- state = true
- }
-
- this._state[index] = state
- })
- }
Toggle组件每次切换状态会执行onChange方法。
当我们发现组件发生变化时,就去更新单选组值,并刷新整个状态数组。
- ForEach(this.list, (option: Option, index: number) => {
- Toggle({
- type: ToggleType.Button,
- isOn: this._state[index]
- })
- .onChange((isOn: boolean) => {
- this.value = option.value
- this.refresh()
- })
- })
现在还差最重要的一步,就是保证选中的单选项再次被点击后不会切换状态。
这里就要用到enabled属性了,只要我们发现这个选项被选中就让这个选项不可响应。
- ForEach(this.list, (option: Option, index: number) => {
- Toggle({
- type: ToggleType.Button,
- isOn: this._state[index]
- })
- .enabled(!this._state[index]) //是否响应状态 正好与 是否选中状态值相反
- })
自定义选项
虽然实现了一个单选组组件,但是我们发现每个选项的样式都被固定在RadioGroup组件内,我们如果想修改样式就必须修改RadioGroup组件。那么有没有什么办法,可以让我们使用单选组逻辑的同时又能够自定义Toggle组件的样式呢。
这里要感谢社区小伙伴提供的ets插槽思路,使用
ForEach配合@Builder装饰器来实现。
选项构造器
首先我们为RadioGroup组件添加一个选项构造器itemBuilder。
- type Update = () => void
- type ItemBuilder = (item: Option, index: number, state: boolean, update: Update) => void
-
- struct RadioGroup {
- private itemBuilder: ItemBuilder
- ...
- }
这个构造器会为父级组件提供RadioGroup选项信息。
item: Option当前选项信息index:number当前选项索引state:boolean当前选项状态update:Update刷新RadioGroup状态方法
有了构造器,我们就可以利用构造器返回的信息渲染单个选项。
我们来看看构造器是如何使用的。
@Builder装饰器定义了一个如何渲染自定义组件的方法。此装饰器提供了一个修饰方法,其目的是和build函数一致。
@Builder装饰器装饰的方法的语法规范与build函数也保持一致。
通过@Builder装饰器可以在一个自定义组件内快速生成多个布局内容。
- @Entry
- @Component
- struct Index {
- @State value: string = ''
-
- // 渲染选项
- @Builder OptionItem(option: Option, index: number, state: boolean, update: Update) {
- Toggle({
- type: ToggleType.Button,
- isOn: state //Toggle组件状态
- }) {
- // 选项显示文字
- Text(`${option.displayValue}`).fontSize(24).fontColor(Color.White)
- }
- .onChange((isOn)=>{
- // 发生变化时,执行刷新方法
- update()
- })
- .enabled(!state) //Toggle组件可响应状态
- .selectedColor(Color.Blue)
- .size({
- width: 150,
- height: 80
- })
- }
-
- build() {
- Column() {
- RadioGroup({
- value: $value, // 单选组值是双向绑定的
- list: this.list,
- itemBuilder: (option: Option, index: number, state: boolean, update: Update) => {
- // 在itemBuilder内调用@Builder装饰器方法
- this.OptionItem(option, index, state, update)
- }
- })
- }
- .height('100%')
- .width('100%')
- }
- }
实现构造器
那么这个构造器怎么实现呢?
我们要知道build方法内仅支持:
- 组合组件
- 使用渲染控制语法
- 调用@Builder装饰的方法
要让itemBuilder构造器方法在build中被调用,我们就需要让itemBuilder成为一个组件。
这就要提起我们的ForEach循环渲染了。
当我们使用ForEach只执行一次循环时,就相当于是一个组件在被渲染。那么只要我们将itemBuilder构造器方法重新定义在ForEach生成子组件的lambda函数上,就可以让itemBuilder构造器成为一个可以被渲染的组件了。
bind()函数创建了一个新函数(原函数的拷贝),这个函数接受一个提供新的this上下文的参数,以及之后任意可选的其他参数。当这个新函数被调用时,它的this关键字指向第一个参数的新上下文。而第二个之后的参数会与原函数的参数组成新参数(原函数的参数在后),传递给函数。另外使用
call()、apply()都是可以的,我们要的就是重新定义ForEach的生成子组件方法。
- private _once = Array(1)
-
- @Builder RadioGroupItem(option: Option, index: number) {
- ForEach(this._once, this.itemBuilder.bind(this, option, index, this._state[index], () => {
- this.value = option.value
- this.refresh()
- }))
- }
循环渲染选项组件
- build() {
- Flex({
- wrap: FlexWrap.Wrap
- }) {
- ForEach(this.list, (option: Option, index: number) => {
- this.RadioGroupItem(option, index)
- })
- }
- }
完整代码
ui/RadioGroup.ets
- export interface Option {
- displayValue: string,
- value: string | number
- }
-
- export type Update = () => void
-
- export type ItemBuilder = (item: Option, index: number, state: boolean, update: Update) => void
-
- // 单选组
- @Component
- export struct RadioGroup {
- private list: Option[]
- private itemBuilder: ItemBuilder
- @State _state: boolean[] = []
- @Link value: string | number
- private _once: number[]
-
- private refresh() {
- this.list.forEach((option, index) => {
- let state = false
-
- if (option.value == this.value) {
- state = true
- }
-
- this._state[index] = state
- })
- }
-
- aboutToAppear() {
- this._once = [1]
-
- if (!this.value) {
- this.value = this.list[0].value
- }
-
- this.refresh()
- }
-
- @Builder RadioGroupItem(option: Option, index: number) {
- ForEach(this._once, this.itemBuilder.bind(this, option, index, this._state[index], () => {
- this.value = option.value
- this.refresh()
- }))
- }
-
- build() {
- Flex({
- wrap: FlexWrap.Wrap
- }) {
- ForEach(this.list, (option: Option, index: number) => {
- this.RadioGroupItem(option, index)
- })
- }
- }
- }
index.ets
- import {Option, RadioGroup, Update} from '../ui/RadioGroup.ets';
-
- @Entry
- @Component
- struct Index {
- @State value: string = ''
- private list: Option[] = [
- {
- displayValue: "这是选项A",
- value: "A"
- },
- {
- displayValue: "这是选项B",
- value: "B"
- },
- {
- displayValue: "这是选项C",
- value: "C"
- },
- {
- displayValue: "这是选项D",
- value: "D"
- }
- ]
-
- @Builder OptionItem(option: Option, index: number, state: boolean, update: Update) {
- Flex({
- alignItems: ItemAlign.Center,
- justifyContent: FlexAlign.Center
- }) {
- Toggle({
- type: ToggleType.Button,
- isOn: state
- }) {
- Text(`${option.displayValue}`).flexGrow(1).fontSize(24).fontColor(Color.White)
- }
- .onChange((isOn) => {
- update()
- })
- .enabled(!state)
- .selectedColor(Color.Blue)
- .borderRadius(150)
- .size({
- width: 150,
- height: 80
- })
- }
- .width('25%')
- .margin({
- top: 10,
- bottom: 10
- })
- }
-
- build() {
- Column() {
- RadioGroup({
- value: $value,
- list: this.list,
- itemBuilder: (option: Option, index: number, state: boolean, update: Update) => {
- this.OptionItem(option, index, state, update)
- }
- })
-
- Column() {
- Text(`您选择了${this.value}`).fontSize(30)
- }.margin(40)
- }
- .height('100%')
- .width('100%')
- }
- }
这是我自己的一个思路,自定义组件在实际应用开发中应该要考虑到更多的情况,大家有更好的思路或者实现方式希望可以在社区里一起交流。


