热门标签
热门文章
- 1Linux高危命令,运维人手一份_高危指令 操作系统
- 201uni-app 基础教程 环境配置【uniapp 专题 1】_uni-app测试正式配置
- 3博科br310交换机级联
- 4git -- 清除本地分支以及删除远程分支_分支中清除功能是什么意思
- 5「一本通 1.1 例 4」加工生产调度(典型例题,值得一看)_某工厂收到 n 个订单(ai,bi),
- 6智能优化算法:社交网络搜索算法-附代码_社交网络算法
- 74 招搞定 Java List 排序_javalist排序sort降序
- 8Moonshot AI API使用(2)-环境变量配置和简单对话demo_moonshot ai 配置环境变量
- 9MS-SQL Server 基础类 - SQL语句
- 10使用MapReduce进行编程来对数据进行处理和计算_能用平台编写mapreduce 程序并分析该程序的数据处理、map阶段、reduce阶段、迭代
当前位置: article > 正文
在linux服务器上部署通义千问国产的多模态大模型_多模态模型部署
作者:小桥流水78 | 2024-06-27 01:39:19
赞
踩
多模态模型部署
这个步骤很简单 一步一步来就能部署!
1.新建一个虚拟环境
conda create -n qwen python=3.9
- 1
2.将github上的qwen模型代码,下载到服务器。链接:代码地址
3.cd 到Qwen-VL-master文件夹,激活环境。
4.安装项目运行需要的依赖。
pip install -r requirements.txt
- 1
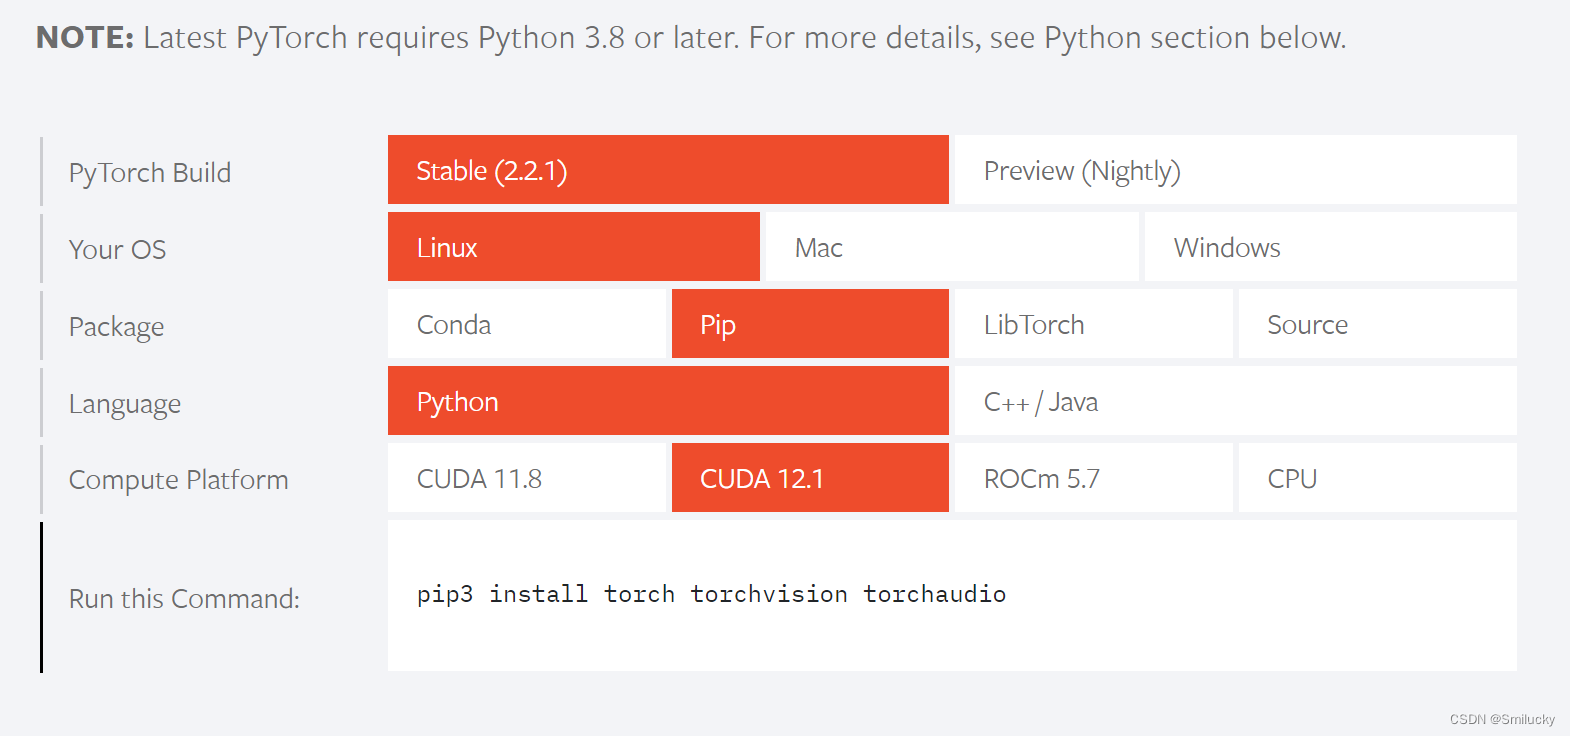
5.安装pytorch,从官网安装,我安装的torch版本是2.2.1,cuda是12.1版本的,这个大家可以根据自己的显卡情况安装,用torch官网给的命令安装。
pip3 install torch torchvision torchaudio
- 1

6.安装demo的依赖。
pip install -r requirements_web_demo.txt
- 1
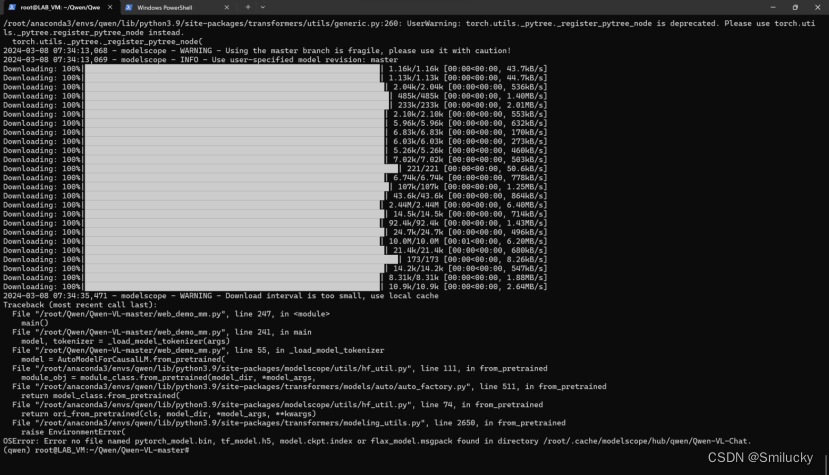
7.运行python web_demo_mm.py,这时会出来一个报错,如下图。

8.根据报错信息的最后一行,他说在/root/.cache/modelscope/hub/qwen/Qwen-VL-Chat这个目录下没有找到模型文件,我们需要到huggingface上去下载Qwen-VL-Chat这个模型到报错的目录即可。
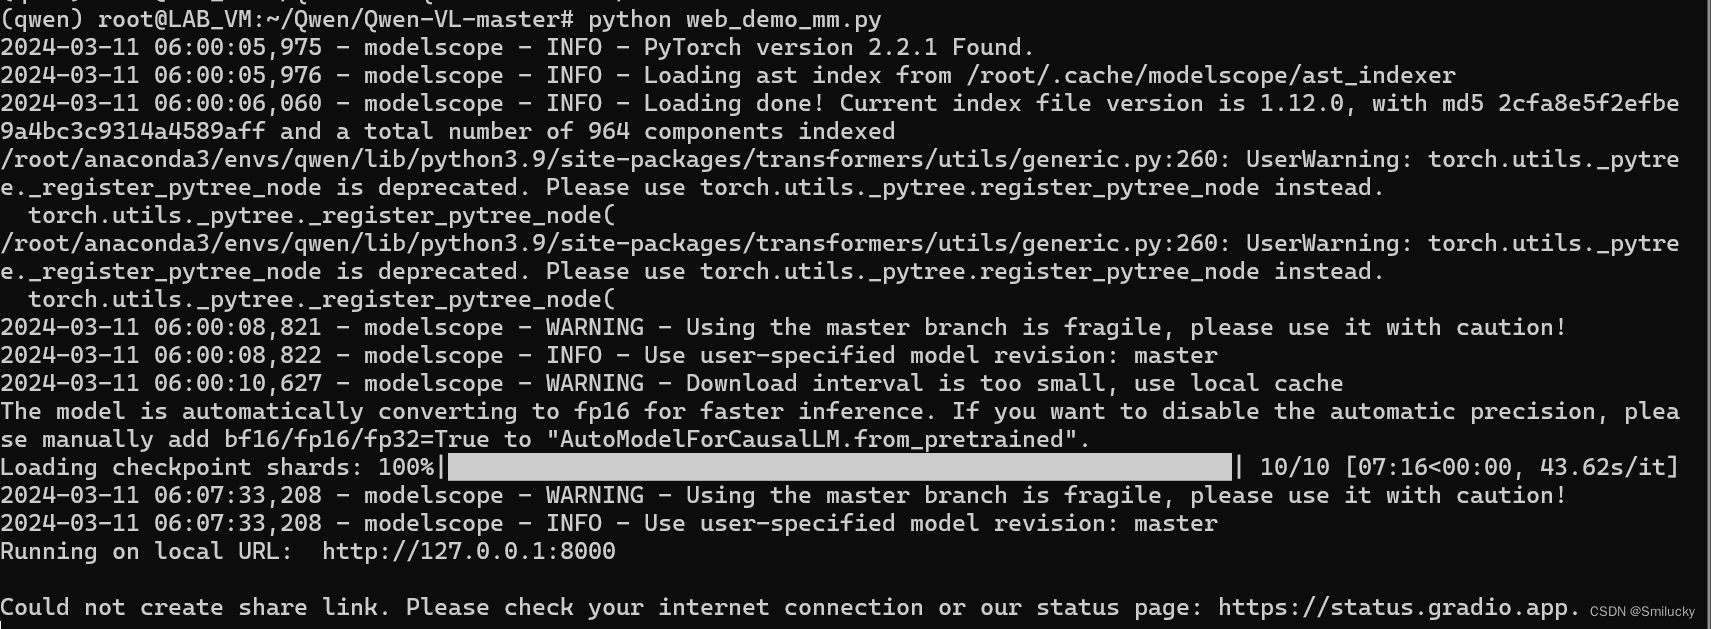
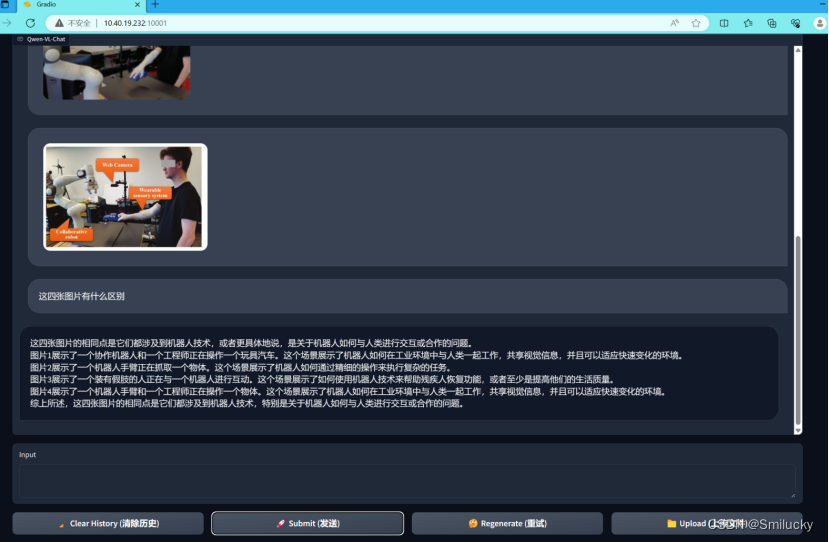
9.重新运行python web_demo_mm.py,如果运行成功则会展示下面的界面。


声明:本文内容由网友自发贡献,不代表【wpsshop博客】立场,版权归原作者所有,本站不承担相应法律责任。如您发现有侵权的内容,请联系我们。转载请注明出处:https://www.wpsshop.cn/w/小桥流水78/article/detail/760937
推荐阅读
相关标签


