- 1美女与修狗儿【 InsCode Stable Diffusion 美图活动一期】
- 2解决使用yum安装软件时出现GPG-Key的问题_gpgkey
- 3高级FPGA开发之PCIe IP Core(三)_pcie fpga
- 4nginx 配置 autoindex
- 5Linux开发工具vim篇_vimrc无插件
- 6MacBook风扇这么响,原来是这些细节没在意!_苹果笔记本风扇解析
- 7unity editor 使用 aws s3 sdk
- 8webclient无法获取html文件,Webclient.DownloadFile().aspx文件无法打开(Webclient.Down
- 9深度学习:GPT1、GPT2、GPT-3_gpt-1
- 10ASP.NET 个人日志系统的设计与实现(论文+源码)_Nueve_于asp.net技术设计实现一个简单的web信息管理系统web日记。
Spring Boot Actuator自定义监控集成到/health接口实战
赞
踩
导言
Spring Boot Actuator 为应用带来了生产就绪的功能。有了 Actuator 后,监控应用程序、收集指标、了解流量或数据库状态就变得易如反掌。Actuator 主要公开应用的运行信息 - 健康状况、指标、信息、转储(dump)、环境等。它使用 HTTP 端点或 JMX Bean 与客户端进行交互。
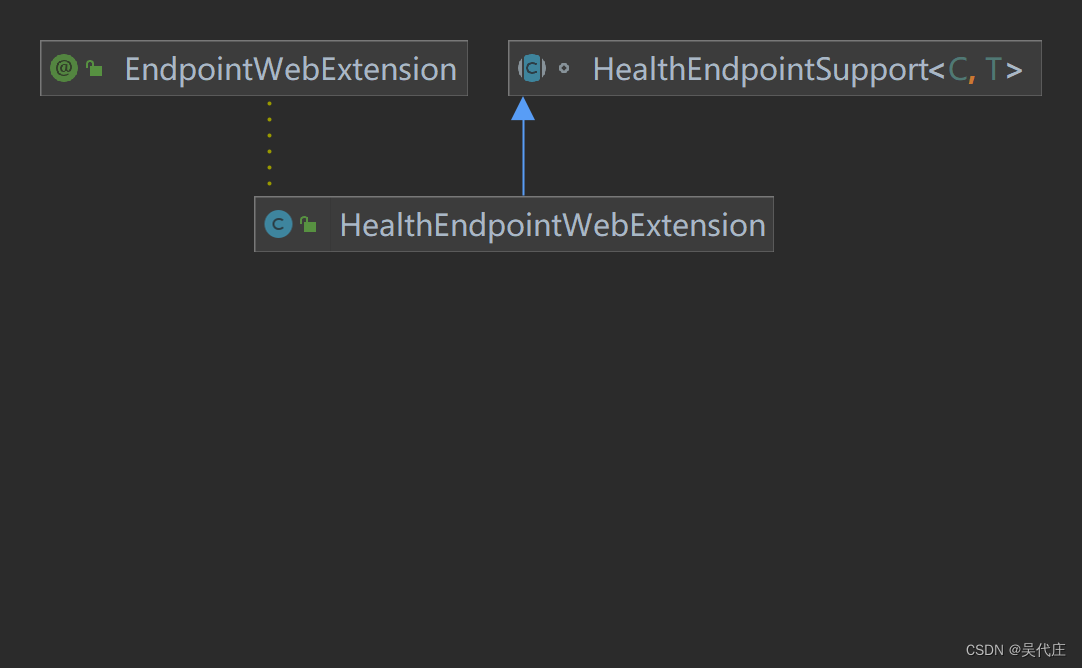
HealthEndpointWebExtension

HealthEndpointWebExtension 是一个用于监控和管理应用程序健康状况的网络扩展。它提供了一个端点(/actuator/health),可以返回应用程序的健康状况信息,包括数据库、缓存、消息队列等组件的健康状态。
源码如下:
@EndpointWebExtension(endpoint = HealthEndpoint.class)
public class HealthEndpointWebExtension extends HealthEndpointSupport<HealthContributor, HealthComponent> {

	private static final String[] NO_PATH = {};

	/**
	 * 使用委托端点创建一个新的HealthEndpointWebExtension实例。
	 */
	@Deprecated
	public HealthEndpointWebExtension(HealthEndpoint delegate, HealthWebEndpointResponseMapper responseMapper) {
	}

	/**
	 *创建一个新的HealthEndpointWebExtension实例
	 */
	public HealthEndpointWebExtension(HealthContributorRegistry registry, HealthEndpointGroups groups) {
		super(registry, groups);
	}

	@ReadOperation
	public WebEndpointResponse<HealthComponent> health(ApiVersion apiVersion, SecurityContext securityContext) {
		return health(apiVersion, securityContext, false, NO_PATH);
	}

	@ReadOperation
	public WebEndpointResponse<HealthComponent> health(ApiVersion apiVersion, SecurityContext securityContext,
			@Selector(match = Match.ALL_REMAINING) String... path) {
		return health(apiVersion, securityContext, false, path);
	}

	public WebEndpointResponse<HealthComponent> health(ApiVersion apiVersion, SecurityContext securityContext,
			boolean showAll, String... path) {
		HealthResult<HealthComponent> result = getHealth(apiVersion, securityContext, showAll, path);
		if (result == null) {
			return (Arrays.equals(path, NO_PATH))
					? new WebEndpointResponse<>(DEFAULT_HEALTH, WebEndpointResponse.STATUS_OK)
					: new WebEndpointResponse<>(WebEndpointResponse.STATUS_NOT_FOUND);
		}
		HealthComponent health = result.getHealth();
		HealthEndpointGroup group = result.getGroup();
		int statusCode = group.getHttpCodeStatusMapper().getStatusCode(health.getStatus());
		return new WebEndpointResponse<>(health, statusCode);
	}

	@Override
	protected HealthComponent getHealth(HealthContributor contributor, boolean includeDetails) {
		return ((HealthIndicator) contributor).getHealth(includeDetails);
	}

	@Override
	protected HealthComponent aggregateContributions(ApiVersion apiVersion, Map<String, HealthComponent> contributions,
			StatusAggregator statusAggregator, boolean showComponents, Set<String> groupNames) {
		return getCompositeHealth(apiVersion, contributions, statusAggregator, showComponents, groupNames);
	}

}
- 1
- 2
- 3
- 4
- 5
- 6
- 7
- 8
- 9
- 10
- 11
- 12
- 13
- 14
- 15
- 16
- 17
- 18
- 19
- 20
- 21
- 22
- 23
- 24
- 25
- 26
- 27
- 28
- 29
- 30
- 31
- 32
- 33
- 34
- 35
- 36
- 37
- 38
- 39
- 40
- 41
- 42
- 43
- 44
- 45
- 46
- 47
- 48
- 49
- 50
- 51
- 52
- 53
- 54
- 55
- 56
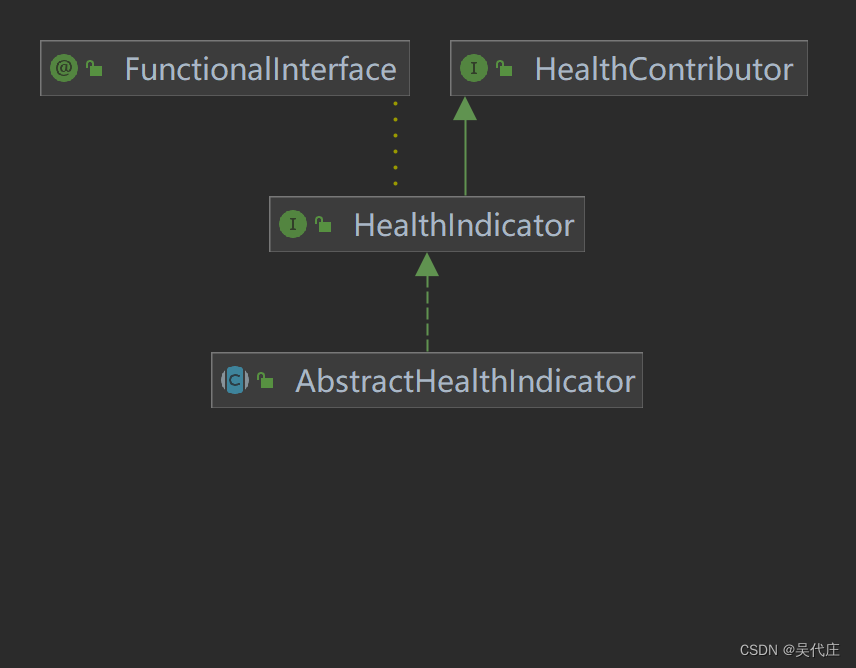
AbstractHealthIndicator

Spring Boot Actuator 的 AbstractHealthIndicator 是一个抽象类,用于自定义健康检查指标。要使用 AbstractHealthIndicator,需要创建一个继承自该类的子类,并实现 doHealthCheck(Builder builder) 方法。在该方法中,可以添加自定义的健康检查逻辑,并将检查结果添加到 HealthIndicatorDetails 对象中。
源码如下:
public abstract class AbstractHealthIndicator implements HealthIndicator {

	private static final String NO_MESSAGE = null;

	private static final String DEFAULT_MESSAGE = "Health check failed";

	private final Log logger = LogFactory.getLog(getClass());

	private final Function<Exception, String> healthCheckFailedMessage;


	protected AbstractHealthIndicator() {
		this(NO_MESSAGE);
	}

	/**
	 * 创建一个新的{@link AbstractHealthIndicator}实例,其中包含特定的消息
	 */
	protected AbstractHealthIndicator(String healthCheckFailedMessage) {
		this.healthCheckFailedMessage = (ex) -> healthCheckFailedMessage;
	}

	/**
	 * 创建一个新的{@link AbstractHealthIndicator}实例,其中包含特定的消息
	 */
	protected AbstractHealthIndicator(Function<Exception, String> healthCheckFailedMessage) {
		Assert.notNull(healthCheckFailedMessage, "HealthCheckFailedMessage must not be null");
		this.healthCheckFailedMessage = healthCheckFailedMessage;
	}

	@Override
	public final Health health() {
		Health.Builder builder = new Health.Builder();
		try {
			doHealthCheck(builder);
		}
		catch (Exception ex) {
			if (this.logger.isWarnEnabled()) {
				String message = this.healthCheckFailedMessage.apply(ex);
				this.logger.warn(StringUtils.hasText(message) ? message : DEFAULT_MESSAGE, ex);
			}
			builder.down(ex);
		}
		return builder.build();
	}

	/**
	 * 实际运行状况检查逻辑
	 */
	protected abstract void doHealthCheck(Health.Builder builder) throws Exception;

}
- 1
- 2
- 3
- 4
- 5
- 6
- 7
- 8
- 9
- 10
- 11
- 12
- 13
- 14
- 15
- 16
- 17
- 18
- 19
- 20
- 21
- 22
- 23
- 24
- 25
- 26
- 27
- 28
- 29
- 30
- 31
- 32
- 33
- 34
- 35
- 36
- 37
- 38
- 39
- 40
- 41
- 42
- 43
- 44
- 45
- 46
- 47
- 48
- 49
- 50
- 51
- 52
@DependsOn注解
@DependsOn 是 Spring 框架中的一个注解,用于指定一个 bean 的初始化依赖于其他 bean。当一个 bean 被标记为 @DependsOn 时,Spring 容器会在初始化该 bean 之前先初始化被依赖的 bean。
例如,有两个 bean:beanA 和 beanB,我们希望在初始化 beanA 之前先初始化 beanB,可以使用 @DependsOn 注解:
@Configuration
public class AppConfig {

    @Bean
    public BeanB beanB() {
        return new BeanB();
    }

    @Bean
    @DependsOn("beanB")
    public BeanA beanA() {
        return new BeanA();
    }
}
- 1
- 2
- 3
- 4
- 5
- 6
- 7
- 8
- 9
- 10
- 11
- 12
- 13
- 14
- 15
在这个例子中,beanA 被标记为依赖于 beanB,所以在初始化 beanA 之前,Spring 容器会先初始化 beanB。
@ConditionalOnAvailableEndpoint注解
@ConditionalOnAvailableEndpoint 是一个条件注解,用于在 Spring Boot 应用程序中根据指定的端点是否可用来决定是否启用某个 Bean。这个注解通常用在 @Configuration 类或 @Bean 方法上,以便在满足特定条件时才创建相应的 Bean。
实战
1.引入依赖
<dependency>
    <groupId>org.springframework.boot</groupId>
    <artifactId>spring-boot-starter-actuator</artifactId>
</dependency>
- 1
- 2
- 3
- 4
2.定义HealthCheck接口
定义标准化的接口,以便于通过这些接口规范进行Bean的依赖注入。
public interface HealthCheck {
    HealthInfo check() throws Exception;
}
- 1
- 2
- 3
3.定义HealthStratgy监控检查类
创建 HealthStrategy 类,继承自 HealthEndpointWebExtension,用于自定义健康监控逻辑。同时,实现 HealthStrategy 类继承自 AbstractHealthIndicator,以注入自定义的健康检查端点贡献者。
public class HealthStratgy extends HealthEndpointWebExtension {
    private final ContributorRegistry<HealthContributor> registry;
    private final HealthEndpointGroups groups;

    public HealthStratgy(HealthContributorRegistry registry, HealthEndpointGroups groups) {
        super(registry, groups);
        this.registry = registry;
        this.groups = groups;
        this.appendCheckers();
    }

    private void appendCheckers() {
    // 获取所有HealthCheck接口实现类
        Map<String, HealthCheck> checkers = SpringUtils.getBeans(HealthCheck.class);
        Iterator<Map.Entry<String, HealthCheck>> it = checkers.entrySet().iterator();

        while(it.hasNext()) {
            Map.Entry<String, HealthCheck> t = (Map.Entry)it.next();
            HealthCheck checker = (HealthCheck)t.getValue();
            HealthIndicator indicator = new HealthStratgy(checker);
            this.registry.registerContributor(this.getKey((String)t.getKey()), indicator);
        }

    }

    private String getKey(String name) {
        int index = name.toLowerCase(Locale.ENGLISH).indexOf("healthcheck");
        if (index > 0) {
            return name.substring(0, index);
        } else {
            index = name.toLowerCase(Locale.ENGLISH).indexOf("healthindicator");
            return index > 0 ? name.substring(0, index) : name;
        }
    }

    class HealthStratgy extends AbstractHealthIndicator {
        private HealthCheck check;

        public HealthStratgy(HealthCheck check) {
            this.check = check;
        }

        protected void doHealthCheck(Health.Builder builder) throws Exception {
            HealthInfo info = this.check.check();
            String infoKey;
            if ("normal".equals(info.getStatus())) {
                builder.up();
                infoKey = "info";
            } else if ("error".equals(info.getStatus())) {
                builder.down();
                infoKey = "error";
            } else {
                builder.unknown();
                infoKey = "error";
            }

            if (StringUtils.isNotEmpty(info.getInfo())) {
                builder.withDetail(infoKey, info.getInfo());
            }

            Map<String, Object> detail = info.getDetail();
            if (detail != null && !detail.isEmpty()) {
                Iterator var5 = detail.entrySet().iterator();

                while(var5.hasNext()) {
                    Map.Entry<String, Object> en = (Map.Entry)var5.next();
                    builder.withDetail((String)en.getKey(), en.getValue());
                }
            }

        }
    }
}
- 1
- 2
- 3
- 4
- 5
- 6
- 7
- 8
- 9
- 10
- 11
- 12
- 13
- 14
- 15
- 16
- 17
- 18
- 19
- 20
- 21
- 22
- 23
- 24
- 25
- 26
- 27
- 28
- 29
- 30
- 31
- 32
- 33
- 34
- 35
- 36
- 37
- 38
- 39
- 40
- 41
- 42
- 43
- 44
- 45
- 46
- 47
- 48
- 49
- 50
- 51
- 52
- 53
- 54
- 55
- 56
- 57
- 58
- 59
- 60
- 61
- 62
- 63
- 64
- 65
- 66
- 67
- 68
- 69
- 70
- 71
- 72
- 73
- 74
4.定义MonitorAutoConfiguration类
因HealthStratgy初始化方法中需要使用SpringUtils,所以使用@DependsOn指定MonitorAutoConfiguration在此方法之后初始化。并绑定到HealthEndpoint健康检查类中。
MonitorAutoConfiguration类源码如下:
@Configuration
@AutoConfigureBefore({EndpointAutoConfiguration.class})
public class MonitorAutoConfiguration {
    public MonitorAutoConfiguration() {
    }

    @DependsOn({"springUtils"})
    @Bean
    @ConditionalOnAvailableEndpoint(
        endpoint = HealthEndpoint.class
    )
    public HealthStratgy healthEndpointWebExtension(HealthContributorRegistry registry, HealthEndpointGroups groups) {
        HealthStratgy strategy = new HealthStratgy(registry, groups);
        return strategy;
    }
}
- 1
- 2
- 3
- 4
- 5
- 6
- 7
- 8
- 9
- 10
- 11
- 12
- 13
- 14
- 15
- 16
- 17
5. 自定义监控检查类
自定义服务启动成功检查类ReadyChecker,示例源码如下:
@Component
public class ReadyChecker implements HealthCheck {
    @Override
    public HealthInfo check() throws Exception {
        if (ReadyListener.getReadyStatus()){
            return HealthInfo.buildNormal("服务注册完成");
        }
        return HealthInfo.buildError("服务尚未注册完成");
    }
}
- 1
- 2
- 3
- 4
- 5
- 6
- 7
- 8
- 9
- 10
- 11
6.启用自定义健康检查指标
management.endpoints.web.exposure.include=*
- 1
总结
在本文中,我们详细探讨了如何通过自定义监控集成到 Spring Boot 的 /health 端点。首先,我们介绍了 HealthEndpointWebExtension 的概念,它允许我们对健康检查端点进行扩展和自定义。然后,我们了解了如何使用 AbstractHealthIndicator 创建自定义的健康指标,这些指标可以插入到健康检查流程中,提供有关应用程序特定部分的健康状况信息。
我们创建了一个名为 HealthStrategy 的类,该类继承了 HealthEndpointWebExtension,并重写了 doGetHealth 方法,以包含我们的自定义健康检查逻辑。此外,我们还实现了一个继承自 AbstractHealthIndicator 的 HealthStrategy 类,它允许我们将自定义的健康检查作为端点贡献者注入到健康检查端点。
最后,我们讨论了 @ConditionalOnAvailableEndpoint 注解,这是一个条件注解,用于根据指定的端点是否可用来决定是否启用某个 Bean。这为我们的自定义监控提供了灵活性,确保只有在 /actuator/health 端点可用时才启用我们的自定义服务。
通过本文的指导,读者应该能够理解如何创建和集成自定义健康监控到 Spring Boot 应用程序的 /health 端点,以及如何利用 Spring Boot Actuator 的强大功能来增强应用程序的监控和管理能力。
在实战经历中,我们能够掌握许多在日常业务开发过程中不常见的知识。我坚信这些经验将为我解决未来问题时提供更丰富的解决方案和思路。


