- 1移动云行动:5.5G技术引领数字化转型
- 2taro(踩坑) npm run dev:weapp 微信小程序开发者工具预览报错_error: module 'vendors-node_modules_taro_weapp_pre
- 3华为交换机命令配置大全,看完赶快收藏_华为交换机配置命令大全
- 4centos7 rpm tar.gz2 安装实例_rpm.tar.gz
- 5Android进阶-Command Line Tools-1_android sdk command-line tools
- 602、Lua 环境安装
- 7OpenHarmony应用实现二维码扫码识别_createimagereceiver
- 8UDP实现聊天室
- 9【23】Kotlin扩展——在Android Studio中使用ViewBinding绑定控件_viewbinding android studio2022.3
- 10二维字符数组的定义,初始化及引用,C语言二位字符数组详解_二维字符数组的每一行可以存放多少字符串
从0到1构建一个基于知识图谱的智能问答系统
赞
踩
一、前言
基于知识图谱的问答系统(Knowledge-Based Question Answering system: KBQA)在以下场景下比较有优势:
- 对于领域类型是结构化数据场景:电商、医药、系统运维(微服务、服务器、事件)、产品支持系统等,其中作为问答系统的参考对象已经是结构化数据;
- 问题的解答过程涉及多跳查询,比如“周杰伦的妈妈今年是本命年吗?”,“你们家的产品 v1 和 v2 的区别是什么?”;
- 为了解决其他需求(风控、推荐、管理),已经构建了图结构数据、知识图谱的情况。
KBQA简单讲就是将把问题解析、转换成在知识图谱中的查询,查询得到结果之后进行筛选、翻译成方便人理解的结果。
问题到图谱查询的转换又有不同的方法可以实现:
- 对语义进行分析:理解问题的意图,针对不同意图匹配最可能的问题类型,从而构建这个类型问题的图谱查询,查得结果;
- 基于信息的抽取:从问题中抽取主要的实体,在图谱中获取实体的所有知识、关系条目(子图),再对结果根据问题中的约束条件匹配、排序选择结果。
这里一切从简,选择第一条对语义进行分析流程一般分为以下4步:
- 实体检测,获取问题的关键词,比如问题“周杰伦有哪些专辑?”,那么首先必须找到周杰伦,才可以进行下一步。
- 意图获取,一个问题,我们只获取了实体还不够,比如上面,只有周杰伦,还要有目的,不然可能我是想问周杰伦是哪里人,今年几岁了等等,所以需要找到问题的真实目的。
- 关系预测,有了实体和目的,那么我们就需要在知识库里面寻找双方的关系,想办法联系起来。
- 查询构建,将处理好的三元组带入知识库搜索答案。
二、知识图谱
知识图谱,本质上是一种揭示实体之间关系的语义网络。
知识图谱通过对错综复杂的文档的数据进行有效的加工、处理、整合,转化为简单、清晰的“实体,关系,实体”的三元组,最后聚合大量知识,从而实现知识的快速响应和推理。
2.1 数据入库
图数据库选用: Nebula Graph(星云图数据库)是一个以 Apache 2.0 许可证开源的分布式图数据库,地址:https://github.com/vesoft-inc/nebula
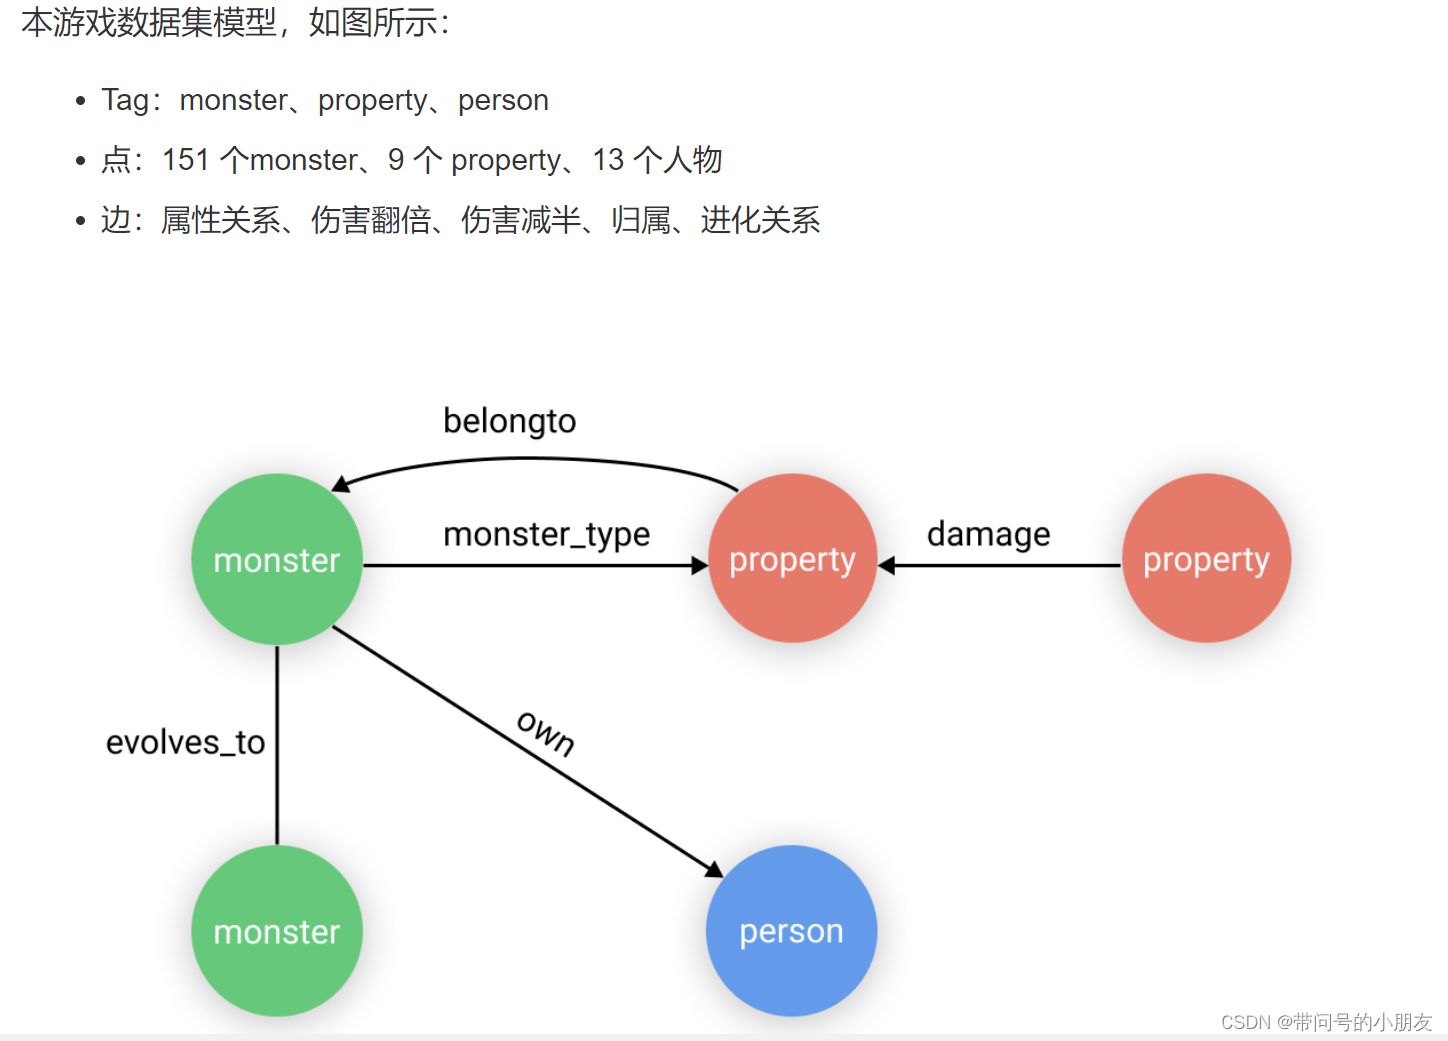
数据采用Nebula Graph官方测试数据 游戏中口袋怪物的数据关系

2.1.1 Nebula Graph搭建
根据官方手册安装步骤,安装Nebula Graph
# Centos 7 下载安装 3.0.1版本
$ wget https://oss-cdn.nebula-graph.com.cn/package/3.0.1/nebula-graph-3.0.1.el7.x86_64.rpm
$ sudo rpm -ivh nebula-graph-3.0.1.el7.x86_64.rpm

# ubuntu 下载安装
wget https://oss-cdn.nebula-graph.com.cn/package/nightly/2021.11.24/nebula-graph-2021.11.24-nightly.ubuntu1804.amd64.deb
sudo dpkg -i nebula-graph-3.0.1.ubuntu1804.amd64.deb

# 下载完成之后启动nebula
$ /usr/local/nebula/scripts/nebula.service start all
# 然后检查是否成功
$ /usr/local/nebula/scripts/nebula.service status all
# 关掉服务
$ /usr/local/nebula/scripts/nebula.service stop all

# 卸载的话要卸载干净
$ rpm -qa|grep nebula
nebula-graph-studio-1.2.5-1.x86_64
nebula-2021.03.02_nightly-1.x86_64
$ sudo rpm -e nebula-2021.03.02_nightly-1.x86_64
$ sudo rpm -e nebula-graph-studio-1.2.5-1.x86_64
# 手动删掉文件夹
rm -rf /usr/local/nebula
rm -rf /vesoft
- 1
- 2
- 3
- 4
- 5
- 6
- 7
- 8
- 9
- 10
- 11
- 12
- 13
- 14
- 15
- 16
- 17
- 18
- 19
- 20
- 21
- 22
- 23
- 24

# 安装客户端来连接nebula
# https://github.com/vesoft-inc/nebula-console/tags 找对应版本点Asset下载
# 将下载好的文件放进/usr/local/nebula/bin 目录下,然后改名
$ cd /usr/local/nebula/bin
$ mv nebula-console-linux-amd64-v3.0.0 nebula-console
# 设置权限
$ chmod 111 nebula-console

# 进入nebula
$ ./nebula-console -addr=127.0.0.1 -port 9669 -u root -p nebula
# ./nebula-console -addr <ip> -port <port> -u <username> -p <password> [-t 120] [-e "nGQL_statement" | -f filename.nGQL]
- 1
- 2
- 3
- 4
- 5
- 6
- 7
- 8
- 9
- 10
- 11
- 12

# 安装可视化工具Nebula Graph Studio
# 下载 https://oss-cdn.nebula-graph.io/nebula-graph-studio/Nebula-Graph-Studio-2.1.9-beta-Linux.rpm
# Centos安装
$ sudo rpm -ivh --replacepkgs Nebula-Graph-Studio-2.1.9-beta-Linux.rpm
$ cd nebula-graph-studio
$ npm run start

#  ubuntu 下载安装
# https://docs.nebula-graph.com.cn/3.0.1/nebula-studio/deploy-connect/st-ug-deploy/#tar_studio  选择版本对应的安装包安装
$ tar -xvf nebula-graph-studio-3.2.2.x86_64.tar.gz
$ cd nebula-graph-studio
$ ./server

# 停止服务
$ kill $(lsof -t -i :7001)
- 1
- 2
- 3
- 4
- 5
- 6
- 7
- 8
- 9
- 10
- 11
- 12
- 13
- 14
- 15
可以看到如下页面,填写host 、用户名密码登录。


至此,nebula graph安装配置已完成~
2.1.2数据导入
# 首先进入nebula
$ cd /usr/local/nebula/bin
$ ./nebula-console -addr=127.0.0.1 -port 9669 -u root -p nebula

# 将 Storage 节点加入 Nebula Graph 集群。等一分钟等他起来
$ ADD HOSTS 127.0.0.1:9779
$ SHOW HOSTS;
- 1
- 2
- 3
- 4
- 5
- 6
- 7

将上面测试数据下载下来: 游戏中口袋怪物的数据关系
# 导入数据
$ ./nebula-console -addr=127.0.0.1 -port 9669 -u root -p nebula -f monster.gql
# 导入完毕后,我们可以使用 Nebula Graph 服务做一些简单的查询。图语句使用可参考官方文档
# https://docs.nebula-graph.com.cn/3.0.1/3.ngql-guide/1.nGQL-overview/1.overview/
- 1
- 2
- 3
- 4
导入完成后就可以选择图空间进来。


有了这个知识图谱,接下来的任务就是在它之上搭一个简单的基于语法解析的 QA 系统了~
三、后端
后端采用 Flask 框架作为web server来接收HTTP的POST请求,大体流程如下:
- 接收问句
- 处理之后访问知识图谱(图数据库)
- 将处理结果返回给用户
3.1 搭建Flask框架,处理http请求
先建一个我们的配置文件conf.json ,定义我们http信息跟日志信息。
{
  "httpserver": {
    "httpPoolNumber": 10,
    "httpMaxConn": 200,
    "port": 10001,
    "host": "0.0.0.0"
  },
  "log": {
    "filename": "KBQA_demo_log",
    "dir": "../logs"
  }
}
- 1
- 2
- 3
- 4
- 5
- 6
- 7
- 8
- 9
- 10
- 11
- 12
然后是我们的服务启动文件main.py。简单的搭建一个Flask框架
import json
import logging
import os
from flask import Flask

app = Flask(__name__)


# 处理用户请求
@app.route('/query', methods=['GET', 'POST'])
def query():
    return "hello"


# 封装一个启动引擎的类
class Engine(object):
    def __init__(self, http_cfg, log_cfg):
        self.port = http_cfg['port']
        self.host = http_cfg['host']

        self.logDir = log_cfg['dir']
        self.logFileName = log_cfg['filename']
        self.debug = False

    def run(self):
        app.run(host=self.host, port=self.port, debug=self.debug, use_reloader=False)

    def set_log(self):
        # 创建app实例前先配置好日志文件
        fmt = '%(asctime)s [%(levelname)s] [%(message)s]'
        logging.basicConfig(level=logging.INFO,
                            format=fmt,  # 定义输出log的格式
                            datefmt='[%Y-%m-%d %H:%M:%S]')
        if not os.path.exists(self.logDir):  # 创建日志目录
            os.makedirs(self.logDir)

        # 实例对象从配置文件中加载配置
        app.config.from_object(logging.INFO)
        return app


if __name__ == '__main__':
    # 载入配置
    conf = json.load(open('./conf.json', 'r'))

    eng = Engine(conf['httpserver'], conf['log'])
    eng.set_log()
    eng.run()
- 1
- 2
- 3
- 4
- 5
- 6
- 7
- 8
- 9
- 10
- 11
- 12
- 13
- 14
- 15
- 16
- 17
- 18
- 19
- 20
- 21
- 22
- 23
- 24
- 25
- 26
- 27
- 28
- 29
- 30
- 31
- 32
- 33
- 34
- 35
- 36
- 37
- 38
- 39
- 40
- 41
- 42
- 43
- 44
- 45
- 46
- 47
- 48
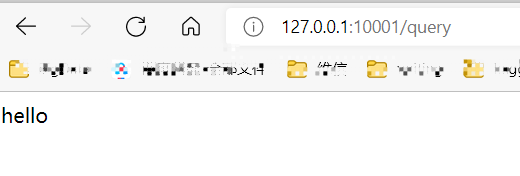
运行起来可以看到,已经走通了。

ok,那稍微修改下我们的query函数,使用户的问题在body里面question关键字的value里。
import question_solve
# 处理用户请求
@app.route('/query', methods=['GET', 'POST'])
def query():
	# 采用form表单的方式请求,
    question = request.form.to_dict().get("question", "")
    if question:
        answer = Solve().query(question)
    else:
        answer = "Sorry, I can't understand what you say."

    return jsonify({"answer": answer})
- 1
- 2
- 3
- 4
- 5
- 6
- 7
- 8
- 9
- 10
- 11
- 12
接下来question_solve就是核心处理请求的逻辑了~
3.2 处理请求(核心)
按照我们上面说的步骤来:
a. 实体提取和意图分类
b. 转换成在知识图谱中的查询语句
c. 查询结果格式化输出
这里,我们把a.的逻辑放在analyze里; b,c.的逻辑放在transfer_ngql里.
a. HTTP请求的问题句子question传过来,用analyze解析它的意图和句子实体
b. 用意图和句子实体构造action,转化成ngql语言。
c. 连接图数据库执行,获取结果,并将结果格式化输出。
代码段:question_solve.py
from src.transfer_ngql import TransferNgql
from src.analyze import Analyze


class Solve(object):
    def __init__(self):
        self.analyze = Analyze()
        self.transfer_ngql = TransferNgql()

    def query(self, question):
        anal = self.analyze.solve(question)
        result = self.transfer_ngql.solve(anal)
        return result
- 1
- 2
- 3
- 4
- 5
- 6
- 7
- 8
- 9
- 10
- 11
- 12
- 13
- 14
3.2.1 实体提取和意图分类
analyze需要在get(question)方法里将句子中的实体和句子的意图解析、分类出来。一般做法是NLP分词实现,这里只是是通过判断输入问句中是否存在特定的实地类别和特定的意图词,来进行意图判断,属于模板匹配。
我们这里实现了五类意图的问题:
从属关系:比如小刚有小拳石吗?
进化情况:皮卡丘进化变成啥?
类别情况:喷火龙是龙属性吗?
伤害情况:电系打飞行系伤害加倍吗?
数量问题:小智有多少个神奇宝贝?
建立AC树
实体提取是利用知识图谱中实体名字构成的特征库,建立AC树(Aho-Corasick Algorithm ),利用AC算法,匹配问句中是否存在特征词,即查询问句中是否存在知识图谱实体名字来实现实体提取。此种提取方式为硬提取方式,不具有模糊推测能力,后续改进应该用 NLP 里的分词的方法来做。
代码段:src/analyze.py
import ahocorasick

def build_ac_tree(self) -> None:
    # 建立AC树
    self.ac_tree = ahocorasick.Automaton()
    # wordlist为3类实体所有名字构成的特征词库
    for index, word in enumerate(self.entity_type_map.keys()):
        self.ac_tree.add_word(word, (index, word))
    self.ac_tree.make_automaton()
- 1
- 2
- 3
- 4
- 5
- 6
- 7
- 8
- 9
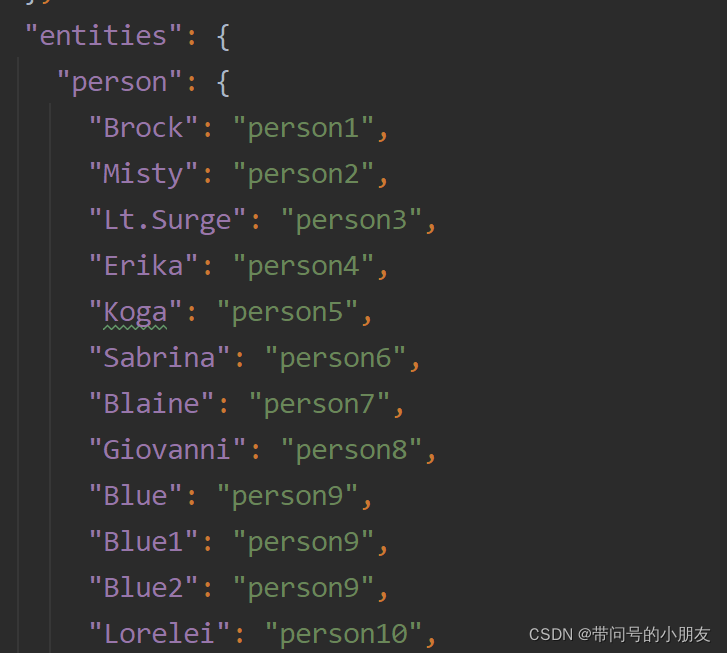
wordlist特征库样例如下所示,包含了3类实体的所有名字。

实体提取
代码段:src/analyze.py
def get_match_entities(self, question: str) -> dict:
    # 实体提取
    entities_matched = []
    for i in self.ac_tree.iter(question):
        entities_matched.append(i[1][1])
        print(i)
    stop_wds = []
    for wd1 in entities_matched:
        for wd2 in entities_matched:
            if wd1 in wd2 and wd1 != wd2:
                stop_wds.append(wd1)
    final_wds = [i for i in entities_matched if i not in stop_wds]
    return {
        entity: self.entity_type_map[entity] for entity in final_wds
    }
- 1
- 2
- 3
- 4
- 5
- 6
- 7
- 8
- 9
- 10
- 11
- 12
- 13
- 14
- 15
- 16
来测试一下,可以看到,已经匹配到了Giovanni 是个人,rapidash(烈焰马)是个monster。

建立意图特征库
这里,将匹配的规则写在intention.yaml中,后面增加规则只需更新配置文件就可以了。在实际场景下,训练模型去做匹配效果会更好。
intents:
  relationship:
    action:
      RelationshipAction
    keywords:
      - owm
      - have
      - hold

  damage:
    action:
      DamageAction
    keywords:
      - damage
      - double
      - half
      - reduce
      - increase
      - addition
      - add
      - constant

  property:
    action:
      PropertyAction
    keywords:
      - monster_type
      - belongto
      - type
      - belong

  evolution:
    action:
      EvolutionAction
    keywords:
      - evolute
      - evolution
      - change
      - grow

  count:
    action:
      CountAction
    keywords:
      - count
      - num
      - number
      - amount
      - many

  drawback:
    action:
      DrawbackAction
    keywords: []
- 1
- 2
- 3
- 4
- 5
- 6
- 7
- 8
- 9
- 10
- 11
- 12
- 13
- 14
- 15
- 16
- 17
- 18
- 19
- 20
- 21
- 22
- 23
- 24
- 25
- 26
- 27
- 28
- 29
- 30
- 31
- 32
- 33
- 34
- 35
- 36
- 37
- 38
- 39
- 40
- 41
- 42
- 43
- 44
- 45
- 46
- 47
- 48
- 49
- 50
- 51
- 52
- 53
- 54
对于每一个意图来说:
-
intents.<名字>代表名字
-
action代表后边在要实现的相应的xxxAction的类,比如EvolutionAction将是用来处理进化关系这样的问题的Action类
-
keywords代表在句子之中匹配的关键词,比如问句里出现evolute,evolution,change,grow的字眼的时候,将会匹配进化的问题
代码段:src/analyze.py
def load_data(self) -> None:
    path = os.path.abspath(os.path.dirname(os.getcwd())) + os.path.sep
    # 加载意图特征库
    with open(f"{path}intention.yaml", "r") as file:
        self.intents = yaml.safe_load(file)["intents"]
    for name, intent in self.intents.items():
        self.intents_map.update({keyword: name for keyword in intent['keywords']})

    # 加载实体库
    self.entity_type_map.update({key: "person" for key in self.entities['person'].keys()})
    self.entity_type_map.update({key: "monster" for key in self.entities['monster'].keys()})
    self.entity_type_map.update({key: "property" for key in self.entities['property'].keys()})
- 1
- 2
- 3
- 4
- 5
- 6
- 7
- 8
- 9
- 10
- 11
- 12
意图模板匹配
代码段:src/analyze.py
# 意图模板匹配
def check_intent_words(self, question: str):
    intents_words = set()
    for word in self.intents_map.keys():
        if word in question:
            intents_words.add(self.intents_map[word])
    return intents_words
- 1
- 2
- 3
- 4
- 5
- 6
- 7
测试一下,同样的匹配到了relationship关键词。

到这里已经能返回解析、分类出来的意图和实体了,下一步它们将会被传给Actions去执行知识图谱的查询。
3.2.2 转换成ngql语句
该模块根据实体提取和意图分类返回的结果,生成对应意图的ngql语句。
代码段:src/transfer_ngql.py
import os
import yaml


class TransferNgql(object):
    def __init__(self) -> None:
        self.intents = {}
        self.load_data()

    def load_data(self) -> None:
        path = os.path.abspath(os.path.dirname(os.getcwd())) + os.path.sep
        # 加载意图特征库
        with open(f"{path}intention.yaml", "r") as file:
            self.intents = yaml.safe_load(file)["intents"]

    def solve(self, intent: dict):
        intent_name = "drawback"
        if len(intent["intents"]) > 0:
            intent_name = intent["intents"][0]
        act_name = self.intents.get(intent_name).get("action")
        result = ''
        # 根据匹到的不同意图,生成对应意图的ngql语句
        if act_name == 'RelationshipAction':
            result = relationship_action(intent)
        elif act_name == 'DamageAction':
            result = damage_action(intent)
        elif act_name == 'PropertyAction':
            result = property_action(intent)
        elif act_name == 'EvolutionAction':
            result = evolution_action(intent)
        elif act_name == 'CountAction':
            result = count_action(intent)
        return result
- 1
- 2
- 3
- 4
- 5
- 6
- 7
- 8
- 9
- 10
- 11
- 12
- 13
- 14
- 15
- 16
- 17
- 18
- 19
- 20
- 21
- 22
- 23
- 24
- 25
- 26
- 27
- 28
- 29
- 30
- 31
- 32
- 33
- 34
最后,来实现其中一个方法,比如relationship_action()对应的代码如下:
def relationship_action(intent):
    try:
        nodes = {key: value for value, key in intent["entities"].items()}
        person, monster = nodes['person'], nodes['monster']
        person_vid = data_load().get_vid(person)
        monster_vid = data_load().get_vid(monster)
        # 拼接ngql语句
        query = f"""USE Game_Monsters;
        MATCH p=(v)-[e:own*1]->(v1:monster)
        WHERE id(v) == '{person_vid}' and id(v1) == '{monster_vid}'
        RETURN p LIMIT 1000;"""

        # 连接nebula查询
        result = data_load().get_nebula_connect(query)
        if result.is_empty():
            answ = f'{person} does not have {monster}.'
        else:
            answ = f'Yes! {person} has a lovely monster named {monster}.'
        return answ
    except Exception:
        print(f"关系实体识别错误!intent: {intent}")
        return ''
- 1
- 2
- 3
- 4
- 5
- 6
- 7
- 8
- 9
- 10
- 11
- 12
- 13
- 14
- 15
- 16
- 17
- 18
- 19
- 20
- 21
- 22
3.3 连接nebula查询结果返回
首先安装nebula3-python,如果nebula graph是2+的版本请安装nebula2-python
https://github.com/vesoft-inc/nebula-python
from nebula3.gclient.net import ConnectionPool
from nebula3.Config import Config

def get_nebula_connect(self, query):
    config = Config()
    config.max_connection_pool_size = 10
    connection_pool = ConnectionPool()
    connection_pool.init([(self.nebula_conf['host'], self.nebula_conf['port'])], config)

    with connection_pool.session_context(self.nebula_conf['username'], self.nebula_conf['passwd']) as session:
        result = session.execute(query)
        if not result.is_succeeded():
            return f"连接nebula时出错!{query}"
        return result
- 1
- 2
- 3
- 4
- 5
- 6
- 7
- 8
- 9
- 10
- 11
- 12
- 13
- 14
ok 至此后端已经搭建完成,让我们来测试一下~
开始启动~

postman 模拟发送一下请求,可以看到,已经返回结果了

换一个神奇宝贝,可以看到,Sabrina 是有venomoth(末入蛾 )的。


