热门标签
当前位置: article > 正文
Spring ai 快速入门及使用,构建你自己的ai_spring-ai 使用方法
作者:我家小花儿 | 2024-05-29 07:59:26
赞
踩
spring-ai 使用方法
第一步:创建springboot项目 jdk必须是17及以上 1.8用不了
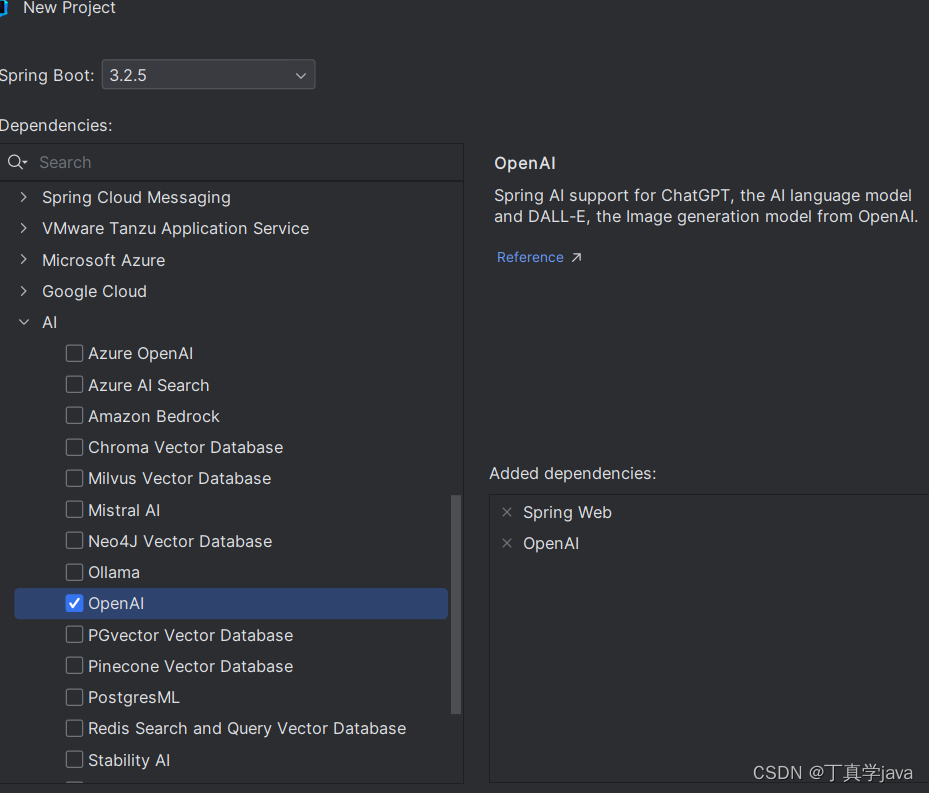
 第二步 选择web和ai的依赖 选择openai

第三步 需要配置openai key 配置
分享个免费或的apikey的地方New API 会免费赠送1刀的token

- spring.application.name=springAI
- spring.ai.openai.base-url=https://api.xty.app
- spring.ai.openai.api-key=sk-DvbisfiKYZMkKjxICe542cEe16B74d41B763E23c449d83Ed
- spring.ai.openai.chat.options.model=gpt-3.5-turbo
- server.port=8811
第四步创建个controller
-
- import org.springframework.ai.chat.ChatResponse;
- import org.springframework.ai.chat.messages.UserMessage;
- import org.springframework.ai.chat.prompt.Prompt;
- import org.springframework.ai.openai.OpenAiChatClient;
- import org.springframework.beans.factory.annotation.Autowired;
- import org.springframework.web.bind.annotation.*;
- import reactor.core.publisher.Flux;
-
- import java.util.Map;
-
- @RestController
-
- public class ChatController {
-
- private final OpenAiChatClient chatClient;
-
- @Autowired
- public ChatController(OpenAiChatClient chatClient) {
- this.chatClient = chatClient;
- }
-
- @GetMapping("/ai/generate")
- public Map generate(@RequestParam(value = "message", defaultValue = "讲个笑话") String message) {
- return Map.of("generation", chatClient.call(message));
- }
-
- @GetMapping("/ai/generateStream")
- public Flux<ChatResponse> generateStream(@RequestParam(value = "message", defaultValue = "Tell me a joke") String message) {
- Prompt prompt = new Prompt(new UserMessage(message));
- return chatClient.stream(prompt);
- }
- }

效果展示:
前端页面
- <script setup lang="ts">
- import {ref} from 'vue'
-
- const msg = ref('');
- const res = ref([]);
-
- const sendMsg = ()=>{
- const message = encodeURIComponent(msg.value);
- let source = new EventSource(`http://localhost:8811/ai/generateStream?message=${message}`)
- let count =0;
- source.onmessage = (e)=>{
- console.log(e.data)
- if(e.data==='')
- {
- count++;
- }
- if(count===2)
- {
- source.close;
- }
- res.value.push(e.data)
-
-
- }
- }
-
- </script>
-
- <template>
-
-
- <div id="container">
- <div id="history">
- <span v-for="(r, i) in res" :key="i">{{ r }}</span>
- </div>
- <div id="chat">
- <textarea v-model="msg"></textarea>
- <button @click="sendMsg">send</button>
- </div>
-
- </div>
-
-
-
- </template>
-
- <style scoped>
- * {
- margin:0;
- padding:0;
- }
- #container{
- display: flex;
- flex-direction: row;
- flex-wrap: wrap;
- width: 100%;
- height: 100vh;
- background-color: white;
- border: 1px solid black;
- }
- #history{
- width: 400px;
- height: 400px;
- border: #f9f9f9;
- }
- #chat{
- width: 400px;
- height: 200;
- border: #747bff;
- }
- textarea{
- width: 400px;
- }
- button{
- width: 100px;
- height: 60px;
- }
- </style>


声明:本文内容由网友自发贡献,不代表【wpsshop博客】立场,版权归原作者所有,本站不承担相应法律责任。如您发现有侵权的内容,请联系我们。转载请注明出处:https://www.wpsshop.cn/w/我家小花儿/article/detail/641253
推荐阅读
相关标签


