- 1Linux系统基础命令 用户名 内核版本 修改网卡IP配置_route-ens33
- 2Flask 教程,第二部分:模板_{% block content%}
- 3win10内置vpn连接出现的一个错误——L2TP连接尝试失败,因为安全层在初始化与远程计算机的协商时遇到了一个处理错误_为什么win10链接不了l2tp
- 4死锁的产生和解决方法_sqlserver死锁在通信缓冲区
- 5git和github的使用教程_github和git
- 6如何从零开始训练大模型?(附AGI大模型路线图)_怎么从0打造ai大模型
- 7MSSQL数据库后台进程(线程)
- 8IDEA版本升级后Git拉取和推送的标签消失_idea2023 git菜单不见了
- 9在机器学习当中,什么是训练,什么是模型?_机器学习 训练是指什么
- 1021个Python爬虫开源项目代码,包含微信、淘宝、豆瓣、知乎、微博等_爬虫代码
python的tkinter库的运用_askokcancel
赞
踩
python的tkinter库的运用
GUI和tkinter
	GUI英文全称是 Graphical User Interface,中文为**图形用户接口**。
早期人与计算机之间的沟通是文字形式的沟通,例如,早期的DOS操作系统、
Windows 的命令提示符窗口、Linux系统,等等。
	Tkinter 是一个python模块,是一个调用Tcl/Tk的接口,它是一个跨平台的脚本图形界面接口。
- 1
- 2
- 3
- 4
创建一个窗口
from tkinter import *
root = Tk()                 # 创建tkinter窗口,(初始化tkinter.Tk类)
root.title('Tk窗口')         # 设置窗口标题
root.geometry("400x200")    # 设置窗口大小(宽、高,大小为像素)
root.mainloop()
# mainloop()方法可以让程序继续执行,同时进入等待与处理窗口事件。
- 1
- 2
- 3
- 4
- 5
- 6

窗口的属性

组件的位置设置
place方法
place(...options...)
	x/y 把父容器看成一个坐标轴 单位为像素 (0,0)为左上角
	width/height 设置标签的宽和高 单位像素
	relx/rely 相对于父容器的位置 值为0.0-1.0
	relwidth/relheight 对于父容器的相对大小
- 1
- 2
- 3
- 4
- 5
pack 方法
pack(...options...)
	side 多标签位置关系  (TOP 由上往下排 ,BOTTOM 下上 LEFT左右RIGHT 右左)
	padx/pady 组件与组件 组件与容器边界的距离
	ipadx/ipady 文字与标签边界的距离
	anchor 标签在容器中的位置n 北 s 南 w 西 e 东)
	fill 填充标签所分配区间的方式 (X 轴, Y 轴, BOTH 填满所分配的空(x,y) , NONE 默认值 原大小)当标签上下排列时分配空间为X轴,左右排列时分配的空间是Y轴
	expand 是否填满额外父容器空间 True(1) 是 False 否(0)
- 1
- 2
- 3
- 4
- 5
- 6
- 7
grid 方法
以网格方法设置组件位置
grid(...options...)
	row/column 标签的排放方式row 行 column 列  (row=0,column=0 第一行第一列)
	columnspan 列方向合并标签
	rowspan    行方向合并标签
	padx/pady 组件与组件 组件与容器边界的距离
	sticky 类似于anchor只能设定(N/S/W/E 上/下/左/右)
	       注可以组合使用N+S 可以拉长高度,让上下对齐
- 1
- 2
- 3
- 4
- 5
- 6
- 7
- 8
Label组件
Label组件,标签控件,可以显示文本和图片。
Label组件的属性
Lable(父对象,options...)  标签
	text 标签的文本内容
	fg 文字颜色
	bg 标签背景颜色
	font(字体,字号,粗细...) 字体
	image 图片    image=图片   图片=PhotoImage(file=‘图片路径+名称’)
	compound 图文关系(LEFT 图片在文字左边 RIGTH 右 TOP 上 BOTTOM 下 CENTER 文字在覆盖在图片上)
	width 标签的宽度
	height 标签的高度
	justify 存在多行文字时最后一行文字的对齐方式(left,rigth,center)
	padx/pady 文字与标签的距离
	anchor 文字在标签中的位置(n 北 s 南 w 西 e 东)
	wraplength 文字到多少宽度换行
	bitmap 内建位图
	config 改变原标签定义的内容 标签.config(options)
注:Label()方法的第一个参数是父对象,表示这个标签将建立在哪一个父对象(可想成父窗口或称容器)内。
- 1
- 2
- 3
- 4
- 5
- 6
- 7
- 8
- 9
- 10
- 11
- 12
- 13
- 14
- 15
- 16
Label组件显示文字
from tkinter import *
root = Tk()
root.title('文字')
root.geometry("400x200")
root.resizable(0,0)
label = Label(root,text='Label组件显示文字',bg='red',font=('华文彩云', 12)) # text:标签的文本内容,bg:标签背景颜色,font:(字体,字号,粗细...) 字体
label.place(x=10,y=20,width=150,height=50)
root.mainloop()
- 1
- 2
- 3
- 4
- 5
- 6
- 7
- 8

Label组件显示图片
from tkinter import *
root = Tk()
root.title('文字')
root.geometry("400x200")
root.resizable(0,0)
img = PhotoImage(file='./图片/02.png')
label = Label(root,image=img,bg='red',) # image:图片,bg:标签背景颜色
label.image = img
label.place(x=10,y=10,width=105,height=105)
root.mainloop()
- 1
- 2
- 3
- 4
- 5
- 6
- 7
- 8
- 9
- 10

Button组件
Button组件,按钮控件,在程序中显示按钮。
Button组件的属性
Button(父对象,...options...)
	bd 边界宽度 默认2
	bg 背景颜色
	fg 字体颜色
	command 单击按钮时执行此方法
	compound 图片和文字同时显示
	font(字体,字号,粗细...) 字体设置
	image 功能按钮上的图片
	justify 当有多行文字时最后一行文字的对齐方式(left、center、right)
	padx/pady 功能键边界与文字的距离 默认1
	text 功能键名称
- 1
- 2
- 3
- 4
- 5
- 6
- 7
- 8
- 9
- 10
- 11
Button实例
from tkinter import *
def test():
    lable = Label(root,text='Button键调用的函数',font=('华文彩云', 12),fg='blue',bg='yellow')
    lable.place(x=5,y=5,width=150,height=50)

root = Tk()
root.title('')
root.geometry("400x200")
root.resizable(0,0)

img = PhotoImage(file='./图片/按钮背景图片.png')

button1 = Button(root,text='打印',image=img,compound=CENTER,font=('华文彩云', 12),command=test)
button1.image = img
button1.place(x=10,y=130,width=100,height=50)

button2 = Button(root,text='退出',image=img,compound=CENTER,font=('华文彩云', 12),command=root.quit)
button2.place(x=120,y=130,width=100,height=50)
root.mainloop()
- 1
- 2
- 3
- 4
- 5
- 6
- 7
- 8
- 9
- 10
- 11
- 12
- 13
- 14
- 15
- 16
- 17
- 18
- 19

Entry组件
Entry组件,输入控件,用于显示简单的文本内容
Entry组件的属性
Entry(父对象,...options...)
	bg 背景颜色
	fg 文字颜色
	font 字体的设置
	command 当更改内容时会执行此函数
	sursor 当鼠标在复选框上时光标的形状
	width/height 宽和高
	justify 当有多行文字时最后一行的对齐方式
	show 显示输入字符,列show='*'时表示显示星号,常用于输入密码字段
	xscrollcommand 在x轴使用滚动条
- 1
- 2
- 3
- 4
- 5
- 6
- 7
- 8
- 9
- 10
Entry实例
from tkinter import *
root = Tk()
root.title('Entry')
root.geometry("400x200")
root.resizable(0,0)
entry = Entry(root,fg='red',) # fg:文字颜色
entry.place(x=10,y=10,width=105,height=30)
root.mainloop()
- 1
- 2
- 3
- 4
- 5
- 6
- 7
- 8

类别变量
类别变量的基本概念
	有些组件在执行时会更改内容,例如,文本框(Entry)、选项按钮(Radiobutton)
等。有些控件我们可以更改它们的内容,例如,标签(Label)等。如果想要更改它们
的内容可以使用这些控件的参数,例如,textvariable、variable 等。
	不过要将组件的参数以变量方式处理时,需要借助tkinter模块内的变量类别
(Variable Classes),这个类别有4个子类别,每一个类别其实是一个数据类型的
构造方法,我们可以通过这4个子类别的数据类型将它们与组件的相关参数结合。
- 1
- 2
- 3
- 4
- 5
- 6
类别变量的类型
Tntvar            整型变量,默认是0
Doublevar         浮点型变量,默认是0.0
Stringvar         字符串变量,默认是''
Booleanvar        布尔型变量,True是1,False是0
- 1
- 2
- 3
- 4
trace追踪
w模式:与输入类组件合用
	trace("w",test)
	变量设置后,我们可以利用变量设置追踪Widget控件,当其内容更改时,让程序执行test函数。
r模式:与提交类组件合用
	trace("r",test)
	当控件内容被读取时,执行追踪并执行特定函数。
- 1
- 2
- 3
- 4
- 5
- 6
get和set
使用get()方法取得变量内容
使用set()方法设置变量内容
- 1
- 2
实例
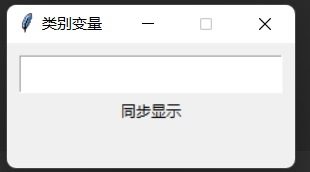
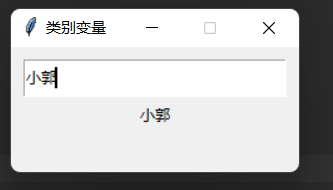
from tkinter import *
def test(*args):
    var2.set(var1.get())
    # var1.get():取得var1变量内容
    # var2.set():设置var2变量内容

root = Tk()
root.title('类别变量')
root.geometry("230x100")
root.resizable(0,0)

var1 = StringVar()   # 设置类别变量
entry = Entry(root,textvariable=var1)   # textvariable:以变量的方式显示输入框的文字
entry.place(x=10,y=10,width=210,height=30)
var1.trace('w',test)   # 以w模式追踪var1类别变量,并且执行test函数

var2 = StringVar()   # 设置类别变量
var2.set('同步显示')   # 设置变量内容
label = Label(root,textvariable=var2)   # # textvariable:以变量的方式显示标签的文字
label.place(x=10,y=40,width=210,height=30)
root.mainloop()
- 1
- 2
- 3
- 4
- 5
- 6
- 7
- 8
- 9
- 10
- 11
- 12
- 13
- 14
- 15
- 16
- 17
- 18
- 19
- 20
- 21
Radiobutton组件
Radiobutton组件,单选按钮控件,显示一个单选的按钮状态(内容)
Radiobutton组件的属性
Radiobutton(父对象,...options...)
 anchor 控制选项按钮的位置
	bg 背景颜色
	fg 文字颜色
	font 字体的设置
	command 当更改内容时会执行此函数
	sursor 当鼠标在复选框上时光标的形状
	height 选项按钮上的文字有几行
	width 选项按钮有几个字符宽
	warplength 限制每行文字数量
	justify 当有多行文字时最后一行的对齐方式
	text 选项按钮旁的文字
	image 简历含图像的选项按钮
	indicatoron 当值为0时,建立盒子选项按钮
	padx 选项按钮与文字的间隔,默认1
	pady 选项按钮之间的间隔,默认1
	selecimage
	state 默认是NORMAL,若设置为DISABLE则以灰阶显示按钮表示按钮暂时无法使用
	textvariable 以变量的方式显示按钮旁的文字
	variable 设置当前按钮的值的类型(Intvar()...
	value 选择按钮的值,可以区分按钮
	selectcolor 选择按钮被选择时的颜色
- 1
- 2
- 3
- 4
- 5
- 6
- 7
- 8
- 9
- 10
- 11
- 12
- 13
- 14
- 15
- 16
- 17
- 18
- 19
- 20
- 21
- 22
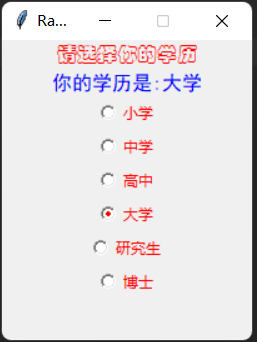
Radiobutton实例
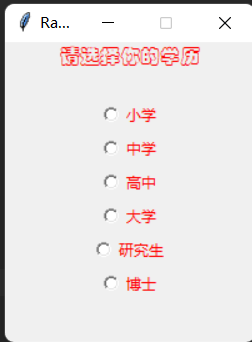
from tkinter import * def test(): label2.config(text='你的学历是:'+dic[var.get()]) # config更改Label组件的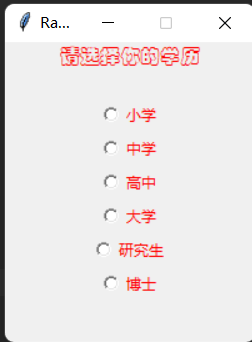 root = Tk() root.title('Radiobutton') root.geometry("200x240") root.resizable(0,0) label1 = Label(root,text='请选择你的学历',font=('华文彩云', 12),fg='red') label1.pack() label2 = Label(root,text='',font=('黑体', 12),fg='blue') label2.pack() var = IntVar() dic = {1:'小学',2:'中学',3:'高中',4:'大学',5:'研究生',6:'博士'} for k,v in dic.items(): radiobutton = Radiobutton(root,text=v,value=k,variable=var,command=test,fg='red',) # value:选择按钮的值,可以区分按钮;text:选项按钮旁的文字;variable:设置当前按钮的值的类型(Intvar()... radiobutton.pack() root.mainloop()
- 1
- 2
- 3
- 4
- 5
- 6
- 7
- 8
- 9
- 10
- 11
- 12
- 13
- 14
- 15
- 16
- 17
- 18
- 19
- 20
- 21
- 22
- 23
- 24
- 25
Checkbutton组件
Checkbutton组件,多选框控件,用于在程序中提供多项选择框。
Checkbutton组件的属性
Checkbutton(父对象,...options...)
	anchor 控制选项按钮的位置
	bg 背景颜色
	fg 文字颜色
	font 字体的设置
	command 当更改内容时会执行此函数
	sursor 当鼠标在复选框上时光标的形状
	height 选项按钮上的文字有几行
	width 选项按钮有几个字符宽
	warplength 限制每行文字数量
	justify 当有多行文字时最后一行的对齐方式
	text 选项按钮旁的文字
	image 简历含图像的选项按钮
	indicatoron 当值为0时,建立盒子选项按钮
	padx 选项按钮与文字的间隔,默认1
	pady 选项按钮之间的间隔,默认1
	state 默认是NORMAL,若设置为DISABLE则以灰阶显示按钮表示按钮暂时无法使用
	textvariable 以变量的方式显示按钮旁的文字
	variable 设置当前按钮的值的类型(Intvar()...
	value 选择按钮的值,可以区分按钮
	selectcolor 选择按钮被选择时的颜色
- 1
- 2
- 3
- 4
- 5
- 6
- 7
- 8
- 9
- 10
- 11
- 12
- 13
- 14
- 15
- 16
- 17
- 18
- 19
- 20
- 21
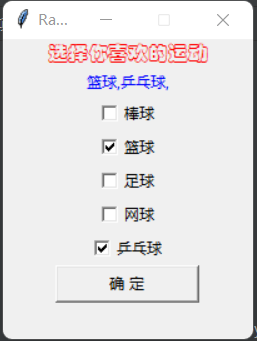
Checkbutton实例
from tkinter import *
def test():
    s = ''
    for i in checkbool:
        if checkbool[i].get() == True:
            s += dic[i] + ','
    label2.config(text=s)

root = Tk()
root.title('Radiobutton')
root.geometry("200x240")
root.resizable(0,0)

label1 = Label(root,text='选择你喜欢的运动',font=('华文彩云', 12),fg='red')
label1.pack()

label2 = Label(root,text='',fg='blue')
label2.pack()

dic = {1:'棒球',2:'篮球',3:'足球',4:'网球',5:'乒乓球'}
checkbool = {}
for i in range(1,len(dic)+1):
    checkbool[i] = BooleanVar()
    checkbutton = Checkbutton(root,text=dic[i],variable=checkbool[i])
    checkbutton.pack()

button = Button(root,text='确 定',width=15,command=test)
button.pack()

root.mainloop()
- 1
- 2
- 3
- 4
- 5
- 6
- 7
- 8
- 9
- 10
- 11
- 12
- 13
- 14
- 15
- 16
- 17
- 18
- 19
- 20
- 21
- 22
- 23
- 24
- 25
- 26
- 27
- 28
- 29
- 30
Frame组件
Frame组件,框架控件,在屏幕上显示一个矩形区域,多用来作为容器。
Frame组件的属性
Frame(复对象,...options...)
	bg 背景色彩
	bd 边界宽度
	height 框架的高度,单位像素
	width 框架的宽度
	relief 控制外框架
- 1
- 2
- 3
- 4
- 5
- 6
Frame实例
from tkinter import *

root = Tk()
root.title('Frame')
root.geometry("400x400")
root.resizable(0,0)

frame1 = Frame(root,width=200,height=200,bg='red')
frame1.place(x=0,y=0)

frame2 = Frame(root,width=200,height=200,bg='blue')
frame2.place(x=200,y=200)

label1 = Label(frame1,text='在Frame内创建标签1',font=('华文彩云', 12),fg='red')  # 在Frame创建组件
label1.place(x=2,y=2,width=180,height=50)

label2 = Label(frame1,text='在Frame内创建标签2',font=('华文彩云', 12),fg='blue')  # 在Frame创建组件
label2.place(x=2,y=148,width=180,height=50)

img = PhotoImage(file='./图片/02.png')
label3 = Label(frame2,image=img)  # 在Frame创建组件
label3.place(x=50,y=50,width=105,height=105)

root.mainloop()
- 1
- 2
- 3
- 4
- 5
- 6
- 7
- 8
- 9
- 10
- 11
- 12
- 13
- 14
- 15
- 16
- 17
- 18
- 19
- 20
- 21
- 22
- 23
- 24

LabelFrame组件
LabelFrame组件,labelframe 是一个简单的容器控件。常用于复杂的窗口布局。并且可以取一个名字
LabelFrame组件的属性
LabelFrame(复对象,...options...)
	bg 背景色彩
	bd 边界宽度
	height 框架的高度,单位像素
	width 框架的宽度
	relief 控制外框架
	text 标签文本内容
- 1
- 2
- 3
- 4
- 5
- 6
- 7
- 8
LabelFrame实例
from tkinter import *
root = Tk()
root.title('LabelFrame')
root.geometry("400x400")
root.resizable(0,0)

labelframe1 = LabelFrame(root,text='登录',width=300,height=200)
labelframe1.place(x=50,y=50)

label1 = Label(labelframe1,text='user:',font=('黑体', 12))  # 在LabelFrame创建组件
label1.place(x=5,y=30,width=50,height=15)

label2 = Label(labelframe1,text='passwd:',font=('黑体', 12))  # 在LabelFrame创建组件
label2.place(x=5,y=80,width=50,height=15)

entry1 = Entry(labelframe1,fg='blue')           # 在LabelFrame创建组件
entry1.place(x=60,y=30,width=150,height=20)

entry2 = Entry(labelframe1,fg='blue',show='*')  # 在LabelFrame创建组件
entry2.place(x=60,y=80,width=150,height=20)

root.mainloop()
- 1
- 2
- 3
- 4
- 5
- 6
- 7
- 8
- 9
- 10
- 11
- 12
- 13
- 14
- 15
- 16
- 17
- 18
- 19
- 20
- 21
- 22

Toplevel组件
控件的功能类似于Frame,但是这个控件所产生的容器是一个独立的窗口,有自己的标题栏和边框。
注:用Tk创建窗口的属性一样。
from tkinter import *

def test():
    toplevel = Toplevel()
    toplevel.title('Toplevel')
    toplevel.geometry("200x200")
    label = Label(toplevel,text='Toplevel窗口',font=('华文彩云',15),fg='blue')
    label.place(x=20,y=80,width=150,height=20)
    toplevel.mainloop()

root = Tk()
root.title('Toplevel')
root.geometry("200x200")
root.resizable(0,0)

button = Button(root,text='打开Toplevel窗口',font=('华文彩云',15),fg='red',command=test)
button.place(x=10,y=50,width=180,height=50)
root.mainloop()
- 1
- 2
- 3
- 4
- 5
- 6
- 7
- 8
- 9
- 10
- 11
- 12
- 13
- 14
- 15
- 16
- 17
- 18

Scale组件
Scale组件,范围控件,显示一个数值刻度,为输出限定范围的数字区间
Scale组件的属性
Scale(父对象,...options...)
	from_ 尺度条范围值的初始值
	to 尺度条范围的末端值
	tickinterval 尺度条标记刻度
	showvalue 尺度条的目前值设置为0则不显示
	variable 设置或取得目前选取的尺度值,Intvar
	bg 背景颜色
	fg 文字颜色
	font 字形
	orient 默认是水平,可以设置水平HORIZONTAL或垂直VERTICAl
	repeatdelay 可以设置按住尺度条多久才能移动此尺度条,单位ms,默认300ms
	resolution 每次更改的数值(0.1,0.2...)
	width 尺度条的宽度
	troughcolor 槽的颜色_
	command 当使用者更改数值时,会自动执行此函数。
- 1
- 2
- 3
- 4
- 5
- 6
- 7
- 8
- 9
- 10
- 11
- 12
- 13
- 14
- 15
Scale实例
from tkinter import *

root = Tk()
root.title('Scale')
root.geometry("300x200")
root.resizable(0,0)

scale1 = Scale(root,from_=0,to=255)    # from_:尺度条范围值的初始值;to:尺度条范围的末端值
scale1.place(x=40,y=0)

scale2 = Scale(root,from_=0,to=255,orient=HORIZONTAL)       # orient:默认是水平,可以设置水平HORIZONTAL或垂直VERTICAl
scale2.place(x=40,y=100)

root.mainloop()
- 1
- 2
- 3
- 4
- 5
- 6
- 7
- 8
- 9
- 10
- 11
- 12
- 13
- 14

用Scale控制颜色
from tkinter import *
def RGB(Scale):
    '''更改窗口的颜色'''
    r = scale1.get()       # 获取Scale组件的数值
    g = scale2.get()
    b = scale3.get()
    rgb = '#%02x%02x%02x' % (r,g,b)
    root.config(bg=rgb)

root = Tk()
root.title('Scale')
root.geometry("300x200")
root.resizable(0,0)

scale1 = Scale(root,from_=0,to=255,command=RGB)
scale1.place(x=40,y=0)

scale2 = Scale(root,from_=0,to=255,command=RGB)
scale2.place(x=100,y=0)

scale3 = Scale(root,from_=0,to=255,command=RGB)
scale3.place(x=160,y=0)
root.mainloop()
- 1
- 2
- 3
- 4
- 5
- 6
- 7
- 8
- 9
- 10
- 11
- 12
- 13
- 14
- 15
- 16
- 17
- 18
- 19
- 20
- 21
- 22
- 23

Spinbox组件
Spinbox组件,输入控件,与Entry类似,可以看成是Entry和Button的组合体,但是可以指定输入范围值。
Spinbox组件的属性、
Spinbox(父对象,options)
	bg ,fg ,font , justify ,
	format 格式化字符
	from_ 数字范围初始数值
	to 数字范围末端值
	increment 单击up/down按钮增加或减少的量
	repeatdelay 单击up/down按钮数值变化的间隔时间,单位ms,默认300ms
	textvariable 可以设置以变量方式显示
	values 可以是元组或其他序列 ,代替from_和to,可以实现字符串
	command 当用户更改选项时,会自动执行此函数。
- 1
- 2
- 3
- 4
- 5
- 6
- 7
- 8
- 9
- 10
Spinbox输入数字
from tkinter import *
def fruits():
    mun = int(spinbox.get())
    print(mun)
    dic = {1:'苹果',2.:'葡萄',3:'山竹',4:'桃子',5:'栗子',6:'其他'}
    if mun == 6:
        label3.config(text='你不喜欢以上5种水果')
    else:
        label3.config(text='你喜欢吃的水果是:'+dic[mun])

root = Tk()
root.title('Spinbox')
root.geometry("300x200")
root.resizable(0,0)

spinbox = Spinbox(root,from_=1,to=6,increment=1,command=fruits)   # increment:单击up/down按钮增加或减少的量
spinbox.pack()

label1 = Label(root,text="请选择你喜欢吃的水果",font=('华文彩云',12),fg='red')
label1.pack()

s = '1.苹果\n2.葡萄\n3.山竹\n4.桃子\n5.栗子\n6.其他'
label2 = Label(root,text=s,font=('黑体',12))
label2.pack()

label3 = Label(root,text='',font=('行楷',12))
label3.pack()

spinbox.mainloop()
- 1
- 2
- 3
- 4
- 5
- 6
- 7
- 8
- 9
- 10
- 11
- 12
- 13
- 14
- 15
- 16
- 17
- 18
- 19
- 20
- 21
- 22
- 23
- 24
- 25
- 26
- 27
- 28
- 29

Spinbox输入字符串
from tkinter import *
root = Tk()
root.title('Spinbox')
root.geometry("300x200")
root.resizable(0,0)
tup = ('小学','中学','高中','大学','研究生0','博士')
spinbox = Spinbox(root,values=tup)
spinbox.pack()
spinbox.mainloop()
- 1
- 2
- 3
- 4
- 5
- 6
- 7
- 8
- 9

Message组件
Message组件,消息控件,Message主要是可以显示短消息,它的功能与Label类似,但是使用起来更灵活,可自动分行。
Message组件的属性
Message(父对象,...options...)
	fg , bg , font , anchor , image , justify , padx/pady , text , textvariable
	bitmap 使用默认位图当作message的内容
	aspect 控件宽度与高度比,默认150%
	relief 默认是relief=FLAT,可由此控制文字外框。
- 1
- 2
- 3
- 4
- 5
Message实例
from tkinter import *
root = Tk()
root.title('Message')
root.geometry("300x200")
root.resizable(0,0)
s = 'qwertyuiopasdfghjklzxcvbm'
message = Message(root,text=s,font=('华文彩云',15),fg='red',relief=RAISED)
message.place(x=40,y=40)
root.mainloop()
- 1
- 2
- 3
- 4
- 5
- 6
- 7
- 8
- 9

MessageBox组件
MessageBox组件,提供8个对话框,不同场景使用不同的对话框
MessageBox的使用场景
1.showinfo
showinfo(title,message,options):显示一般提示消息。
from tkinter import *
from tkinter import messagebox
def dialogbox():
    messagebox.showinfo('showinfo','showinfo对话框')
root = Tk()
root.title('messagebox')
root.geometry('200x100')
button = Button(root,text='showinfo',font=('Segoe Script',20),fg='red',command=dialogbox)
button.pack()
root.mainloop()
- 1
- 2
- 3
- 4
- 5
- 6
- 7
- 8
- 9
- 10

2.showwarning
showwarning(title,message,options):显示警告消息。
from tkinter import *
from tkinter import messagebox
def dialogbox():
    messagebox.showwarning('showwarning','showwarning对话框')
root = Tk()
root.title('messagebox')
root.geometry('260x100')
button = Button(root,text='showwarning',font=('Segoe Script',20),fg='red',command=dialogbox)
button.pack()
root.mainloop()
- 1
- 2
- 3
- 4
- 5
- 6
- 7
- 8
- 9
- 10

3.showerror
showerror(title,message,options):显示错误消息。
from tkinter import *
from tkinter import messagebox
def dialogbox():
    messagebox.showerror('showerror','showerror对话框')
root = Tk()
root.title('messagebox')
root.geometry('260x100')
button = Button(root,text='showerror',font=('Segoe Script',20),fg='red',command=dialogbox)
button.pack()
root.mainloop()
- 1
- 2
- 3
- 4
- 5
- 6
- 7
- 8
- 9
- 10

4.askquestion
askquestion(title,message,options):显示询问消息。若单击“是”按钮会传回"yes”,若单击“否”按钮会传回“no”。
from tkinter import *
from tkinter import messagebox
def dialogbox():
    messagebox.askquestion('askquestion','askquestion对话框')
root = Tk()
root.title('messagebox')
root.geometry('260x100')
button = Button(root,text='askquestion',font=('Segoe Script',20),fg='red',command=dialogbox)
button.pack()
root.mainloop()
- 1
- 2
- 3
- 4
- 5
- 6
- 7
- 8
- 9
- 10

5.askokcancel
askokcancel(title,message,options):显示确定或取消消息。若单击“确定”按钮会传回True,若单击“取消”按钮会传回False。
from tkinter import *
from tkinter import messagebox
def dialogbox():
    messagebox.askokcancel('askokcancel','askokcancel对话框')
root = Tk()
root.title('messagebox')
root.geometry('260x100')
button = Button(root,text='askokcancel',font=('Segoe Script',20),fg='red',command=dialogbox)
button.pack()
root.mainloop()
- 1
- 2
- 3
- 4
- 5
- 6
- 7
- 8
- 9
- 10

6.askyesno
askyesno(title,message,options):显示“是或否”消息。若单击“是”按钮会传回True,若单击“否”按钮会传回False。
from tkinter import *
from tkinter import messagebox
def dialogbox():
    messagebox.askyesno('askyesno','askyesno对话框')
root = Tk()
root.title('messagebox')
root.geometry('260x100')
button = Button(root,text='askyesno',font=('Segoe Script',20),fg='red',command=dialogbox)
button.pack()
root.mainloop()
- 1
- 2
- 3
- 4
- 5
- 6
- 7
- 8
- 9
- 10

7.askyesnocancel
askyesnocancel(title,message,options):显示“是或否或取消”消息,若单击“是”按钮会传回True,若单击“否”按钮会传回False,若单击“取消”按钮传回None。
from tkinter import *
from tkinter import messagebox
def dialogbox():
    messagebox.askyesnocancel('askyesnocancel','askyesnocancel对话框')
root = Tk()
root.title('messagebox')
root.geometry('260x100')
button = Button(root,text='askyesnocancel',font=('Segoe Script',20),fg='red',command=dialogbox)
button.pack()
root.mainloop()
- 1
- 2
- 3
- 4
- 5
- 6
- 7
- 8
- 9
- 10

8.askretrycancel
askretrycancel(title,message,options):显示“重试或取消”消息。若单击“重试”按钮会传回True,若单击“取消”按钮会传回False。
from tkinter import *
from tkinter import messagebox
def dialogbox():
    messagebox.askretrycancel('askretrycancel','askretrycancel对话框')
root = Tk()
root.title('messagebox')
root.geometry('260x100')
button = Button(root,text='askretrycancel',font=('Segoe Script',20),fg='red',command=dialogbox)
button.pack()
root.mainloop()
- 1
- 2
- 3
- 4
- 5
- 6
- 7
- 8
- 9
- 10

事件和绑定
command参数
前面介绍了很多的组件(控件),属性(构造方法)都有command方法,比如Button(功能按钮)、Radiobutton(单选按钮)等,这些就是控件的事件绑定概念,当按钮事件发生时,就可以通过command=test,调用test函数,test函数就是事处理的程序。
from tkinter import *
def test():
    label = Label(root,text='command参数绑定事件',font=('行楷',12),fg='blue')
    label.pack()
root = Tk()
root.title('command')
root.geometry("300x200")
root.resizable(0,0)
button = Button(root,text='按 钮',font=('华文彩云',15),fg='red',command=test)     # command=test,通过command调用test
button.pack()
root.mainloop()
- 1
- 2
- 3
- 4
- 5
- 6
- 7
- 8
- 9
- 10
- 11

事件绑定
mainloop( )可以让程序进入事件等待循环,除了控件状态改变可以调用相对应的事件处理程序外,tkinter 也提供了为事件绑定处理程序的机制。
- 1
语法:
	root.bind(event,handler)
	event:事件
	handler:事件调用的函数
	上述绑定语法中 root是事件的来源,可以是root窗口对象,或是任意的Widget 控件,例如,功能按钮、选项按钮、复选框……handler是事件处理程序。
- 1
- 2
- 3
- 4
- 5
1.鼠标事件
| 鼠标事件 | 说明 |
|---|---|
| <Button-1> | 单击鼠标左键,鼠标光标相对控件位置会被存入事件对象的x和y变量 |
| <Button-2> | 单击鼠标中键(鼠标含三个键),鼠标光标相对控件位置会被存入事件对象的x和y变量 |
| <Button-3> | 单击鼠标右键,鼠标光标相对控件位置会被存入事件对象的x和y变量 |
| <Button-4> | 鼠标滑轮向上滚动,鼠标光标相对控件位置会被存入事件对象的x和y变量 |
| <Button-5> | 鼠标滑轮向下滚动,鼠标光标相对控件位置会被存入事件对象的x和y变量 |
| <Motion> | 鼠标移动,鼠标光标相对控件位置会被存入事件对象的x和y变量 |
| <B1-Motion> | 拖曳,按住鼠标左键再移动鼠标,鼠标光标相对控件位置会被存入事件对象的x和y变量 |
| <B2-Motion> | 拖曳,按住鼠标中键再移动鼠标,鼠标光标相对控件位置会被存入事件对象的x和y变量 |
| <B3-Motion> | 拖曳,按住鼠标右键再移动鼠标,鼠标光标相对控件位置会被存入事件对象的x和y变量 |
| <ButtonRelease-1> | 放开鼠标左键,鼠标光标相对控件位置会被存入事件对象的x和y 变量 |
| <ButtonRelease-2> | 放开鼠标中键,鼠标光标相对控件位置会被存入事件对象的x和y变量 |
| <ButtonRelease-3> | 放开鼠标右键,鼠标光标相对控件位置会被存入事件对象的x和y变量 |
| <Double-Button-1> | 连按两下鼠标左键,鼠标光标相对控件位置会被存入事件对象的x和y变量 |
| <Double-Bntton-2> | 连按两下鼠标中键,鼠标光标相对控件位置会被存入事件对象的x和y变量 |
| <Double-Button-3> | 连按两下鼠标右键,鼠标光标相对控件位置会被存入事件对象的x和y变量 |
| <Enter> | 鼠标光标进入 Widget控件 |
| <Leave> | 鼠标光标离开Widget控件 |
2.键盘事件
| 键盘事件 | 说明 |
|---|---|
| <Focusln> | 键盘焦点进入Widget控件 |
| <FocusOut> | 键盘焦点离开Widget控件 |
| <Return> | 按下Enter键,键盘所有键都可以被绑定,例如,Cancel、BackSpace、Tab、ShiftCtrl、Alt、End、Esc、Next(Page Down)、Prior(Page Up)、Home、End、Right、Left、Up、Down、Fl ~F12、Scroll Lock、Num Lock |
| <Key > | 按下某键盘键,键值会被储存在event对象中传递 |
| <Shift-Up > | 按住Shift 键时按下Up键 |
| <Alt-Up> | 按住Alt键时按下Up键 |
| <Ctrl-Up> | 按住Ctrl键时按下Up键 |
3.控件事件
| 控件事件 | 说明 |
|---|---|
| <Configure> | 更改Widget控件的大小和位置,新控件大小的width 与height会储存在event对象内 |
from tkinter import *
def test(event):
    root.config(bg='red')
root = Tk()
root.title('command')
root.geometry("300x200")
root.resizable(0,0)
label = Label(root,text='左击鼠标有惊喜',font=('华文彩云',15),fg='red')
label.pack()
label.bind("<Button-1>",test)  # 在label标签位置左击鼠标调用test函数
root.mainloop()
- 1
- 2
- 3
- 4
- 5
- 6
- 7
- 8
- 9
- 10
- 11


取消绑定
obj.unbind ( “<xxx>”) #<XXX>是绑定方式
from tkinter import *
def test1(off):
    if b.get() == True:
        off.bind('<Button-1>',test2)
    else:
        off.unbind('<Button-1>')
        l = Label(root, text='\n')
        l.pack()
def test2(event):
    l = Label(root,text='现在是bind模式')
    l.pack()

root = Tk()
root.title('command')
root.geometry("300x200")
root.resizable(0,0)

button = Button(root,text='提 交',font=('华文彩云',12),fg='red')
button.pack()

b = BooleanVar()
checkbutton =Checkbutton(root,text='bind/unbind',variable=b,command=lambda :test1(button))
checkbutton.pack()

root.mainloop()
# 注:当勾选复选框点击“提交”,打印“现在是bind模式”,绑定事件;当没有勾选复选框点击“提交”,显示一个空格标签,没有绑定事件。
- 1
- 2
- 3
- 4
- 5
- 6
- 7
- 8
- 9
- 10
- 11
- 12
- 13
- 14
- 15
- 16
- 17
- 18
- 19
- 20
- 21
- 22
- 23
- 24
- 25
- 26

Listbox组件
Listbox组件,列表框控件,在Listbox窗口小部件是用来显示一个字符串列表给用户。
Listbox组件的属性
Listbox(父对象,options...)
	bg fg font
	bd 边界宽度,默认是两个像素。
	height 高,单位是字符,默认是10。
	width 宽,单位是字符。
	highlightcolor 当列表框获得焦点时的颜色。
	highlightthickness 当列表框获得焦点时的厚度。
	listvariable 以变量方式处理选项内容。
	relief 默认是relief=FLAT,可由此控制列表框外框,默认是SUNKEN。
	selectbackground 被选取字符串的背景色彩。
	selectmode 可以决定有多少选项可以被选,以及鼠标拖曳如何影响选项。
	    ① BROWSE 这是默认值,我们可以选择一个选项,如果选取一个选项同时拖曳鼠标,将造成选项最后的位置是被选取的项目位置。
	    ② SINGLE 只能选择一个选项,可以用单击方式选取,不可用拖曳方式更改所选的项目。
	    ③MULTIPLE 可以选择多个选项,单击项目可以切换是否选择该项目
	    ④EXTENDED 单击第一个项目然后拖曳到最后一个项目,即可选择这个区间的一系列选项。单击可以选择第一个项目,此时若是按住Shift键并单击另一个项目,可以选取区间项目。
	xscrollcommand 在x轴使用滚动条。
	yscrollcommand 在y轴使用滚动条。
- 1
- 2
- 3
- 4
- 5
- 6
- 7
- 8
- 9
- 10
- 11
- 12
- 13
- 14
- 15
- 16
- 17
Listbox实例
from tkinter import *
root = Tk()
root.title('Listbox')
root.geometry("300x200")
root.resizable(0,0)
listbox = Listbox(root,width=20,height=8,yscrollcommand='y')
listbox.place(x=10,y=20)
root.mainloop()
- 1
- 2
- 3
- 4
- 5
- 6
- 7
- 8

insert
insert(index,elements)函数,建立列表框项目。index:插入列表框的位置END(在末尾插入);elements:插入的元素
选择列表框中的项目返回的值为索引
from tkinter import *
root = Tk()
root.title('Listbox')
root.geometry("300x200")
root.resizable(0,0)
listbox = Listbox(root,height=8)
listbox.place(x=10,y=20)
listbox.insert(END,'小学 ')
listbox.insert(END,'中学 ')
listbox.insert(END,'高中 ')
listbox.insert(END,'大学 ')
listbox.insert(END,'研究生 ')
listbox.insert(END,'博士 ')
root.mainloop()
- 1
- 2
- 3
- 4
- 5
- 6
- 7
- 8
- 9
- 10
- 11
- 12
- 13
- 14

Listbox的基本操作
(1)size():传回列表项目的数量;
(2)selection_set():选取特定索引项;
(3)delete():删除特定索引项;
(4)get():传回指定索引项;
(5)curselection():传回选取项目的索引;
(6)selection_include():检查指定索引是否被选取;
- 1
- 2
- 3
- 4
- 5
- 6
from tkinter import *
def test():
    indexs = listbox.curselection()
    dic = {0:'苹果',1:'菠萝',2:'山竹',3:'栗子',4:'桃子',5:'葡萄',6:'其他'}
    str1 = '你喜欢吃的水果是:'
    str2 = ''
    for index in indexs:
        str2 += dic[index] + '、'
    message = Message(root,text=str1+str2,font=('楷体',10))
    message.pack()

root = Tk()
root.title('Listbox')
root.geometry("300x300")
root.resizable(0,0)

label = Label(root,text='请选择你喜欢词的水果',font=('华文彩云',15),fg='red')
label.pack()

listbox = Listbox(root,height=8,selectmode=MULTIPLE,font=('楷体',15))
listbox.pack()
ls = ['苹果','菠萝','山竹','栗子','桃子','葡萄','其他']
for i in ls:
    listbox.insert(END,i)

button = Button(root,text='提 交',font=('华文彩云',15),fg='blue',command=test)
button.pack()
root.mainloop()
- 1
- 2
- 3
- 4
- 5
- 6
- 7
- 8
- 9
- 10
- 11
- 12
- 13
- 14
- 15
- 16
- 17
- 18
- 19
- 20
- 21
- 22
- 23
- 24
- 25
- 26
- 27
- 28


