- 1Tensorflow 环境配置与安装版本的选择_tensorflow各版本 安装需求
- 2小程序获取不到用户头像和昵称返回微信用户问题解决,即小程序授权获取用户头像规则调整的最新解决方案_微信小程序获取头像加载弹出
- 3平面切分- 蓝桥杯第十一届Python组第九题_平面切分摘要
- 4zabbix配置(三)之mysql监控_怎么查看zabbix的mysql配置
- 5jdk8銝要onematch_JDK8新特性详解 - 纯粹而又极致的光--木九天 - OSCHINA - 中文开源技术交流社区...
- 6无线瘦AP部署——Capwap隧道原理及故障:无线Capwap隧道技术原理_在瘦ap与ac通讯,中,我们规定了capwap的通信方式,那么capwap隧道的建立步骤中几步
- 7一、Docker:Linux/Windows在线安装Docker与命令大全总结_docker for windows installer
- 8洛谷刷题C++语言 | P5705 数字反转_输入一个不小于100且小于1000数字反转c语言
- 9校验输入大于0且可保留小数点后两位数的正则_正则大于0保留两位小数
- 10可信计算3.0工程初步pdf_查校 | 英国大学工业工程与运筹学专业40个授课硕士+研究Mphil/Phd 项目汇总...
Springboot自定义异常处理超详细实现和使用_springboot 自定义异常 触发事务
赞
踩
目录
一、序言
本文主要围绕springboot项目实现和使用自定义异常处理,其中包含全部实现代码以及使用自定义异常处理的内容,需要小伙伴对springboot项目环境搭建有一定的理解能力。
二、实现自定义异常处理过程
首先实现自定义异常处理的内容包含:异常服务接口类、异常处理枚举类、自定义异常类、规范返回值结构体类、全局异常处理控制类;
异常服务接口类:提供获取编码和描述的方法
- public interface BaseErrorInfoInterface {
- /**
- * 错误码
- * @return
- */
- String getResultCode();
-
- /**
- * 错误描述
- * @return
- */
- String getResultMsg();
- }
异常处理枚举类:实现 异常服务接口类的方法,并且定义数据操作异常的类型
- public enum ExceptionEnum implements BaseErrorInfoInterface {
- // 数据操作异常定义
- SUCCESS("2000", "请求成功!"),
- BODY_NOT_MATCH("4000", "请求的数据格式不符!"),
- SIGNATURE_NOT_MATCH("4001", "请求的数字签名不匹配!"),
- DATA_EMPTY("4002","数据为空!"),
- DATA_NOT_ENOUGH("4003", "数据不足!"),
- NOT_FOUND("4004", "数据不存在或已删除!"),
- DATA_FOUND("4005", "数据已存在!"),
- CODE_NOT_MATCH("4006", "验证码错误!"),
- CODE_TIME_OUT("4007", "验证码已过期!"),
- PASSWORD_NOT_MATCH("4008", "密码不一致!"),
- INTERNAL_SERVER_ERROR("5000", "服务器内部错误!"),
- SERVER_BUSY("5003", "服务器正忙,请稍后再试!");
-
- /**
- * 错误码
- */
- private final String resultCode;
-
- /**
- * 错误描述
- */
- private final String resultMsg;
-
- ExceptionEnum(String resultCode, String resultMsg) {
- this.resultCode = resultCode;
- this.resultMsg = resultMsg;
- }
-
- @Override
- public String getResultCode() {
- return resultCode;
- }
-
- @Override
- public String getResultMsg() {
- return resultMsg;
- }
- }

以上数据操作异常的定义作为参考,同志们可以根据自己的需求修改;
自定义异常类:获取错误码和错误信息;以及利用构造方法实例化异常处理类,并设置错误码和错误信息
- public class CustomizationException extends RuntimeException {
- private static final long serialVersionUID = 1L;
-
- /**
- * 错误码
- */
- protected String errorCode;
- /**
- * 错误信息
- */
- protected String errorMsg;
-
- public CustomizationException() {
- super();
- }
-
- public CustomizationException(BaseErrorInfoInterface errorInfoInterface) {
- super(errorInfoInterface.getResultCode());
- this.errorCode = errorInfoInterface.getResultCode();
- this.errorMsg = errorInfoInterface.getResultMsg();
- }
-
- public CustomizationException(BaseErrorInfoInterface errorInfoInterface, Throwable cause) {
- super(errorInfoInterface.getResultCode(), cause);
- this.errorCode = errorInfoInterface.getResultCode();
- this.errorMsg = errorInfoInterface.getResultMsg();
- }
-
- public CustomizationException(String errorMsg) {
- super(errorMsg);
- this.errorMsg = errorMsg;
- }
-
- public CustomizationException(String errorCode, String errorMsg) {
- super(errorCode);
- this.errorCode = errorCode;
- this.errorMsg = errorMsg;
- }
-
- public CustomizationException(String errorCode, String errorMsg, Throwable cause) {
- super(errorCode, cause);
- this.errorCode = errorCode;
- this.errorMsg = errorMsg;
- }
-
- public String getErrorCode() {
- return errorCode;
- }
-
- public void setErrorCode(String errorCode) {
- this.errorCode = errorCode;
- }
-
- public String getErrorMsg() {
- return errorMsg;
- }
-
- public void setErrorMsg(String errorMsg) {
- this.errorMsg = errorMsg;
- }
-
- @Override
- public Throwable fillInStackTrace() {
- return this;
- }
-
- }
规范返回值结构体类:属于规范方法返回值结构体的类,也有利于一致化后端所有接口的返回结构,方便前端(客户端)读取所需要的数据;异常处理返回客户端的数据将采用该类的数据结构;
- @Data
- public class ResultAPI {
- private int status; //响应状态
- private String msg; //相应消息
- private String code;//响应代码
- public ResultAPI(){}
-
- /** 失败 **/
- public static ResultAPI error(BaseErrorInfoInterface errorInfo) {
- ResultAPI result = new ResultAPI();
- result.setCode(errorInfo.getResultCode());
- result.setMsg(errorInfo.getResultMsg());
- result.setStatus(0);
- return result;
- }
- /** 失败 **/
- public static ResultAPI error(String code, String message) {
- ResultAPI result = new ResultAPI();
- result.setCode(code);
- result.setMsg(message);
- result.setStatus(0);
- return result;
- }
- /** 失败 **/
- public static ResultAPI error(String message) {
- ResultAPI result = new ResultAPI();
- result.setStatus(0);
- result.setMsg(message);
- return result;
- }
-
- }
注入lombok依赖,为运用@Data注解,使ResultAPI 类相当于一个pojo类,拥有get,set方法;
打开pom.xml,添加以下语句 ,并加载Maven变更:
- <dependency>
- <groupId>org.projectlombok</groupId>
- <artifactId>lombok</artifactId>
- </dependency>
全局异常处理控制类 :处理各类异常的业务(即根据不同的异常类型向客户端返回相应的信息)
- @ControllerAdvice
- public class GlobalExceptionController {
- /**
- * 处理自定义的业务异常
- * @param req
- * @param exception
- * @return
- */
- @ExceptionHandler(value = CustomizationException.class)
- @ResponseBody
- public ResultAPI exception(HttpServletRequest req, CustomizationException exception) {
- return ResultAPI.error(exception.getErrorCode(), exception.getErrorMsg());
- }
-
- /**
- * 处理空指针的异常
- * @param req
- * @param e
- * @return
- */
- @ExceptionHandler(value = NullPointerException.class)
- @ResponseBody
- public ResultAPI exceptionHandler(HttpServletRequest req, NullPointerException e) {
- return ResultAPI.error(ExceptionEnum.BODY_NOT_MATCH);
- }
- }
三、使用自定义异常处理
第一步:创建测试控制类TestController,添加@RestController 和 @RequestMapping注解
- @RestController
- @RequestMapping("/test")
- public class TestController {
-
- }
在pom.xml 文件中添加依赖(如已添加,忽略此步骤):
- <dependency>
- <groupId>org.springframework.boot</groupId>
- <artifactId>spring-boot-starter-web</artifactId>
- </dependency>
第二步:添加方法,根据需求添加自定义异常处理,例如:参数为空时抛出异常并处理。
- @RestController
- @RequestMapping("/test")
- public class TestController {
- @RequestMapping("/exception")
- public String exceptionTest(String data) {
- if (data == null) {
- throw new CustomizationException(ExceptionEnum.DATA_EMPTY.getResultCode(),
- ExceptionEnum.DATA_EMPTY.getResultMsg());
- }
- return data;
- }
- }
第三步:用postMan或者Apifox软件测试,发送请求
注意springboot的端口号与测试软件的端口号一致

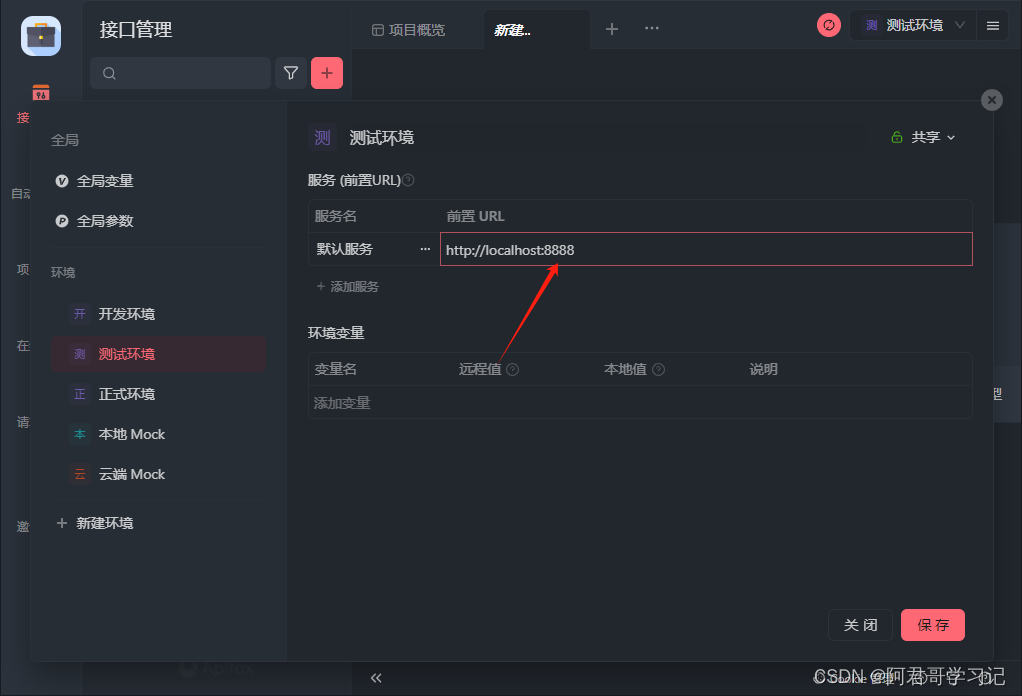
发送请求:http://localhost:8888/test/exception
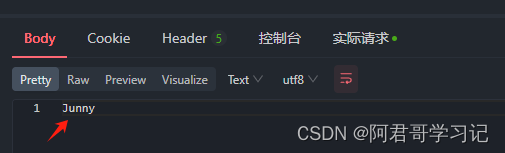
类型一:参数为data,值为Junny

结果:
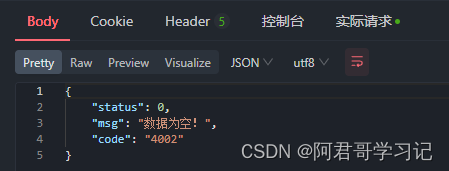
类型二:参数为空
结果: