- 1四川古力未来科技抖音小店打造品质生活,可靠之选引领潮流
- 2利用定时/计数器TO从P1输入周期为1s的方波,让发光二极管以1HZ闪烁,设晶振频率为12MHZ_如何将12mhz的信号分频出1mhz
- 3建堆的时间复杂度详解
- 4python snownlp情感分析_白杨数说 | 不会做文本情感分析?试试这两个Python包
- 5大数据学习连载06篇:Hadoop初体验之Hadoop安装包目录结构_hadoop的安装包自带了很多mapreduce示例程序其位于
- 6【机器学习】QLoRA:基于PEFT亲手微调你的第一个AI大模型
- 7新版OneNET云平台-多协议接入WIFI模块_新版onenet的api-key在哪里
- 8Allegro光绘Gerber文件、IPC网表、坐标文件、装配PDF文件导出打包_allegro导出光绘文件
- 9本地容器化快速部署GLM-4-9B-chat教程_glm-4-9b-chat本地部署
- 10FPGA入门学习第四天(数码管静态显示)_quartus中的三极管
Elastic实战:通过pipeline实现mysql同步数据到es的数据预处理_elastic pipeline
赞
踩
0. 引言
最近在将公司的一部分mysql数据同步到es中,采用了logstash-input-jdbc实现全量同步,canal实现增量同步,但是还有一个问题就是es中的数据结构需要重新设计,也就导致部分mysql字段需要经过转换,然后同步到es中
首先canal是支持自定义客户端的,需要引入如下依赖,这种方式适合数据转换规则比较复杂,具有强定制性的场景,但是考虑到我这里还要做logstash的数据同步,因此需要一个比较通用的方式来实现数据转换处理,因此我用到了es的pipeline来做预处理
<dependency>
    <groupId>com.alibaba.otter</groupId>
    <artifactId>canal.client</artifactId>
    <version>1.1.4</version>
</dependency>
- 1
- 2
- 3
- 4
- 5
1. pipeline实现数据预处理
首先pipeline的作用就是在数据进入索引之前进行预处理,而且其也支持类java的painless语法,可以满足我们当前的业务需求。
下面我以用户表的处理来举例示范。为方便演示和脱敏,已经剔除掉部分数据
1.1 mysql中user结构
mysql8.0
id: Long
code: varchar
real_name: varchar
role_id: varchar ,多个id用逗号隔开
dept_id: varchar ,多个id用逗号隔开
post_id: varchar ,多个id用逗号隔开
create_time: datetime
- 1
- 2
- 3
- 4
- 5
- 6
- 7
1.2 es中的user结构
以下演示基于es7.13.0
PUT user
{
  "mappings": {
    "properties": {
      "code": {
        "type": "keyword"
      },
      "realName": {
        "type": "text",
        "analyzer": "ik_smart"
      },
      "roleId": {
        "type": "long"
      },
      "deptId": {
        "type": "keyword"
      },
      "postId": {
        "type": "long"
      },
      "userSource": {
        "type": "integer"
      }
    }
  }
}
- 1
- 2
- 3
- 4
- 5
- 6
- 7
- 8
- 9
- 10
- 11
- 12
- 13
- 14
- 15
- 16
- 17
- 18
- 19
- 20
- 21
- 22
- 23
- 24
- 25
- 26
1.3 目标
我们需要进行的处理包括:
1、将role_id、dept_id、post_id由字符串转换为数组
2、因为还涉及到要从另外一张微信用户表数据同步到es中,为了区分是来自微信还是pc,通过nickName字段来判定,因为nickName是微信用户表独有的字段。当它存在时说明用户来自于微信表,将userSource标注为1,否则标注为0
1.4 书写pipeline
可以看到直接通过split函数实现字符串转数组,通过自定义脚本来标注userSource的值
更多关于pipeline的使用,可以参考官方文档:ingest pipeline
关于painless语法的使用,也可参考官方文档:painless guide
如果对于pipeline或者自定义脚本的书写有疑惑的,可以留言讨论
PUT _ingest/pipeline/user_mysql_pipeline
{
  "description": "用户数据mysql导入转换为es结构",
  "processors": [
    {
      "split": {
        "field": "roleId",
        "separator": ","
      }
    },
    {
      "split": {
        "field": "deptId",
        "separator": ","
      }
    },
    {
      "split": {
        "field": "postId",
        "separator": ","
      }
    },
    {
      "script": {
        "lang": "painless",
        "source": """
          if(ctx.containsKey('nickName')){
            ctx.name = ctx.nickName;
            ctx.remove('nickName');
            ctx.userSource = 1;
          }
        """
      }
    }
  ]
}
- 1
- 2
- 3
- 4
- 5
- 6
- 7
- 8
- 9
- 10
- 11
- 12
- 13
- 14
- 15
- 16
- 17
- 18
- 19
- 20
- 21
- 22
- 23
- 24
- 25
- 26
- 27
- 28
- 29
- 30
- 31
- 32
- 33
- 34
- 35
- 36
1.5 调用pipeline
1、使用pipeline需要在es中添加ignest角色,修改es配置文件
node.roles: [ignest]
- 1
2、在user的settings中指定pipeline
PUT user
{
  "mappings": {
    "properties": {
      "code": {
        "type": "keyword"
      },
      "userType": {
        "type": "long"
      },
      "account": {
        "type": "text",
        "analyzer": "ik_smart"
      },
      "realName": {
        "type": "text",
        "analyzer": "ik_smart"
      },
      "email": {
        "type": "text",
        "fields": {
          "keyword": {
            "type": "keyword"
          }
        }
      },
      "phone": {
        "type": "keyword"
      },
      "sex": {
        "type": "integer"
      },
      "roleIds": {
        "type": "long"
      },
      "deptIds": {
        "type": "keyword"
      },
      "postIds": {
        "type": "long"
      },
      "parentDeptIds": {
        "type": "keyword"
      },
      "thirdPlatformUserId": {
        "type": "keyword"
      },
      "tenantUserId": {
        "type": "long"
      },
      "userSource": {
        "type": "integer"
      },
      "tenantId": {
        "type": "keyword"
      },
      "createUser": {
        "type": "long"
      },
      "createDept": {
        "type": "keyword"
      },
      "createTime": {
        "type": "date"
      }
    }
  },
  "settings": {
    "default_pipeline": "user_mysql_pipeline",
    "number_of_replicas": 0,  // 因为我测试用的单节点,所以将副本分片设置为0
    "number_of_shards": 1
  }
}
- 1
- 2
- 3
- 4
- 5
- 6
- 7
- 8
- 9
- 10
- 11
- 12
- 13
- 14
- 15
- 16
- 17
- 18
- 19
- 20
- 21
- 22
- 23
- 24
- 25
- 26
- 27
- 28
- 29
- 30
- 31
- 32
- 33
- 34
- 35
- 36
- 37
- 38
- 39
- 40
- 41
- 42
- 43
- 44
- 45
- 46
- 47
- 48
- 49
- 50
- 51
- 52
- 53
- 54
- 55
- 56
- 57
- 58
- 59
- 60
- 61
- 62
- 63
- 64
- 65
- 66
- 67
- 68
- 69
- 70
- 71
- 72
- 73
或者还可以在插入数据的时候指定pipeline,这里因为是自动同步,所以这种方式不适用
PUT user/_doc/1?pipeline=user_mysql_pipeline
{
   ...
}
- 1
- 2
- 3
- 4
3、将上述语句在kibana或者其他es客户端中执行后,再启动canal,logstash同步数据,es就会对数据进行预处理了
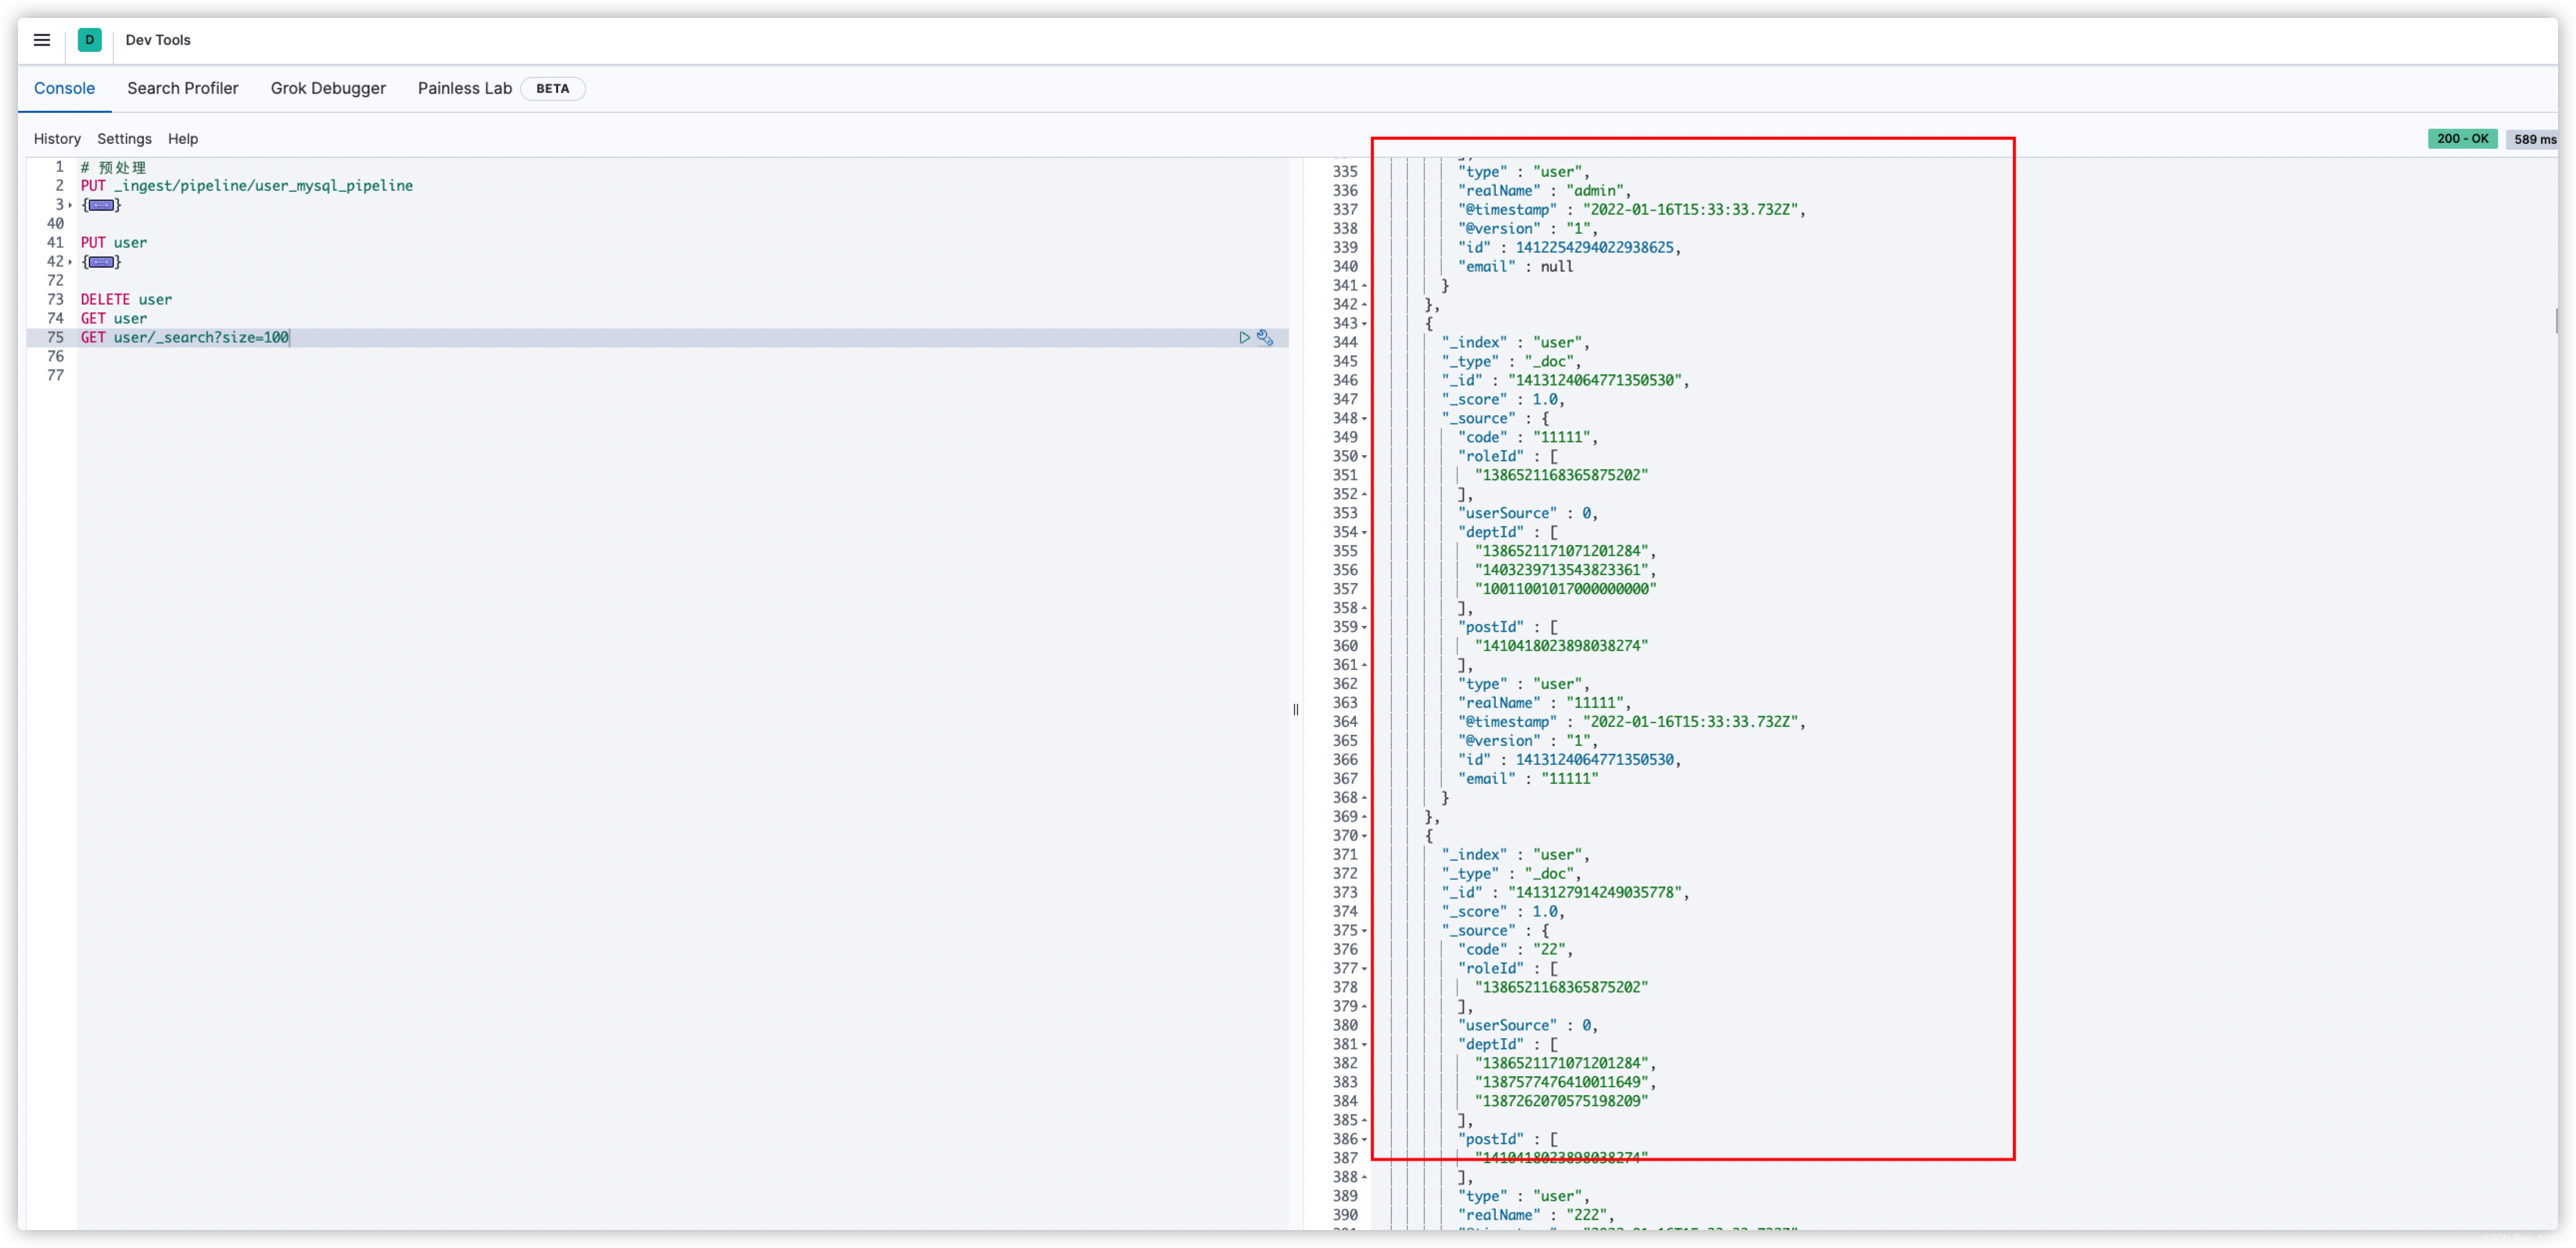
4、测试,可以看到数据转换成功
GET user/_search?size=100
- 1


