- 1Vue中的数据代理_vue数据代理
- 2GitLab 分支策略_gitlab分支策略
- 3(一)STM32 学习笔记——Keil 5 ARM 安装与激活_arm keil mdk安装
- 4物联网平台搭建的全过程介绍(一)——物联网简介
- 5Redis的16种常见应用场景
- 6linux通过yum安装vim,centos7 yum安装vim 8
- 7【BI-DIRECTIONAL ATTENTION FLOW FOR MACHINE COMPREHENSION】论文笔记
- 8gitgit did not exit cleanly (exit code 128)处理方式_git did not exit cleanly code128
- 9webservice到底是什么_legado web service
- 10【BP预测】基于果蝇算法优化BP神经网络实现数据预测附matlab代码_foa优化bp神经网络伪代码
Day28:ElasticSearch入门、Spring整合ES、开发社区搜索功能
赞
踩
ElasticSearch入门
Elasticsearch简介
- 一个分布式的、Restful风格的搜索引擎。
- 支持对各种类型的数据的检索(非结构化的也可以)。
- 搜索速度快,可以提供实时的搜索服务。
- 便于水平扩展(集群式部署),每秒可以处理PB级海量数据。
Elasticsearch术语
- 索引(数据库,6.0后对应表)、类型(表)、文档(行)、字段(列)。
- 集群、节点、分片、副本。
安装es服务器
docker部署见https://git.lug.ustc.edu.cn/Iris666/elastic-kg/-/tree/main?ref_type=heads
先用docker部署,不行再直接安装
为了简单,还是直接安装了ES,就是解压压缩包,
打开config/elasticsearch.yml文件改配置:
cluster.name: nowcoder
#
# ------------------------------------ Node ------------------------------------
#
# Use a descriptive name for the node:
#
#node.name: node-1
#
# Add custom attributes to the node:
#
#node.attr.rack: r1
#
# ----------------------------------- Paths ------------------------------------
#
# Path to directory where to store the data (separate multiple locations by comma):
#
path.data: /Users/iris/items/elasticsearch-8.13.2/data
#
# Path to log files:
#
path.logs: /Users/iris/items/elasticsearch-8.13.2/logs
- 1
- 2
- 3
- 4
- 5
- 6
- 7
- 8
- 9
- 10
- 11
- 12
- 13
- 14
- 15
- 16
- 17
- 18
- 19
- 20
- 21
然后把二进制程序添加到环境变量
vim ~/.bash_profile
- 1
export PATH=$PATH:/path/to/elasticsearch/bin
- 1
source ~/.bash_profile
- 1
再mac上直接运行es会报错,说jdk来路不明,方法是暂时关闭检查,用下面的命令:
sudo spctl --master-disable
- 1
- 2
为了安全用完后再打开:
sudo spctl --master-enable
- 1
安装中文分词插件
bin/elasticsearch-plugin install https://get.infini.cloud/elasticsearch/analysis-ik/8.13.2
- 1
- 2
(docker版本exec进container里面装插件)
版本要和es的版本严格对应。不然报错,之后会将插件存储在es/plugins路径下
使用postman发送HTTP请求
注册账号模拟发送HTTP请求
通过命令行访问es
在命令行中键入:
curl -X GET "http://localhost:9200/_cluster/settings?pretty"
- 1
查看状态,但是报错empty,原因是es默认SSL开的,所以http过不去,解决方法是在config中将:
xpack.security.enabled: false
- 1
运行结果如下:
{
  "error" : {
    "root_cause" : [
      {
        "type" : "security_exception",
        "reason" : "missing authentication credentials for REST request [/_cluster/settings?pretty]",
        "header" : {
          "WWW-Authenticate" : [
            "Basic realm=\"security\" charset=\"UTF-8\"",
            "ApiKey"
          ]
        }
      }
    ],
    "type" : "security_exception",
    "reason" : "missing authentication credentials for REST request [/_cluster/settings?pretty]",
    "header" : {
      "WWW-Authenticate" : [
        "Basic realm=\"security\" charset=\"UTF-8\"",
        "ApiKey"
      ]
    }
  },
  "status" : 401
}
- 1
- 2
- 3
- 4
- 5
- 6
- 7
- 8
- 9
- 10
- 11
- 12
- 13
- 14
- 15
- 16
- 17
- 18
- 19
- 20
- 21
- 22
- 23
- 24
- 25
- 26
接着报错,原因是curl的时候要-u传入用户名和密码,但是之前的已经忘了,重新创建个用户:
./elasticsearch-users useradd your_username -p your_password -r superuser
- 1
curl -u ***:password -X GET "http://localhost:9200/_cluster/settings?pretty"
- 1
health status index                             uuid                   pri rep docs.count docs.deleted store.size pri.store.size
yellow open   average_annual_wage               kqix1Pp7SiaUDtwWYNnELQ   1   1        785            0     56.8kb         56.8kb
green  open   .monitoring-es-7-2024.03.26       JtNGXpQYSvqBsClZtT8jdw   1   0      61371            0     24.7mb         24.7mb
green  open   .monitoring-es-7-2024.03.25       bHqBijFKQPy-S8aIXz_NQw   1   0      39185            0     16.2mb         16.2mb
green  open   .monitoring-kibana-7-2024.03.26   3vMGC8z5TJibwdTi1s0yOA   1   0       8178            0      1.7mb          1.7mb
yellow open   jobsearch                         9ekhjB0bQ4m3KKai8WmpFw   2   1      10661            0    161.4mb        161.4mb
green  open   .monitoring-kibana-7-2024.03.25   uY_wWKlGR1KgWdbUgSjHfw   1   0       6698            0      1.5mb          1.5mb
green  open   .monitoring-logstash-7-2024.03.25 VUJRgqRlSx-pDUr84z-QkA   1   0      39399            0        2mb            2mb
green  open   .monitoring-kibana-7-2024.03.27   sbMuIju9STCrPVuYLiQHzQ   1   0        230            0    126.4kb        126.4kb
green  open   .monitoring-kibana-7-2024.04.28   VPE9IIJLQrGHcjRt1GYvxA   1   0        338            0    254.6kb        254.6kb
yellow open   logstash-test_log-index           5dKT09aNRM-8GxjycBsH1Q   1   1         37            0     66.7kb         66.7kb
green  open   .monitoring-logstash-7-2024.03.27 GRmZTJ2XToyn5LDO6d8Xow   1   0       1380            0    200.5kb        200.5kb
green  open   .monitoring-logstash-7-2024.04.28 xvBwhA2pRkmKZYEpEacV3g   1   0       1583            0    317.9kb        317.9kb
green  open   .monitoring-logstash-7-2024.03.26 XhRvHVWdTu2klG5Gi78TLQ   1   0      48972            0      2.2mb          2.2mb
green  open   .monitoring-es-7-2024.03.27       l3k6wMcUToeToGVI5X1FkA   1   0       2155         3335      1.9mb          1.9mb
green  open   .monitoring-es-7-2024.04.28       DVXGvGDQSlaLB4CQYMbNkg   1   0        887           64    711.3kb        711.3kb
- 1
- 2
- 3
- 4
- 5
- 6
- 7
- 8
- 9
- 10
- 11
- 12
- 13
- 14
- 15
- 16
(发现之前弄的都是yellow,不知道为什么)
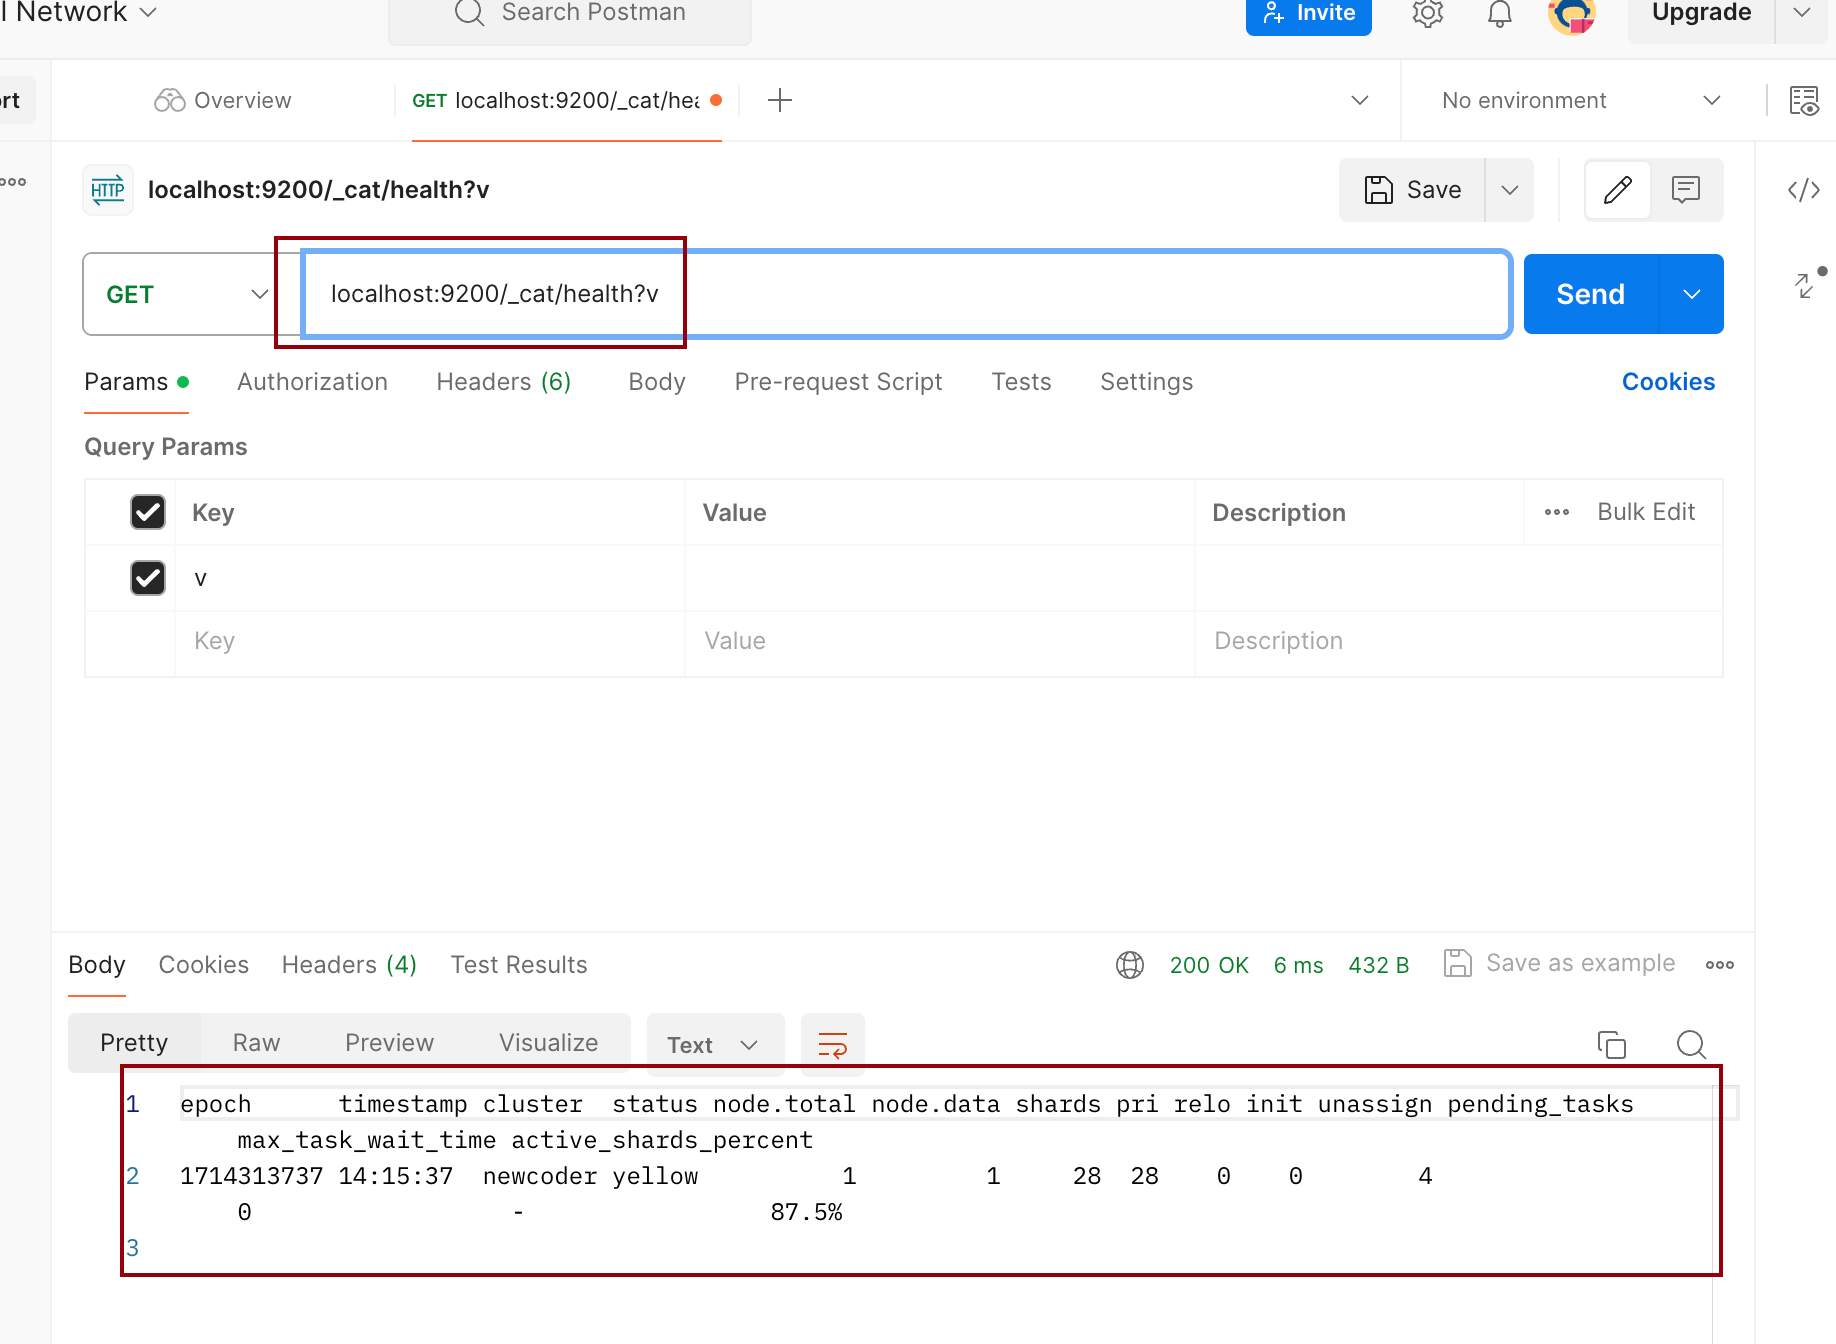
使用PostMan发请求
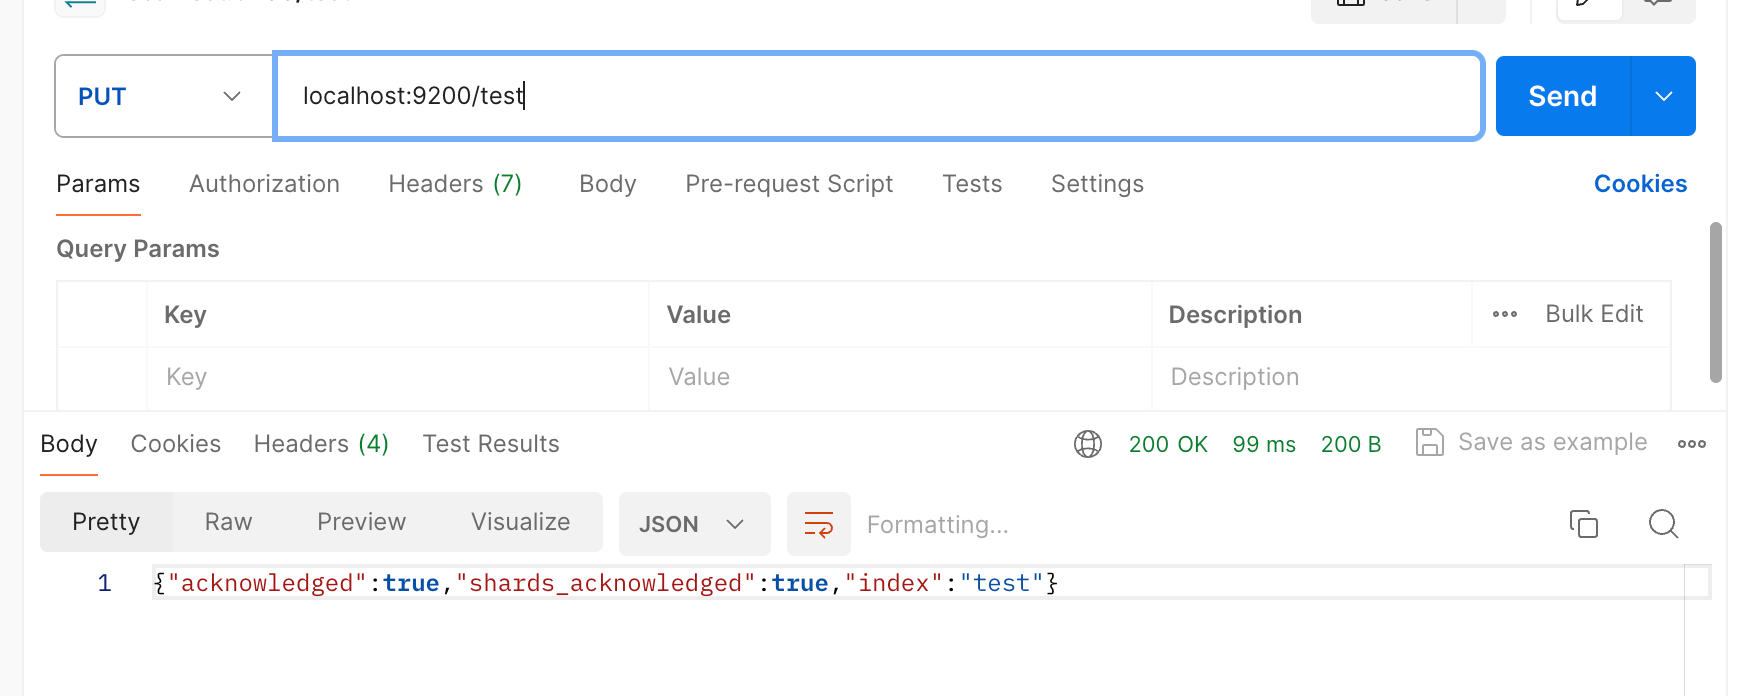
创建索引test PUT:
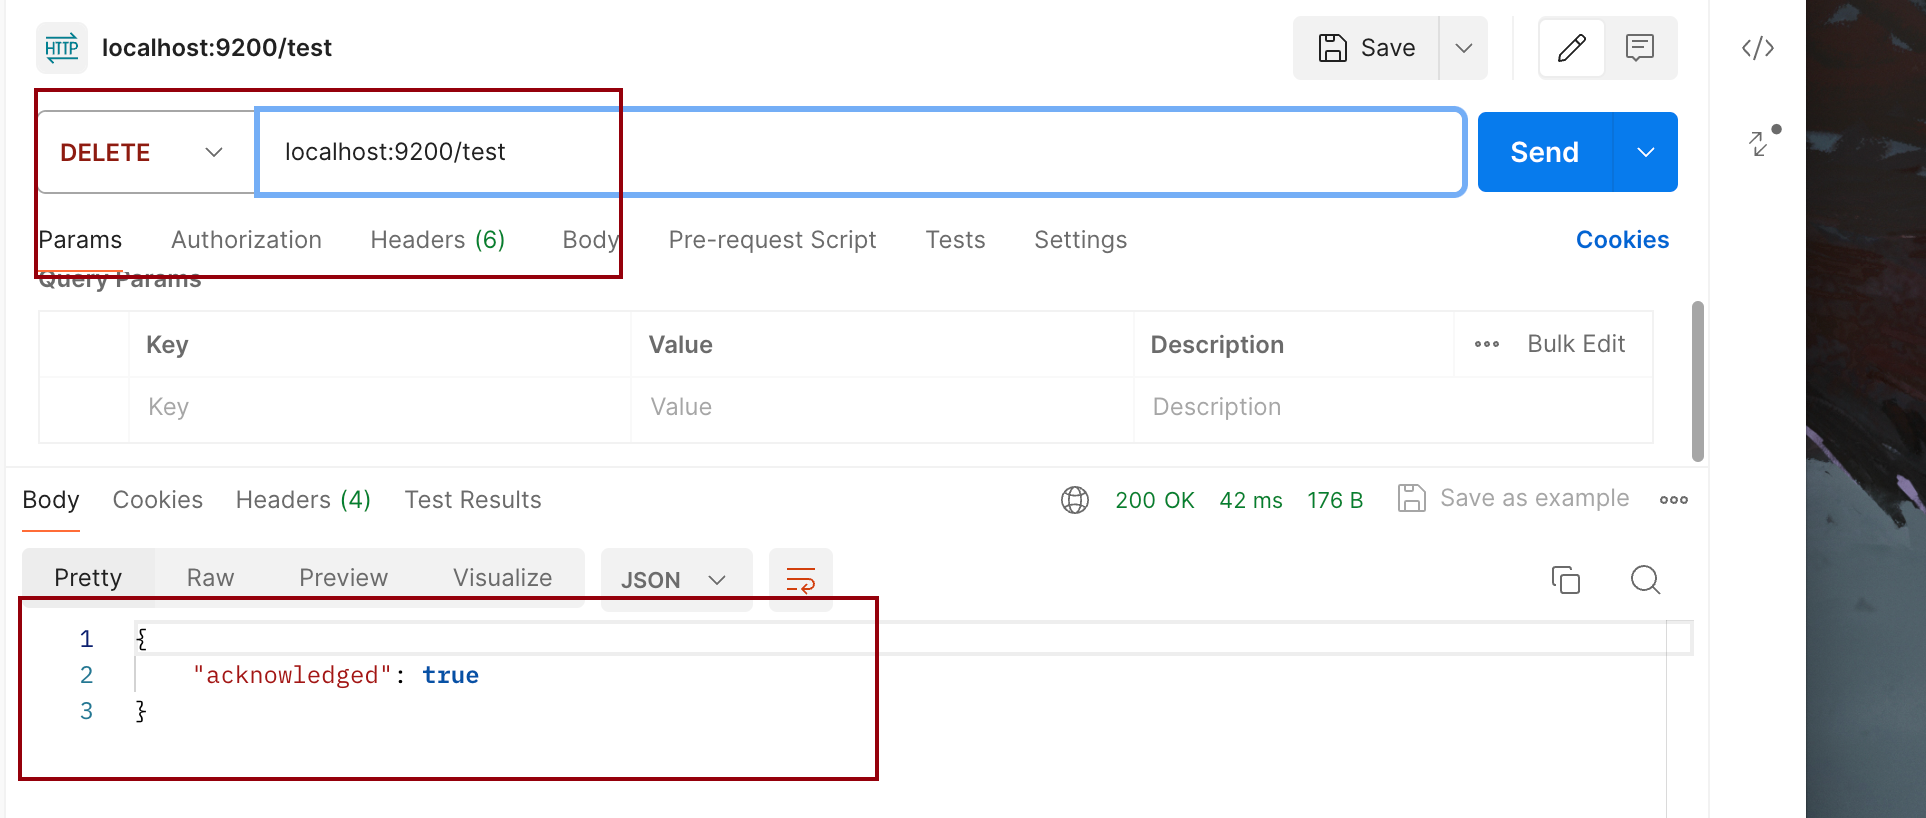
删除索引 DELETE:
提交数据(文档)PUT
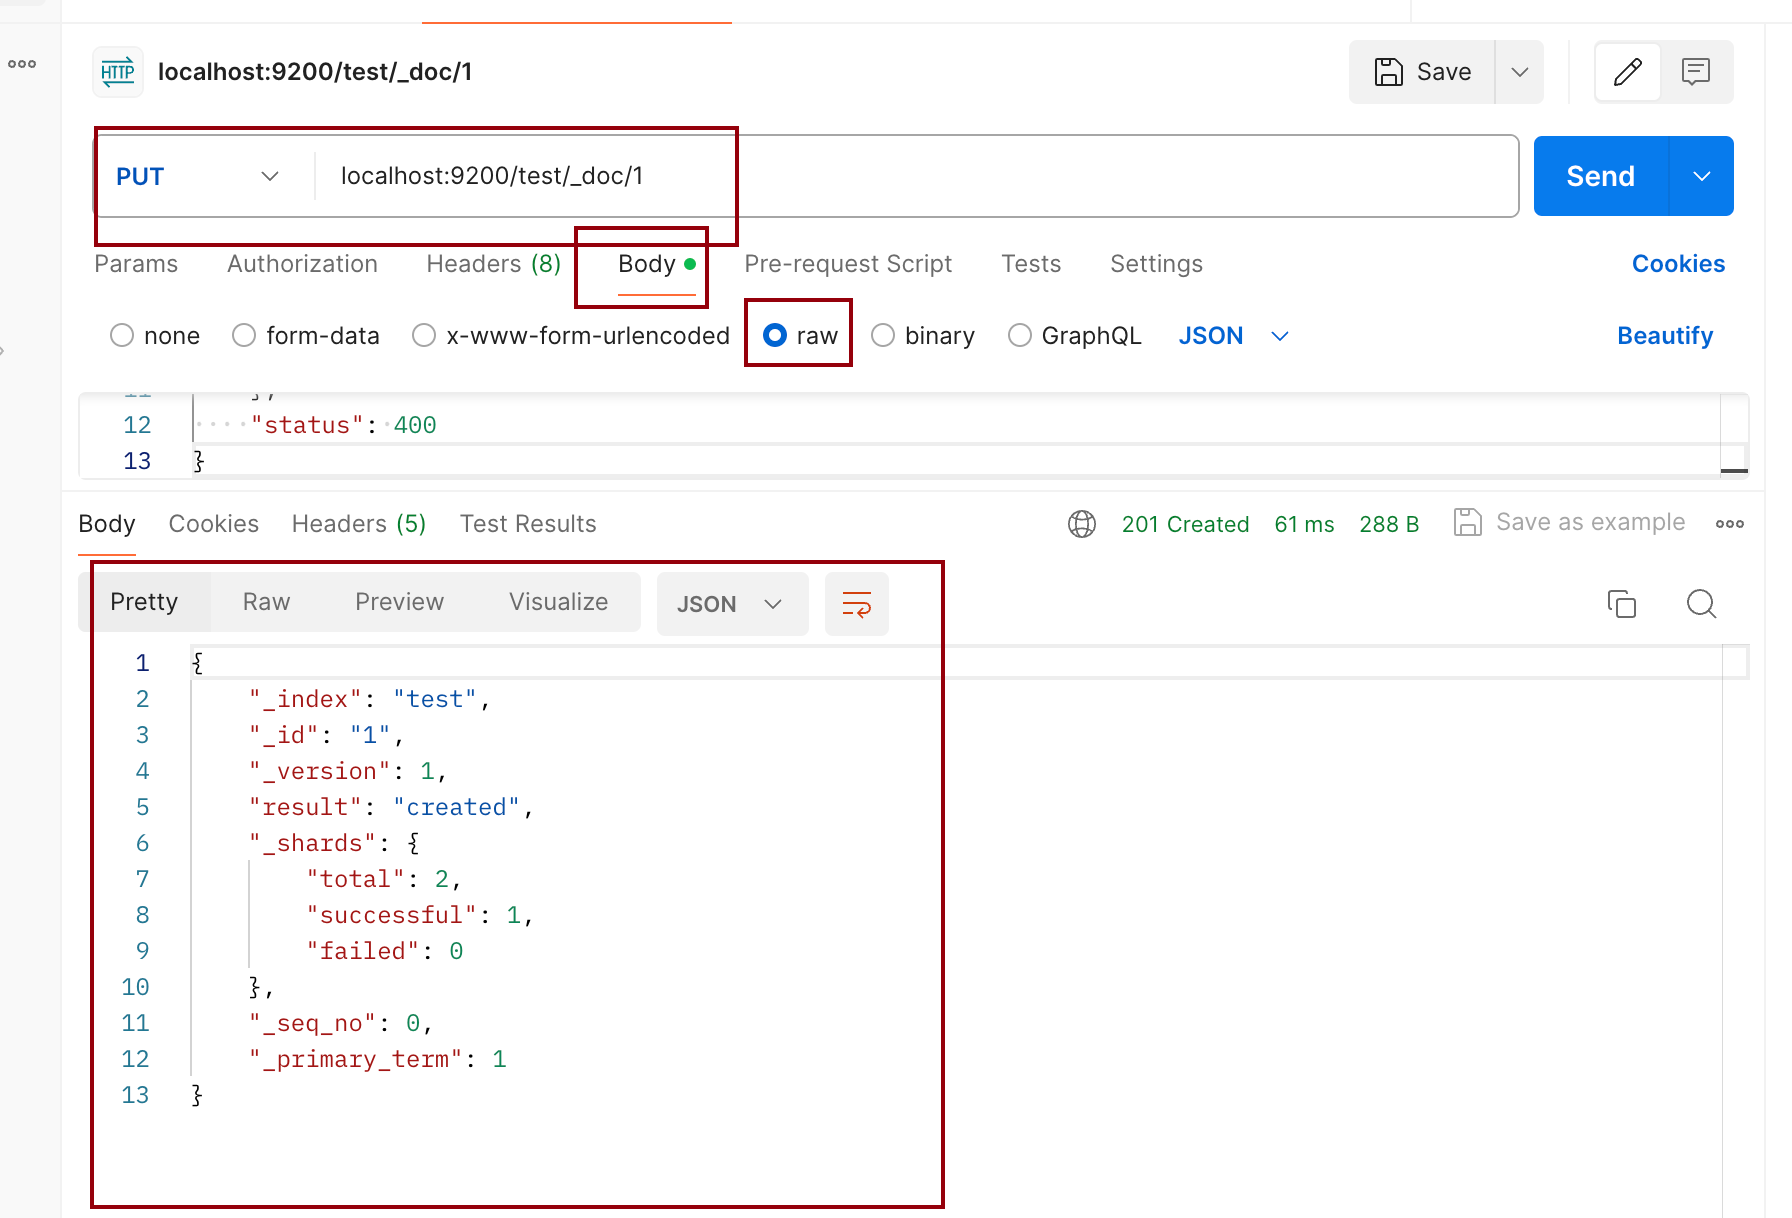
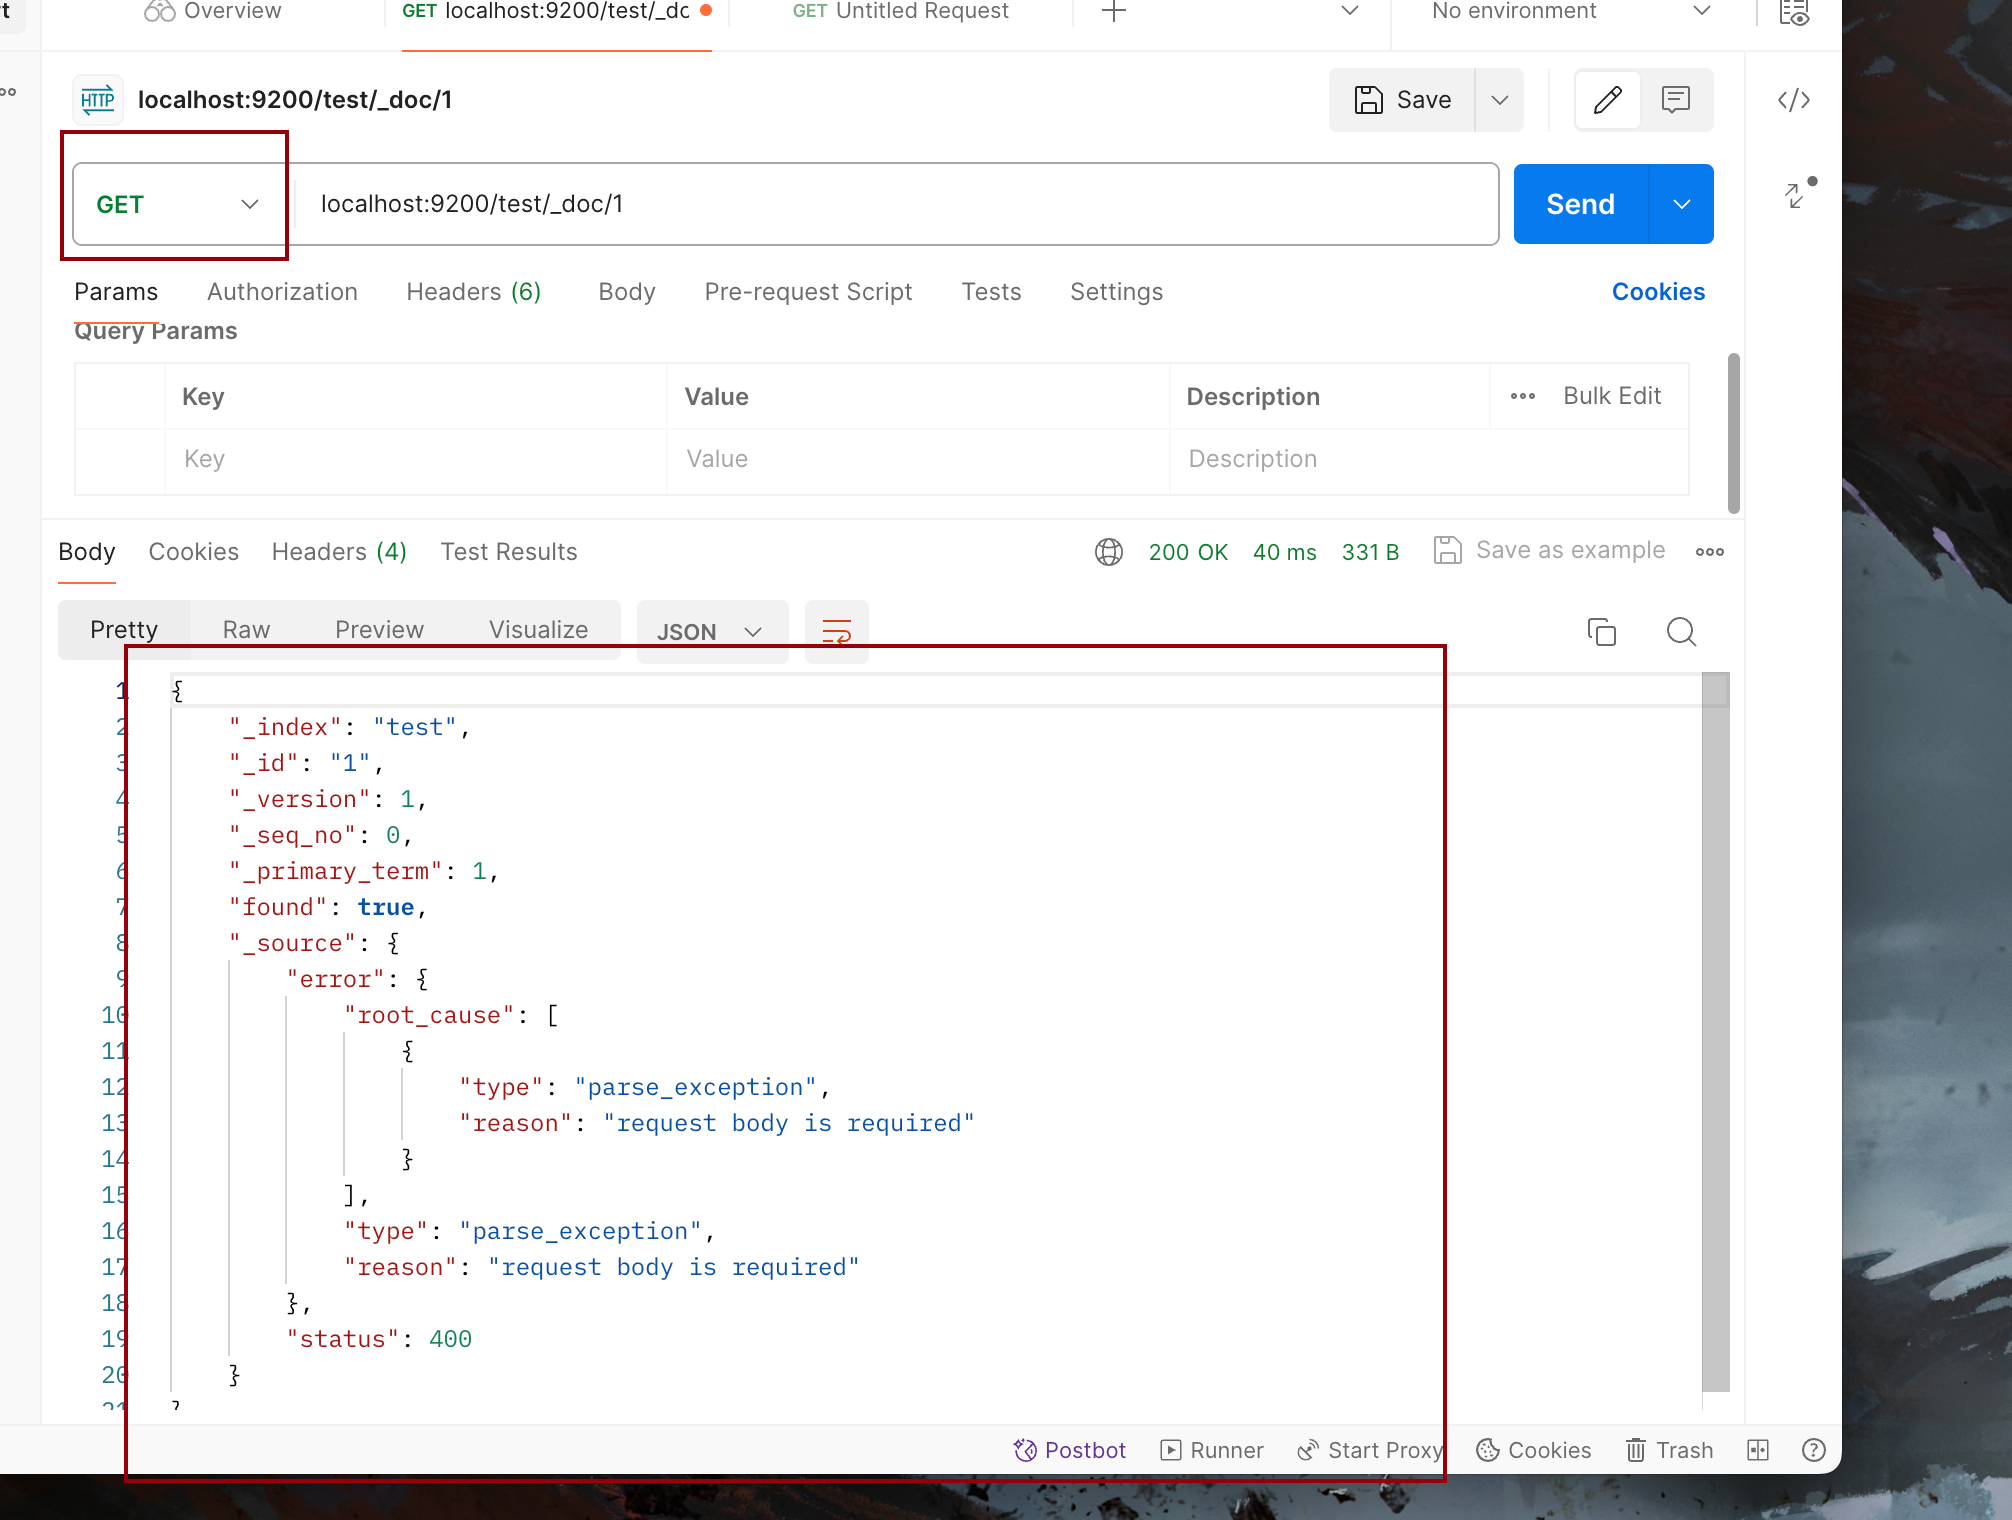
查数据GET
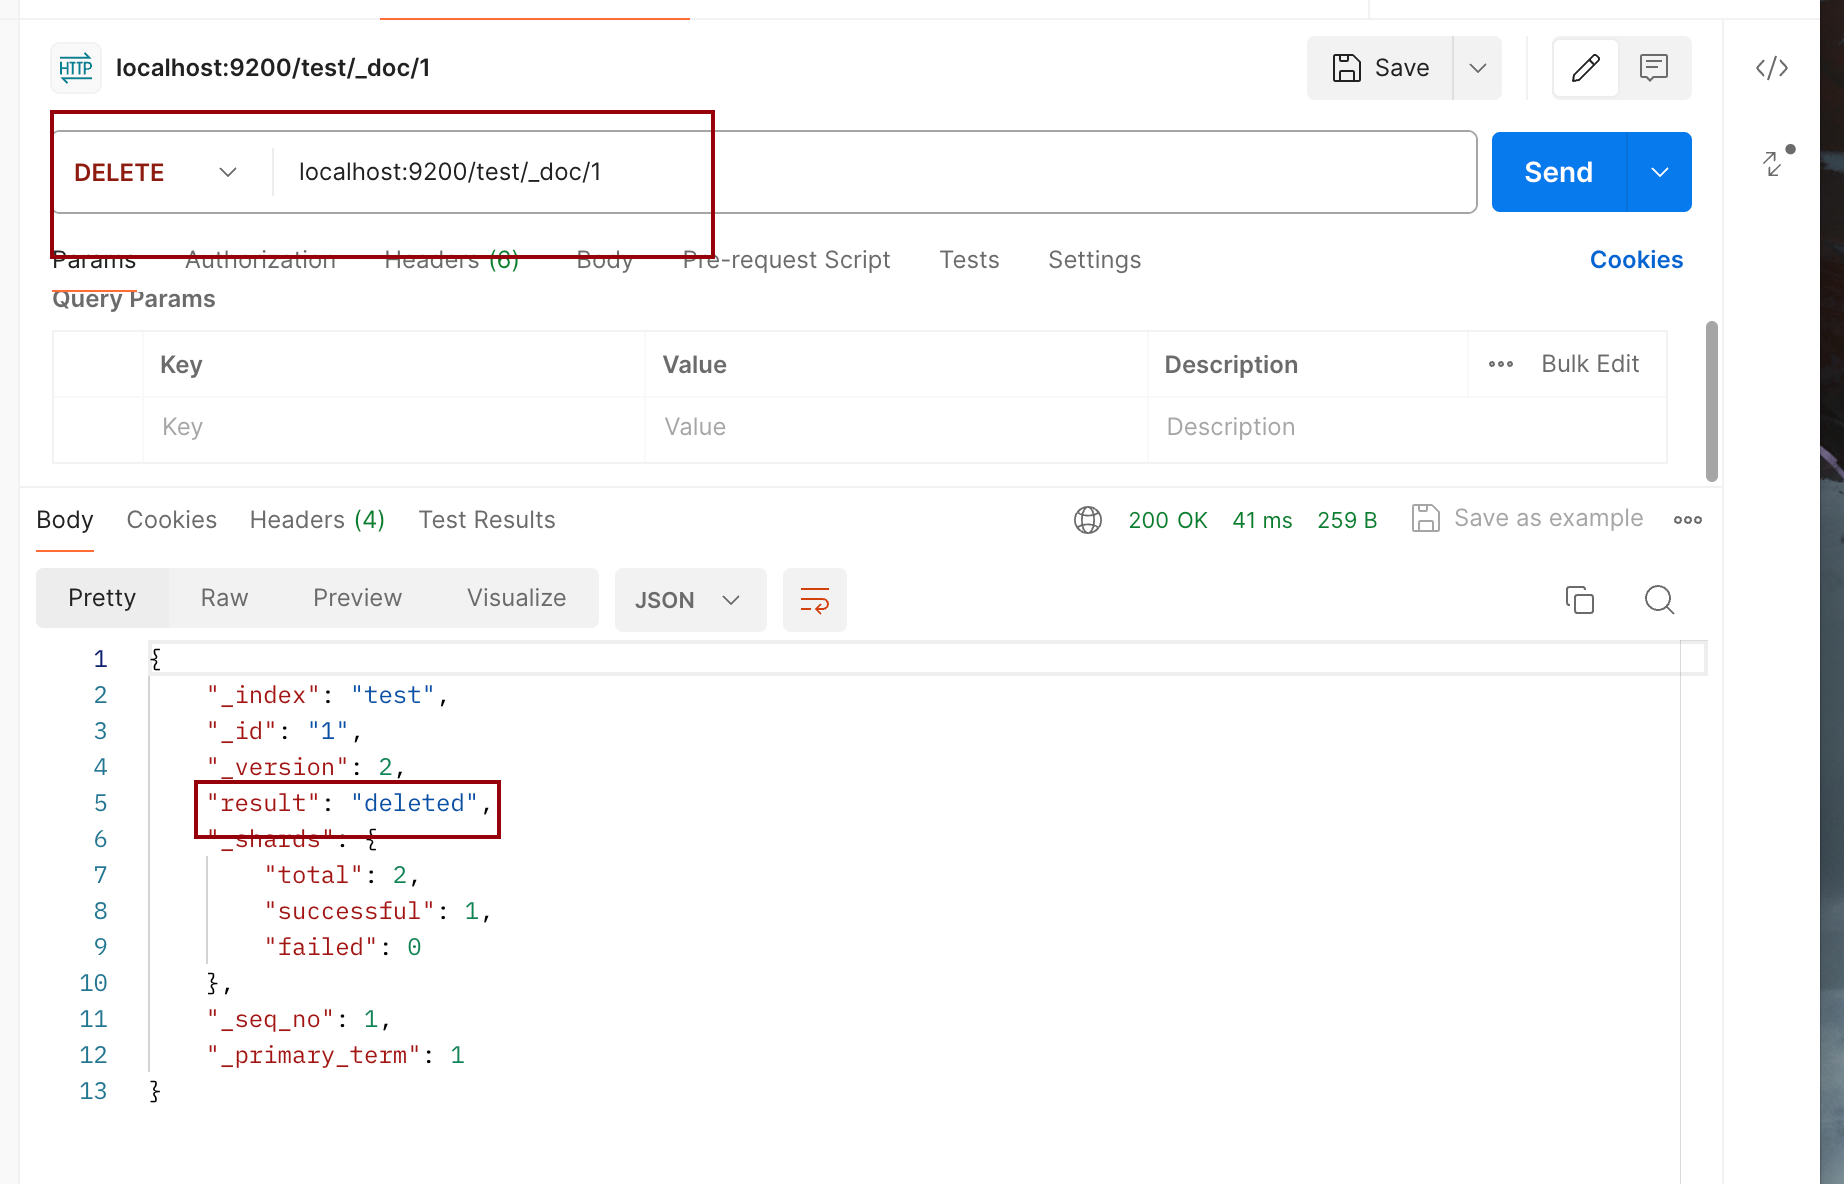
删除文档 DELETE
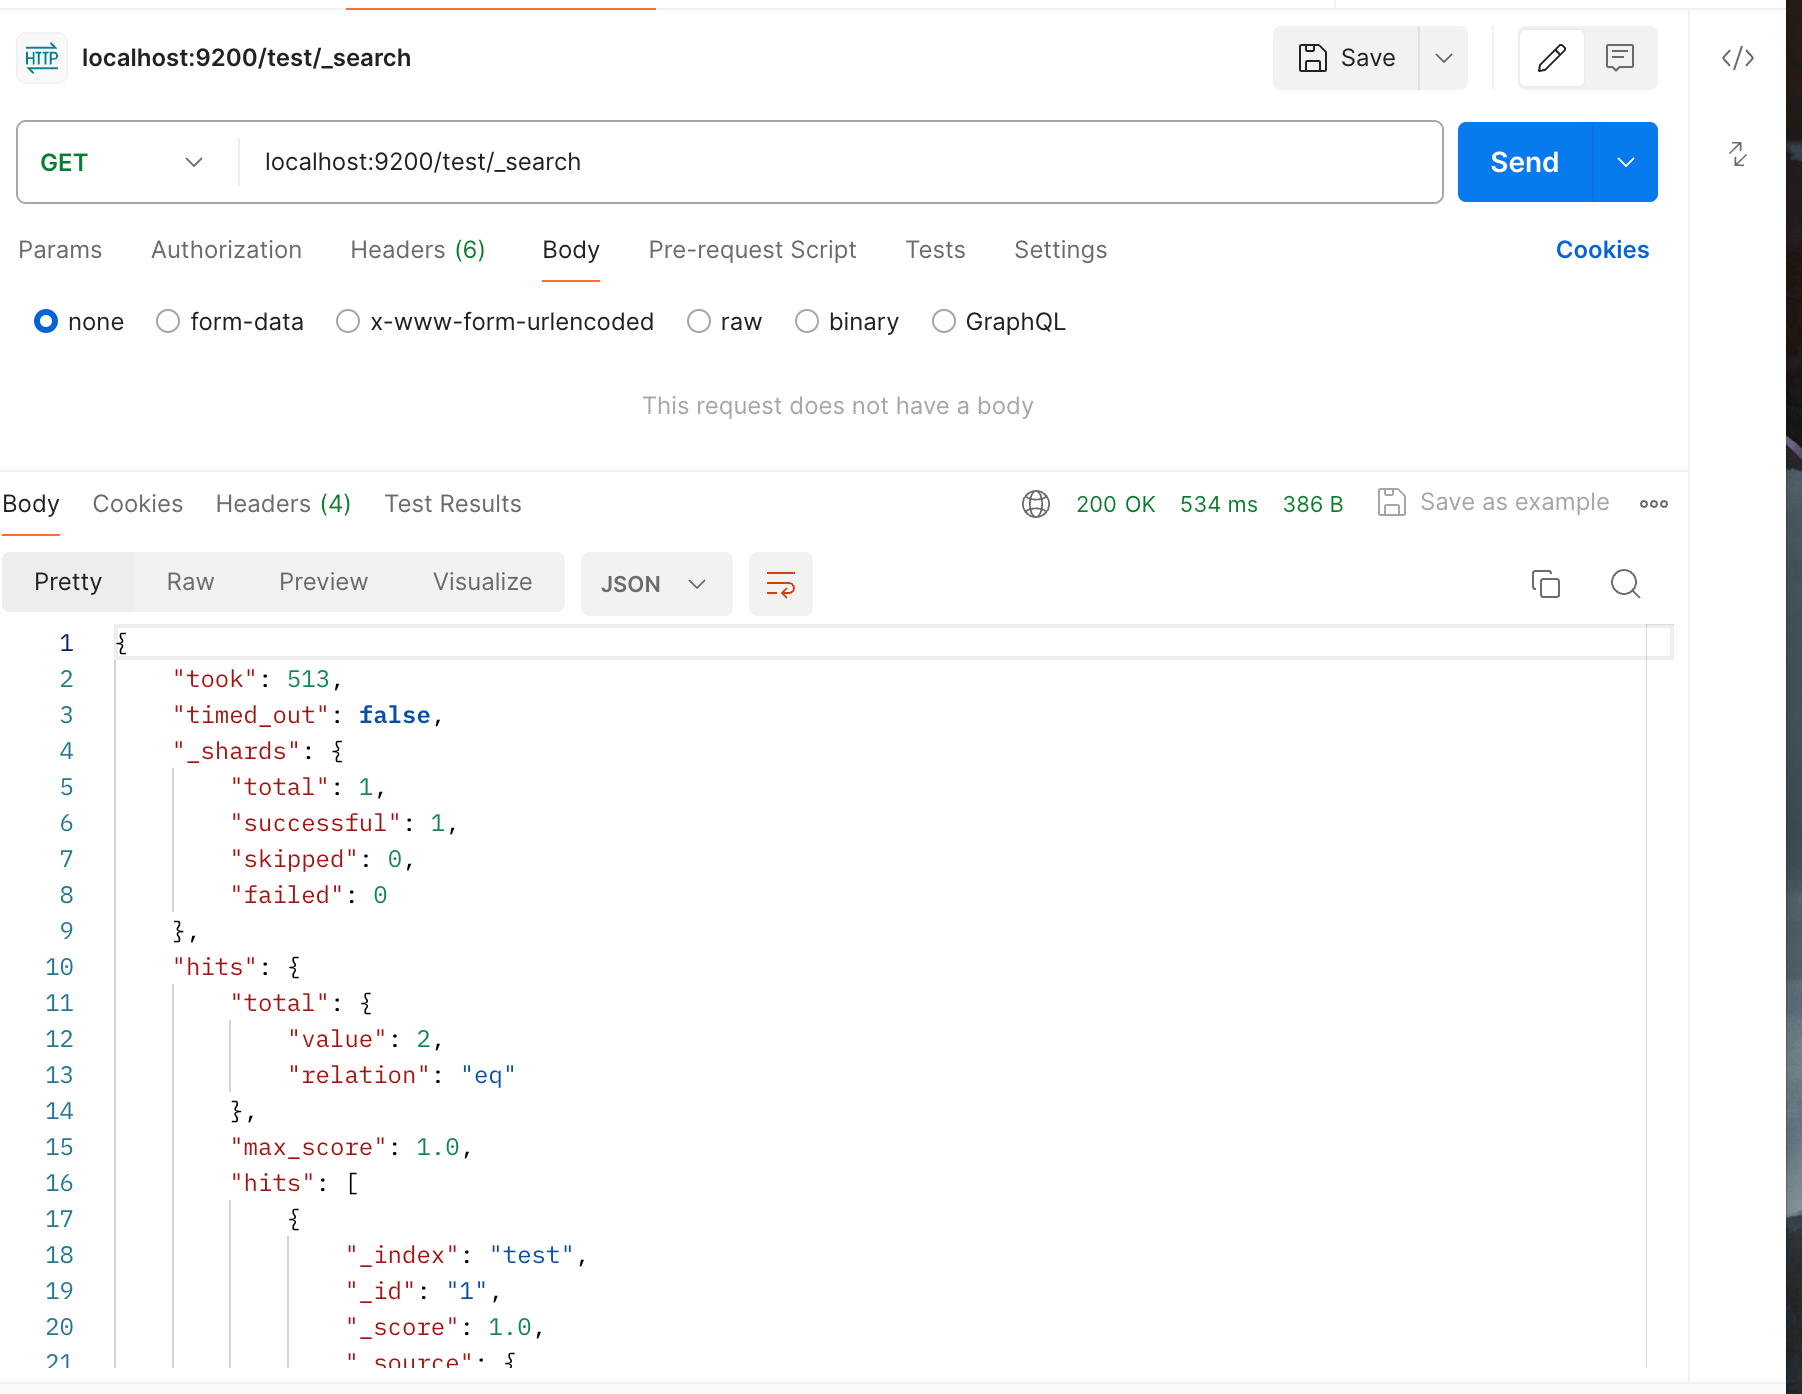
搜索_search GET
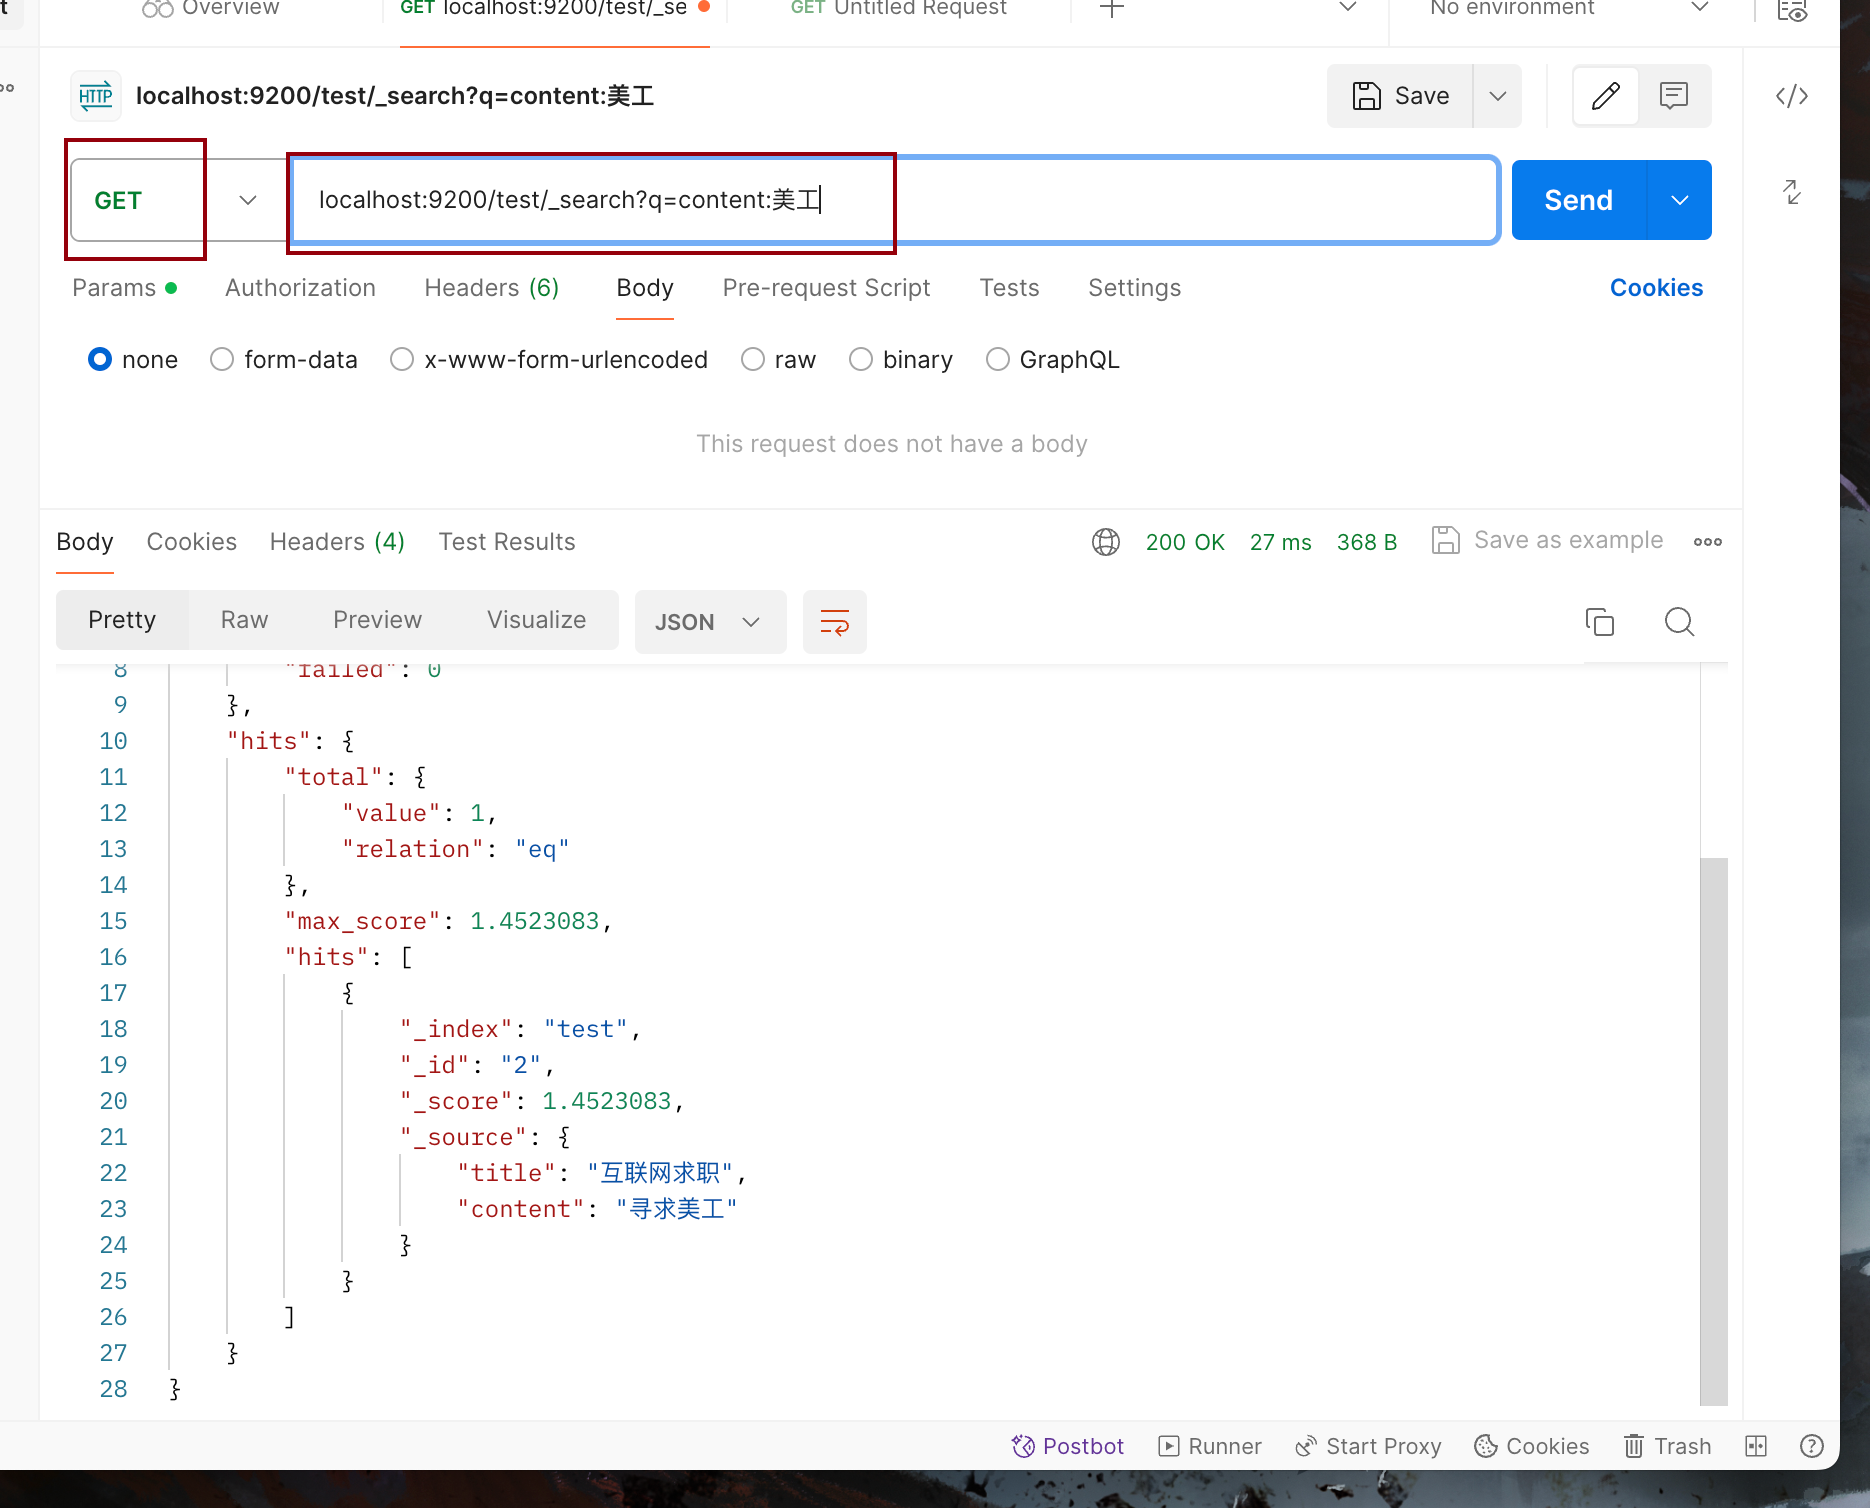
多个字段逐层匹配:复合json查询
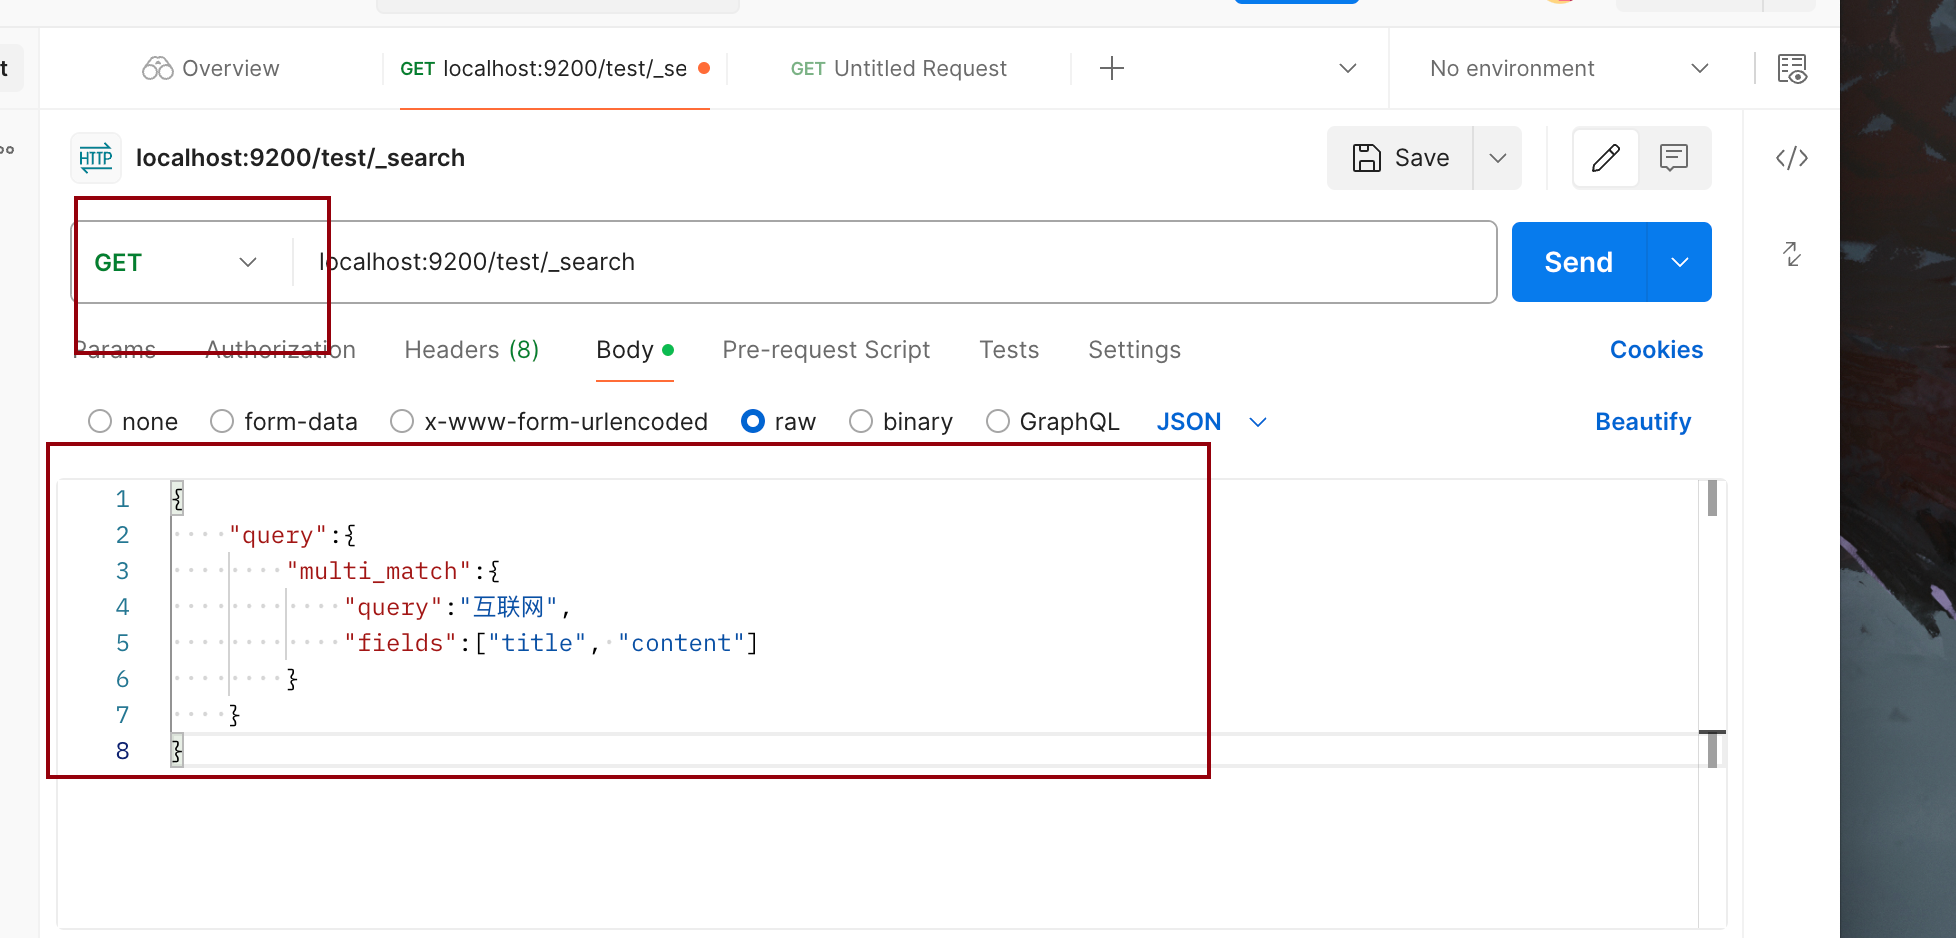
{
    "query":{
        "multi_match":{
            "query":"互联网",
            "fields":["title", "content"]
        }
    }
}
- 1
- 2
- 3
- 4
- 5
- 6
- 7
- 8
Spring整合ES
引入依赖
- spring-boot-starter-data-elasticsearch
配置Elasticsearch
- cluster-name、cluster-nodes
Spring Data Elasticsearch API
- ElasticsearchTemplate
- ElasticsearchRepository
引入依赖
<!-- https://mvnrepository.com/artifact/org.springframework.boot/spring-boot-starter-data-elasticsearch -->
<dependency>
    <groupId>org.springframework.boot</groupId>
    <artifactId>spring-boot-starter-data-elasticsearch</artifactId>
</dependency>
- 1
- 2
- 3
- 4
- 5
- 6
配置es
# Elasticsearch Properties
spring.elasticsearch.rest.uris=http://localhost:9200
#spring.data.elasticsearch.cluster-nodes=localhost:9300
- 1
- 2
- 3
解决netty冲突
在CommunityApplication.java中添加:在项目构建前运行。
@PostConstruct
public void init() {
    // 解决netty启动冲突问题
    // see Netty4Utils.setAvailableProcessors()
    System.setProperty("es.set.netty.runtime.available.processors", "false");
}
- 1
- 2
- 3
- 4
- 5
- 6
实现搜索功能
配置表和es索引的关系
在要搜索的实体类disscussPost中添加如下注解:
@Document(indexName = "discusspost")
public class DiscussPost {
    @Id
    private int id;

    @Field(type = FieldType.Integer)
    private int userId;

    //analyzer:存储时的分词器,searchAnalyzer:搜索时的分词器
    @Field(type = FieldType.Text, analyzer = "ik_max_word", searchAnalyzer = "ik_smart")
    private String title;

    @Field(type = FieldType.Text, analyzer = "ik_max_word", searchAnalyzer = "ik_smart")
    private String content;

    @Field(type = FieldType.Integer)
    private int type;
    @Field(type = FieldType.Integer)
    private int status;

    @Field(type = FieldType.Date)
    private java.util.Date createTime;

    @Field(type = FieldType.Integer)
    private int commentCount;

    @Field(type = FieldType.Double)
    private double score;
    ...
}
- 1
- 2
- 3
- 4
- 5
- 6
- 7
- 8
- 9
- 10
- 11
- 12
- 13
- 14
- 15
- 16
- 17
- 18
- 19
- 20
- 21
- 22
- 23
- 24
- 25
- 26
- 27
- 28
- 29
- 30
配置Elasticsearch Reposity
在dao下创建子包elasticsearch,并添加接口DiscussPostRepository:
package com.newcoder.community.dao.elasticsearch;

import com.newcoder.community.entity.DiscussPost;
import org.springframework.data.elasticsearch.repository.ElasticsearchRepository;
import org.springframework.stereotype.Repository;

@Repository
public interface DiscussPostRepository  extends ElasticsearchRepository<DiscussPost, Integer> {
    ;
}
- 1
- 2
- 3
- 4
- 5
- 6
- 7
- 8
- 9
- 10
- 11
- Repository是Spring提供的用于数据访问层的注解;
- 只需继承ElasticsearchRepository即可;
- 需要范形。DiscussPost目标实体类型,Integer主键类型
测试
插入帖子
@RunWith(SpringRunner.class)
@SpringBootTest
@ContextConfiguration(classes = CommunityApplication.class)
public class ElasticsearchTests {
    @Autowired
    private DiscussPostMapper discussMapper;

    @Autowired
    private DiscussPostRepository discussRepository;

    @Autowired
    private ElasticsearchTemplate elasticTemplate;

    @Test
    public void testInsert() {
        discussRepository.save(discussMapper.selectDiscussPostById(241));
        discussRepository.save(discussMapper.selectDiscussPostById(242));
        discussRepository.save(discussMapper.selectDiscussPostById(243));
    }
}
- 1
- 2
- 3
- 4
- 5
- 6
- 7
- 8
- 9
- 10
- 11
- 12
- 13
- 14
- 15
- 16
- 17
- 18
- 19
- 20
- 21
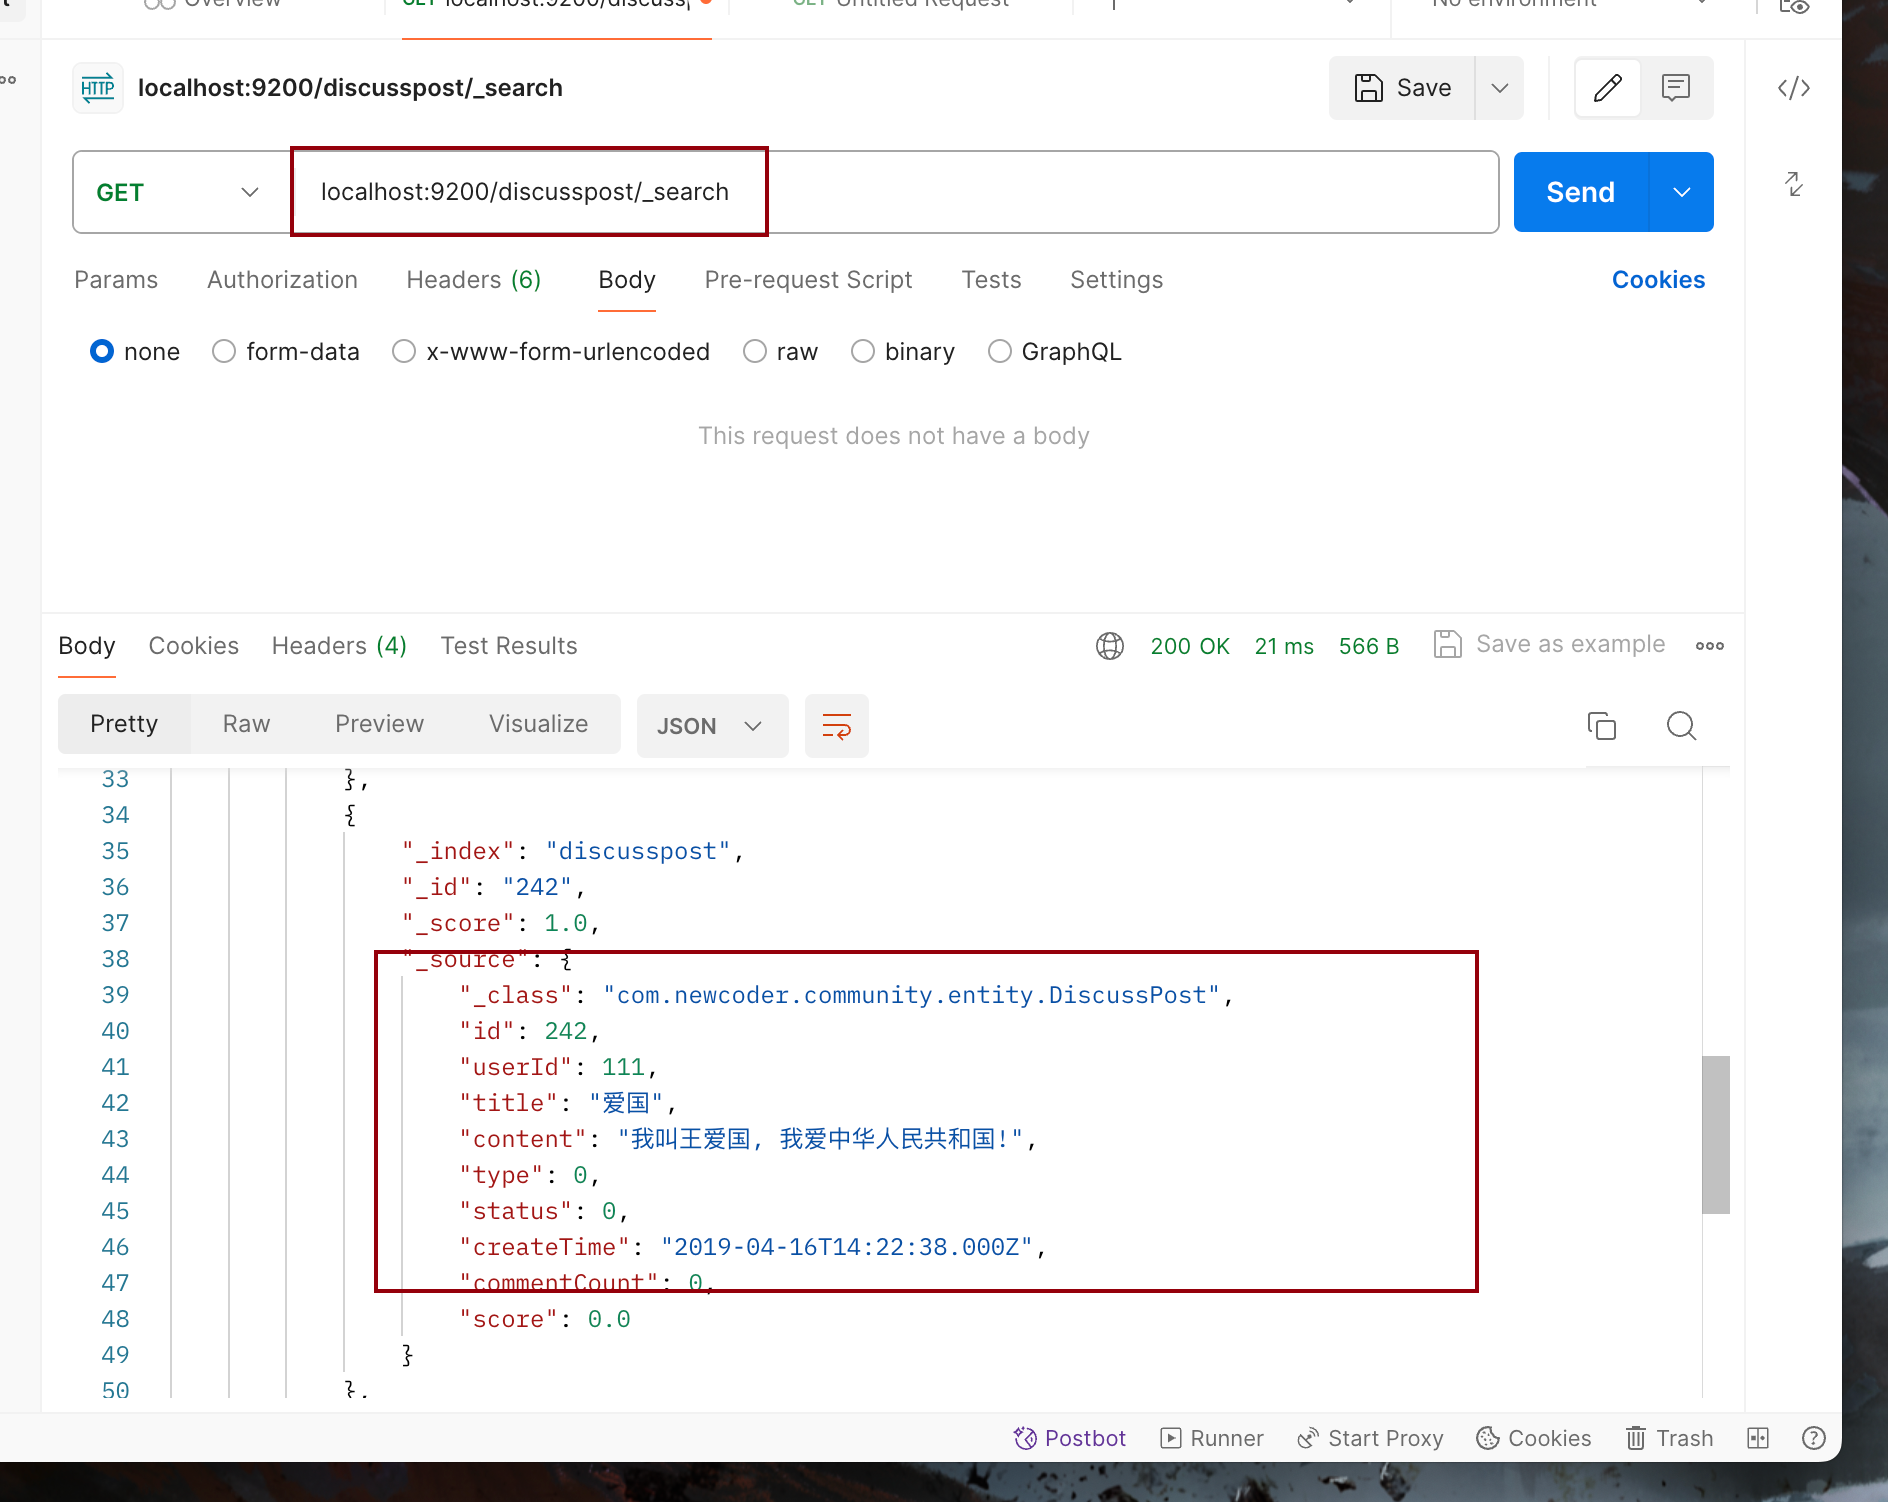
这样从mysql中传入3条数据到es,通过postman发请求看到插入数据成功:
批量入多个到es中:
 @Test
    public void testInsertList(){
        discussRepository.saveAll(discussMapper.selectDiscussPosts(101,0,100));
        discussRepository.saveAll(discussMapper.selectDiscussPosts(102,0,100));
        discussRepository.saveAll(discussMapper.selectDiscussPosts(103,0,100));
        discussRepository.saveAll(discussMapper.selectDiscussPosts(111,0,100));
        discussRepository.saveAll(discussMapper.selectDiscussPosts(112,0,100));
        discussRepository.saveAll(discussMapper.selectDiscussPosts(131,0,100));
        discussRepository.saveAll(discussMapper.selectDiscussPosts(132,0,100));
        discussRepository.saveAll(discussMapper.selectDiscussPosts(133,0,100));
        discussRepository.saveAll(discussMapper.selectDiscussPosts(134,0,100));
    }
- 1
- 2
- 3
- 4
- 5
- 6
- 7
- 8
- 9
- 10
- 11
- 12
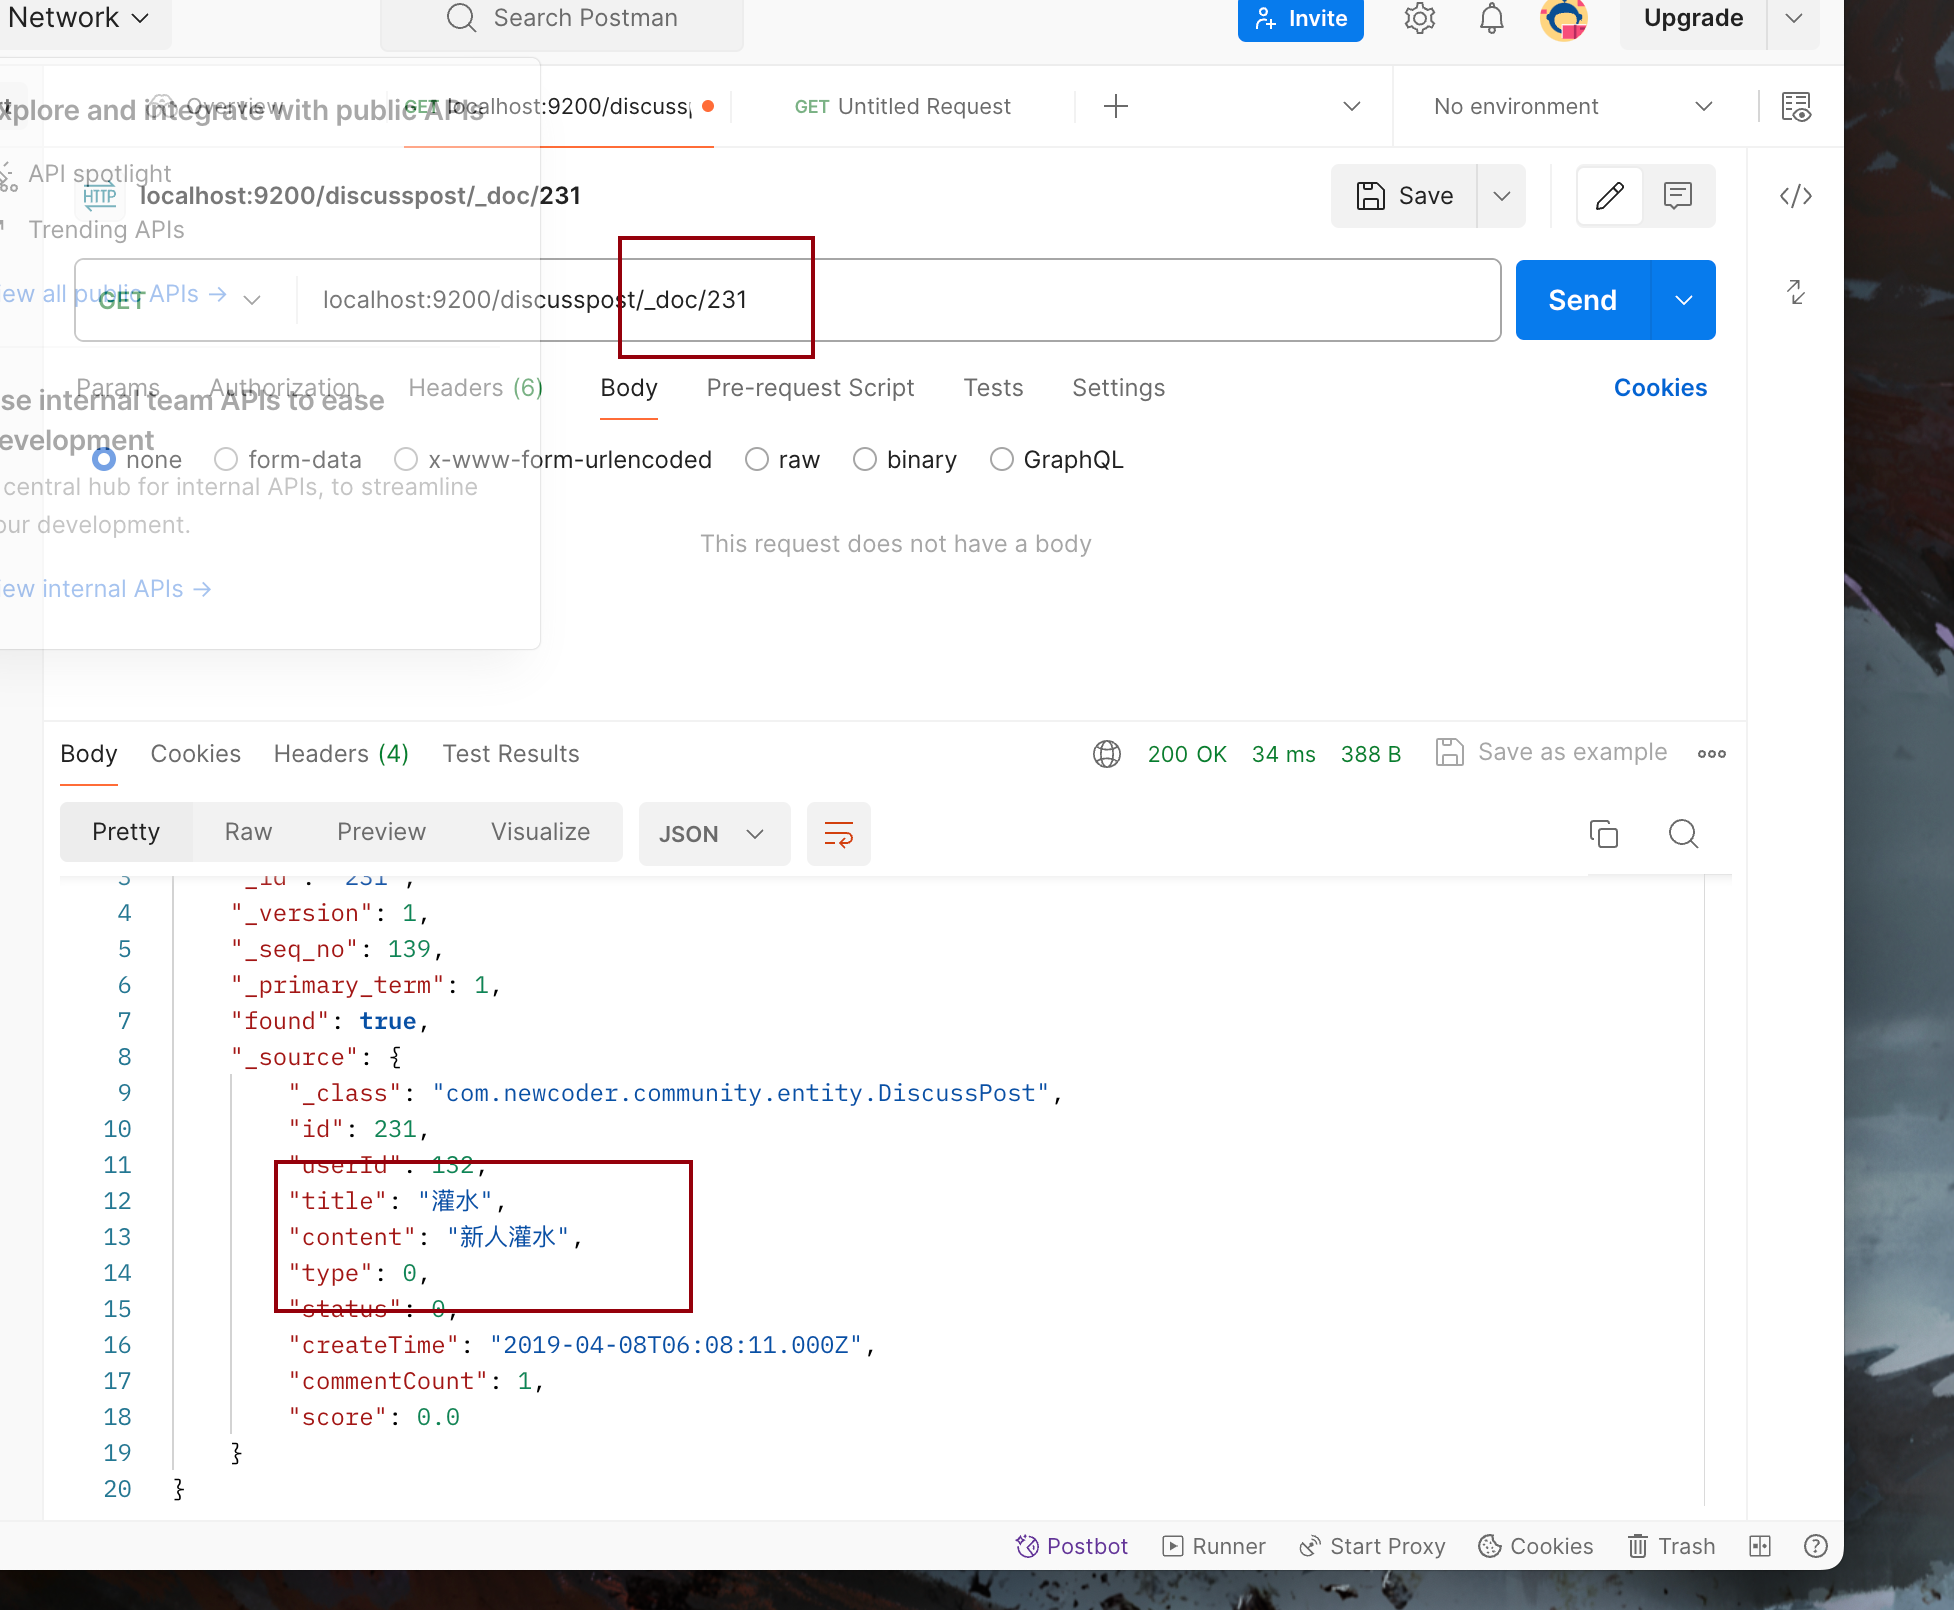
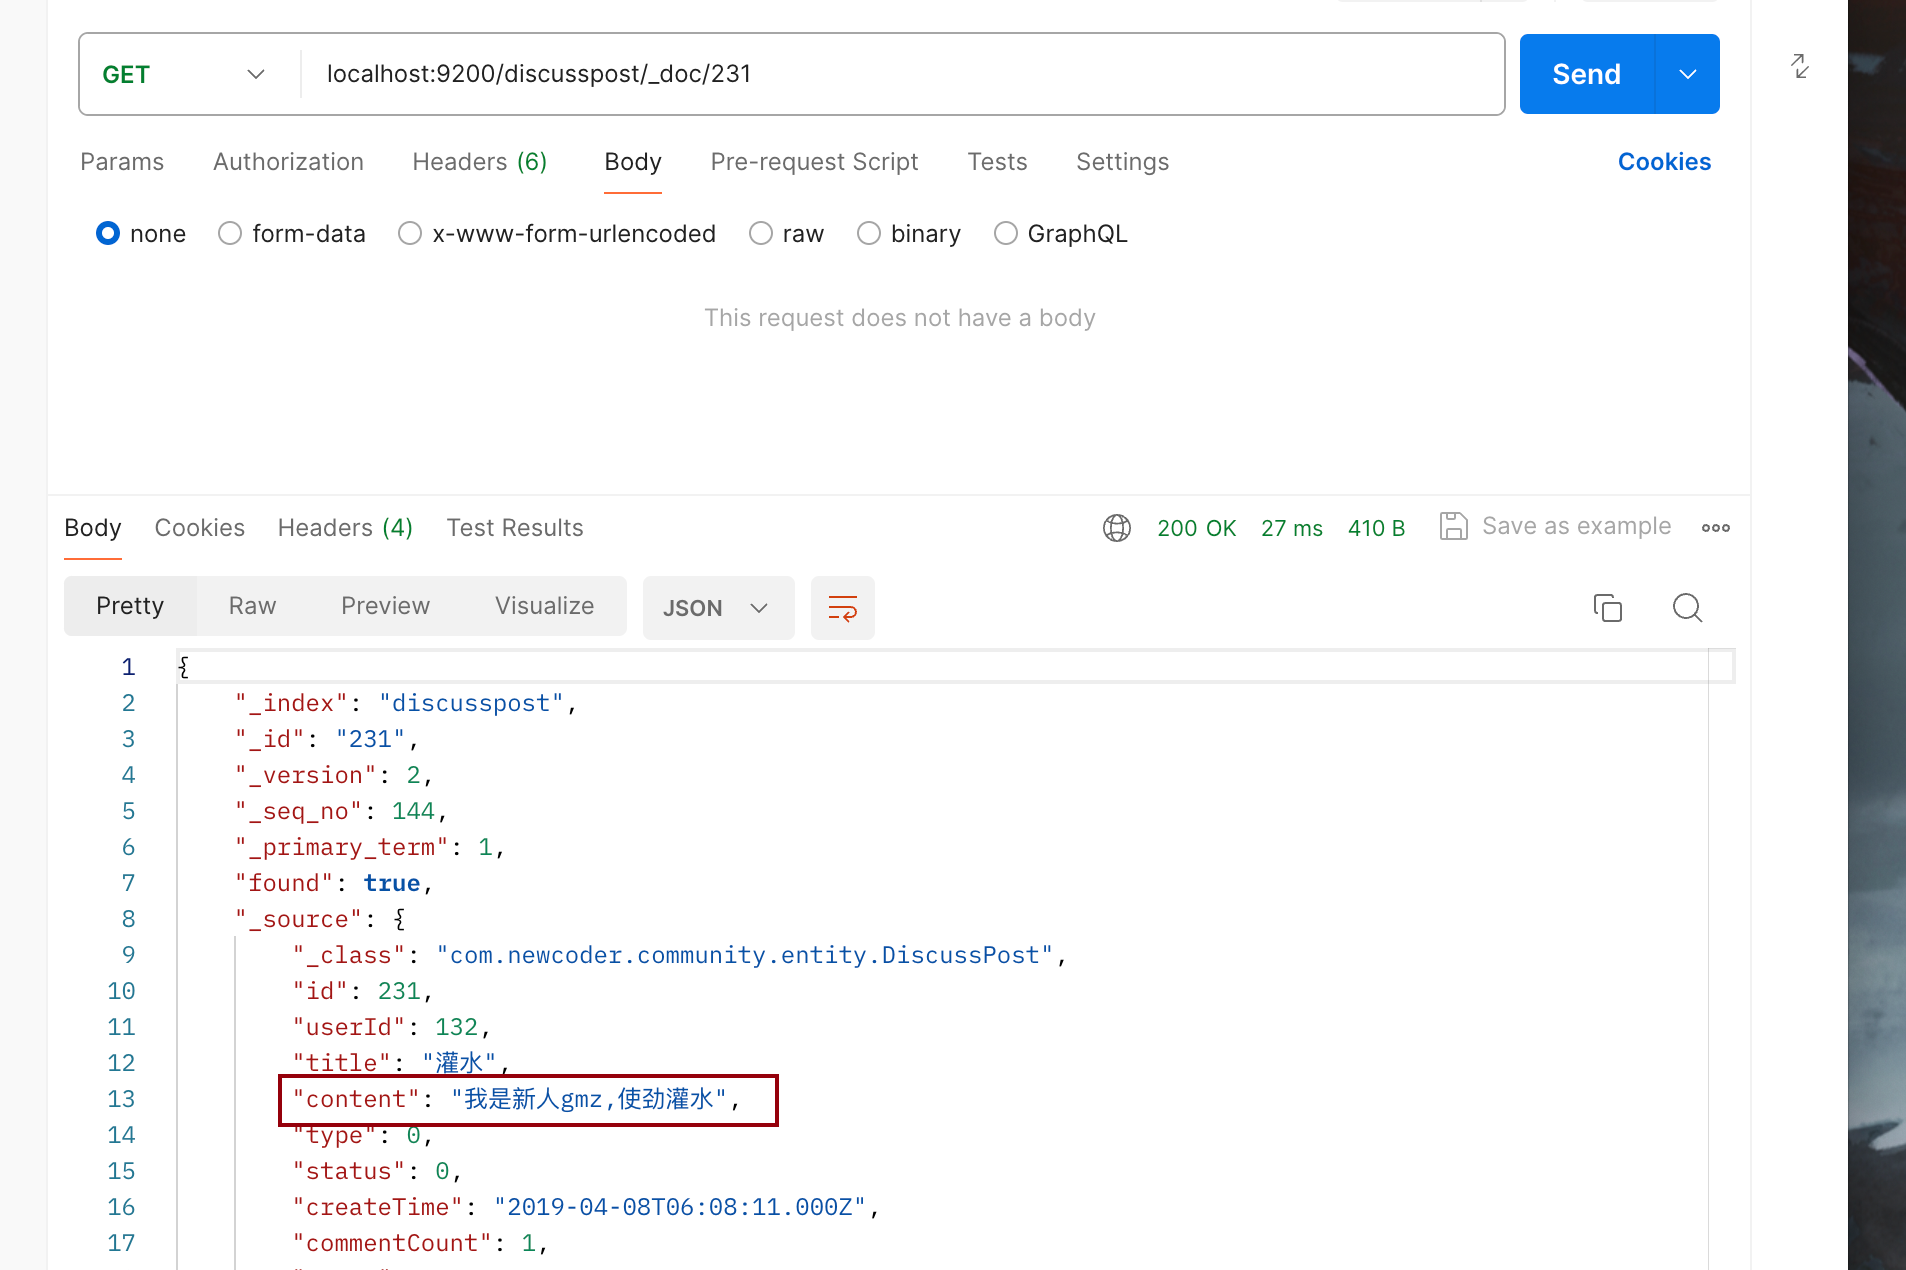
修改帖子:
    @Test
    public void testUpdate(){//修改先取出来再存进去
        DiscussPost post = discussMapper.selectDiscussPostById(231);
        post.setContent("我是新人gmz,使劲灌水");
        discussRepository.save(post);
    }
- 1
- 2
- 3
- 4
- 5
- 6
- 7
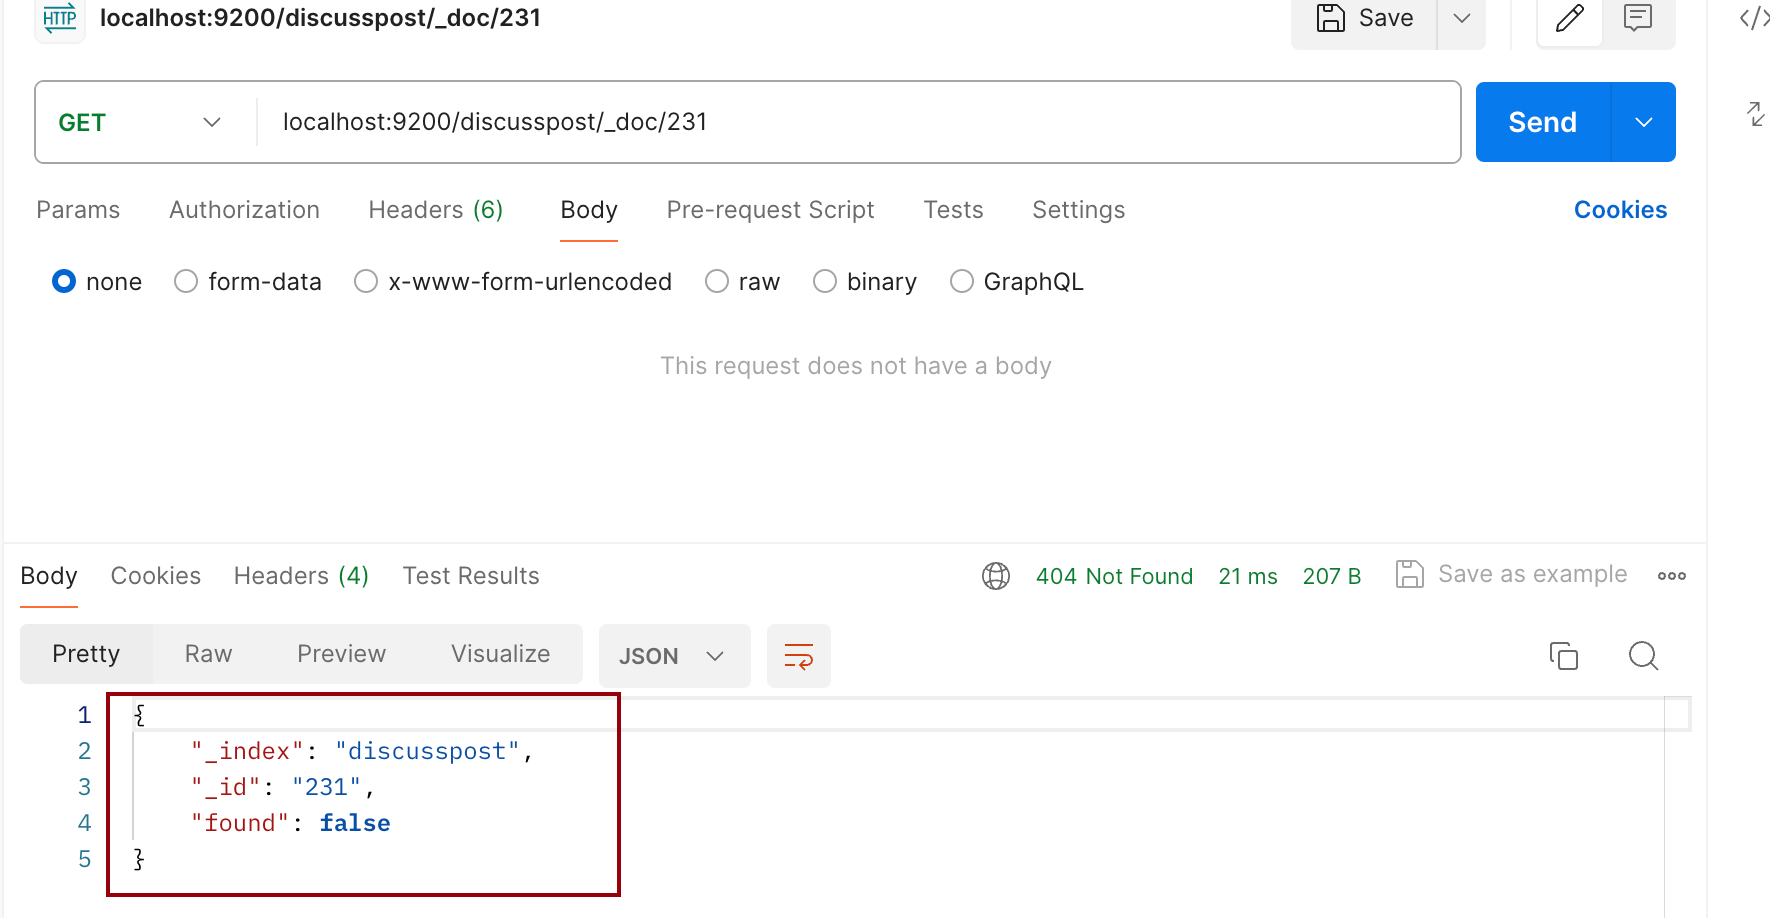
删除帖子
    @Test
    public void testDelete(){
        discussRepository.deleteById(231);
    }
- 1
- 2
- 3
- 4
(全删是deleteAll)
搜索帖子(这里版本问题混乱,先跳过)
@Test
    public void matchQuery(){

        Query query = NativeQuery.builder().withQuery(q -> q
                .match(m -> m
                        .field("title")//字段
                        .field("content")
                        .query("互联网寒冬") //值
                ))
                .withPageable(Pageable.ofSize(10).withPage(0))
                .withSort(Sort.by("type").descending())
                .withSort(Sort.by("score").descending())
                .withSort(Sort.by("createTime").descending())
                .build();
        SearchHits<DiscussPost> searchHits = restTemplate.search(query, DiscussPost.class);
        // 获得searchHits,进行遍历得到content
        List<DiscussPost> posts = new ArrayList<>();
//        System.out.println("总计:" + searchHits.getTotalHits());
        searchHits.forEach(hit -> {
            posts.add(hit.getContent());
        });
//        System.out.println(posts);
//        System.out.println("实际:" + posts.size());

    }
- 1
- 2
- 3
- 4
- 5
- 6
- 7
- 8
- 9
- 10
- 11
- 12
- 13
- 14
- 15
- 16
- 17
- 18
- 19
- 20
- 21
- 22
- 23
- 24
- 25
开发社区搜索功能
搜索服务
- 将帖子保存至Elasticsearch服务器。 - 从Elasticsearch服务器删除帖子。
- 从Elasticsearch服务器搜索帖子。
发布事件(表现层)
- 发布帖子时,将帖子异步的提交到Elasticsearch服务器。
- 增加评论时,将帖子异步的提交到Elasticsearch服务器(相当于修改帖子 )。
- 在消费组件中增加一个方法,消费帖子发布事件。
显示结果(动态模版)#
- 在控制器中处理搜索请求,在HTML上显示搜索结果。
搜索服务
首先解决一个问题,在DiscussPostMapper中insert方法添加KeyPropety:
 <insert id="insertDiscussPost" parameterType="DiscussPost" keyProperty="id">
        insert into discuss_post (<include refid="insertFields"></include>)
        values (#{userId}, #{title}, #{content}, #{type}, #{status}, #{createTime}, #{commentCount}, #{score})
    </insert>
- 1
- 2
- 3
- 4
(不然主键无法映射到实体类)
然后编写service类:
@Service
public class ElasticsearchService {
    @Autowired
    private DiscussPostRepository discussPostRepository;

    @Autowired
    private ElasticsearchTemplate restTemplate;

    public void saveDiscussPost(DiscussPost post) {
        discussPostRepository.save(post);
    }

    public void deleteDiscussPost(int id) {
        discussPostRepository.deleteById(id);
    }

    public ArrayList<DiscussPost> searchDiscussPost(String keyword, int current, int limit) {
        Query query = NativeQuery.builder().withQuery(q -> q
                        .match(m -> m
                                .field("title")//字段
                                .field("content")
                                .query(keyword) //值
                        ))
                .withPageable(Pageable.ofSize(limit).withPage(current))
                .withSort(Sort.by("type").descending())
                .withSort(Sort.by("score").descending())
                .withSort(Sort.by("createTime").descending())
                .build();

        SearchHits<DiscussPost> searchHits = restTemplate.search(query, DiscussPost.class);
        // 获得searchHits,进行遍历得到content
        ArrayList<DiscussPost> posts = new ArrayList<>();
//        System.out.println("总计:" + searchHits.getTotalHits());
        searchHits.forEach(hit -> {
            posts.add(hit.getContent());
        });
//        System.out.println(posts);
//        System.out.println("实际:" + posts.size());
        return posts;
    }


}
- 1
- 2
- 3
- 4
- 5
- 6
- 7
- 8
- 9
- 10
- 11
- 12
- 13
- 14
- 15
- 16
- 17
- 18
- 19
- 20
- 21
- 22
- 23
- 24
- 25
- 26
- 27
- 28
- 29
- 30
- 31
- 32
- 33
- 34
- 35
- 36
- 37
- 38
- 39
- 40
- 41
- 42
- 43
表现层:发布事件
发帖触发
DiscussPostController->addDiscussPost:
discussPostService.addDiscussPost(post);

        //发帖子之后,触发发帖事件,将帖子存入es服务器
        Event event = new Event()
                .setTopic(TOPIC_PUBLISH)
                .setUserId(user.getId())
                .setEntityType(ENTITY_TYPE_POST)
                .setEntityId(post.getId());
        eventProducer.fireEvent(event);


        // 报错的情况,将来统一处理.
///
- 1
- 2
- 3
- 4
- 5
- 6
- 7
- 8
- 9
- 10
- 11
- 12
- 13
评论触发
CommentController→ addComment
 //触发发帖时间,存到es服务器
        if(comment.getEntityType() == ENTITY_TYPE_POST) {
            event = new Event()
                    .setTopic(TOPIC_PUBLISH)
                    .setUserId(comment.getUserId())
                    .setEntityType(ENTITY_TYPE_POST)
                    .setEntityId(discussPostId);
            eventProducer.fireEvent(event);
        }
- 1
- 2
- 3
- 4
- 5
- 6
- 7
- 8
- 9
消费事件
EventConsumer:
//消费发帖事件
@KafkaListener(topics = {TOPIC_PUBLISH})
public void handlePublishMessage(ConsumerRecord record){
    if(record == null || record.value() == null){
        logger.error("消息的内容为空");
        return;
    }

    Event event = JSONObject.parseObject(record.value().toString(), Event.class);
    if(event == null){
        logger.error("消息格式错误");
        return;
    }

    //查询帖子
    DiscussPost post = discussPostService.findDiscussPostById(event.getEntityId());
    //存入es
    elasticsearchService.saveDiscussPost(post);

}
- 1
- 2
- 3
- 4
- 5
- 6
- 7
- 8
- 9
- 10
- 11
- 12
- 13
- 14
- 15
- 16
- 17
- 18
- 19
- 20
控制层查询数据
@Controller
public class SearchController implements CommunityConstant {
    @Autowired
    private ElasticsearchService elasticsearchService;

    @Autowired
    private UserService userService;

    @Autowired
    private LikeService likeService;

    //search?keyword=xxx
    @RequestMapping(path = "/search", method = RequestMethod.GET)
    public String search(String keyword, Page page, Model model) {
        //搜索帖子
        ArrayList<DiscussPost> searchResult = elasticsearchService.searchDiscussPost(keyword, page.getCurrent() - 1, page.getLimit());

        //处理数据聚合数据
        List<Map<String,Object>> discussPosts = new ArrayList<>();
        if(searchResult != null){
            for(DiscussPost post : searchResult){
                Map<String,Object> map = new HashMap<>();
                //帖子
                map.put("post",post);
                //作者
                map.put("user",userService.findUserById(post.getUserId()));
                //点赞数量
                map.put("likeCount",likeService.findEntityLikeCount(ENTITY_TYPE_POST,post.getId()));
                discussPosts.add(map);
            }
        }
        //传入模版
        model.addAttribute("discussPosts",discussPosts);
        model.addAttribute("keyword",keyword);

        //分页信息
        page.setPath("/search?keyword=" + keyword);
        page.setRows(searchResult == null ? 0 : searchResult.size());

        return "/site/search";
    }

}
- 1
- 2
- 3
- 4
- 5
- 6
- 7
- 8
- 9
- 10
- 11
- 12
- 13
- 14
- 15
- 16
- 17
- 18
- 19
- 20
- 21
- 22
- 23
- 24
- 25
- 26
- 27
- 28
- 29
- 30
- 31
- 32
- 33
- 34
- 35
- 36
- 37
- 38
- 39
- 40
- 41
- 42
- 43
- 44
修改模版
修改index.html的header
<!-- 搜索 -->
<form class="form-inline my-2 my-lg-0" method="get" th:action="@{/search}">
    <input class="form-control mr-sm-2" type="search" aria-label="Search" name="keyword" th:value="${keyword}"/>
    <button class="btn btn-outline-light my-2 my-sm-0" type="submit">搜索</button>
</form>
- 1
- 2
- 3
- 4
- 5
修改search.html
<li class="media pb-3 pt-3 mb-3 border-bottom" th:each="map:${discussPosts}">
    <img th:src="${map.user.headerUrl}" class="mr-4 rounded-circle" alt="用户头像">
    <div class="media-body">
        <h6 class="mt-0 mb-3">
            <a th:href="@{|/discuss/detail/${map.post.id}|}" th:utext="${map.post.title}">备战<em>春招</em>,面试刷题跟他复习,一个月全搞定!</a>
        </h6>
        <div class="mb-3" th:utext="${map.post.content}">
            金三银四的金三已经到了,你还沉浸在过年的喜悦中吗? 如果是,那我要让你清醒一下了:目前大部分公司已经开启了内推,正式网申也将在3月份陆续开始,金三银四,<em>春招</em>的求职黄金时期已经来啦!!! 再不准备,作为19应届生的你可能就找不到工作了。。。作为20届实习生的你可能就找不到实习了。。。 现阶段时间紧,任务重,能做到短时间内快速提升的也就只有算法了, 那么算法要怎么复习?重点在哪里?常见笔试面试算法题型和解题思路以及最优代码是怎样的? 跟左程云老师学算法,不仅能解决以上所有问题,还能在短时间内得到最大程度的提升!!!
        </div>
        <div class="text-muted font-size-12">
            <u class="mr-3" th:utext="${map.user.username}">寒江雪</u>
            发布于 <b th:text="${#dates.format(map.post.createTime,'yyyy-MM-dd HH:mm:ss')}">2019-04-15 15:32:18</b>
            <ul class="d-inline float-right">
                <li class="d-inline ml-2">赞 <i th:text = "${map.likeCount}"></i></li>
                <li class="d-inline ml-2">|</li>
                <li class="d-inline ml-2">回复 <i th:text = "${map.post.commentCount}"></i></li>
            </ul>
        </div>
    </div>
</li>
- 1
- 2
- 3
- 4
- 5
- 6
- 7
- 8
- 9
- 10
- 11
- 12
- 13
- 14
- 15
- 16
- 17
- 18
- 19
- 20
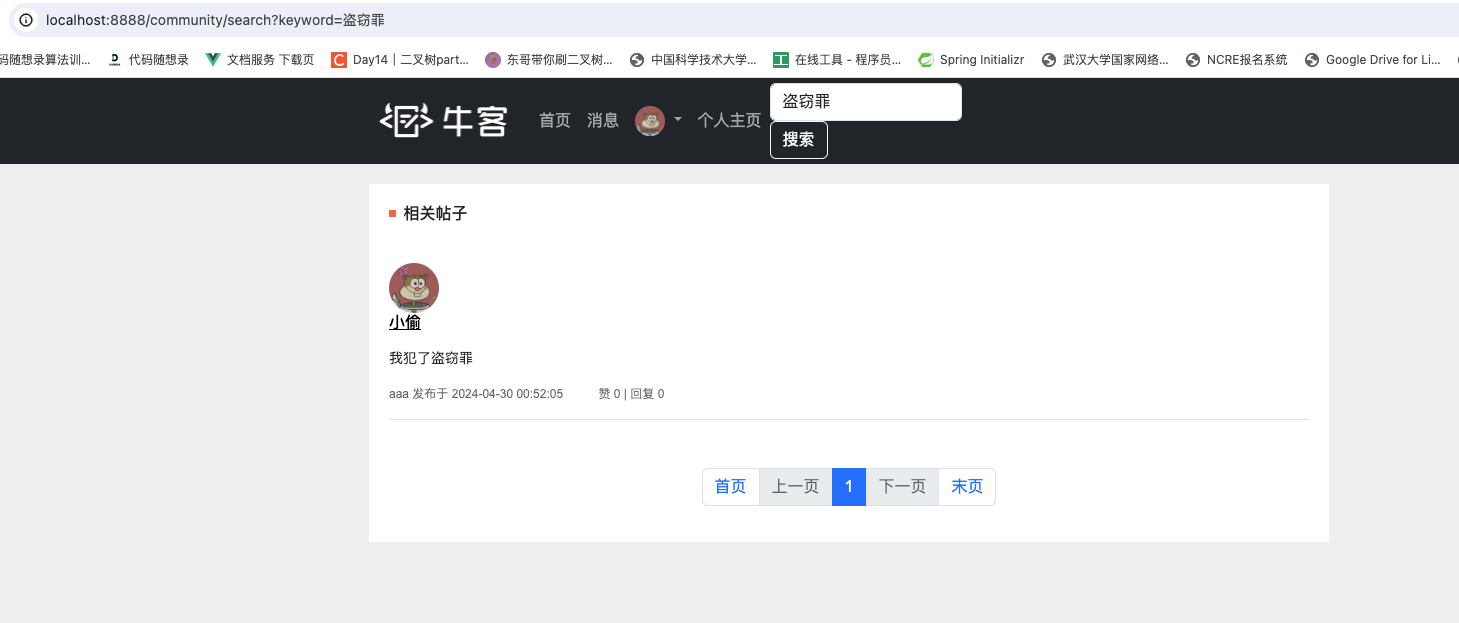
测试效果
