- 1MongoDb可视化管理工具nosqlbooster4mongo的使用_nosqlbooster怎么用账号密码登录mango
- 2# Jedis、Redission、Lettuce 操作Redis、常用Redis操作方法_redission lettuce
- 3【免费题库】华为OD机试 - 模拟数据序列化传输(Java & JS & Python & C & C++)_java 模拟数据序列化传输
- 4IT专业入门,高考假期预习指南
- 5计算机启动一下就停机,电脑主机亮一下就灭了,电脑开机3秒就循环重启怎么办...
- 6springboot创建及使用多线程的几种方式_springboot创建线程
- 7了解大型语言模型中的思维链(Thought Chain)_大模型思维链
- 8python(Django之html模板继承)_{% block title %}主页{% endblock %} {% block css %}
- 9Ai-321’发现Ai工具eSheep 这个平台完全免费,跑图超级快_widget `esheep-midjourney-prompt` not found:esheep
- 10git commit 规范_git commit -m 规范
2024年最全医学图像分割 3D nnUNet全流程快速实现_医学图像分割步骤(1),2024年最新牛逼_图像分割最新
赞
踩
网上学习资料一大堆,但如果学到的知识不成体系,遇到问题时只是浅尝辄止,不再深入研究,那么很难做到真正的技术提升。
一个人可以走的很快,但一群人才能走的更远!不论你是正从事IT行业的老鸟或是对IT行业感兴趣的新人,都欢迎加入我们的的圈子(技术交流、学习资源、职场吐槽、大厂内推、面试辅导),让我们一起学习成长!
import os
path = r’*/DATASET’ # 想要存放nnUNet数据、模型的地方
os.mkdir(os.path.join(path, ‘nnUNet_raw’))
os.mkdir(os.path.join(path, ‘nnUNet_preprocessed’))
os.mkdir(os.path.join(path, ‘nnUNet_trained_models’))
os.mkdir(os.path.join(path, ‘nnUNet_raw’, ‘nnUNet_raw_data’))
os.mkdir(os.path.join(path, ‘nnUNet_raw’, ‘nnUNet_cropped_data’))
确定好存放数据的位置后,修改nnUNet代码里的paths.py文件,将原始的DATASET路径换成自己的:  > > PS:如果不改代码的话,则默认是需要设置环境变量的,即参考链接里的方式 > > > #### 2.2 数据集转换 ① 在nnUNet\_raw\_data文件夹下创建自己的任务文件夹,格式:**TaskXXX\_任务名**,比如Task101\_PC 该文件夹下创建以下文件夹:**imagesTr、imagesTs、labelsTr、labelsTs、inferTs**,分别是训练数据、测试数据、训练标签、测试标签、测试集推理结果存放;其中前三个是必需要有的 ② 把自己的数据集按上述方式放入nnUNet文件夹,注意数据名字需要改成**名字\_000X**的nnUNet格式,X从0开始,代表数据模态 这里提供我处理时的代码,可以依据这个修改
- 1
- 2
- 3
- 4
- 5
- 6
- 7
- 8
- 9
- 10
- 11
- 12
- 13
- 14
- 15
- 16
- 17
- 18
- 19
- 20
- 21
- 22
- 23
- 24
- 25
“”"
创建nnuent需要的文件路径,并将数据复制到对应路径并改名
“”"
import os
import shutil
import numpy as np
创建文件夹
img_tr_path = r’*/DATASET/nnUNet_raw/nnUNet_raw_data/Task101_PC/imagesTr’
img_ts_path = r’*/DATASET/nnUNet_raw/nnUNet_raw_data/Task101_PC/imagesTs’
label_tr_path = r’*/DATASET/nnUNet_raw/nnUNet_raw_data/Task101_PC/labelsTr’
label_ts_path = r’*/DATASET/nnUNet_raw/nnUNet_raw_data/Task101_PC/labelsTs’
infer_ts_path = r’*/DATASET/nnUNet_raw/nnUNet_raw_data/Task101_PC/inferTs’
if not os.path.isdir(img_tr_path):
os.mkdir(img_tr_path)
os.mkdir(img_ts_path)
os.mkdir(label_tr_path)
os.mkdir(label_ts_path)
os.mkdir(infer_ts_path)
获取训练、测试集的ID,按需修改
train_id = []
test_id = []
复制数据文件并改成nnunet的命名形式
data_folder = r’*’ # 个人数据集的文件夹路径
for patient_id in train_id:
# 预处理文件夹下文件名,我这里有两种数据模态PET/CT,以及一个分割标签mask
pet_file = os.path.join(data_folder, str(patient_id)+‘_pet_pre.nii.gz’)
ct_file = os.path.join(data_folder, str(patient_id)+‘_ct_pre.nii.gz’)
mask_file = os.path.join(data_folder, str(patient_id)+‘_mask_pre.nii.gz’)
# nnunet文件夹文件名,nnUNet通过_0000和_0001这种形式分辨多模态输入
pet_new_file = os.path.join(img_tr_path, str(patient_id)+‘_image_0000.nii.gz’)
ct_new_file = os.path.join(img_tr_path, str(patient_id) + ‘_image_0001.nii.gz’)
mask_new_file = os.path.join(label_tr_path, str(patient_id) + ‘_image.nii.gz’)
# 复制
shutil.copyfile(pet_file, pet_new_file)
shutil.copyfile(ct_file, ct_new_file)
shutil.copyfile(mask_file, mask_new_file)
for patient_id in test_id:
# 预处理文件夹下文件名
pet_file = os.path.join(data_folder, str(patient_id) + ‘_pet_pre.nii.gz’)
ct_file = os.path.join(data_folder, str(patient_id) + ‘_ct_pre.nii.gz’)
mask_file = os.path.join(data_folder, str(patient_id)+‘_mask_pre.nii.gz’)
# nnunet文件夹文件名
pet_new_file = os.path.join(img_ts_path, str(patient_id) + ‘_image_0000.nii.gz’)
ct_new_file = os.path.join(img_ts_path, str(patient_id) + ‘_image_0001.nii.gz’)
mask_new_file = os.path.join(label_ts_path, str(patient_id) + ‘_image.nii.gz’)
# 复制
shutil.copyfile(pet_file, pet_new_file)
shutil.copyfile(ct_file, ct_new_file)
shutil.copyfile(mask_file, mask_new_file)
③制作dataset.json,nnUNet需要提供一个json文件来描述你的数据集,通过以下代码生成,这个代码nnUNet文件夹中有提供,这里是我修改后的版本,实际需要各自修改后使用
- 1
- 2
- 3
- 4
- 5
“”"
创建数据集的json
“”"
import glob
import os
import re
import json
from collections import OrderedDict
def list_sort_nicely(l):
“”" Sort the given list in the way that humans expect.
“”"
def tryint(s):
try:
return int(s)
except:
return s
def alphanum\_key(s):
    """ Turn a string into a list of string and number chunks.
- 1
- 2
“z23a” -> [“z”, 23, “a”]
“”"
return [tryint© for c in re.split(‘([0-9]+)’, s)]
l.sort(key=alphanum_key)
return l
path_originalData = “/data/nas/heyixue_group/PCa//DATASET_nfs/nnUNet_raw/nnUNet_raw_data/Task108_PCa_256/”
if not os.path.exists(path_originalData):
os.mkdir(path_originalData+“imagesTr/”)
os.mkdir(path_originalData+“labelsTr/”)
os.mkdir(path_originalData+“imagesTs/”)
os.mkdir(path_originalData+“labelsTs/”)
train_image = list_sort_nicely(glob.glob(path_originalData+“imagesTr/*”))
train_label = list_sort_nicely(glob.glob(path_originalData+“labelsTr/*”))
test_image = list_sort_nicely(glob.glob(path_originalData+“imagesTs/*”))
test_label = list_sort_nicely(glob.glob(path_originalData+“labelsTs/*”))
文件夹里已经带后缀了,并且有两个模态
train_image = [“{}”.format(patient_no.split(‘/’)[-1]) for patient_no in train_image]
train_label = [“{}”.format(patient_no.split(‘/’)[-1]) for patient_no in train_label]
test_image = [“{}”.format(patient_no.split(‘/’)[-1]) for patient_no in test_image]
去掉后缀,整合
train_real_image = []
train_real_label = []
test_real_image = []
for i in range(0, len(train_image), 2):
train_real_image.append(train_image[i].replace(‘_0000’, ‘’))
for i in range(0, len(train_label)):
train_real_label.append(train_label[i].replace(‘_0000’, ‘’))
for i in range(0, len(test_image), 2):
test_real_image.append(test_image[i])
输出一下目录的情况,看是否成功
print(len(train_real_image), len(train_real_label))
print(len(test_real_image), len(test_label))
print(train_real_image[0])
-------下面是创建json文件的内容--------------------------
可以根据你的数据集,修改里面的描述
json_dict = OrderedDict()
json_dict[‘name’] = “PC” # 任务名
json_dict[‘description’] = " Segmentation"
json_dict[‘tensorImageSize’] = “3D”
json_dict[‘reference’] = “see challenge website”
json_dict[‘licence’] = “see challenge website”
json_dict[‘release’] = “0.0”
这里填入模态信息,0表示只有一个模态,还可以加入“1”:“MRI”之类的描述,详情请参考官方源码给出的示例
json_dict[‘modality’] = {“0”: “PET”, ‘1’: ‘CT’}
这里为label文件中的标签,名字可以按需要命名
json_dict[‘labels’] = {“0”: “Background”, “1”: “cancer”}
下面部分不需要修改
json_dict[‘numTraining’] = len(train_real_image)
json_dict[‘numTest’] = len(test_real_image)
json_dict[‘training’] = []
for idx in range(len(train_real_image)):
json_dict[‘training’].append({‘image’: “./imagesTr/%s” % train_real_image[idx],
“label”: “./labelsTr/%s” % train_real_label[idx]})
json_dict[‘test’] = [“./imagesTs/%s” % i for i in test_real_image]
with open(os.path.join(path_originalData, “dataset.json”), ‘w’) as f:
json.dump(json_dict, f, indent=4, sort_keys=True)
## 3 预处理、训练、测试


将自己的NII数据集转换成nnUNet所需要的格式后,即可在命令行中直接输入命令进行流水线操作了


#### 3.1 预处理


`nnUNet_plan_and_preprocess -t 101`
 -t后面的数字即为任务的ID,一般直接使用这个命令进行全部预处理就行,会默认的进行2d、3d\_full\_res和3d\_cascade\_fullres三种任务的预处理,如果只想跑单独某一种的预处理的话,需要额外设置其他参数,可以输入`nnUNet_plan_and_preprocess -h` 查看帮助,这里不详细介绍了


 **预处理后,还可以自定义nnUNet的分折**
 nnUNet的默认是随机的五折交叉验证,如果需要用自己定好的分折方式的话,可以通过在预处理结果中创建splits\_final.pkl文件进行设定,代码如下
- 1
- 2
- 3
- 4
- 5
- 6
- 7
- 8
- 9
- 10
- 11
- 12
- 13
- 14
- 15
- 16
- 17
- 18
- 19
“”"
把自己设定的分折方式写成nnunet的pkl文件
“”"
import numpy as np
from collections import OrderedDict
import pickle
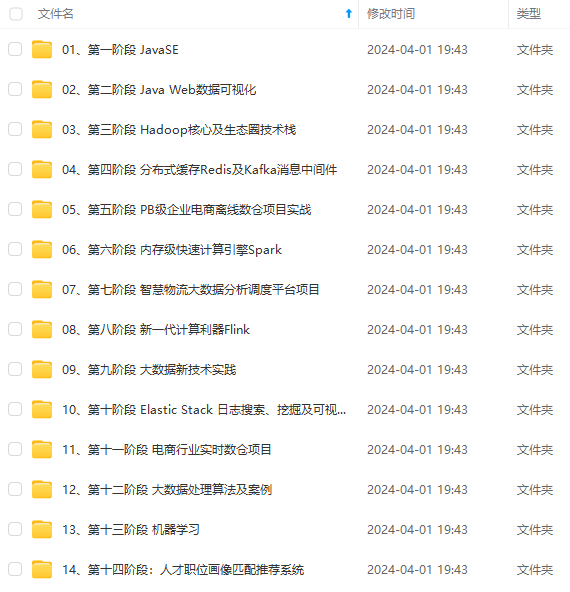
既有适合小白学习的零基础资料,也有适合3年以上经验的小伙伴深入学习提升的进阶课程,涵盖了95%以上大数据知识点,真正体系化!
由于文件比较多,这里只是将部分目录截图出来,全套包含大厂面经、学习笔记、源码讲义、实战项目、大纲路线、讲解视频,并且后续会持续更新
)]
既有适合小白学习的零基础资料,也有适合3年以上经验的小伙伴深入学习提升的进阶课程,涵盖了95%以上大数据知识点,真正体系化!
由于文件比较多,这里只是将部分目录截图出来,全套包含大厂面经、学习笔记、源码讲义、实战项目、大纲路线、讲解视频,并且后续会持续更新


