- 1插入排序和希尔排序
- 2vue根据文字动态判断溢出...鼠标悬停显示el-tooltip展示_el-tooltip鼠标悬浮触发
- 3大学慕课堂搜题软件哪个好?分享7个软件和公众号,来对比看看吧 #微信#微信_慕课搜题软件
- 4关于达梦数据库与oracle数据库的迁移_使用达梦迁移工具oracle迁移到达梦会因为没有创建数据库报错吗
- 5YOLOv5改进 | 注意力机制 | 通道和空间的双重作用的CBAM注意力机制_通道注意力加空间注意力模块
- 6windows环境下使用virtualenv对python进行多版本隔离
- 7多云中的大数据处理:Hadoop与Spark
- 8浅谈mysql中子查询_子查询原理
- 9Git 多账号管理_你可能需要管理多个账号,例如公司仓库和个人仓库使用不同账号,或者个人私有仓库和
- 10IEEE TTE最终稿提交注意事项
超详细!全避坑!macOS下的m芯片安装mysql并连接Navicat,解决Access denied for user ‘root‘@‘localhost‘ 及系统红绿状态跳_macos navicat
赞
踩
帖主在按照csdn上的帖子Macbook在配置mysql时总是不成功,下载下来的mysql在系统设置里总是变红绿色之间来回跳动,并无法连接Navicat进入mysql,修改了一天几乎把坑几乎全踩了,给各位参考。
首先,绝大部分教程都是在官网选择下arm或x86系列,再一步步点安装完成后还有很多其他的问题。然而根本不需要如此繁琐,在这里我们选用使用mac所带的brew工具进行下载安装。
brew安装及配置
Homebrew是macOS的包管理工具。首先,如果你还没有安装Homebrew,请按照以下步骤进行安装:
以下命令默认都在根目录进行,如不在请先cd ~到根目录
打开终端并运行以下命令:
/bin/bash -c "$(curl -fsSL https://raw.githubusercontent.com/Homebrew/install/HEAD/install.sh
- 1
如果不行考虑开T子,使用git进行安装
git clone https://github.com/Homebrew/brew ~/.brew
- 1
安装完成后,按照提示将Homebrew添加到你的路径中。通常,它会要求你运行以下命令:
echo 'eval "$(/opt/homebrew/bin/brew shellenv)"' >> ~/.zprofile
eval "$(/opt/homebrew/bin/brew shellenv)
- 1
- 2
更新Homebrew
brew update
- 1
通过brew安装MYSQL
在终端中运行以下命令来安装MySQL:
brew install mysql
- 1
安装完成后,启动MySQL服务:
brew services start mysql
- 1
注:在这里可能会出现报错
Bootstrap failed: 5: Input/output error
Try re-running the command as root for richer errors.
Error: Failure while executing; /bin/launchctl bootstrap gui/501 /Users/jimmy/Library/LaunchAgents/homebrew.mxcl.mysql.plist exited with 5.
- 1
- 2
- 3
解决办法:
确保所有相关目录和文件的权限正确:
sudo chown -R $(whoami):admin /opt/homebrew/var/mysql
sudo chown -R $(whoami):admin /opt/homebrew/opt/mysql
sudo chown -R $(whoami):admin ~/Library/LaunchAgents/homebrew.mxcl.mysql.plist
- 1
- 2
- 3
手动启动MySQL服务,查看是否有更详细的错误信息:
/opt/homebrew/opt/mysql/bin/mysql.server start
- 1
或者对电脑进行重启后继续运行
brew services start mysql
- 1
如果都不行,别着急我们再进行下一步
配置MYSQL初始安全设置
安装完成后的初始设置
运行以下命令进行MySQL的初始安全设置:
mysql_secure_installation
- 1
这将启动MySQL的安全安装程序,以下是一些常见的问题和建议的答案:
首先进行设置密码。
Enter password for user root:
The 'validate_password' component is installed on the server.
The subsequent steps will run with the existing configuration
of the component.
Using existing password for root.

Estimated strength of the password: 100
Change the password for root ? ((Press y|Y for Yes, any other key for No) : y
- 1
- 2
- 3
- 4
- 5
- 6
- 7
- 8
在mysql_secure_installation脚本开始时,系统会提示你输入当前root用户的密码。这是为了验证你有权进行安全设置。
Enter password for user root:
- 1
你输入当前的root用户密码并按回车。如果密码正确,脚本将继续。(首次安装没有密码随便输入一个强度高的密码)
脚本会询问你是否要更改root用户的密码:
Change the password for root ? ((Press y|Y for Yes, any other key for No) : y
- 1
你选择y并按回车,表示你希望更改root用户的密码。
系统会提示你输入新密码并再次确认:
(此时应该输入自己准备设置的root密码,强度要求:长度大于8,有大小写字母,特殊符号,数字)
New password:
Re-enter new password:
- 1
- 2
你需要输入两次相同的新密码。如果两次输入的密码一致,系统将更新root用户的密码。
Estimated strength of the password: 100
Do you wish to continue with the password provided?(Press y|Y for Yes, any other key for No) : y
- 1
- 2
解释: 这一步告诉你,提供的密码强度为100(通常是满分),这是一个很高的密码强度分数。然后它会询问你是否要继续使用这个密码。
建议: 如果密码强度高,可以继续使用这个密码。选择 y 继续。
下边配置需要特别注意!!!
除了最后一个,我们千万都不要选y,一路n或者其他拒绝符号!!!
By default, a MySQL installation has an anonymous user,
allowing anyone to log into MySQL without having to have
a user account created for them. This is intended only for
testing, and to make the installation go a bit smoother.
You should remove them before moving into a production
environment.

Remove anonymous users? (Press y|Y for Yes, any other key for No) : n
Success.
- 1
- 2
- 3
- 4
- 5
- 6
- 7
- 8
- 9
解释:MySQL 默认安装时包含匿名用户,允许任何人无需用户名和密码即可登录 MySQL。这是为了测试和方便安装,但在生产环境中是不安全的。
Normally, root should only be allowed to connect from
'localhost'. This ensures that someone cannot guess at
the root password from the network.

Disallow root login remotely? (Press y|Y for Yes, any other key for No) : n
... skipping.
- 1
- 2
- 3
- 4
- 5
- 6
解释: 默认情况下,root 用户只能从本地主机(localhost)登录。这可以防止通过网络进行暴力破解攻击尝试。选择 n 表示允许 root 用户远程登录。
By default, MySQL comes with a database named 'test' that
anyone can access. This is also intended only for testing,
and should be removed before moving into a production
environment.

Remove test database and access to it? (Press y|Y for Yes, any other key for No) : n
... skipping.
- 1
- 2
- 3
- 4
- 5
- 6
- 7
- 8
解释: MySQL 默认安装时包含一个名为 test 的数据库,任何人都可以访问。这是为了测试用途,但在生产环境中不安全。选择 n 表示保留测试数据库。
Reloading the privilege tables will ensure that all changes
made so far will take effect immediately.

Reload privilege tables now? (Press y|Y for Yes, any other key for No) : y
... skipping.
- 1
- 2
- 3
- 4
- 5
解释: 重新加载权限表可以确保所有更改立即生效。选择 n 表示暂不重新加载权限表。
验证MySQL安装
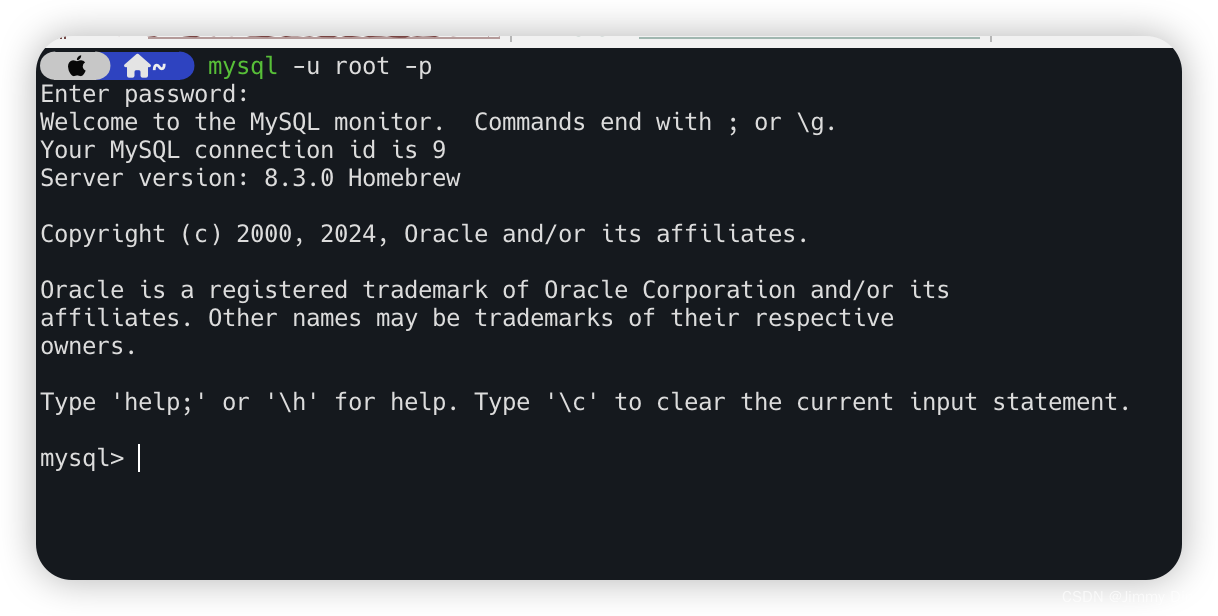
在终端中运行以下命令,使用root用户登录MySQL:
mysql -u root -p
- 1
你会被提示输入刚才设置的root用户密码,输入正确密码后将进入MySQL命令行界面。

配置MYSQL环境变量
为了便于使用,你可以将MySQL的可执行文件路径添加到你的环境变量中。
编辑你的Shell配置文件(如/.zshrc或/.bash_profile):
nano ~/.zshrc
- 1
在文件末尾添加:
export PATH=/opt/homebrew/opt/mysql/bin:$PATH
- 1
- 2
使用Control+O保存,Control+X退出
保存并退出编辑器,然后重新加载配置文件:
source ~/.zshrc
- 1
设置MySQL为开机自启动
brew services start mysql
- 1
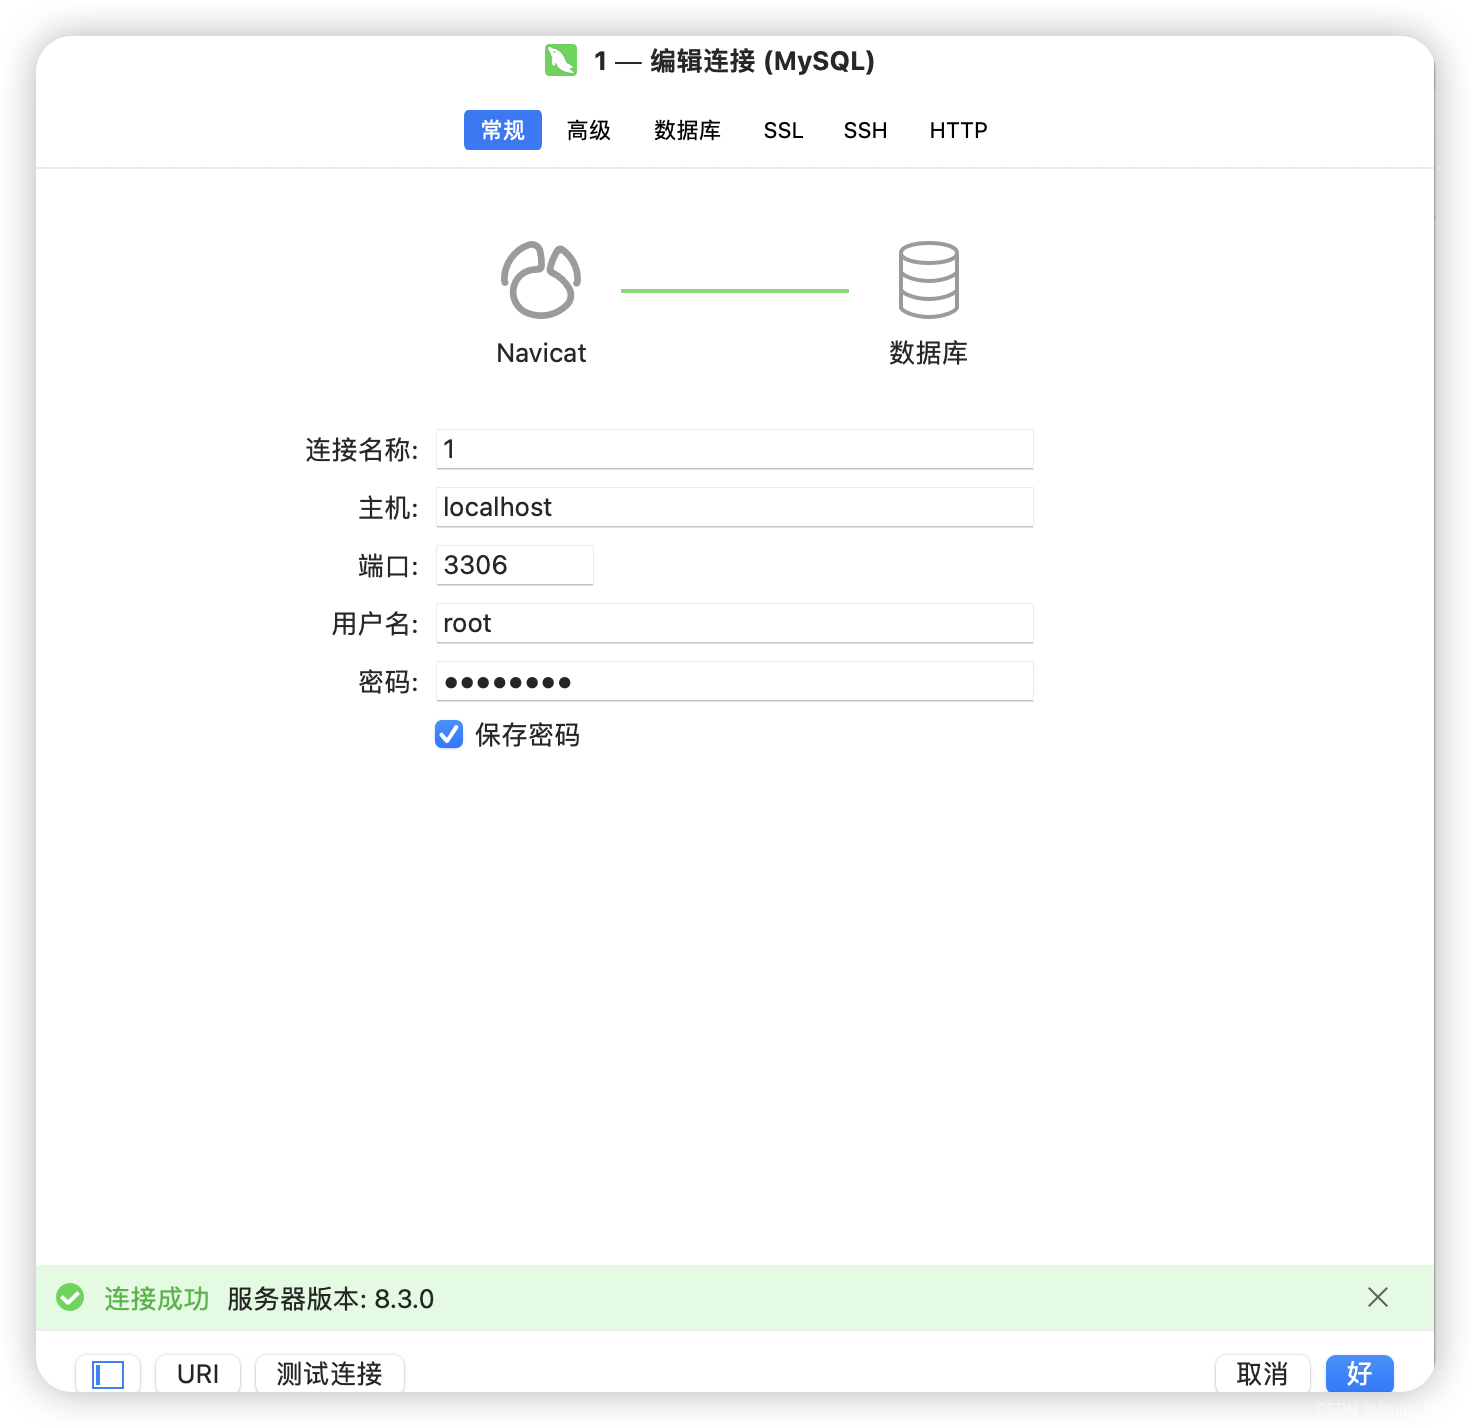
连接Navicat
我满心欢喜的打开Navicat输入完账号密码却弹出来报错信息
2002 - Can’t connect to server on ‘127.0.0.1’ (36)
解决方法:
首先,确保MySQL服务正在运行:
brew services list
- 1
如果使用这行命令又报错
Name Status User File
mysql error 256 ~/Library/LaunchAgents/homebrew.mxcl.mysql.plist
- 1
- 2
继续修改
有时候MySQL socket文件会导致连接问题。删除现有的socket文件:
sudo rm /tmp/mysql.soc
- 1
确保MySQL配置文件(my.cnf)中的配置正确。编辑配置文件:
sudo nano /opt/homebrew/etc/my.cnf
- 1
确保配置文件包含以下内容:
[mysqld]
bind-address = 127.0.0.1
socket = /tmp/mysql.sock
- 1
- 2
- 3
重启服务
brew services restart mysql
- 1
确保MySQL数据目录的权限正确。修复权限问题:
sudo chown -R $(whoami):admin /opt/homebrew/var/mysql
- 1
如果执行上述步骤仍然无法运行,请继续看下一步。
查找并终止现有的mysqld进程
首先,查找所有正在运行的mysqld进程:
ps aux | grep mysqld
- 1
这个命令会列出所有与mysqld相关的进程。找到进程ID(PID)后,终止这些进程:
sudo kill -9 PID
- 1
有时候MySQL socket文件会导致连接问题。删除现有的socket文件:
sudo rm /tmp/mysql.sock
- 1
保存并退出后,重新启动MySQL服务:
brew services restart mysql
- 1
确保MySQL服务已经成功启动:
brew services list
- 1
MySQL应该显示为started状态。
在终端中尝试连接MySQL,确保连接没有问题:
/opt/homebrew/opt/mysql/bin/mysql -u root -p -h 127.0.0.1
- 1
如果还有问题请重启电脑,并重新执行命令启动MYSQL
brew services start mysql
- 1
如果这些都没问题了,恭喜你Navicat连接成功至此全部结束!


