- 1【深度学习】李宏毅2021/2022春深度学习课程笔记 - Transformer_transormer
- 2WPF使用转换器(Converter)
- 3人工智能在医疗领域的应用,网络安全面试知识点总结宝典助你通关
- 4邦注科技 模具清洗机 干冰清洗机 干冰清洗设备原理介绍
- 5Springboot中Service不被识别_@service 扫描路径
- 6JDK1.8新特性(剩余)【Stream;Optional;接口的类优先原则 和 接口冲突;日期时间组件 ;重复注解】--学习JavaEE的day43
- 7three.js流动线_threejs流动线
- 8MLX90640 热成像 热像仪 OV2640 双光融合_mlx90640 热红外成像 说明书
- 9基于SpringCloud微服务的Hdfs分布式大数据实现的企业网盘系统_8.1 测试方案设计 8.1.1 测试策略 8.1.2 测试进度安排 8.1.3 测试资源 8.1.
- 10学会midjourney要多久?Midjourney超详细傻瓜式使用教程!5分钟学会Midjourney AI绘画!...
Spring Boot 单元测试_springboot测试
赞
踩
一,Spring Boot单元测试概述
在实际开发中,每当完成一个功能接口或业务方法的编写后,通常都会借助单元测试验证该功能是否正确。Spring Boot对项目的单元测试提供了很好的支持,在使用时,需要提前在项目的pom.xml文件中添加spring-boot-starter-test测试依赖启动器,可以通过相关注解实现单元测试。
二,对项目HelloWorld01进行单元测试
1、添加测试依赖启动器和单元测试
打开先前创建的项目(如未创建请参考《Maven方式构建Spring Boot项目》) - HelloWorld01
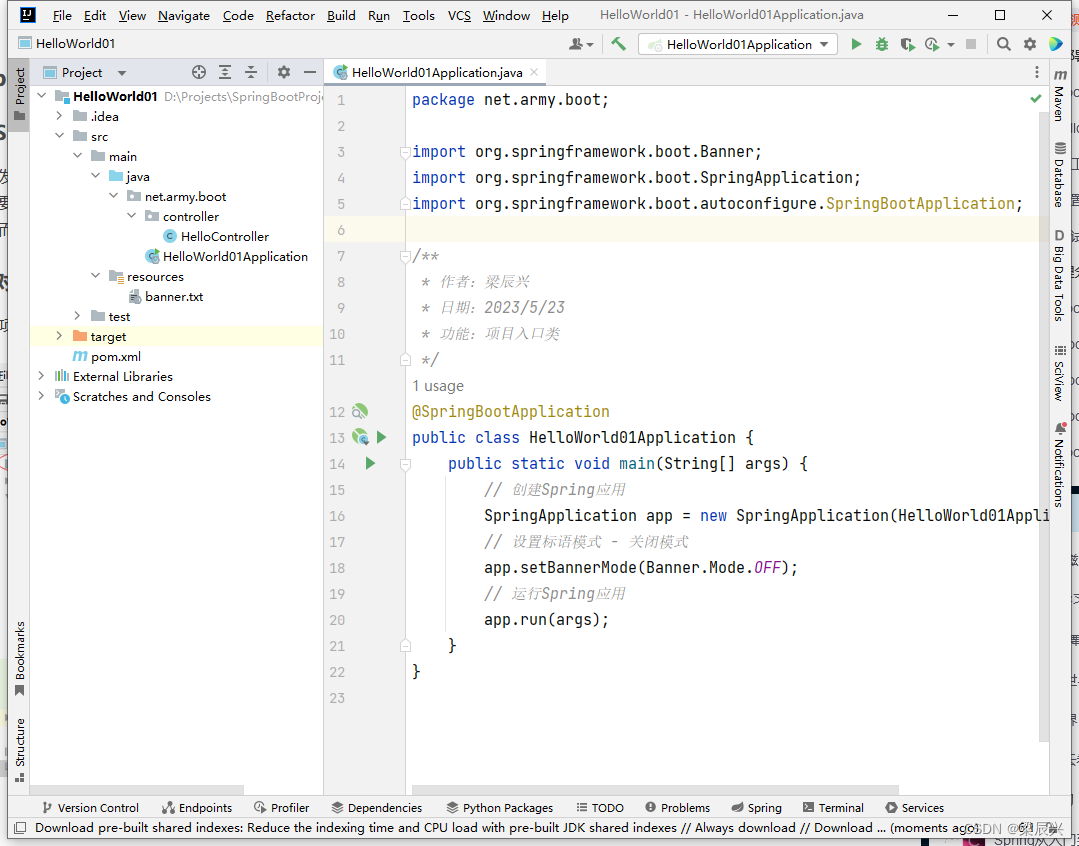 修改pom.xml文件,添加依赖
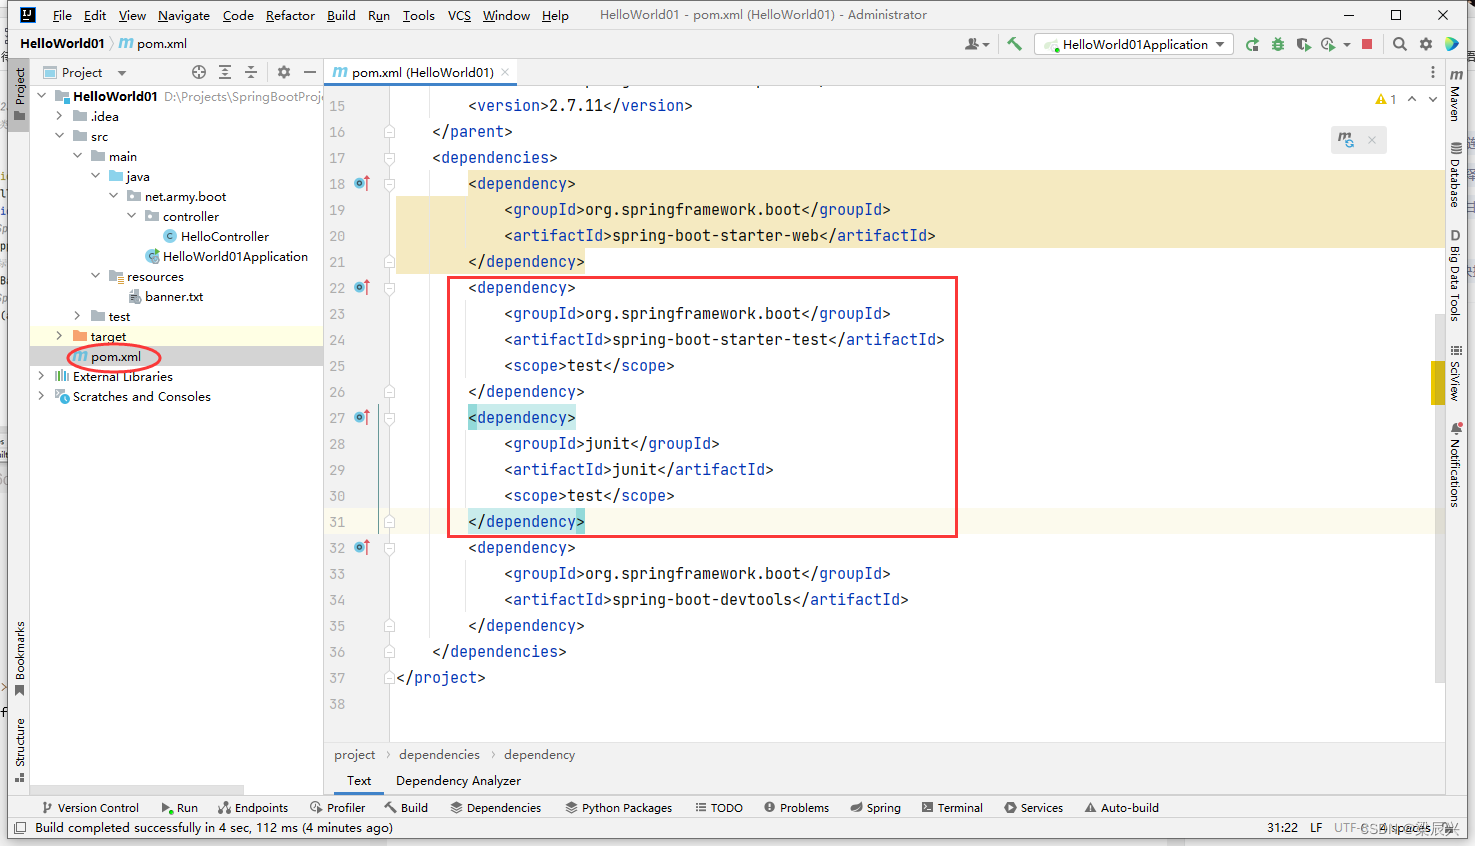
添加内容如下:
<dependency>
    <groupId>org.springframework.boot</groupId>
    <artifactId>spring-boot-starter-test</artifactId>
    <scope>test</scope>
</dependency>
<dependency>
     <groupId>junit</groupId>
     <artifactId>junit</artifactId>
     <scope>test</scope>
</dependency>
- 1
- 2
- 3
- 4
- 5
- 6
- 7
- 8
- 9
- 10
刷新项目依赖
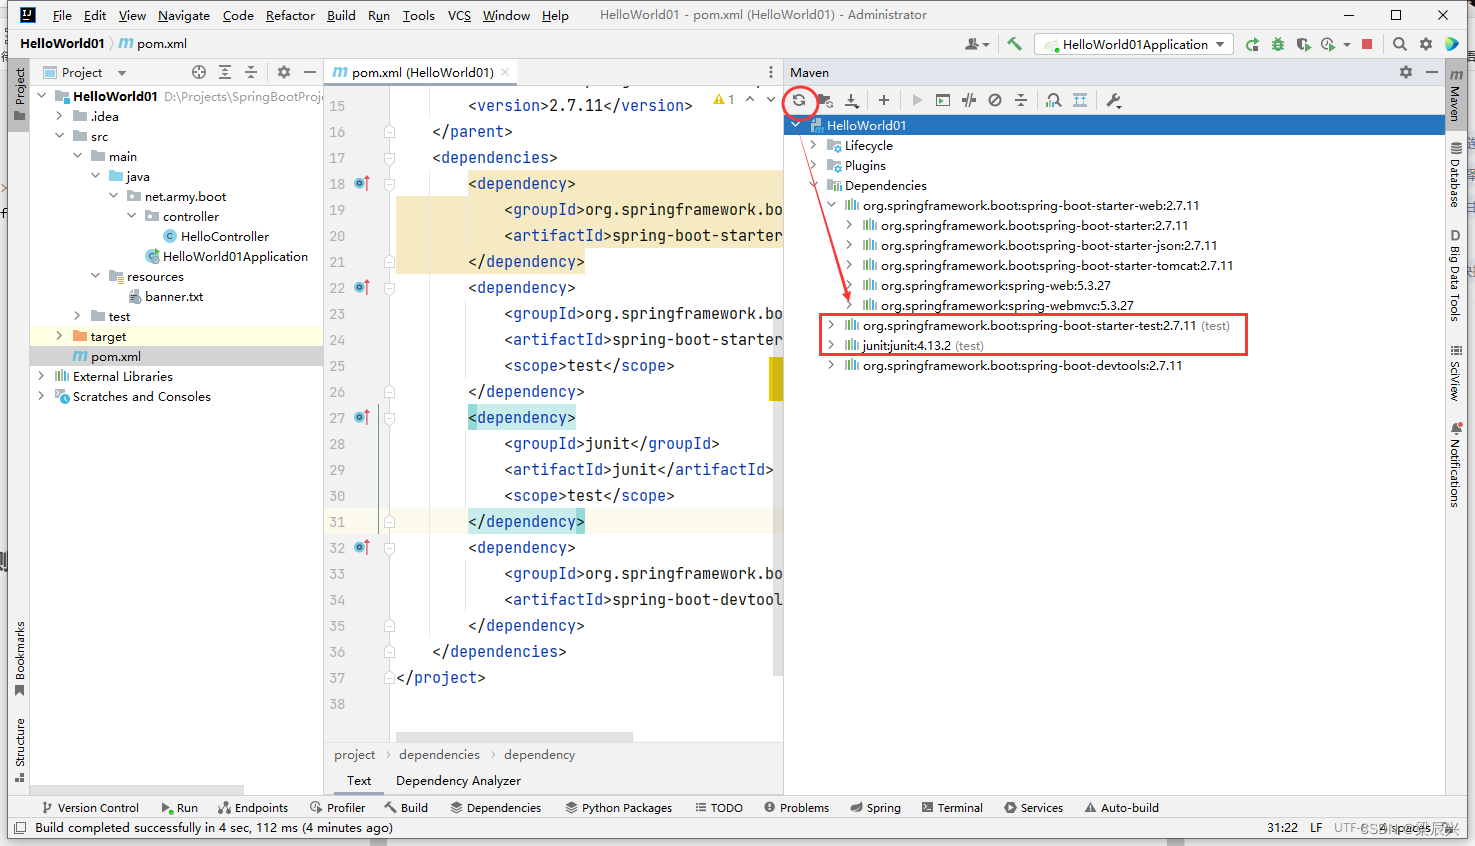
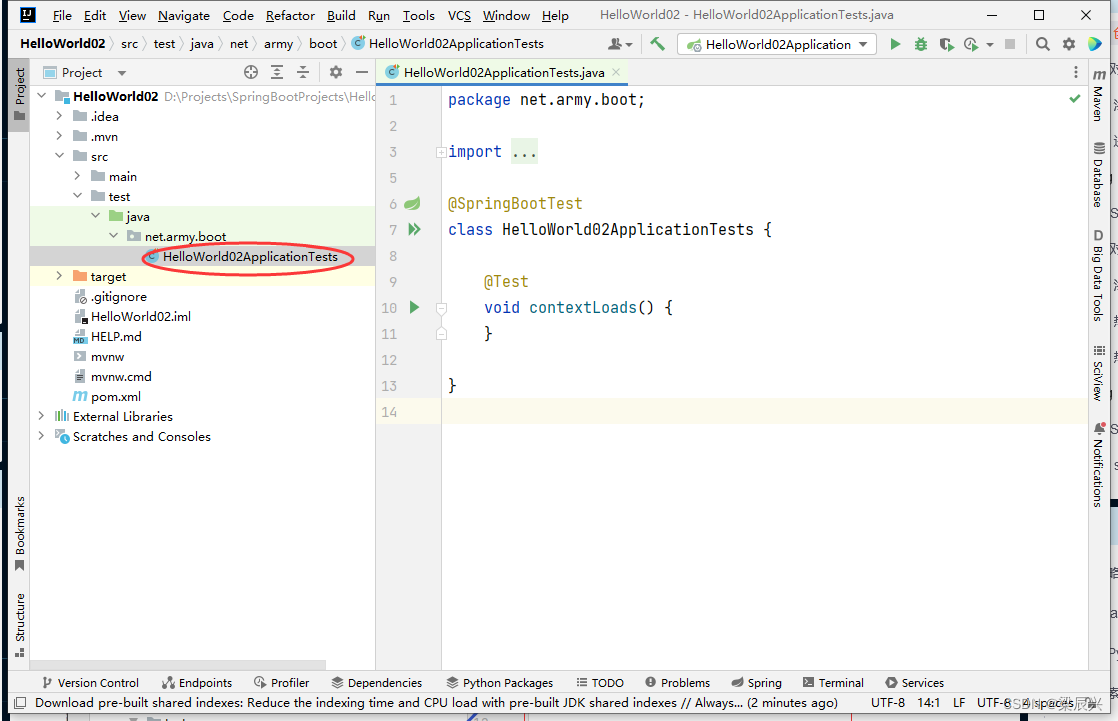
如果使用Spring Initializr方式构建Spring Boot项目,则会自动加入测试依赖启动器。大家可以查看上一讲我们创建的HelloWorld02项目。
2、创建测试类与测试方法
在src/test/java里创建net.army.boot包
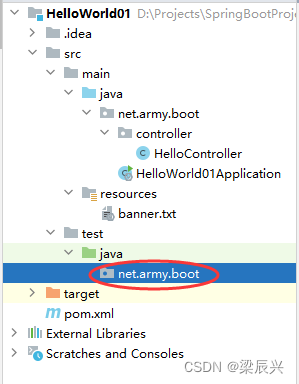
在net.army.boot包里创建测试类TestHelloWorld01
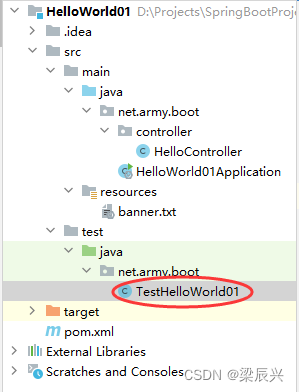
给测试类添加测试启动器注解与Spring Boot单元测试注解
@RunWith(SpringRunner.class) // 实现Spring Boot单元测试
@SpringBootTest // 标记Spring Boot测试,并加载应用容器
- 1
- 2
注入待测试类HelloController
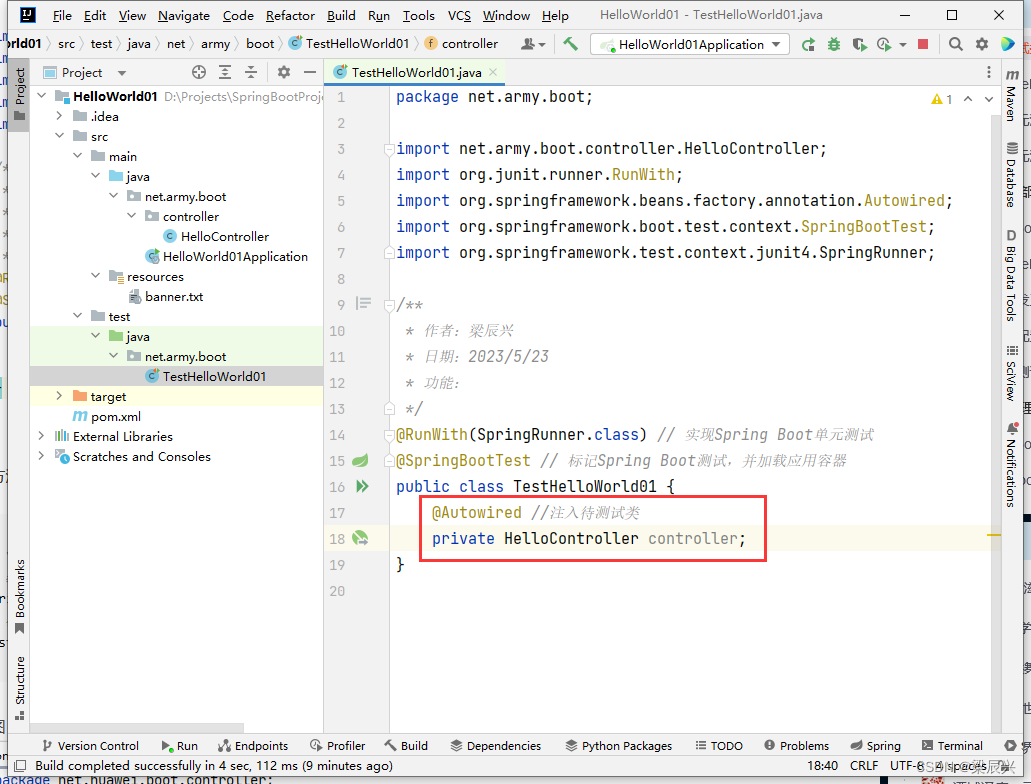
创建测试方法testHello(),测试待测试类实例的hello()方法
添加如下代码:
@Test
public void testHello(){
    // 获取控制器hello()方法的返回值
    String hello = controller.hello();
    // 在控制台输出hello()方法的返回值
    System.out.println("hello()方法的返回值:" + hello);
}
- 1
- 2
- 3
- 4
- 5
- 6
- 7
运行测试方法testHello()
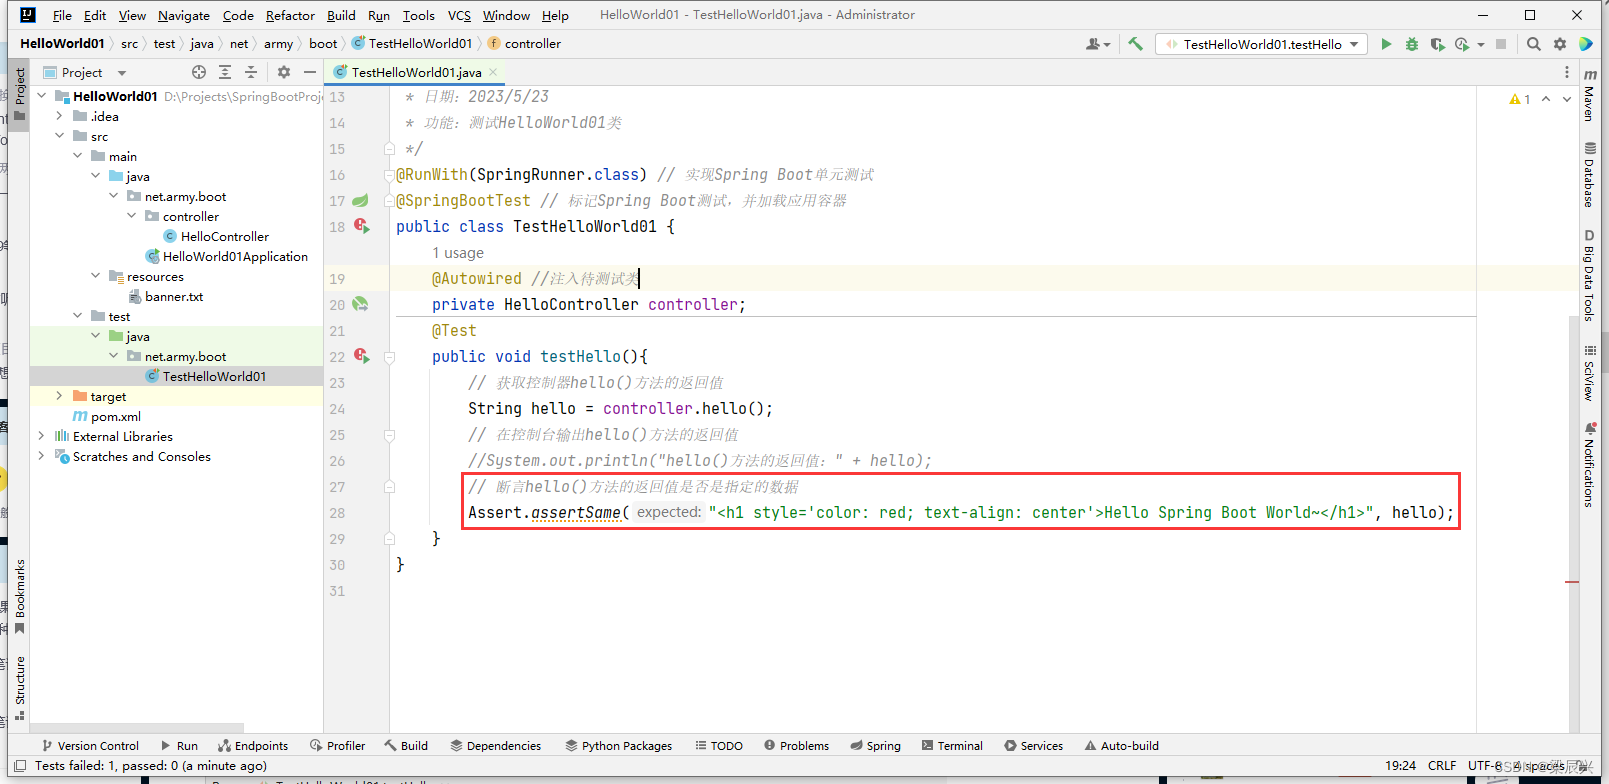
 如果相判断待测试类的方法的返回值是不是指定的某个数据,那么我们可以利用Assert类的assertSame()方法来进行测试
修改测试方法testHello()
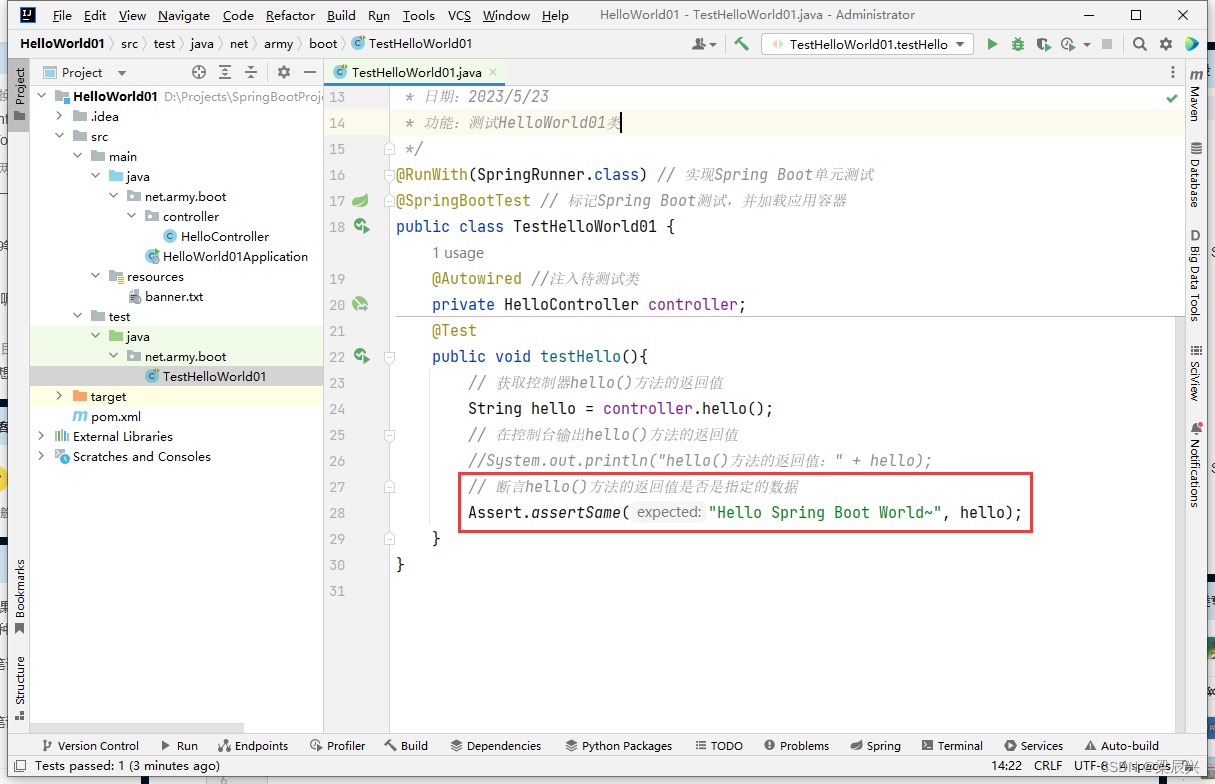 运行测试方法,查看结果

测试失败。抛出AssertionError(断言错误)。
期望值:Hello Spring Boot World~
实际值:<h1 style='color: red; text-align: center'>Hello Spring Boot World~</h1>
再修改测试方法testHello(),修改期望值
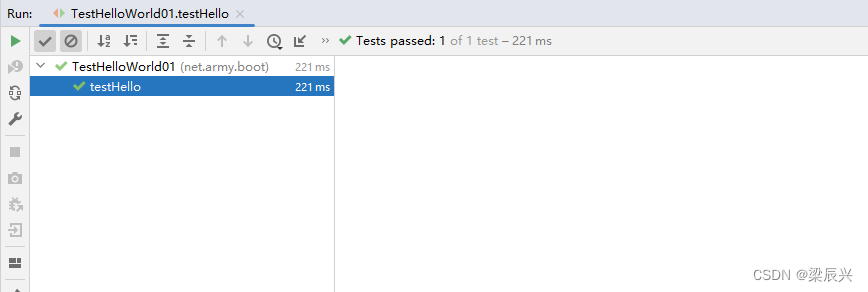
运行测试方法,查看结果
三,对项目HelloWorld02进行单元测试
1、添加单元测试依赖
打开先前创建的项目(如未创建请参考《Spring Initializr方式构建Spring Boot项目》),查看Spring Initializr自动生成的测试类
在pom.xml文件里,添加单元测试依赖
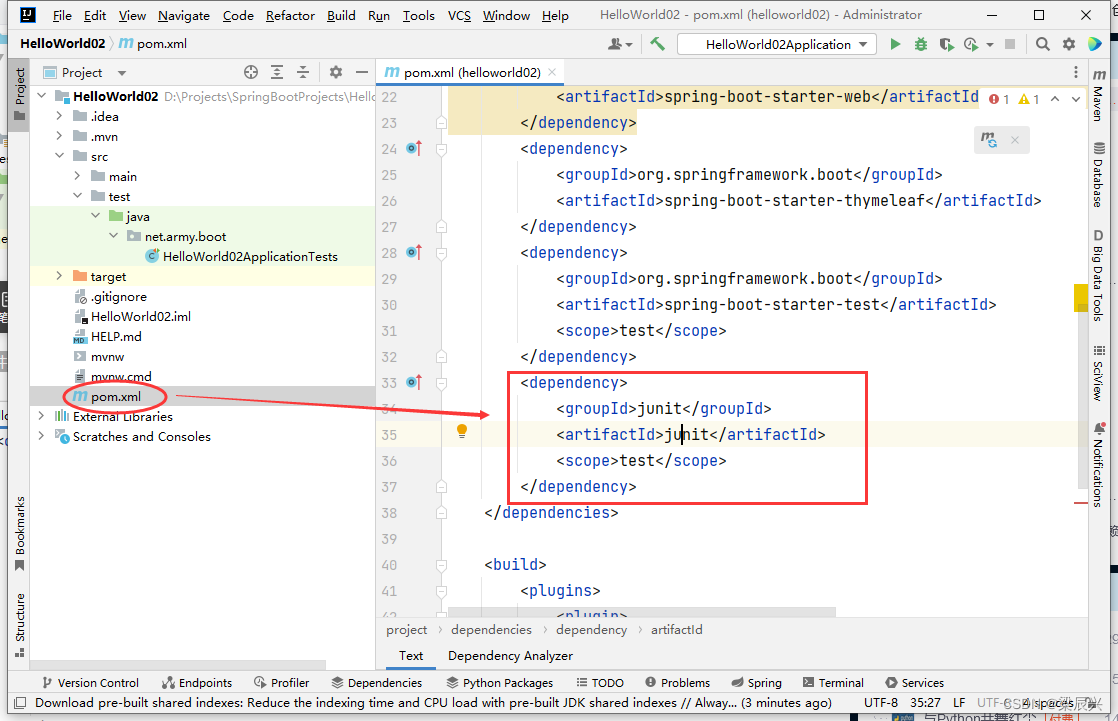
添加内容如下:
<dependency>
   <groupId>junit</groupId>
   <artifactId>junit</artifactId>
   <scope>test</scope>
</dependency>
- 1
- 2
- 3
- 4
- 5
更新项目依赖
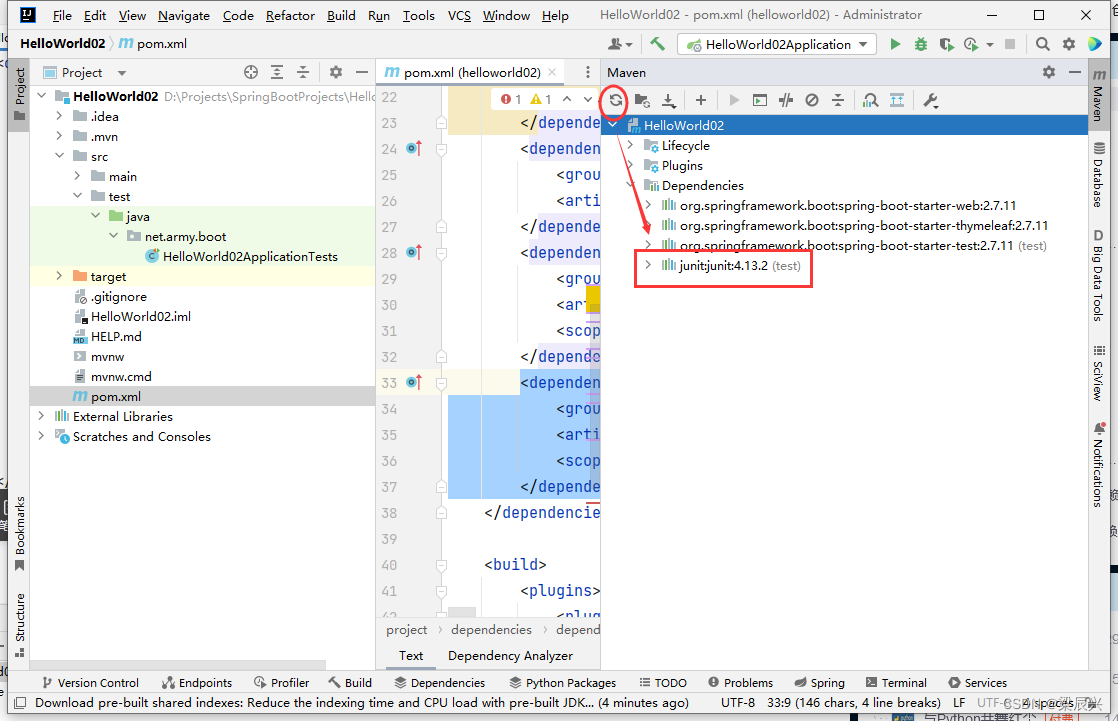
2、进行单元测试
在默认的应用测试类里,注入待测试类,创建testHello()测试方法
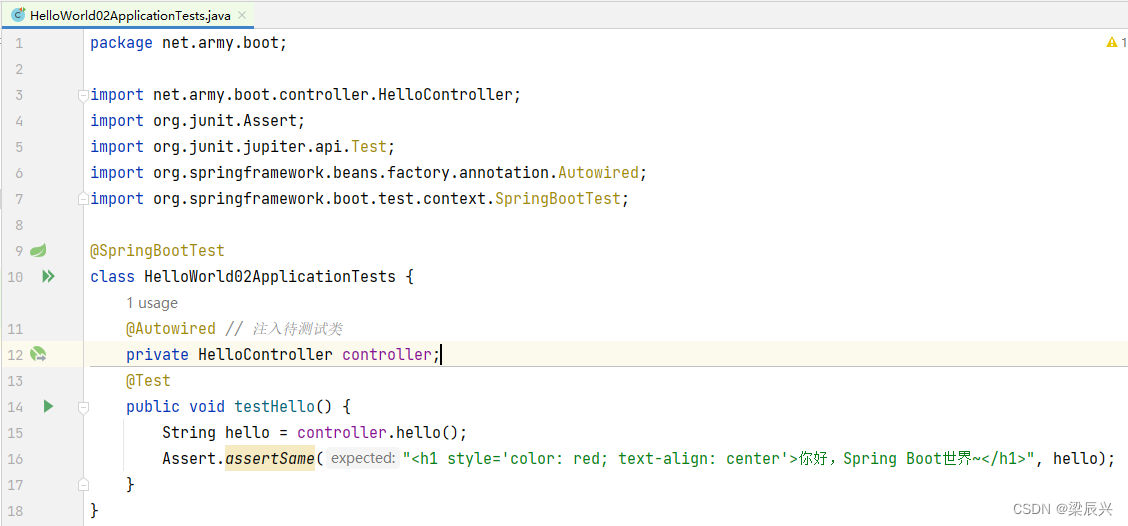
添加代码如下:
package net.army.boot;

import net.army.boot.controller.HelloController;
import org.junit.Assert;
import org.junit.jupiter.api.Test;
import org.springframework.beans.factory.annotation.Autowired;
import org.springframework.boot.test.context.SpringBootTest;

@SpringBootTest
class HelloWorld02ApplicationTests {
    @Autowired // 注入待测试类
    private HelloController controller;
    @Test
    public void testHello() {
        String hello = controller.hello();
        Assert.assertSame("<h1 style='color: red; text-align: center'>你好,Spring Boot世界~</h1>", hello);
    }
}
- 1
- 2
- 3
- 4
- 5
- 6
- 7
- 8
- 9
- 10
- 11
- 12
- 13
- 14
- 15
- 16
- 17
- 18
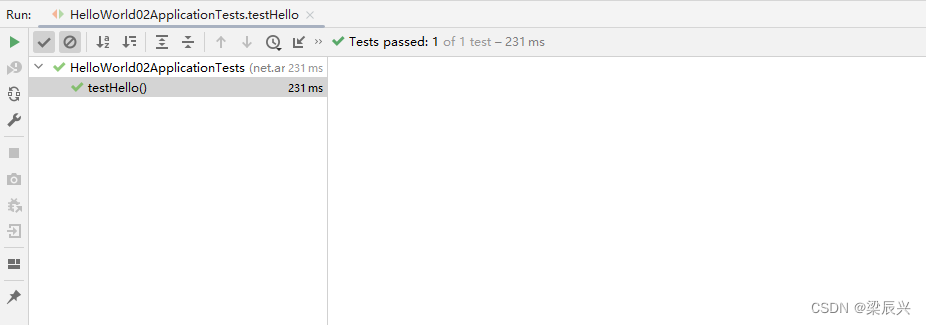
运行测试方法testHello(),查看结果
