热门标签
热门文章
- 1java中常见的限流算法详细解析_java中固定窗口算法
- 29.4.k8s的控制器资源(job控制器,cronjob控制器)
- 3git cherry-pick同步commit到多个分支_git cherry-pick多个commit
- 4Vue+springboot+java民宿管理系统_共享民宿 开源 java
- 5dpdk使用intel-82599网卡SRIOV的VF时,需要将VF网卡绑定到vfio_82599ec vf
- 6【大数据开发运维解决方案】超级详细的VMware16安装Redhat8&挂载镜像配置本地yum源&安装unixODBC教程_redhat8.0挂载镜像
- 7python装饰器详解_def fun1(func): func()
- 8人工智能在模拟空战中击落人类飞行员
- 9MacOSX 安装ffmpeg_install_name_tool -change ffmpeg
- 10中文文本关键词抽取的三种方法(TF-IDF、TextRank、word2vec)_word2vec和tfidf的区别
当前位置: article > 正文
virt-manager上安装ubuntu22.04虚拟机_virtmanager安装虚拟机
作者:繁依Fanyi0 | 2024-05-16 18:06:18
赞
踩
virtmanager安装虚拟机
前言
记录一下使用virt-manager安装ubuntu22.04虚拟机
一、镜像下载
地址:http://releases.ubuntu.com/jammy/
下载:ubuntu-22.04.2-live-server-amd64.iso
注:我当时下载的时候是22.04.1 这里就不下载这个22.04.2版本了
二、 virt-manager新建机器
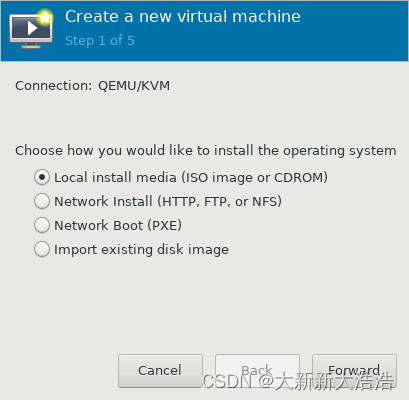
2.1 选择安装来源类型
使用本地ISO文件
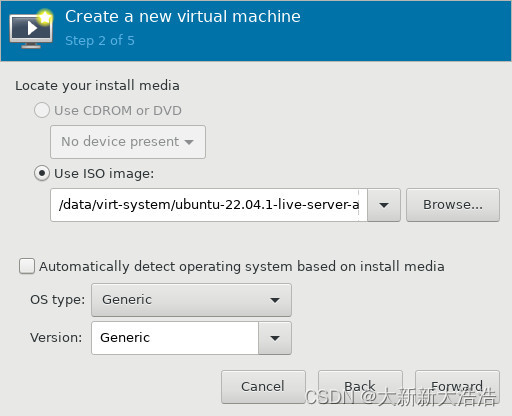
2.2 选择ISO文件
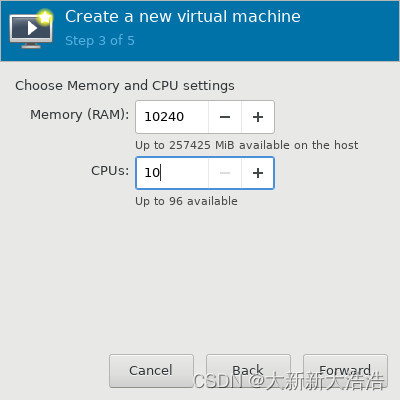
2.3 设置CPU数量和内存容量
CPU数量设置为10个。内存设置为10G
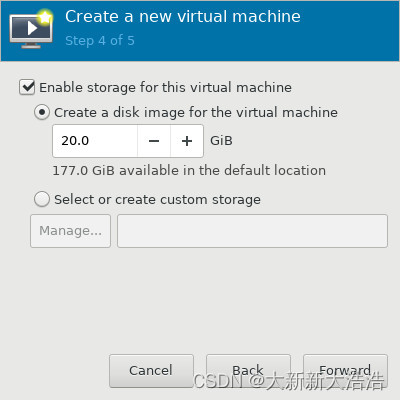
2.4 设置硬盘容量
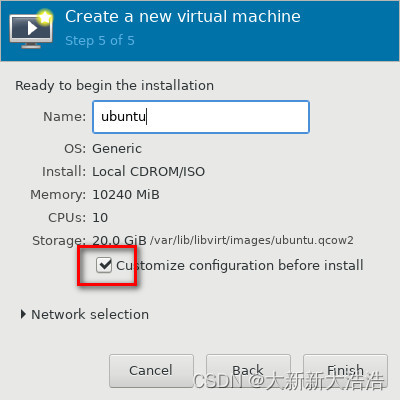
2.5 设置虚拟机类型,勾选配置按钮
勾选配置按钮
2.6 修改硬盘驱动类型
设置驱动类型为VirtIO

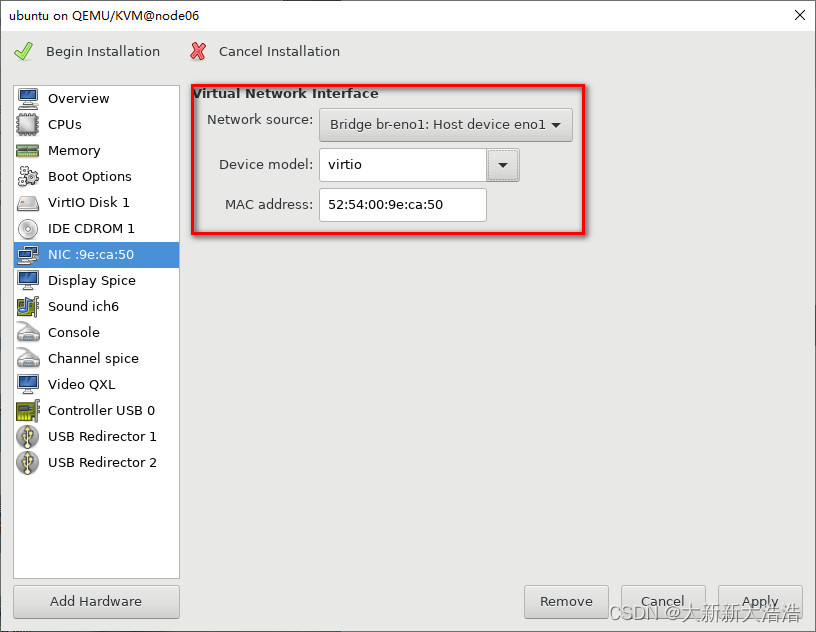
2.7 修改网卡驱动类型
设置驱动类型为VirtIO
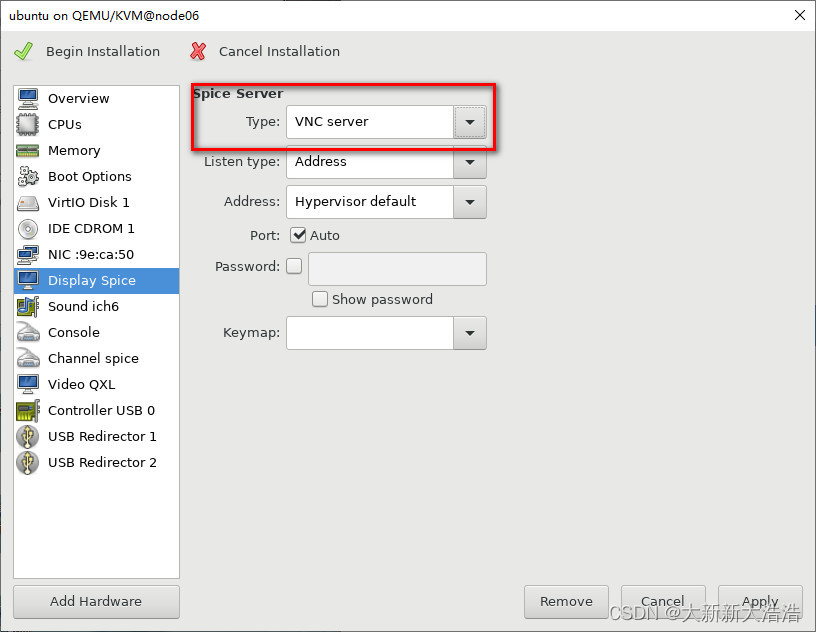
2.8 设置显示器类型
设置类型为VNC server
2.9 开始安装
三、操作系统安装
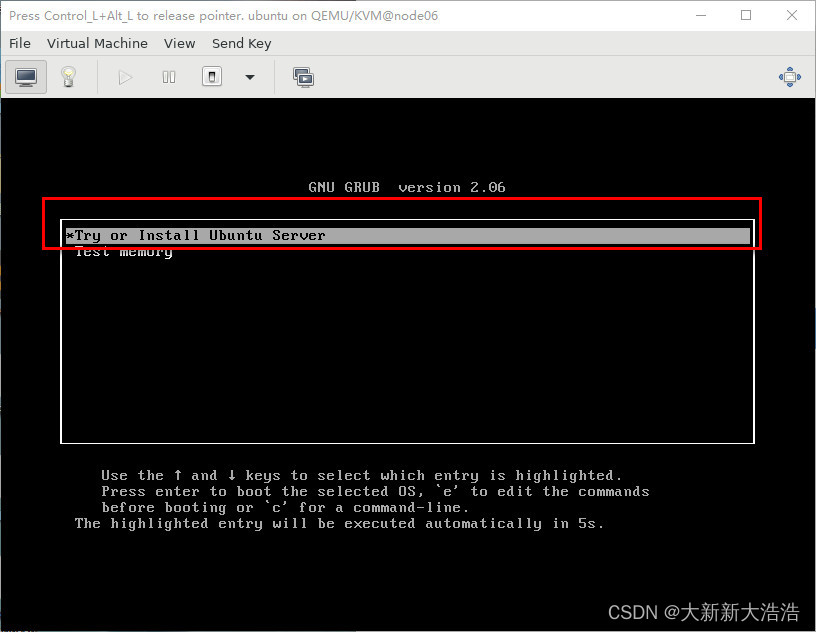
3.1 开始安装
3.2 选择系统语言
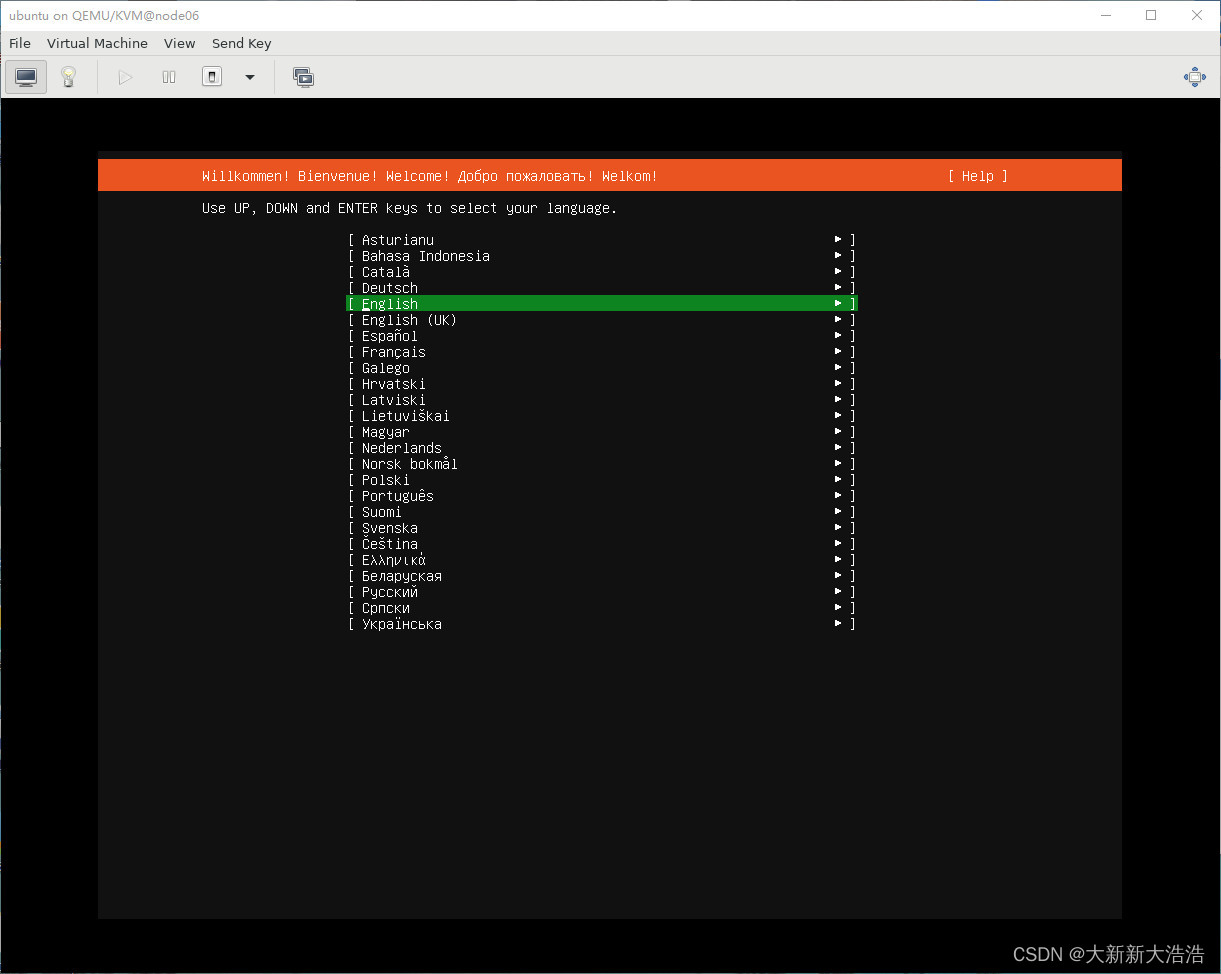
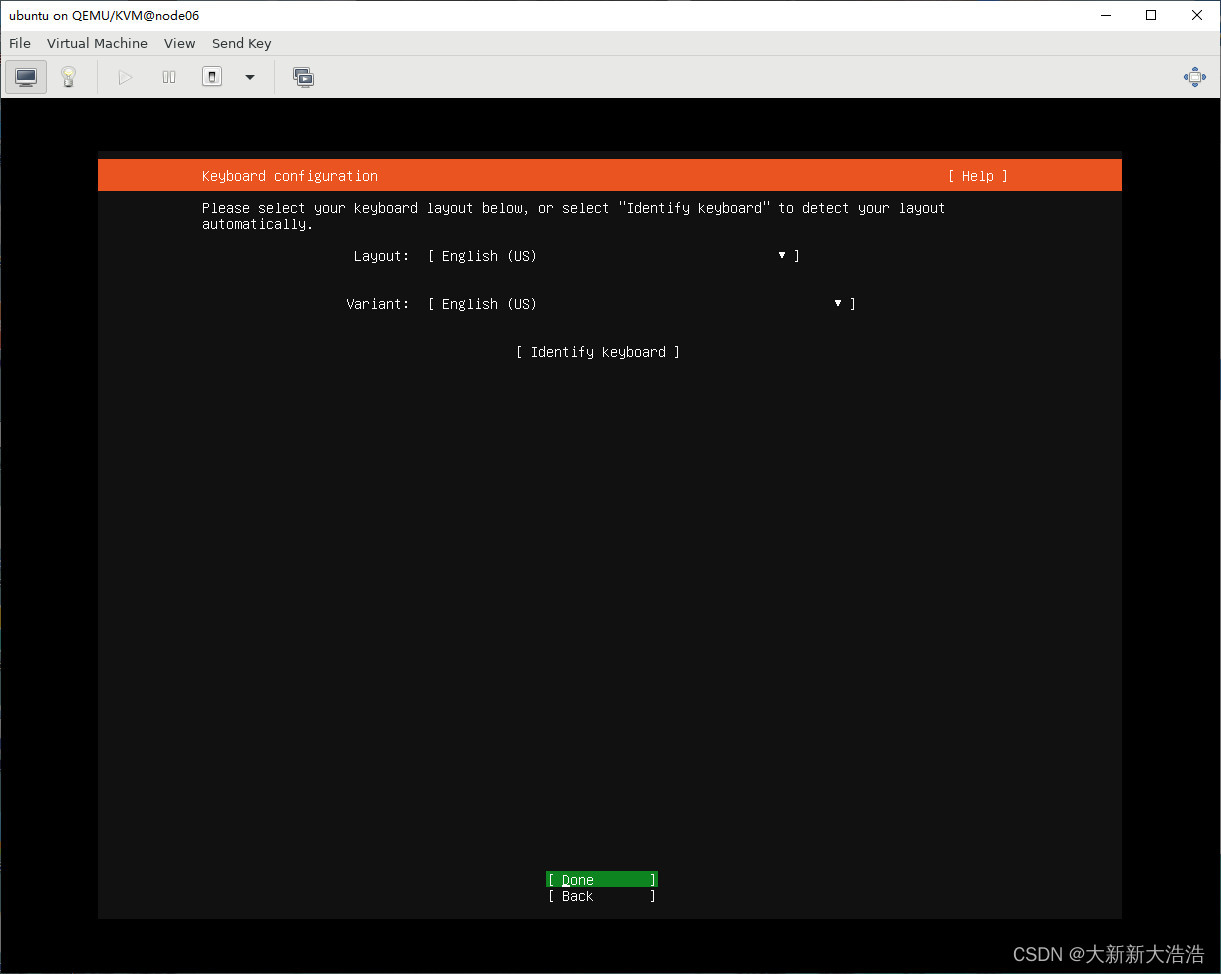
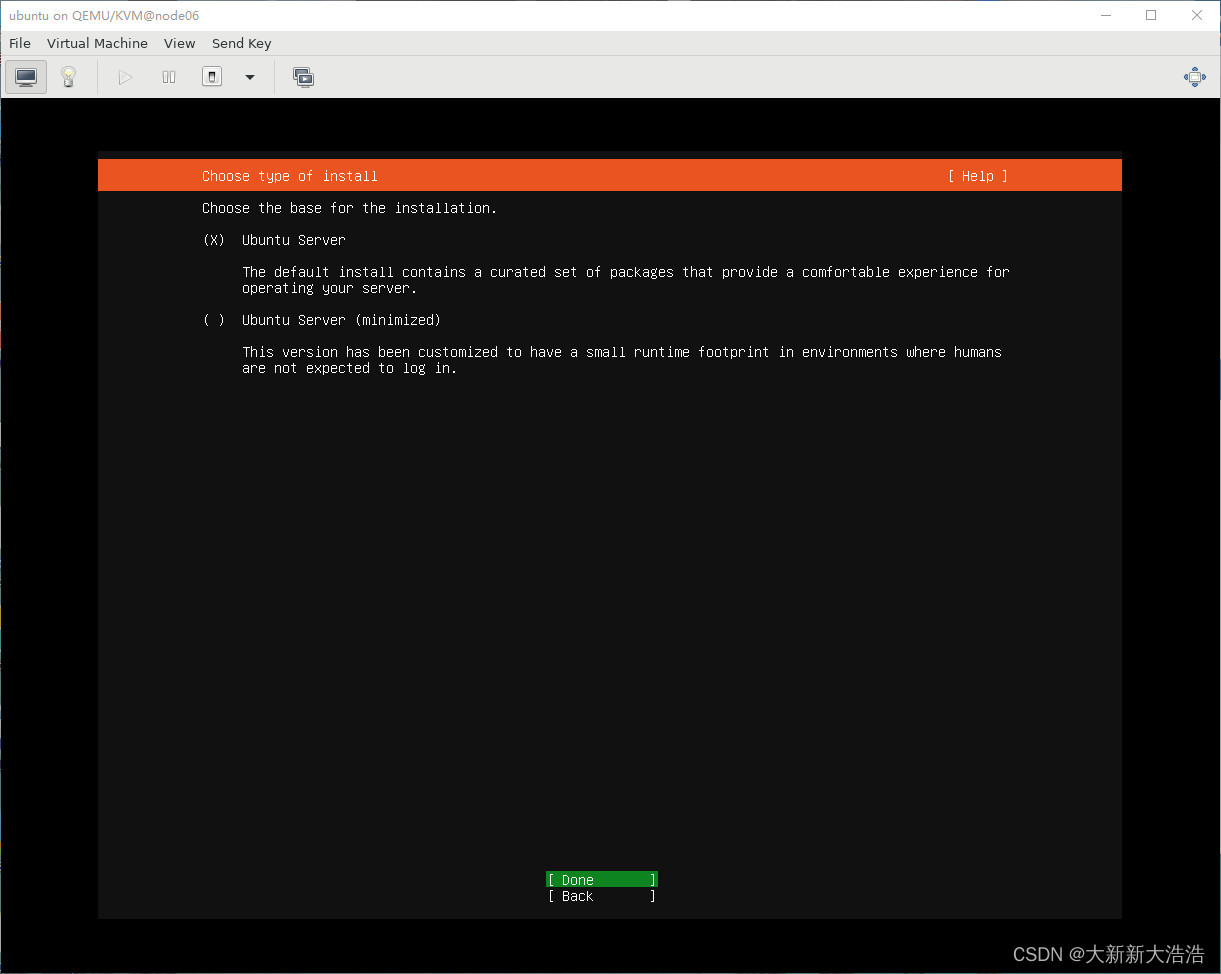
3.3 选择安装的类型
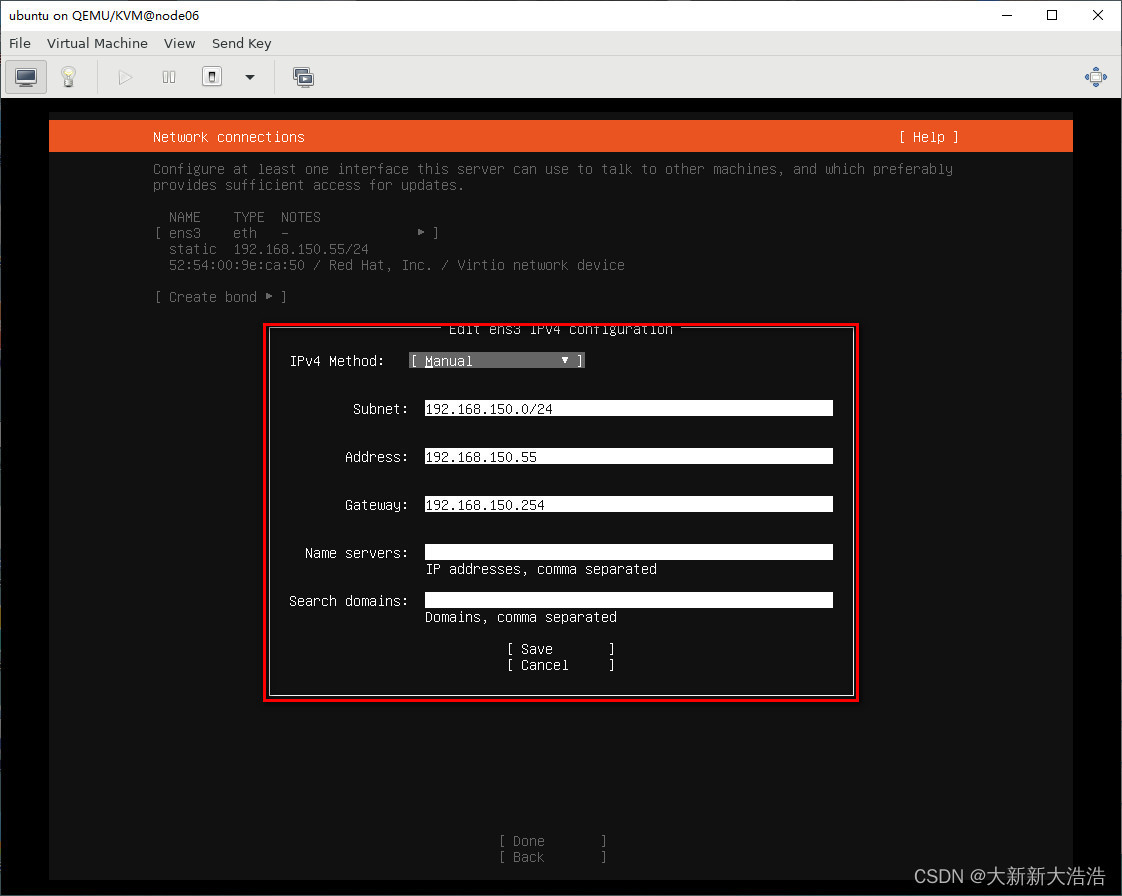
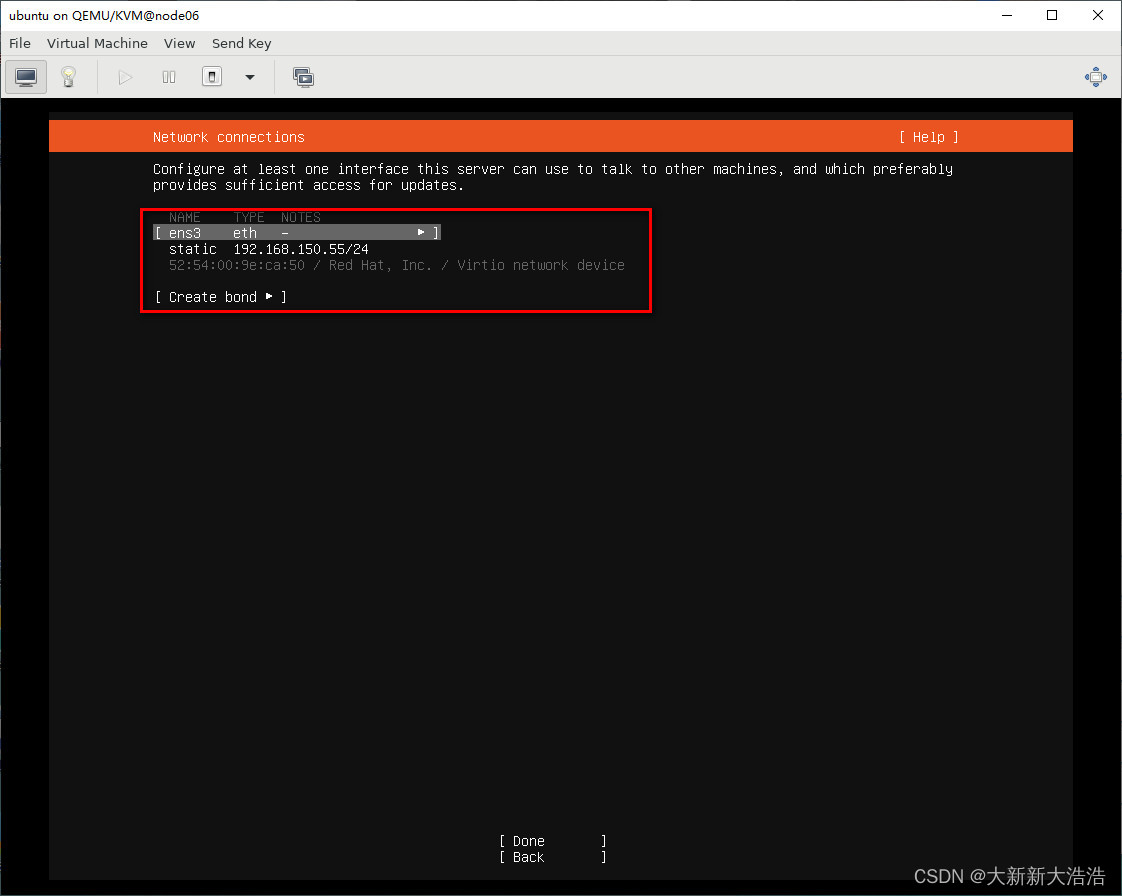
3.4 设置网卡信息
会自动DHCP一个IP,我这里进行了手动的配置
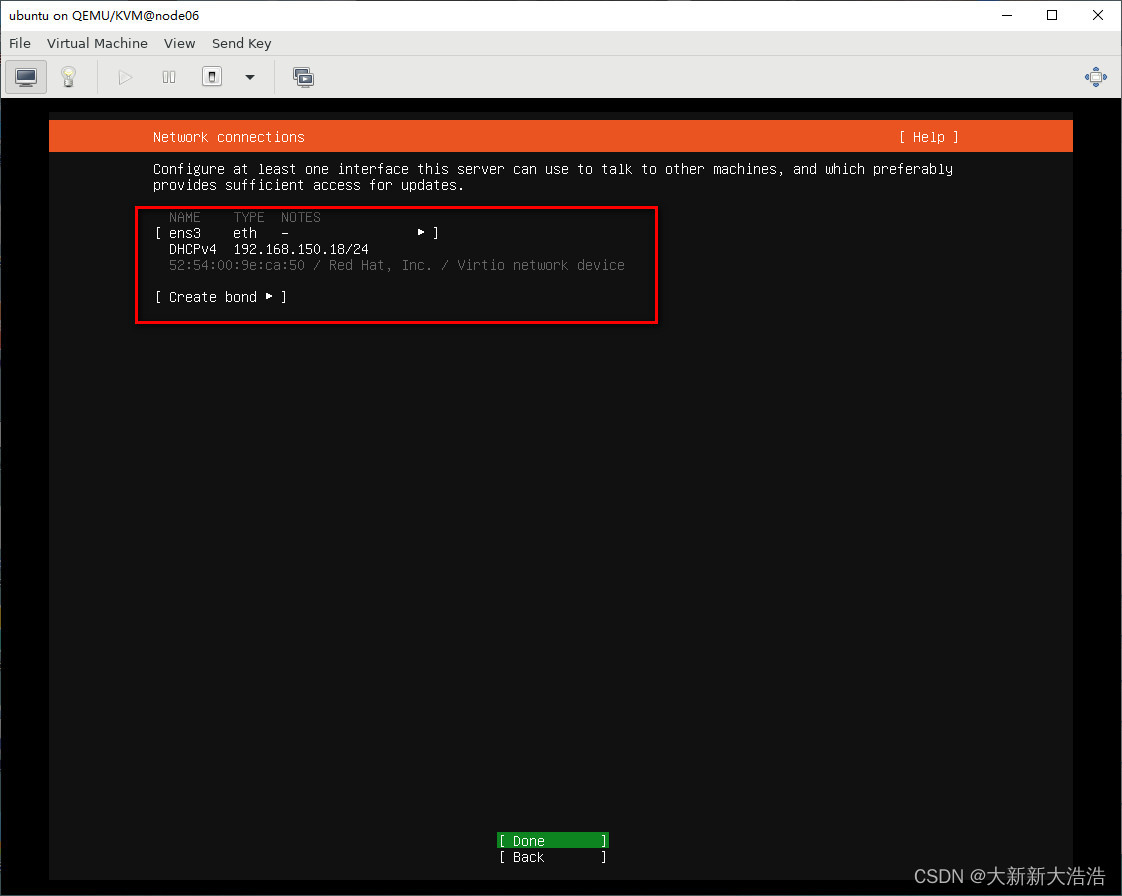
我给机器配置的网络信息如下
Subnet:192.168.150.0/24
Address:192.168.150.55
Gateway:192.168.150.254
Name servers:不做配置
Search domains:不做配置
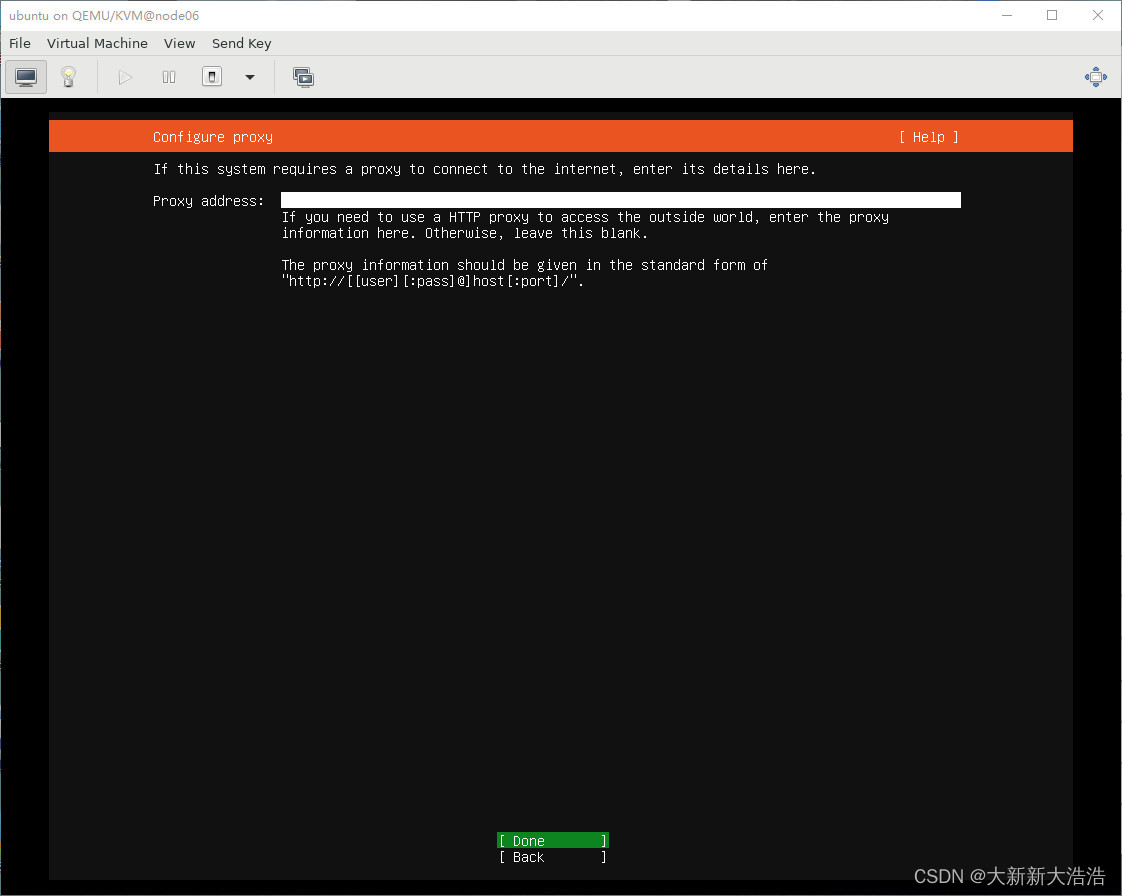
3.5 代理不做配置
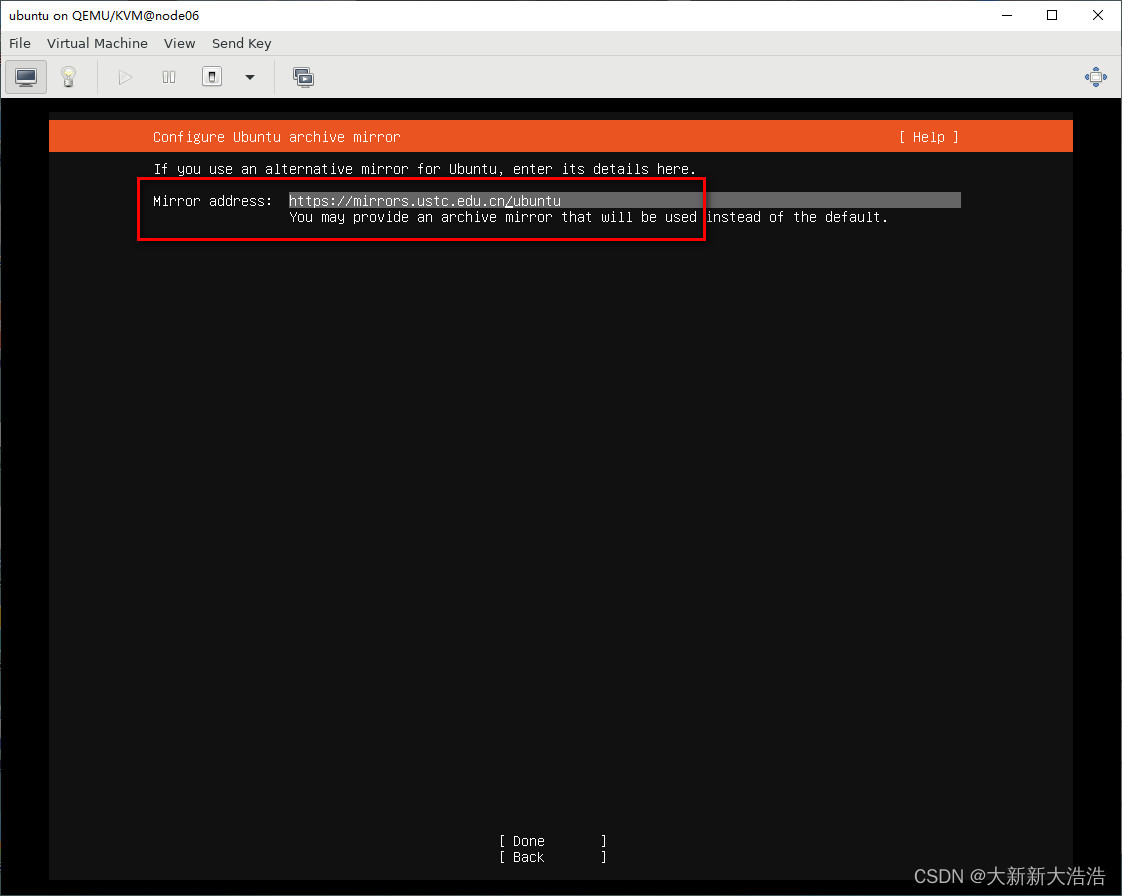
3.6 设置mirror到中科大的源
使用中科大的源:https://mirrors.ustc.edu.cn/ubuntu/
3.7 硬盘分区设置
我这里没有做特殊的配置
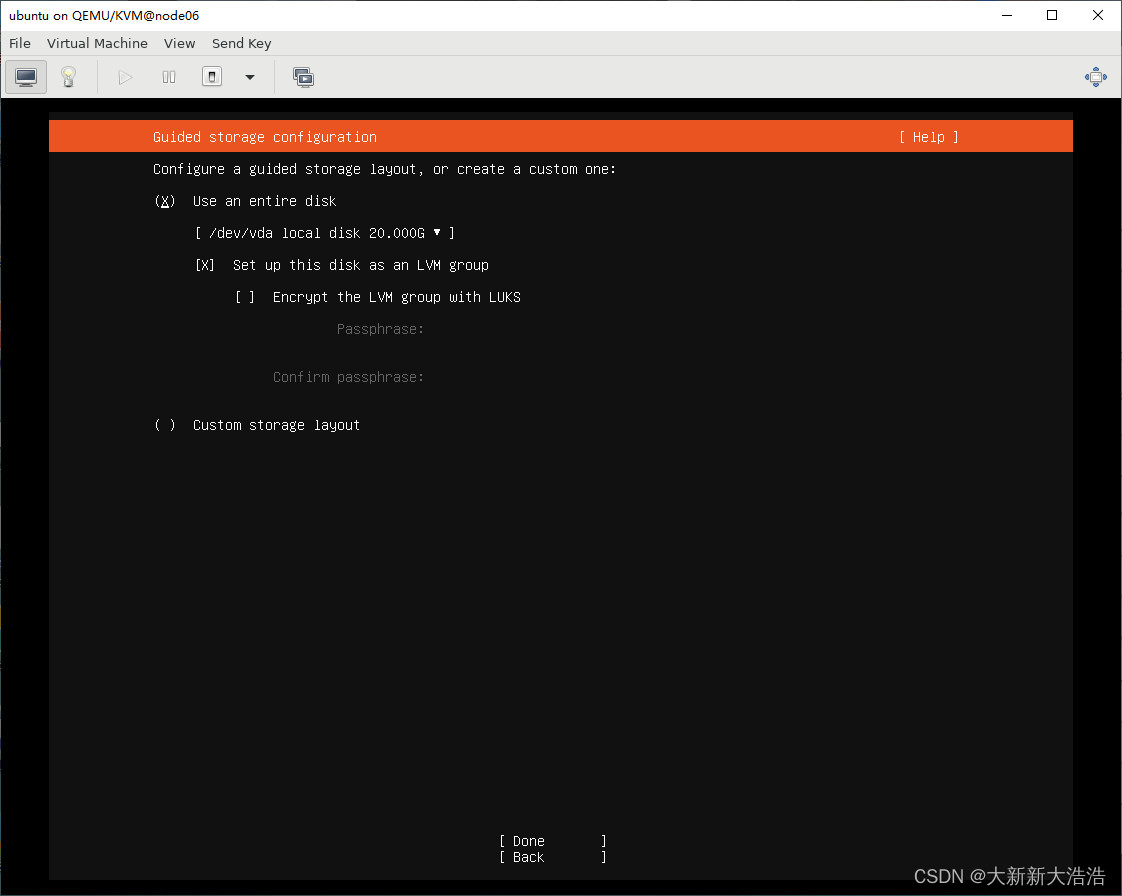
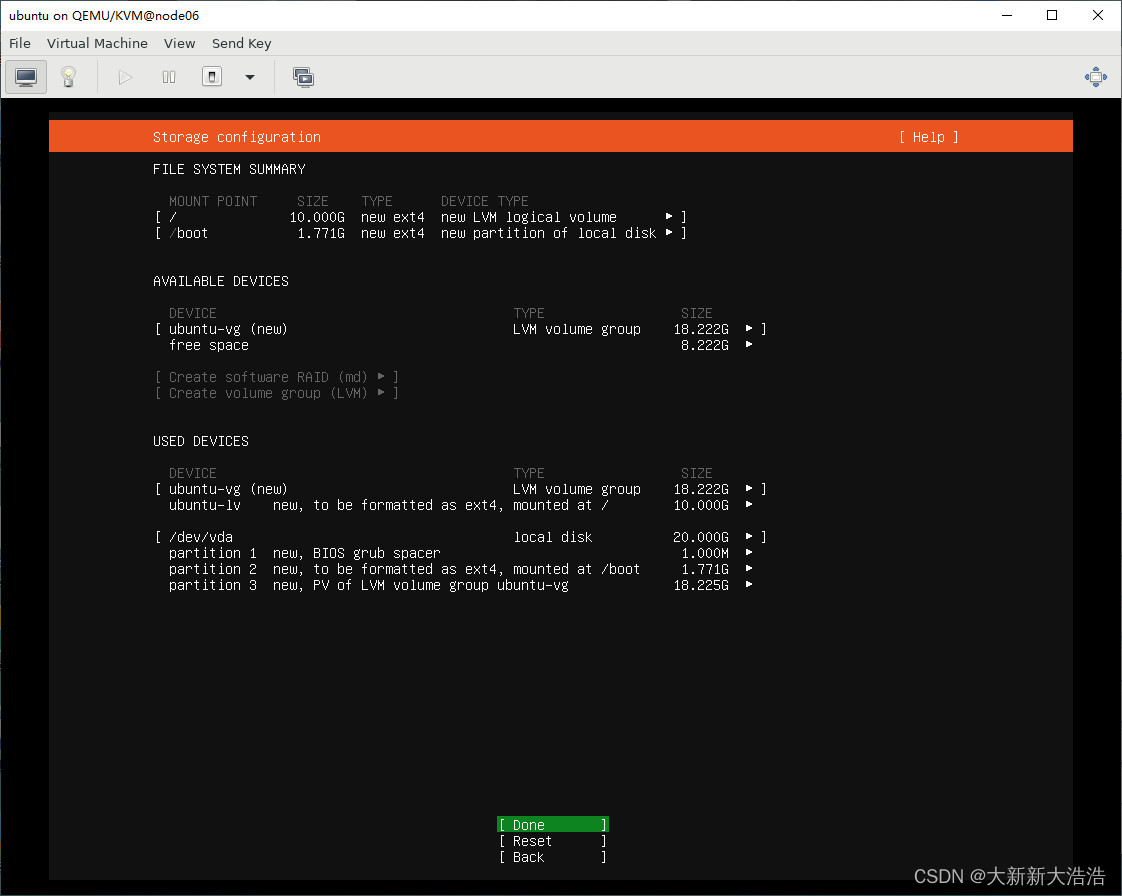
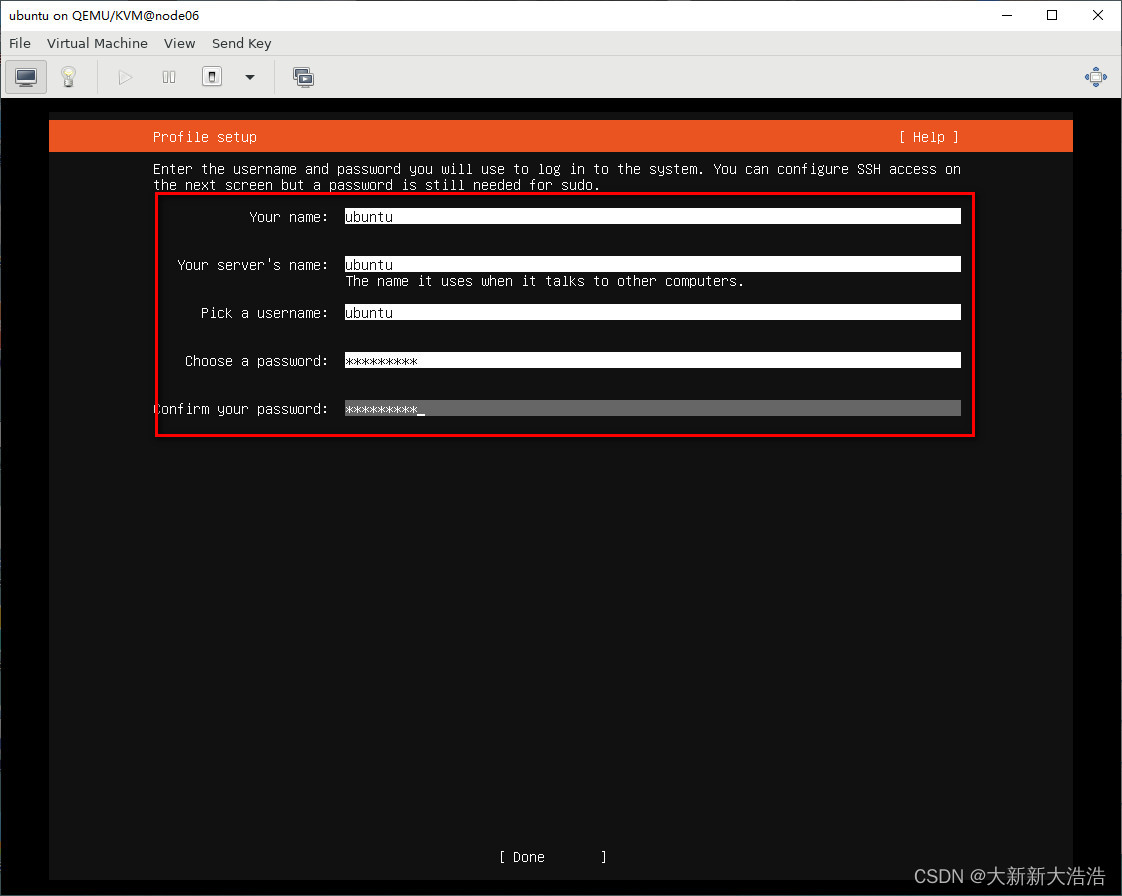
3.8 设置账号信息
name:ubuntu
hostname:ubuntu
username:ubuntu
passwd:smartcore
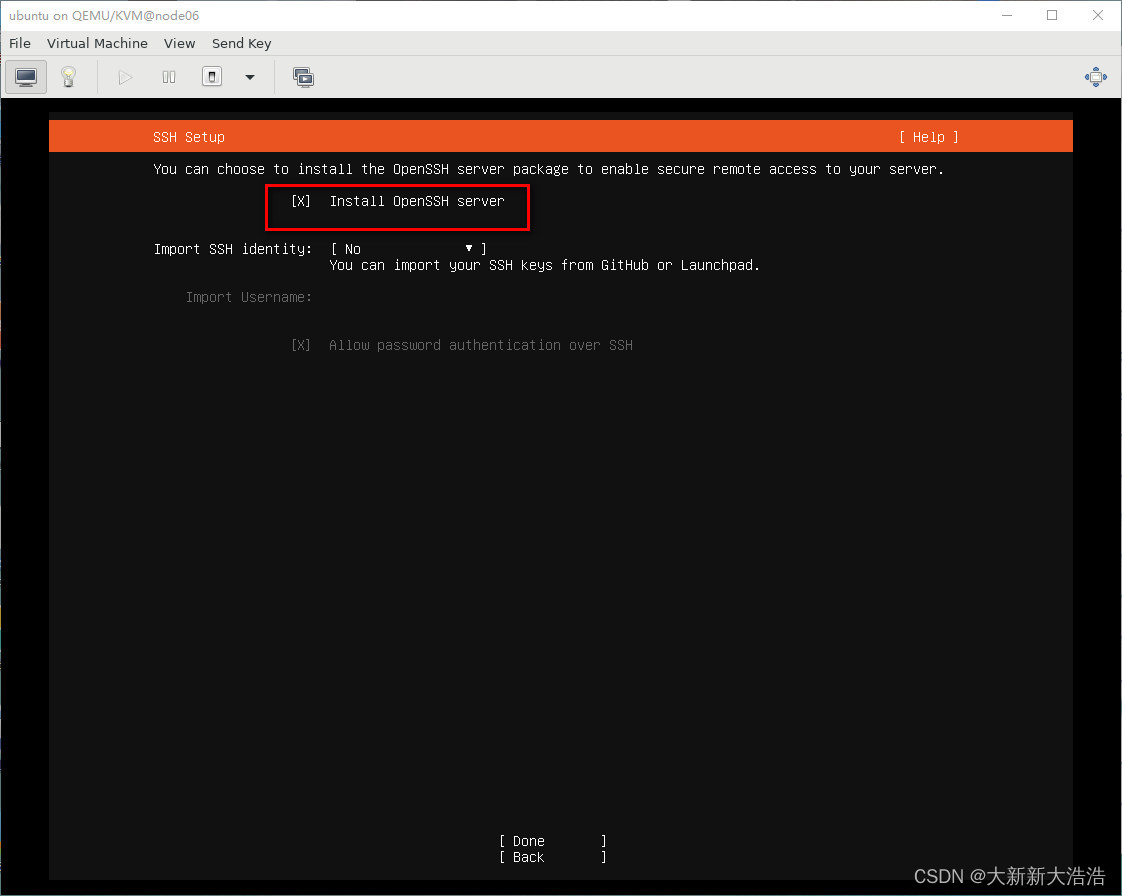
3.9 选择安装SSH服务
3.10 开始安装
3.11 安装完成,重启机器
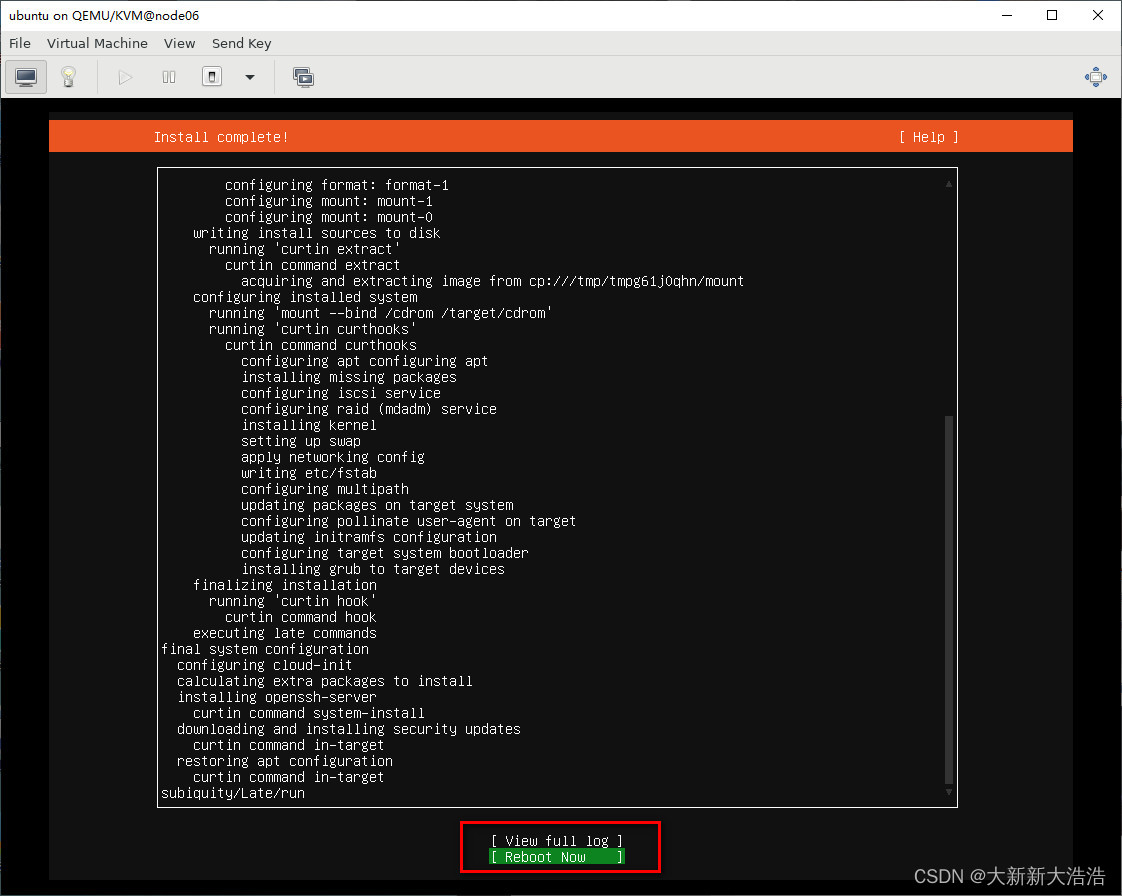
3.12 开机完成
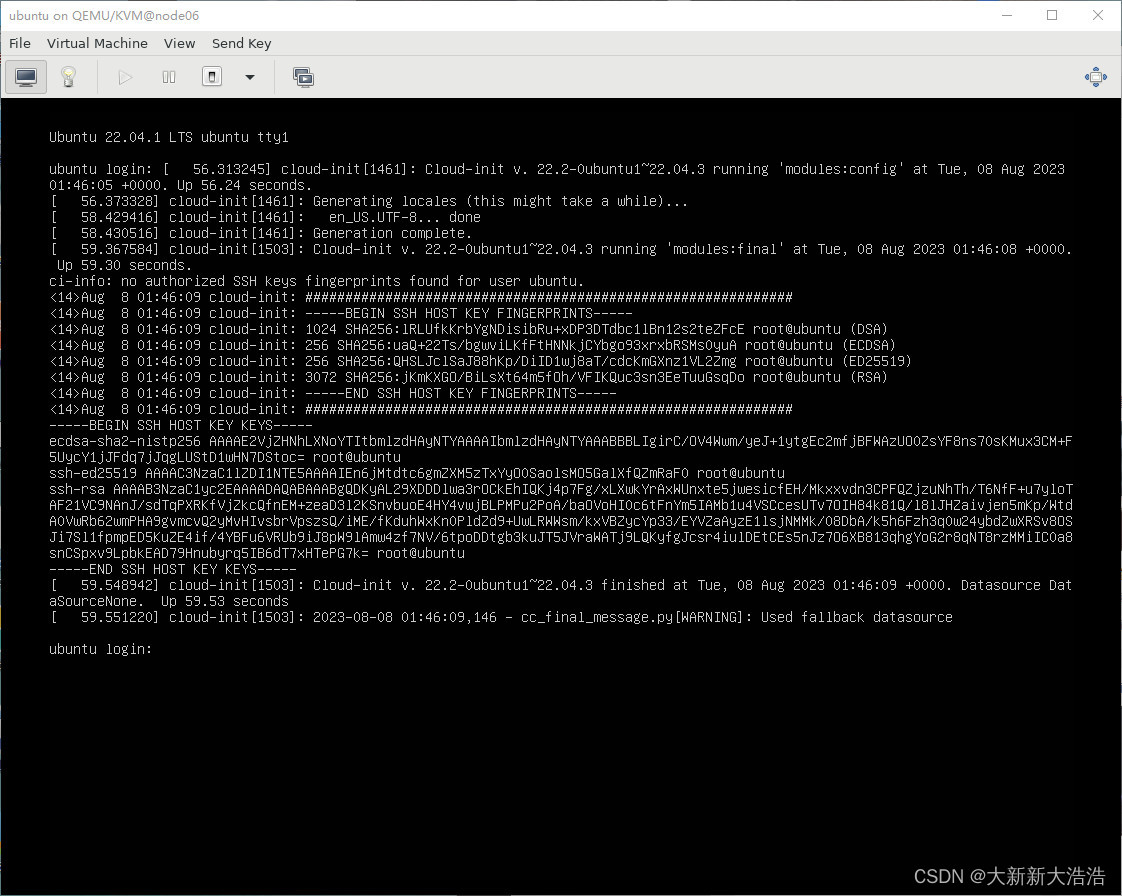
四、配置系统
4.1 使用ubunut用户登陆
1、修改root用户密码为smartcore
sudo passwd
- 1
2、修改sshd服务配置,打开root用户登陆
sudo sed -i 's/^#\?PermitRootLogin.*/PermitRootLogin yes/g' /etc/ssh/sshd_config;
sudo sed -i 's/^#\?PasswordAuthentication.*/PasswordAuthentication yes/g' /etc/ssh/sshd_config;
sudo service sshd restart
- 1
- 2
- 3
4.2 使用root用户登陆
1、设置DNS
cat >> /etc/systemd/resolved.conf << EOF
DNS=8.8.8.8 114.114.114.114
EOF
systemctl restart systemd-resolved.service
- 1
- 2
- 3
- 4
- 5
2、安装时间服务
sudo apt install -y chrony && sudo systemctl enable --now chrony
- 1
3、关闭防火墙
systemctl stop ufw
systemctl disable ufw
- 1
- 2
4、更新系统
apt-get update;
apt-get update -y;
- 1
- 2
总结
几个重点内容:
1、修改驱动类型,不同的驱动类型的虚拟设备的性能差异极大
2、源使用中科大的比阿里云的要好用的多
3、为了方便的话,最好是将root的登陆打开。
声明:本文内容由网友自发贡献,版权归原作者所有,本站不承担相应法律责任。如您发现有侵权的内容,请联系我们。转载请注明出处:【wpsshop博客】
推荐阅读
相关标签


