
热门标签
当前位置: article > 正文
2024版本idea集成SpringBoot + Ai 手写一个chatgpt 【推荐】_idea2024的ai怎么用
作者:繁依Fanyi0 | 2024-06-04 01:13:02
赞
踩
idea2024的ai怎么用
题目:SpringBoot + OpenAi 代码获取
在这里获取key和url:获取免费key
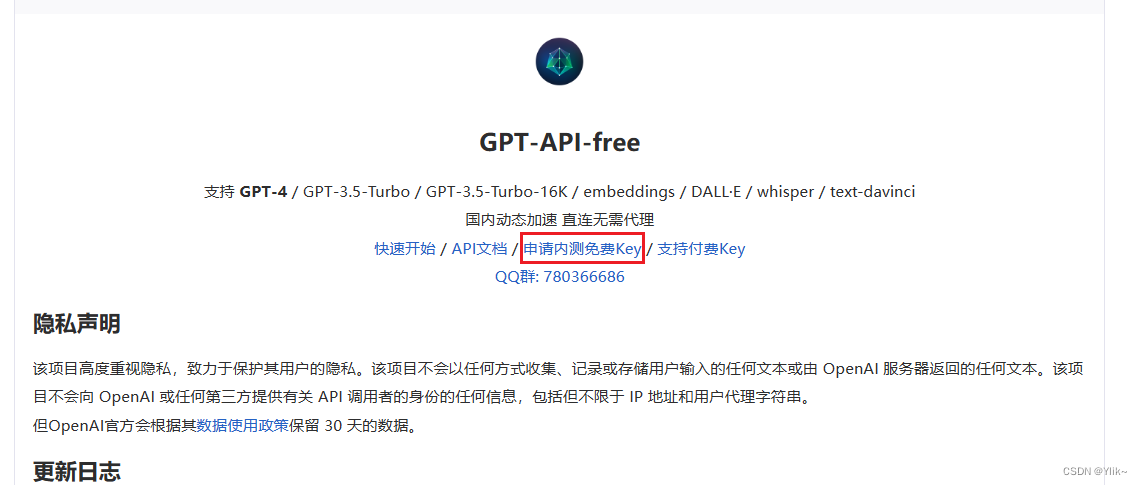
base-url为这两个:


话不多说直接来!
一、简介
Spring AI 是 AI 工程的应用框架。其目标是将 Spring 生态系统设计原则(如可移植性和模块化设计)应用于 AI,并推广使用 POJO 作为 AI 领域应用程序的构建块。
跨 AI 提供商的可移植 API 支持,适用于聊天、文本到图像和嵌入模型。支持同步和流 API 选项。还支持下拉以访问特定于模型的功能
二、Ai聊天程序代码
1、 创建项目工程
- 在父工程下面创建新的模块
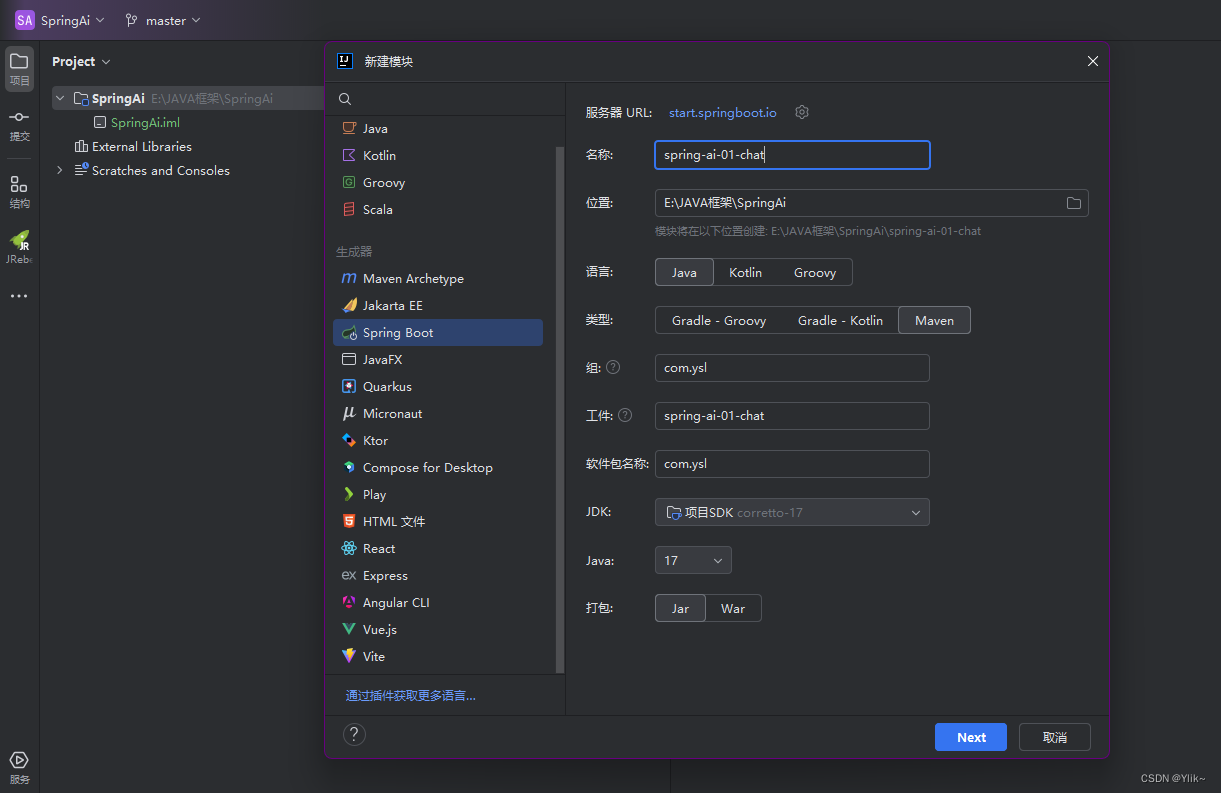
- 勾选上依赖然后创建

- 具体的依赖如下
<?xml version="1.0" encoding="UTF-8"?>
<project xmlns="http://maven.apache.org/POM/4.0.0" xmlns:xsi="http://www.w3.org/2001/XMLSchema-instance"
         xsi:schemaLocation="http://maven.apache.org/POM/4.0.0 https://maven.apache.org/xsd/maven-4.0.0.xsd">
    <modelVersion>4.0.0</modelVersion>
    <parent>
        <groupId>org.springframework.boot</groupId>
        <artifactId>spring-boot-starter-parent</artifactId>
        <version>3.2.4</version>
        <relativePath/> <!-- lookup parent from repository -->
    </parent>

    <!-- Generated by https://start.springboot.io -->
    <!-- 优质的 spring/boot/data/security/cloud 框架中文文档尽在 => https://springdoc.cn -->
    <groupId>com.ysl</groupId>
    <artifactId>SpringAi</artifactId>
    <version>0.0.1-SNAPSHOT</version>
    <packaging>pom</packaging>
    <name>SpringAi</name>
    <description>SpringAi</description>
    <modules>
        <module>spring-ai-01-chat</module>
    </modules>

    <properties>
        <java.version>17</java.version>
<!--        快照版本-->
        <spring-ai.version>1.0.0-SNAPSHOT</spring-ai.version>
    </properties>
    <dependencies>
        <dependency>
            <groupId>org.springframework.boot</groupId>
            <artifactId>spring-boot-starter-web</artifactId>
        </dependency>
        <dependency>
            <groupId>org.springframework.ai</groupId>
            <artifactId>spring-ai-openai-spring-boot-starter</artifactId>
        </dependency>

        <dependency>
            <groupId>org.springframework.boot</groupId>
            <artifactId>spring-boot-devtools</artifactId>
            <scope>runtime</scope>
            <optional>true</optional>
        </dependency>
        <dependency>
            <groupId>org.projectlombok</groupId>
            <artifactId>lombok</artifactId>
            <optional>true</optional>
        </dependency>
        <dependency>
            <groupId>org.springframework.boot</groupId>
            <artifactId>spring-boot-starter-test</artifactId>
            <scope>test</scope>
        </dependency>
    </dependencies>
<!--    相当于继承一个父项目:spring-ai-bom-->
    <dependencyManagement>
        <dependencies>
            <dependency>
                <groupId>org.springframework.ai</groupId>
                <artifactId>spring-ai-bom</artifactId>
                <version>${spring-ai.version}</version>
                <type>pom</type>
                <scope>import</scope>
            </dependency>

        </dependencies>
    </dependencyManagement>

    <build>
        <plugins>
            <plugin>
                <groupId>org.springframework.boot</groupId>
                <artifactId>spring-boot-maven-plugin</artifactId>
                <configuration>
                    <image>
                        <builder>paketobuildpacks/builder-jammy-base:latest</builder>
                    </image>
                    <excludes>
                        <exclude>
                            <groupId>org.projectlombok</groupId>
                            <artifactId>lombok</artifactId>
                        </exclude>
                    </excludes>
                </configuration>
            </plugin>
        </plugins>
    </build>
    <!--~配置本项目的仓库:因maven中心仓库还设有更新spring ai的jar包-->
    <repositories>
        <repository>
<!--            里程碑版本releases的仓库,改成快照版本的snapshot-->
            <id>spring-snapshot</id>
            <name>Spring Snapshots</name>
            <url>https://repo.spring.io/snapshot</url>
            <releases>
                <enabled>false</enabled>
            </releases>
        </repository>
    </repositories>

</project>

- 1
- 2
- 3
- 4
- 5
- 6
- 7
- 8
- 9
- 10
- 11
- 12
- 13
- 14
- 15
- 16
- 17
- 18
- 19
- 20
- 21
- 22
- 23
- 24
- 25
- 26
- 27
- 28
- 29
- 30
- 31
- 32
- 33
- 34
- 35
- 36
- 37
- 38
- 39
- 40
- 41
- 42
- 43
- 44
- 45
- 46
- 47
- 48
- 49
- 50
- 51
- 52
- 53
- 54
- 55
- 56
- 57
- 58
- 59
- 60
- 61
- 62
- 63
- 64
- 65
- 66
- 67
- 68
- 69
- 70
- 71
- 72
- 73
- 74
- 75
- 76
- 77
- 78
- 79
- 80
- 81
- 82
- 83
- 84
- 85
- 86
- 87
- 88
- 89
- 90
- 91
- 92
- 93
- 94
- 95
- 96
- 97
- 98
- 99
- 100
- 101
- 102
- 103
- 编写yml配置
- openai有自动配置类OpenAiAutoConfiguration
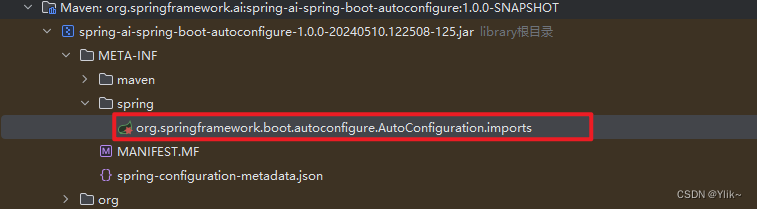
其中有聊天客户端,图片客户端…等(看下面源码)
//聊天客户端
@Bean
	@ConditionalOnMissingBean
	@ConditionalOnProperty(prefix = OpenAiChatProperties.CONFIG_PREFIX, name = "enabled", havingValue = "true",
			matchIfMissing = true)
	public OpenAiChatClient openAiChatClient(OpenAiConnectionProperties commonProperties,
			OpenAiChatProperties chatProperties, RestClient.Builder restClientBuilder,
			List<FunctionCallback> toolFunctionCallbacks, FunctionCallbackContext functionCallbackContext,
			RetryTemplate retryTemplate, ResponseErrorHandler responseErrorHandler) {

		var openAiApi = openAiApi(chatProperties.getBaseUrl(), commonProperties.getBaseUrl(),
				chatProperties.getApiKey(), commonProperties.getApiKey(), restClientBuilder, responseErrorHandler);

		if (!CollectionUtils.isEmpty(toolFunctionCallbacks)) {
			chatProperties.getOptions().getFunctionCallbacks().addAll(toolFunctionCallbacks);
		}

		return new OpenAiChatClient(openAiApi, chatProperties.getOptions(), functionCallbackContext, retryTemplate);
	}
- 1
- 2
- 3
- 4
- 5
- 6
- 7
- 8
- 9
- 10
- 11
- 12
- 13
- 14
- 15
- 16
- 17
- 18
- 19
//图片客户端
@Bean
	@ConditionalOnMissingBean
	@ConditionalOnProperty(prefix = OpenAiImageProperties.CONFIG_PREFIX, name = "enabled", havingValue = "true",
			matchIfMissing = true)
	public OpenAiImageClient openAiImageClient(OpenAiConnectionProperties commonProperties,
			OpenAiImageProperties imageProperties, RestClient.Builder restClientBuilder, RetryTemplate retryTemplate,
			ResponseErrorHandler responseErrorHandler) {

		String apiKey = StringUtils.hasText(imageProperties.getApiKey()) ? imageProperties.getApiKey()
				: commonProperties.getApiKey();

		String baseUrl = StringUtils.hasText(imageProperties.getBaseUrl()) ? imageProperties.getBaseUrl()
				: commonProperties.getBaseUrl();

		Assert.hasText(apiKey, "OpenAI API key must be set");
		Assert.hasText(baseUrl, "OpenAI base URL must be set");

		var openAiImageApi = new OpenAiImageApi(baseUrl, apiKey, restClientBuilder, responseErrorHandler);

		return new OpenAiImageClient(openAiImageApi, imageProperties.getOptions(), retryTemplate);
	}
- 1
- 2
- 3
- 4
- 5
- 6
- 7
- 8
- 9
- 10
- 11
- 12
- 13
- 14
- 15
- 16
- 17
- 18
- 19
- 20
- 21
- 22
二、一个简单的示例
1、直接写一个Controller层就可以
package com.ysl.controller;

import jakarta.annotation.Resource;
import org.springframework.ai.chat.ChatResponse;
import org.springframework.ai.chat.prompt.Prompt;
import org.springframework.ai.openai.OpenAiChatClient;
import org.springframework.ai.openai.OpenAiChatOptions;
import org.springframework.web.bind.annotation.RequestMapping;
import org.springframework.web.bind.annotation.RequestParam;
import org.springframework.web.bind.annotation.RestController;
import reactor.core.publisher.Flux;

/**
* @Author Ysl
* @Date 2024/5/11
* @name SpringAi
**/
@RestController
public class ChatController {
    /**
     * OpenAi自动装配,可以直接注入使用
     */
    @Resource
    private OpenAiChatClient openAiChatClient;

    /**
     * 调用OpenAi的接口,call方法为同步的api
     * @param msg 你要问的问题
     * @return
     */
    @RequestMapping ("/ai/chat")
    public String chat(@RequestParam("msg") String msg) {
        String call = openAiChatClient.call(msg);
        return call;
    }

    /**
     * 调用OpenAi的接口
     * @param msg 你要问的问题
     * @return  Object--json对象
     */
    @RequestMapping ("/ai/chat1")
    public Object chat1(@RequestParam("msg") String msg) {
        ChatResponse response = openAiChatClient.call(new Prompt(msg));
        return response;
//        return response.getResult().getOutput().getContent();//只拿到内容
    }

    /**
     * 调用OpenAi的接口
     * @param msg 你要问的问题
     * @return
     */
    @RequestMapping ("/ai/chat3")
    public String chat3(@RequestParam("msg") String msg) {
        //可选参数在yml配置,同时在代码中也配置,那么会以代码为准
        ChatResponse response = openAiChatClient.call(new Prompt(msg, OpenAiChatOptions.builder()
//                .withModel("gpt-4")//使用的模型
                .withTemperature(0.3F)//温度越高回答越慢,温度越低回答越快
                .build()));
        return response.getResult().getOutput().getContent();
    }

    /**
     * 调用OpenAi的接口 stream是流式的api
     * @param msg 你要问的问题
     * @return
     */
    @RequestMapping ("/ai/chat4")
    public Object chat4(@RequestParam("msg") String msg) {
        //可选参数在yml配置,同时在代码中也配置,那么会以代码为准
        Flux<ChatResponse> flux = openAiChatClient.stream(new Prompt(msg, OpenAiChatOptions.builder()
//                .withModel("gpt-3.5")//使用的模型
                .withTemperature(0.3F)//温度越高回答越慢,温度越低回答越快
                .build()));
        flux.toStream().forEach(chatResponse ->{
            System.out.println(chatResponse.getResult().getOutput().getContent());
                });
        return flux.collectList();//数据的序列
    }
}
- 1
- 2
- 3
- 4
- 5
- 6
- 7
- 8
- 9
- 10
- 11
- 12
- 13
- 14
- 15
- 16
- 17
- 18
- 19
- 20
- 21
- 22
- 23
- 24
- 25
- 26
- 27
- 28
- 29
- 30
- 31
- 32
- 33
- 34
- 35
- 36
- 37
- 38
- 39
- 40
- 41
- 42
- 43
- 44
- 45
- 46
- 47
- 48
- 49
- 50
- 51
- 52
- 53
- 54
- 55
- 56
- 57
- 58
- 59
- 60
- 61
- 62
- 63
- 64
- 65
- 66
- 67
- 68
- 69
- 70
- 71
- 72
- 73
- 74
- 75
- 76
- 77
- 78
- 79
- 80
- 81
- 82
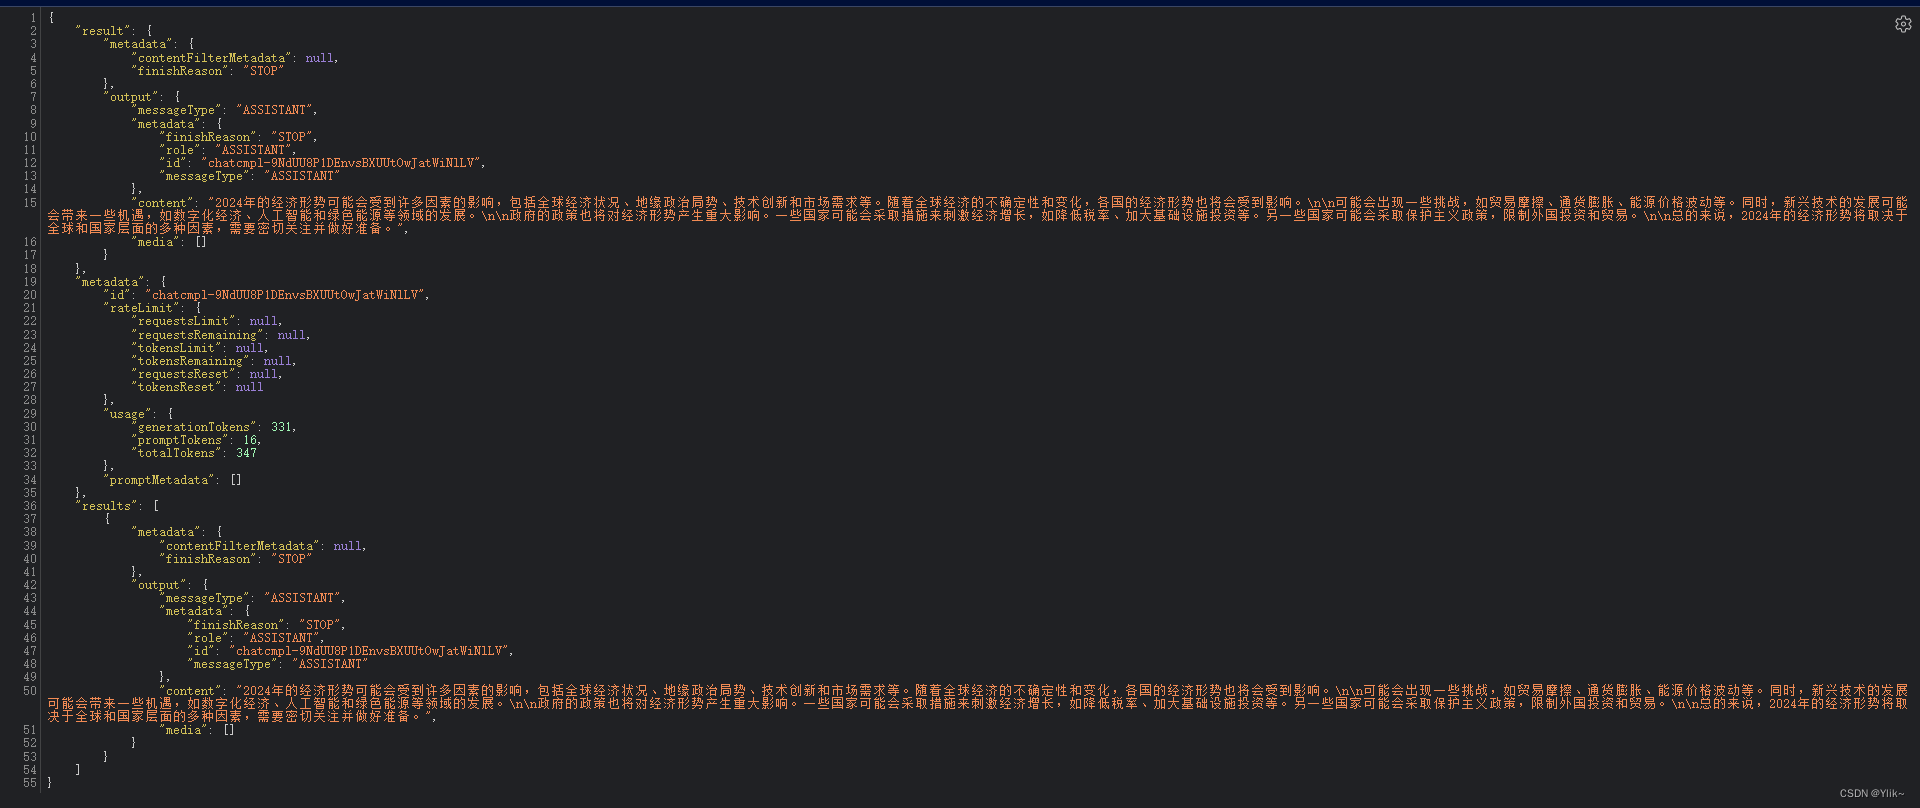
2、直接在浏览器访问
- http://localhost:8080/ai/chat?msg=24年经济形势

- http://localhost:8080/ai/chat1?msg=24年经济形势
- http://localhost:8080/ai/chat3?msg=java怎么学

OpenAi聊天客户端就写到这里,接下来是图片客户端。
三、Ai画图程序代码
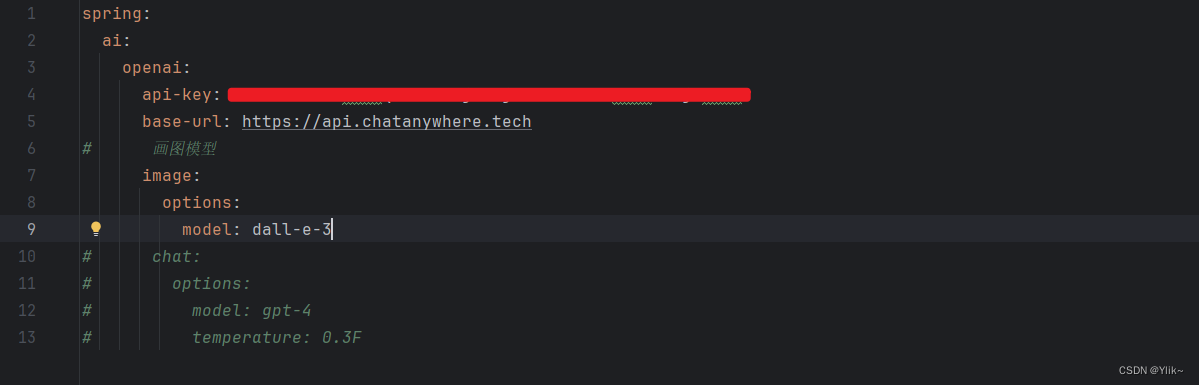
首先需要确保你的key支持绘图可以使用DALL·E 模型
1、创建一个子项目(pom文件的依赖和第一个项目一样即可)
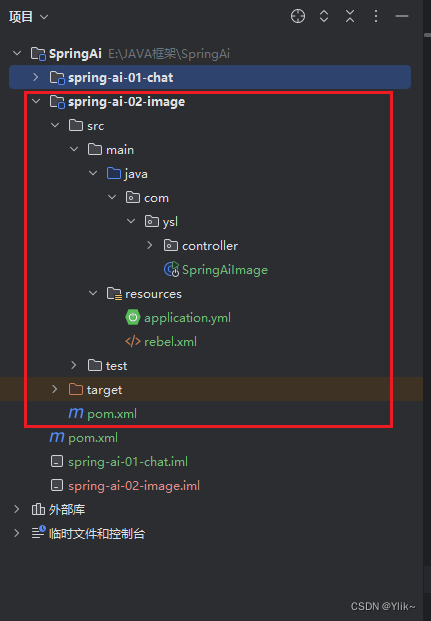
2、编写yml配置文件
3、编写controller层
import jakarta.annotation.Resource;
import org.springframework.ai.image.ImagePrompt;
import org.springframework.ai.image.ImageResponse;
import org.springframework.ai.openai.OpenAiImageClient;
import org.springframework.ai.openai.OpenAiImageOptions;
import org.springframework.web.bind.annotation.RequestMapping;
import org.springframework.web.bind.annotation.RequestParam;
import org.springframework.web.bind.annotation.RestController;

/**
 * @Author Ysl
 * @Date 2024/5/12
 * @name SpringAi
 **/
@RestController
public class ImageController {
    @Resource
    private OpenAiImageClient openAiImageClient;

    @RequestMapping("/ai/image")
    public Object image(@RequestParam("msg") String msg) {
        ImageResponse imageResponse = openAiImageClient.call(new ImagePrompt(msg));
//        对图片进行业务处理(拿到图片的链接)
        String url = imageResponse.getResult().getOutput().getUrl();

        return imageResponse.getResult().getOutput();
    }

    @RequestMapping("/ai/image2")
    public Object image2(@RequestParam("msg") String msg) {
        //第二个参数是传递图片的参数,同样可在yml里配置
        ImageResponse imageResponse = openAiImageClient.call(new ImagePrompt(msg, OpenAiImageOptions.builder()
                .withQuality("hd")//高清
                .withN(1)//生成1张,可填数字1-10
                .withHeight(1024)//高度
                .withWidth(1024)//宽度
                .build()
        ));
//        对图片进行业务处理(拿到图片的链接)
        String url = imageResponse.getResult().getOutput().getUrl();

        return imageResponse.getResult().getOutput();
    }

}
- 1
- 2
- 3
- 4
- 5
- 6
- 7
- 8
- 9
- 10
- 11
- 12
- 13
- 14
- 15
- 16
- 17
- 18
- 19
- 20
- 21
- 22
- 23
- 24
- 25
- 26
- 27
- 28
- 29
- 30
- 31
- 32
- 33
- 34
- 35
- 36
- 37
- 38
- 39
- 40
- 41
- 42
- 43
- 44
- 45
3、访问链接
- http://localhost:8080/ai/image?msg=画一只蝴蝶
- http://localhost:8080/ai/image2?msg=画一只蝴蝶
4、结果:

打开链接

Ai画图就讲到这里,下面是音频翻译
四、Ai音频翻译代码
首先确保你的key可以使用whisper 模型
1、创建子项目编写配置文件
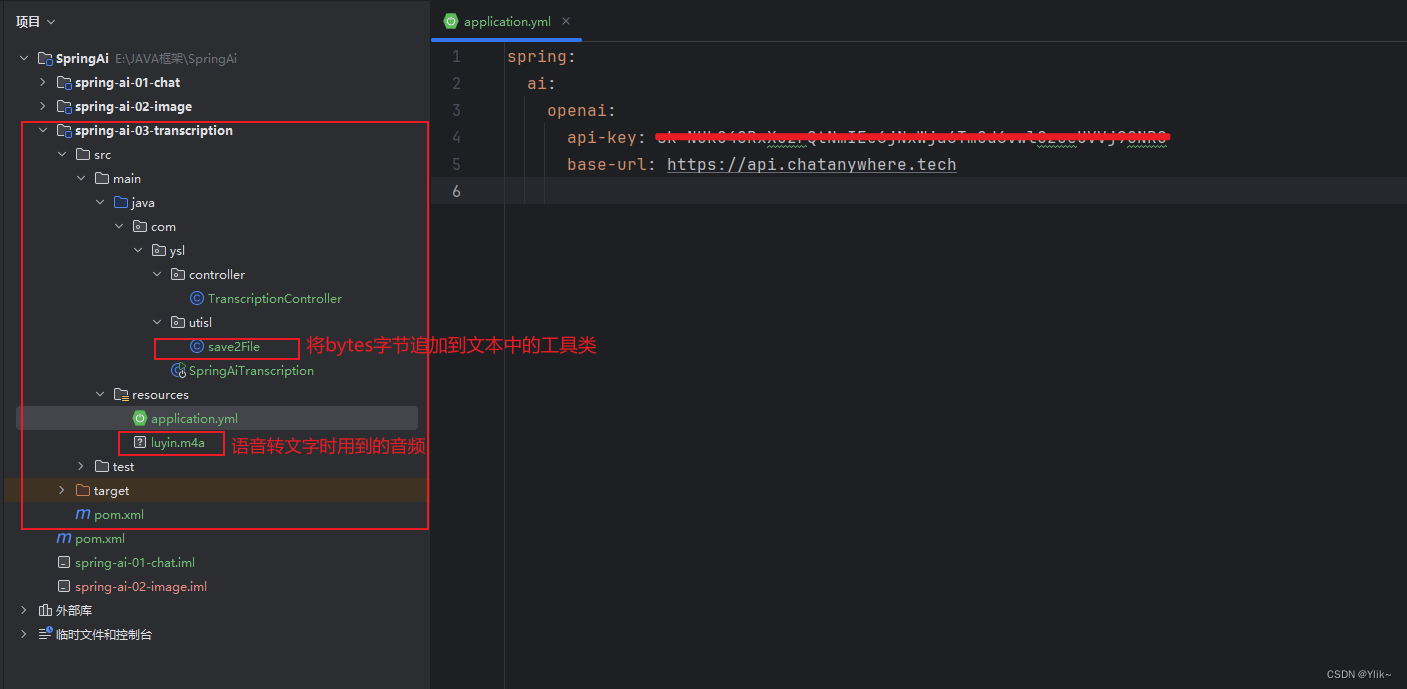
2、用到的工具类:将bytes[ ]字节数组写入新建的文件中
import java.io.*;

/**
 * @Author Ysl
 * @Date 2024/5/12
 * @name SpringAi
 **/
public class save2File {
    /**
     * 方法功能:将字节数组写入到新建文件中。
     * @param  fname
     * @param  msg
     * @return boolean
     * */
    public static boolean save2File(String fname, byte[] msg){
        OutputStream fos = null;
        try{
            File file = new File(fname);
            File parent = file.getParentFile();
            boolean bool;
            if ((!parent.exists()) &&
                    (!parent.mkdirs())) {
                return false;
            }
            fos = new FileOutputStream(file);
            fos.write(msg);
            fos.flush();
            return true;
        } catch (FileNotFoundException e) {
            return false;
        }catch (IOException e){
            File parent;
            return false;
        }
        finally{
            if (fos != null) {
                try{
                    fos.close();
                }catch (IOException e) {}
            }
        }
    }
}
- 1
- 2
- 3
- 4
- 5
- 6
- 7
- 8
- 9
- 10
- 11
- 12
- 13
- 14
- 15
- 16
- 17
- 18
- 19
- 20
- 21
- 22
- 23
- 24
- 25
- 26
- 27
- 28
- 29
- 30
- 31
- 32
- 33
- 34
- 35
- 36
- 37
- 38
- 39
- 40
- 41
- 42
- 43
2、编写controller层
import jakarta.annotation.Resource;
import org.springframework.ai.openai.OpenAiAudioSpeechClient;
import org.springframework.ai.openai.OpenAiAudioTranscriptionClient;
import org.springframework.core.io.ClassPathResource;
import org.springframework.web.bind.annotation.RequestMapping;
import org.springframework.web.bind.annotation.RestController;
import static com.ysl.utisl.save2File.save2File;

/**
 * @Author Ysl
 * @Date 2024/5/12
 * @name SpringAi
 **/
@RestController
public class TranscriptionController {
    //将音频转文字时使用
    @Resource
    private OpenAiAudioTranscriptionClient transcriptionClient;
    //将文字转语音时使用
    @Resource
    private OpenAiAudioSpeechClient speechClient;

    /**
     * 将音频转文字
     * @return
     */
    @RequestMapping("/ai/transcription")
    public Object transcription() {
    //读取的是磁盘的路径
    //FileSystemResource audioFile = new FileSystemResource("C:\\Users\\DELL\\Desktop\\luyin.m4a");
        //读取的是classpath静态资源下的文件
        ClassPathResource audioFile = new ClassPathResource("luyin.m4a");
        String call = transcriptionClient.call(audioFile);
        System.out.println(call);
        return call;
    }

    /**
     * 将文字转音频
     * @return
     */
    @RequestMapping("/ai/tts")
    public Object tts() {
        String text = "Spring AI 是 AI 工程的应用框架。其目标是将 Spring 生态系统设计原则(如可移植性和模块化设计)应用于 AI,并推广使用 POJO 作为 AI 领域应用程序的构建块。 跨 AI 提供商的可移植 API 支持,适用于聊天、文本到图像和嵌入模型。支持同步和流 API 选项。还支持下拉以访问特定于模型的功能";
        byte[] bytes = speechClient.call(text);
        save2File("C:\\Users\\DELL\\Desktop\\test.mp3",bytes);
        return "OK";
    }

}
- 1
- 2
- 3
- 4
- 5
- 6
- 7
- 8
- 9
- 10
- 11
- 12
- 13
- 14
- 15
- 16
- 17
- 18
- 19
- 20
- 21
- 22
- 23
- 24
- 25
- 26
- 27
- 28
- 29
- 30
- 31
- 32
- 33
- 34
- 35
- 36
- 37
- 38
- 39
- 40
- 41
- 42
- 43
- 44
- 45
- 46
- 47
- 48
- 49
- 50
3、访问链接
- 1、 http://localhost:8080/ai/transcription
- 将音频中的话转化为文字显示在页面中

- 2、 http://localhost:8080/ai/tts
- 将text中的文字转为语音后储存在路径C:\Users\DELL\Desktop\test.mp3
- 打开mp3文件即可听到代码中text文本中的内容

声明:本文内容由网友自发贡献,不代表【wpsshop博客】立场,版权归原作者所有,本站不承担相应法律责任。如您发现有侵权的内容,请联系我们。转载请注明出处:https://www.wpsshop.cn/w/繁依Fanyi0/article/detail/669743
推荐阅读