- 1【机器学习】Transformer:自然语言处理的巅峰之作_transformer成功
- 2对接第三方接口,其中图片是经过Base64加密的_hyl.tv
- 3联想台式机usb驱动_台式机间歇性黑屏怎么办?
- 4【机器学习】机器学习重要方法—— 半监督学习:理论、算法与实践
- 5Conda linux-gnu-c++版本报错_conda 安装gnu-cc
- 6Java作业练习_实验七接口与实现(小白学习记录,仅供参考,有错指出)_java代码作业
- 7网络故障汇编_ghosts 幻象干扰
- 8【TCP/IP协议详解】_tcp ip协议
- 9Win11 Windows安全中心一直显示警告图标解决方法_快捷方式 安全警告
- 10英伟达市值超过微软、苹果,登顶全球第一
Centos7配置webrtc-streamer环境_linux webrtc-streamer
赞
踩
Centos7配置webrtc-streamer环境
安装webrtc-streamer0.7版本
下载安装包
wget https://github.com/mpromonet/webrtc-streamer/releases/download/v0.7.0/webrtc-streamer-v0.7.0-Linux-x86_64-Release.tar.gz

解压
tar -zxvf webrtc-streamer-v0.7.0-Linux-x86_64-Release.tar.gz

重命名
mv webrtc-streamer-v0.7.0-Linux-x86_64-Release/ webrtc-streamer/

cd webrtc-streamer/

执行 ./webrtc-streamer 查看缺少的依赖
- 1
- 2
- 3
- 4
- 5
- 6
- 7
- 8
- 9
- 10
- 11
- 12
- 13
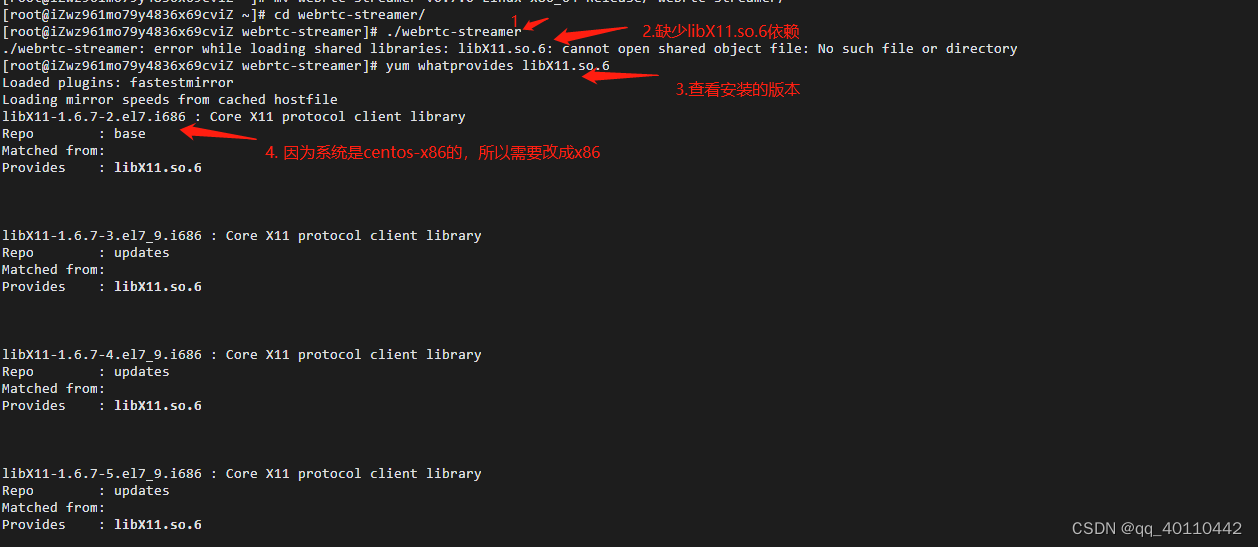
缺少libX11.so.6依赖,执行 yum whatprovides libX11.so.6 查看需要安装的版本
然后执行以下命令安装 libX11.so.6
yum install -y libX11-1.6.7-2.el7.x86_64 --setopt=protected_multilib=false
- 1
然后再重复执行./webrtc-streamer查看还缺哪些依赖按照以上步骤安装,直到最后出现如下情况:缺少glibc依赖

升级glibc依赖前,需要升级gdb 、gcc、python、make
升级gdb
gdb版本:升级前7.6.1,升级后7.8
1、yum安装
yum install -y gdb
- 1
2、查看gdb版本

3.下载待升级的gdb版本
下载安装包
wget http://ftp.gnu.org/gnu/gdb/gdb-7.8.tar.gz

解压软件包
tar -zxvf gdb-7.8.tar.gz
- 1
- 2
- 3
- 4
- 5
预编译,分别执行以下指令,如果出现报错,按照QA章节处理,建议执行make之前先把QA章节的依赖先安装一遍
cd gdb-7.8
mkdir build && cd build
../configure --prefix=/usr
make
make install
- 1
- 2
- 3
- 4
- 5
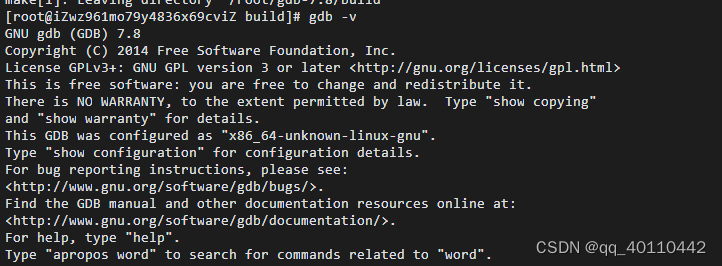
最后检查版本
4.QA
1、预编译的时候报错no acceptable C compiler found in $PATH
报错信息:configure: error: no acceptable C compiler found in $PATH
报错原因:未安装gcc
解决方案:yum -y install gcc-c++
2、make的时候报错[all-bfd] Error
报错信息:make[3]: *** [bfd.info] Error 1
报错原因:没有安装texinfo模块
解决方案:yum install -y texinfo,然后重新执行预编译步骤
3、make的时候报错
报错信息:no termcap library found
报错原因:没有安装termcap
解决方案:源码安装termcap
#下载termcap软件包
[root@s142 opt]# wget https://ftp.gnu.org/gnu/termcap/termcap-1.3.1.tar.gz --no-check-certificate
#解压软件包
[root@s142 opt]# tar -zxvf termcap-1.3.1.tar.gz
#预编译
[root@s142 termcap-1.3.1]# ./configure --prefix=/usr
#编译
[root@s142 termcap-1.3.1]# make
#编译安装
[root@s142 termcap-1.3.1]# make install
————————————————
版权声明:本文为博主原创文章,遵循 CC 4.0 BY-SA 版权协议,转载请附上原文出处链接和本声明。
- 1
原文链接:https://blog.csdn.net/carefree2005/article/details/125068985
升级GCC
1.源码编译升级gcc9.3.0
wget https://mirrors.aliyun.com/gnu/gcc/gcc-9.3.0/gcc-9.3.0.tar.gz
tar -zxf gcc-9.3.0.tar.gz
cd gcc-9.3.0/

 ./contrib/download_prerequisites
- 1
- 2
- 3
- 4
- 5
执行后如果报错:lbzip2: Cannot exec: No such file or directory,那就需要安装lbzip2

执行
yum -y install bzip2
- 1
- 2
安装完毕后再次执行
./contrib/download_prerequisites
- 1

最后再执行编译
 mkdir build && cd build
../configure --enable-checking=release --enable-language=c,c++ --disable-multilib --prefix=/usr

make
make install
- 1
- 2
- 3
- 4
- 5
2.升级成功后gcc版本检查
gcc -v
- 1

升级Python
执行
 yum install python3 -y

查看python版本,
python --version
- 1
- 2
- 3
- 4
- 5

发现python版本没变,这是因为在/usr/bin中有个python软链接文件仍然指向python2

删除该文件,重新创建一个,指向python3就可以了

更改了链接后会导致yum命令不可用

这是因为yum包管理是使用python2.x写的,将python2.x升级到python3.6.8以后,由于python版本语法兼容性导致问题出现
解决办法:
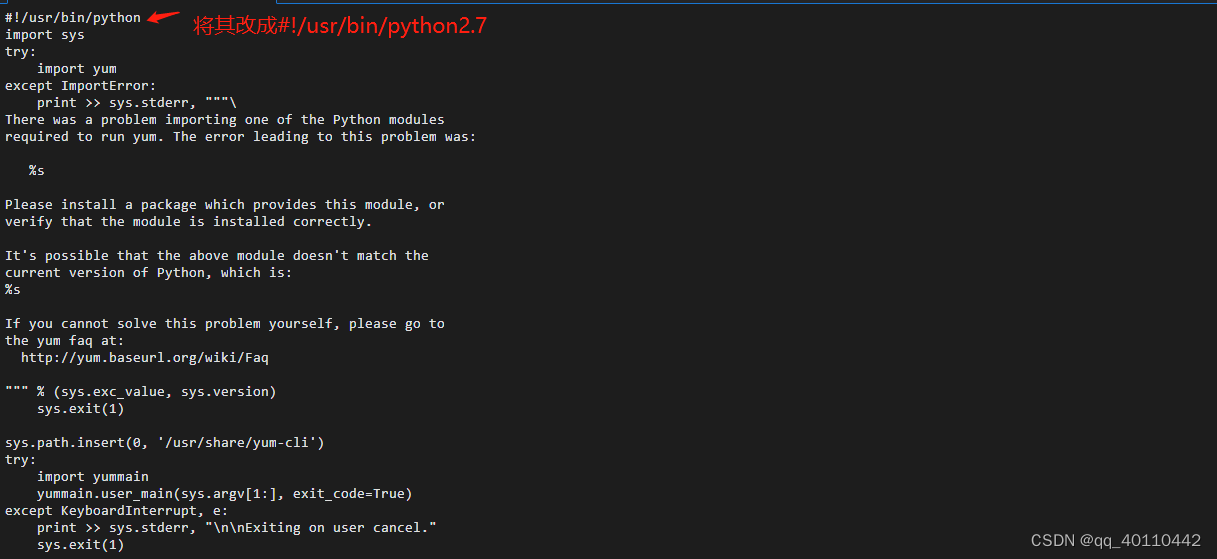
修改yum配置文件,将python版本指向以前的旧版本
# vi /usr/bin/yum
#!/usr/bin/python2.7
- 1
- 2
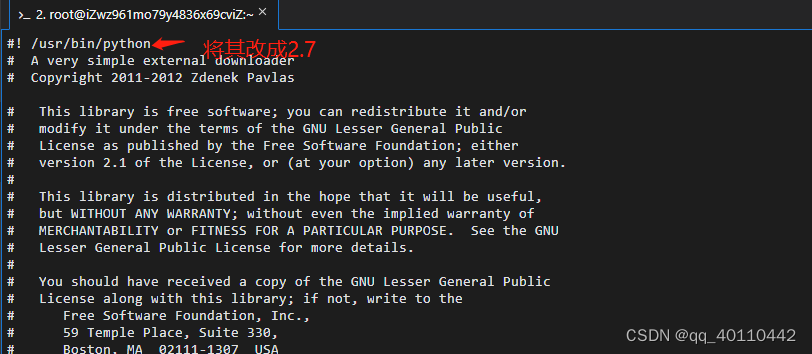
修改urlgrabber-ext-down文件,更改python版本
# vi /usr/libexec/urlgrabber-ext-down
#!/usr/bin/python2.7
- 1
- 2
- 3
升级make
下载make
wget https://mirrors.aliyun.com/gnu/make/make-4.4.tar.gz
tar -zxvf make-4.4.tar.gz
- 1
- 2
编译安装make
cd make-4.4
mkdir build && cd build

# 编译安装
../configure --prefix=/usr
 make
 make install
- 1
- 2
- 3
- 4
- 5
- 6
- 7
make版本检查
make -v
- 1
升级binutils
下载binutils
wget https://mirrors.aliyun.com/gnu/binutils/binutils-2.30.tar.gz
tar -zxvf binutils-2.30.tar.gz
- 1
- 2
编译安装binutils
cd binutils-2.30
./configure  --prefix=/usr
make && make install
- 1
- 2
- 3
升级bison
下载bison
wget https://mirrors.aliyun.com/gnu/bison/bison-3.0.1.tar.gz
tar -zxvf bison-3.0.1.tar.gz
- 1
- 2
编译安装bison
cd bison-3.0.1
./configure --prefix=/usr
make && make install
- 1
- 2
- 3
bison版本检查
bison -V
- 1
升级glibc
下载glibc3.3版本
wget https://mirrors.aliyun.com/gnu/glibc/glibc-2.33.tar.gz
tar -zxf glibc-2.31.tar.gz
cd glibc-2.31/
- 1
- 2
- 3
查看安装glibc需要的依赖版本
cat INSTALL | grep -E "newer|later"
- 1
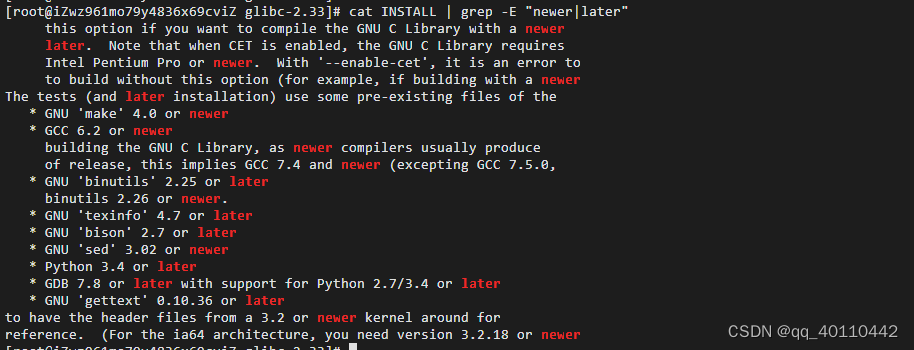
如果有依赖版本不符合需重新安装后再编译glibc
编译glibc
mkdir build
cd build
../configure  --prefix=/usr --disable-profile --enable-add-ons --with-headers=/usr/include --with-binutils=/usr/bin --disable-sanity-checks --disable-werror

make
make install
make localedata/install-locales
- 1
- 2
- 3
- 4
- 5
- 6
- 7
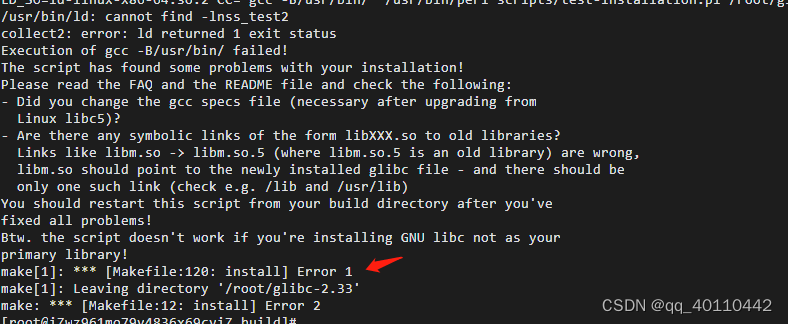
最后升级完成后的页面,会有一个error,可以忽略,如下:
版本检查
strings /lib64/libc.so.6 | grep GLIBC
ll /lib64/libc.so*
ldd --version
- 1
- 2
- 3


