- 1人工智能与情绪识别:未来的关键技术
- 2UDP端口连不上的情况
- 3最全的java对接微信小程序客服功能实现(包含自动回复文本消息、图片消息,进入人工客服)_java实现连接微信客服的方法
- 4虚拟机网段与宿主机的网段不匹配造成xshell连接不上_复制虚拟机ip和本地ip网段不一致,xshell连不上
- 5【2024美赛】C题 Problem C: Momentum in Tennis网球运动中的势头 网球问题一python代码_2024美赛c 题目
- 6MMSegmentation自定义数据集
- 7YOLOv8改进:构建新的C2f_RepGhost模块,针对Ghost进行重参数化,速度,mAP双提高!_repghostconv
- 8白天研究生系列:炼丹专题第三集《本地部署大语言模型保姆级教程——以ChatGLM-6B为例》_chatglm4-6b
- 9轻易云AI:引领企业数智化转型提升企业AI效率_小汤ai健康百科智能搜索工具
- 10为什么大模型计算的时候只会利用KVcache来存放KV矩阵,Q矩阵每次不一样?_kv缓存技术为什么不能用在训练阶段
SpringCloudAlibaba 2021.0.1 - Java/Kotlin 项目完整搭建(Nacos + OpenFeign + Getway + Sentinel)_springcloudalibaba项目搭建
赞
踩
目录
1.5.2、在 application.yml 中配置 sentinel
1.6.2、创建 application.yml 并配置网关
一、SpringCloudAlibaba 项目完整搭建
1.1、初始化项目
1.1.1、创建工程
a)先创建一个空项目,名字自定义.

Ps:
1. 这里也可以不创建空项目,而是直接创建一个 Maven 项目作为父项目,然后删掉 src 目录即可.
2. 还有一种更方便的管理办法,就是直接创建一个 Spring Boot 项目做为父项目,这样就可以提前引入好依赖,然后只留下 pom.xml 、.gitinore 、.idea 即可.
b)在刚刚的空项目下创建整个项目的父模块

c)父工程下的 src 可以删了,没用
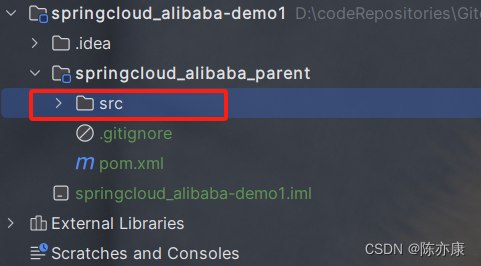
d)最后直接用 IDEA 打开空项目下的父工程(否则 Java 文件不生效)
1.1.2、配置父工程的 pom.xml
a)引入依赖如果没有语法提示,可以这样添加索引

b)配置依赖如下
- <?xml version="1.0" encoding="UTF-8"?>
- <project xmlns="http://maven.apache.org/POM/4.0.0"
- xmlns:xsi="http://www.w3.org/2001/XMLSchema-instance"
- xsi:schemaLocation="http://maven.apache.org/POM/4.0.0 http://maven.apache.org/xsd/maven-4.0.0.xsd">
- <modelVersion>4.0.0</modelVersion>
-
- <groupId>org.example</groupId>
- <artifactId>springcloud_alibaba_parent</artifactId>
- <version>1.0-SNAPSHOT</version>
-
- <!--配置版本信息-->
- <properties>
- <java.version>8</java.version>
- <spring-cloud.version>Hoxton.SR8</spring-cloud.version>
- <spring-cloud-alibaba.version>2.2.5.RELEASE</spring-cloud-alibaba.version>
- </properties>
-
-
- <!--parent-->
- <parent>
- <groupId>org.springframework.boot</groupId>
- <artifactId>spring-boot-starter-parent</artifactId>
- <version>2.3.9.RELEASE</version>
- </parent>
-
- <dependencies>
- <!--基本上每个项目都需要日志-->
- <dependency>
- <groupId>org.projectlombok</groupId>
- <artifactId>lombok</artifactId>
- </dependency>
- </dependencies>
-
- <!--管理依赖规范-->
- <dependencyManagement>
- <dependencies>
-
- <!-- springCloud -->
- <dependency>
- <groupId>org.springframework.cloud</groupId>
- <artifactId>spring-cloud-dependencies</artifactId>
- <version>${spring-cloud.version}</version>
- <type>pom</type>
- <scope>import</scope>
- </dependency>
-
- <!-- spring-cloud-alibaba -->
- <dependency>
- <groupId>com.alibaba.cloud</groupId>
- <artifactId>spring-cloud-alibaba-dependencies</artifactId>
- <version>${spring-cloud-alibaba.version}</version>
- <type>pom</type>
- <scope>import</scope>
- </dependency>
-
- </dependencies>
- </dependencyManagement>
-
- </project>
Ps:SpringCloud Alibaba 、SpringCloud、SpringBoot 各版本对应说明 如下
https://github.com/alibaba/spring-cloud-alibaba/wiki/%E7%89%88%E6%9C%AC%E8%AF%B4%E6%98%8E
例如按照上述文档,这里给出一个更新的版本样式(稳定).
Java 版如下:
- <properties>
- <maven.compiler.source>17</maven.compiler.source>
- <maven.compiler.target>17</maven.compiler.target>
- <project.build.sourceEncoding>UTF-8</project.build.sourceEncoding>
- <mybatis-spring-boot.version>2.3.1</mybatis-spring-boot.version>
- <mybatis-plus>3.5.3.1</mybatis-plus>
- <mysql.version>5.1.49</mysql.version>
- <spring-cloud.version>2021.0.1</spring-cloud.version>
- <spring-cloud-alibaba.version>2021.0.1.0</spring-cloud-alibaba.version>
- </properties>
-
- <parent>
- <groupId>org.springframework.boot</groupId>
- <artifactId>spring-boot-starter-parent</artifactId>
- <version>2.6.3</version>
- <relativePath/>
- </parent>
-
-
- <!--维护依赖-->
- <dependencyManagement>
- <dependencies>
-
- <!-- spring-cloud -->
- <dependency>
- <groupId>org.springframework.cloud</groupId>
- <artifactId>spring-cloud-dependencies</artifactId>
- <version>${spring-cloud.version}</version>
- <type>pom</type>
- <scope>import</scope>
- </dependency>
-
- <!-- spring-cloud-alibaba -->
- <dependency>
- <groupId>com.alibaba.cloud</groupId>
- <artifactId>spring-cloud-alibaba-dependencies</artifactId>
- <version>${spring-cloud-alibaba.version}</version>
- <type>pom</type>
- <scope>import</scope>
- </dependency>
-
- <!--mybatis-plus-->
- <dependency>
- <groupId>com.baomidou</groupId>
- <artifactId>mybatis-plus-boot-starter</artifactId>
- <version>${mybatis-plus}</version>
- </dependency>
-
- <!--mysql-->
- <dependency>
- <groupId>mysql</groupId>
- <artifactId>mysql-connector-java</artifactId>
- <version>${mysql.version}</version>
- </dependency>
-
- <!--spring-boot-test-->
- <dependency>
- <groupId>org.springframework.boot</groupId>
- <artifactId>spring-boot-starter-test</artifactId>
- <scope>test</scope>
- </dependency>
-
- <!--mybatis-test-->
- <dependency>
- <groupId>org.mybatis.spring.boot</groupId>
- <artifactId>mybatis-spring-boot-starter-test</artifactId>
- <version>${mybatis-spring-boot.version}</version>
- <scope>test</scope>
- </dependency>
- </dependencies>
- </dependencyManagement>
Kotlin 版如下:
- <properties>
- <kotlin.version>1.9.22</kotlin.version>
- <maven.compiler.source>17</maven.compiler.source>
- <maven.compiler.target>17</maven.compiler.target>
- <project.build.sourceEncoding>UTF-8</project.build.sourceEncoding>
- <mybatis-plus>3.5.5</mybatis-plus>
- <mysql.version>5.1.49</mysql.version>
- <spring-cloud.version>2021.0.1</spring-cloud.version>
- <spring-cloud-alibaba.version>2021.0.1.0</spring-cloud-alibaba.version>
- <jwt.version>3.4.0</jwt.version>
- </properties>
-
- <parent>
- <groupId>org.springframework.boot</groupId>
- <artifactId>spring-boot-starter-parent</artifactId>
- <version>3.1.8</version>
- <relativePath/>
- </parent>
-
- <dependencies>
- <dependency>
- <groupId>org.jetbrains.kotlin</groupId>
- <artifactId>kotlin-reflect</artifactId>
- </dependency>
- <dependency>
- <groupId>org.jetbrains.kotlin</groupId>
- <artifactId>kotlin-stdlib</artifactId>
- </dependency>
- <dependency>
- <groupId>org.jetbrains.kotlinx</groupId>
- <artifactId>kotlinx-coroutines-core</artifactId>
- </dependency>
- </dependencies>
-
-
- <!--维护依赖-->
- <dependencyManagement>
- <dependencies>
-
- <!-- spring-cloud -->
- <dependency>
- <groupId>org.springframework.cloud</groupId>
- <artifactId>spring-cloud-dependencies</artifactId>
- <version>${spring-cloud.version}</version>
- <type>pom</type>
- <scope>import</scope>
- </dependency>
-
- <!-- spring-cloud-alibaba -->
- <dependency>
- <groupId>com.alibaba.cloud</groupId>
- <artifactId>spring-cloud-alibaba-dependencies</artifactId>
- <version>${spring-cloud-alibaba.version}</version>
- <type>pom</type>
- <scope>import</scope>
- </dependency>
-
- <!--mybatis-plus-->
- <dependency>
- <groupId>com.baomidou</groupId>
- <artifactId>mybatis-plus-boot-starter</artifactId>
- <version>${mybatis-plus}</version>
- </dependency>
-
- <!--mysql-->
- <dependency>
- <groupId>mysql</groupId>
- <artifactId>mysql-connector-java</artifactId>
- <version>${mysql.version}</version>
- </dependency>
-
- <dependency>
- <groupId>com.auth0</groupId>
- <artifactId>java-jwt</artifactId>
- <version>${jwt.version}</version>
- </dependency>
-
- <!--spring-boot-test-->
- <dependency>
- <groupId>org.springframework.boot</groupId>
- <artifactId>spring-boot-starter-test</artifactId>
- <scope>test</scope>
- </dependency>
-
- </dependencies>
- </dependencyManagement>
-
- <!--kotlin 相关构建-->
- <build>
- <sourceDirectory>${project.basedir}/src/main/kotlin</sourceDirectory>
- <testSourceDirectory>${project.basedir}/src/test/kotlin</testSourceDirectory>
- <plugins>
- <plugin>
- <groupId>org.jetbrains.kotlin</groupId>
- <artifactId>kotlin-maven-plugin</artifactId>
- <configuration>
- <args>
- <arg>-Xjsr305=strict</arg>
- </args>
- <compilerPlugins>
- <plugin>spring</plugin>
- </compilerPlugins>
- </configuration>
- <dependencies>
- <dependency>
- <groupId>org.jetbrains.kotlin</groupId>
- <artifactId>kotlin-maven-allopen</artifactId>
- <version>${kotlin.version}</version>
- </dependency>
- </dependencies>
- </plugin>
- </plugins>
- </build>
1.1.3、创建子模块
在父工程下创建 4 个 module
- user:用户微服务(案例).
- product:商品微服务(案例).
- gateway:网关微服务.
- model:模组微服务,用来管理实体类,公共依赖(例如 user 微服务和 product 微服务中都需要 spring web 依赖,那么只需要将这个依赖放到 model 中,然后在 user 和 product 中分别引入 model 模块即可)

1.2、user 微服务
1.2.1、配置 pom.xml
用户微服务所需依赖如下(按需引入):
- <dependencies>
-
- <!--web-->
- <dependency>
- <groupId>org.springframework.boot</groupId>
- <artifactId>spring-boot-starter-web</artifactId>
- </dependency>
- <!--nacos-discovery-->
- <dependency>
- <groupId>com.alibaba.cloud</groupId>
- <artifactId>spring-cloud-starter-alibaba-nacos-discovery</artifactId>
- </dependency>
-
- <!--openFeign-->
- <dependency>
- <groupId>org.springframework.cloud</groupId>
- <artifactId>spring-cloud-starter-openfeign</artifactId>
- </dependency>
-
- <!--sentinel-->
- <dependency>
- <groupId>com.alibaba.cloud</groupId>
- <artifactId>spring-cloud-starter-alibaba-sentinel</artifactId>
- </dependency>
-
-
- </dependencies>
Ps:不要一开始就引入这么多,按需引入!尤其是 nacos config配置 依赖,如果引入不使用就会报错!
1.2.2、创建 application.yml 配置文件
配置端口号,以及 nacos 地址
- server:
- port: 8090
-
- spring:
- application:
- name: user
- cloud:
- nacos:
- server-addr: localhost:8890
1.2.3、创建启动类
- @SpringBootApplication
- @EnableDiscoveryClient // nacos 服务发现(可以省略)
- public class UserApplication {
-
- public static void main(String[] args) {
- SpringApplication.run(UserApplication.class, args);
- }
-
- }
启动 user 微服务,就可以看到 nacos 中存在该服务了

1.2.4、测试
创建 UserController,如下
- @Slf4j
- @RestController
- @RequestMapping
- public class UserController {
-
- @Value("${server.port}")
- private int port;
-
- @GetMapping("/user")
- public String user() {
- log.info("user ok! port={}", port);
- return "user ok! port=" + port;
- }
-
- }
postman 测试结果如下:

1.3、product 微服务
1.3.1、配置 pom.xml
用户微服务所需依赖如下(按需引入):
- <dependencies>
-
- <!--web-->
- <dependency>
- <groupId>org.springframework.boot</groupId>
- <artifactId>spring-boot-starter-web</artifactId>
- </dependency>
- <!--nacos-discovery-->
- <dependency>
- <groupId>com.alibaba.cloud</groupId>
- <artifactId>spring-cloud-starter-alibaba-nacos-discovery</artifactId>
- </dependency>
-
- <!--openFeign-->
- <dependency>
- <groupId>org.springframework.cloud</groupId>
- <artifactId>spring-cloud-starter-openfeign</artifactId>
- </dependency>
-
- <!--sentinel-->
- <dependency>
- <groupId>com.alibaba.cloud</groupId>
- <artifactId>spring-cloud-starter-alibaba-sentinel</artifactId>
- </dependency>
-
-
- </dependencies>
Ps:不要一开始就引入这么多,按需引入!尤其是 nacos config配置 依赖,如果引入不使用就会报错!
1.3.2、创建 application.yml 配置文件
配置端口号,以及 nacos 地址
- server:
- port: 8091
-
- spring:
- application:
- name: product
- cloud:
- nacos:
- server-addr: localhost:8890
1.3.3、创建启动类
- @SpringBootApplication
- @EnableDiscoveryClient //可省略
- public class ProductApplication {
-
- public static void main(String[] args) {
- SpringApplication.run(ProductApplication.class, args);
- }
-
- }
启动 user 微服务,就可以看到 nacos 中存在该服务了

1.3.4、测试
创建 UserController,如下
- @Slf4j
- @RestController
- @RequestMapping
- public class UserController {
-
- @Value("${server.port}")
- private int port;
-
- @GetMapping("/user")
- public String user() {
- log.info("user ok! port={}", port);
- return "user ok! port=" + port;
- }
-
- }
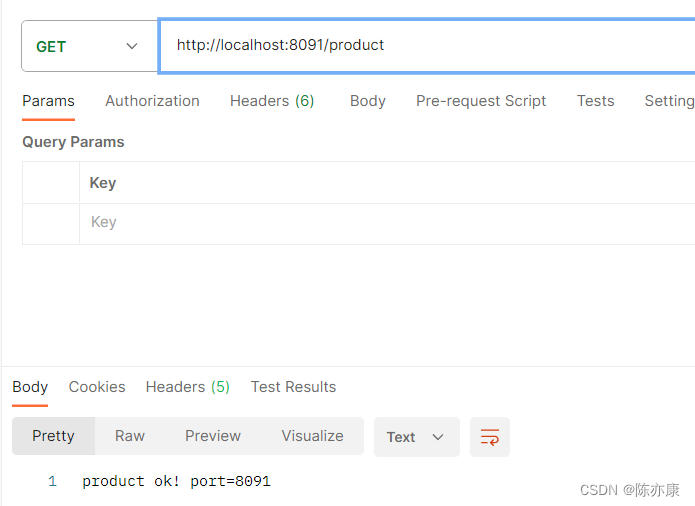
postman 测试结果如下:
1.4、引入 OpenFeign,进行远程调用
1.4.1、引入依赖
在 user 微服务中引入 openfeign 依赖(这里只是举例,实际开发中,按需引入).
- <!--openFeign-->
- <dependency>
- <groupId>org.springframework.cloud</groupId>
- <artifactId>spring-cloud-starter-openfeign</artifactId>
- </dependency>
注意:由于SpringCloud Feign高版本(例如 springcloud 2021.0.1)不使用Ribbon而是使用spring-cloud-loadbalancer,所以需要引用spring-cloud-loadbalancer或者降版本
后一个是缓存处理
- <dependency>
- <groupId>org.springframework.cloud</groupId>
- <artifactId>spring-cloud-loadbalancer</artifactId>
- </dependency>
-
- <dependency>
- <groupId>com.github.ben-manes.caffeine</groupId>
- <artifactId>caffeine</artifactId>
- </dependency>
1.4.2、实现远程调用
a)在 user 微服务中创建一个 product 微服务 feign 接口
- @FeignClient("product")
- public interface ProductClient {
-
- @GetMapping("/product")
- String product();
-
- }
b)在启动类中开启 feign 客户端
- @SpringBootApplication
- @EnableDiscoveryClient // nacos 服务发现(可以省略)
- @EnableFeignClients // 开启 openfeign 远程调用
- public class UserApplication {
-
- public static void main(String[] args) {
- SpringApplication.run(UserApplication.class, args);
- }
-
- }
c)如果是高版本的 SpringCloud,那么就需要使用 SpringCloud LoadBalencer 做负载均衡.
具体的添加@LoadBalancerClient注解:在调用服务的Service类上添加@LoadBalancerClient注解,并指定服务名。这样,负载均衡器将根据配置的属性来选择合适的服务实例进行调用。例如:
如下:
- @FeignClient(value = "service-name", configuration = LoadBalancerClientConfig.class)
- public interface MyService {
- @LoadBalanced //启用负载均衡
- @GetMapping("/endpoint")
- String getEndpointData();
- }
d)在 UserController 中进行远程调用.
- @GetMapping("/user")
- public String user() {
- log.info("user ok! port={}", port);
- //远程调用 product
- String result = productClient.product();
- log.info("远程调用 result: {}", result);
- return "user ok! port=" + port;
- }
执行结果如下:

1.5、user 微服务集成 Sentinel
1.5.1、引入 sentinel 依赖
在 user 微服务中引入 sentinel 依赖
- <!--sentinel-->
- <dependency>
- <groupId>com.alibaba.cloud</groupId>
- <artifactId>spring-cloud-starter-alibaba-sentinel</artifactId>
- </dependency>
1.5.2、在 application.yml 中配置 sentinel
- server:
- port: 8090
-
- spring:
- application:
- name: user
- cloud:
- nacos:
- server-addr: localhost:8890
- sentinel:
- eager: true # 立即触发 sentinel
- transport:
- dashboard: localhost:8891
1.5.3、测试
a)打开 sentinel 控制台
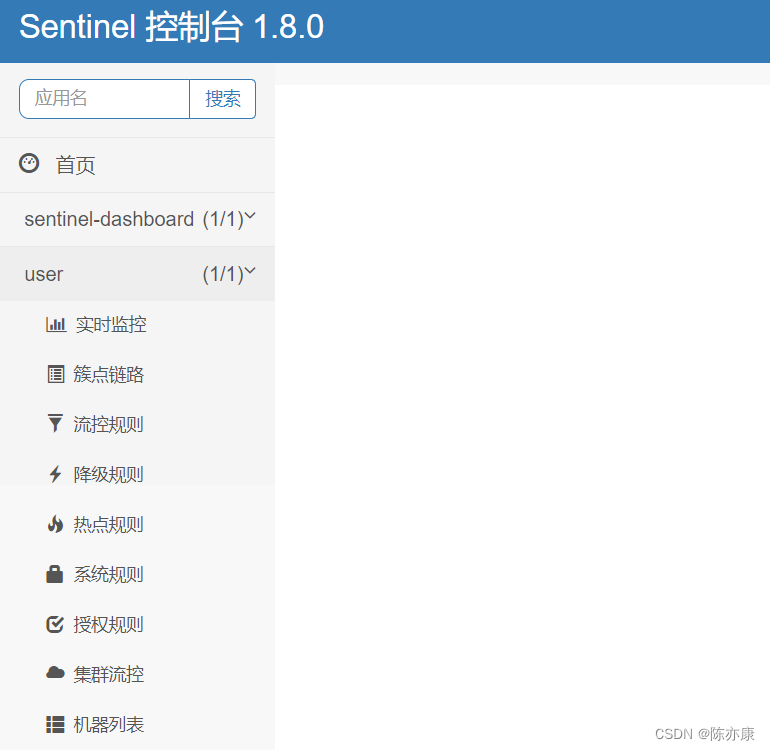
b)设置流控规则为 1秒 / 3次点击.

c)测试后限流生效
1.6、网关微服务
1.6.1、配置 pom.xml
- <dependencies>
-
- <!--gateway-->
- <dependency>
- <groupId>org.springframework.cloud</groupId>
- <artifactId>spring-cloud-starter-gateway</artifactId>
- </dependency>
-
- <!--nacos-->
- <dependency>
- <groupId>com.alibaba.cloud</groupId>
- <artifactId>spring-cloud-starter-alibaba-nacos-discovery</artifactId>
- </dependency>
-
- </dependencies>
如果使用的是 springcloud高版本(例如 2020.1.0),那么 gateway 中的 ribbon 负载均衡已经被剔除了,因此需要引入 springcloud loadbalencer 作为 gateway 的负载均衡.
- <dependency>
- <groupId>org.springframework.cloud</groupId>
- <artifactId>spring-cloud-loadbalancer</artifactId>
- </dependency>
引入此依赖后,可能还会报 cache 的警告,引入一下两个依赖即可
- <dependency>
- <groupId>com.github.ben-manes.caffeine</groupId>
- <artifactId>caffeine</artifactId>
- </dependency>
- <dependency>
- <groupId>org.springframework</groupId>
- <artifactId>spring-context-support</artifactId>
- </dependency>
1.6.2、创建 application.yml 并配置网关
- server:
- port: 18080
-
- spring:
- application:
- name: gateway
- cloud:
- nacos:
- server-addr: localhost:8890
- gateway:
- routes:
- - id: users_router
- # uri: http://localhost:9090 无负载均衡
- uri: lb://user # lb 表示负载均衡
- predicates:
- - Path=/user
-
- - id: products_router
- # uri: http://localhost:9091
- uri: lb://product
- predicates:
- - Path=/product
另外,如果配置跨域,如下:
- server:
- port: 18080
-
- spring:
- application:
- name: gateway
- cloud:
- nacos:
- server-addr: localhost:8890
- gateway:
- routes:
- - id: users_router
- # uri: http://localhost:9090 无负载均衡
- uri: lb://user # lb 表示负载均衡
- predicates:
- - Path=/user
-
- - id: products_router
- # uri: http://localhost:9091
- uri: lb://product
- predicates:
- - Path=/product
- globalcors: # 全局跨域处理
- cors-configurations:
- '[/**]':
- allowedMethods: "*"
- allowedHeaders: "*"
- allowedOriginPatterns: "*" # 2.4 以后版本不可以写成 allowedOrigin
- allowCredentials: true
1.6.3、创建启动类
- @SpringBootApplication
- @EnableDiscoveryClient //(可省略)
- public class GatewayApplication {
-
- public static void main(String[] args) {
- SpringApplication.run(GatewayApplication.class, args);
- }
-
- }
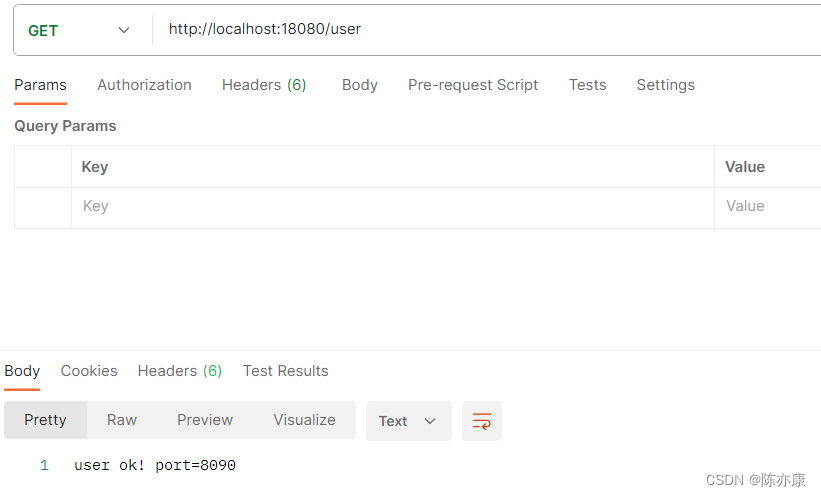
1.6.4、测试
通过网关访问 user 微服务和 product 微服务

1.7、nacos 实现配置中心
1.7.1、建议
一般来说,项目初期开发只用三个组件:nacos注册中心、gateway网关、openFeign声明式远程调用。
值得注意的是,前期项目开发完成之前,也不要使用 nacos 配置中心,原因如下:
- 因为一旦需要改什么配置,还需要打开 nacos 修改,容易分心,建议就先用项目中 application.yml 即可
- 引入依赖,但不配置,会报错.
1.7.2、引入 nacos 配置中心依赖
这里以 user 微服务为例,引入 nacos 配置中心依赖.
- <!--nacos config-->
- <dependency>
- <groupId>com.alibaba.cloud</groupId>
- <artifactId>spring-cloud-starter-alibaba-nacos-config</artifactId>
- </dependency>
注意:SpringCloudAlibaba 高版本(例如 springcloud-alibaba 2021.0.1.0)会忽略 bootstrap.yml 文件,因此需要加上以下配置
- <dependency>
- <groupId>org.springframework.cloud</groupId>
- <artifactId>spring-cloud-starter-bootstrap</artifactId>
- </dependency>
1.7.3、在 nacos 上创建配置
a)在 nacos 上创建一个命名空间

b)在配置管理中选择刚创建的命名空间 demo1
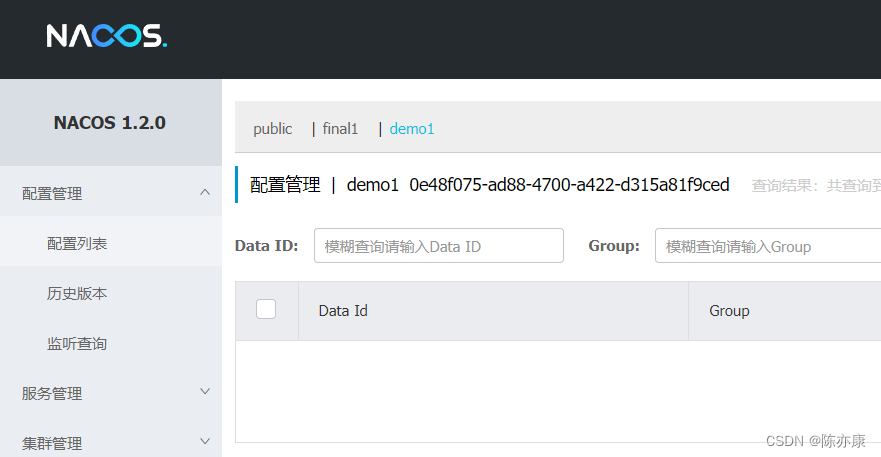
c)创建一个新的配置文件,接着就可以把 user 微服务 yml 中配置所有信息都放到 nacos 上进行统一管理,随后点击发布

Ps:配置内容不要有注释! 天坑!
d)创建 bootstrap.yml 配置文件,用来拉去 nacos 上的配置文件.
- # 远端配置中心是谁
- spring:
- cloud:
- nacos:
- server-addr: locahost:8890
- config:
- # 使用 nacos 中的哪个 namespace
- namespace: 0e48f075-ad88-4700-a422-d315a81f9ced
- # 使用 nacos 中的哪个组
- group: user
- # 使用 nacos 中的哪个 dataId 1.name+文件后缀 2.文件名+env+后缀
- name: user-prod
- file-extension: yml
Ps:原先的 application.yml 就可以删除了.


