- 1南洋理工发布多模态金融交易Agent,平均利润提高36%!
- 2Android 蓝牙通信_mbluetoothdevice.createrfcommsockettoservicerecord
- 3分享一个自己写的免费的微信聊天记录提取软件 2023.11.03_wechatexporter
- 4二分法求最小值的最大下标_二分法求下标最大的那个xi的下标
- 5PyExecJs报错解决
- 6从0到1入门C++编程——11 函数对象及算法介绍
- 7.NET NPOI导出Excel详解_.net npoi excel导出
- 8SystemServer简述
- 9PyCharm配置PyTorch环境,手把手教学
- 10mysql如何在逗号分隔的字段查询_mysql 逗号分割查询
1.3_VMare 16 虚拟机安装配置 CentOS-7-x86_64-DVD-2009+GUI+原生 Java 1.8+ibus+VMware Tools_在vm装带有gui服务器
赞
踩
##################################################
目录
VMware 16 + CentOS 7、GNOME、配置 ibus 中文输入、Open Java 1.8 以及虚拟机增强工具
VMware 16 + CentOS 7、GNOME、配置 ibus 中文输入
##################################################
VMware 16 + CentOS 7、GNOME、配置 ibus 中文输入、Open Java 1.8 以及虚拟机增强工具
——————————
打开 VMware 16
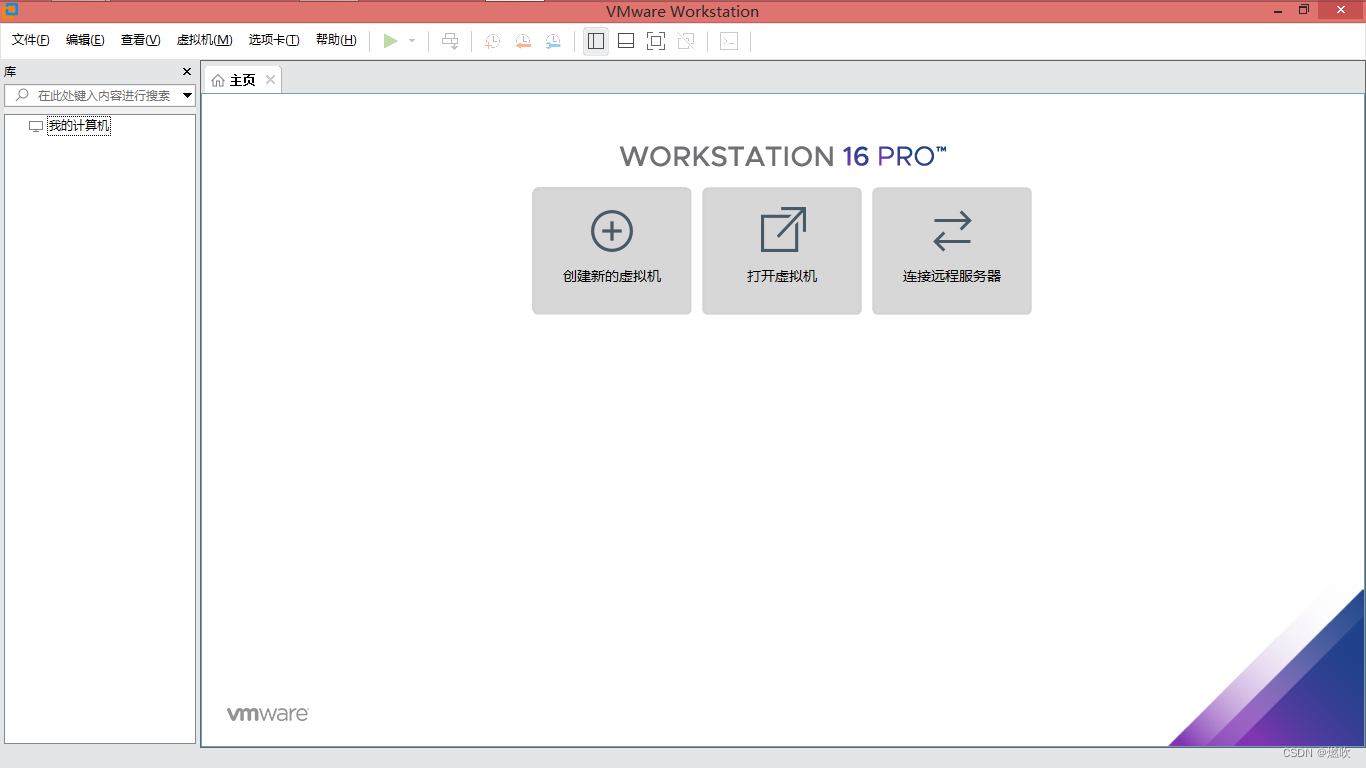
——————————
配置虚拟机硬件环境
%%%%%
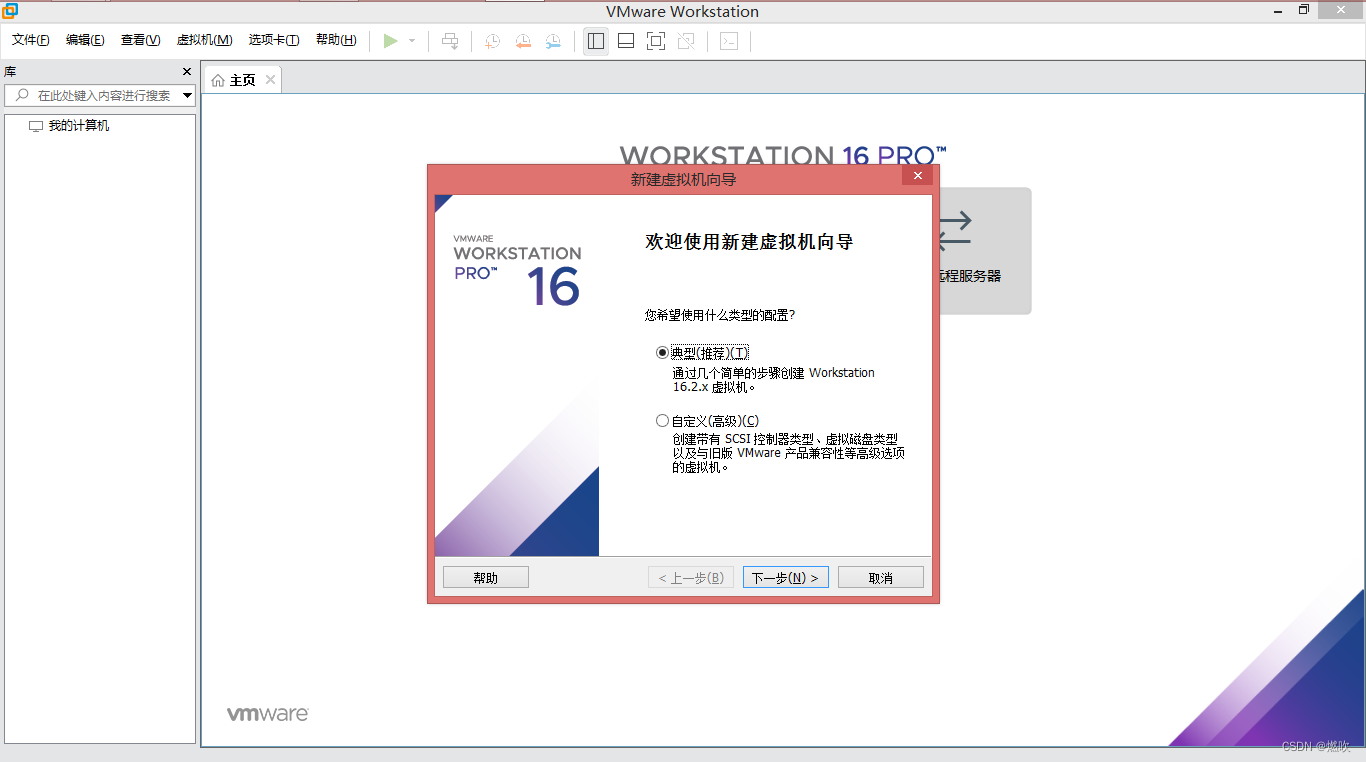
典型安装
%%%%%
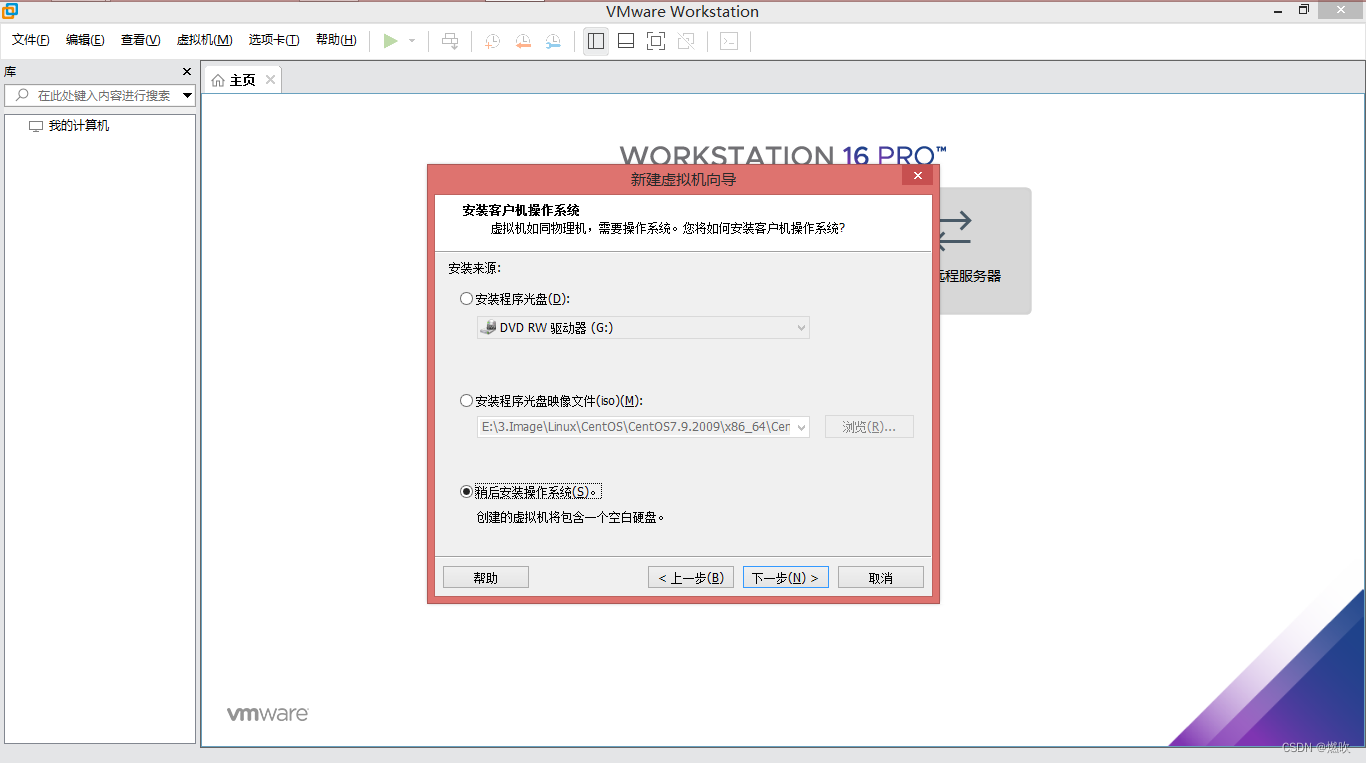
稍后安装操作系统
%%%%%
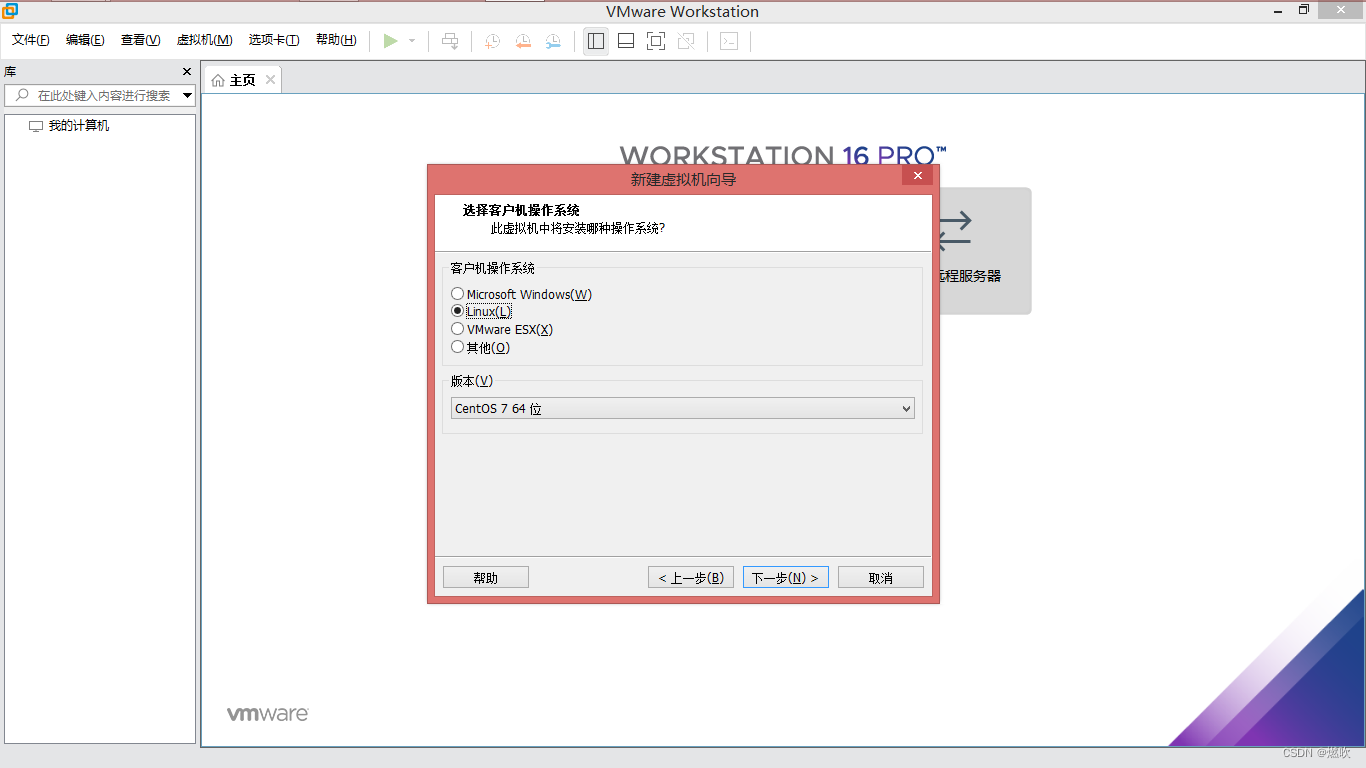
安装客户机系统
客户机操作系统:
Linux
版本:
CentOS 7 64 位
%%%%%
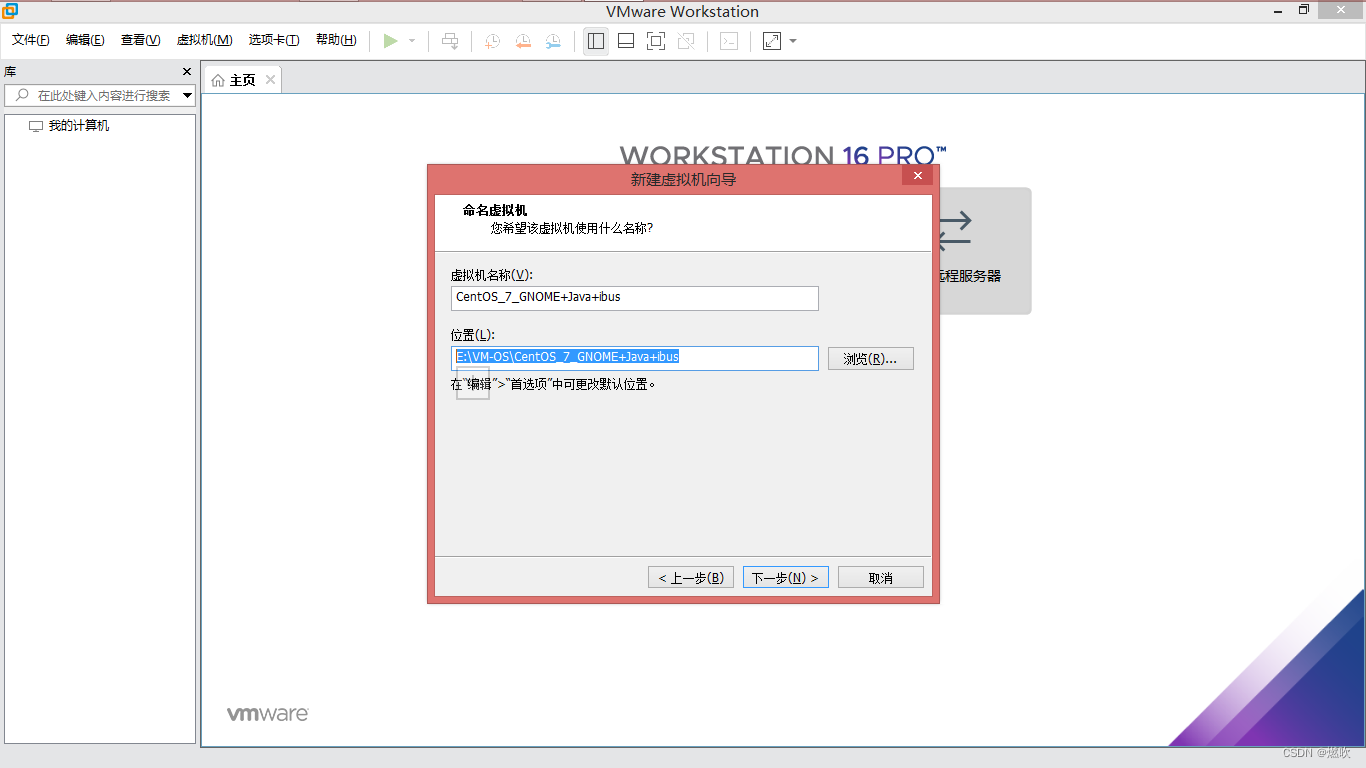
命名虚拟机
虚拟机名称:
CentOS_7_GNOME+Java+ibus
位置:
E:\VM-OS\CentOS_7_GNOME+Java+ibus
%%%%%
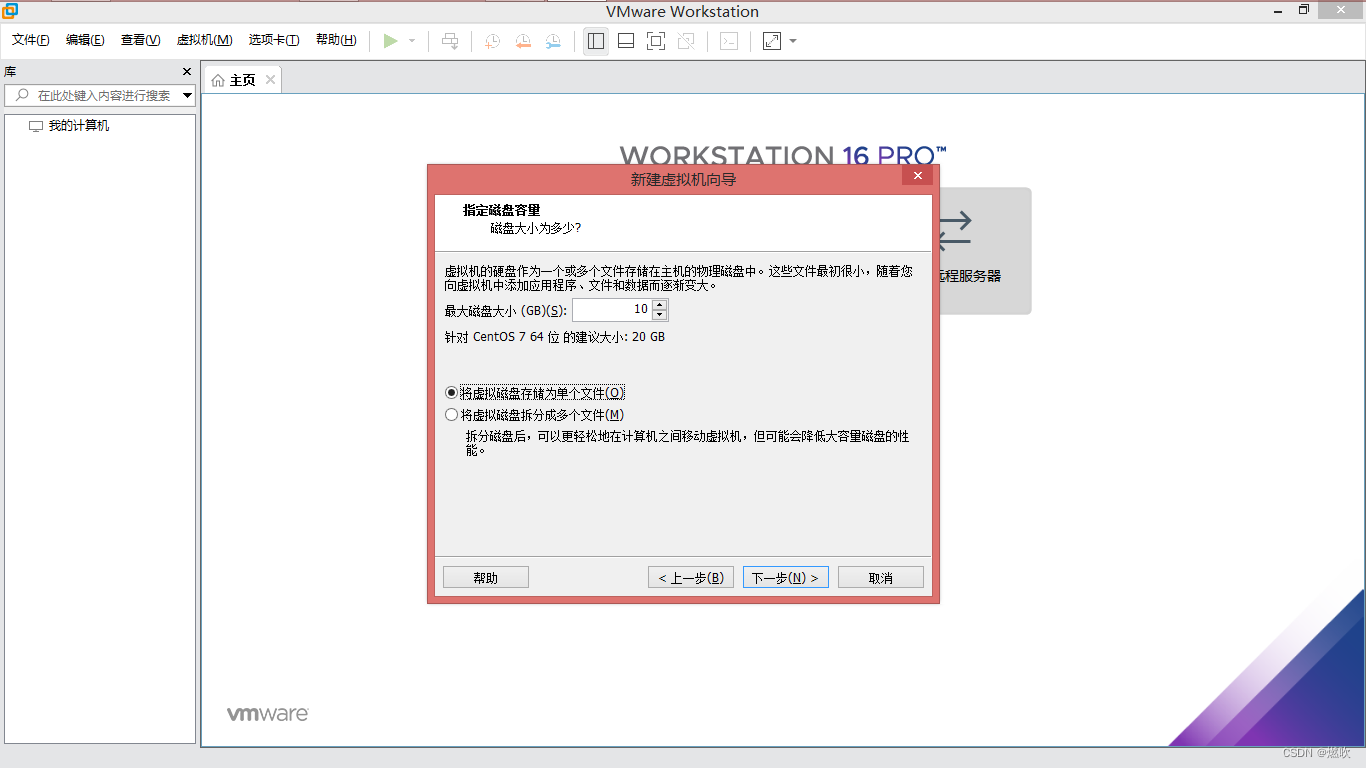
指定磁盘容量
最大磁盘大小:
10 G
勾选:
将虚拟磁盘存储为单个文件
%%%%%
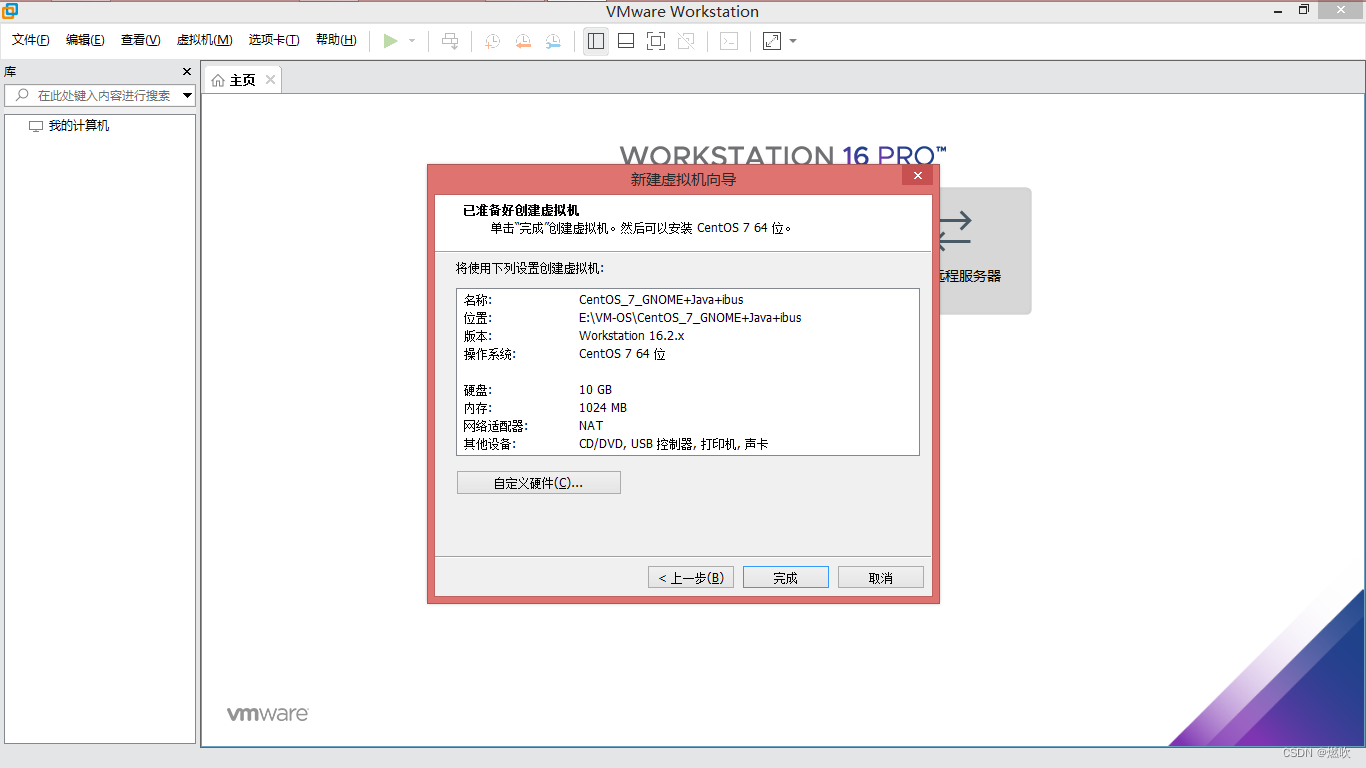
已经准备好创建虚拟机
点击
自定义硬件
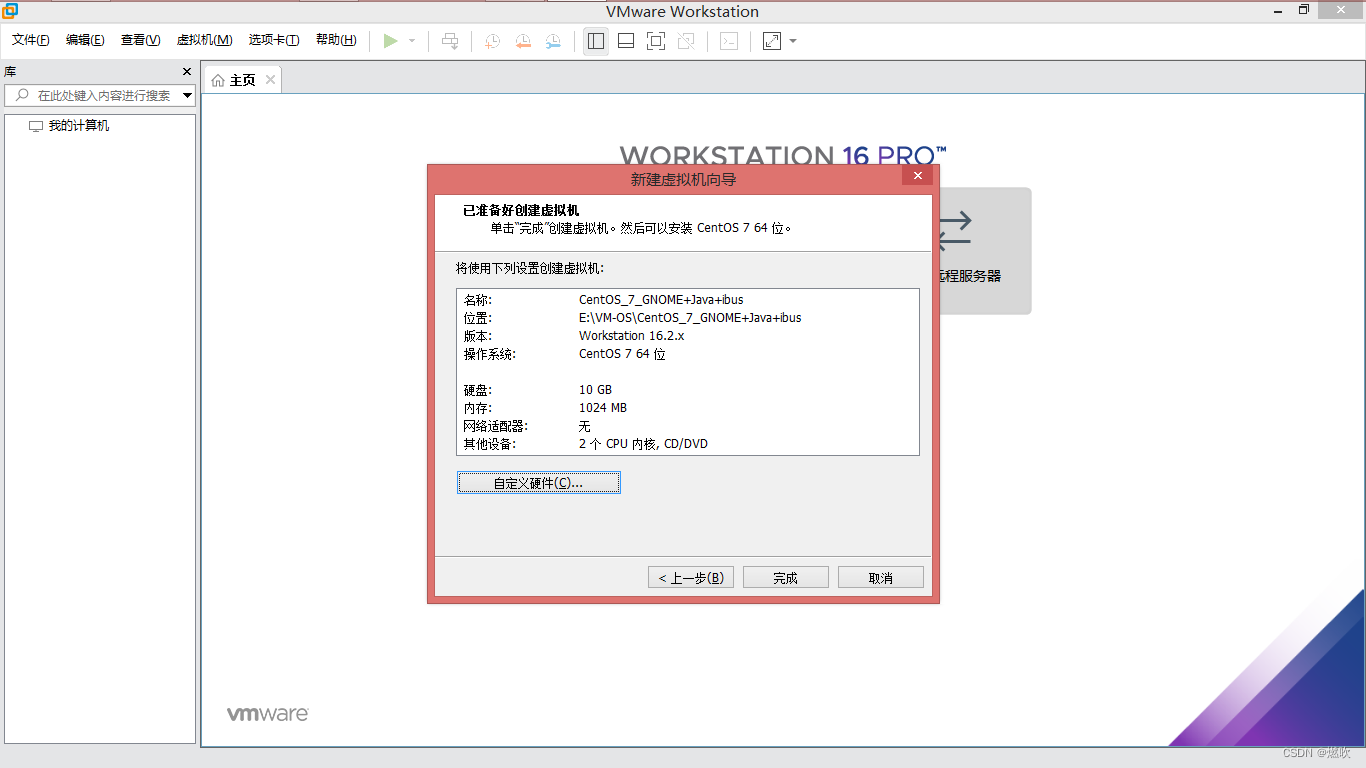
- 移除
- 声卡
- 打印机
- USB 控制器
- 网络适配器
-
- 内存
- 1024 M
-
- CPU
- 1 个处理器
- 2 个内核
- 虚拟化引擎全部开启
-
- CD/DVD
- 使用 ISO 映像文件
- 映像文件为 CentOS-7-x86_64-DVD-2009.iso
点击
完成
%%%%%
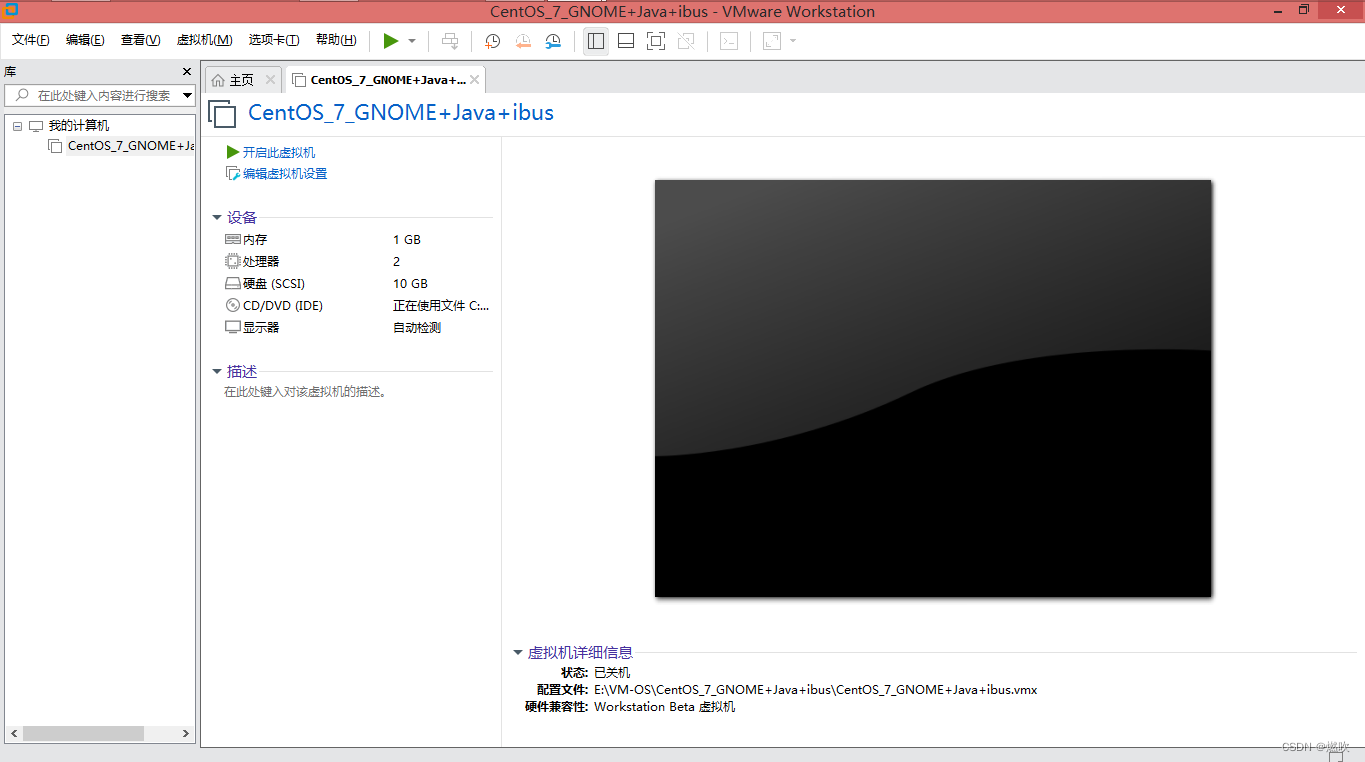
虚拟机创建完毕
——————————
VMware 虚拟机怎么进 BIOS 设置第一启动项
除了
打开电源时进入固件
虚拟机启动时也说了:
- Press F2 to enter SETUP F2 进入 BIOS 设置
- F12 for Network Boot F12 用于网络引导
- ESC for Boot Menu ESC 选择启动设备
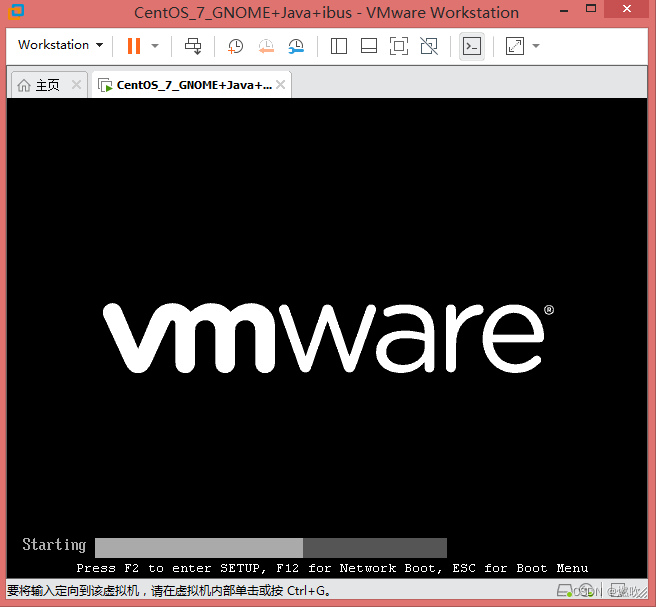
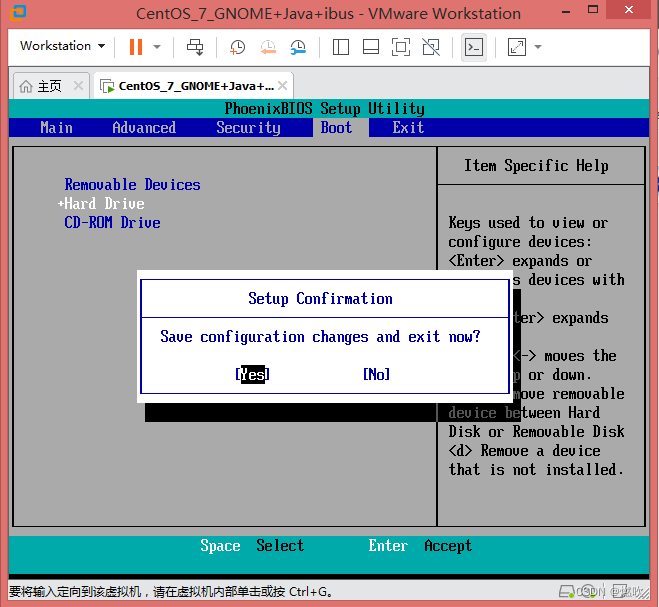
除了 F2 进入 BIOS 设置第一启动设置
还可以在此界面按下 ESC 在启动菜单手动选择启动设备:
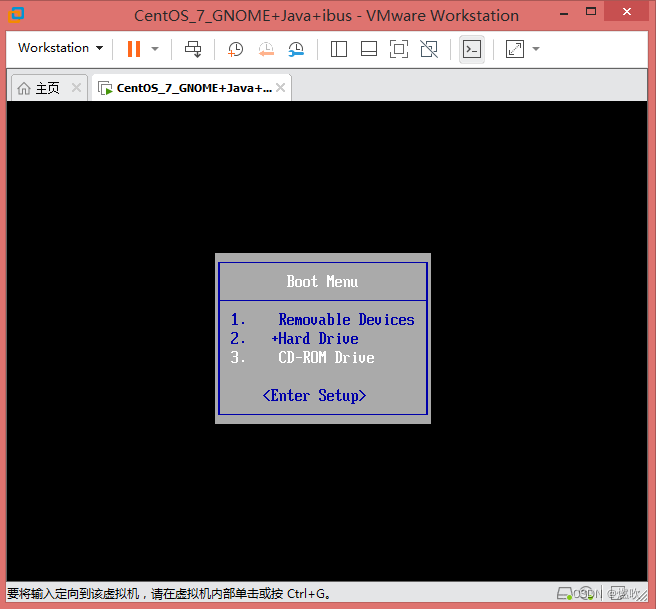
这边我们选择的光盘启动。
——————————
VMware 16 + CentOS 7、GNOME、配置 ibus 中文输入
%%%%%
光盘引导进入 Live DVD 系统
倒计时界面选择第一项安装 CentOS 7
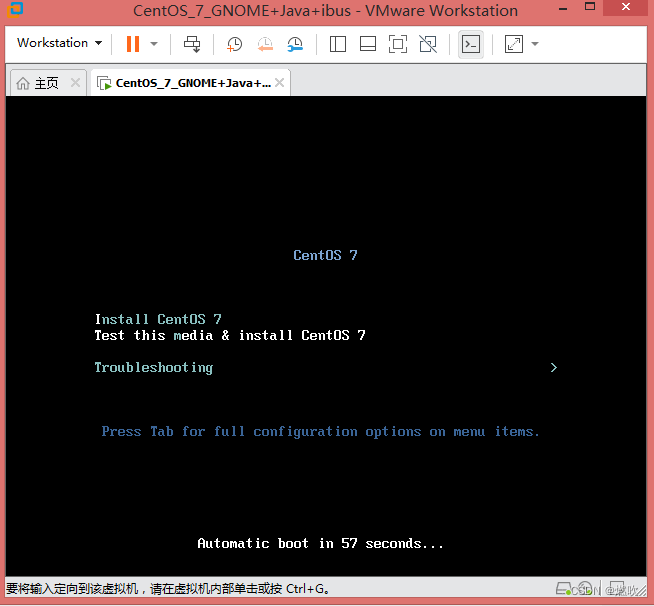
%%%%%
按回车开始安装
按 <ENTER> 键开始安装过程:
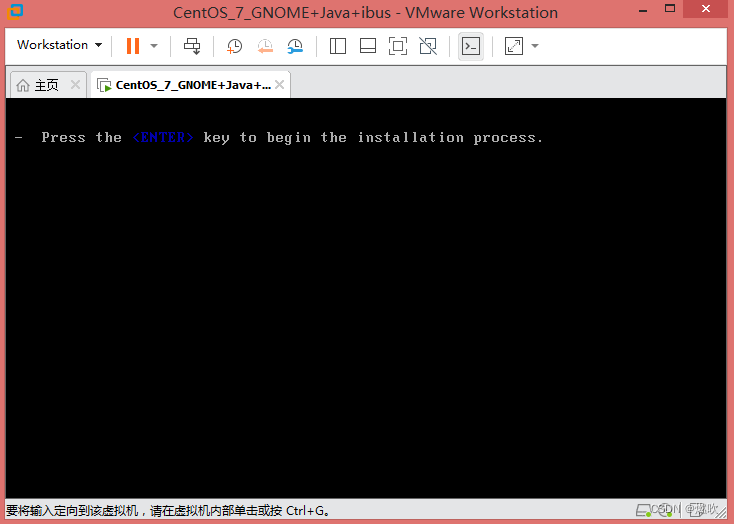
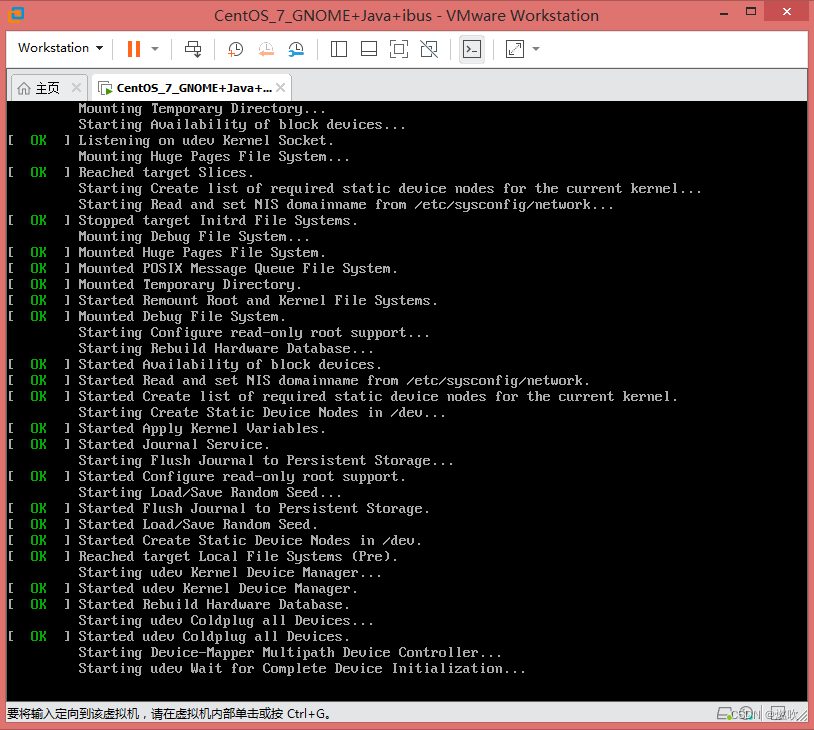
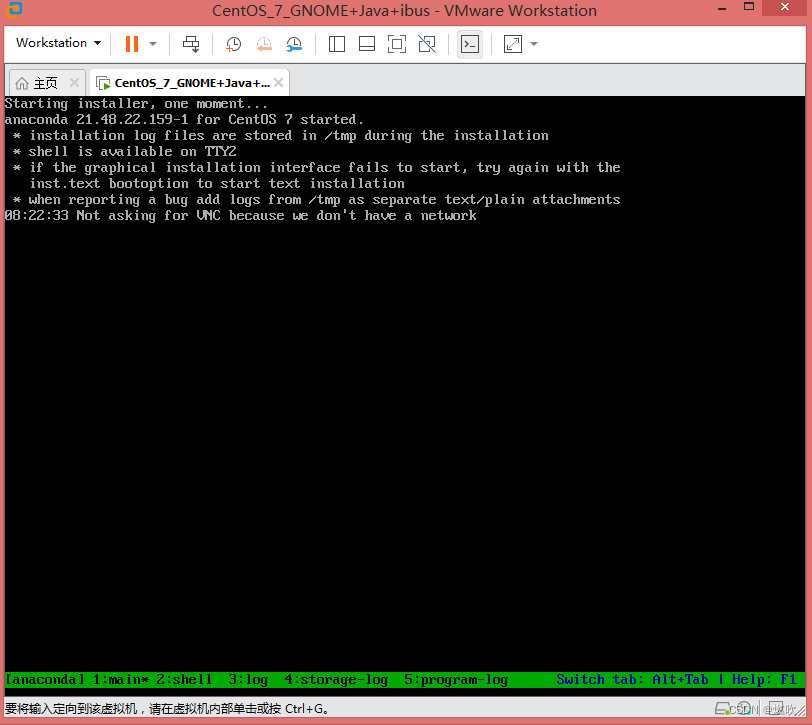
进入安装界面 这其实是一个 Live 系统
选择安装过程中使用的语言 这边选择:
中文
简体中文
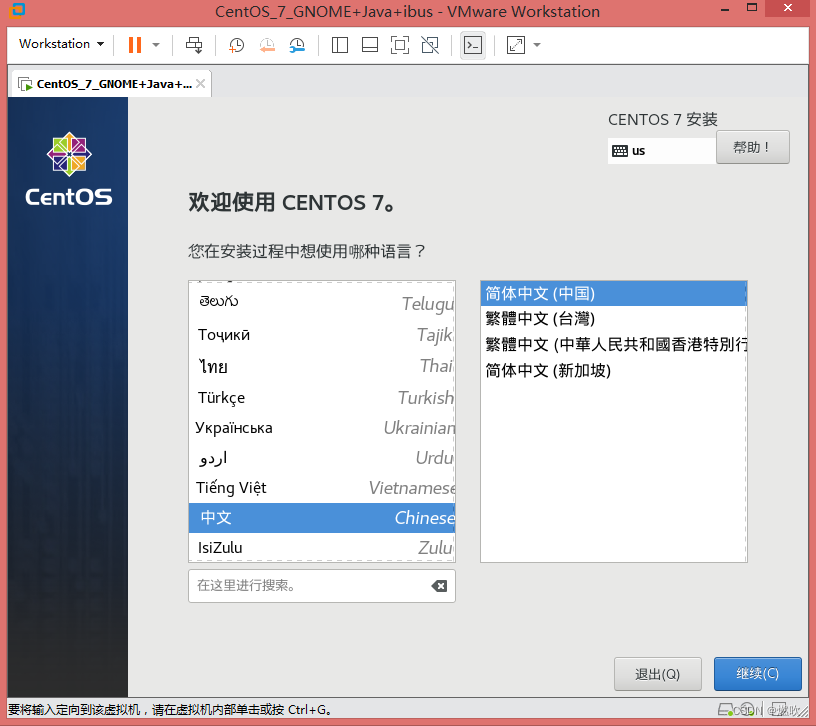
继续后跳到安装配置主界面:
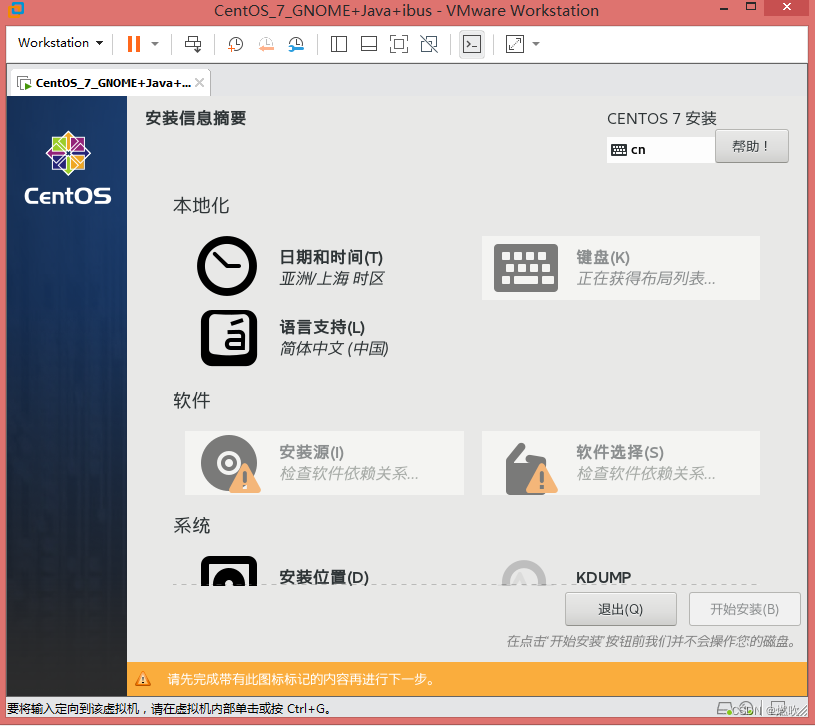
关于安装主界面:
本地化
日期和时间
键盘
系统支持的语言
软件
安装源
软件选择
系统
安装位置
KDUMP 内核崩溃转储机制
网络和主机名
SECURIY POLOCY 安全策略
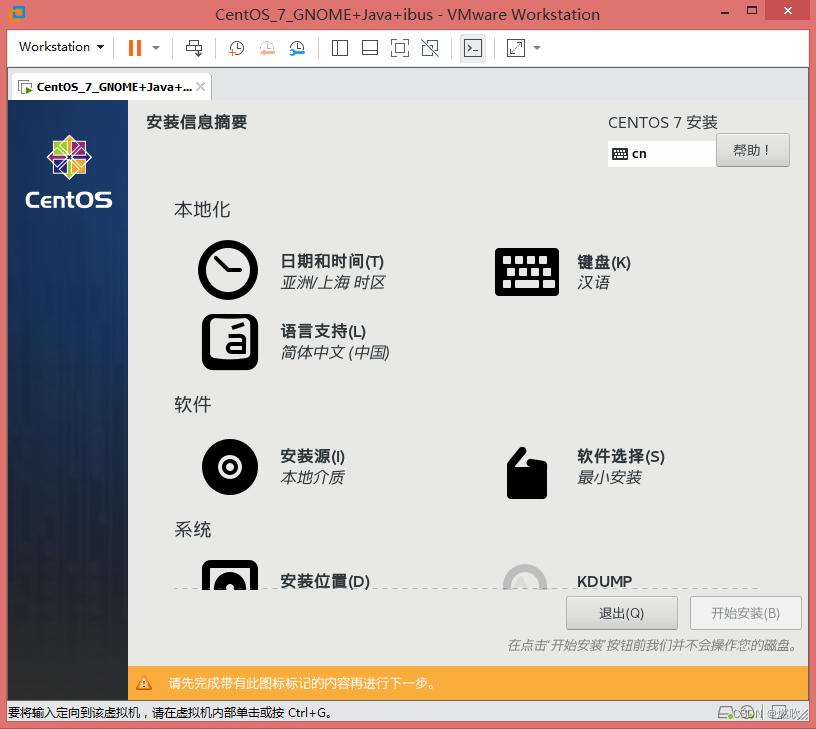
%%%%%
本地化
配置好日期和时间 点击完成:
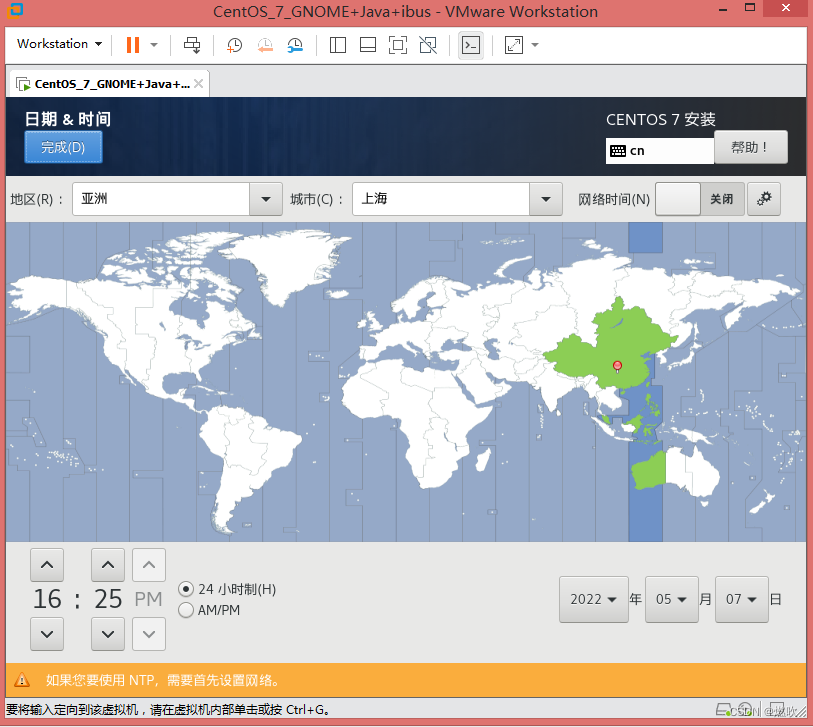
键盘布局 默认:
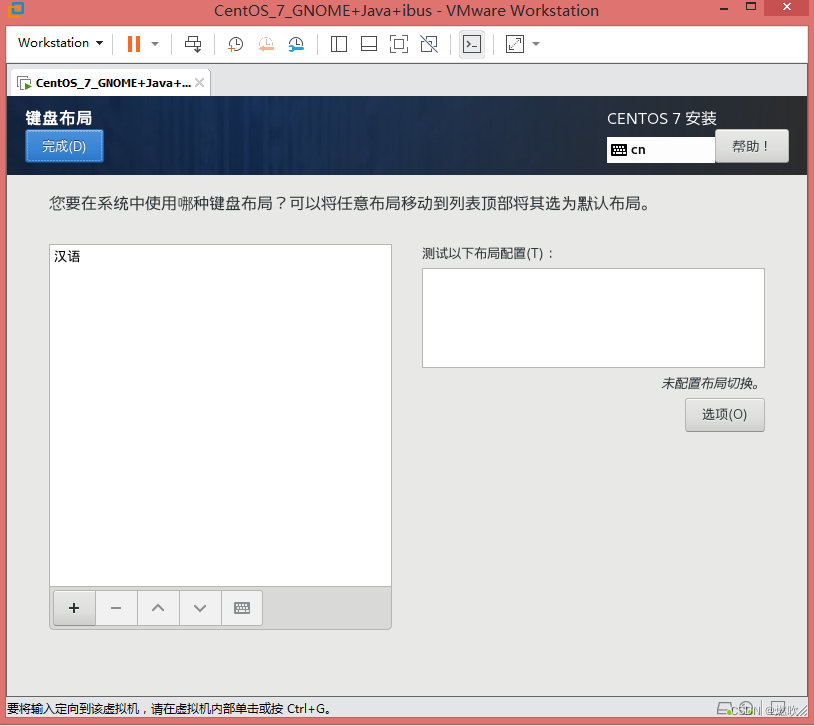
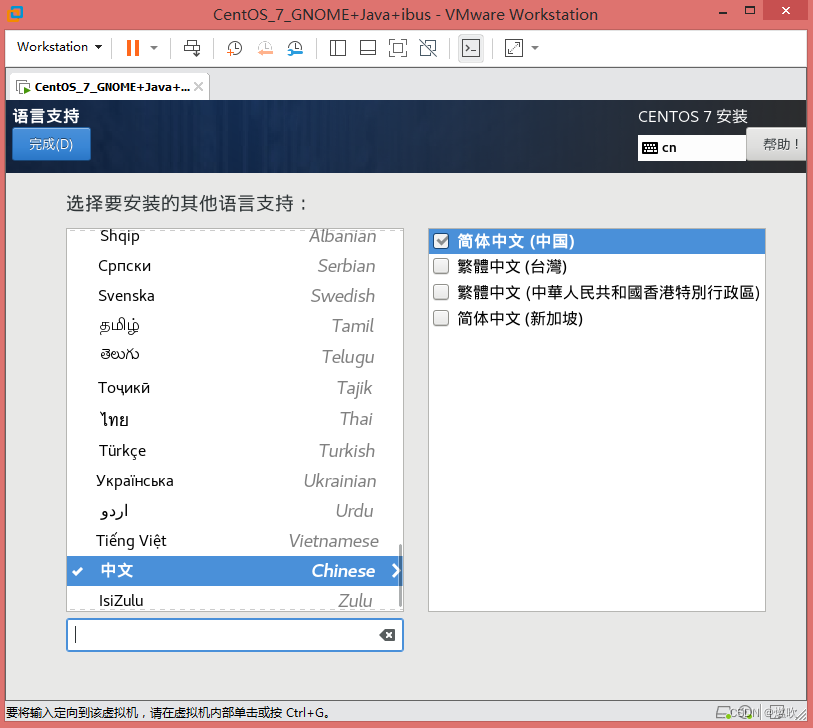
语言支持 安装界面选择什么语言这边就默认什么语言系统:
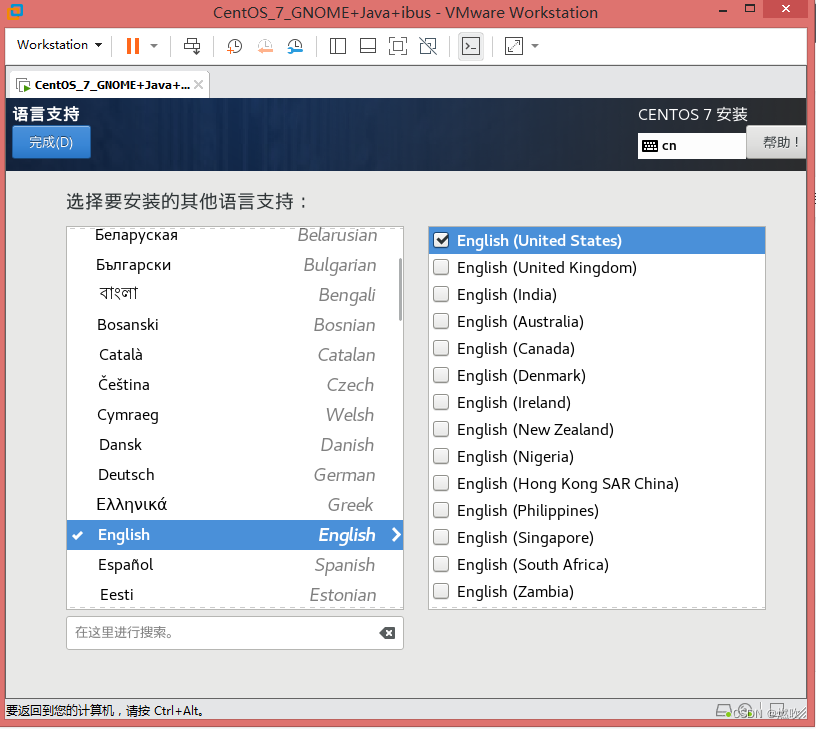
不过还是勾选支持 英语/English (United States)
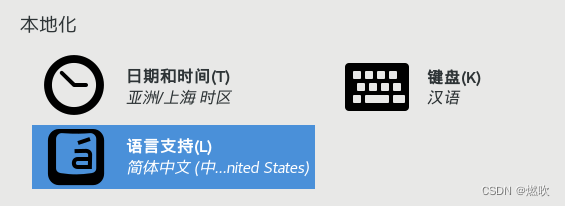
本地化设置完毕:
%%%%%
软件
安装源 默认就好 sr0 是第一个光驱 除非你要联网镜像服务器下载安装:
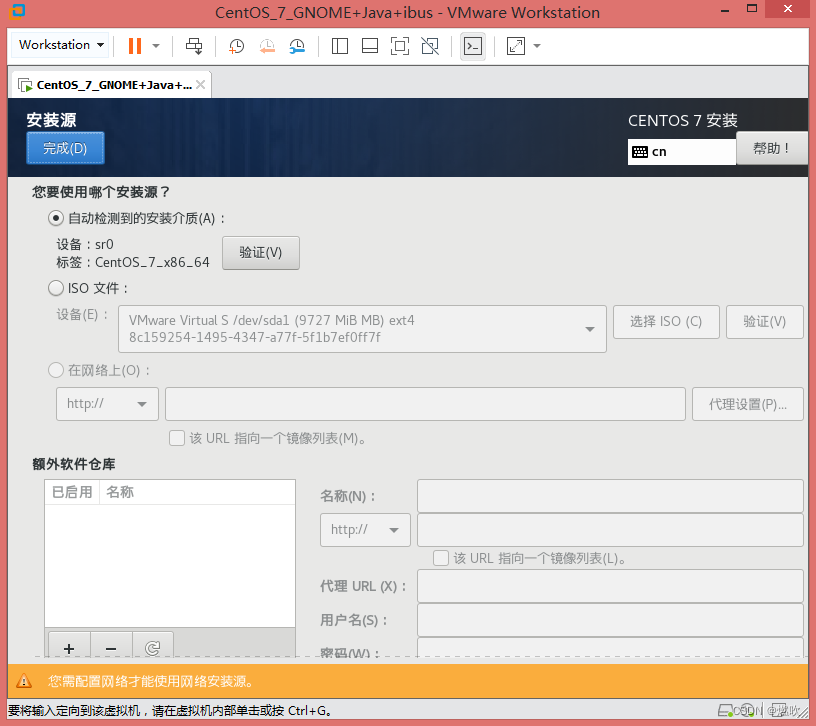
当然 你对镜像文件有没有什么毛病也不是很放心 所以可以选择校验:
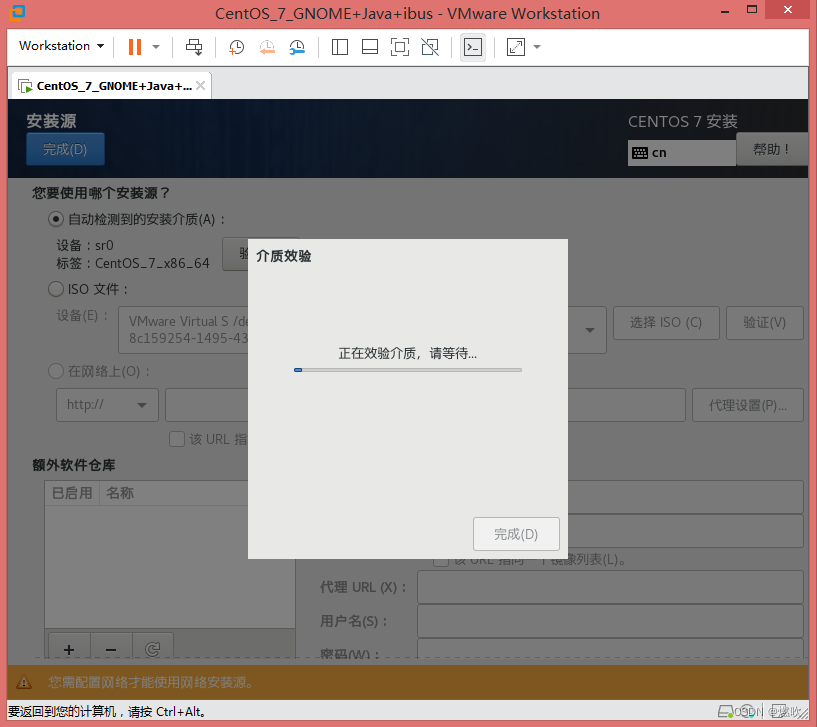
正在校验介质 请稍后:
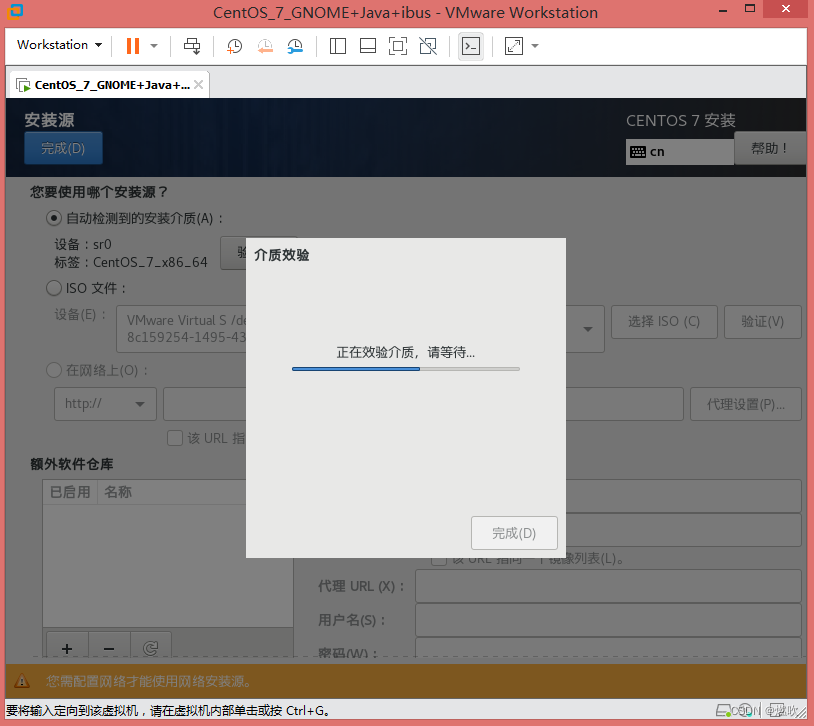
这玩意儿实在是有点慢了:
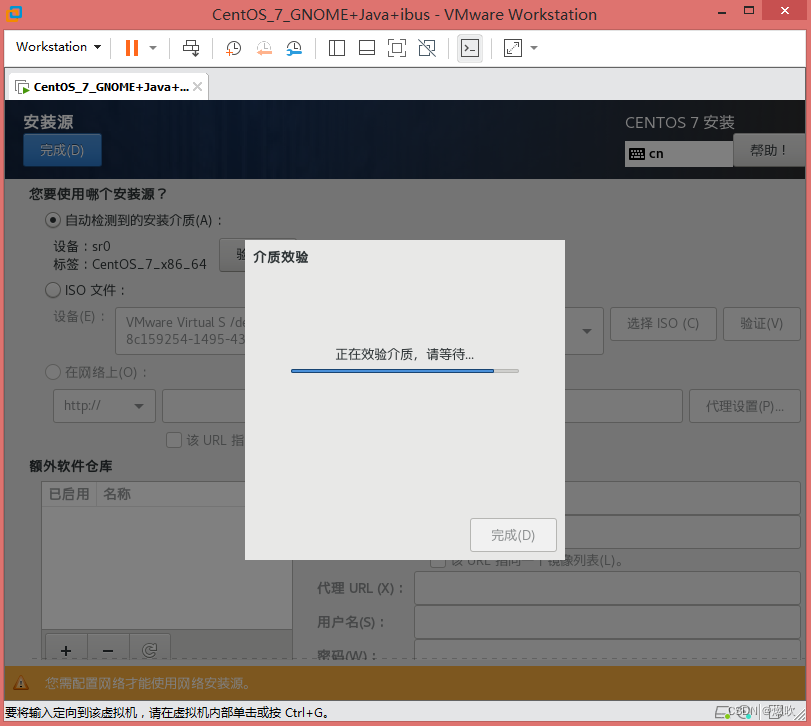
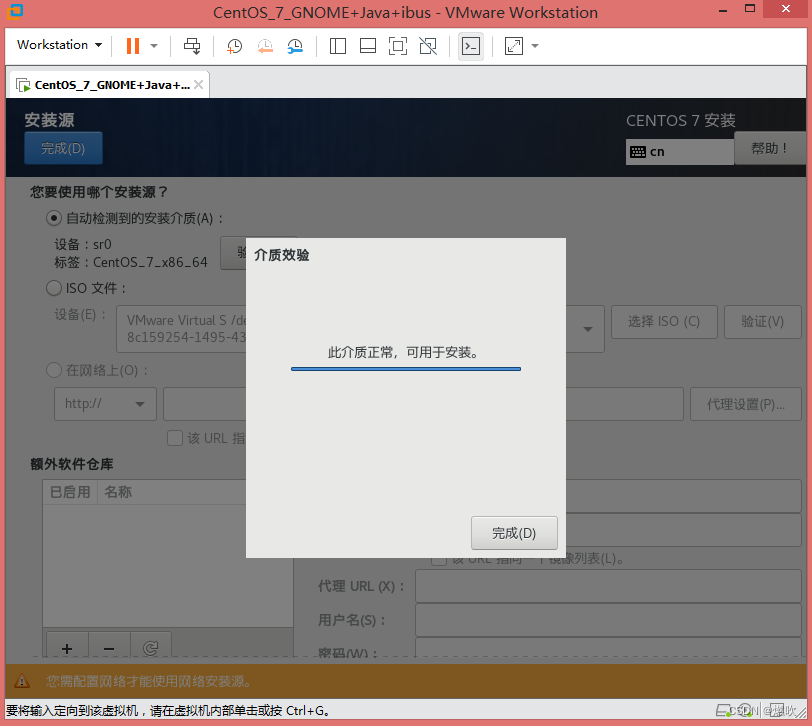
校验完毕 此介质正常 可以用于安装:
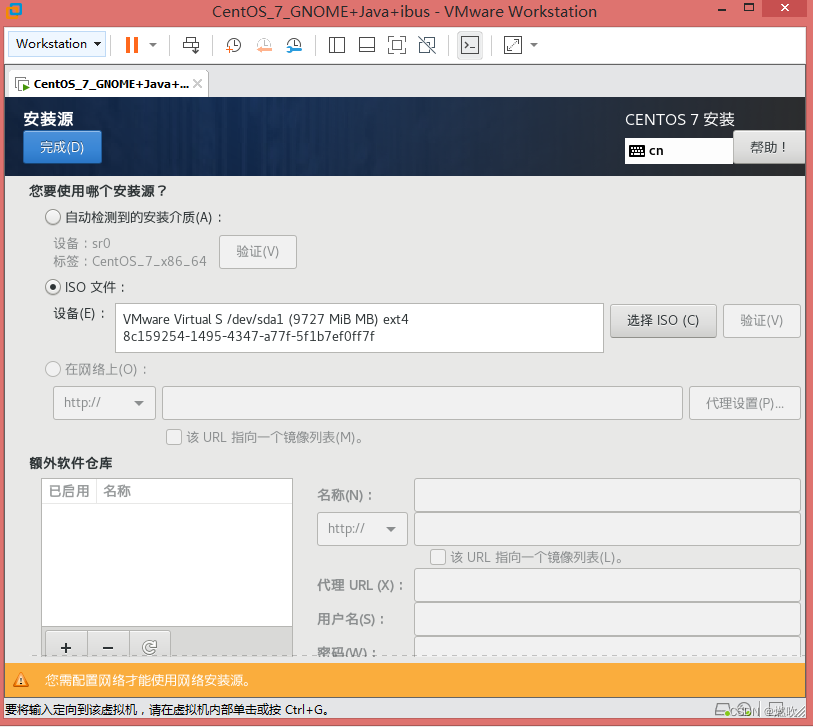
当然你也可以选择本地磁盘上的 ISO 文件如果你的硬盘上有操作系统分区的话:
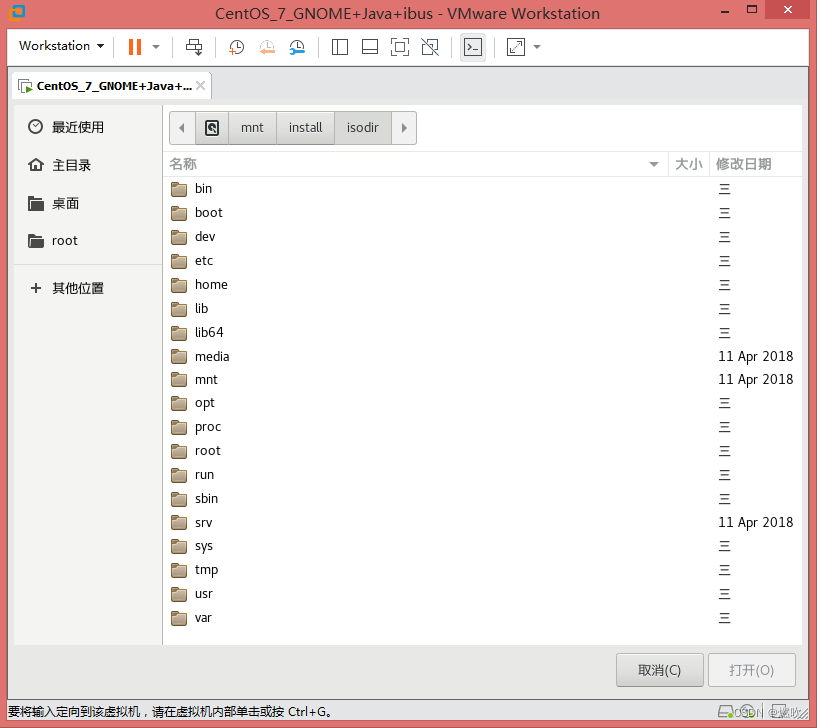
然后就可以选择本地操作系统上的 ISO 映像文件 明白为什么说这是 Live 系统上的安装程序了吗?
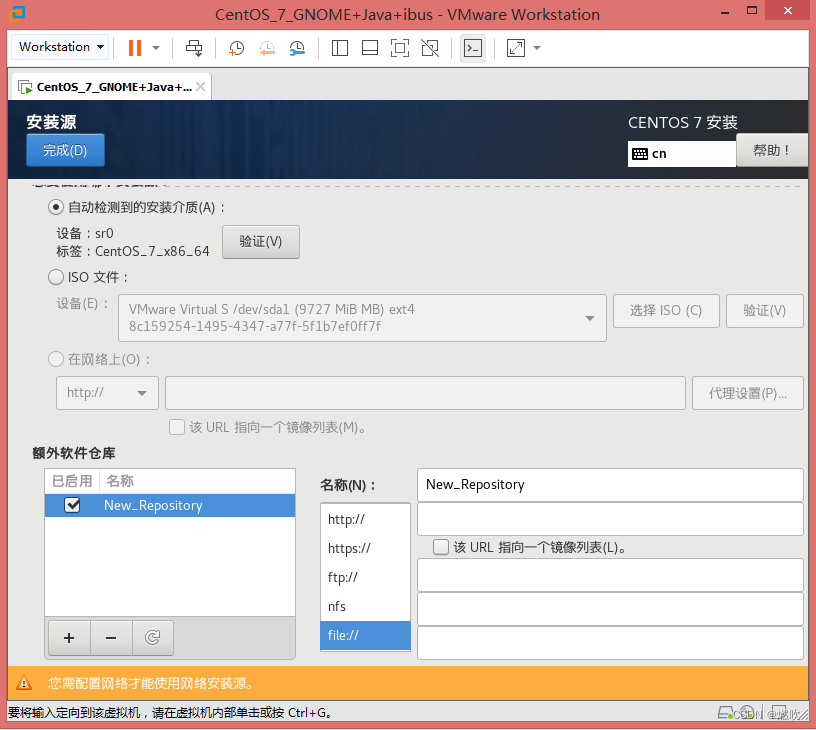
当然可以选择额外软件仓库 有很多协议 可以联网选择:
软件选择界面:
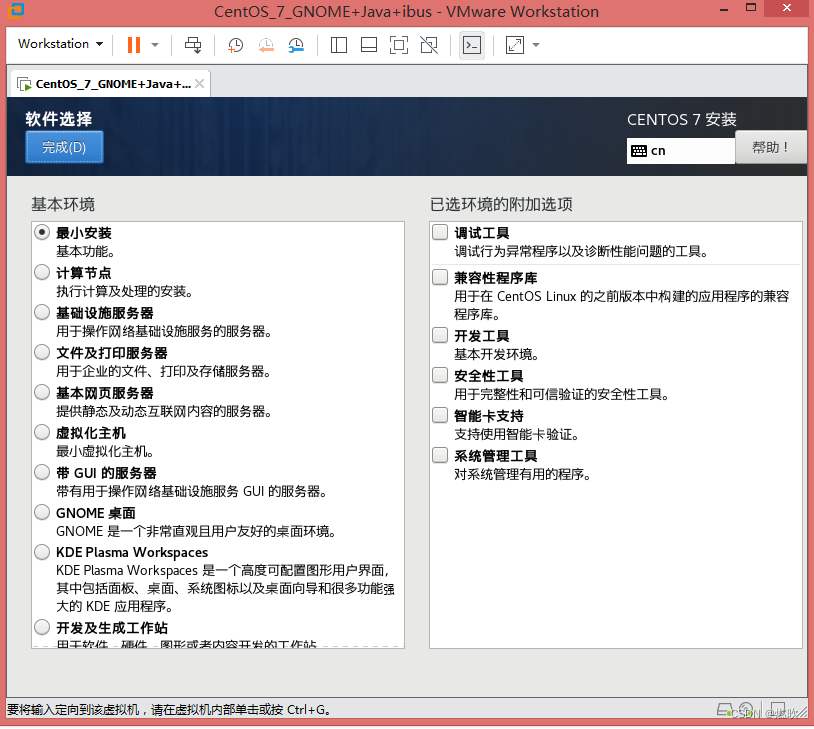
软件选择
带 GUI 的服务器
就是 GUI 桌面 默认是 Gnome 当然你也可以在附加选项中选择安装一个 KDE
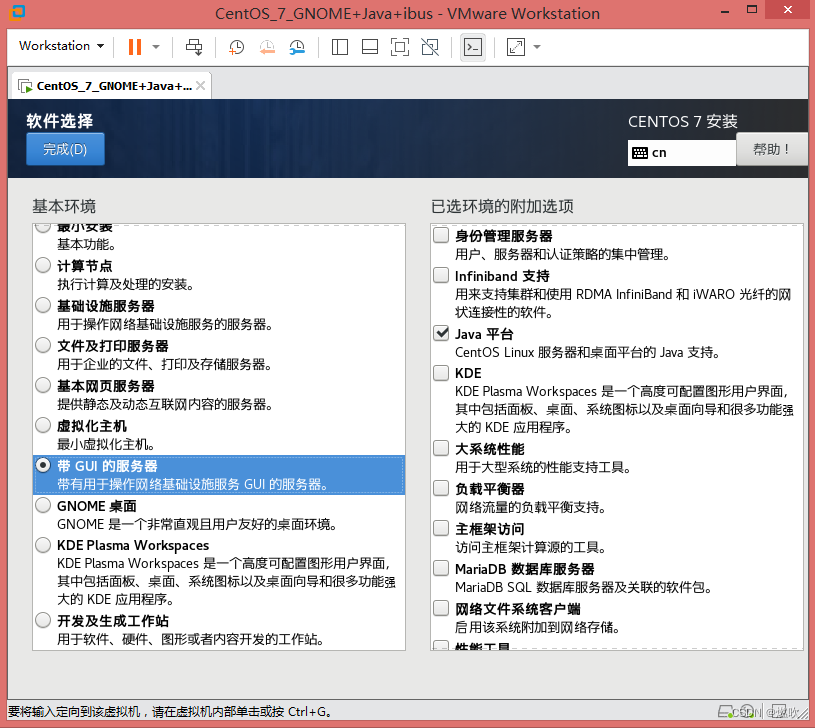
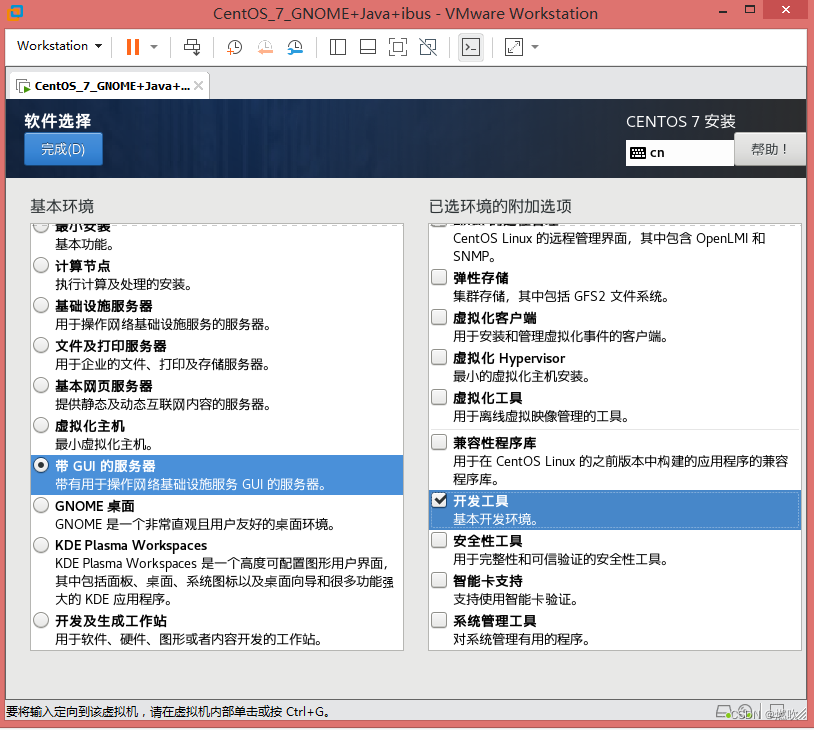
这边仅仅选择 Java 平台 和 基本开发工具 :
Java 平台
开发工具
正在检查依赖:
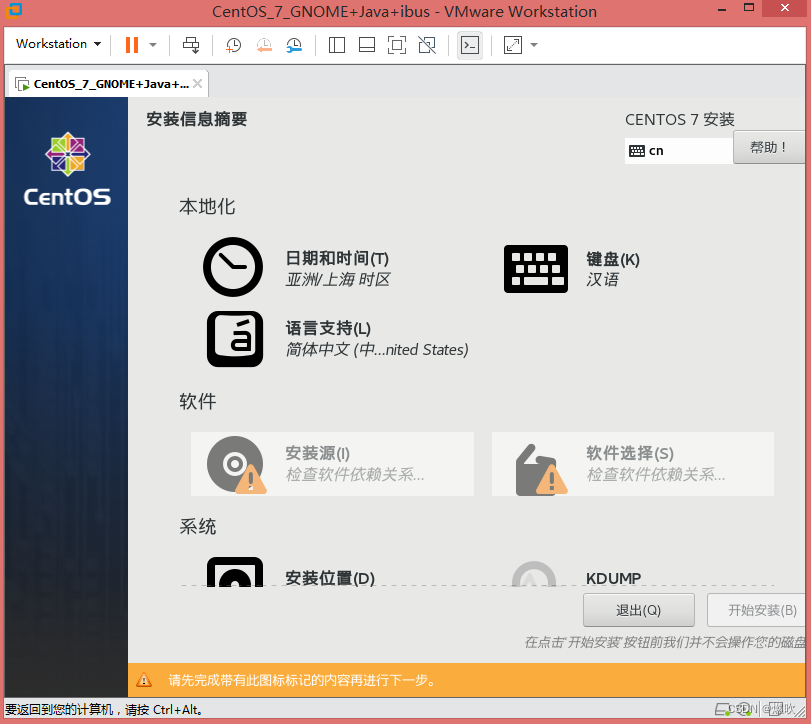
依赖检查完毕:
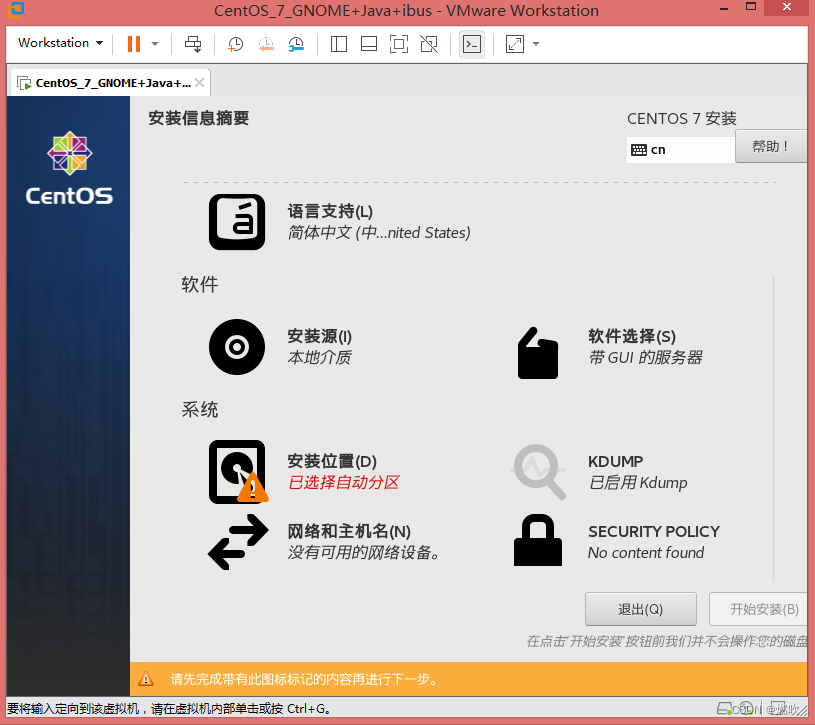
软件也配置完毕:

%%%%%
系统
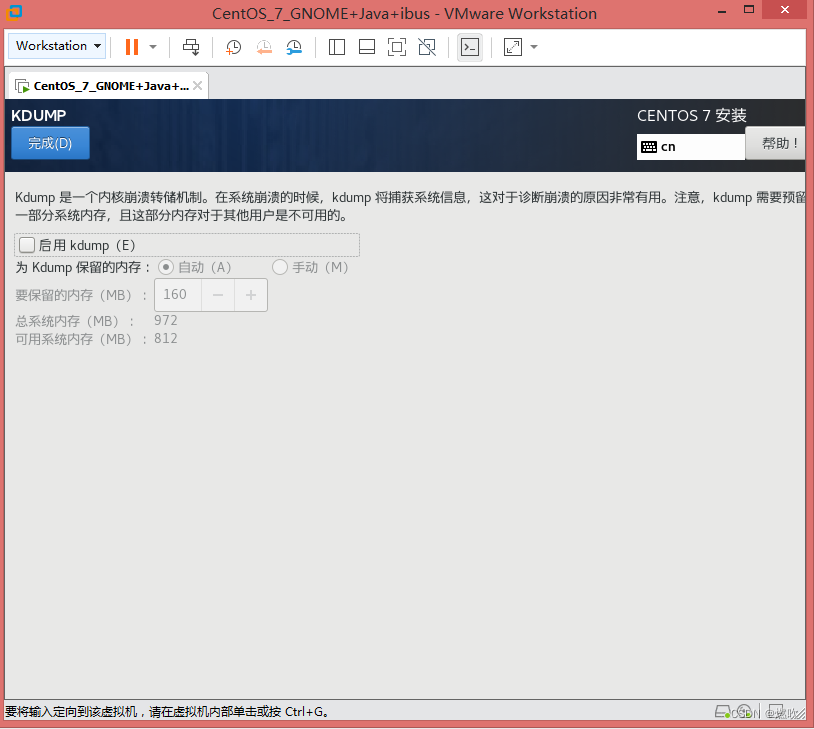
先把 KDUMP 关了
系统坏了我们就重装或者恢复快照 内核转储有点占内存:
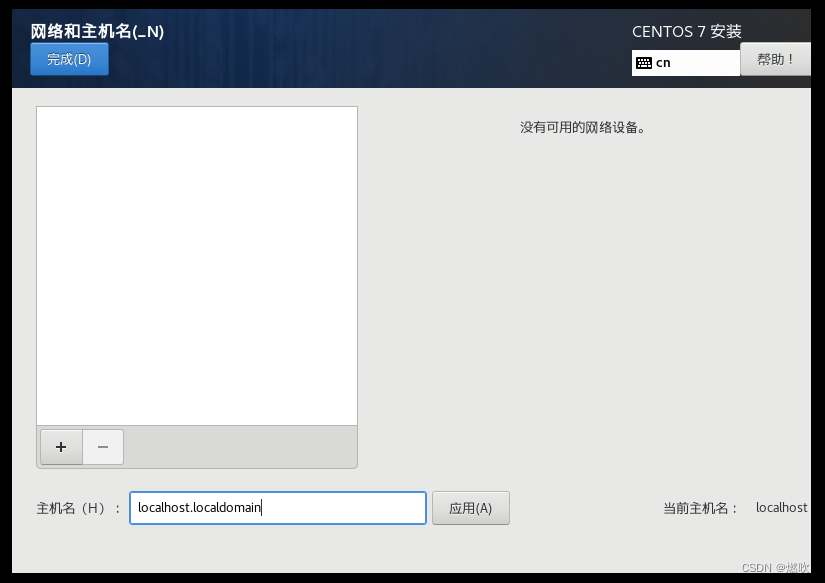
网络和主机名
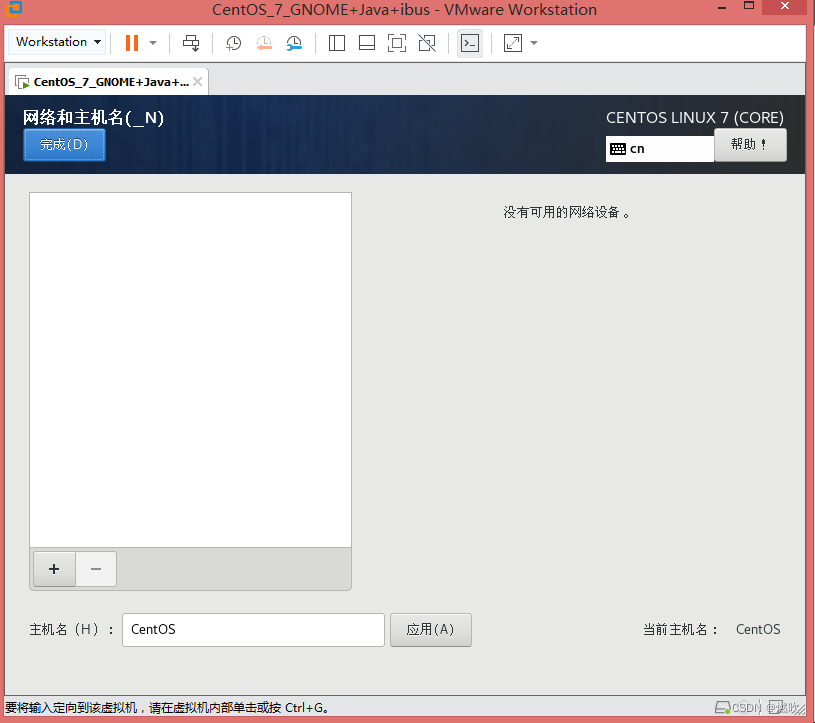
因为移除了网卡 所以没有任何网络设备:
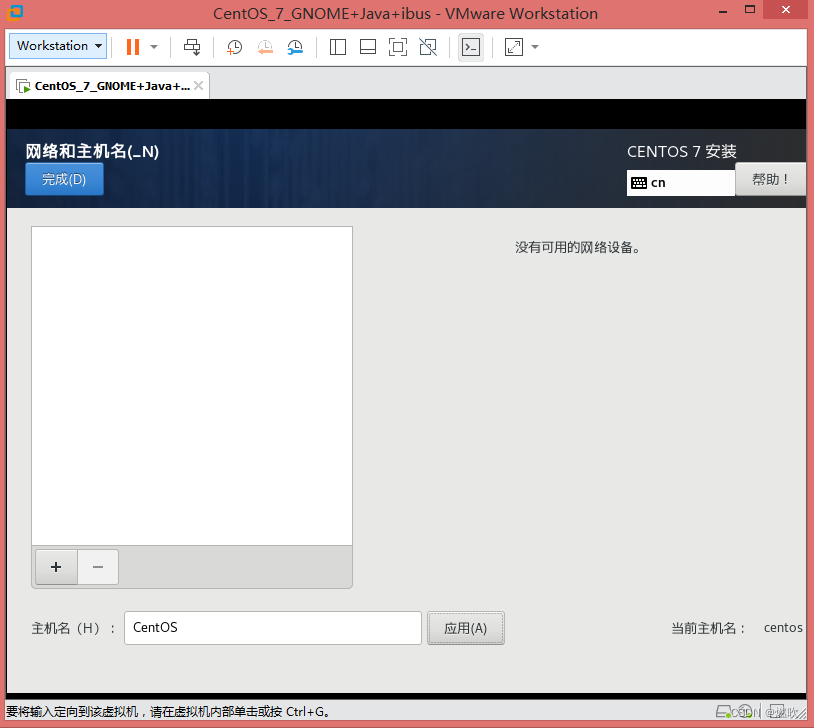
主机名 这边设置
CentOS
点击 应用:
%%%%%
系统/分区
安装位置
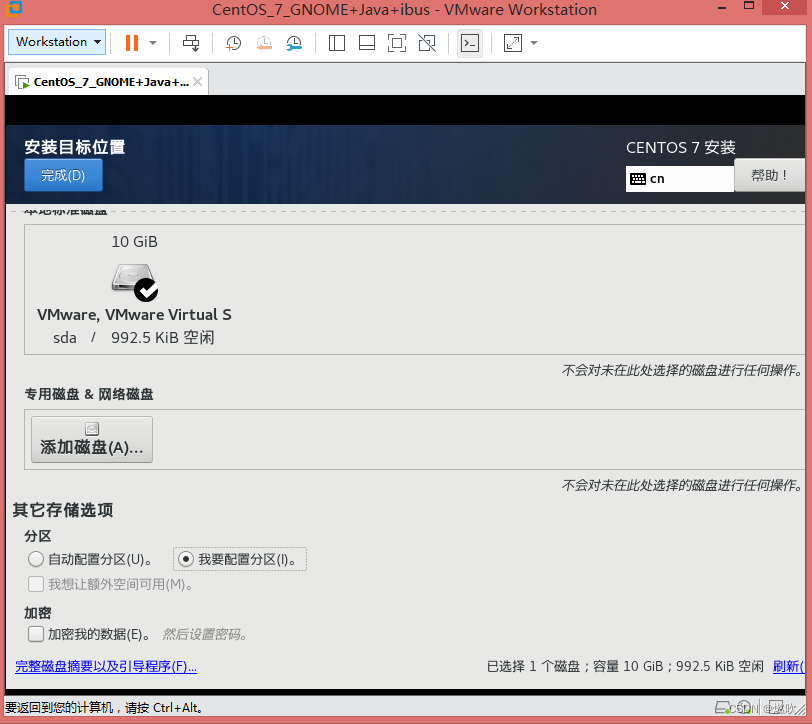
勾选硬盘 然后勾选:
我要配置分区
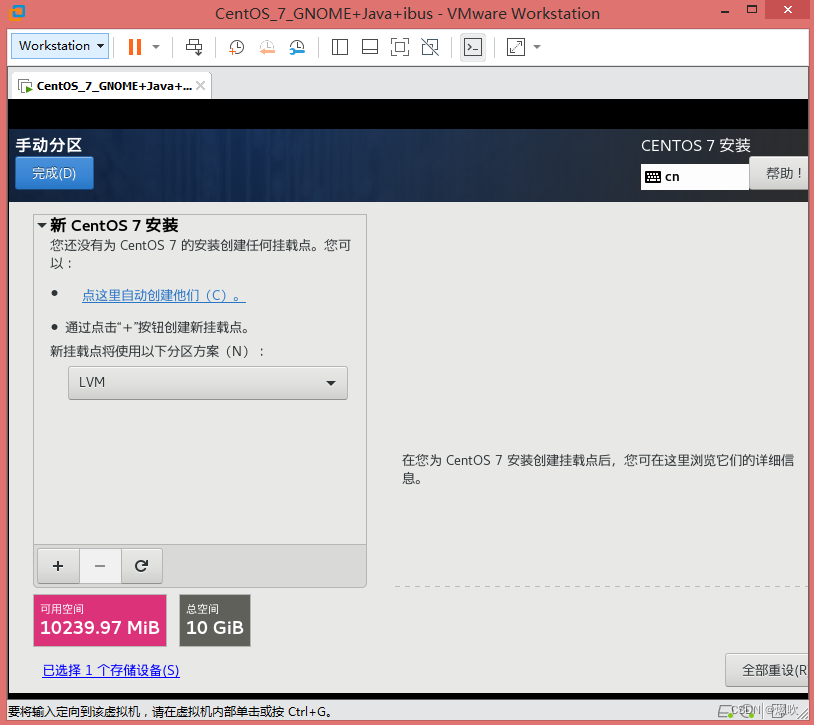
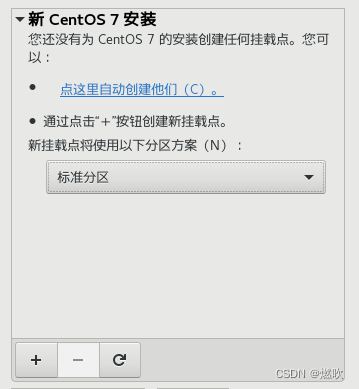
将新建分区更改为 标准分区
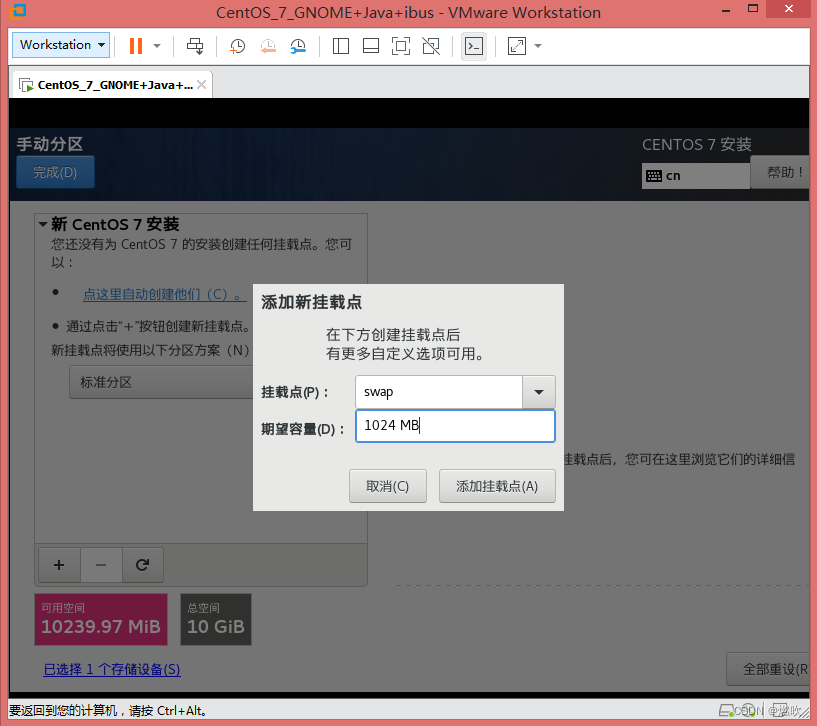
交换分区給 1 G 意思意思就行了 毕竟不是真实开发环境 能跑 GUI 桌面就成:
根分区 挂载点选择好后直接
添加挂载点
将第一块硬盘剩下的空间全部分配給她
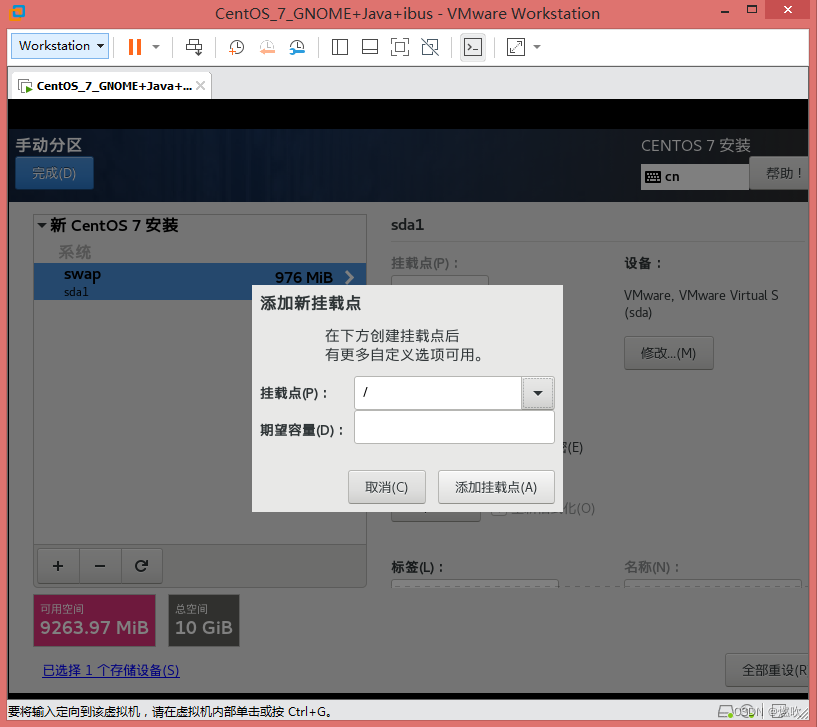
默认文件系统是 xfs
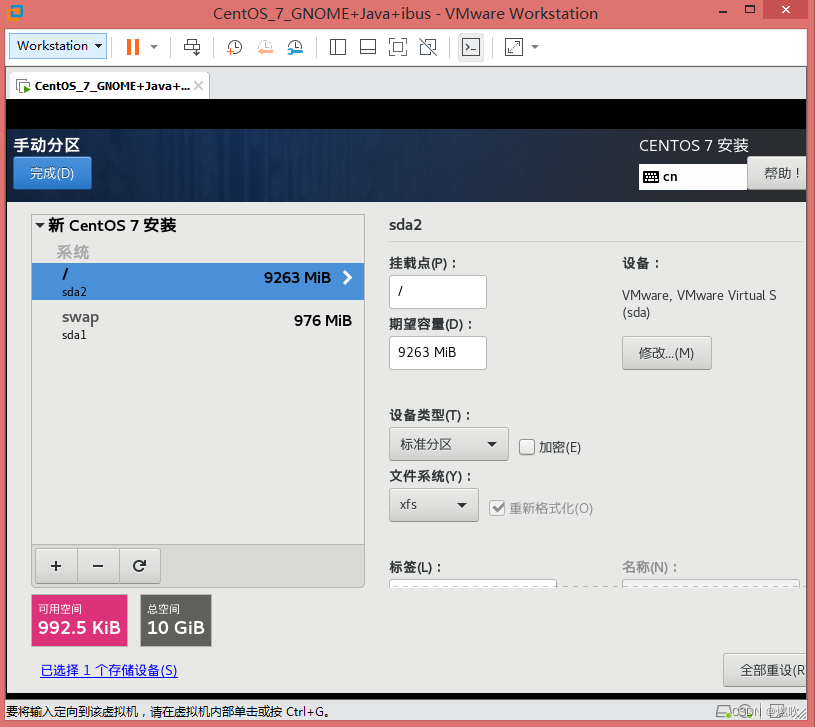
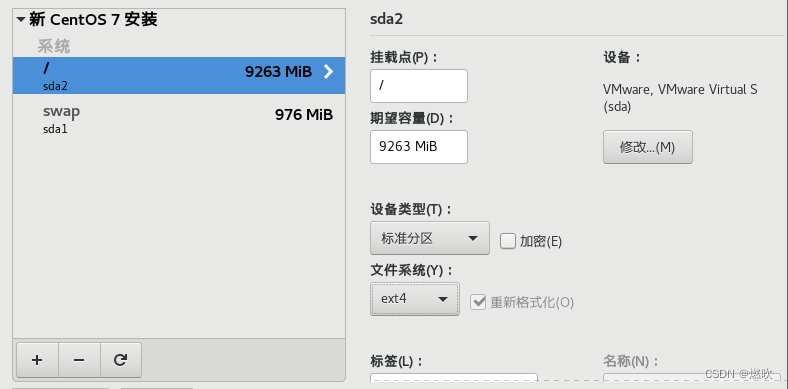
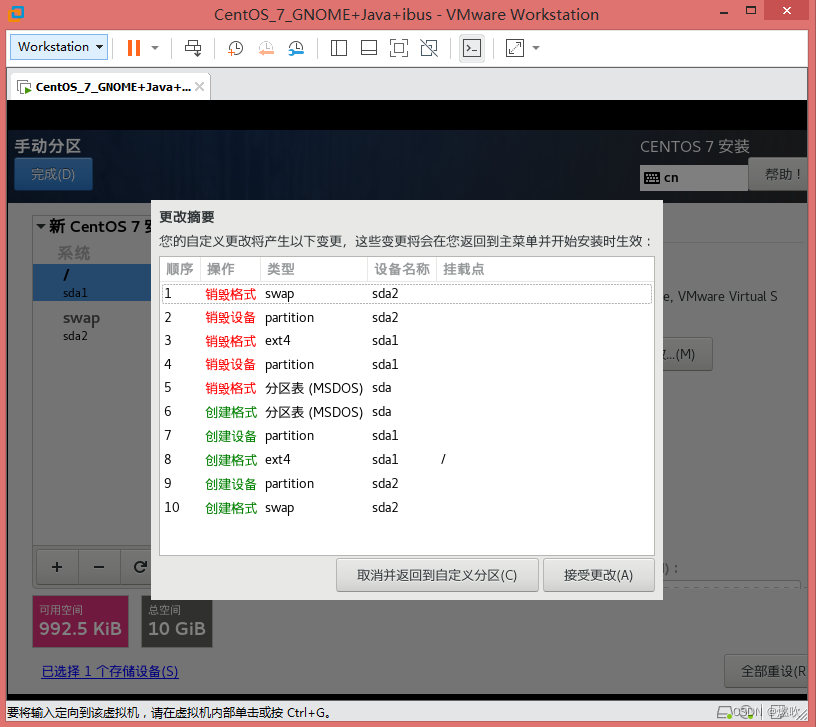
xfs 文件系统基本都是服务器用 说实话 ext4 比较适合我 毕竟使用惯了:
接受更改:
系统也配置完毕:
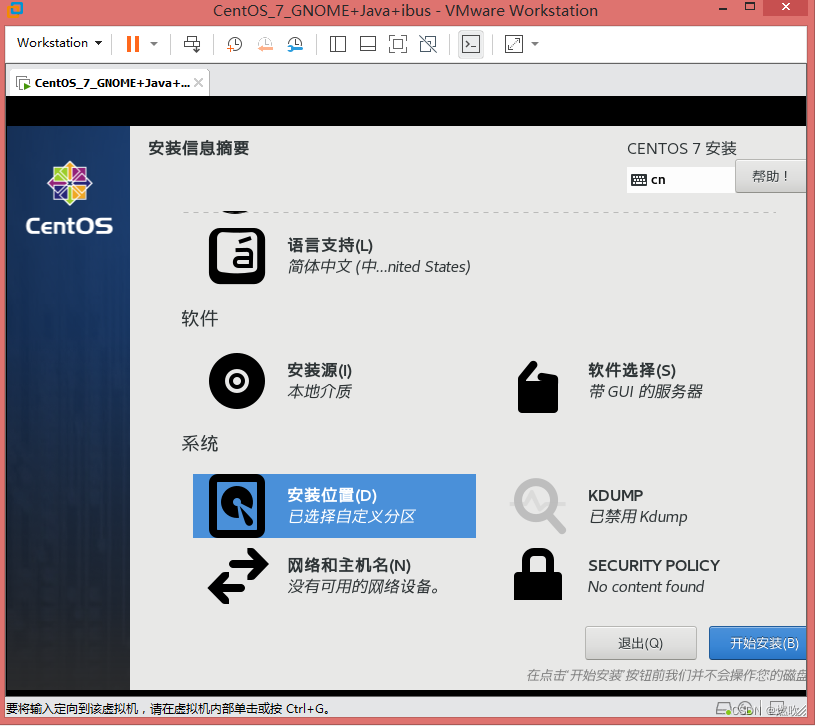
%%%%%
开始安装
点击开始安装!
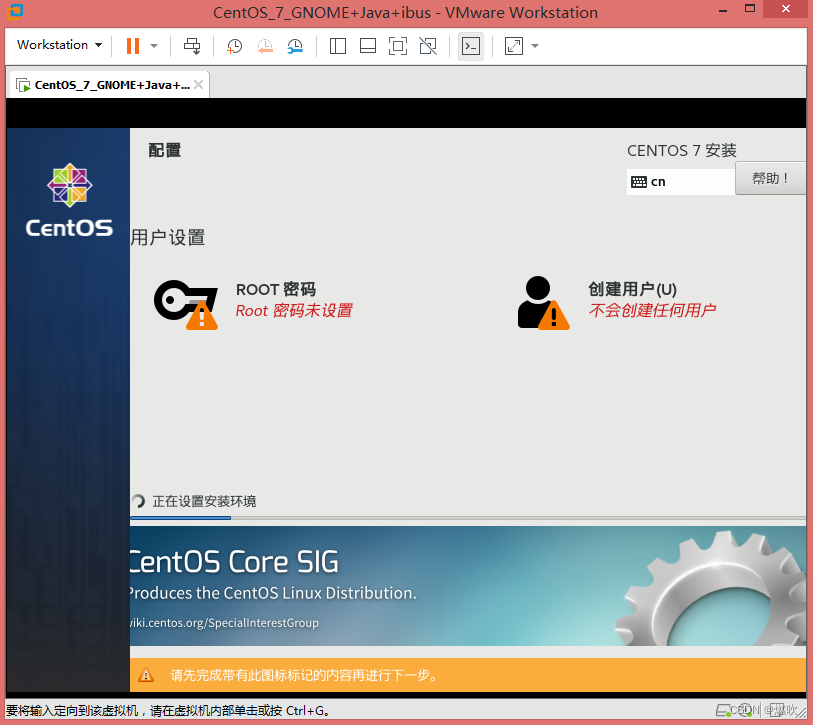
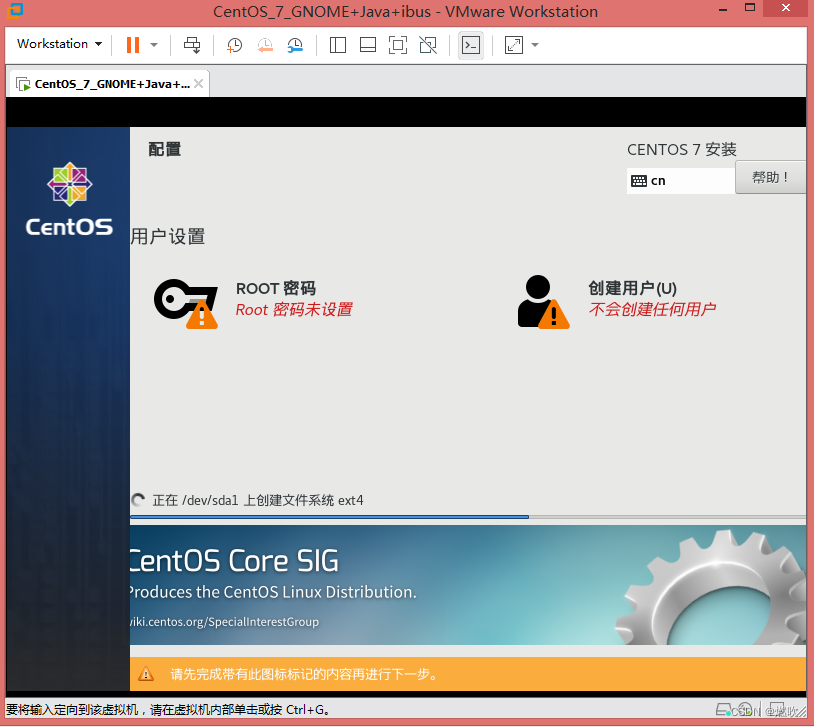
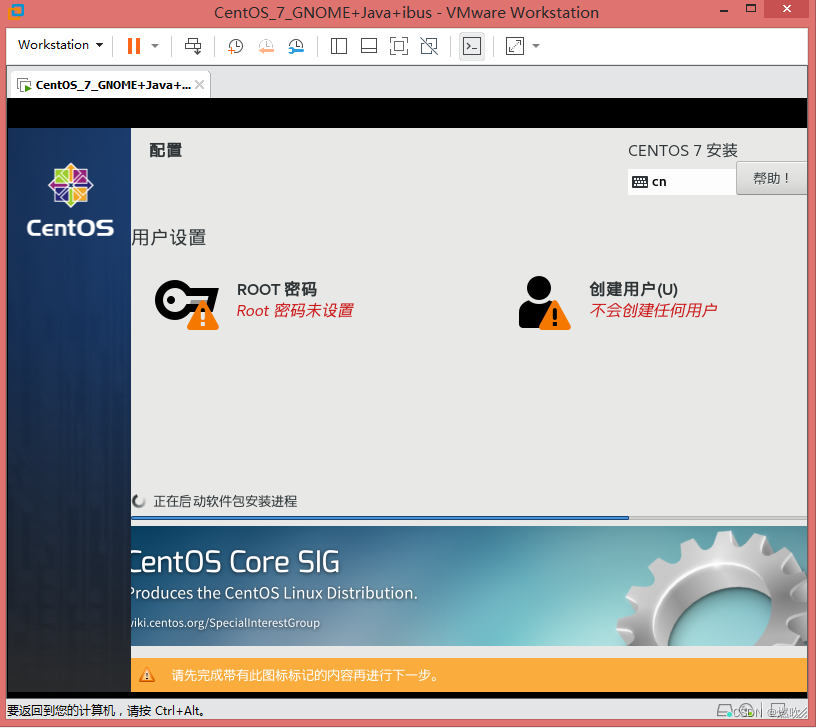
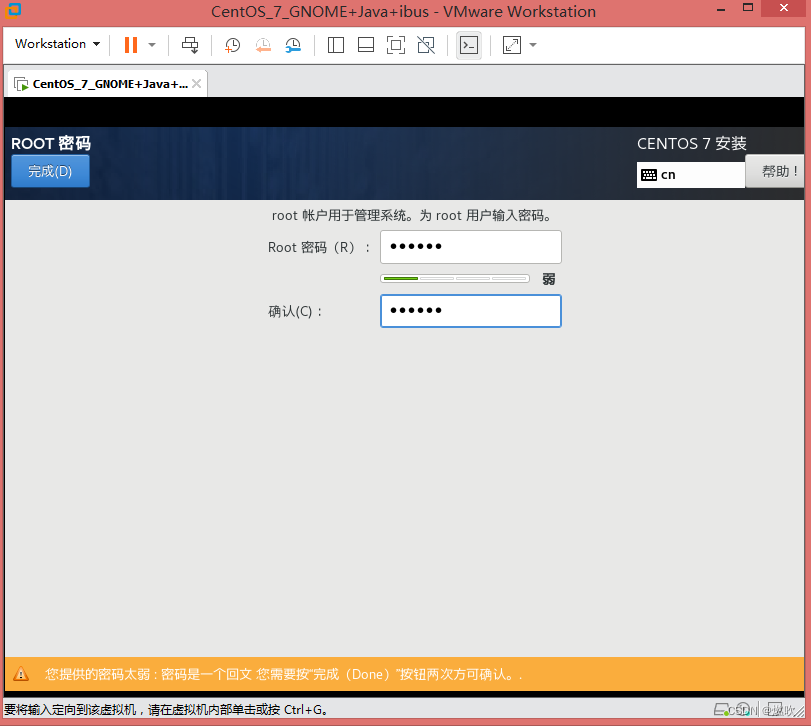
设置 管理员 密码:
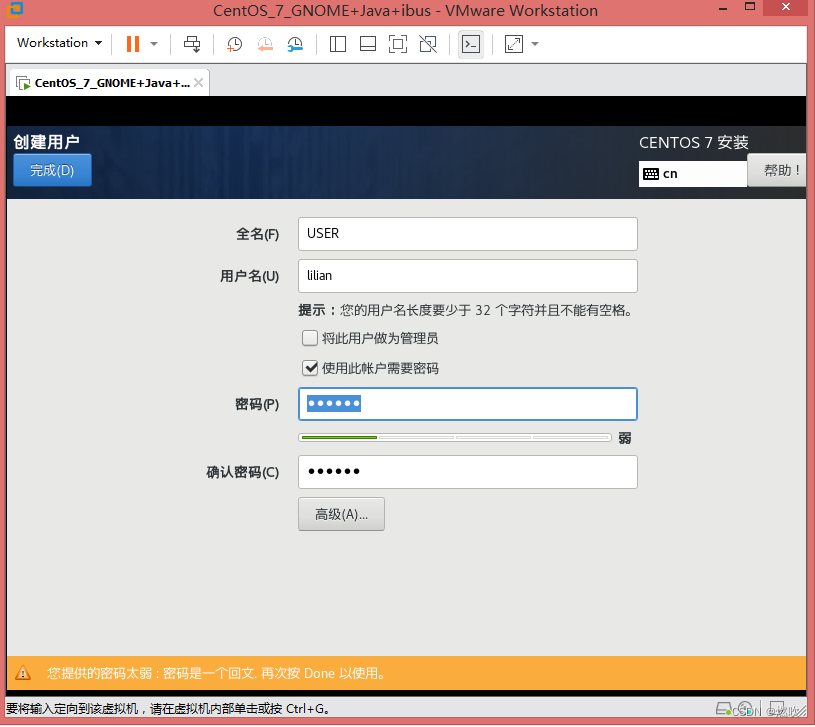
创建普通用户
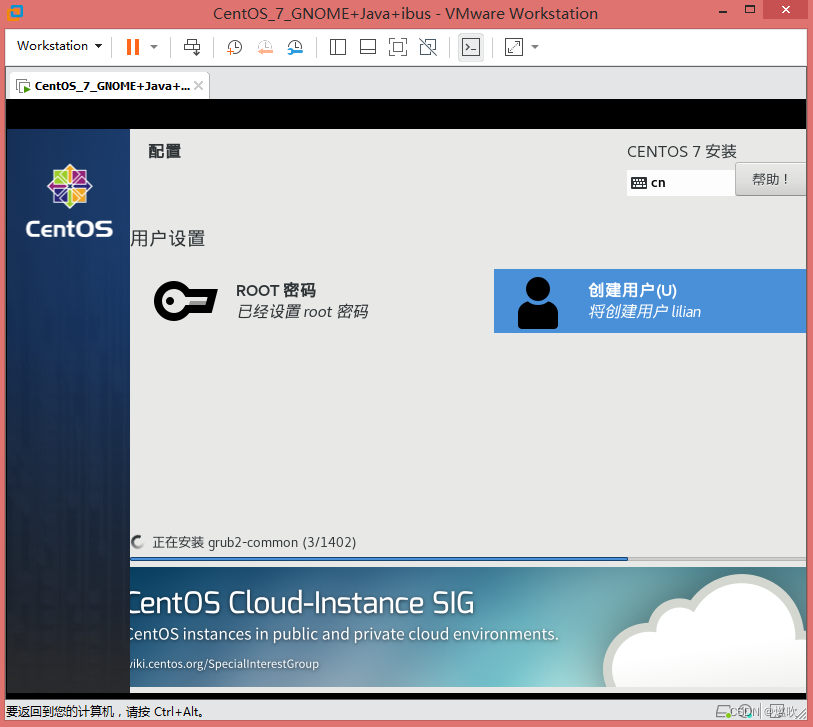
第一个安装的软件竟然是 grub2 引导程序:
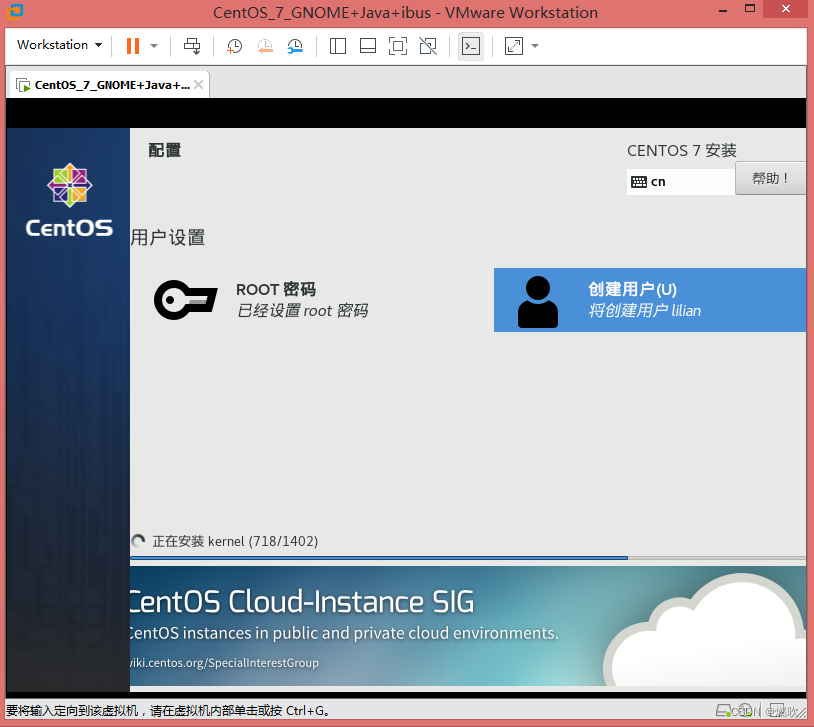
开始安装 java 了!!!
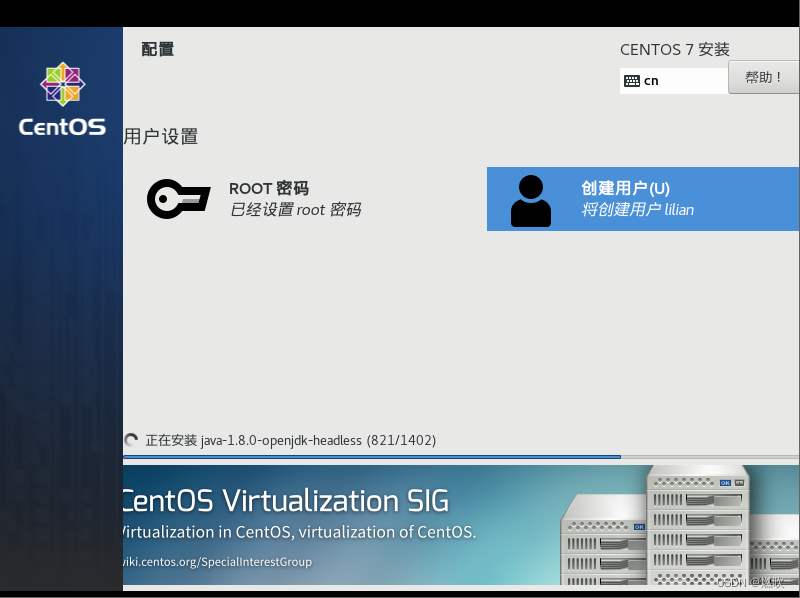
看到火狐浏览器了!
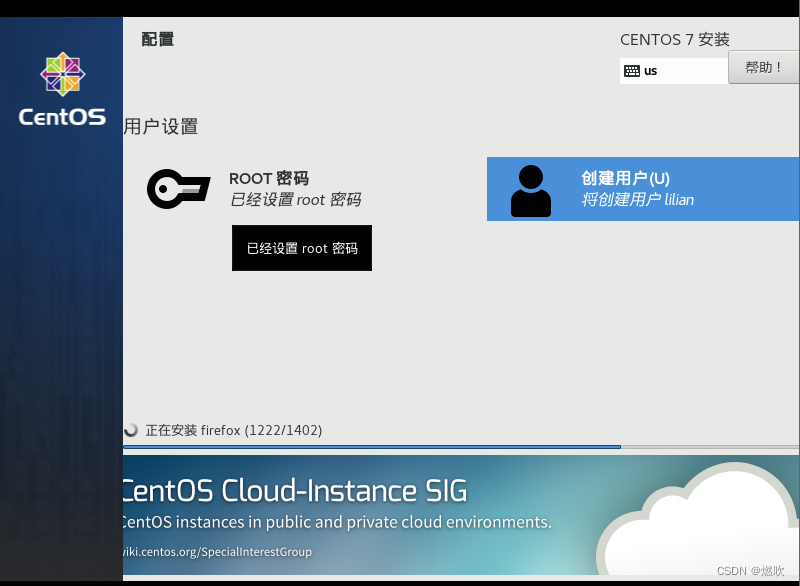
软件基本安装完毕 正在进行设置:
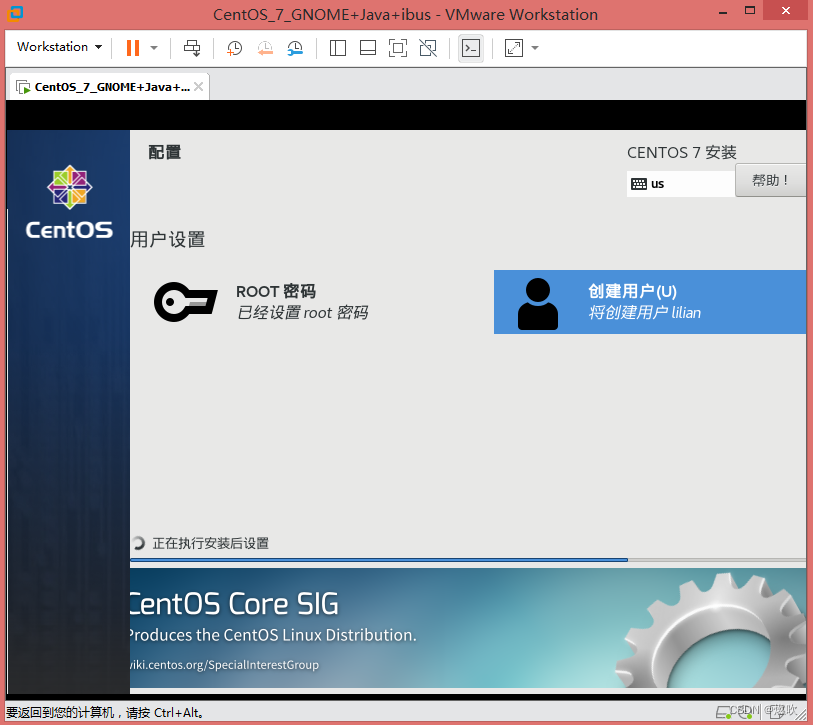
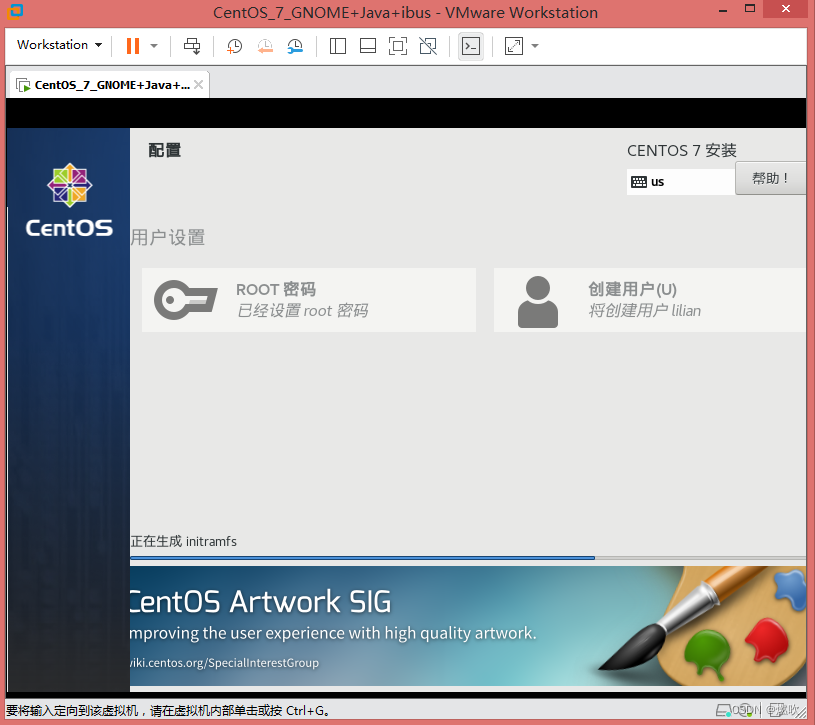
安装完成!
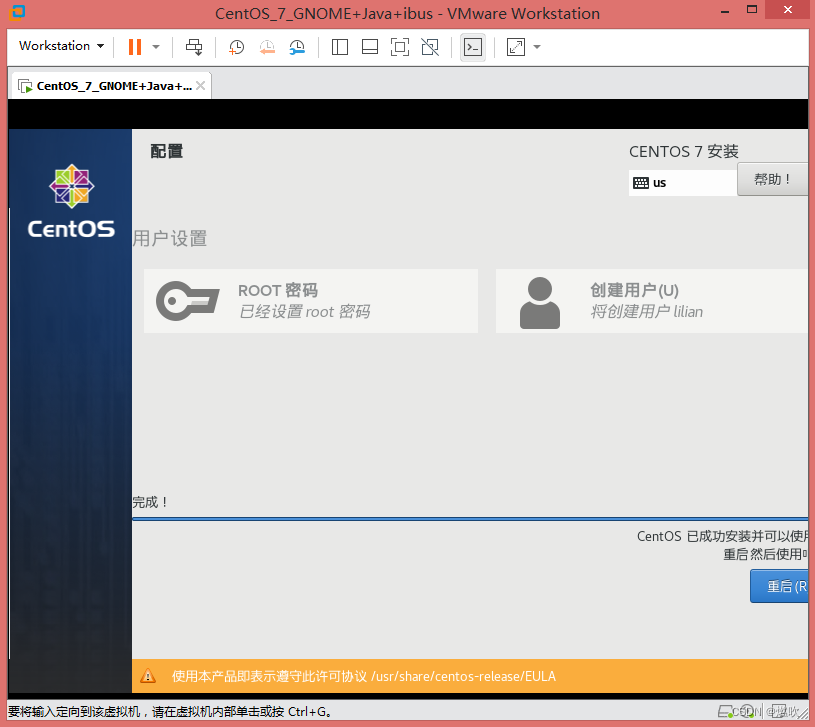
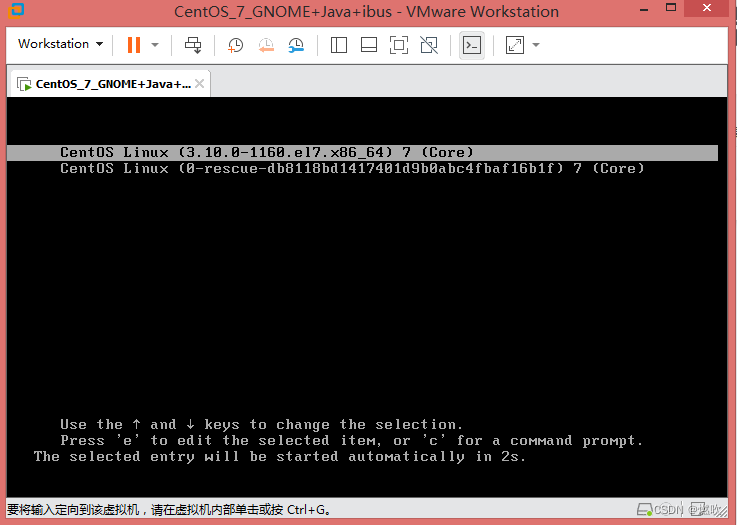
看到熟悉的引导界面:
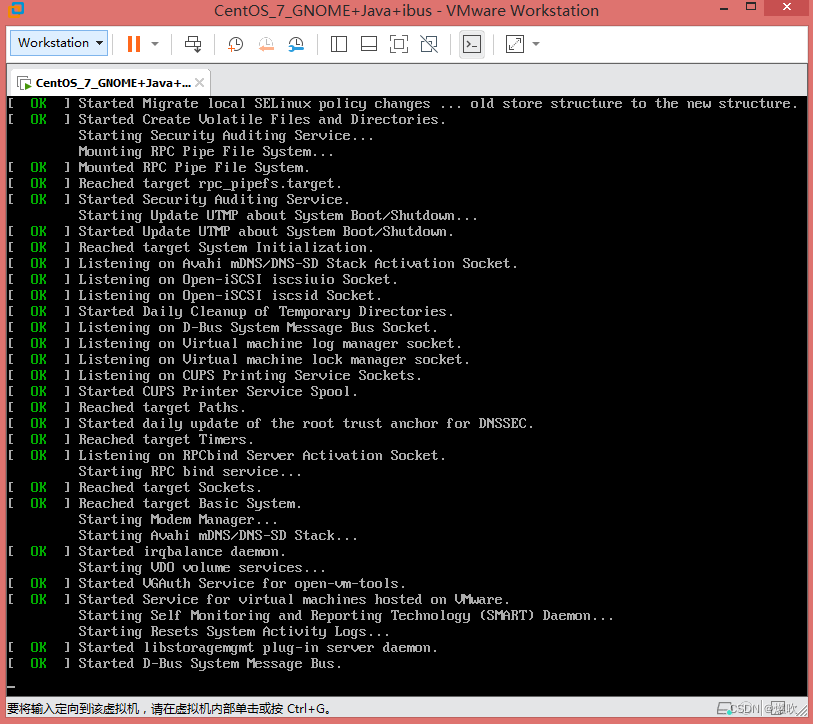
正在启动:
%%%%%
初始设置
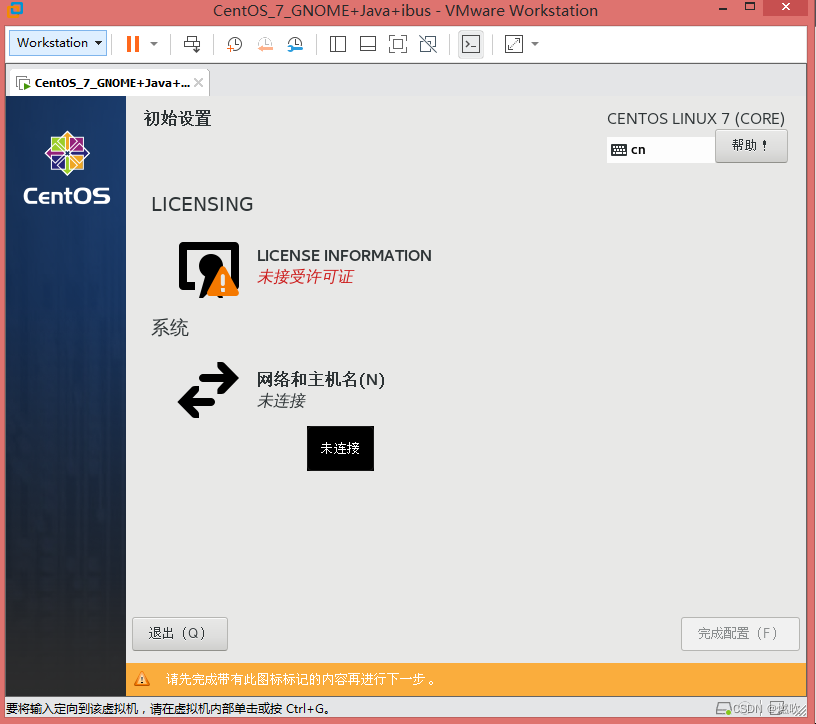
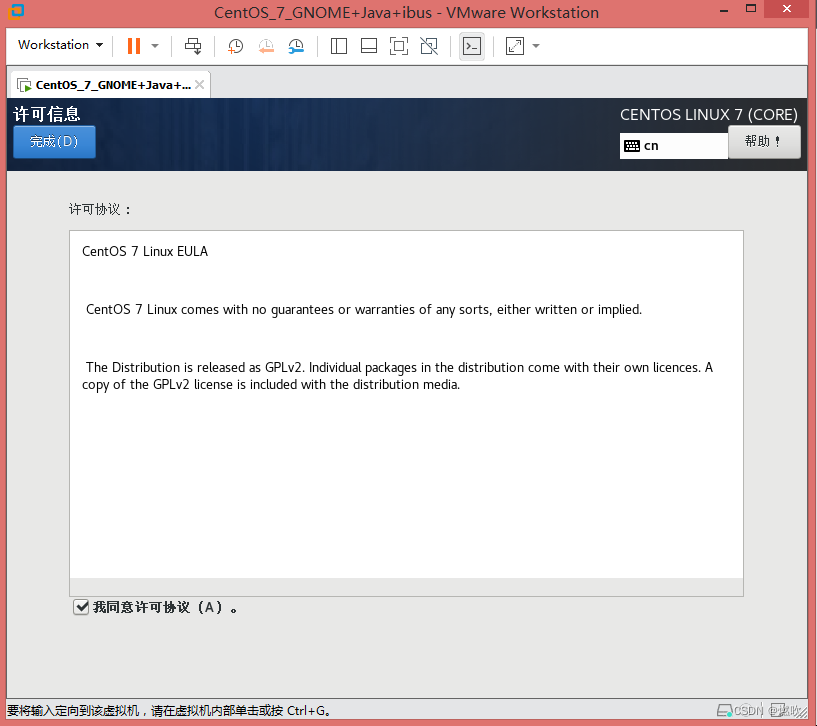
接受许可信息:
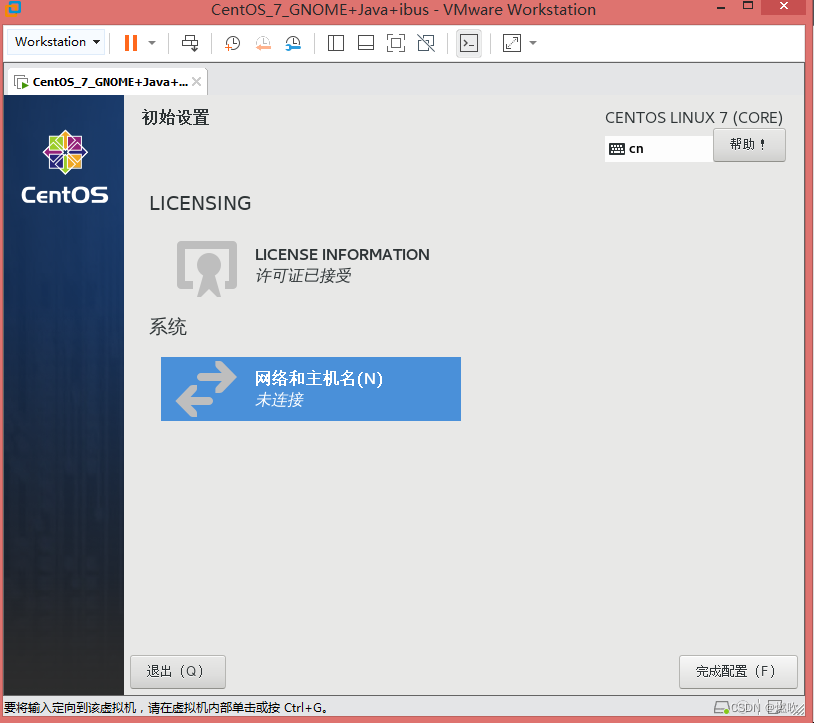
主机名之前设置好了 现在不用管 默认就行:
点击 完成配置
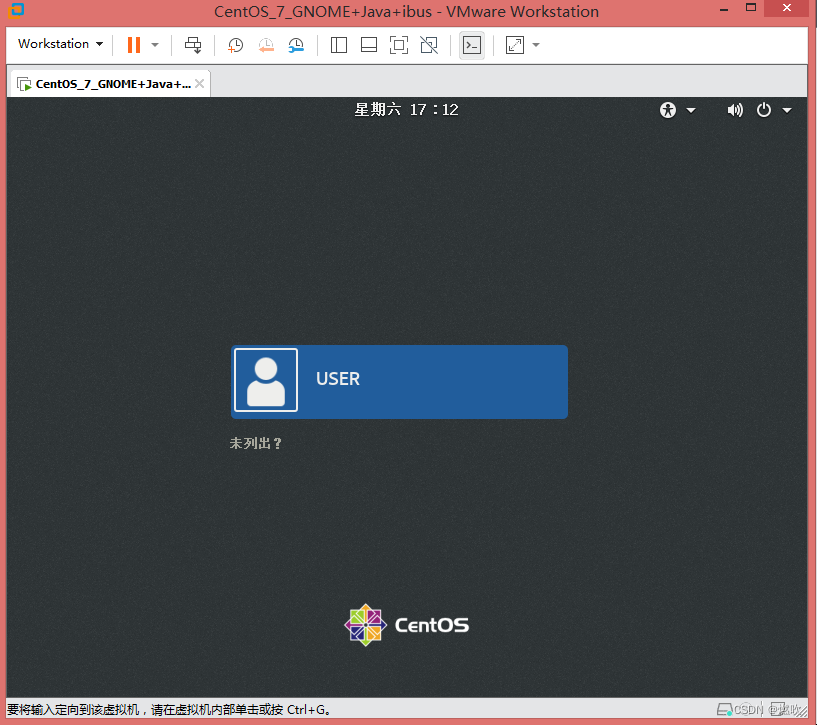
普通用户 USER/lilian 登录:
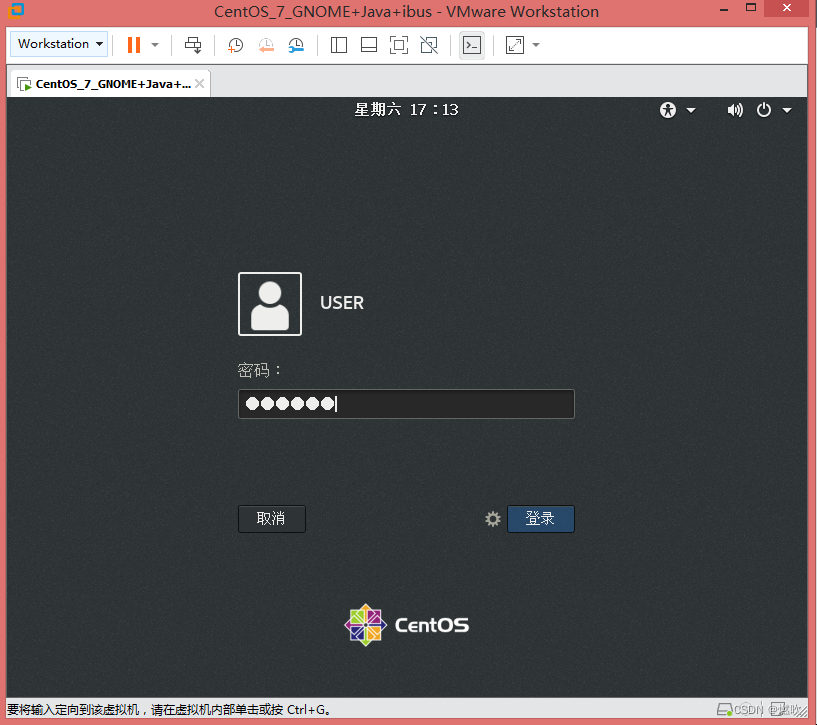
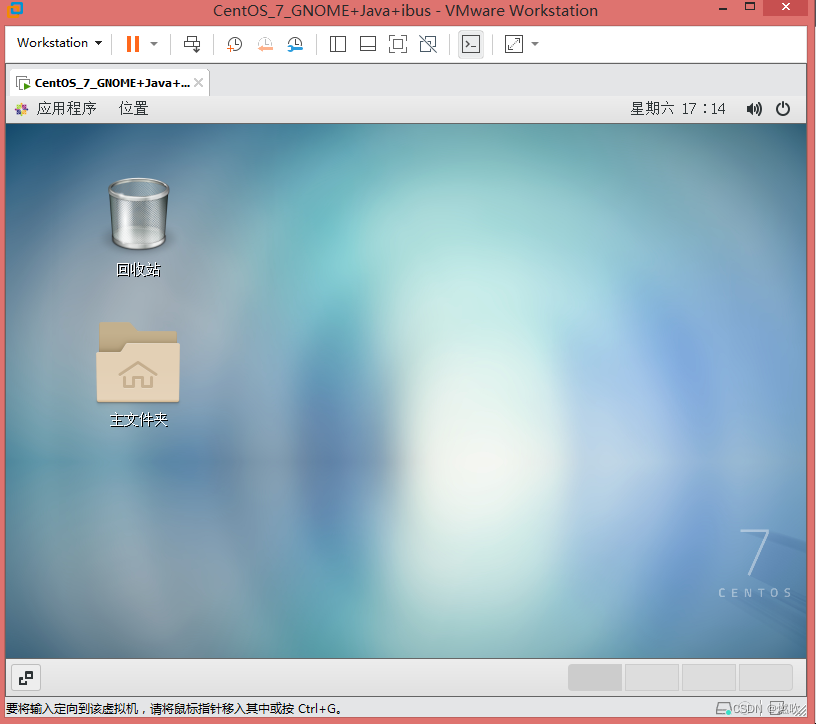
登录成功:
%%%%%
首次登录配置
开始首次登录配置了:
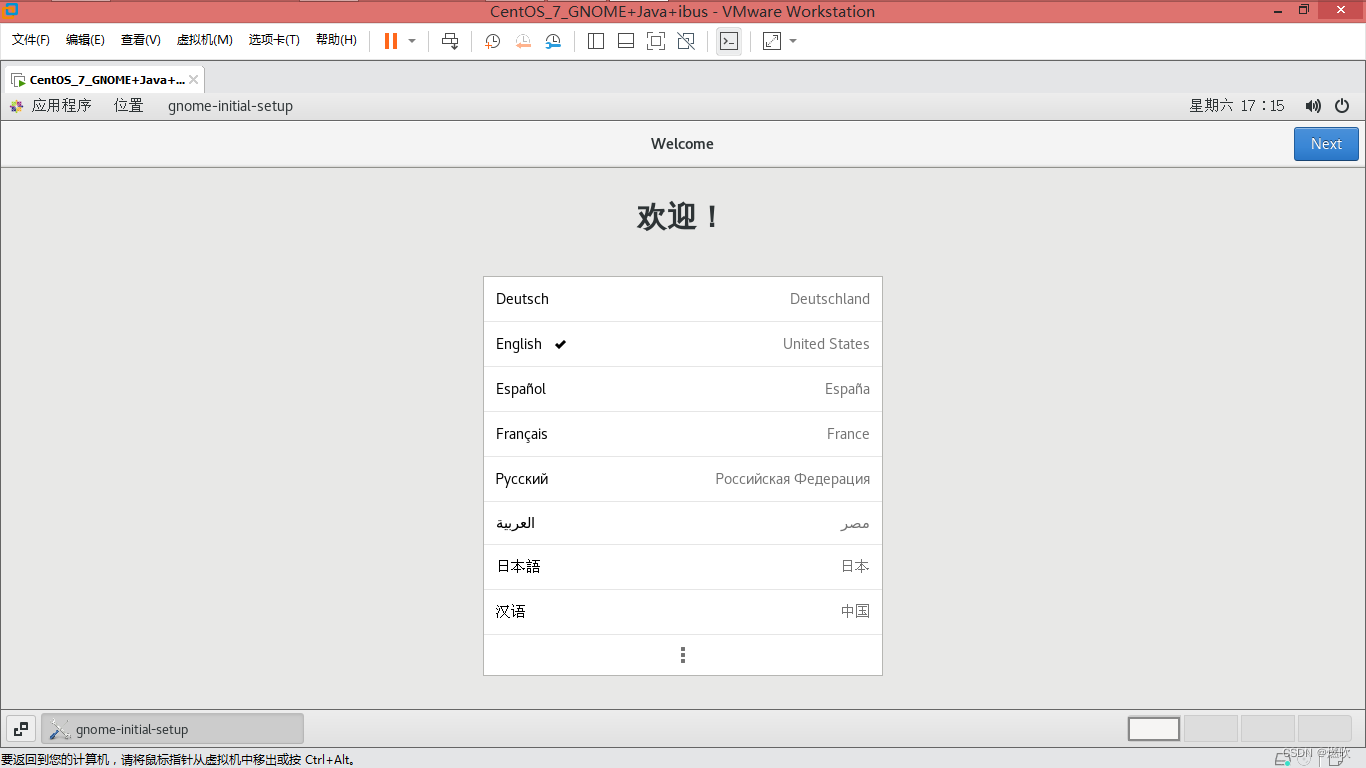
选择 汉语:
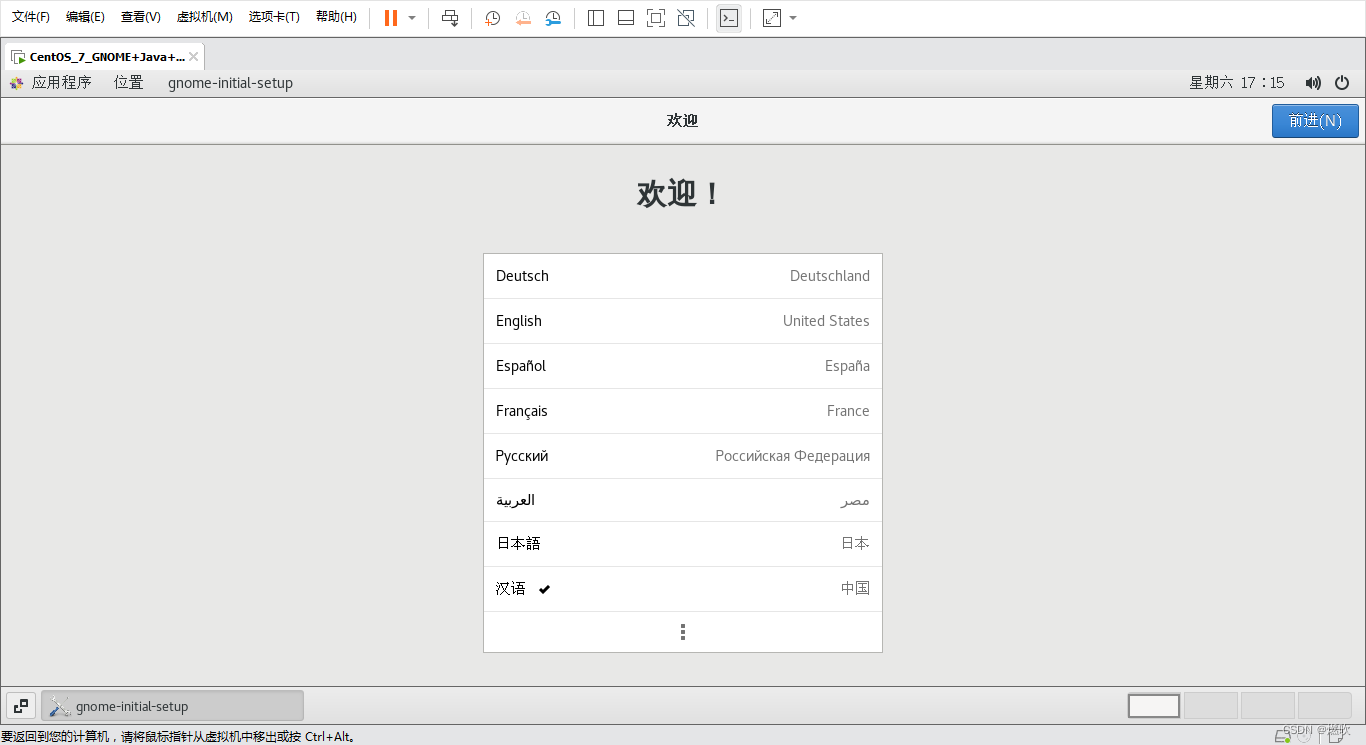
点击最下面的更多配置 进入输入配置:
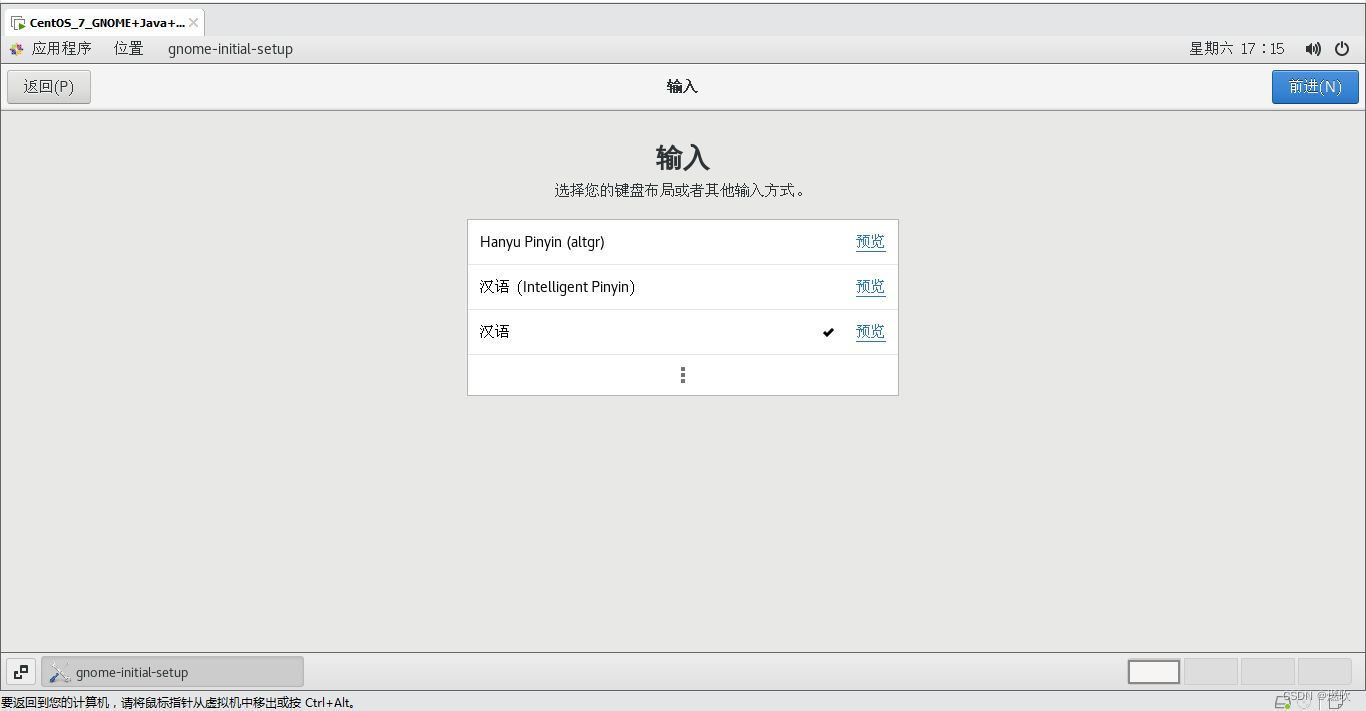
配置键盘输入为
汉语 (Intelligent Pinyin)/汉语 (智能拼音)
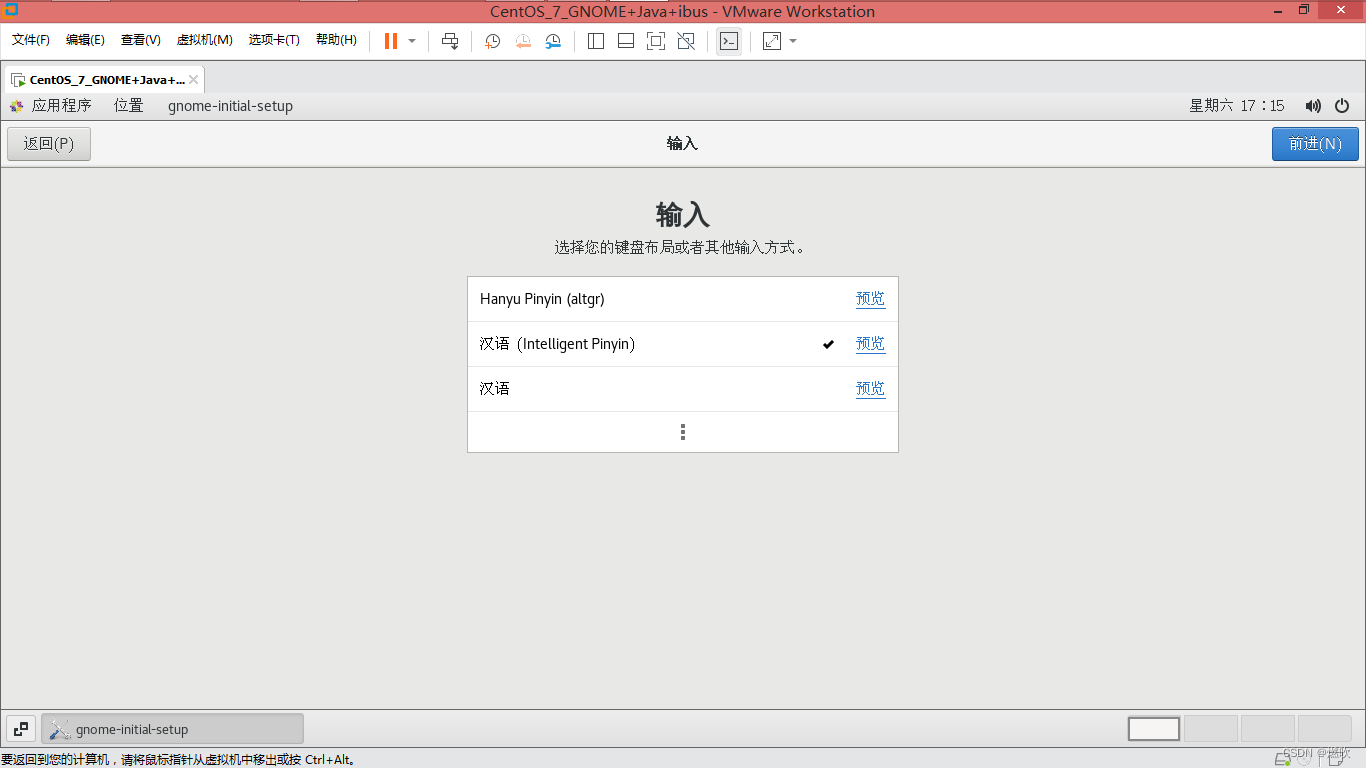
点击前进 进入隐私设置:
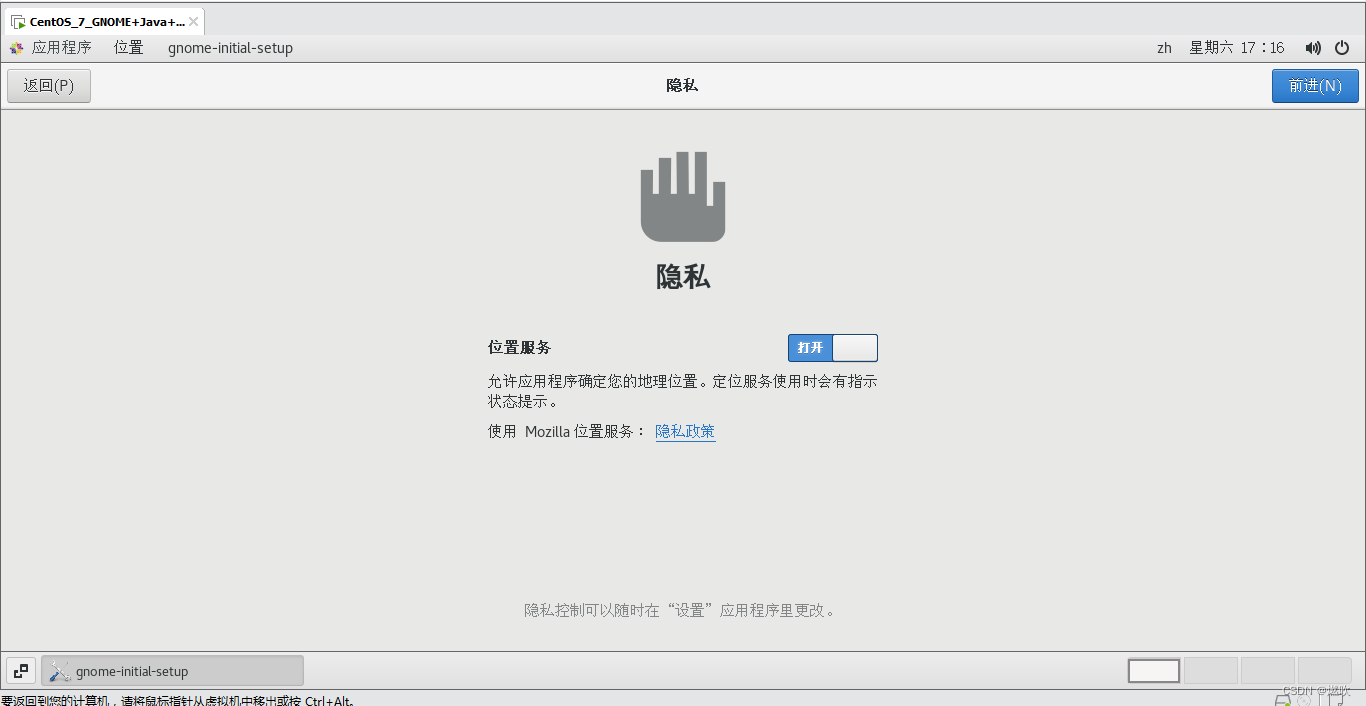
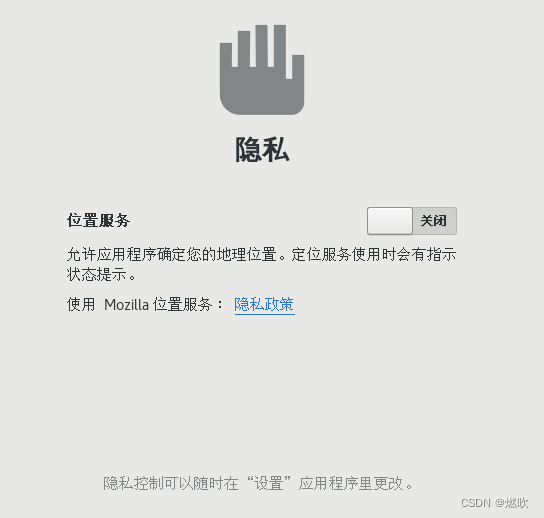
关掉位置服务:
再次前进 在线账号 点击跳过:
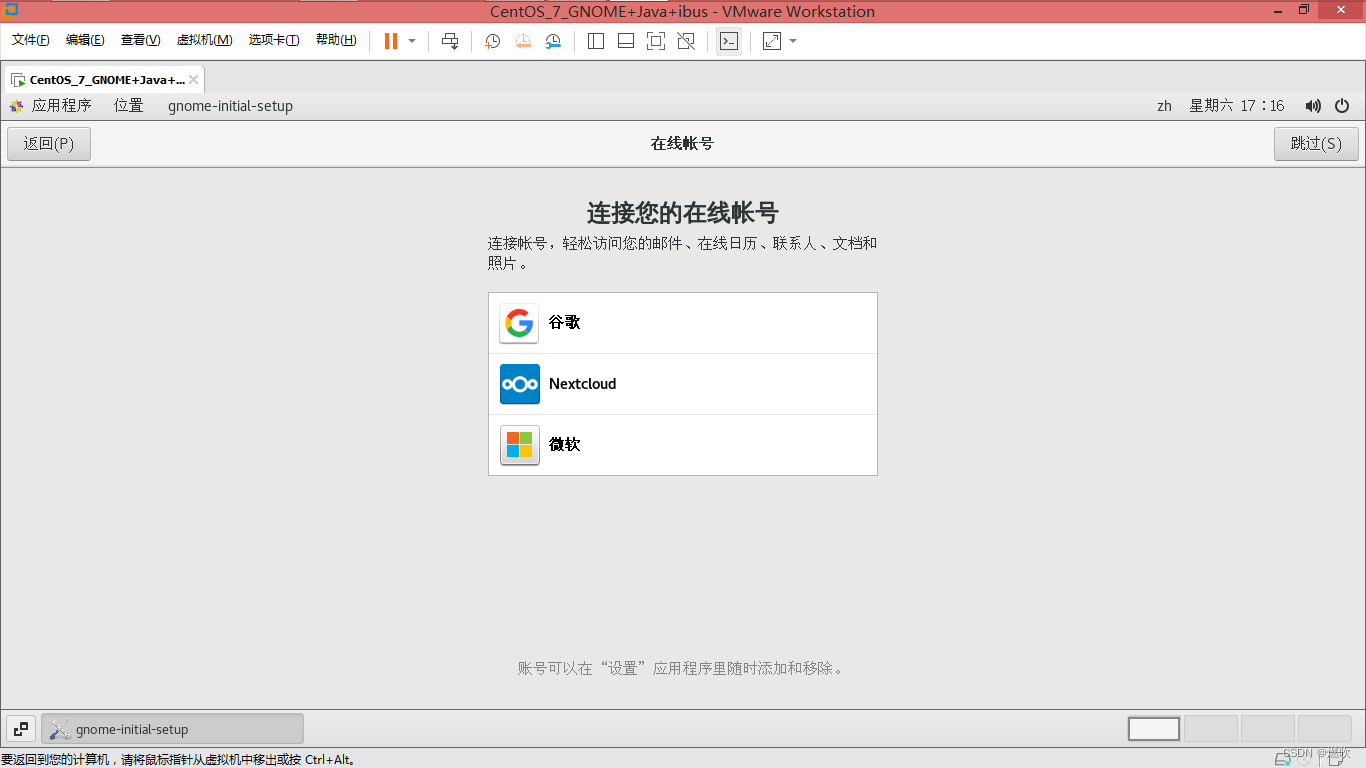
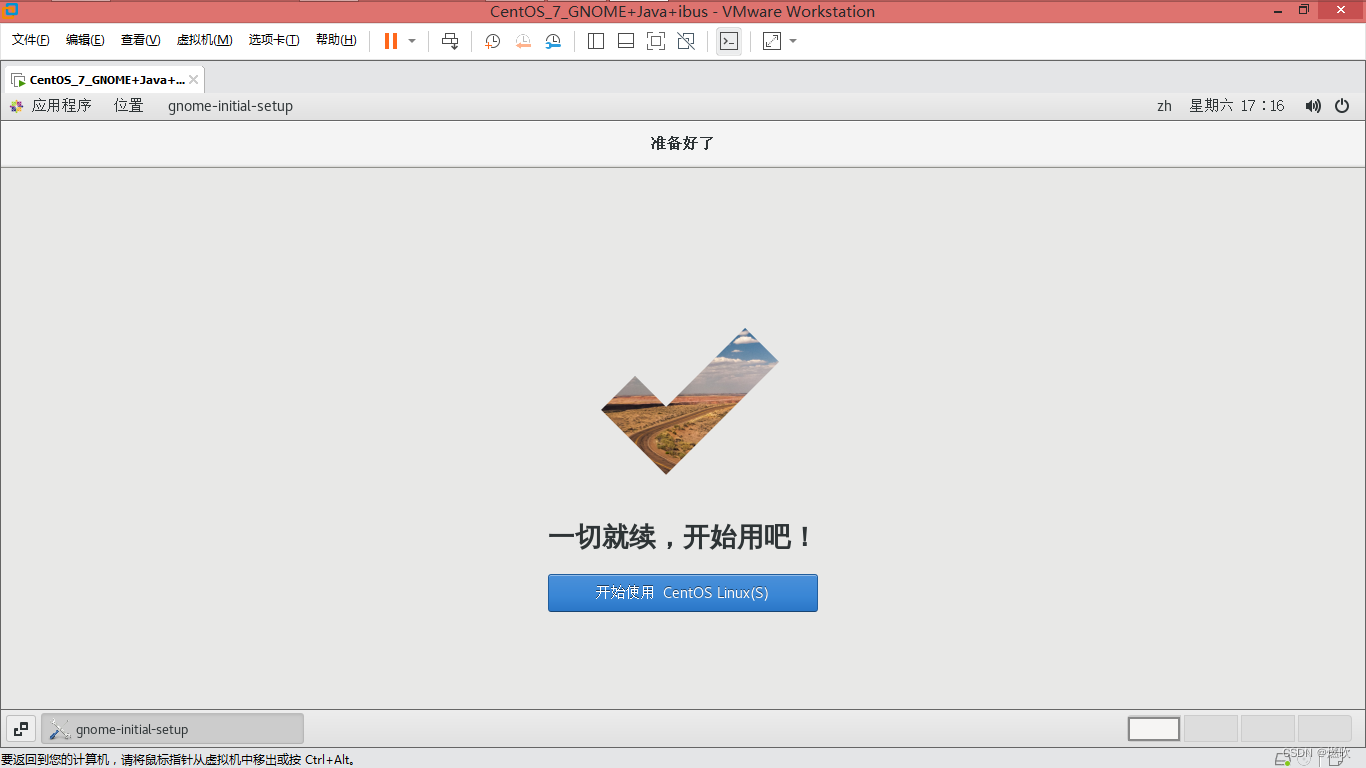
准备好了:
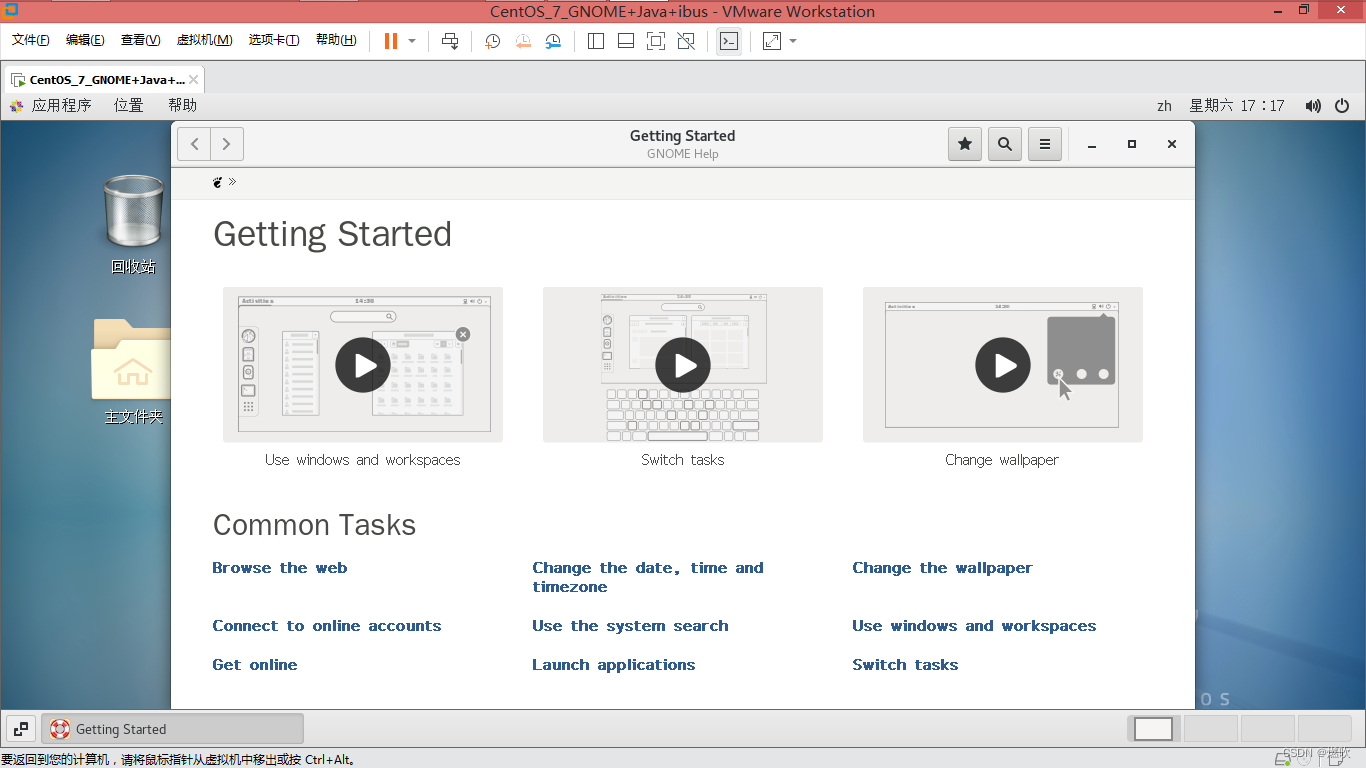
又弹出帮助视频界面:
Windows 空格 调出输入法 可以输入汉字!
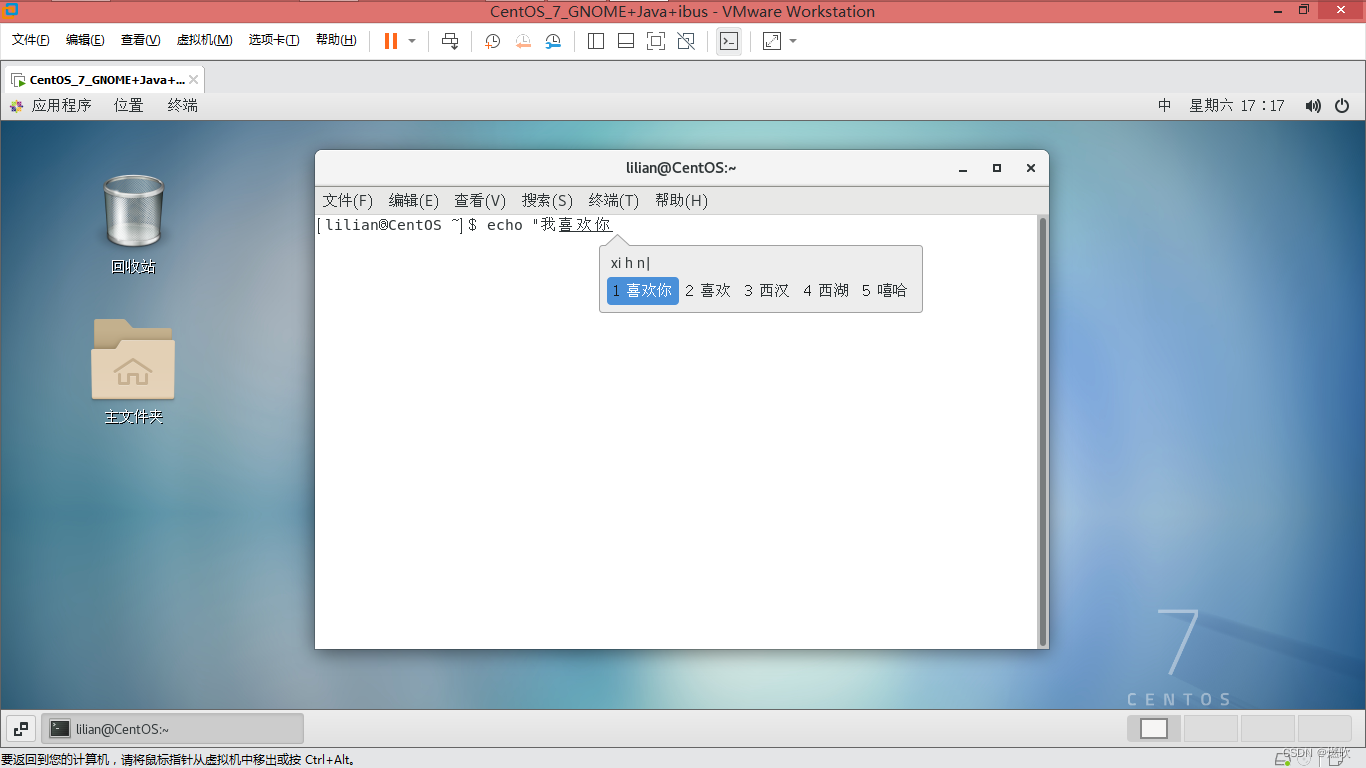
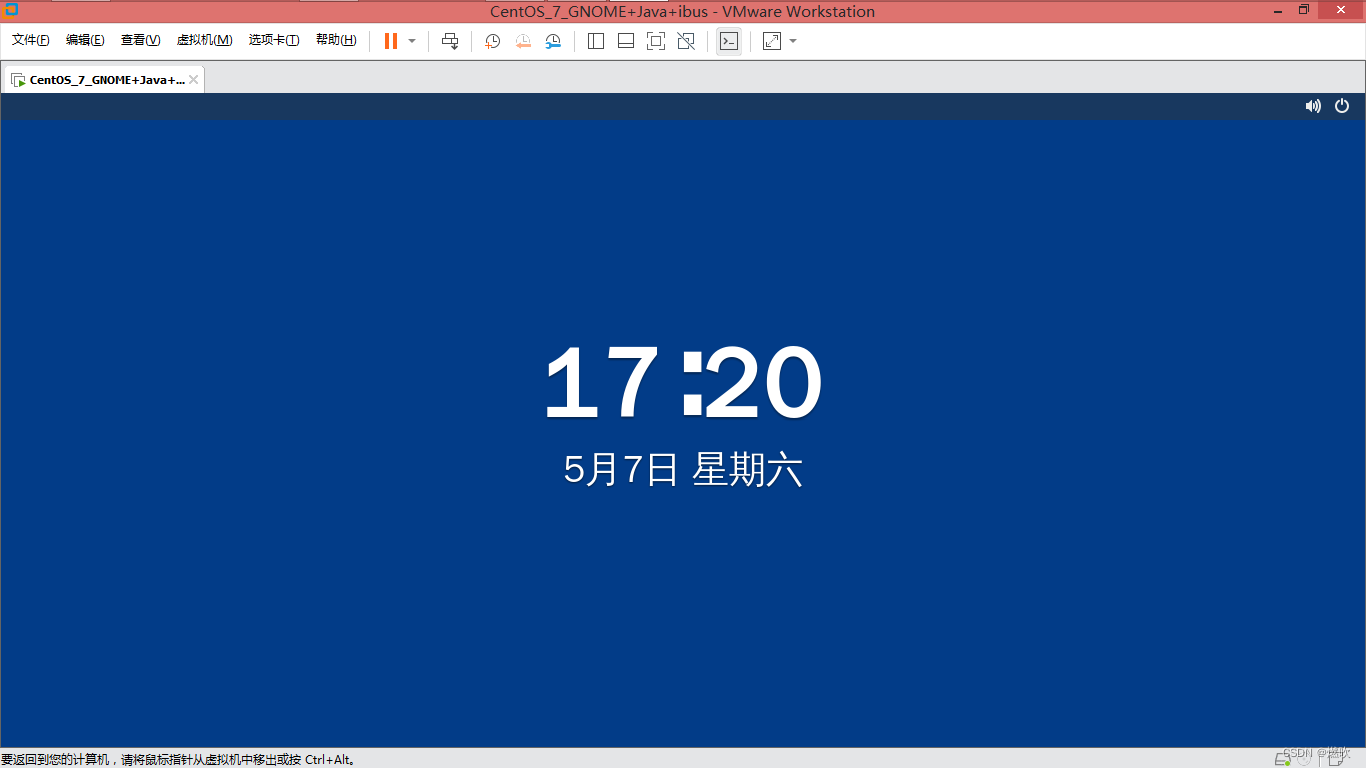
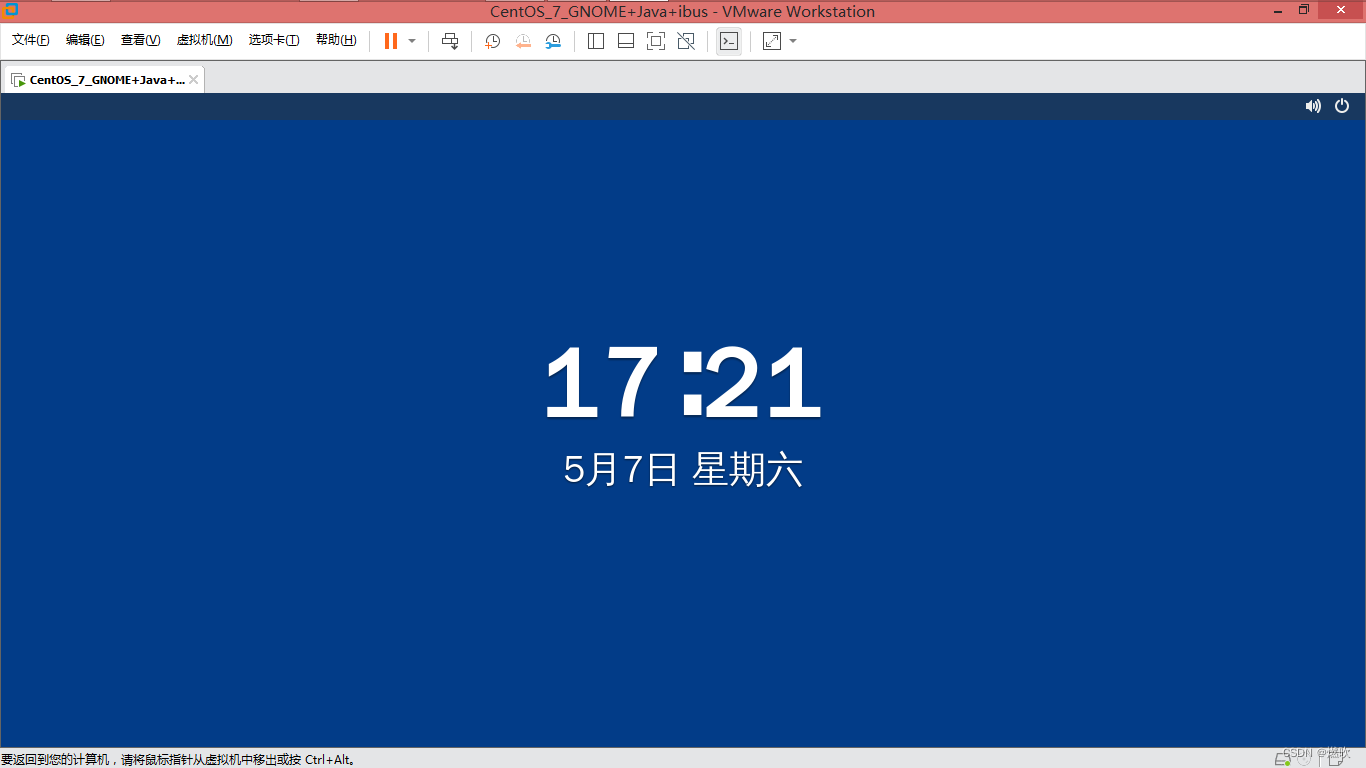
可以输入中文:
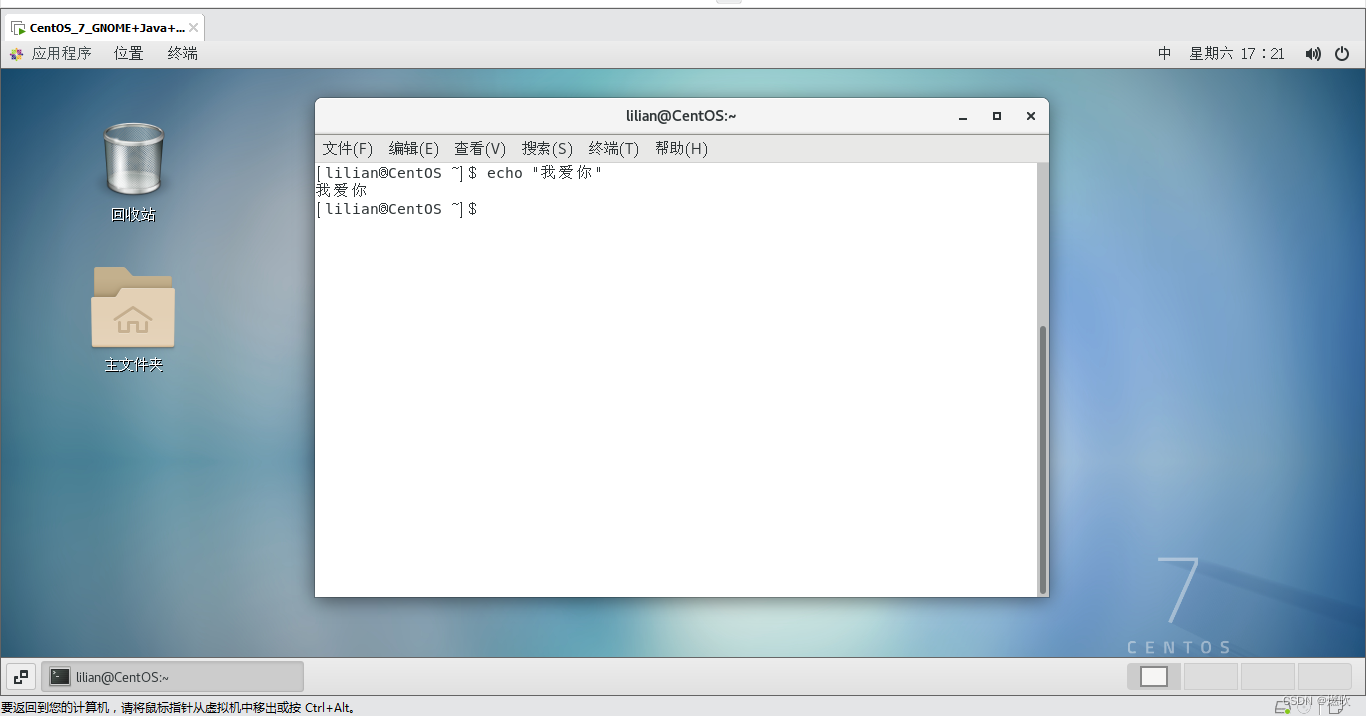
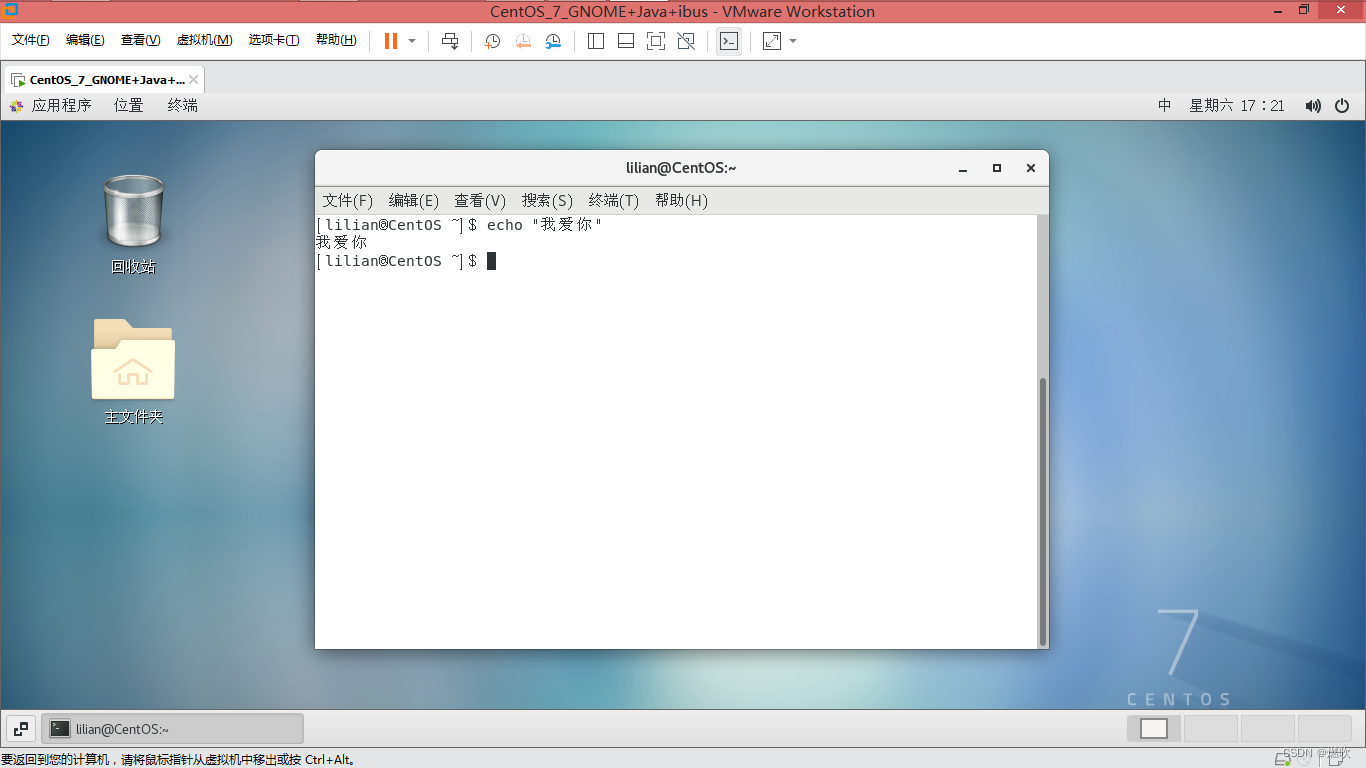
%%%%%
英文 GUI 配置中文
这次在英文环境下配置中文输入法
以 root 登录系统:
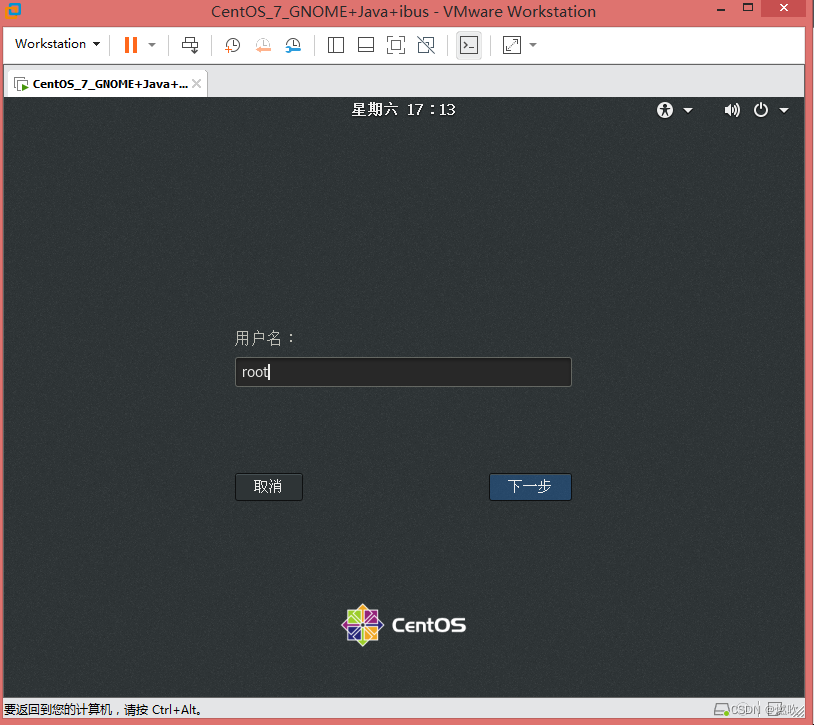
这次选择英文环境:
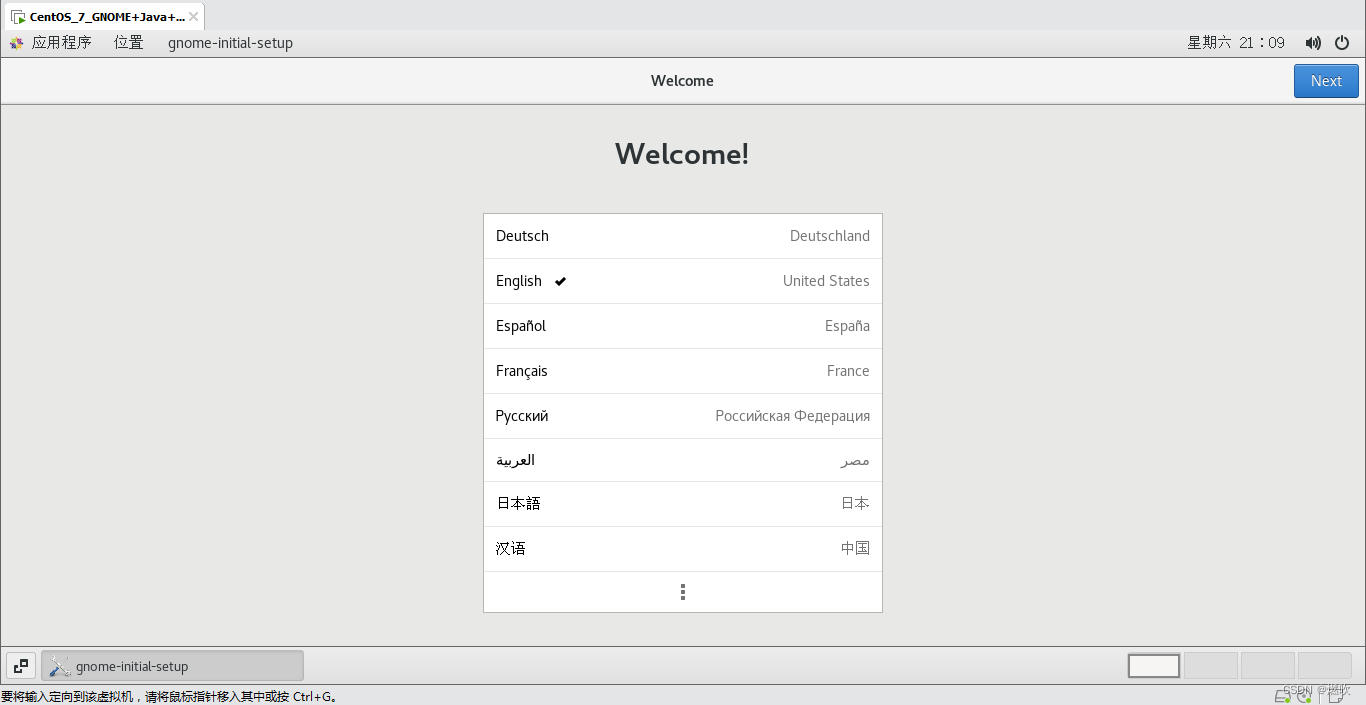
按键默认是 Chinese
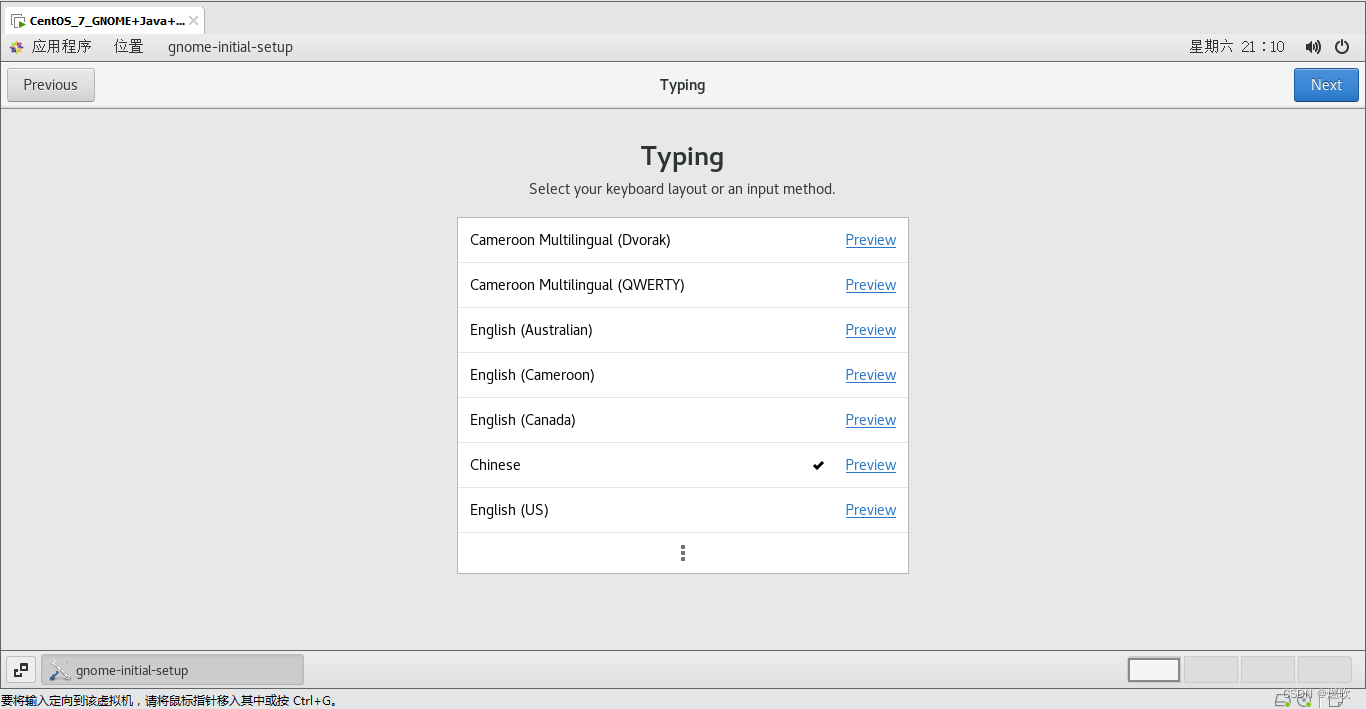
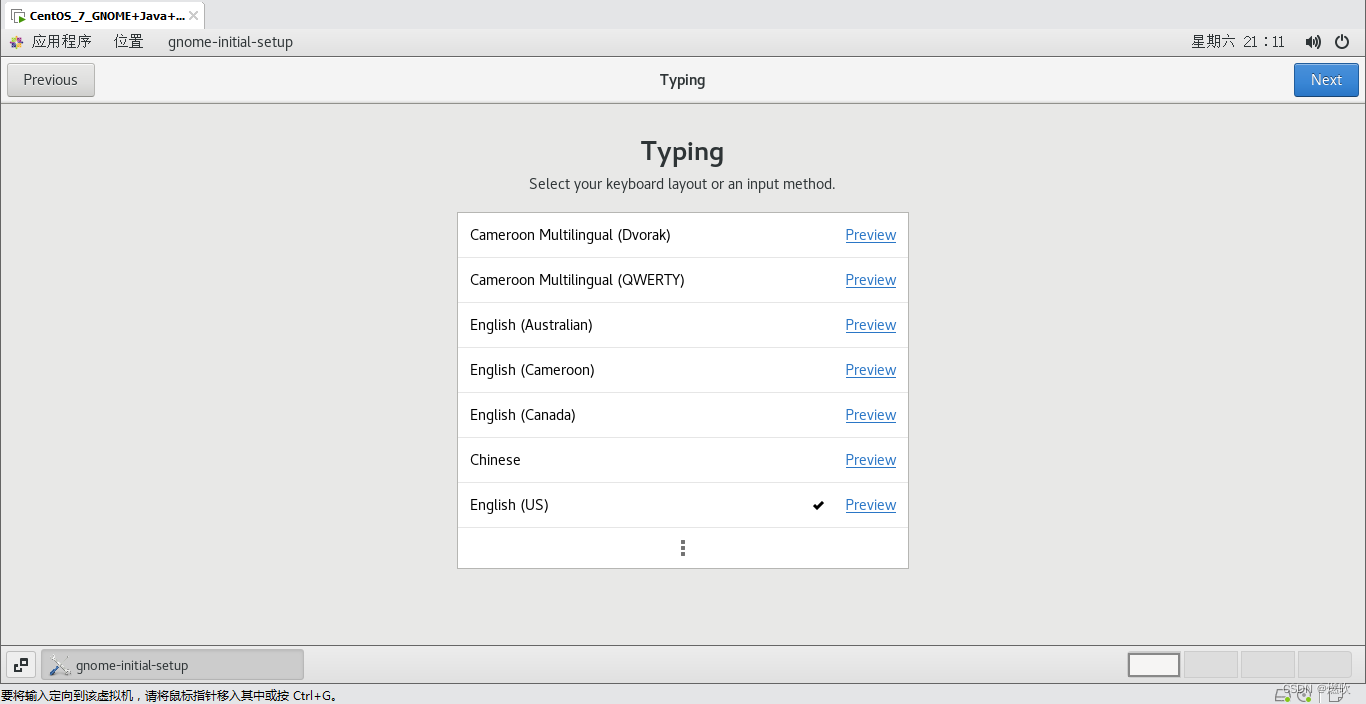
选择 English (US)
同样 关掉位置服务:
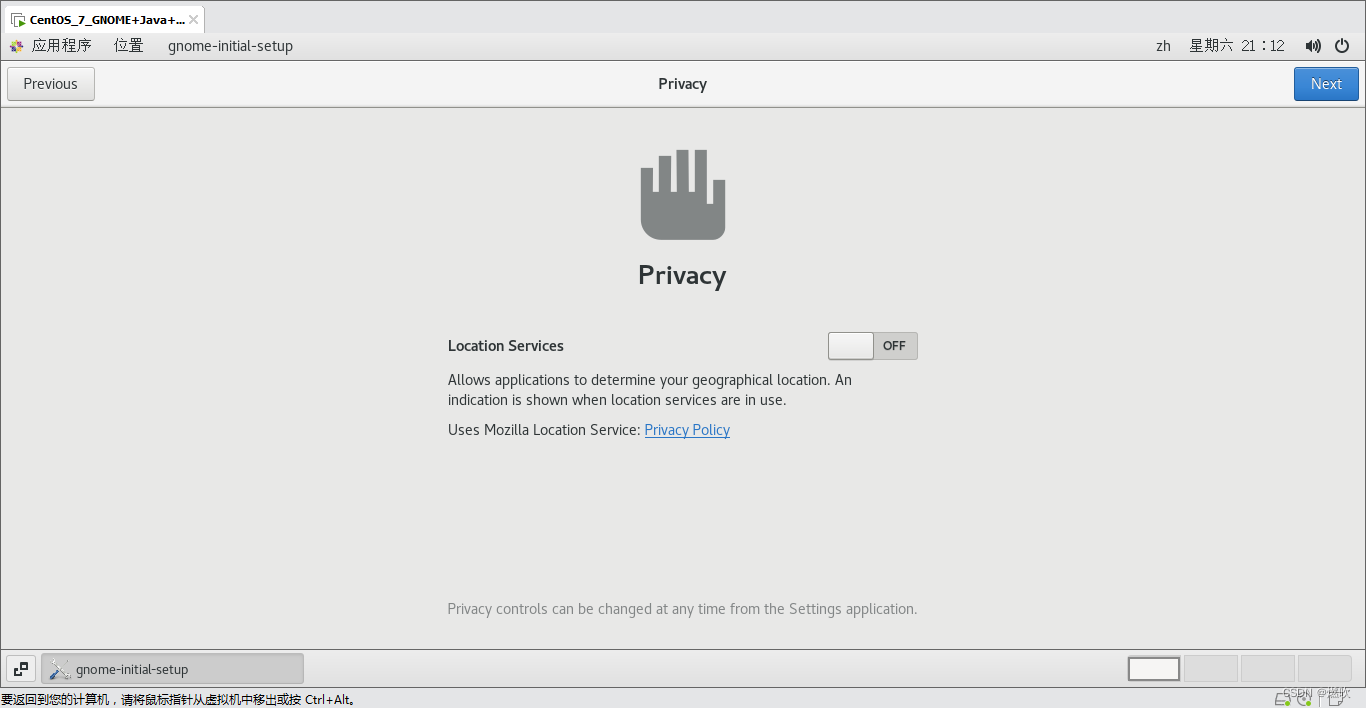
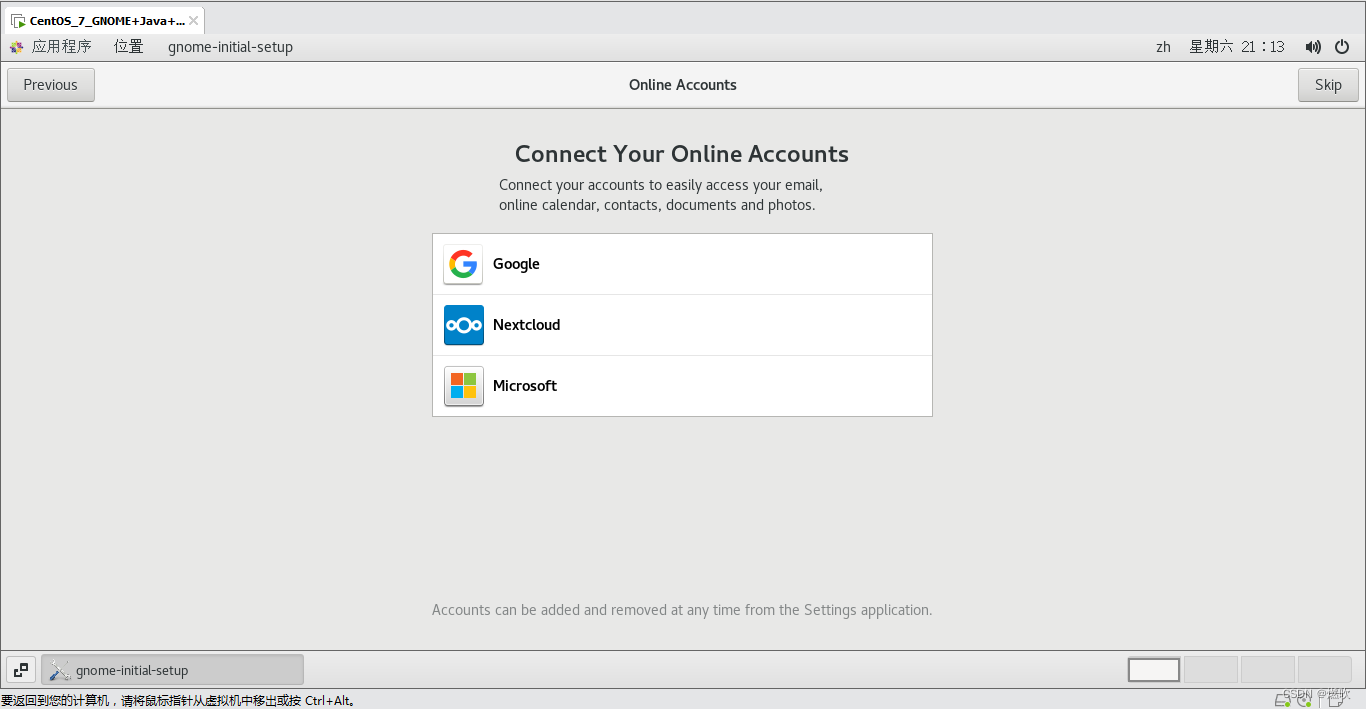
同样跳过在线账号:
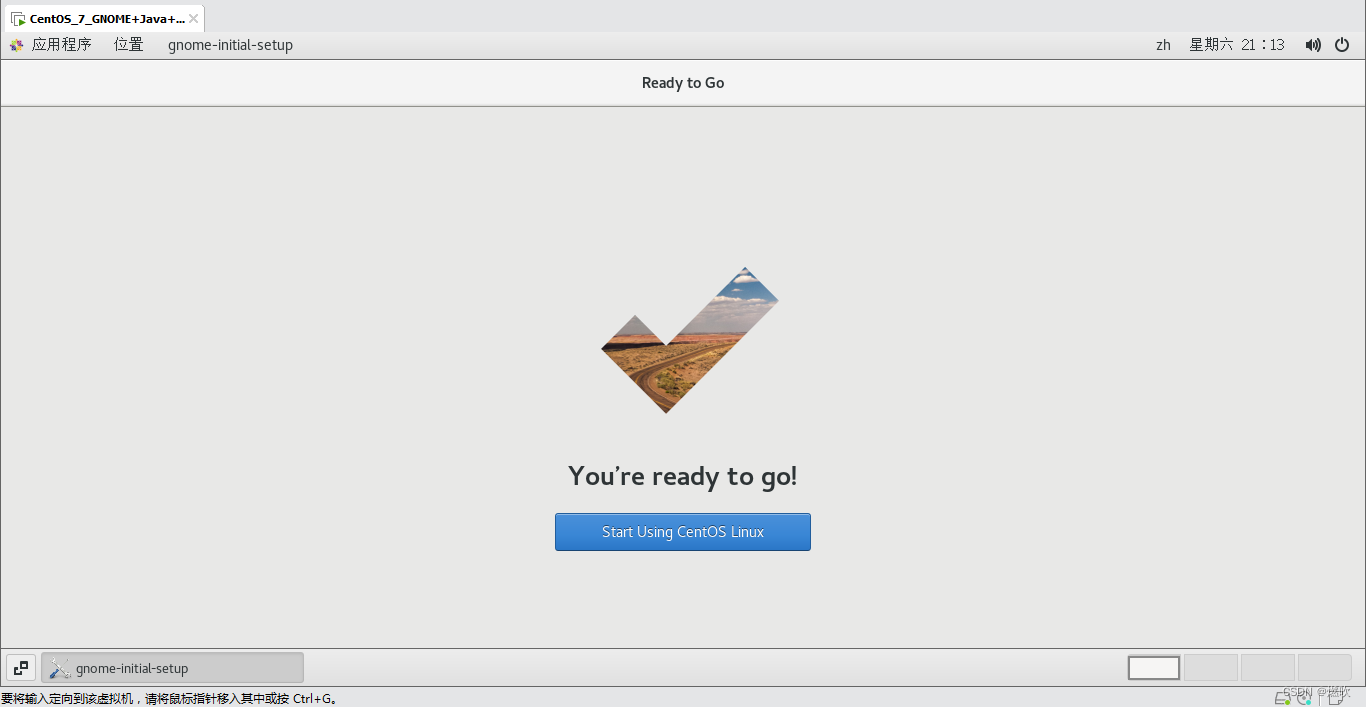
准备好了:
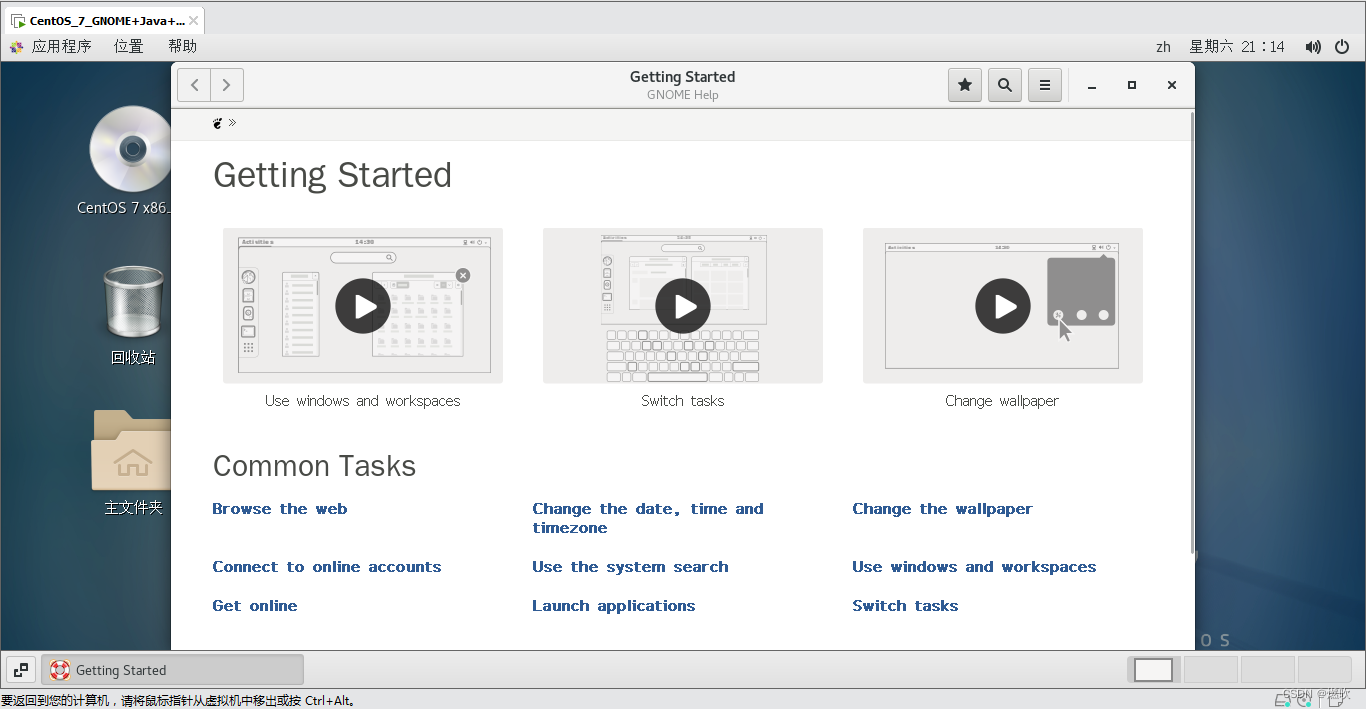
关掉帮助:
Windows + 空格 切换半天也不能输入汉字:
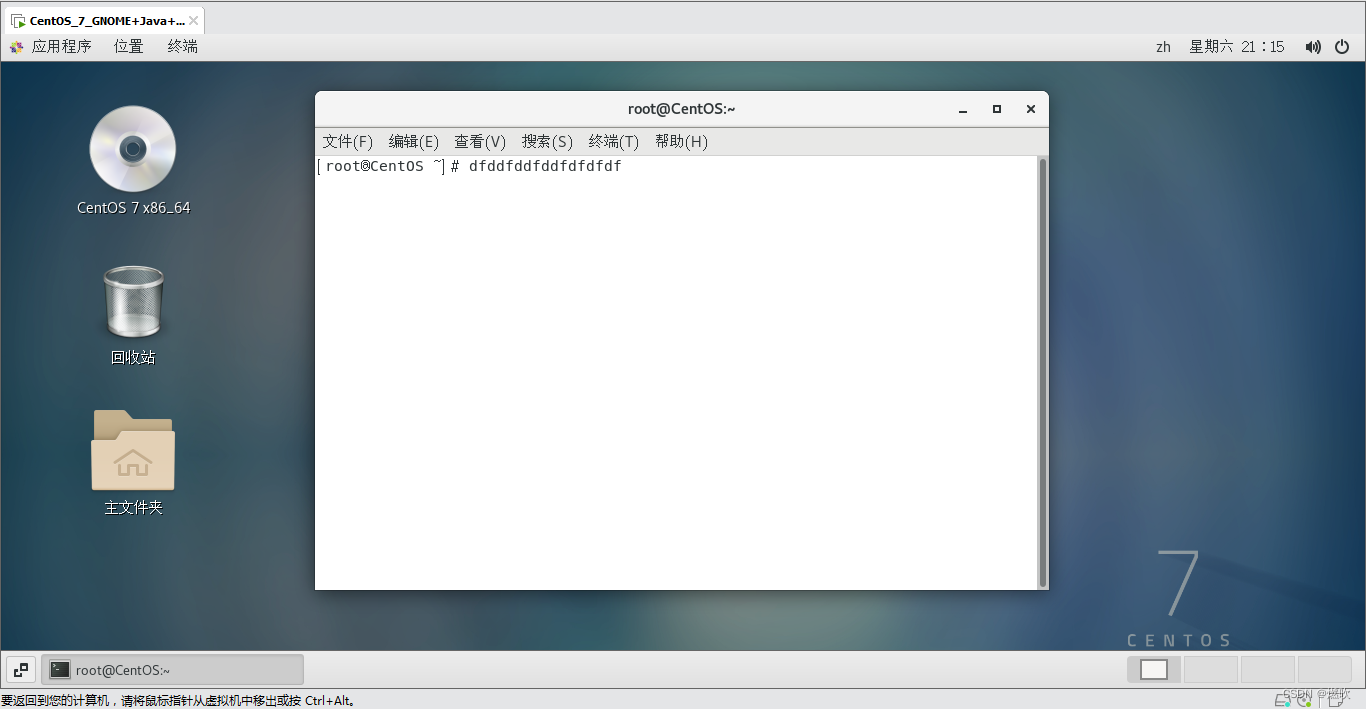
点击打开设置界面:
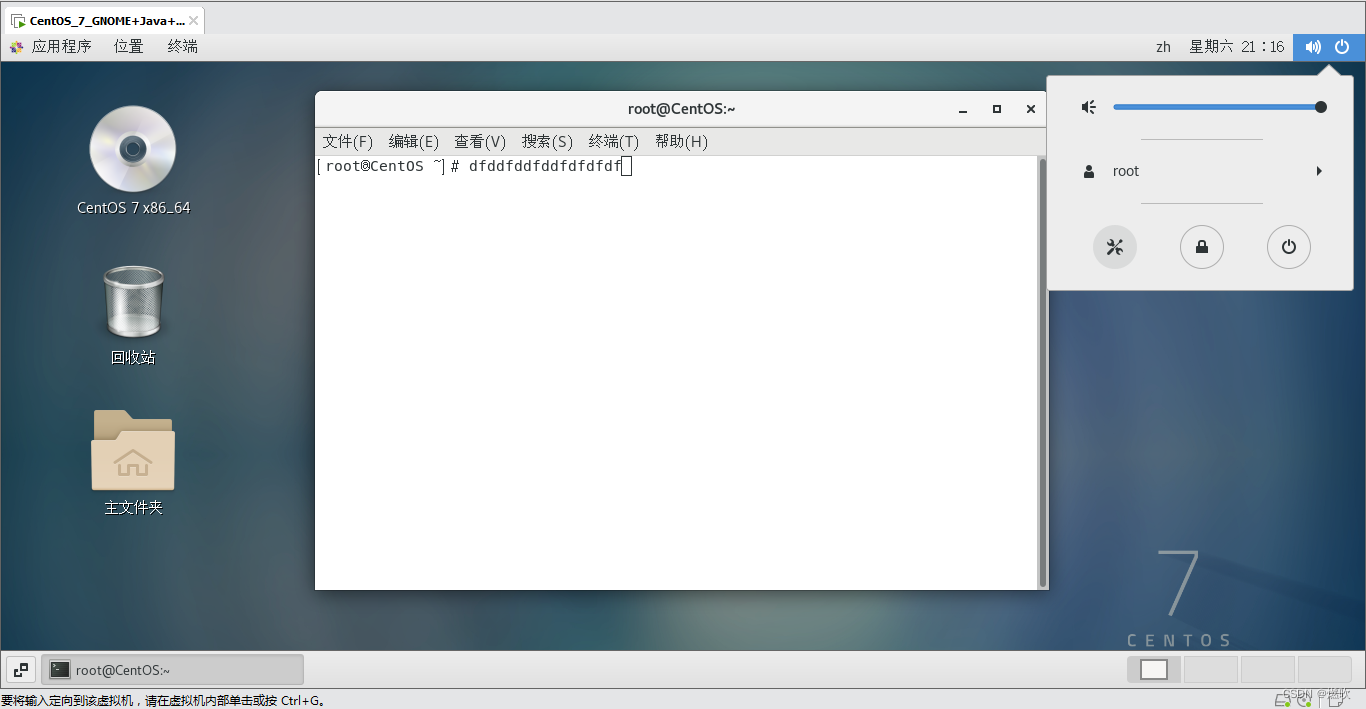
区域和语言页:
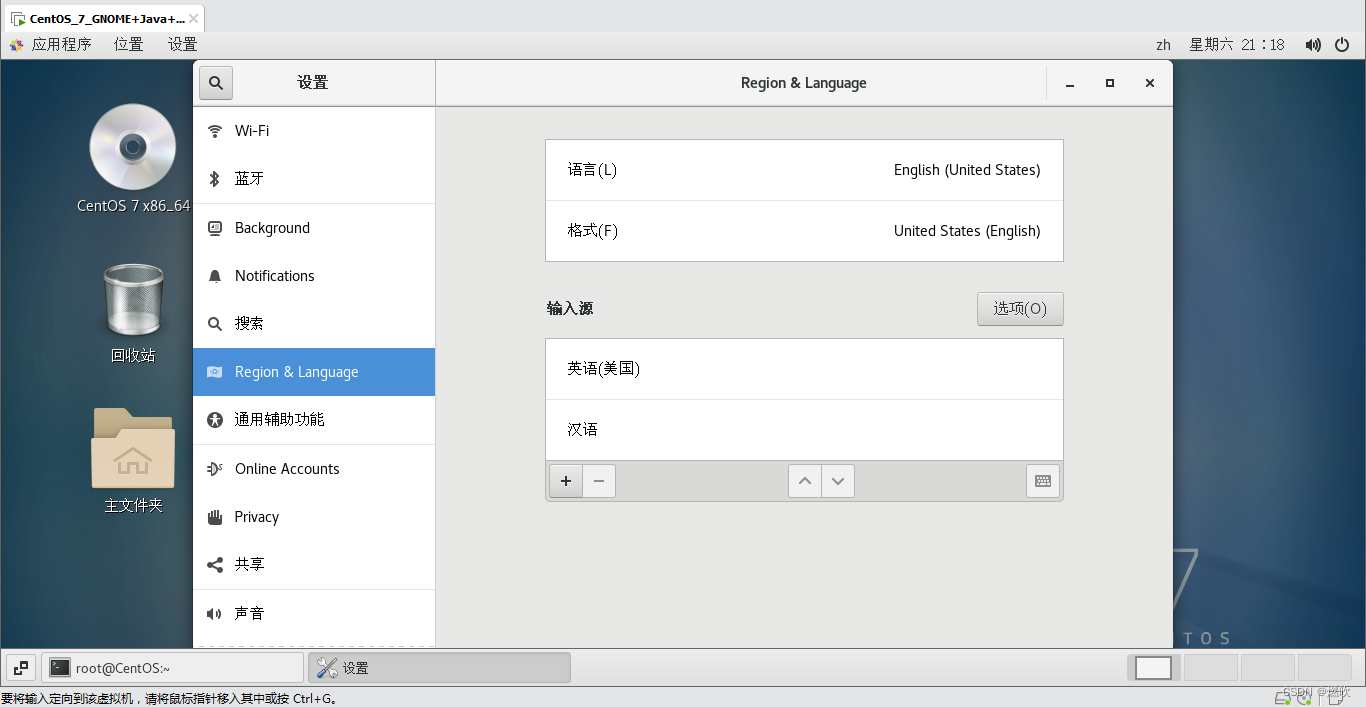
点击加号添加输入源为 汉语 (中国):
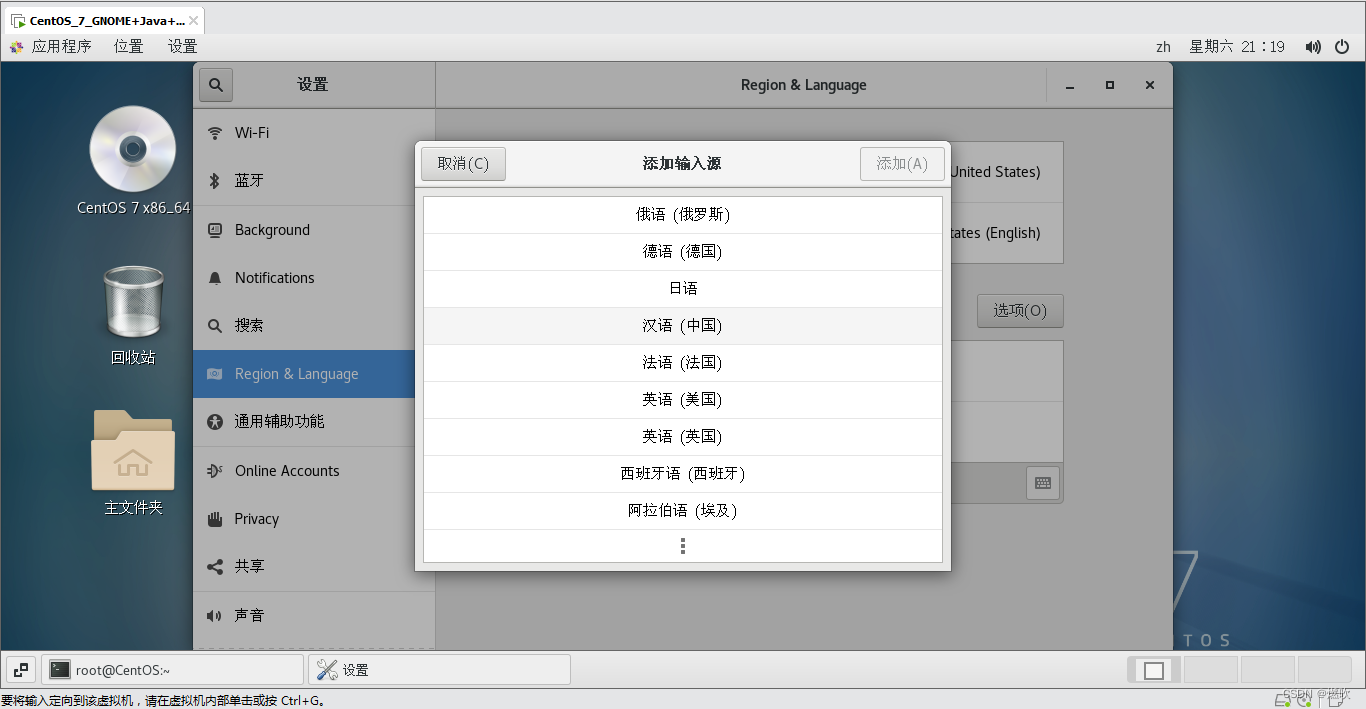
选择 汉语 Intelligent Pinyin 添加:
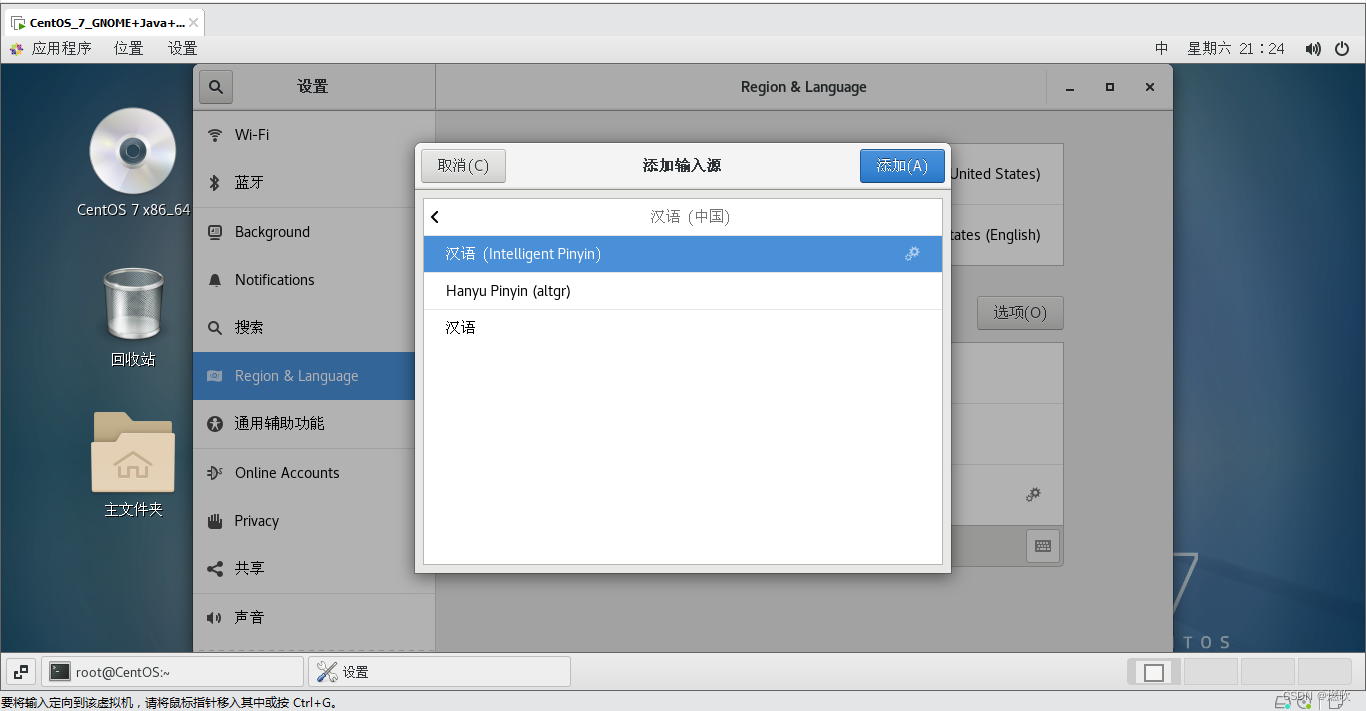
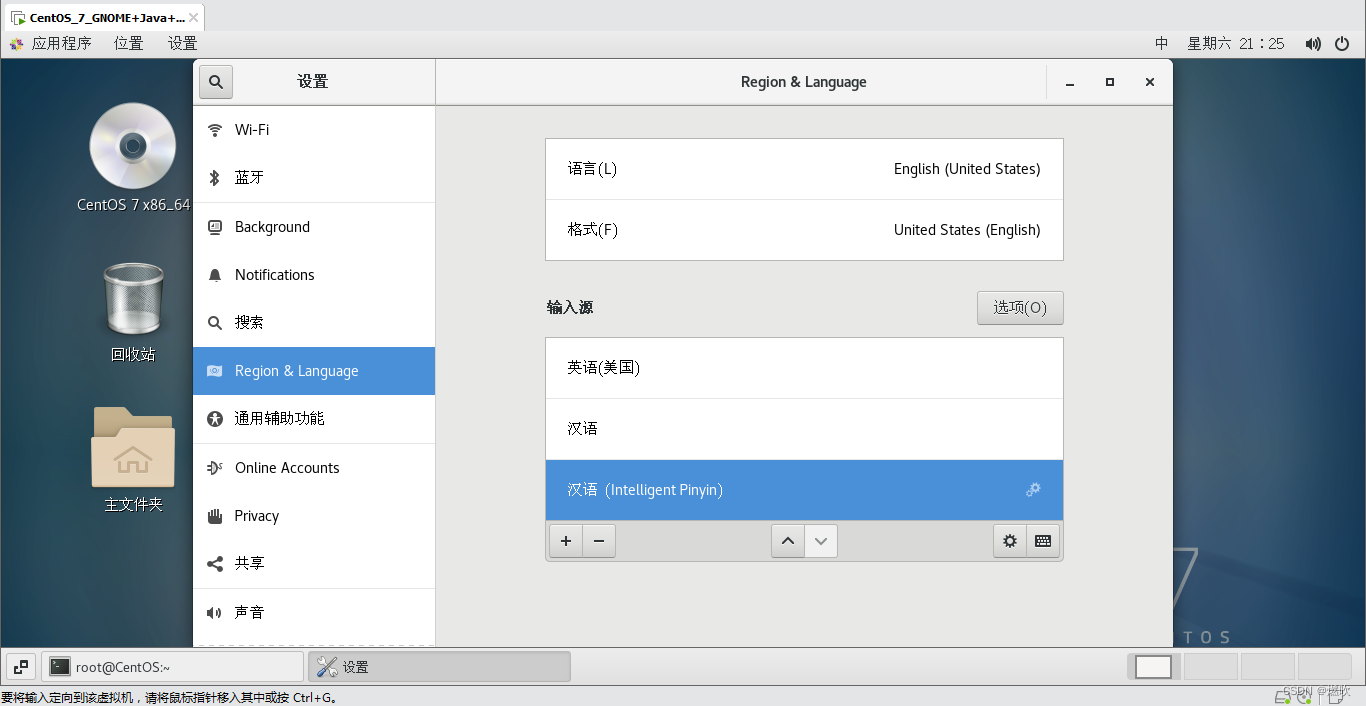
输入源配置完毕:
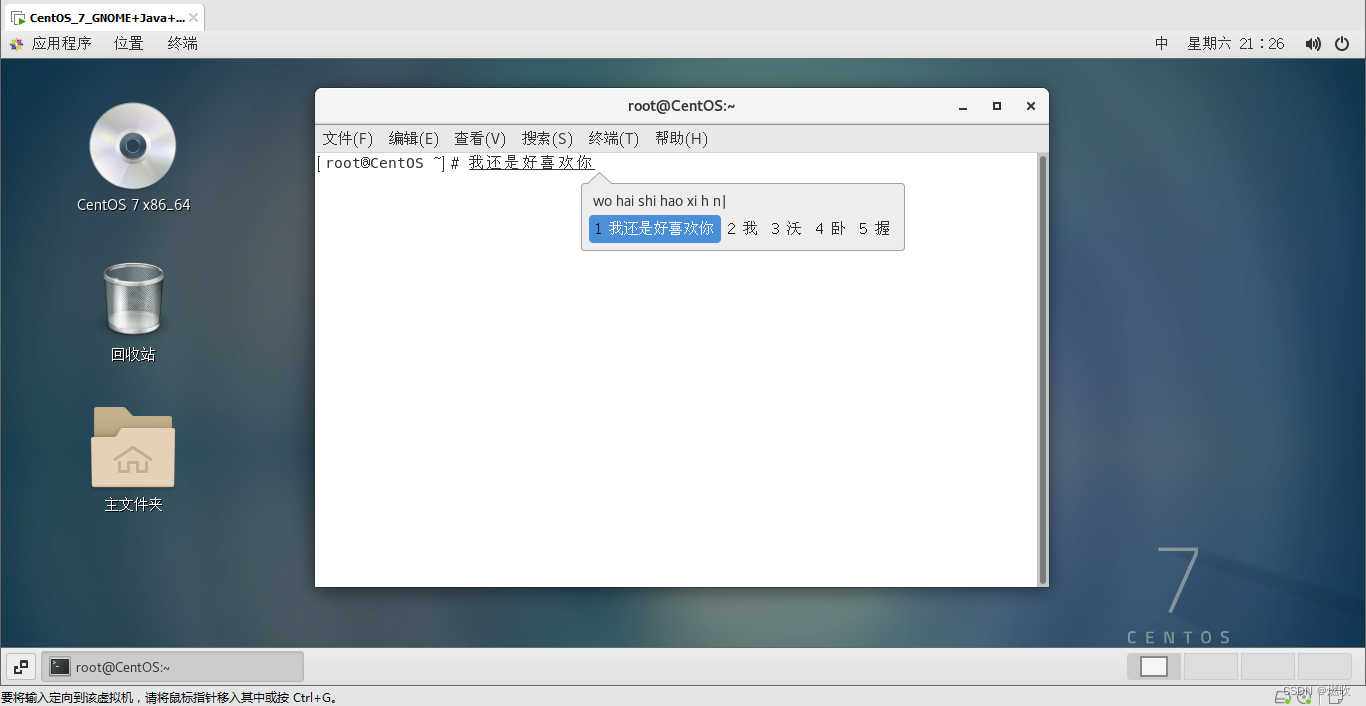
可以输入汉字:
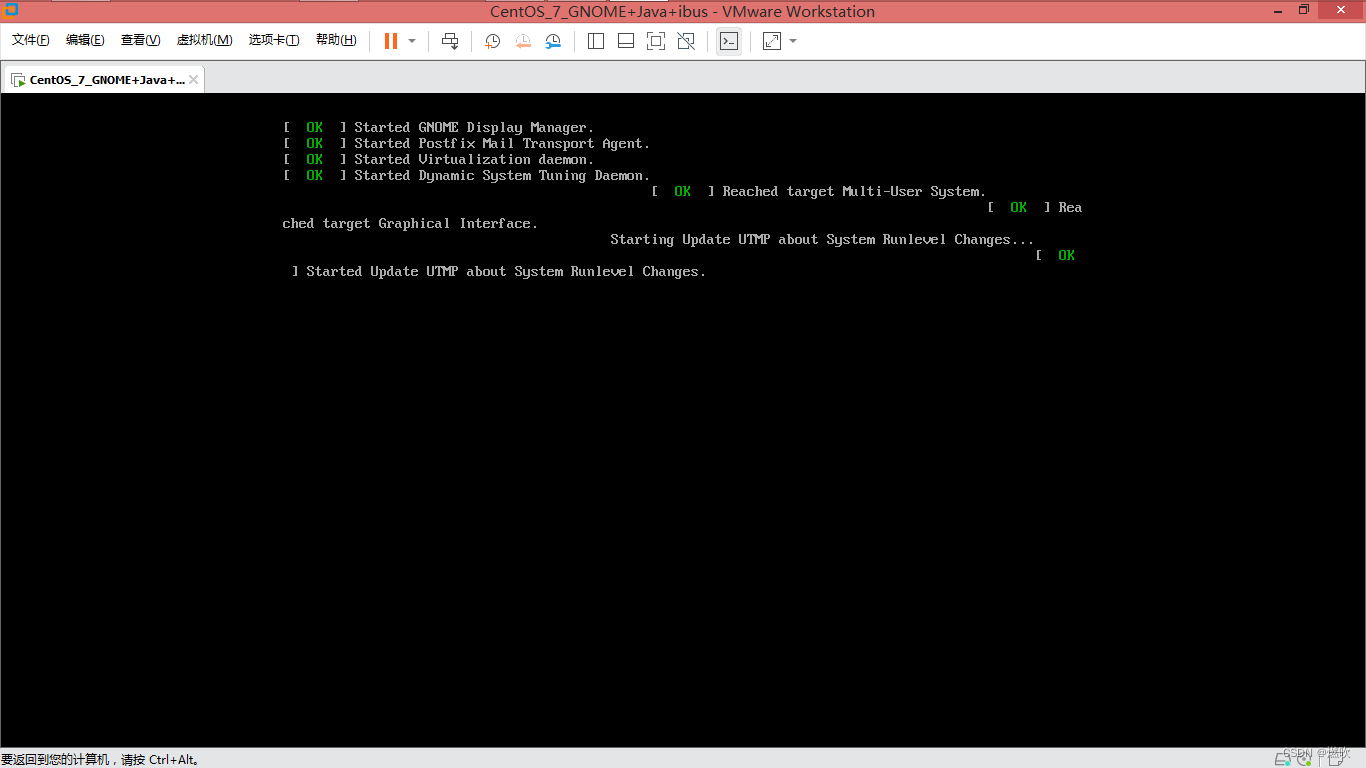
反手就是一个 poweroff 关机!
%%%%%
Open Java 1.8
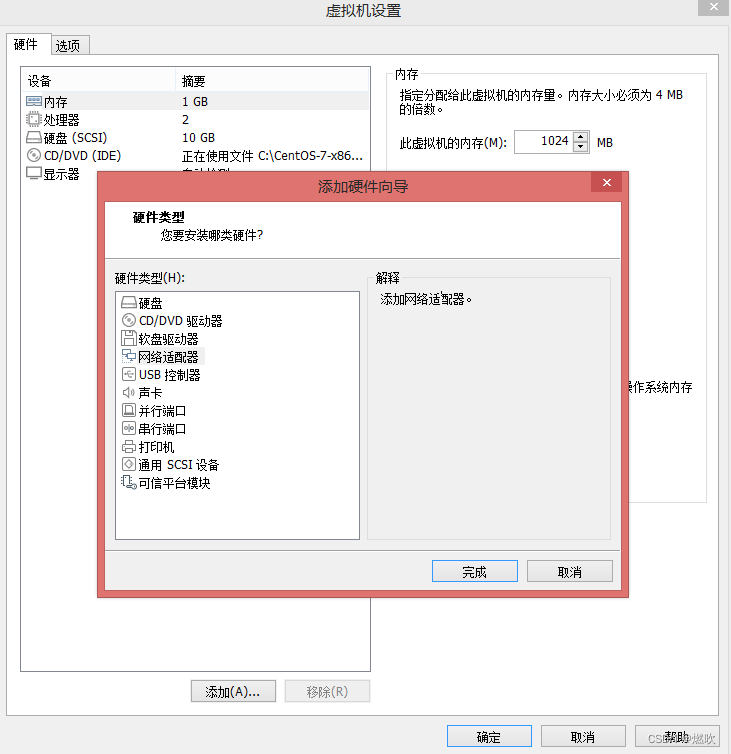
添加一块网卡:
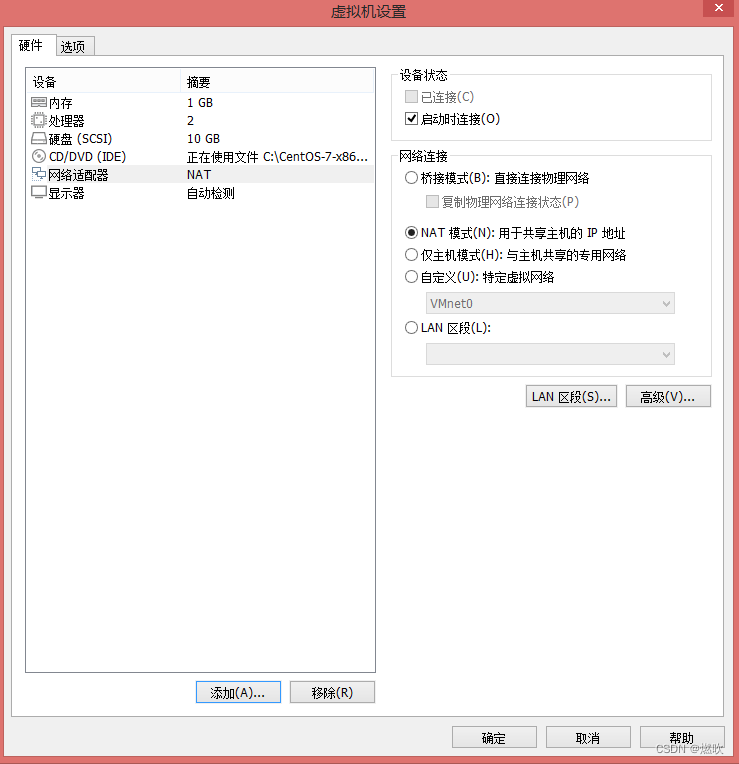
共享主机 IP 地址:
启动虚拟机:
jdk 安装环境不全,缺少必要的 jar 包:
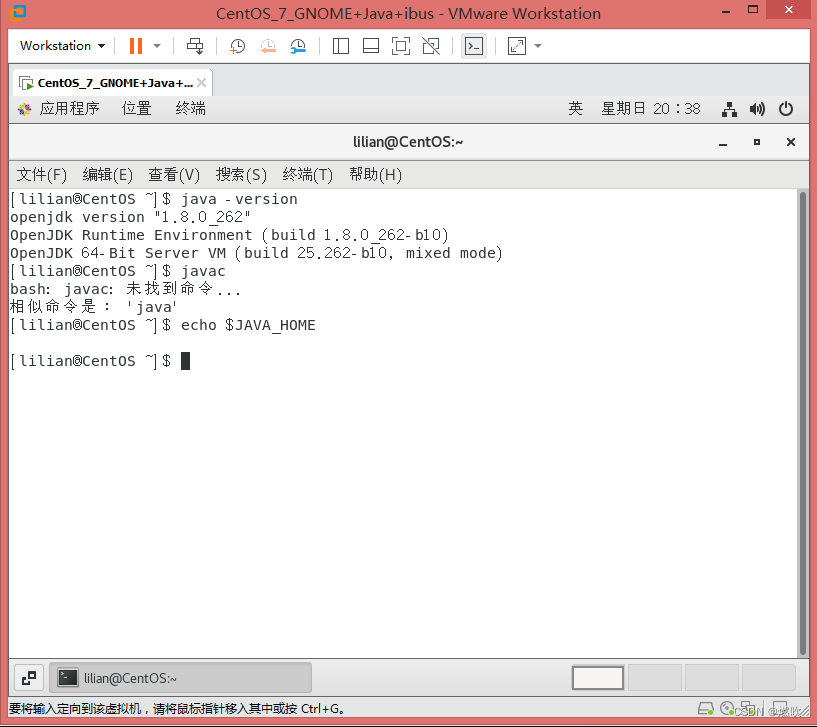
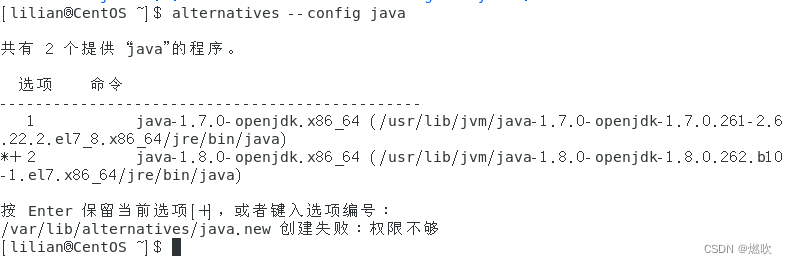
两个版本的 jdk
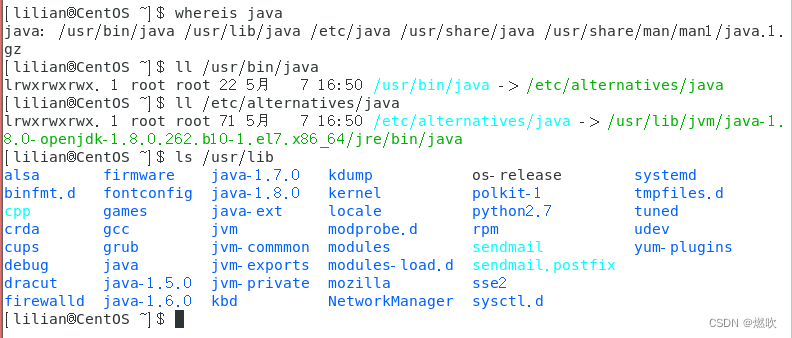
默认是 JDK 1.8
确定可以连接网络 切换管理员用户:

安装 Java 开发环境必须的包:
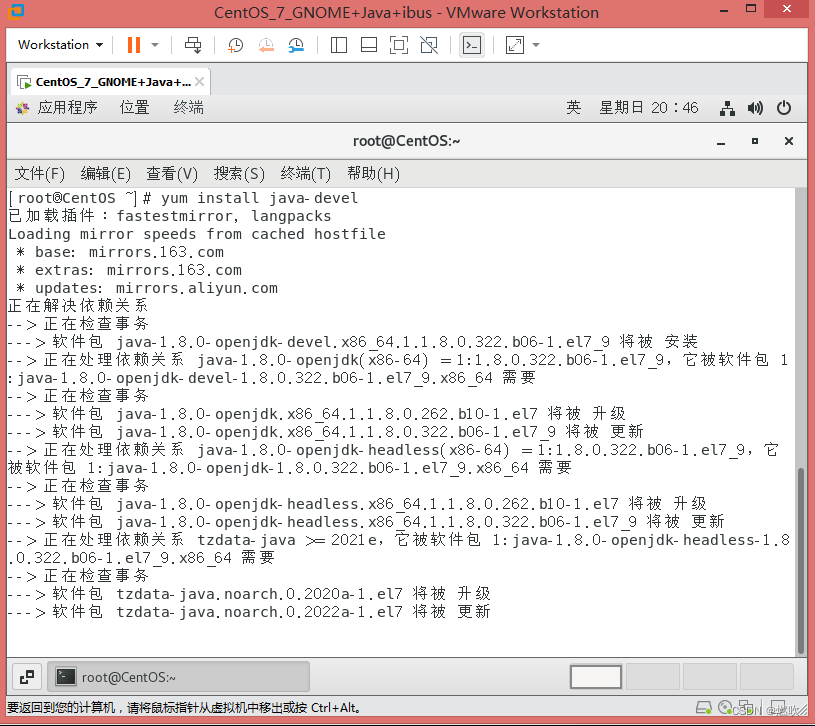
需要安装的包 输入 y 确认下载:
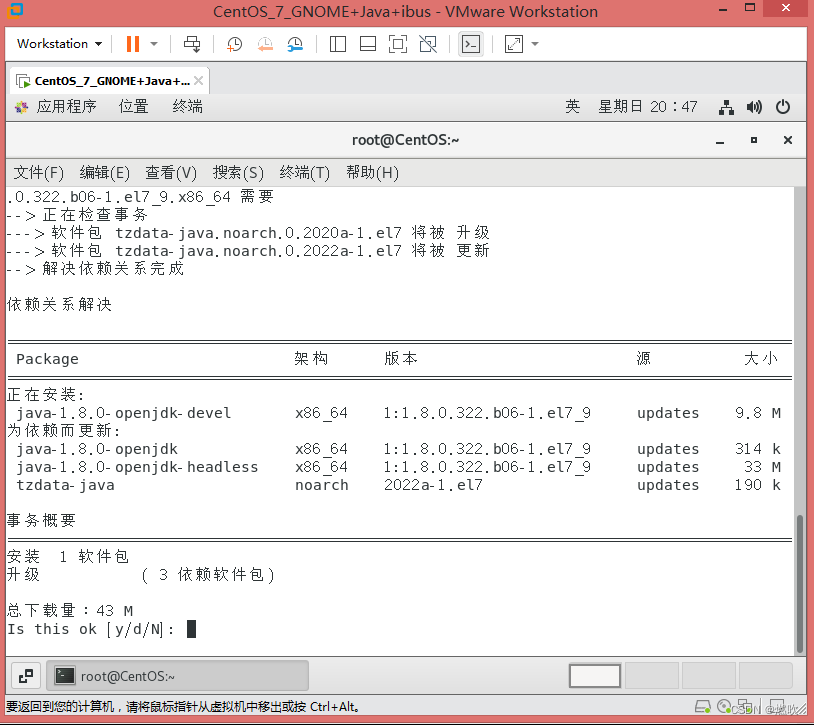
正在下载:
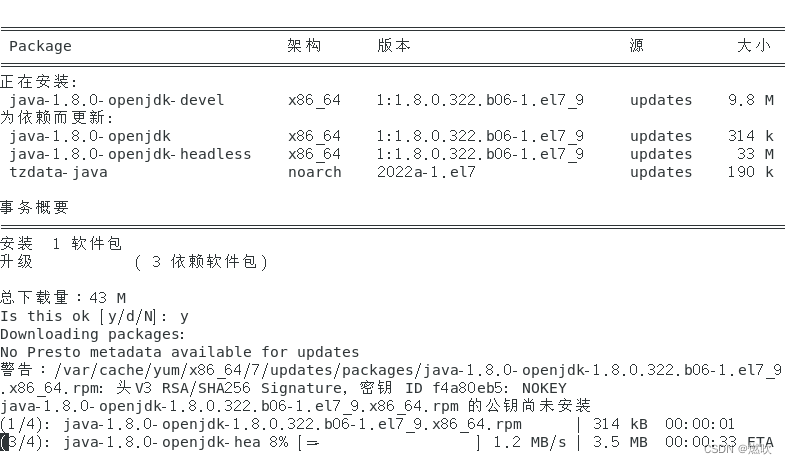
下载完成 是否安装 先不要继续:
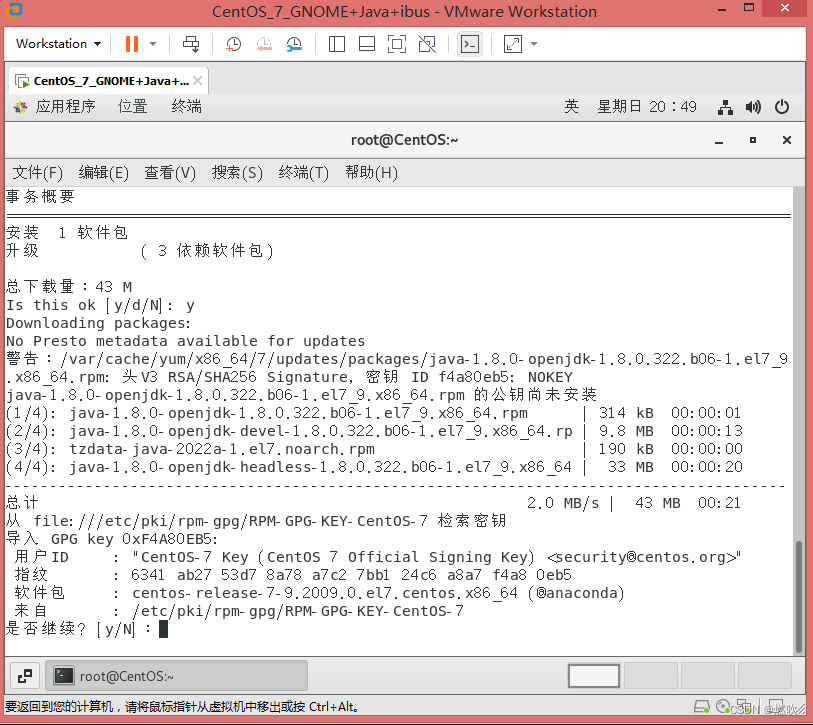
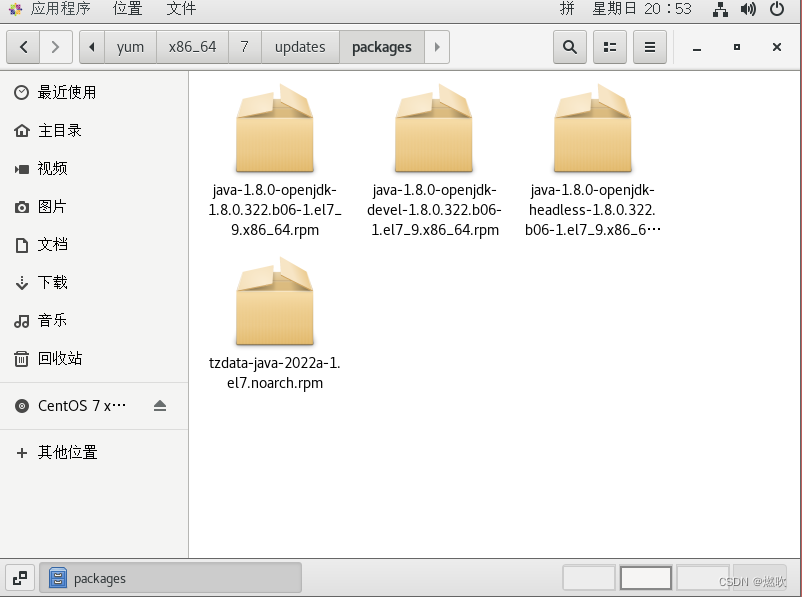
先去备份下载的包:
/var/cache/yum/x86_64/7/updates/packages/
备份好了:
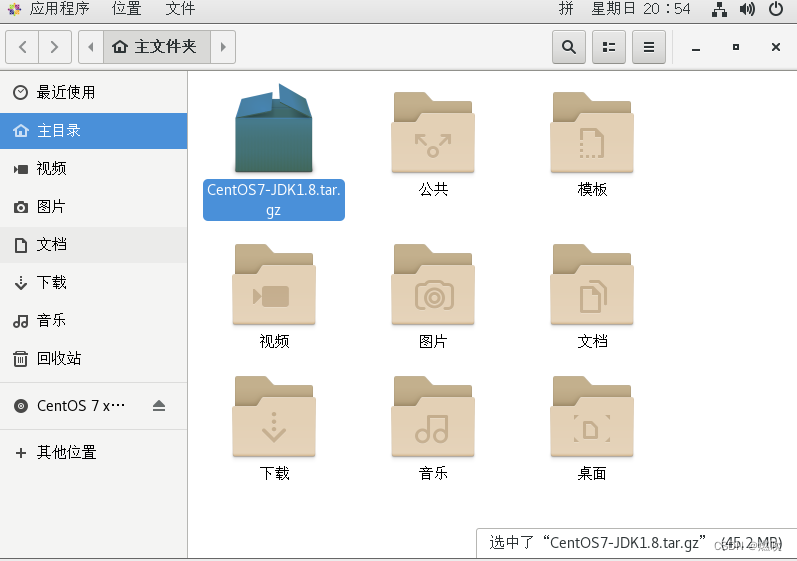
输入 y 继续安装:
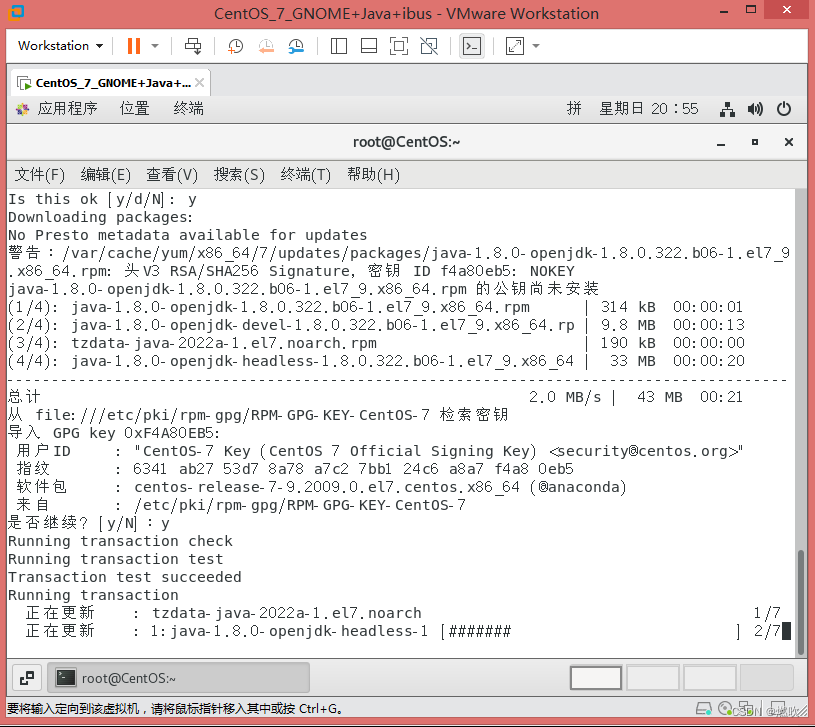
安装完毕:
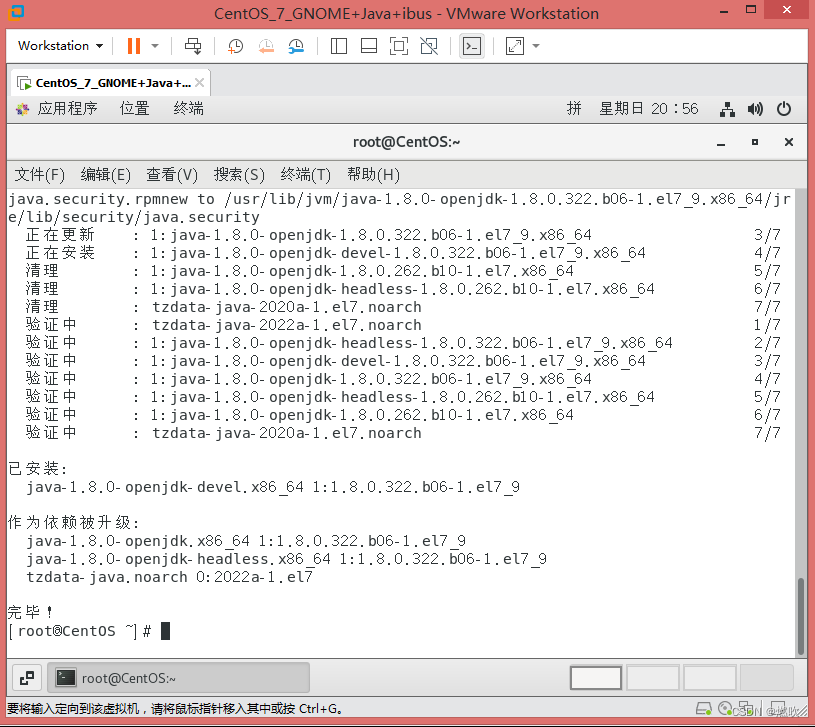
这下 javac 可以用了:
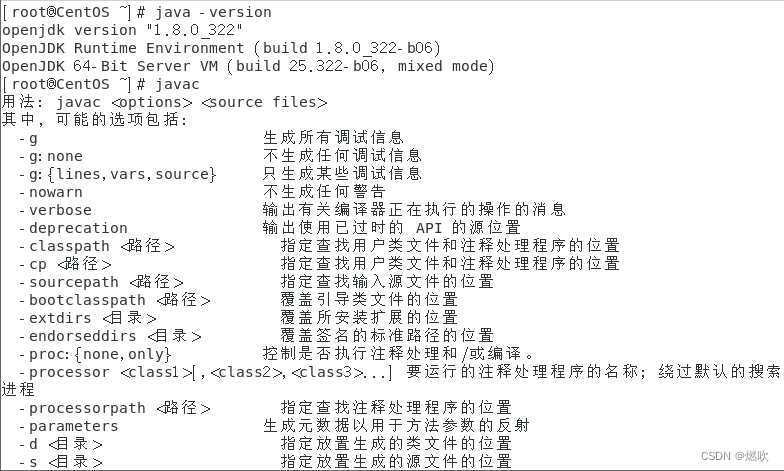
过程拷贝:
- [lilian@CentOS ~]$ ping www.baidu.com
- PING www.a.shifen.com (110.242.68.3) 56(84) bytes of data.
- 64 bytes from 110.242.68.3 (110.242.68.3): icmp_seq=1 ttl=128 time=17.2 ms
- 64 bytes from 110.242.68.3 (110.242.68.3): icmp_seq=2 ttl=128 time=50.7 ms
- ^C
- --- www.a.shifen.com ping statistics ---
- 2 packets transmitted, 2 received, 0% packet loss, time 1002ms
- rtt min/avg/max/mdev = 17.244/33.986/50.729/16.743 ms
- [lilian@CentOS ~]$ su - root
- 密码:
- 上一次登录:六 5月 7 21:07:59 CST 2022:0 上
- [root@CentOS ~]# yum install java-devel
- 已加载插件:fastestmirror, langpacks
- Loading mirror speeds from cached hostfile
- * base: mirrors.163.com
- * extras: mirrors.163.com
- * updates: mirrors.aliyun.com
- 正在解决依赖关系
- --> 正在检查事务
- ---> 软件包 java-1.8.0-openjdk-devel.x86_64.1.1.8.0.322.b06-1.el7_9 将被 安装
- --> 正在处理依赖关系 java-1.8.0-openjdk(x86-64) = 1:1.8.0.322.b06-1.el7_9,它被软件包 1:java-1.8.0-openjdk-devel-1.8.0.322.b06-1.el7_9.x86_64 需要
- --> 正在检查事务
- ---> 软件包 java-1.8.0-openjdk.x86_64.1.1.8.0.262.b10-1.el7 将被 升级
- ---> 软件包 java-1.8.0-openjdk.x86_64.1.1.8.0.322.b06-1.el7_9 将被 更新
- --> 正在处理依赖关系 java-1.8.0-openjdk-headless(x86-64) = 1:1.8.0.322.b06-1.el7_9,它被软件包 1:java-1.8.0-openjdk-1.8.0.322.b06-1.el7_9.x86_64 需要
- --> 正在检查事务
- ---> 软件包 java-1.8.0-openjdk-headless.x86_64.1.1.8.0.262.b10-1.el7 将被 升级
- ---> 软件包 java-1.8.0-openjdk-headless.x86_64.1.1.8.0.322.b06-1.el7_9 将被 更新
- --> 正在处理依赖关系 tzdata-java >= 2021e,它被软件包 1:java-1.8.0-openjdk-headless-1.8.0.322.b06-1.el7_9.x86_64 需要
- --> 正在检查事务
- ---> 软件包 tzdata-java.noarch.0.2020a-1.el7 将被 升级
- ---> 软件包 tzdata-java.noarch.0.2022a-1.el7 将被 更新
- --> 解决依赖关系完成
-
- 依赖关系解决
-
- =======================================================================================
- Package 架构 版本 源 大小
- =======================================================================================
- 正在安装:
- java-1.8.0-openjdk-devel x86_64 1:1.8.0.322.b06-1.el7_9 updates 9.8 M
- 为依赖而更新:
- java-1.8.0-openjdk x86_64 1:1.8.0.322.b06-1.el7_9 updates 314 k
- java-1.8.0-openjdk-headless x86_64 1:1.8.0.322.b06-1.el7_9 updates 33 M
- tzdata-java noarch 2022a-1.el7 updates 190 k
-
- 事务概要
- =======================================================================================
- 安装 1 软件包
- 升级 ( 3 依赖软件包)
-
- 总下载量:43 M
- Is this ok [y/d/N]: y
- Downloading packages:
- No Presto metadata available for updates
- 警告:/var/cache/yum/x86_64/7/updates/packages/java-1.8.0-openjdk-1.8.0.322.b06-1.el7_9.x86_64.rpm: 头V3 RSA/SHA256 Signature, 密钥 ID f4a80eb5: NOKEY
- java-1.8.0-openjdk-1.8.0.322.b06-1.el7_9.x86_64.rpm 的公钥尚未安装
- (1/4): java-1.8.0-openjdk-1.8.0.322.b06-1.el7_9.x86_64.rpm | 314 kB 00:00:01
- (2/4): java-1.8.0-openjdk-devel-1.8.0.322.b06-1.el7_9.x86_64.rp | 9.8 MB 00:00:13
- (3/4): tzdata-java-2022a-1.el7.noarch.rpm | 190 kB 00:00:00
- (4/4): java-1.8.0-openjdk-headless-1.8.0.322.b06-1.el7_9.x86_64 | 33 MB 00:00:20
- ---------------------------------------------------------------------------------------
- 总计 2.0 MB/s | 43 MB 00:21
- 从 file:///etc/pki/rpm-gpg/RPM-GPG-KEY-CentOS-7 检索密钥
- 导入 GPG key 0xF4A80EB5:
- 用户ID : "CentOS-7 Key (CentOS 7 Official Signing Key) <security@centos.org>"
- 指纹 : 6341 ab27 53d7 8a78 a7c2 7bb1 24c6 a8a7 f4a8 0eb5
- 软件包 : centos-release-7-9.2009.0.el7.centos.x86_64 (@anaconda)
- 来自 : /etc/pki/rpm-gpg/RPM-GPG-KEY-CentOS-7
- 是否继续?[y/N]:y
- Running transaction check
- Running transaction test
- Transaction test succeeded
- Running transaction
- 正在更新 : tzdata-java-2022a-1.el7.noarch 1/7
- 正在更新 : 1:java-1.8.0-openjdk-headless-1.8.0.322.b06-1.el7_9.x86_64 2/7
- warning: /usr/lib/jvm/java-1.8.0-openjdk-1.8.0.322.b06-1.el7_9.x86_64/jre/lib/security/blacklisted.certs created as /usr/lib/jvm/java-1.8.0-openjdk-1.8.0.322.b06-1.el7_9.x86_64/jre/lib/security/blacklisted.certs.rpmnew
- warning: /usr/lib/jvm/java-1.8.0-openjdk-1.8.0.322.b06-1.el7_9.x86_64/jre/lib/security/java.security created as /usr/lib/jvm/java-1.8.0-openjdk-1.8.0.322.b06-1.el7_9.x86_64/jre/lib/security/java.security.rpmnew
- restored /usr/lib/jvm/java-1.8.0-openjdk-1.8.0.322.b06-1.el7_9.x86_64/jre/lib/security/blacklisted.certs.rpmnew to /usr/lib/jvm/java-1.8.0-openjdk-1.8.0.322.b06-1.el7_9.x86_64/jre/lib/security/blacklisted.certs
- restored /usr/lib/jvm/java-1.8.0-openjdk-1.8.0.322.b06-1.el7_9.x86_64/jre/lib/security/java.security.rpmnew to /usr/lib/jvm/java-1.8.0-openjdk-1.8.0.322.b06-1.el7_9.x86_64/jre/lib/security/java.security
- 正在更新 : 1:java-1.8.0-openjdk-1.8.0.322.b06-1.el7_9.x86_64 3/7
- 正在安装 : 1:java-1.8.0-openjdk-devel-1.8.0.322.b06-1.el7_9.x86_64 4/7
- 清理 : 1:java-1.8.0-openjdk-1.8.0.262.b10-1.el7.x86_64 5/7
- 清理 : 1:java-1.8.0-openjdk-headless-1.8.0.262.b10-1.el7.x86_64 6/7
- 清理 : tzdata-java-2020a-1.el7.noarch 7/7
- 验证中 : tzdata-java-2022a-1.el7.noarch 1/7
- 验证中 : 1:java-1.8.0-openjdk-headless-1.8.0.322.b06-1.el7_9.x86_64 2/7
- 验证中 : 1:java-1.8.0-openjdk-devel-1.8.0.322.b06-1.el7_9.x86_64 3/7
- 验证中 : 1:java-1.8.0-openjdk-1.8.0.322.b06-1.el7_9.x86_64 4/7
- 验证中 : 1:java-1.8.0-openjdk-headless-1.8.0.262.b10-1.el7.x86_64 5/7
- 验证中 : 1:java-1.8.0-openjdk-1.8.0.262.b10-1.el7.x86_64 6/7
- 验证中 : tzdata-java-2020a-1.el7.noarch 7/7
-
- 已安装:
- java-1.8.0-openjdk-devel.x86_64 1:1.8.0.322.b06-1.el7_9
-
- 作为依赖被升级:
- java-1.8.0-openjdk.x86_64 1:1.8.0.322.b06-1.el7_9
- java-1.8.0-openjdk-headless.x86_64 1:1.8.0.322.b06-1.el7_9
- tzdata-java.noarch 0:2022a-1.el7
-
- 完毕!
- [root@CentOS ~]# java -version
- openjdk version "1.8.0_322"
- OpenJDK Runtime Environment (build 1.8.0_322-b06)
- OpenJDK 64-Bit Server VM (build 25.322-b06, mixed mode)
- [root@CentOS ~]# javac
- 用法: javac <options> <source files>
- 其中, 可能的选项包括:
- -g 生成所有调试信息
- -g:none 不生成任何调试信息
- -g:{lines,vars,source} 只生成某些调试信息
- -nowarn 不生成任何警告
- -verbose 输出有关编译器正在执行的操作的消息
- -deprecation 输出使用已过时的 API 的源位置
- -classpath <路径> 指定查找用户类文件和注释处理程序的位置
- -cp <路径> 指定查找用户类文件和注释处理程序的位置
- -sourcepath <路径> 指定查找输入源文件的位置
- -bootclasspath <路径> 覆盖引导类文件的位置
- -extdirs <目录> 覆盖所安装扩展的位置
- -endorseddirs <目录> 覆盖签名的标准路径的位置
- -proc:{none,only} 控制是否执行注释处理和/或编译。
- -processor <class1>[,<class2>,<class3>...] 要运行的注释处理程序的名称; 绕过默认的搜索进程
- -processorpath <路径> 指定查找注释处理程序的位置
- -parameters 生成元数据以用于方法参数的反射
- -d <目录> 指定放置生成的类文件的位置
- -s <目录> 指定放置生成的源文件的位置
- -h <目录> 指定放置生成的本机标头文件的位置
- -implicit:{none,class} 指定是否为隐式引用文件生成类文件
- -encoding <编码> 指定源文件使用的字符编码
- -source <发行版> 提供与指定发行版的源兼容性
- -target <发行版> 生成特定 VM 版本的类文件
- -profile <配置文件> 请确保使用的 API 在指定的配置文件中可用
- -version 版本信息
- -help 输出标准选项的提要
- -A关键字[=值] 传递给注释处理程序的选项
- -X 输出非标准选项的提要
- -J<标记> 直接将 <标记> 传递给运行时系统
- -Werror 出现警告时终止编译
- @<文件名> 从文件读取选项和文件名
-
- [root@CentOS ~]# java
- 用法: java [-options] class [args...]
- (执行类)
- 或 java [-options] -jar jarfile [args...]
- (执行 jar 文件)
- 其中选项包括:
- -d32 使用 32 位数据模型 (如果可用)
- -d64 使用 64 位数据模型 (如果可用)
- -server 选择 "server" VM
- 默认 VM 是 server.
-
- -cp <目录和 zip/jar 文件的类搜索路径>
- -classpath <目录和 zip/jar 文件的类搜索路径>
- 用 : 分隔的目录, JAR 档案
- 和 ZIP 档案列表, 用于搜索类文件。
- -D<名称>=<值>
- 设置系统属性
- -verbose:[class|gc|jni]
- 启用详细输出
- -version 输出产品版本并退出
- -version:<值>
- 警告: 此功能已过时, 将在
- 未来发行版中删除。
- 需要指定的版本才能运行
- -showversion 输出产品版本并继续
- -jre-restrict-search | -no-jre-restrict-search
- 警告: 此功能已过时, 将在
- 未来发行版中删除。
- 在版本搜索中包括/排除用户专用 JRE
- -? -help 输出此帮助消息
- -X 输出非标准选项的帮助
- -ea[:<packagename>...|:<classname>]
- -enableassertions[:<packagename>...|:<classname>]
- 按指定的粒度启用断言
- -da[:<packagename>...|:<classname>]
- -disableassertions[:<packagename>...|:<classname>]
- 禁用具有指定粒度的断言
- -esa | -enablesystemassertions
- 启用系统断言
- -dsa | -disablesystemassertions
- 禁用系统断言
- -agentlib:<libname>[=<选项>]
- 加载本机代理库 <libname>, 例如 -agentlib:hprof
- 另请参阅 -agentlib:jdwp=help 和 -agentlib:hprof=help
- -agentpath:<pathname>[=<选项>]
- 按完整路径名加载本机代理库
- -javaagent:<jarpath>[=<选项>]
- 加载 Java 编程语言代理, 请参阅 java.lang.instrument
- -splash:<imagepath>
- 使用指定的图像显示启动屏幕
- 有关详细信息, 请参阅 http://www.oracle.com/technetwork/java/javase/documentation/index.html。
- [root@CentOS ~]# echo $JAVA_HOME
-
- [root@CentOS ~]#
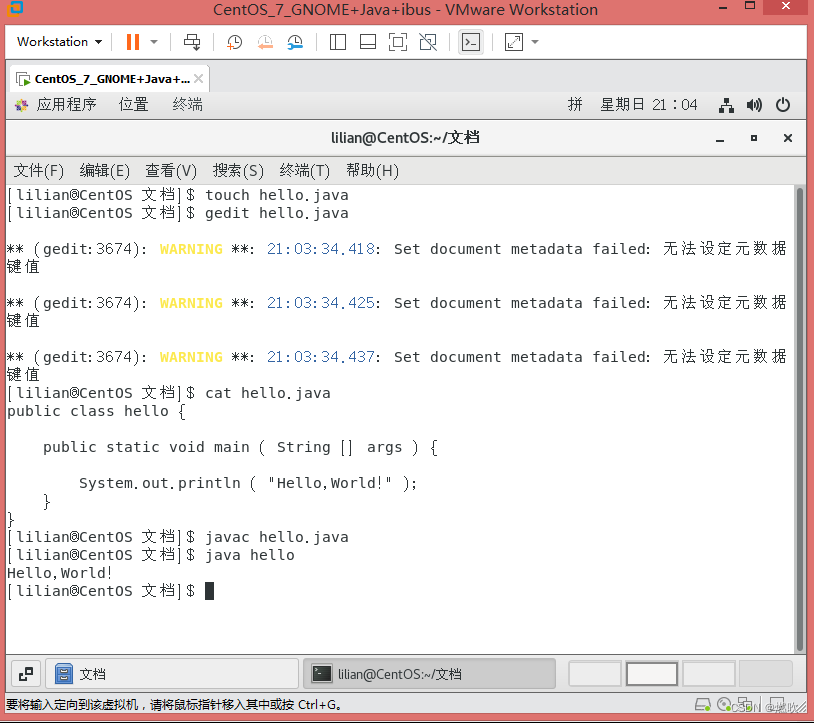
写个 Java 程序测试一下:
- hello.java code:
- public class hello {
-
- public static void main ( String [] args ) {
-
- System.out.println ( "Hello,World!" );
- }
- }
成功运行:
%%%%%
CentOS 7 重新安装/卸载 虚拟机增强工具等问题
重新安装 VMware Tools 是灰色的!因为之前安装过一次 这次想重新安装发现就不行了!
如果你安装过旧版本的 VMware Tools 这里会显示更新 VMware Tools
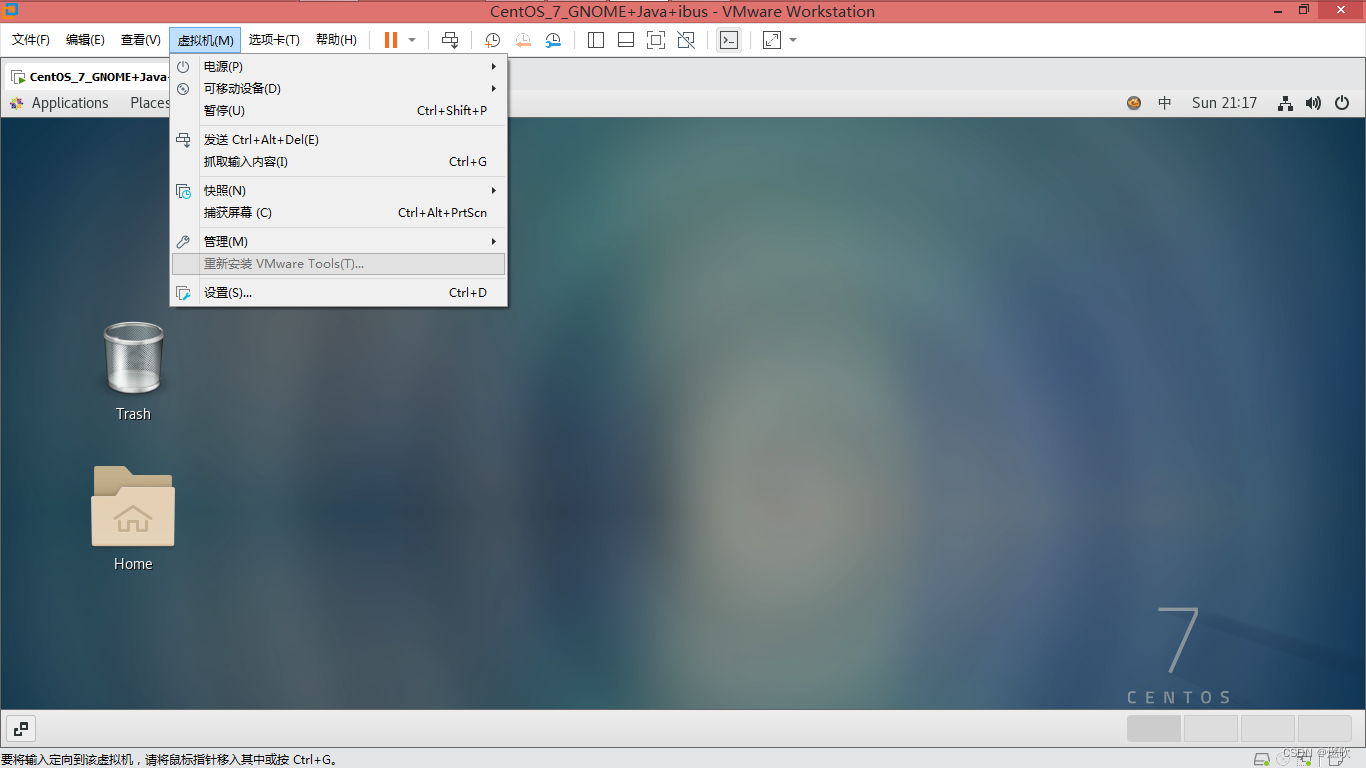
我一开始以为是 root 权限问题 后来发现不是。
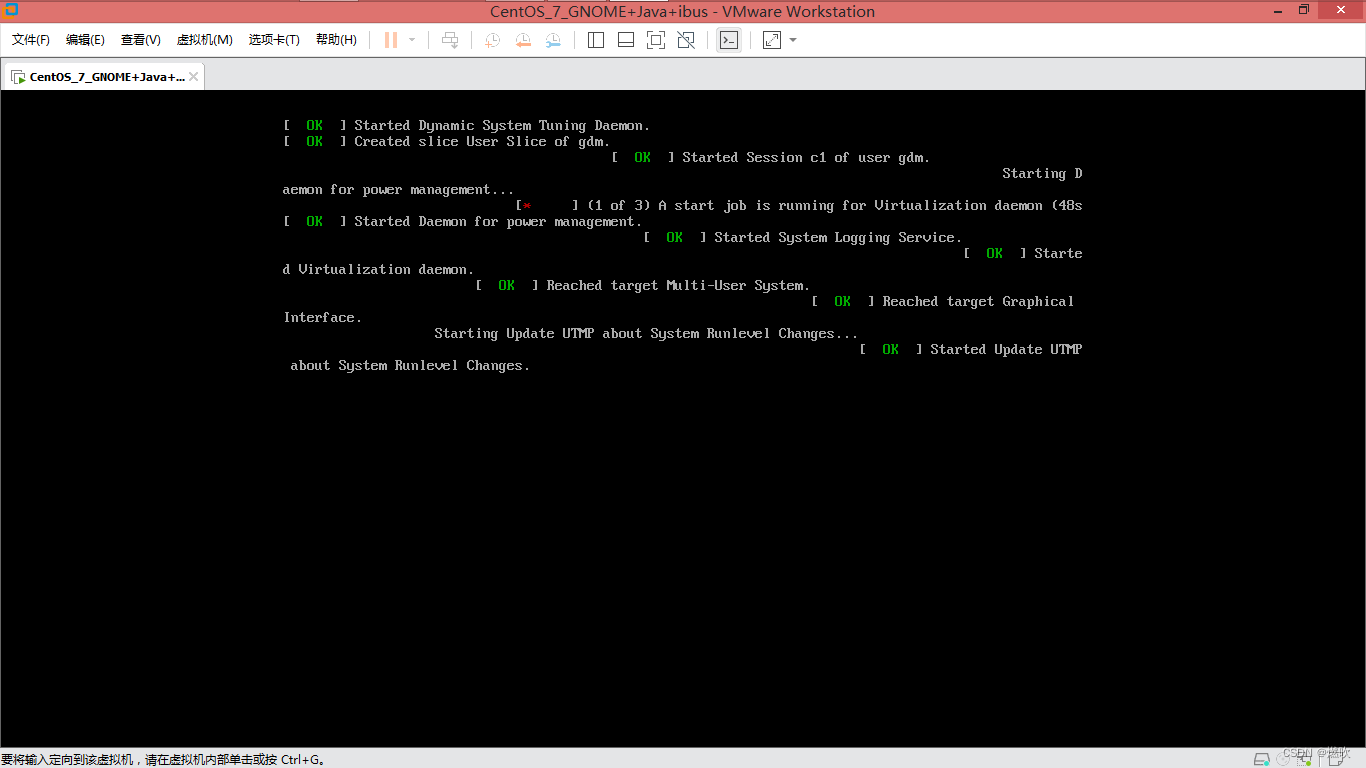
然后关掉虚拟机:
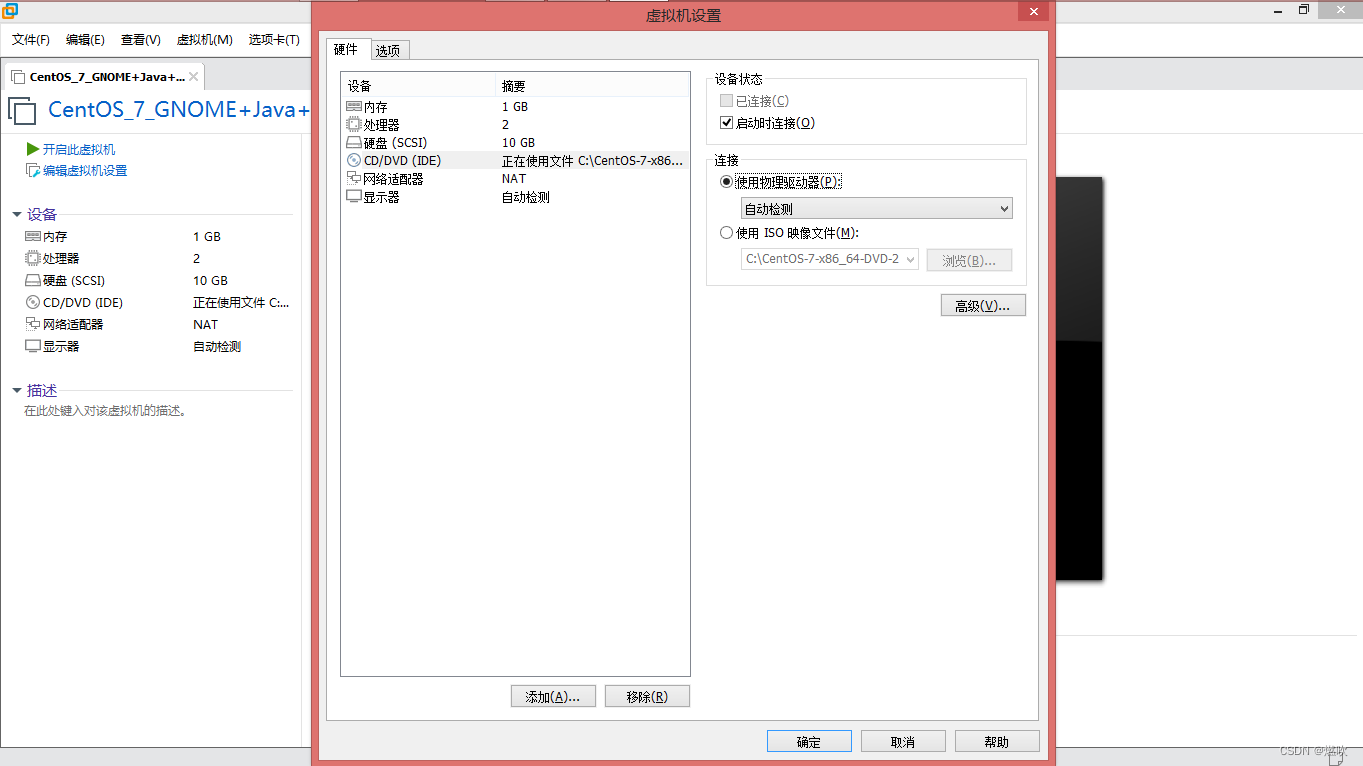
将使用 ISO 映像文件改成使用物理驱动器:
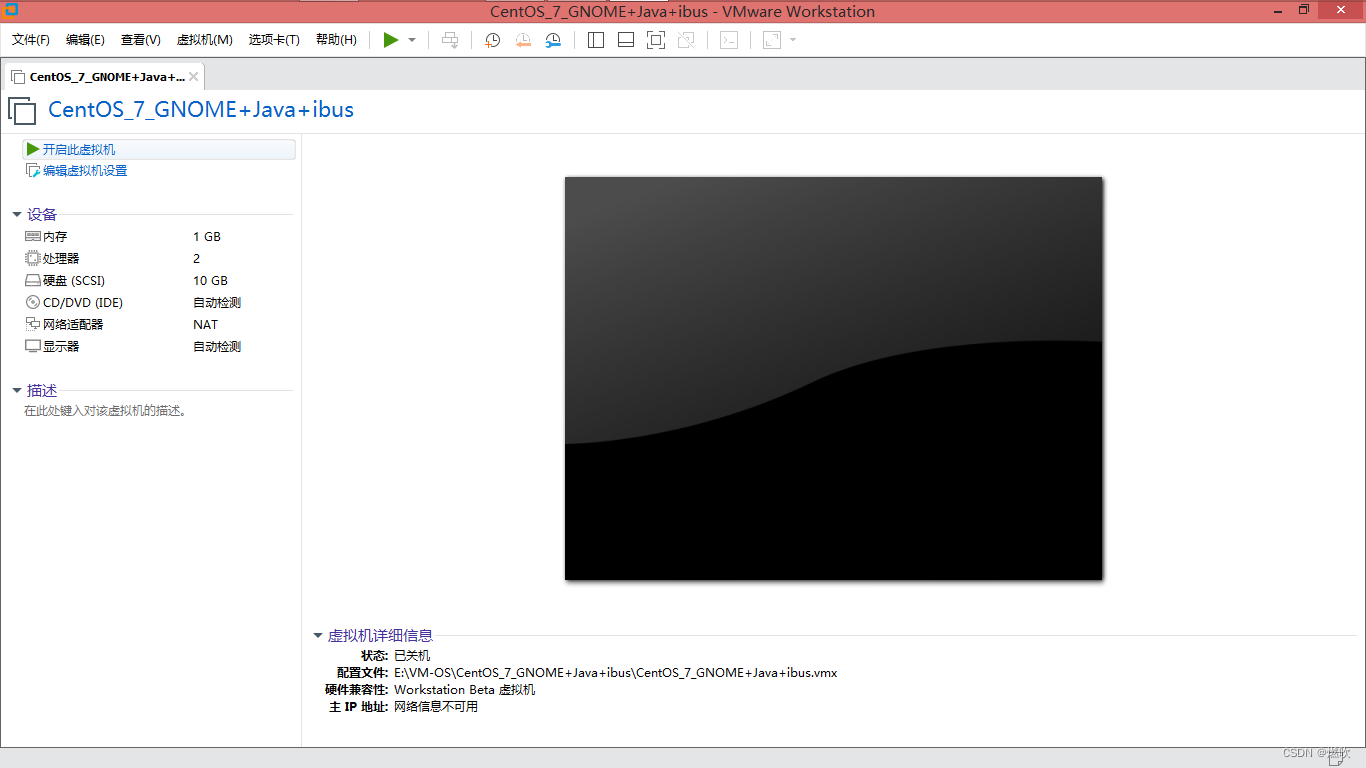
开启虚拟机:
管理员身份登入系统:
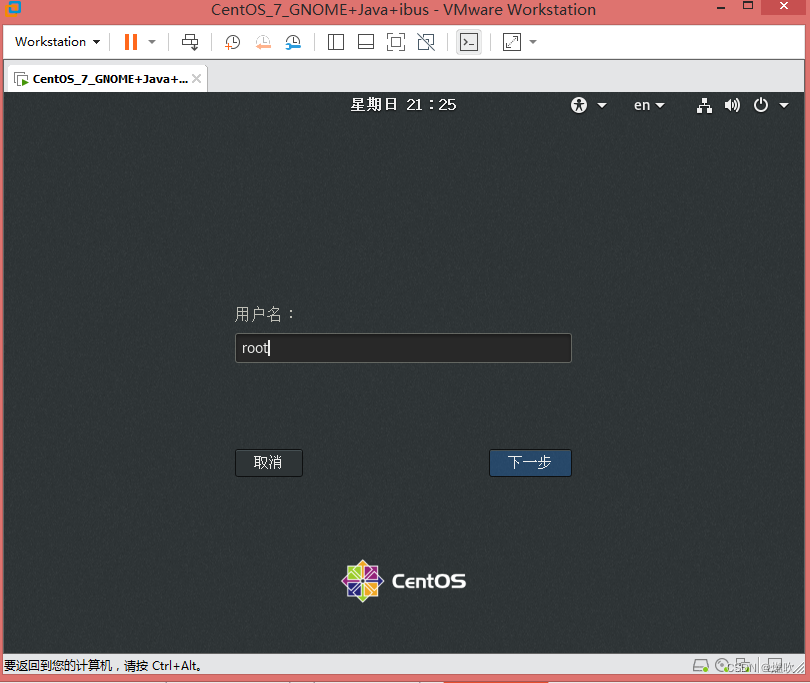
还是灰色的:
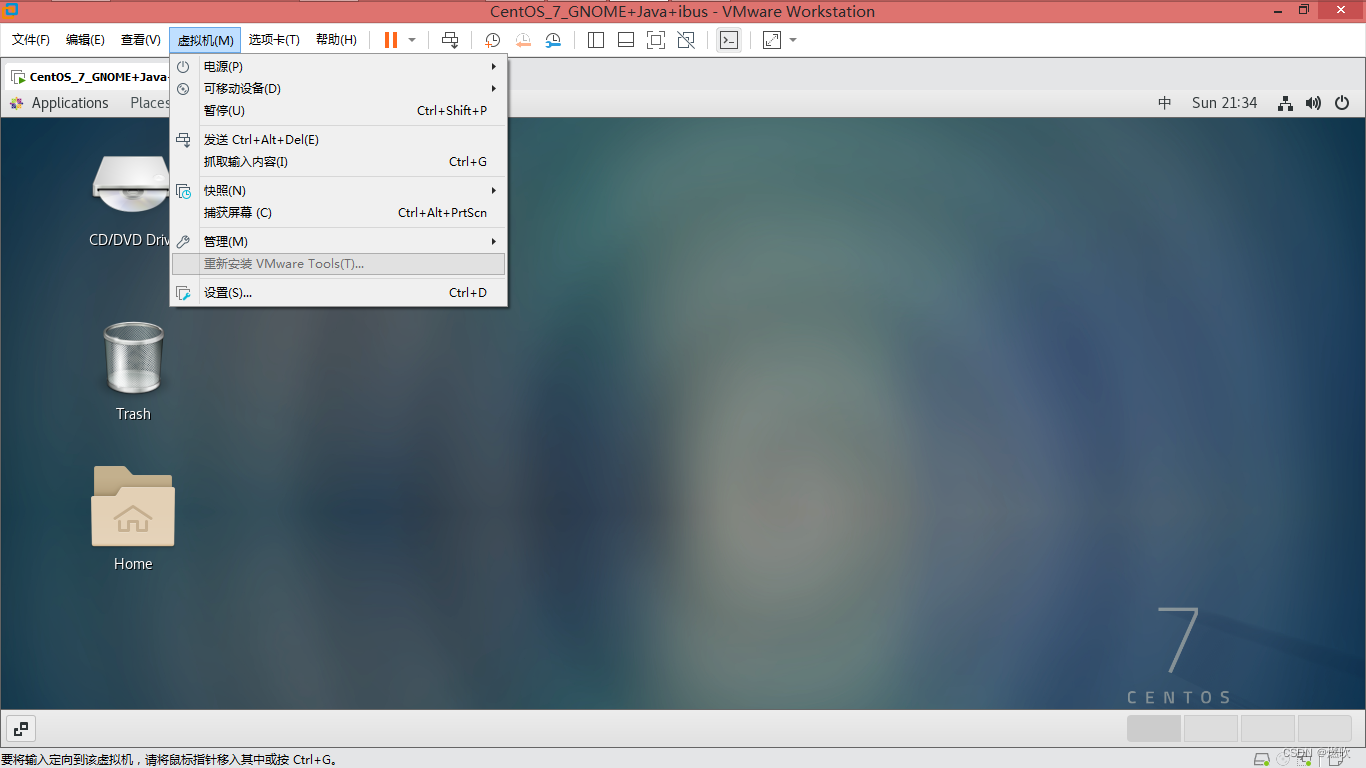
理论上就是将 ISO 映像读取进系统安装增强工具 那么我们只需要找到这个映像文件即可!
经过一番寻找终于找到这个镜像:
C:\Program Files (x86)\VMware\VMware Workstation\linux.iso
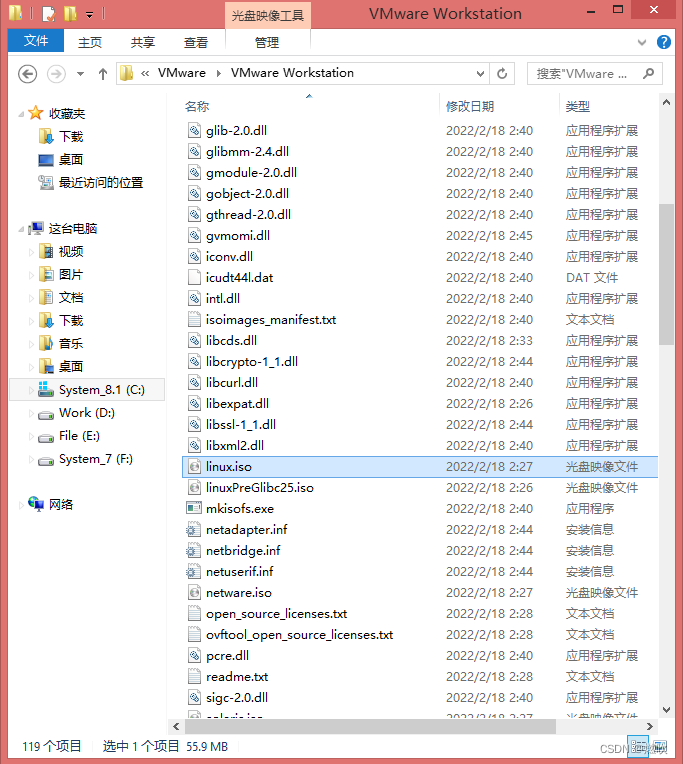
光驱这次挂载这个映像:
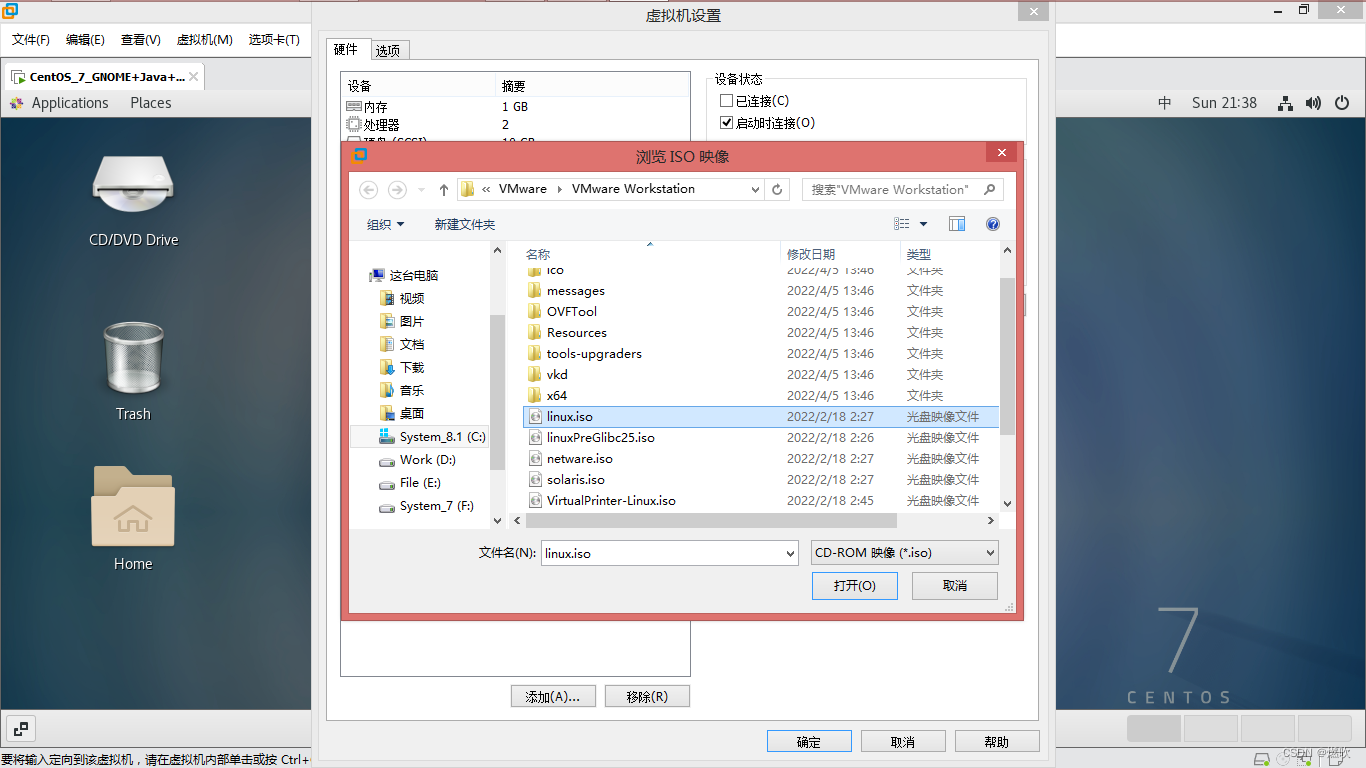
点击确定:
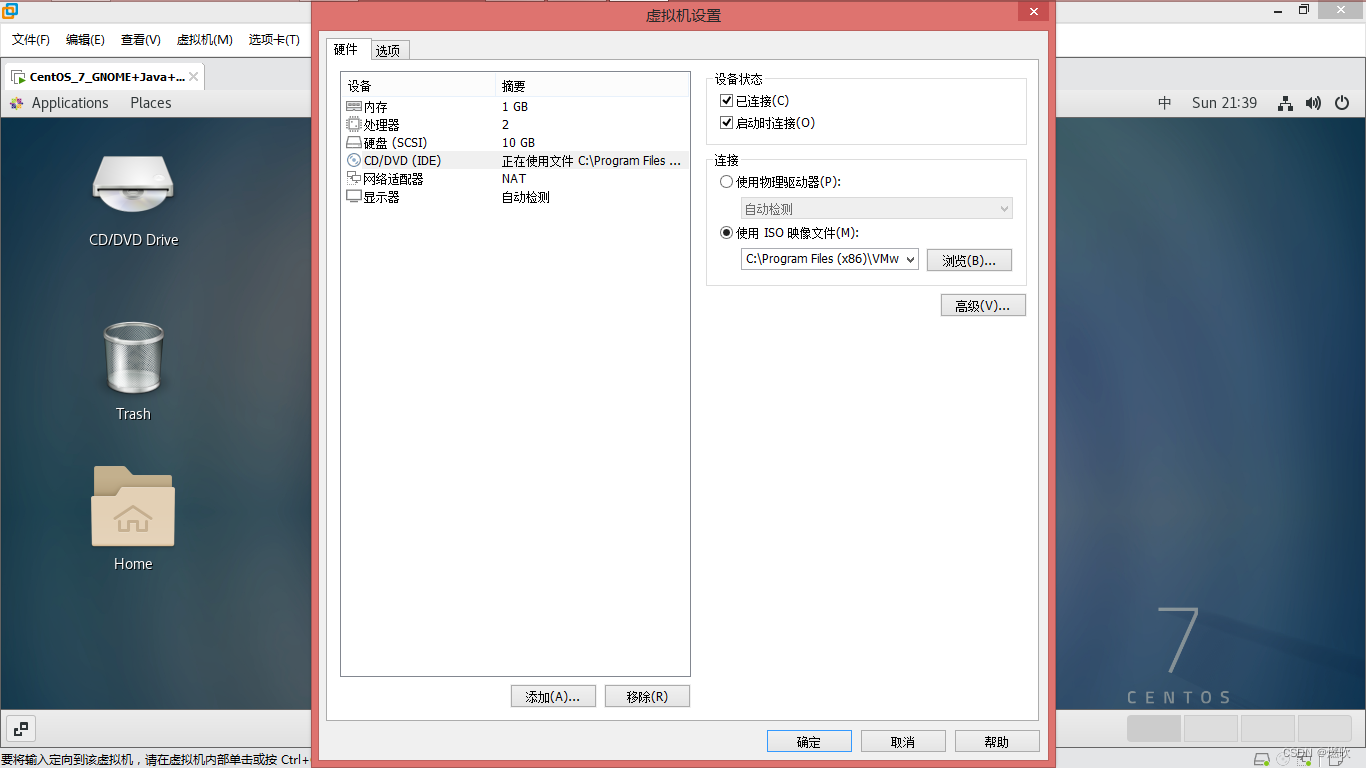
成功挂载!
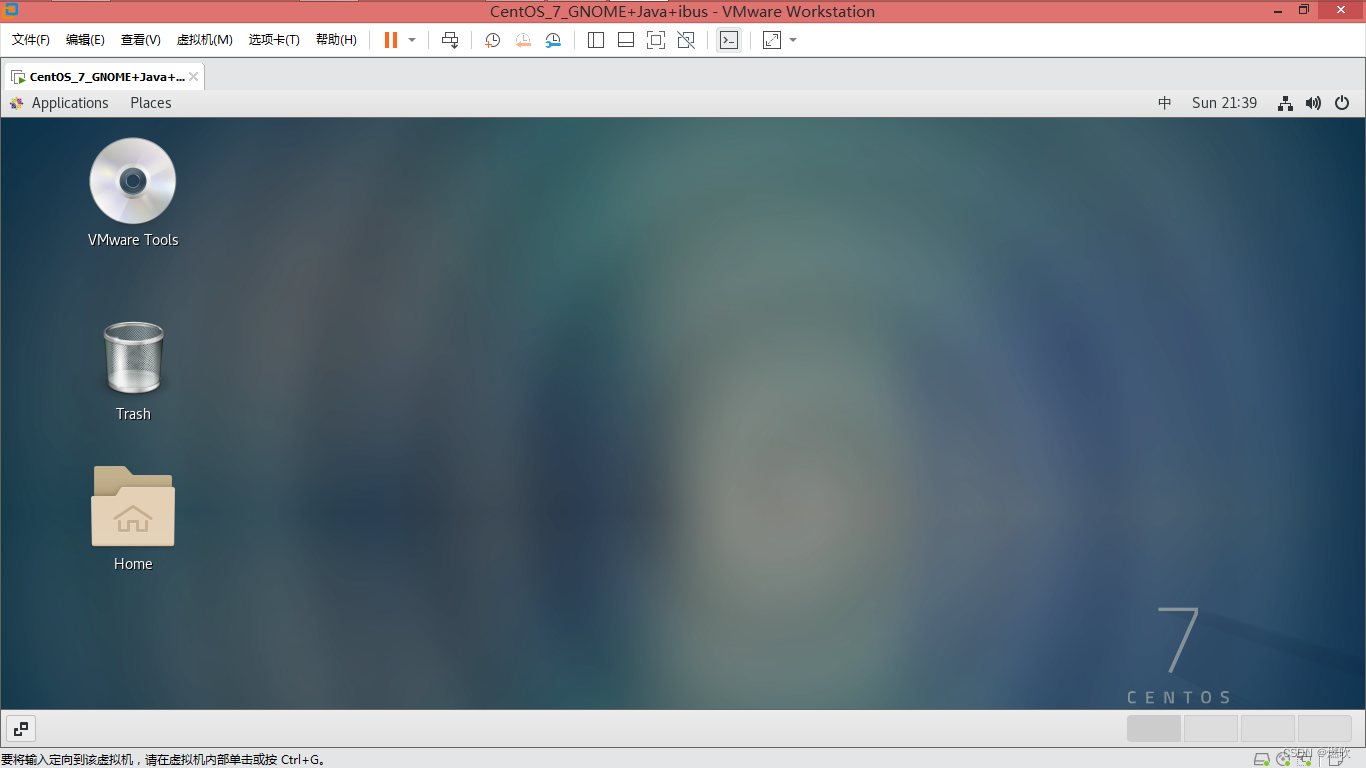
光驱中成功找到 VMwareTools-10.3.23-16594550.tar.gz 压缩包:
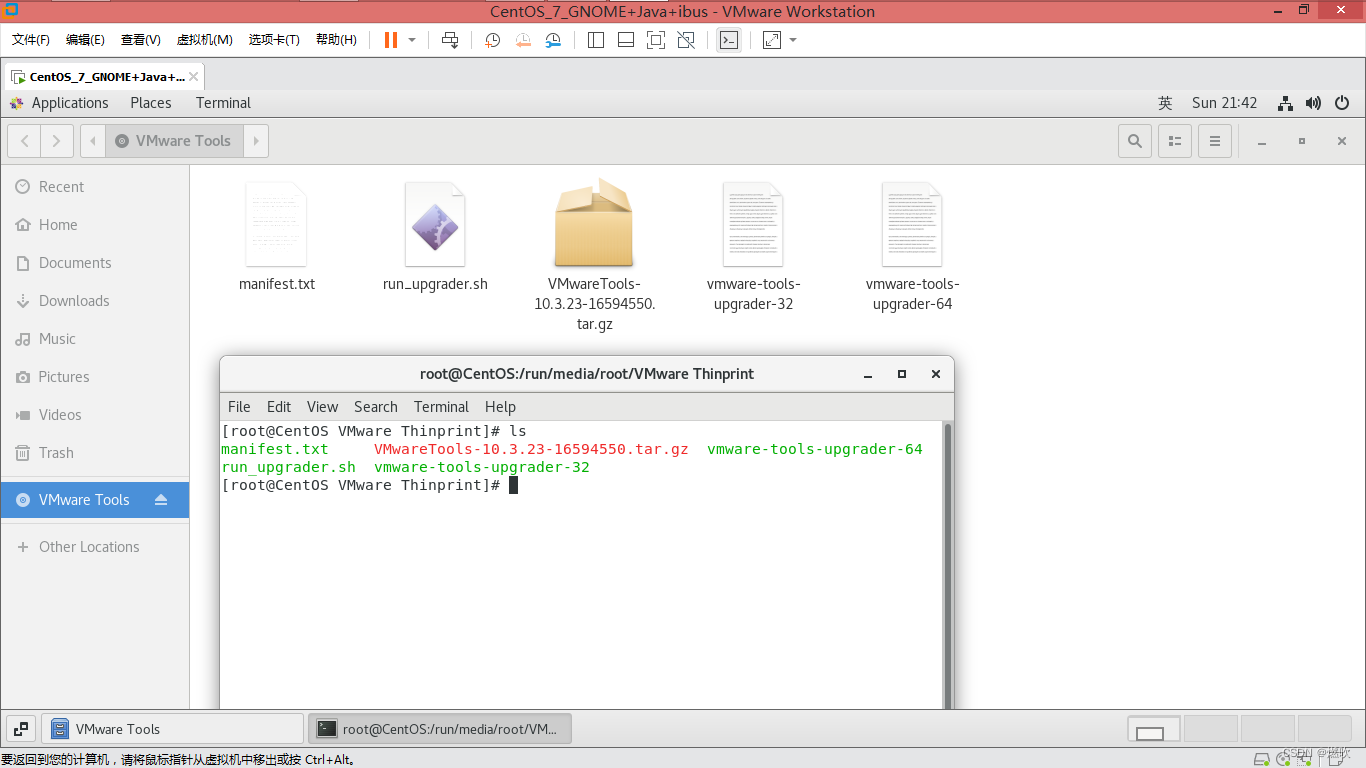
但是是不可操作的 所以需要重新挂载一下 卸载所有设备:
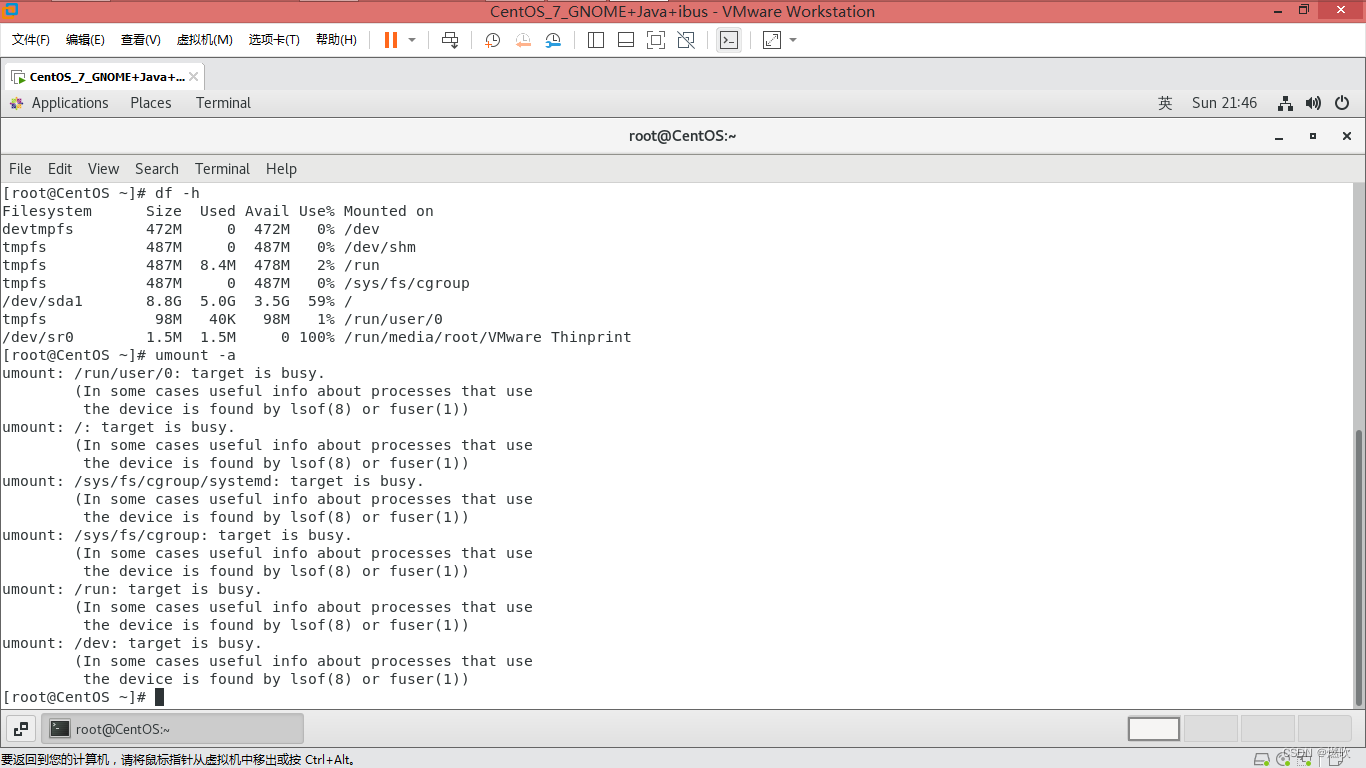
挂载到新挂载点:
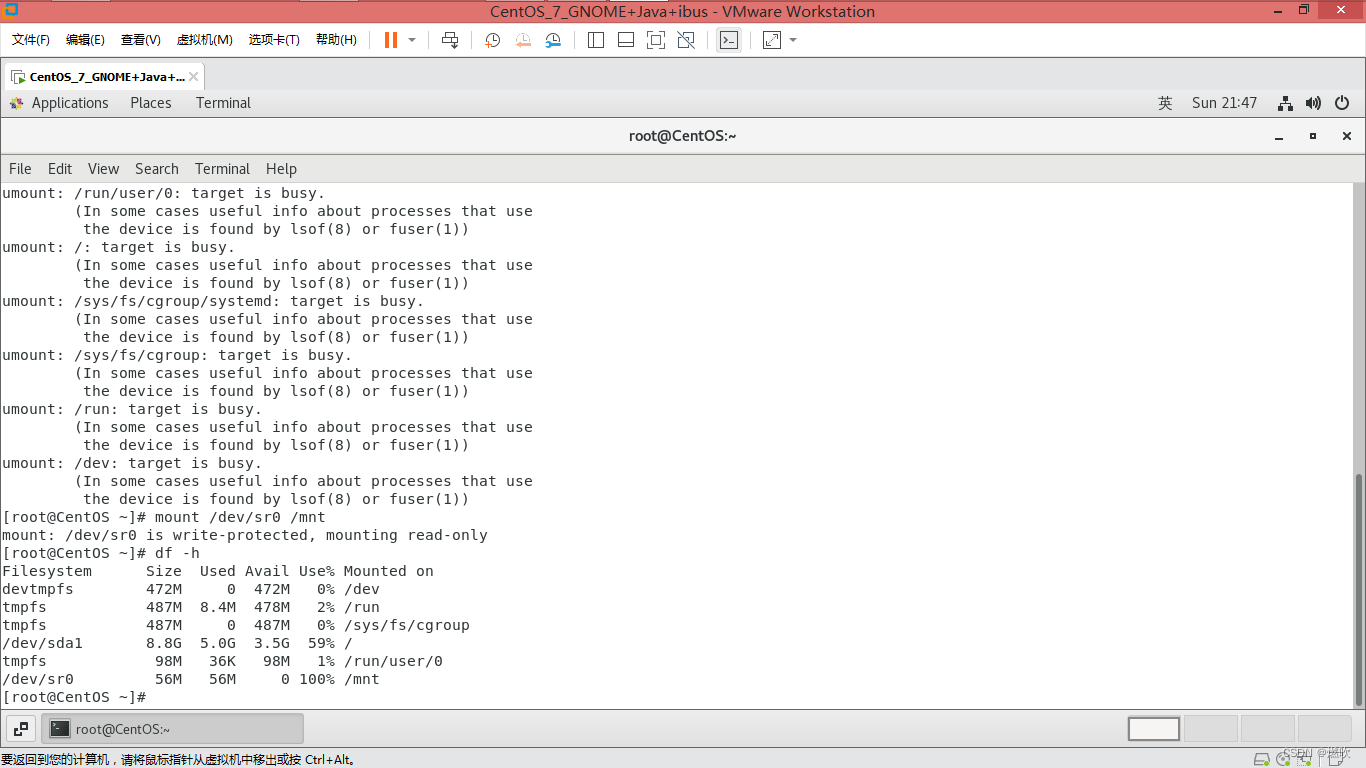
成功复制到家目录下:
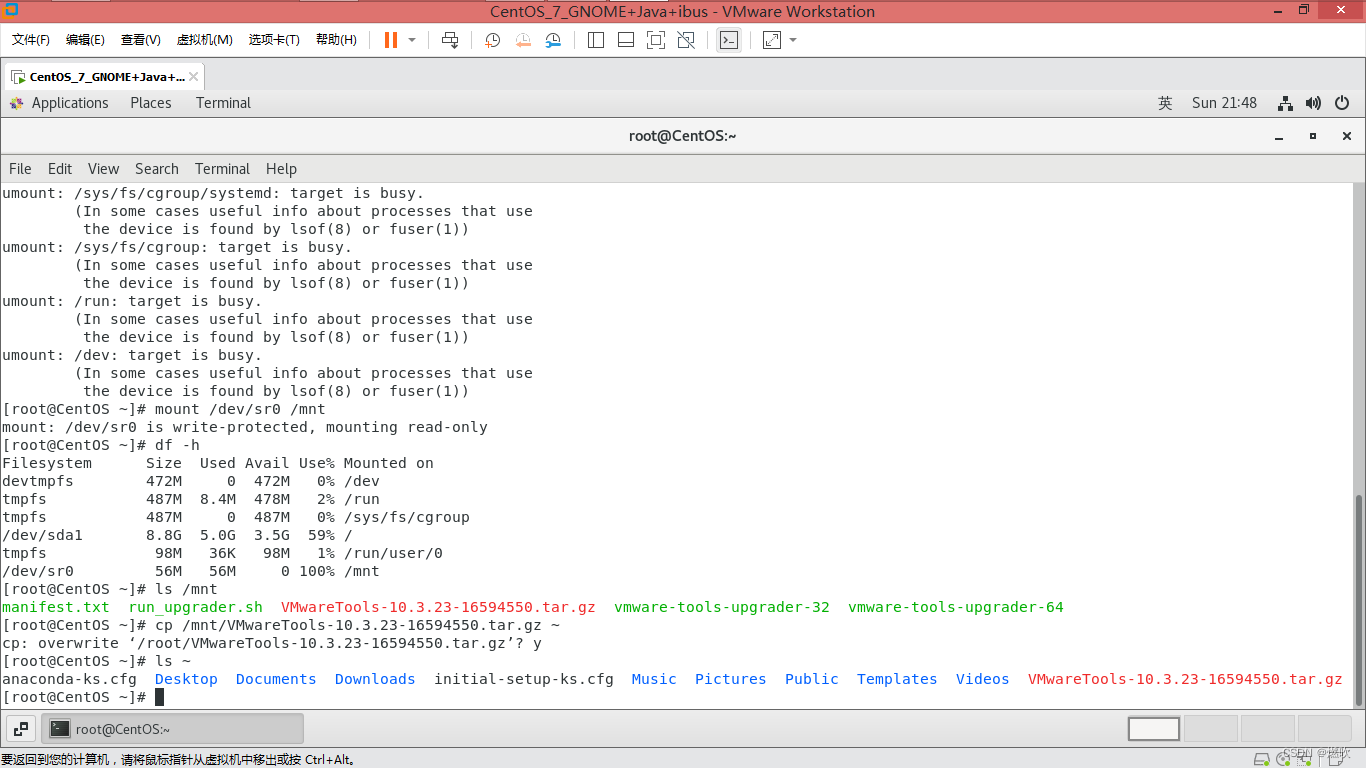
- [root@CentOS ~]# df -h
- Filesystem Size Used Avail Use% Mounted on
- devtmpfs 472M 0 472M 0% /dev
- tmpfs 487M 0 487M 0% /dev/shm
- tmpfs 487M 8.4M 478M 2% /run
- tmpfs 487M 0 487M 0% /sys/fs/cgroup
- /dev/sda1 8.8G 5.0G 3.5G 59% /
- tmpfs 98M 40K 98M 1% /run/user/0
- /dev/sr0 1.5M 1.5M 0 100% /run/media/root/VMware Thinprint
- [root@CentOS ~]# umount -a
- umount: /run/user/0: target is busy.
- (In some cases useful info about processes that use
- the device is found by lsof(8) or fuser(1))
- umount: /: target is busy.
- (In some cases useful info about processes that use
- the device is found by lsof(8) or fuser(1))
- umount: /sys/fs/cgroup/systemd: target is busy.
- (In some cases useful info about processes that use
- the device is found by lsof(8) or fuser(1))
- umount: /sys/fs/cgroup: target is busy.
- (In some cases useful info about processes that use
- the device is found by lsof(8) or fuser(1))
- umount: /run: target is busy.
- (In some cases useful info about processes that use
- the device is found by lsof(8) or fuser(1))
- umount: /dev: target is busy.
- (In some cases useful info about processes that use
- the device is found by lsof(8) or fuser(1))
- [root@CentOS ~]# mount /dev/sr0 /mnt
- mount: /dev/sr0 is write-protected, mounting read-only
- [root@CentOS ~]# df -h
- Filesystem Size Used Avail Use% Mounted on
- devtmpfs 472M 0 472M 0% /dev
- tmpfs 487M 8.4M 478M 2% /run
- tmpfs 487M 0 487M 0% /sys/fs/cgroup
- /dev/sda1 8.8G 5.0G 3.5G 59% /
- tmpfs 98M 36K 98M 1% /run/user/0
- /dev/sr0 56M 56M 0 100% /mnt
- [root@CentOS ~]# ls /mnt
- manifest.txt run_upgrader.sh VMwareTools-10.3.23-16594550.tar.gz vmware-tools-upgrader-32 vmware-tools-upgrader-64
- [root@CentOS ~]# cp /mnt/VMwareTools-10.3.23-16594550.tar.gz ~
- cp: overwrite ‘/root/VMwareTools-10.3.23-16594550.tar.gz’? y
- [root@CentOS ~]# ls ~
- anaconda-ks.cfg Desktop Documents Downloads initial-setup-ks.cfg Music Pictures Public Templates Videos VMwareTools-10.3.23-16594550.tar.gz
- [root@CentOS ~]#
VMwareTools-10.3.23-16594550.tar.gz:
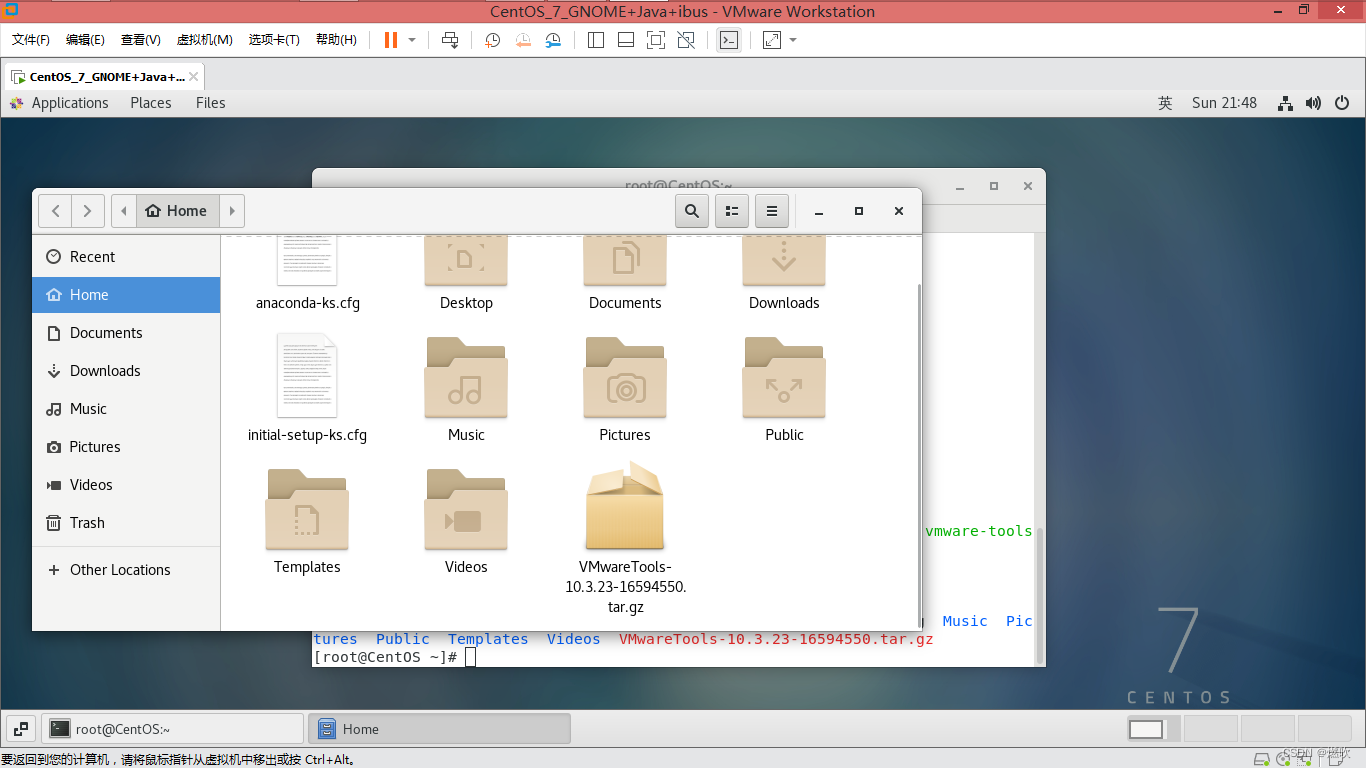
解压到当前目录下:
- [root@CentOS ~]# tar -xzvf VMwareTools-10.3.23-16594550.tar.gz
- vmware-tools-distrib/
- vmware-tools-distrib/bin/
- vmware-tools-distrib/bin/vm-support
- vmware-tools-distrib/bin/vmware-config-tools.pl
- /* 实在太长 全部省略 */
- [root@CentOS ~]# ls
- anaconda-ks.cfg Documents initial-setup-ks.cfg Pictures Templates VMwareTools-10.3.23-16594550.tar.gz
- Desktop Downloads Music Public Videos vmware-tools-distrib
- [root@CentOS ~]# ls vmware-tools-distrib/
- bin caf doc etc FILES INSTALL installer lib vgauth vmware-install.pl
- [root@CentOS ~]#
到了最关键的一步了 安装 只需要记住一个技巧:
有 [no] 输 no
有 [yes] 的输 yes
两者都无便回车默认
最后一个绝对 no
下面该输入的都用 C 语言注释格式说明了:
- [root@CentOS ~]# ./vmware-tools-distrib/vmware-install.pl /* 执行安装脚本 */
- The installer has detected an existing installation of open-vm-tools packages
- on this system and will not attempt to remove and replace these user-space
- applications. It is recommended to use the open-vm-tools packages provided by
- the operating system. If you do not want to use the existing installation of
- open-vm-tools packages and use VMware Tools, you must uninstall the
- open-vm-tools packages and re-run this installer.
- The packages that need to be removed are:
- open-vm-tools
- The installer will next check if there are any missing kernel drivers. Type yes
- if you want to do this, otherwise type no [yes] yes /* 输入 yes */
-
- INPUT: [yes]
-
- A previous installation of VMware Tools has been detected.
-
- The previous installation was made by the tar installer (version 4).
-
- Keeping the tar4 installer database format.
-
- You have a version of VMware Tools installed. Continuing this install will
- first uninstall the currently installed version. Do you wish to continue?
- (yes/no) [yes] yes /* 输入 yes */
-
- INPUT: [yes]
-
- Uninstalling the tar installation of VMware Tools.
-
- manageSELinux uninstall: Unable to remove vmtools_t permissive mapping.
- There was an error configuring the SELinux security context for VMware Tools.
- Please make certain that SELinux is configured correctly.
-
- Stopping services for VMware Tools
-
- Stopping vmware-tools (via systemctl): [ OK ]
-
- The removal of VMware Tools 10.3.23 build-16594550 for Linux completed
- successfully.
-
- Installing VMware Tools.
-
- In which directory do you want to install the binary files?
- [/usr/bin] /* 输入 回车 */
-
- INPUT: [/usr/bin] default
-
- What is the directory that contains the init directories (rc0.d/ to rc6.d/)?
- [/etc/rc.d] /* 输入 回车 */
-
- INPUT: [/etc/rc.d] default
-
- What is the directory that contains the init scripts?
- [/etc/rc.d/init.d] /* 输入 回车 */
-
- INPUT: [/etc/rc.d/init.d] default
-
- In which directory do you want to install the daemon files?
- [/usr/sbin] /* 输入 回车 */
-
- INPUT: [/usr/sbin] default
-
- In which directory do you want to install the library files?
- [/usr/lib/vmware-tools] /* 输入 回车 */
-
- INPUT: [/usr/lib/vmware-tools] default
-
- The path "/usr/lib/vmware-tools" does not exist currently. This program is
- going to create it, including needed parent directories. Is this what you want?
- [yes] yes /* 输入 yes */
-
- INPUT: [yes]
-
- In which directory do you want to install the documentation files?
- [/usr/share/doc/vmware-tools]
-
- INPUT: [/usr/share/doc/vmware-tools] default /* 输入 回车 */
-
- The path "/usr/share/doc/vmware-tools" does not exist currently. This program
- is going to create it, including needed parent directories. Is this what you
- want? [yes] yes /* 输入 yes */
-
- INPUT: [yes]
-
- The installation of VMware Tools 10.3.23 build-16594550 for Linux completed
- successfully. You can decide to remove this software from your system at any
- time by invoking the following command: "/usr/bin/vmware-uninstall-tools.pl".
-
- Before running VMware Tools for the first time, you need to configure it by
- invoking the following command: "/usr/bin/vmware-config-tools.pl". Do you want
- this program to invoke the command for you now? [yes] yes /* 输入 yes */
-
- INPUT: [yes]
-
-
- You have chosen to install VMware Tools on top of an open-vm-tools package.
- You will now be given the option to replace some commands provided by
- open-vm-tools. Please note that if you replace any commands at this time and
- later remove VMware Tools, it may be necessary to re-install the open-vm-tools.
-
- The file /usr/bin/vmware-hgfsclient that this program was about to install
- already exists. Overwrite? [no] no /* 输入 no */
-
- INPUT: [no]
-
- The file /usr/bin/vmhgfs-fuse that this program was about to install already
- exists. Overwrite? [no] no /* 输入 no */
-
- INPUT: [no]
-
- Initializing...
-
-
- Making sure services for VMware Tools are stopped.
-
- Stopping vmware-tools (via systemctl): [ OK ]
-
-
- The module vmci has already been installed on this system by another installer
- or package and will not be modified by this installer.
-
- The module vsock has already been installed on this system by another installer
- or package and will not be modified by this installer.
-
- The module vmxnet3 has already been installed on this system by another
- installer or package and will not be modified by this installer.
-
- The module pvscsi has already been installed on this system by another
- installer or package and will not be modified by this installer.
-
- The module vmmemctl has already been installed on this system by another
- installer or package and will not be modified by this installer.
-
- The VMware Host-Guest Filesystem allows for shared folders between the host OS
- and the guest OS in a Fusion or Workstation virtual environment. Do you wish
- to enable this feature? [yes] yes /* 输入 yes */
-
- INPUT: [yes]
-
- The vmxnet driver is no longer supported on kernels 3.3 and greater. Please
- upgrade to a newer virtual NIC. (e.g., vmxnet3 or e1000e)
-
-
- Skipping configuring automatic kernel modules as no drivers were installed by
- this installer.
-
-
- Skipping rebuilding initrd boot image for kernel as no drivers to be included
- in boot image were installed by this installer.
- /* 在这里会等一段时间安装 下一个是最后一个 */
-
- The configuration of VMware Tools 10.3.23 build-16594550 for Linux for this
- running kernel completed successfully.
-
- VMware Tools installed on top of open-vm-tools has not added anything of
- significance or potential benefit. VMware Tools is not needed.
-
- Would you like to recover the wasted disk space by uninstalling VMware Tools at
- this time? (yes/no) [yes] no /* 一般来说最后一个一定要输入 no */
-
- INPUT: [no]
-
- Enjoy,
-
- --the VMware team
-
- [root@CentOS ~]#
虚拟机增强工具安装完成!
剩下的善后大家自己完成吧
无非是添加了块网卡、光驱读取的 ISO 文件、电脑里复制解压的一堆东西
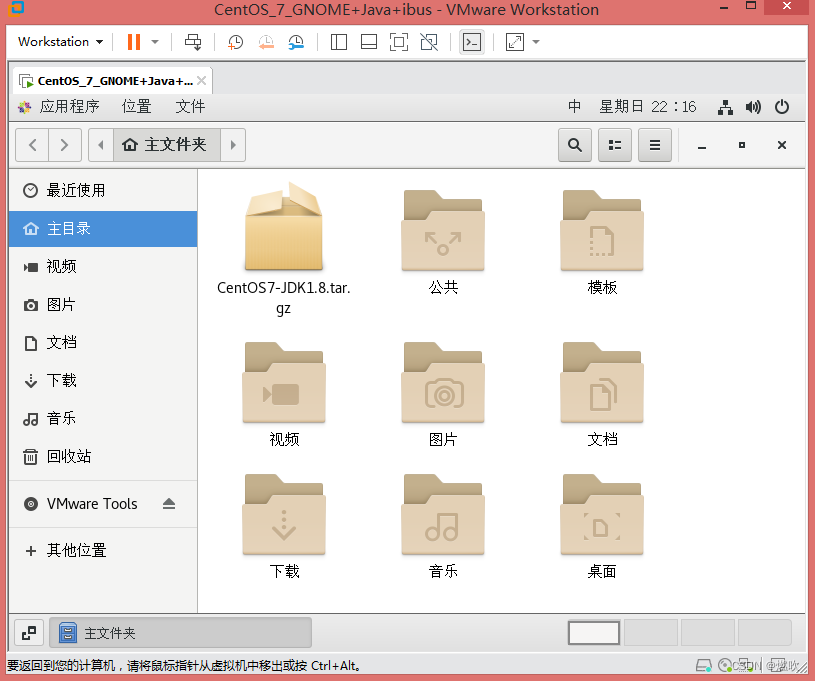
安装成功后虚拟机就会支持铺满屏幕:
以及窗口缩放自适应:
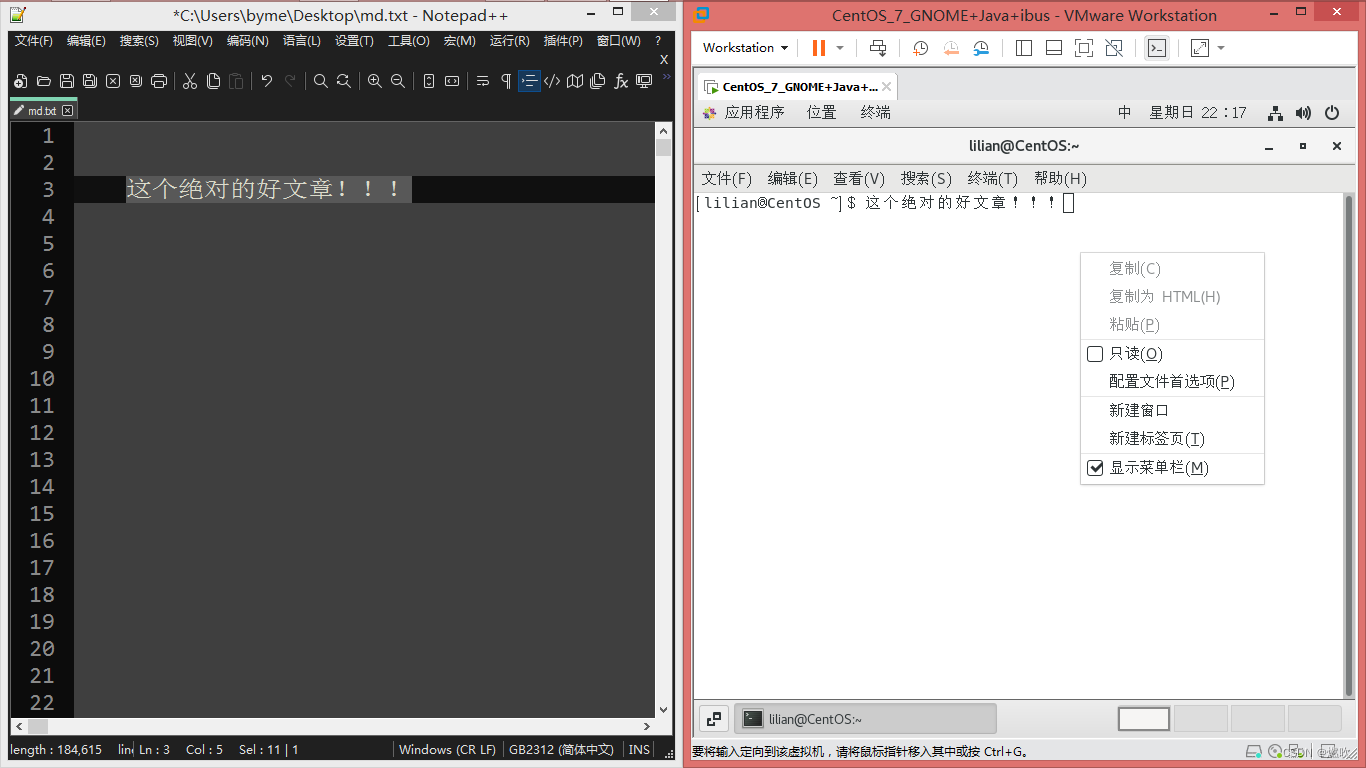
剪贴板共享:
最重要的拖拽复制:
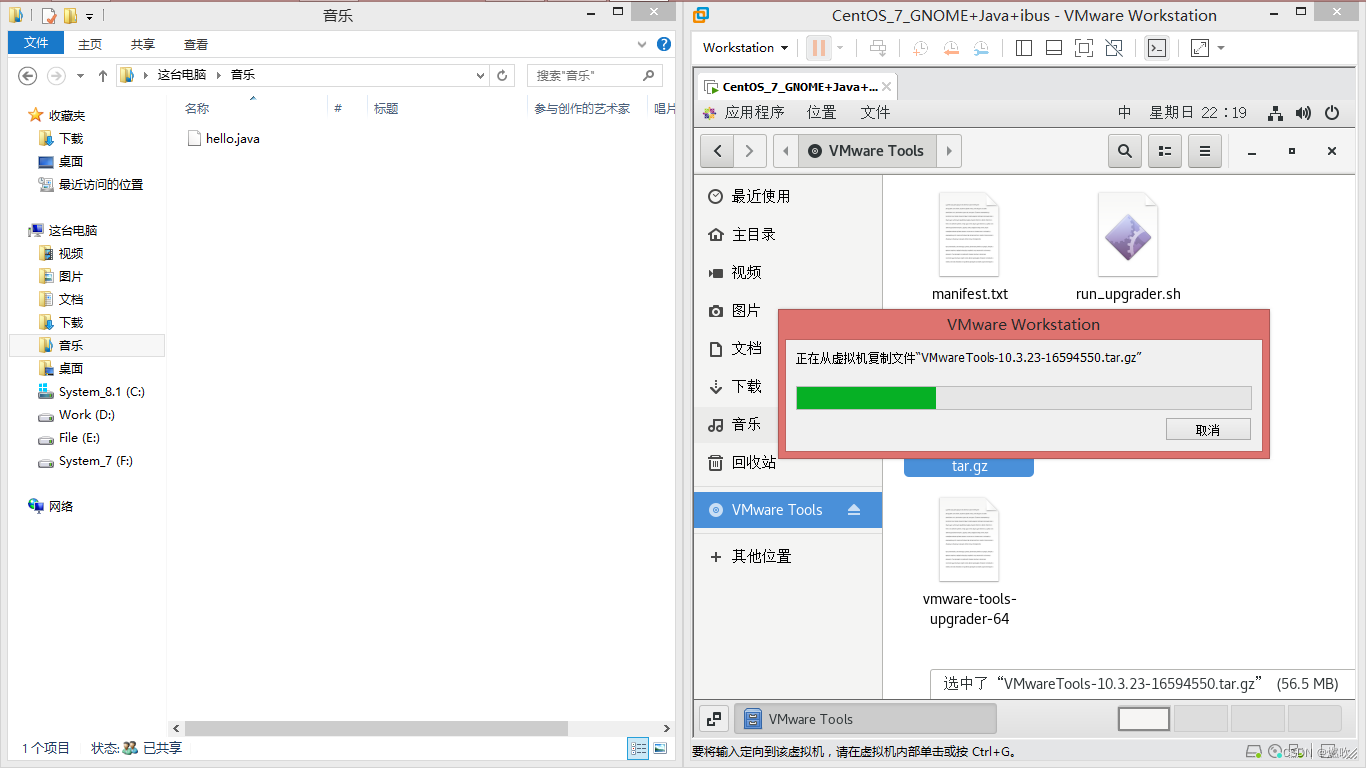
这样就不用通过网络或者 USB 设备来虚拟机实体机之间传输数据了!
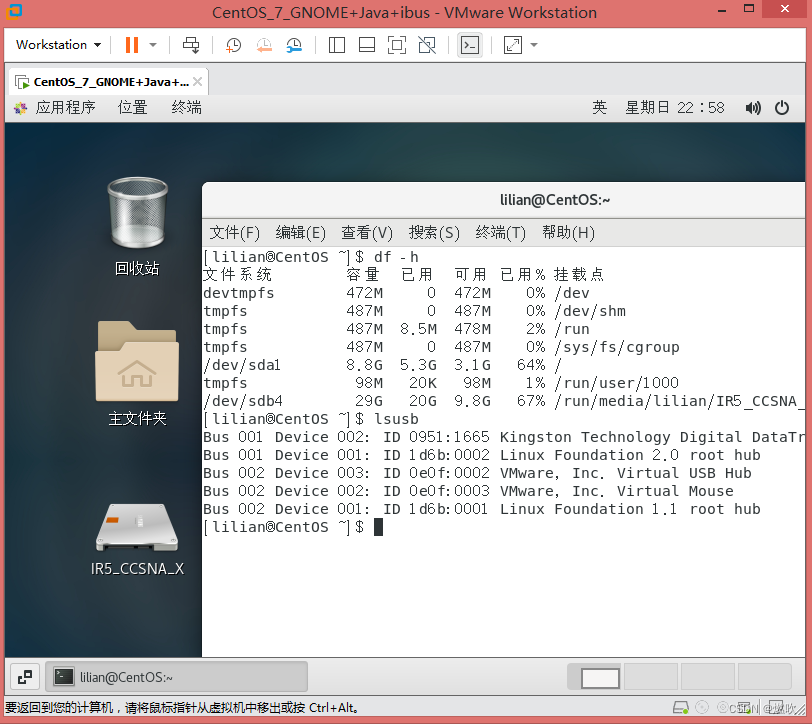
忘了说 GUI 图形界面的 CentOS 7 自带 ntfs-3g 支持读取 ntfs 分区:
一次卸载 VMware Tools
- [root@CentOS ~]# vm
- vmcore-dmesg vmware-namespace-cmd
- vmhgfs-fuse vmware-rpctool
- vmmouse_detect vmware-toolbox-cmd
- vmstat vmware-uninstall-tools.pl
- vm-support vmware-user
- vmtoolsd vmware-user-suid-wrapper
- vmware-checkvm vmware-vgauth-cmd
- vmware-config-tools.pl vmware-vmblock-fuse
- vmware-hgfsclient vmware-xferlogs
- [root@CentOS ~]# vmware-uninstall-tools.pl
- Uninstalling the tar installation of VMware Tools.
-
- Stopping services for VMware Tools
-
- Stopping vmware-tools (via systemctl): [ OK ]
-
- The removal of VMware Tools 10.3.23 build-16594550 for Linux completed
- successfully. Thank you for having tried this software.
-
- [root@CentOS ~]#
一次普通用户安装示例 最后一步选择 yes 也无伤大雅:
- [lilian@CentOS vmware-tools-distrib]$ su root
- 密码:
- [root@CentOS vmware-tools-distrib]# ./vmware-install.pl
- The installer has detected an existing installation of open-vm-tools packages
- on this system and will not attempt to remove and replace these user-space
- applications. It is recommended to use the open-vm-tools packages provided by
- the operating system. If you do not want to use the existing installation of
- open-vm-tools packages and use VMware Tools, you must uninstall the
- open-vm-tools packages and re-run this installer.
- The packages that need to be removed are:
- open-vm-tools
- The installer will next check if there are any missing kernel drivers. Type yes
- if you want to do this, otherwise type no [yes] yes
-
- INPUT: [yes]
-
- Creating a new VMware Tools installer database using the tar4 format.
-
- Installing VMware Tools.
-
- In which directory do you want to install the binary files?
- [/usr/bin]
-
- INPUT: [/usr/bin] default
-
- What is the directory that contains the init directories (rc0.d/ to rc6.d/)?
- [/etc/rc.d]
-
- INPUT: [/etc/rc.d] default
-
- What is the directory that contains the init scripts?
- [/etc/rc.d/init.d]
-
- INPUT: [/etc/rc.d/init.d] default
-
- In which directory do you want to install the daemon files?
- [/usr/sbin]
-
- INPUT: [/usr/sbin] default
-
- In which directory do you want to install the library files?
- [/usr/lib/vmware-tools]
-
- INPUT: [/usr/lib/vmware-tools] default
-
- The path "/usr/lib/vmware-tools" does not exist currently. This program is
- going to create it, including needed parent directories. Is this what you want?
- [yes] yes
-
- INPUT: [yes]
-
- In which directory do you want to install the documentation files?
- [/usr/share/doc/vmware-tools]
-
- INPUT: [/usr/share/doc/vmware-tools] default
-
- The path "/usr/share/doc/vmware-tools" does not exist currently. This program
- is going to create it, including needed parent directories. Is this what you
- want? [yes] yes
-
- INPUT: [yes]
-
- The installation of VMware Tools 10.3.23 build-16594550 for Linux completed
- successfully. You can decide to remove this software from your system at any
- time by invoking the following command: "/usr/bin/vmware-uninstall-tools.pl".
-
- Before running VMware Tools for the first time, you need to configure it by
- invoking the following command: "/usr/bin/vmware-config-tools.pl". Do you want
- this program to invoke the command for you now? [yes] yes
-
- INPUT: [yes]
-
-
- You have chosen to install VMware Tools on top of an open-vm-tools package.
- You will now be given the option to replace some commands provided by
- open-vm-tools. Please note that if you replace any commands at this time and
- later remove VMware Tools, it may be necessary to re-install the open-vm-tools.
-
- The file /usr/bin/vmware-hgfsclient that this program was about to install
- already exists. Overwrite? [no] no
-
- INPUT: [no]
-
- The file /usr/bin/vmhgfs-fuse that this program was about to install already
- exists. Overwrite? [no] no
-
- INPUT: [no]
-
- Initializing...
-
-
- Making sure services for VMware Tools are stopped.
-
- Stopping vmware-tools (via systemctl): [ 确定 ]
-
-
- The module vmci has already been installed on this system by another installer
- or package and will not be modified by this installer.
-
- The module vsock has already been installed on this system by another installer
- or package and will not be modified by this installer.
-
- The module vmxnet3 has already been installed on this system by another
- installer or package and will not be modified by this installer.
-
- The module pvscsi has already been installed on this system by another
- installer or package and will not be modified by this installer.
-
- The module vmmemctl has already been installed on this system by another
- installer or package and will not be modified by this installer.
-
- The VMware Host-Guest Filesystem allows for shared folders between the host OS
- and the guest OS in a Fusion or Workstation virtual environment. Do you wish
- to enable this feature? [yes] yes
-
- INPUT: [yes]
-
- The vmxnet driver is no longer supported on kernels 3.3 and greater. Please
- upgrade to a newer virtual NIC. (e.g., vmxnet3 or e1000e)
-
-
- Skipping configuring automatic kernel modules as no drivers were installed by
- this installer.
-
-
- Skipping rebuilding initrd boot image for kernel as no drivers to be included
- in boot image were installed by this installer.
-
- The configuration of VMware Tools 10.3.23 build-16594550 for Linux for this
- running kernel completed successfully.
-
- VMware Tools installed on top of open-vm-tools has not added anything of
- significance or potential benefit. VMware Tools is not needed.
-
- Would you like to recover the wasted disk space by uninstalling VMware Tools at
- this time? (yes/no) [yes] yes
-
- INPUT: [yes]
-
- Uninstalling the tar installation of VMware Tools.
-
- Stopping services for VMware Tools
-
- Stopping vmware-tools (via systemctl): [ 确定 ]
-
- The removal of VMware Tools 10.3.23 build-16594550 for Linux completed
- successfully. Thank you for having tried this software.
-
- [root@CentOS vmware-tools-distrib]#
##################################################
好人来啦
- CentOS7-JDK1.8.tar.gz:
- pan.baidu.com/s/1nfPfHJl7dxPFo8Xa00VGJQ
- 1308
-
- VMwareTools-10.3.23-16594550.tar.gz:
- pan.baidu.com/s/1r5-ZYwVXIahxU9QXLhvVOA
- 1307


