
- 1Git在windows下的安装和使用GIT@OSC
- 2洛谷网校的课程怎么样?_洛谷的csp课程怎么样
- 3vs2017开发php,C#编写的可供PHP调用的com dll(Visual studio 2017)
- 4对路由的理解_路由设计是什么意思
- 5解决 No active profile set, falling back to 1 default profile: “default“问题以及如何查看spring boot版本号
- 6中文,英文,数字,下划线不包含特殊字符的正则表达式_java正则校验 由字母、数字、或下划线组成,不能包含其他特殊字符
- 7一、mac 安装及使用docker_docker for mac
- 8玩转Jetson Nano(九)安装ROS
- 9STM32_Day04(SPI + 中断)_stm32 spi接收中断
- 10cocos2dx-3.2创建项目_x-8wswmbowni017f
【WPF】消息蒙版弹窗UI以及await实现等待反馈(popup)_wpf popup
赞
踩
一、概要
原版的消息框太丑?不喜欢?如果您对原版消息框的外观不太满意,或者不符合您的应用程序的需求,那么可以通过自定义消息框来实现所需的外观和功能。
原版的消息框:
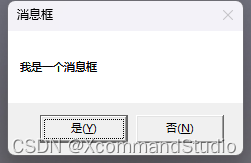
可以看出这个消息框可能和你设计的UI界面格格不入
自定义消息框可以实现各种风格和布局的效果。
下面我展示一个B端设计的消息框界面
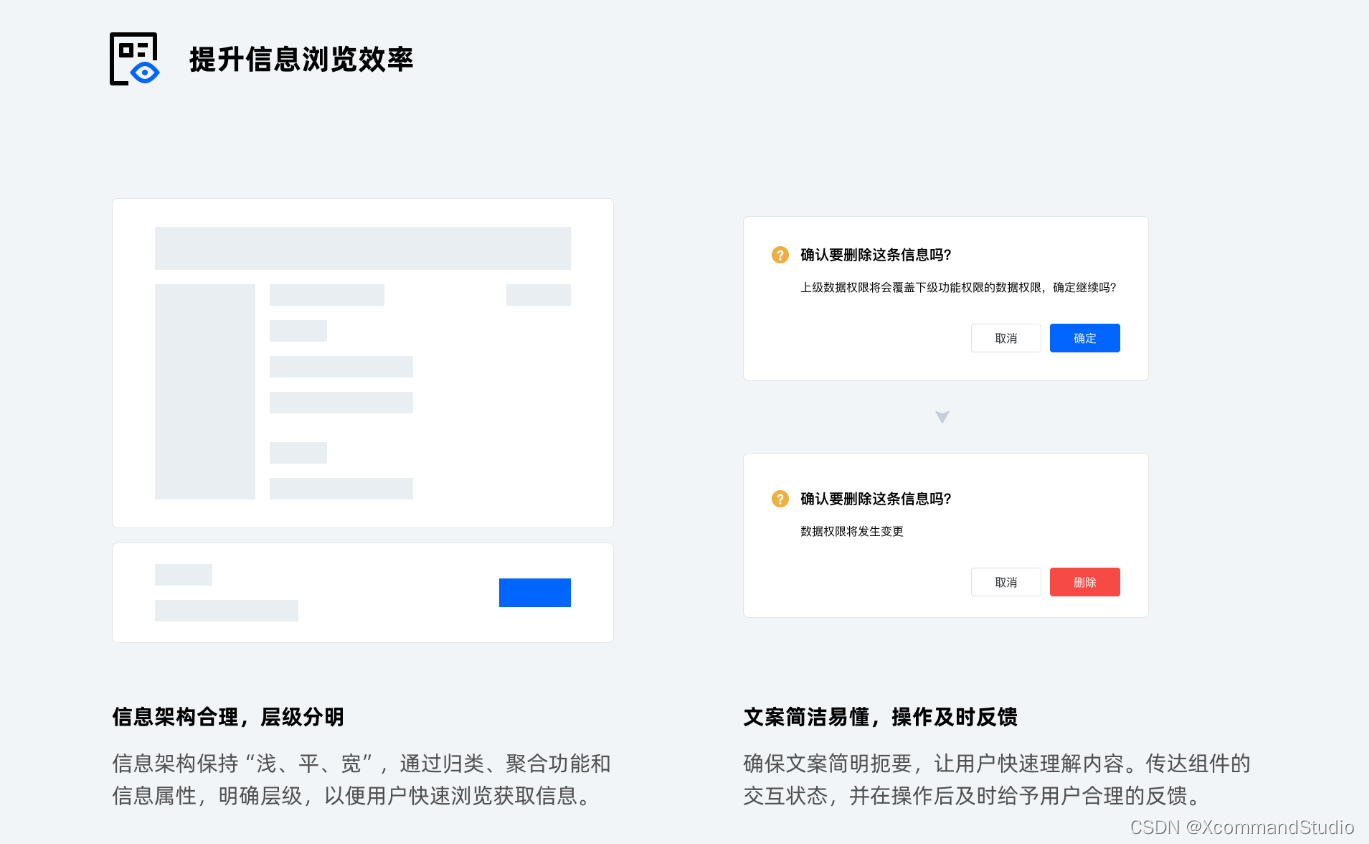
那么我们如何做到类似的效果呢?
- 构思背景遮罩逻辑
- 制作UI界面(遮罩+Popup)
- Cs后端弹窗实现(Await)
实现效果展示:
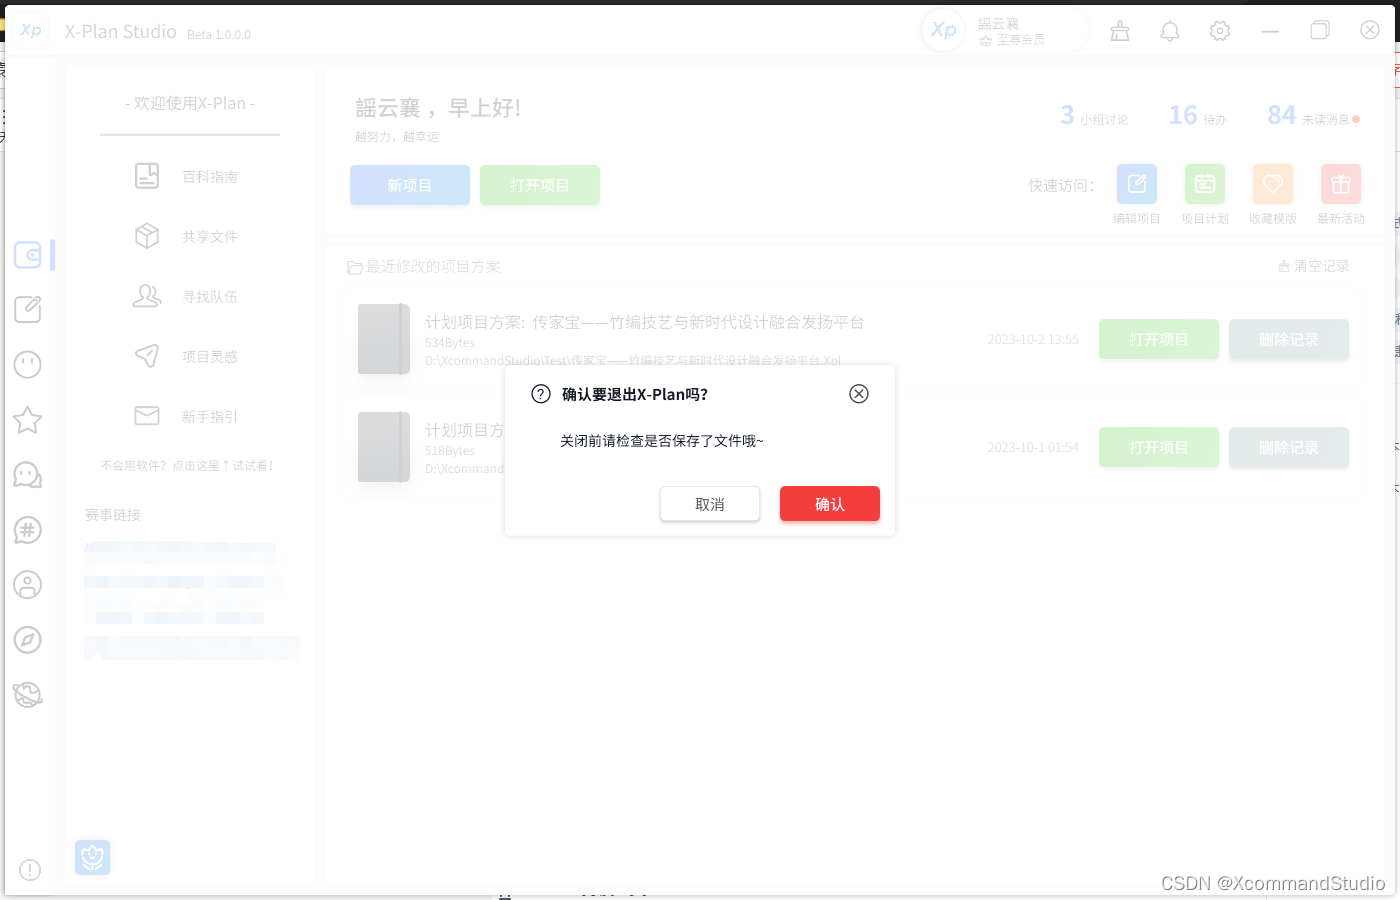
其中,按钮颜色、文本,图标等都可以通过自定义。
快速通道:下载链接
二、UI制作流程
下面我们一步一步制作这个弹窗。
1.遮罩逻辑
首先是背景层:
背景层是一个半透明的遮罩蒙版。
<Grid x:Name="MessageGridBox" Visibility="Collapsed">
    <Border Background="White" Opacity="0.8" CornerRadius="5"/>
	<!--这里放消息框的部分--!/>


	<!--这里放消息框的部分--!/>
</Grid>
- 1
- 2
- 3
- 4
- 5
- 6
- 7
效果就是一块蒙版挡住用户其他使用区域。(当然你也可以选择不挡着或者设计逻辑选择性挡住或者不挡住,挡住的话可以防止用户不处理这个消息就去其他操作。)
这里的CornerRadius="5"可以改为自己的主界面的圆角,当然也可以不设置。
2.Popup展示层
中间层是Popup展示层:
为了让消息框弹出不那么突兀,使用了Popup的Fade展示效果显示。
<Popup x:Name="MessageGridPopup" PopupAnimation="Fade" Placement="Center" AllowsTransparency="True" StaysOpen="True">
    <Grid HorizontalAlignment="Center" VerticalAlignment="Center" MaxWidth="450" MaxHeight="250" MinWidth="400" MinHeight="165">
        <Grid.RowDefinitions>
            <RowDefinition Height="55"/>
            <RowDefinition />
        </Grid.RowDefinitions>
        <Rectangle Grid.RowSpan="2" Fill="White" Margin="5" Opacity="1" RadiusY="5" RadiusX="5">
            <Rectangle.Effect>
                <DropShadowEffect Color="#FFBBBBBB" Direction="0" BlurRadius="10" RenderingBias="Quality" ShadowDepth="0" Opacity="0.3"></DropShadowEffect>
            </Rectangle.Effect>
        </Rectangle>
        <!--这里放消息展示内容部分--!/>


		<!--这里放消息展示内容部分--!/>
    </Grid>
</Popup>

- 1
- 2
- 3
- 4
- 5
- 6
- 7
- 8
- 9
- 10
- 11
- 12
- 13
- 14
- 15
- 16
- 17
3.消息展示层
消息展示层是核心区域,用于动态更新消息框的展示文本。
我分三个部分来介绍:
- 标题部分
<Grid Margin="10,0,10,0">
<StackPanel Orientation="Horizontal" VerticalAlignment="Bottom" Margin="10,0,0,0">
<TextBlock x:Name="MessageIconQ" Text="" FontFamily="{DynamicResource Iconfont}" FontSize="22" VerticalAlignment="Center" Margin="10"/>
<TextBlock x:Name="MessageIconC" Text="" FontFamily="{DynamicResource Iconfont}" FontSize="22" VerticalAlignment="Center" Margin="10" Visibility="Collapsed"/>
<TextBlock x:Name="MessageTitleBox" Text="标题显示" FontFamily="{DynamicResource BlodFont}" FontSize="15" VerticalAlignment="Center"/>
</StackPanel>
<Button HorizontalAlignment="Right" VerticalAlignment="Bottom" Margin="0,0,20,10" FontSize="22" Style="{DynamicResource wdButton}" Click="CancelBtn_Click">
<Button.Content>
<TextBlock FontFamily="{DynamicResource Iconfont}" Text=""/>
</Button.Content>
</Button>
</Grid>
- 1
- 2
- 3
- 4
- 5
- 6
- 7
- 8
- 9
- 10
- 11
- 12
- 内容区域
 <StackPanel Grid.RowSpan="2" Margin="10">
     <TextBlock x:Name="MessageContentBox" Margin="50,60,50,80" TextWrapping="Wrap" Text="消息框测试" FontSize="14" FontFamily="{DynamicResource RegularFont}"/>
 </StackPanel>
- 1
- 2
- 3
- 按钮部分
 <StackPanel Grid.Row="1" Orientation="Horizontal" VerticalAlignment="Bottom" HorizontalAlignment="Right" Margin="10" >
     <Button x:Name="CancelBtn" Content="取消" Style="{DynamicResource wButton}" Width="100" FontSize="15" Height="35" Margin="10" Click="CancelBtn_Click"/>
     <Button x:Name="ConfirmBtn" Content="确定" Style="{DynamicResource mButton}" Width="100" FontSize="15" Height="35" Margin="10" Click="ConfirmBtn_Click"/>
 </StackPanel>
- 1
- 2
- 3
- 4
按钮还可以继续增加,逻辑我就不赘述了,可以看后面的代码研究一下。
值得注意的是:这里的
Style是我自己做的,你也可以更换为自己的按钮样式,如果有需要可以后台私信我。除了底层逻辑,这些样式都可以自己自定义。
三、C#后端代码逻辑
1. 定义变量
首先定义一个TaskCompletionSource<bool> 命名taskCompletionSource,当然名字可以自己改。
private TaskCompletionSource<bool> taskCompletionSource;
#这段内容需要全局变量哦
- 1
- 2
2. 定义函数
写一个显示消息框的函数,注意函数需要async才支持等待用户回复。
private async Task<bool> ShowMessageGridBoxAsync(string MessageContent,string title,bool isconfirm = true, int ButtonIndex=0)
{
	 /// <summary>
	 /// 参数分别是
	 /// MessageContent 信息内容
	 /// title 信息标题
	 /// isconfirm 是否确认按钮(判断Icon情况)
	 /// ButtonIndex 按钮类型
	 /// </summary>
	//#我这里的后两个参数带默认值,所以可以直接简化写。

	//#展示消息框
	MessageGridBox.Visibility = Visibility.Visible;
	MessageTitleBox.Text = title;
	MessageContentBox.Text = MessageContent;
	//#上面这些比较简单就不赘述了。分别赋值进去。

	//#重新赋值一个 taskCompletionSource 让其重置。
	taskCompletionSource = new TaskCompletionSource<bool>();

	//#判断ICON 其中MessageIconC是确认的ICON,MessageIconQ是询问的ICON
    if (isconfirm)
    {
        CancelBtn.Visibility = Visibility.Collapsed;
        MessageIconC.Visibility = Visibility.Visible;
        MessageIconQ.Visibility = Visibility.Collapsed;
    }
    else
    {
        CancelBtn.Visibility = Visibility.Visible;
        MessageIconC.Visibility = Visibility.Collapsed;
        MessageIconQ.Visibility = Visibility.Visible;
    }

	//#判断按钮的类型
	switch (ButtonIndex)
	{
	    case 0:
	        ConfirmBtn.SetValue(Button.StyleProperty, Application.Current.Resources["mButton"]);
	        ConfirmBtn.Content = "确认";
	        break;
	    case 1:
	        ConfirmBtn.SetValue(Button.StyleProperty, Application.Current.Resources["RButton"]);
	        ConfirmBtn.Content = "删除";
	        System.Media.SystemSounds.Exclamation.Play();
	        break;
	    case 2:
	        ConfirmBtn.SetValue(Button.StyleProperty, Application.Current.Resources["RButton"]);
	        ConfirmBtn.Content = "确认";
	        System.Media.SystemSounds.Exclamation.Play();
	        break;
	    case 3:
	        ConfirmBtn.SetValue(Button.StyleProperty, Application.Current.Resources["RButton"]);
	        ConfirmBtn.Content = "重试";
	        System.Media.SystemSounds.Exclamation.Play();
	        break;
	    case 4:
	        ConfirmBtn.SetValue(Button.StyleProperty, Application.Current.Resources["mButton"]);
	        ConfirmBtn.Content = "我知道了";
	        break;
	}

	//#这里写了4个类型,你可以再自定义更多

	//#这里要先关闭再打开!不然动态效果就没了。
	MessageGridPopup.IsOpen = false;
	MessageGridPopup.IsOpen = true;

	//#等待Task用户操作
	await taskCompletionSource.Task;

	//#操作后隐藏遮罩与Popup
	MessageGridBox.Visibility = Visibility.Collapsed;
	MessageGridPopup.IsOpen = false;

	//#返回Task的Result
	return taskCompletionSource.Task.Result;
}
- 1
- 2
- 3
- 4
- 5
- 6
- 7
- 8
- 9
- 10
- 11
- 12
- 13
- 14
- 15
- 16
- 17
- 18
- 19
- 20
- 21
- 22
- 23
- 24
- 25
- 26
- 27
- 28
- 29
- 30
- 31
- 32
- 33
- 34
- 35
- 36
- 37
- 38
- 39
- 40
- 41
- 42
- 43
- 44
- 45
- 46
- 47
- 48
- 49
- 50
- 51
- 52
- 53
- 54
- 55
- 56
- 57
- 58
- 59
- 60
- 61
- 62
- 63
- 64
- 65
- 66
- 67
- 68
- 69
- 70
- 71
- 72
- 73
- 74
- 75
- 76
- 77
- 78
3.写按钮按下的逻辑
 private void ConfirmBtn_Click(object sender, RoutedEventArgs e)
 {
     // 设置任务结果为true,并标记任务为已完成
     taskCompletionSource.SetResult(true);
 }

 private void CancelBtn_Click(object sender, RoutedEventArgs e)
 {
     // 设置任务结果为false,并标记任务为已完成
     taskCompletionSource.SetResult(false);
 }
- 1
- 2
- 3
- 4
- 5
- 6
- 7
- 8
- 9
- 10
- 11
4.如何调用这个函数
确认框情况
ShowMessageGridBoxAsync("-欢迎使用-", "欢迎:");
- 1
需要判断的情况
bool result = await ShowMessageGridBoxAsync("寻找不到该文件,是否删除?", "错误:", false, 1);
//这里的1是删除按钮哦,可以看前面的定义
- 1
- 2
四、技术细节/常见错误
- 消息框初始化需要关闭状态。不然会出错哦
- Popup的
StaysOpen="True",不然点击其他地方就自动关闭了,然后就会剩下遮罩无法操作 - Popup和Grid都需要在用户操作完后隐藏!
- 在调用需要await的情况,所在函数需要支持
async才可以,
“await”运算符只能用于异步方法中。请考虑用“async"修饰符标记此方法。
举个例子:
private async void DeleteButton_Click(object sender, RoutedEventArgs e)
{
    bool result = await ShowMessageGridBoxAsync("点击删除后记录将被删除,该操作不可逆。", "确认要删除这条记录么?", false, 1);
    if (result)
    {
    	//按钮逻辑
    }
}
- 1
- 2
- 3
- 4
- 5
- 6
- 7
- 8
五、小结/完整代码
Xml部分
<Grid x:Name="MessageGridBox" Visibility="Collapsed"> <Border Background="White" Opacity="0.8" CornerRadius="5"/> <Popup x:Name="MessageGridPopup" PopupAnimation="Fade" Placement="Center" AllowsTransparency="True" StaysOpen="True"> <Grid HorizontalAlignment="Center" VerticalAlignment="Center" MaxWidth="450" MaxHeight="250" MinWidth="400" MinHeight="165"> <Grid.RowDefinitions> <RowDefinition Height="55"/> <RowDefinition /> </Grid.RowDefinitions> <Rectangle Grid.RowSpan="2" Fill="White" Margin="5" Opacity="1" RadiusY="5" RadiusX="5"> <Rectangle.Effect> <DropShadowEffect Color="#FFBBBBBB" Direction="0" BlurRadius="10" RenderingBias="Quality" ShadowDepth="0" Opacity="0.3"></DropShadowEffect> </Rectangle.Effect> </Rectangle> <Grid Margin="10,0,10,0"> <StackPanel Orientation="Horizontal" VerticalAlignment="Bottom" Margin="10,0,0,0"> <TextBlock x:Name="MessageIconQ" Text="" FontFamily="{DynamicResource Iconfont}" FontSize="22" VerticalAlignment="Center" Margin="10"/> <TextBlock x:Name="MessageIconC" Text="" FontFamily="{DynamicResource Iconfont}" FontSize="22" VerticalAlignment="Center" Margin="10" Visibility="Collapsed"/> <TextBlock x:Name="MessageTitleBox" d:Text="标题显示" FontFamily="{DynamicResource BlodFont}" FontSize="15" VerticalAlignment="Center"/> </StackPanel> <Button HorizontalAlignment="Right" VerticalAlignment="Bottom" Margin="0,0,20,10" FontSize="22" Style="{DynamicResource wdButton}" Click="CancelBtn_Click"> <Button.Content> <TextBlock FontFamily="{DynamicResource Iconfont}" Text=""/> </Button.Content> </Button> </Grid> <StackPanel Grid.RowSpan="2" Margin="10"> <TextBlock x:Name="MessageContentBox" Margin="50,60,50,80" TextWrapping="Wrap" Text="消息框测试" FontSize="14" FontFamily="{DynamicResource RegularFont}"/> </StackPanel> <StackPanel Grid.Row="1" Orientation="Horizontal" VerticalAlignment="Bottom" HorizontalAlignment="Right" Margin="10" > <Button x:Name="CancelBtn" Content="取消" Style="{DynamicResource wButton}" Width="100" FontSize="15" Height="35" Margin="10" Click="CancelBtn_Click"/> <Button x:Name="ConfirmBtn" Content="确定" Style="{DynamicResource mButton}" Width="100" FontSize="15" Height="35" Margin="10" Click="ConfirmBtn_Click"/> </StackPanel> </Grid> </Popup> </Grid>
- 1
- 2
- 3
- 4
- 5
- 6
- 7
- 8
- 9
- 10
- 11
- 12
- 13
- 14
- 15
- 16
- 17
- 18
- 19
- 20
- 21
- 22
- 23
- 24
- 25
- 26
- 27
- 28
- 29
- 30
- 31
- 32
- 33
- 34
- 35
C#部分
namespace Pro
{
	public partial class MainWindow : Window
	{
		private TaskCompletionSource<bool> taskCompletionSource;
		/// <summary>
		/// 参数分别是
		/// MessageContent 信息内容
		/// title 信息标题
		/// isconfirm 是否确认按钮(判断Icon情况)
		/// ButtonIndex 按钮类型
		/// </summary>
		private async Task<bool> ShowMessageGridBoxAsync(string MessageContent,string title,bool isconfirm = false, int ButtonIndex=0)
		{

			//#我这里的后两个参数带默认值,所以可以直接简化写。

			//#展示消息框
			MessageGridBox.Visibility = Visibility.Visible;
			MessageTitleBox.Text = title;
			MessageContentBox.Text = MessageContent;
			//#上面这些比较简单就不赘述了。分别赋值进去。

			//#重新赋值一个 taskCompletionSource 让其重置。
			taskCompletionSource = new TaskCompletionSource<bool>();

			//#判断ICON 其中MessageIconC是确认的ICON,MessageIconQ是询问的ICON
		    if (isconfirm)
		    {
		        CancelBtn.Visibility = Visibility.Collapsed;
		        MessageIconC.Visibility = Visibility.Visible;
		        MessageIconQ.Visibility = Visibility.Collapsed;
		    }
		    else
		    {
		        CancelBtn.Visibility = Visibility.Visible;
		        MessageIconC.Visibility = Visibility.Collapsed;
		        MessageIconQ.Visibility = Visibility.Visible;
		    }

			//#判断按钮的类型
			switch (ButtonIndex)
			{
			    case 0:
			        ConfirmBtn.SetValue(Button.StyleProperty, Application.Current.Resources["mButton"]);
			        ConfirmBtn.Content = "确认";
			        break;
			    case 1:
			        ConfirmBtn.SetValue(Button.StyleProperty, Application.Current.Resources["RButton"]);
			        ConfirmBtn.Content = "删除";
			        System.Media.SystemSounds.Exclamation.Play();
			        break;
			    case 2:
			        ConfirmBtn.SetValue(Button.StyleProperty, Application.Current.Resources["RButton"]);
			        ConfirmBtn.Content = "确认";
			        System.Media.SystemSounds.Exclamation.Play();
			        break;
			    case 3:
			        ConfirmBtn.SetValue(Button.StyleProperty, Application.Current.Resources["RButton"]);
			        ConfirmBtn.Content = "重试";
			        System.Media.SystemSounds.Exclamation.Play();
			        break;
			    case 4:
			        ConfirmBtn.SetValue(Button.StyleProperty, Application.Current.Resources["mButton"]);
			        ConfirmBtn.Content = "我知道了";
			        break;
			}

			//#这里写了4个类型,你可以再自定义更多

			//#这里要先关闭再打开!不然动态效果就没了。
			MessageGridPopup.IsOpen = false;
			MessageGridPopup.IsOpen = true;

			//#等待Task用户操作
			await taskCompletionSource.Task;

			//#操作后隐藏遮罩与Popup
			MessageGridBox.Visibility = Visibility.Collapsed;
			MessageGridPopup.IsOpen = false;

			//#返回Task的Result
			return taskCompletionSource.Task.Result;
		}
		 private void ConfirmBtn_Click(object sender, RoutedEventArgs e)
		 {
		     // 设置任务结果为true,并标记任务为已完成
		     taskCompletionSource.SetResult(true);
		 }

		 private void CancelBtn_Click(object sender, RoutedEventArgs e)
		 {
		     // 设置任务结果为false,并标记任务为已完成
		     taskCompletionSource.SetResult(false);
		 }

		private async void DeleteButton_Click(object sender, RoutedEventArgs e)
		{
		    bool result = await ShowMessageGridBoxAsync("点击删除后记录将被删除,该操作不可逆。", "确认要删除这条记录么?", false, 1);
		    if (result)
		    {
		    	ShowMessageGridBoxAsync("-你点击了删除-", "提示:");
		    }else
		    {
		    	ShowMessageGridBoxAsync("-你点击了取消-", "提示:");
		    }
		}
	}
}
- 1
- 2
- 3
- 4
- 5
- 6
- 7
- 8
- 9
- 10
- 11
- 12
- 13
- 14
- 15
- 16
- 17
- 18
- 19
- 20
- 21
- 22
- 23
- 24
- 25
- 26
- 27
- 28
- 29
- 30
- 31
- 32
- 33
- 34
- 35
- 36
- 37
- 38
- 39
- 40
- 41
- 42
- 43
- 44
- 45
- 46
- 47
- 48
- 49
- 50
- 51
- 52
- 53
- 54
- 55
- 56
- 57
- 58
- 59
- 60
- 61
- 62
- 63
- 64
- 65
- 66
- 67
- 68
- 69
- 70
- 71
- 72
- 73
- 74
- 75
- 76
- 77
- 78
- 79
- 80
- 81
- 82
- 83
- 84
- 85
- 86
- 87
- 88
- 89
- 90
- 91
- 92
- 93
- 94
- 95
- 96
- 97
- 98
- 99
- 100
- 101
- 102
- 103
- 104
- 105
- 106
- 107
- 108
- 109
感谢观看,代码还有需要完善的地方,欢迎指正。
- 第三届进博会刚刚圆满闭幕不久,就在无数企业还在回味着进博会的各种精彩瞬间,还在消化着进博会的巨大成果之际,进博会组委会就正式按下了新一届展会筹备工作的启动键,在上海的国家会展中心举办了第四届进博会的首场招展宣介会。中国国际进口博览会不再简单... [详细]
赞
踩
- 安全产品与等级保护:匹配与选择指南安全产品与等级保护:匹配与选择指南基本要求项测评项基本措施对应产品网络架构应保证网络各个部分的带宽满足业务高峰期需要;带宽管理流量控制系统应避免将重要网络区域部署在边界处,重要网络区域与其他网络区域之间应采... [详细]
赞
踩
- article
mitmdump 脚本使用python第三方包方法(报错:in script xxx.py: No module named ‘xxx‘)_mitmdump in script e:\work_code\appnium_frame\util
本文仅供学习交流使用,如侵立删!联系方式及demo下载见文末mitmdump-s调用py脚本时加载python第三方包会报错报错:inscriptxxx.py:Nomodulenamed'xxx'解决方法:importsyssys.path... [详细]赞
踩
- 断点回归设计可以帮助我们确定这些结构性断点的位置,并根据断点来拟合不同的线性模型。在实际应用中,可以根据数据的特点和需求调整断点回归模型的设置,例如尝试不同的断点位置、使用不同的线性模型等,以更好地理解数据中的结构性断点和拟合合适的模型。在... [详细]
赞
踩
- 时间:2019年6月阶段:大三下学期背景:物联网网关开发技术&物联网工程设计与实现设计课设名称:智能控制及网关系统实现摘要粤嵌GEC6818开发板作为系统的网关板,其为系统数据的中枢。启动串口收发,可以接收到ZigBee网络的协调器通过串口... [详细]
赞
踩
- 怎样用C语言实现多态,首先想到的应该是去模拟C++的虚函数。在C++中,每一个含有虚函数的类,都有一个虚函数表。对于类的每一个对象,都有一个指向虚函数表的指针。用C语言模拟这个过程。先考虑最简单的情况,只含有一个虚函数的类,并且只有构造函数... [详细]
赞
踩
- #include#definekey_S5000sbitKEY1=P2^0;sbitKEY2=P2^1;sbitOUT1=P3^5;sbitOUT2=P3^6;sbitOUT3=P3^7;sbitOUT4=P3^4;#definenum20... [详细]
赞
踩
- 1、TCP和UDP的区别TCP(TransmissionControlProtocol,传输控制协议)提供的是面向连接,可靠的字节流服务。即客户和服务器交换数据前,必须现在双方之间建立一个TCP连接,之后才能传输数据。并且提供超时重发,丢弃... [详细]
赞
踩
- article
npm install 卡在了 reify:rxjs: timing reifyNode,出现 gyp ERR find Python、gyp ERR find VS_reify:fsevents: timing reifynode:node_modules/jest
前言最近跑一个vue的项目,第一步肯定是npminstall,结果就出现我标题上写的那些情况,经过一番搜索,网上一堆方法尝试了,有说叫你用管理员权限运行npminstall--global--productionwindows-build-... [详细]赞
踩
- 关于virtual关键字的用法总结如下,有错误或者总结不到位的情况请能帮本人指出,非常感谢!Virtual是C++OO机制中很重要的一个关键字。只要是学过C++的人都知道在类Base中加了Virtual关键字的函数就是虚拟函数。基类的函数调... [详细]
赞
踩
- *1480.一维数组的动态和*给你一个数组nums。数组「动态和」的计算公式为:runningSum[i]=sum(nums[0]…nums[i])。**请返回nums的动态和。****示例1:**输入:nums=[1,2,3,4]*输出:... [详细]
赞
踩
- 转自:http://blog.csdn.net/zouxy09/article/details/7928771目标的检测大体框架:目标检测分为以下几个步骤:1、训练分类器所需训练样本的创建: 训练样本包括正样本和负样本;其中正例样本是指待... [详细]
赞
踩
- 大家好晚上好,现在AI技术的发展,它已经渗透到我们生活的各个层面。对于普通人来说,理解并有效利用AI技术不仅能增强个人竞争力,还能在日常生活中带来便利。无论是提高工作效率,还是优化日常任务,AI工具都可以扮演关键角色。上一篇文章整理了《快速... [详细]
赞
踩
- 本篇介绍了JMM、三大特性、指令重排序、happens-before、内存屏障、volatile、单例模式_loadstorevolatileloadstorevolatileJMM内存模型可以理解为在特定的操作协议下,对特定的内存或者高速... [详细]
赞
踩
- 为了匹配正则表达式,将要匹配的字符串进行对比,就能够筛选出需要的字符串;如需改进匹配模式,也可以修正和优化匹配规则,从而得到想要的字符串,达到事半功倍、提高效率的目的。Python编程技巧–使用正则表达式Python编程技巧–使用正则表达式... [详细]
赞
踩
- //#include//#define_CRT_SECURE_NO_WARNINGS//此处是解决scanf()报错问题,我是在编译器里解决,要运行的话请放开注释intrun_led(inta,intb)//开灯回调函数{return1;}... [详细]
赞
踩
- 1.全局数组:同一个程序中,供其他的.cpp文件调用在A.h或A.cpp中定义charbuf[10];这里执行的是默认初始化(为原生数据类型提供默认初始化)如果在B.cpp要用,就在其开头声明这个数组就行了:externcharbuf[10... [详细]
赞
踩
- 这个问题真是无语,网上完全没有相应的问题,全都是直接安装成功,真是醉了无论怎么设置,都是这样显示然后我一气之下,安装了旧版本2019-03-28的,然后,然后就成功了!浪费了我一天时间,哭笑不得。。。..._模拟器安装提示游戏包数据异常模拟... [详细]
赞
踩
- python3引入了一系列向后不兼容的变更。大多数不兼容的地方主要是:移除二义性和错误修正。1.字符串类型python中有两种字符类型:字节字符串和文本字符串。版本python2python3字节字符串strbytes文本字符串Unicod... [详细]
赞
踩
- 带宽beta即模型的计算性能,单位为FLOP/s。令I_max=计算平台算力/计算平台带宽,当模型的计算强度I小于平台的理论计算强度I_max,模型的计算能力P即I。大语言模型推理优化策略大模型推理优化策略7.1显存优化PagedAtten... [详细]
赞
踩

