
- 1图像处理之图像质量评价指标PSNR(峰值信噪比)
- 2Spring Boot的简介_系统介绍 spring boot
- 3网络信息安全之纵深防御
- 4GAN(二):VAE-GAN,BiGAN
- 5Docker CentOS 安装要求_docker-1.20.17
- 6嵌入式培训机构四个月实训课程笔记(完整版)-Linux ARM平台编程第四天-Bootloader编写2(物联技术666)
- 7HBase的shell操作_hbase shell操作
- 8【elastic search】JAVA操作elastic search
- 9爬虫工作量由小到大的思维转变---<第三十章 Scrapy Redis 第一步(配置同步redis)>
- 10区块链 技术 基本概念_软件工程区块链什么意思
报错!error: subprocess-exited-with-error python setup.py bdist_wheel did not run successfully._error: subprocess-exited-with-error 脳 python setup
赞
踩
报错!error: subprocess-exited-with-error python setup.py bdist_wheel did not run successfully
这类问题有通用的解决方法。
问题背景
使用pip安装包时出粗:
pip install -r requirements.txt
报错原文:
Building wheels for collected packages: fastcache, pycosat
  Building wheel for fastcache (setup.py) ... error
  error: subprocess-exited-with-error

  × python setup.py bdist_wheel did not run successfully.
  │ exit code: 1
  ╰─> [31 lines of output]
- 1
- 2
- 3
- 4
- 5
- 6
- 7
问题分析
这类问题有通用的解决方法,观察报错原文,是fastcache包下载出错,如果其他包下载出错也可以使用同样的方法解决:
Building wheel for fastcache (setup.py) … error
对于这种问题,需要将包先下载到本地再使用pip进行安装。
问题解决
从下面地址下载包:Archived: Unofficial Windows Binaries for Python Extension Packages
下载时需要选择对应的python版本,观察英文字母cp之后的数字,以fastcache‑1.1.0‑cp38‑cp38‑win_amd64.whl为例,cp38‑cp38代表这个包适配的包的版本是Python3.8的(最后的数字代表适配的平台,有32位和64位,一般PC选择64位的下载就行):
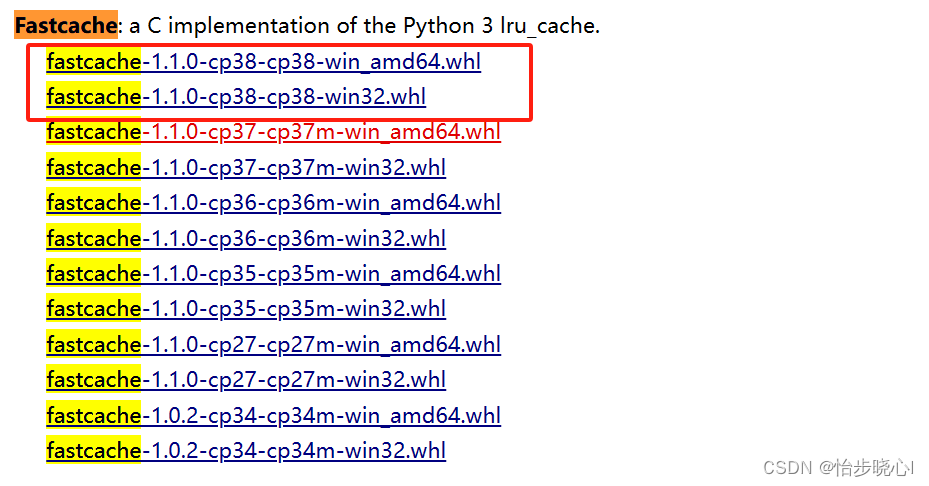
如果上面的包对应的python版本选错了会出现如下报错:
ERROR: fastcache-1.1.0-cp27-cp27m-win_amd64.whl is not a supported wheel on this platform.
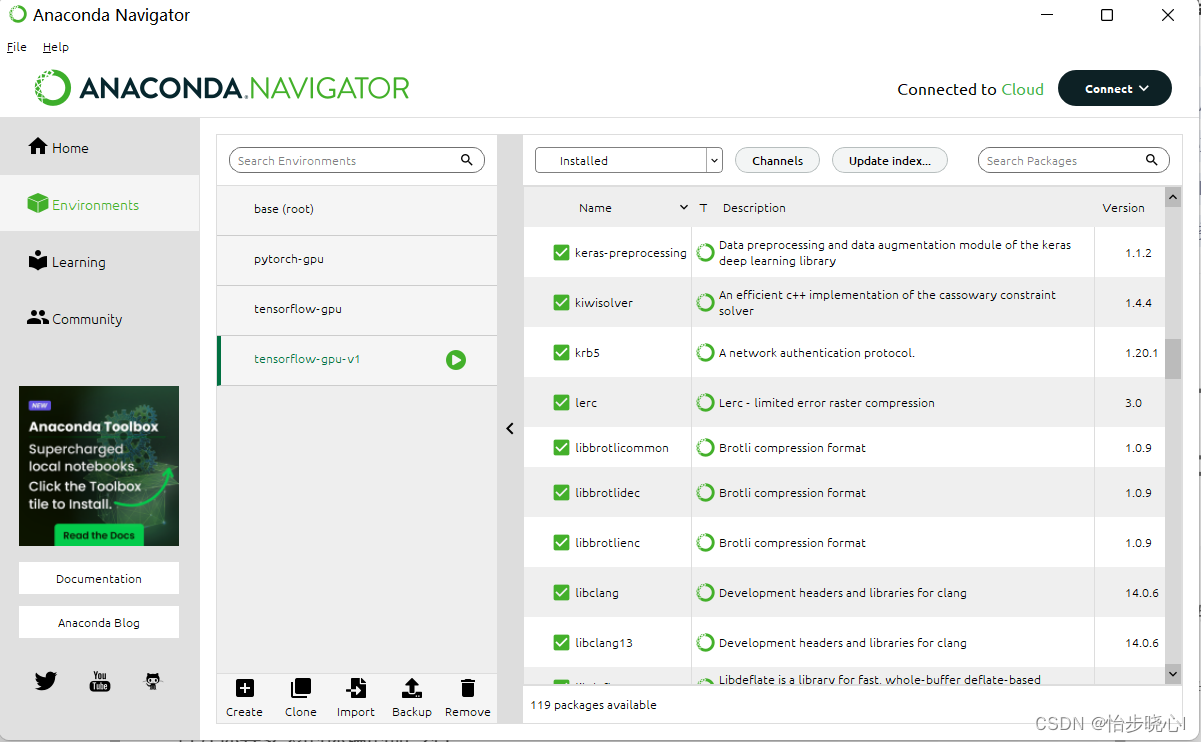
打开你要安装的环境的命令行,我这边使用的conda里面的tensorflow-gpu-v1的环境:
cd到你刚刚下载的文件的目录:
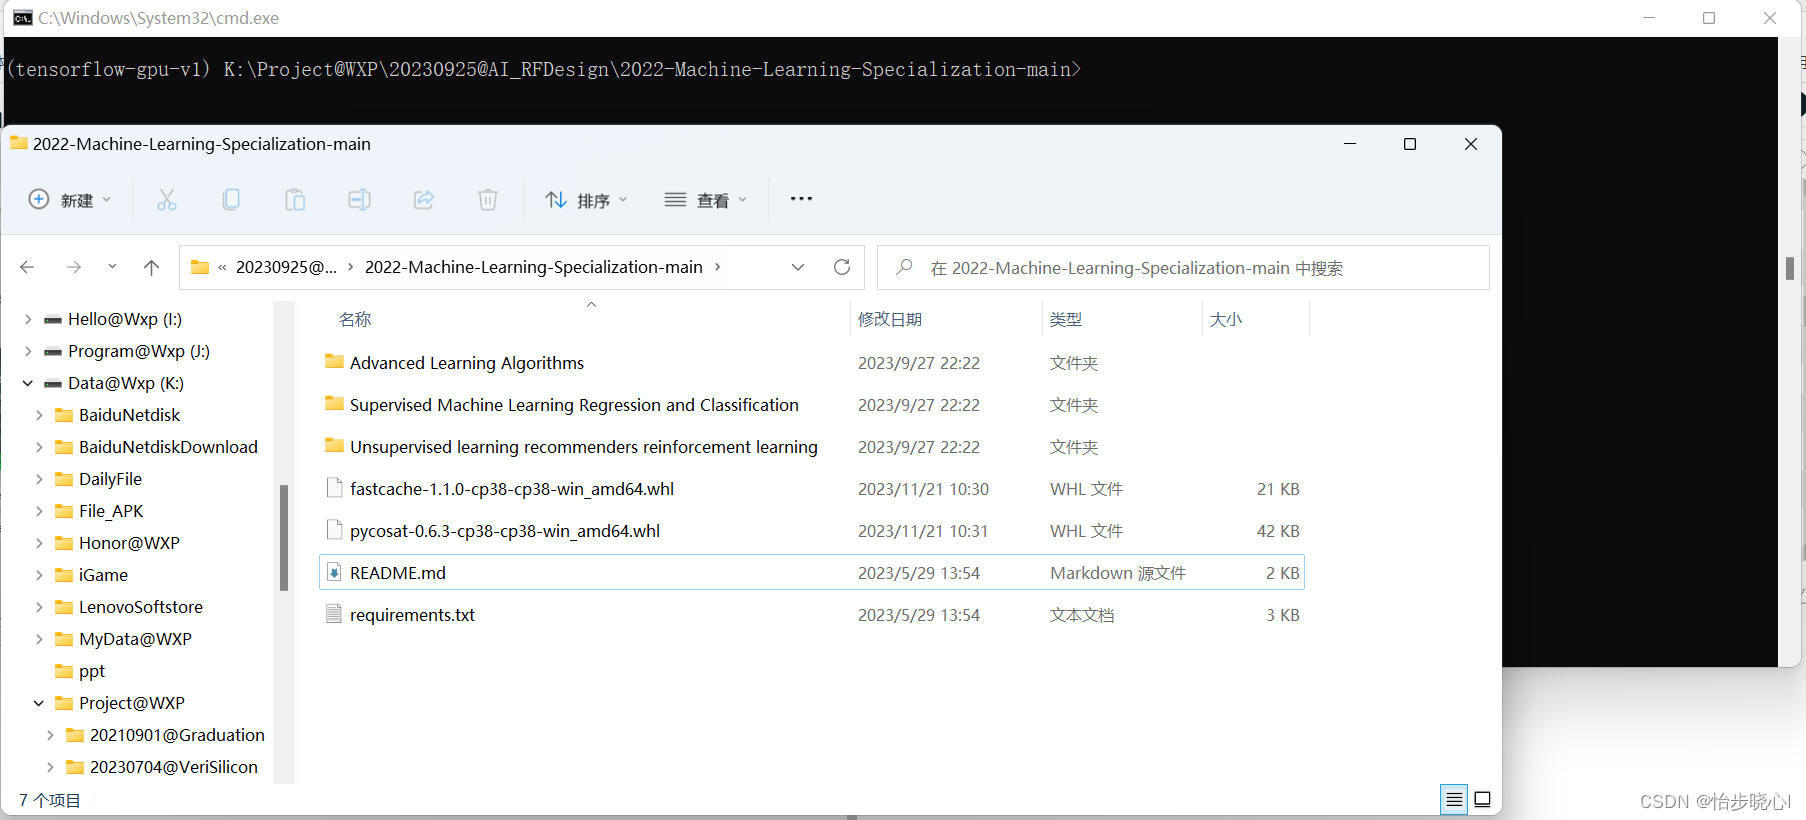
使用pip命令在本地进行包的安装,如:
pip install fastcache-1.1.0-cp38-cp38-win_amd64.whl
由此对应的包即可安装成功啦,每次从requirements下载包总有几个要手动下载安装。
 文章浏览阅读1.5w次,点赞124次,收藏198次。Pygame是一个基于Python的游戏开发库,它提供了一系列的工具和接口,使开发人员能够轻松地创建各种类型的游戏,包括2D游戏和简单的3D游戏。Python“贪吃蛇”游戏,在不断改进中学... [详细]
赞
踩
- 文章浏览阅读6.5k次,点赞46次,收藏39次。FastAPI库(Python的Web框架)基本使用指南(二)FastAPI库(Python的Web框架)基本使用指南(二)核心功能定义路由FastAPI中定义路由的方式主要有两种,一种是使用... [详细]
赞
踩
- 文章浏览阅读3k次,点赞4次,收藏16次。Python是一种高级编程语言,它具有简单、易学、高效等特点。而Pythonget()函数是其中一个重要的函数。该函数用于返回指定键的值,如果键不存在,则返回默认值None。下面将从各个方面对Pyt... [详细]
赞
踩
- 文章浏览阅读1.1w次,点赞55次,收藏66次。本文仅分享Githack工具基本安装及使用相关知识不承担任何法律责任。Git是一个非常流行的开源分布式版本控制系统,它被广泛用于协同开发和代码管理。许多网站和应用程序都使用Git作为其代码管理... [详细]
赞
踩
- 文章浏览阅读6.9k次,点赞46次,收藏122次。get()是获取网页最常用的方式,在调用requests.get()函数后,返回的网页内容会保存为一个Response对象,其中,get()函数的参数url必须采用HTTP或HTTPS方式访... [详细]
赞
踩
- 文章浏览阅读1.5k次,点赞44次,收藏46次。6.2.4修改字典中的值要修改字典中的值,可依次指定字典名、用方括号括起的键以及与该键相关联的新值。我们首先定义了一个表示外星人alien_0的字典,其中只包含这个外星人的颜色。接下来,我们将... [详细]
赞
踩
- 文章浏览阅读3.8k次。本文介绍了Django框架中文件上传和处理的基本原理和实现方法,以及阿里云oss的对接方法。Django提供了一些内置的功能和工具,使文件上传变得简单和安全。它提供了一个处理文件上传的高级API,可以验证上传的文件... [详细]
赞
踩
- 文章浏览阅读1k次,点赞80次,收藏72次。本文主要介绍了集合和字典相关的知识,其中集合最大的特点就是无序和无重复,有三个特殊的操作,取出差集,消除差集,集合合并;字典最大的特点就是每个数据都是KeyValue键值对,且Key不可重复【Py... [详细]
赞
踩
- 文章浏览阅读4.4k次,点赞41次,收藏263次。深入探索Python的Pandas库:从核心数据结构到高级特性,本指南为你提供了全面的Pandas知识概览。无论你是数据初学者还是专家,都可在此找到宝贵的insights和技巧,助力你的数据... [详细]
赞
踩
- 文章浏览阅读2k次,点赞104次,收藏87次。OpenCV(OpenSourceComputerVisionLibrary)是一个开源的计算机视觉库,提供了丰富的图像处理和计算机视觉算法。它由一组用C++编写的函数和工具组成,同时也支持多种... [详细]
赞
踩
- 文章浏览阅读1.1w次,点赞43次,收藏270次。python-爬虫(可直接使用)python-爬虫(可直接使用)爬虫(WebScraping)是指通过编程自动化地获取互联网上的信息的过程。爬虫的目的通常是从网页中抓取数据,进行数据分析、处... [详细]
赞
踩
- 文章浏览阅读1.5k次,点赞8次,收藏12次。MAE的误差大概在0.11,以下数据均是预测未知数据。Holt-Winters模型,也称为三重指数平滑模型,是一种经典的时间序列预测模型,用于处理具有趋势和季节性的时间序列数据。Holt-Win... [详细]
赞
踩
- article
Unable to create process using ‘D:\Anaconda3\python.exe D:\Anaconda3\Scripts\conda-script.py shell.c
文章浏览阅读1w次,点赞20次,收藏17次。记录一下和Anacondaprompt斗智斗勇的一天,早上打开电脑,准备用prompt打开jupyter写点东西,结果人傻啦,报错无法启动进程。。。注意是先报错,后进入起始位置可以输入cmd指令,... [详细]赞
踩
 文章浏览阅读5.6k次,点赞2次,收藏12次。在“installcsvba”这个文件夹中新建一个名为“template”的文件夹,其中存放着所有csv文件的二进制文件,比如:接下来,我们以“installcsvba”这个工程为例,来介绍一下... [详细]
赞
踩
- 文章浏览阅读2.2k次。url:要发送请求的URL地址。data:要发送的数据。默认为None。timeout:超时时间,单位为秒。默认为socket默认的超时时间。cafile:包含CA证书的文件路径。... [详细]
赞
踩
- 文章浏览阅读4.1k次,点赞95次,收藏100次。维诺图的应用涵盖了多个领域,包括计算机图形学、地理信息系统、计算机视觉等。本文介绍维诺图在运动规划中的概念,并结合C++/Python/Matlab三种实现加深理解,为后续基于维诺图的路径规... [详细]
赞
踩
- 文章浏览阅读5.5k次,点赞123次,收藏181次。上述代码完成了一个简单的情感分析任务。根据具体需求和数据集,您可能需要调整预处理步骤、特征提取方法和支持向量机参数。此外,还可以尝试使用其他机器学习算法,如神经网络、决策树、随机森林等,以... [详细]
赞
踩
- 文章浏览阅读6.9k次,点赞26次,收藏138次。LSTM(LongShort-TermMemory)是一种常用的循环神经网络(RNN)模型,用于处理序列数据,具有记忆长短期的能力。在时间序列预测中,LSTM既可以多元预测机制又可以作为单元... [详细]
赞
踩
- 文章浏览阅读1.1k次。SegmentAnything可以实现对任意物体的识别和分割提供了简单易用的接口,用户只需要通过提示,即可进行物体识别和分割操作,今天给大家分享一下SAM的源码。【Python&语义分割】SegmentAnythin... [详细]
赞
踩
- 文章浏览阅读4.3w次,点赞291次,收藏1.3k次。本文一步一步地教你如何用Pyinstaller模块将Python程序打包成exe文件!这篇教程绝对是全网最全面、最详细的教程!包含五种打包的方法,从简单到复杂依次是:一般打包方法、虚拟环... [详细]
赞
踩

