热门标签
热门文章
- 1毕设选题 基于机器学习的情感分类与分析算法设计与实现(源码+论文)
- 2uniapp使用uview搭建小程序脚手架_uniapp uview 脚手架
- 3蓝桥杯算法基础(15):十大排序算法(堆排序)c语言版
- 4苹果笔记本android studio安装教程,MAC下如何安装AndroidStudio_android studio mac
- 5几分钟打造自己的简历生成器,收割offer!_python生成pdf简历
- 6模拟电子技术基础 第二章 常用半导体器件原理_扩散电流和漂移电流
- 7Origin画图技巧之回归预测(拟合)_orign 拟合图
- 8大学考试分数越高学分越多吗_大学之路 | 伯克利学姐讲学分,选课和转专业那些事...
- 9《最新出炉》系列入门篇-Python+Playwright自动化测试-9-页面(page)_playwright page对象能关闭浏览器不
- 10【论文笔记】FastPillars: A Deployment-friendly Pillar-based 3D Detector
当前位置: article > 正文
鸿蒙ArkTS实现http,axios网络请求_arkts怎么条用http
作者:不正经 | 2024-03-22 05:07:30
赞
踩
arkts怎么条用http
实现http请求,在ArkTS中我们可以直接使用http如下代码
- import http from '@ohos.net.http'
- @Entry
- @Component
- struct HttpPage {
- @State message: string = 'Hello World'
-
- build() {
- Column({space:20}) {
- Row(){
- Button('发送http请求')
- .onClick(()=>{
- let httpRequest = http.createHttp();
- httpRequest.request(
- 'http://localhost:8018/device/getDeviceDetail',
- {
- method:http.RequestMethod.POST,
- extraData:{
- sn:'1001'
- }
- }
- )
- .then(resp=>{
- console.log("resp=>",JSON.stringify(resp))
- if(resp.responseCode === 200){
- console.log(resp.result.toString())
- }
- }).catch(err=>{
- console.log('请求错误err=>',err)
- })
-
- })
- }
-
- }
- .width('100%')
- .height('100%')
- }
- }

实现axios我们需要使用一个第三方工具
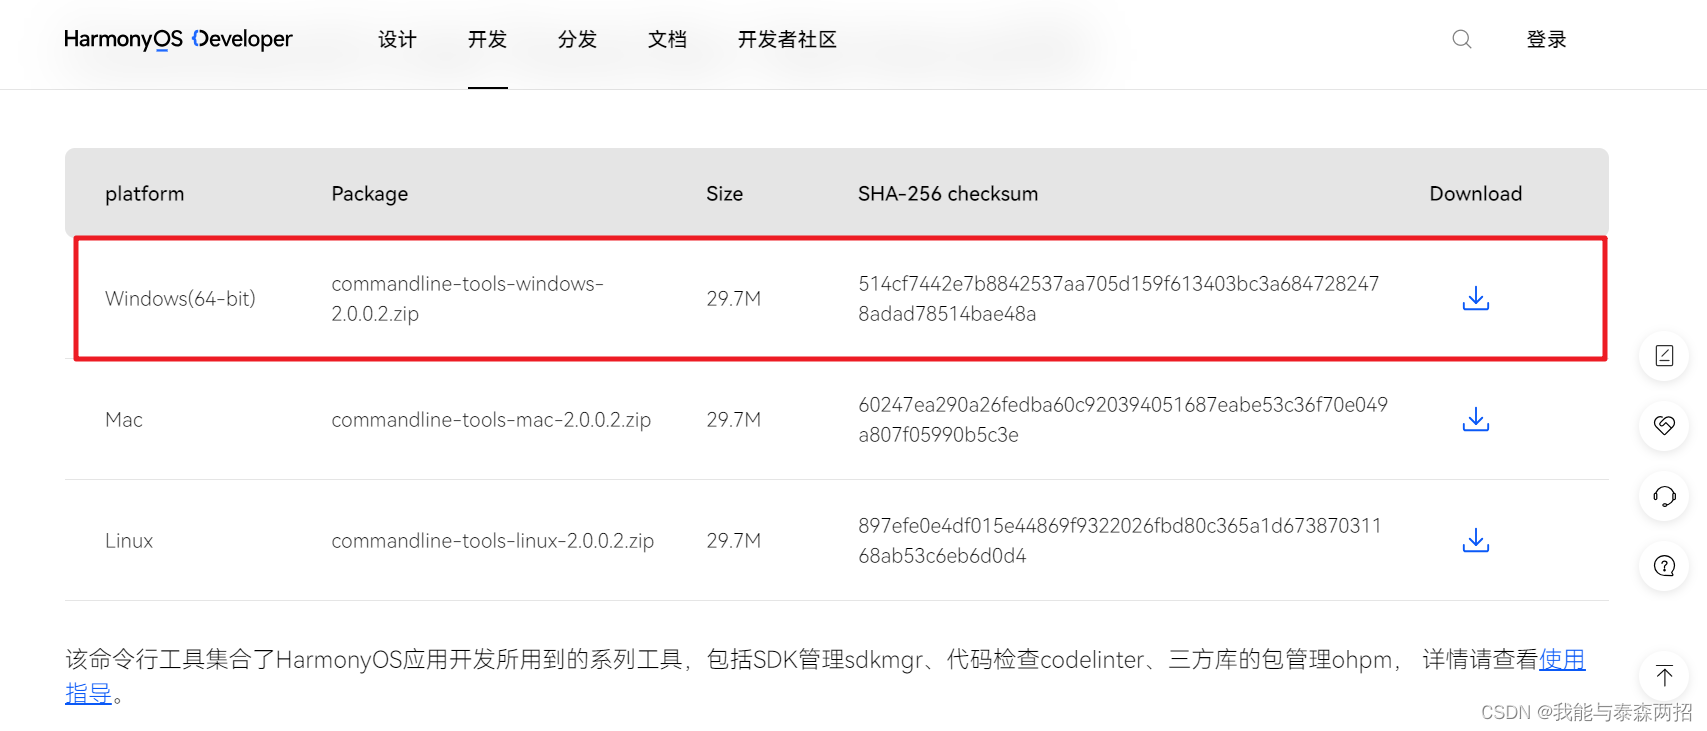
- 下载ohpm工具包,点击链接获取。

2. 解压文件,进入“ohpm/bin”目录,打开命令行工具,执行如下指令初始化ohpm
Windows环境下执行:
init.bat
如果init.bat不可以使用./init.bat
3. 将ohpm配置到环境变量中。
- export OHPM_HOME=/home/xx/Downloads/ohpm #本处路径请替换为ohpm的安装路径
- export PATH=${OHPM_HOME}/bin:${PATH}
4. 安装完成后,执行ohpm -v 在终端中显示版本号安装成功
5. 安装axios库,在链接
找到@ohos/axios
6. 在当前项目终端目录下执行
ohpm install @ohos/axiosOpenHarmony三方库中心仓需要网络权限,在module.json5文件中将以下代码配置到module中
- "requestPermissions": [
- {
- "name": 'ohos.permission.INTERNET'
- }
- ],
新建一个.ets文件,如下代码写入
- import http from '@ohos.net.http'
- import axios from '@ohos/axios'
- @Entry
- @Component
- struct HttpPage {
- @State message: string = 'Hello World'
-
- build() {
- Column({space:20}) {
- Row(){
- Button('发送http请求')
- .onClick(()=>{
- let httpRequest = http.createHttp();
- httpRequest.request(
- 'http://localhost:8018/device/getDeviceDetail',//请求路径http://localhost:8018/device/getDeviceDetail
- {
- method:http.RequestMethod.POST,
- extraData:{
- sn:'1001'
- }
- }
- )
- .then(resp=>{
- console.log("resp=>",JSON.stringify(resp))
- if(resp.responseCode === 200){
- console.log(resp.result.toString())
- }
- }).catch(err=>{
- console.log('请求错误err=>',err)
- })
-
- })
-
- }
- Row(){
- Button('发送axios请求')
- .onClick(()=>{
- axios.post(
- 'http://localhost:8018/device/getDeviceDetail',
- {
- sn:'1001'
- }
- ).then(response=>{
- console.log("response=>",JSON.stringify( response))
- }).catch(err=>{
- console.log('err=>',err)
- })
- })
-
- }
- }
- .width('100%')
- .height('100%')
- }
- }

就可以实现axios请求了,当然后续可以将http和axios封装成一个单独的文件,方便后续项目开发的接口请求
注意:网络请求接口需要替换成自己项目的相应接口,本文中接口地址为本地地址。
声明:本文内容由网友自发贡献,不代表【wpsshop博客】立场,版权归原作者所有,本站不承担相应法律责任。如您发现有侵权的内容,请联系我们。转载请注明出处:https://www.wpsshop.cn/w/不正经/article/detail/285499
推荐阅读
相关标签


