- 1Java 对接智谱 AI(官方 sdk 是真垃圾)_智普ai java 调用
- 2基于ROS搭建简易软件框架实现ROV水下目标跟踪(十)--程序解析之手动控制_rov运动控制 csdn
- 304SpringCloud 消息中间件_spring cloud 消息中间件
- 4python 自然语言处理 词性标注_词性标注器用 pos_tagger(sentence) 来实现
- 5华为“全球最大研发中心”今年建成!预计招聘3.5万人!_华为全球最大研发中心年中启用,招募3.5万名研发人员
- 6基于springboot的在线导游预约系统java+vue
- 7Word2Vec词向量模型代码_根据已有词表,实现词转换为词向量代码
- 8谁说 Python 搞不定 AI 模型微服务?!Towhee 来了!_towhee 需要gpu吗
- 9Python+django+vue开发的家教信息管理系统
- 10.net 父子级关联排序_LTR排序算法LambdaRank原理详解
嵌入式Linux(一):东山派壹号 ubuntu开发环境配置_gcc version 8.2.1 20180802 (gnu toolchain for the
赞
踩
前言
最近要学嵌入式Linux,网上查了下,被价格吓死了,基本上都是四五百或以上。终于找到了东山派壹号这块板子。主板和底板加起来两百多。本文,主要介绍这块板子 嵌入式linux开发环境的搭建,包括相关资料链接,交叉编译环境,tftp上传程序到板子。买板子的时候,建议主板底板都买,因为在上传程序时,需要底板的网路接口。
嵌入式Linux(一):东山派壹号 ubuntu开发环境配置
(一)相关资料链接
- 东山派壹号官方文档:https://dongshanpi.com/DongshanPi-One/01-BoardIntroduction/
- MobaXterm可以通过访问页面 https://mobaxterm.mobatek.net/ 获取 (推荐使用)。
- 交叉编译环境配置官方文档 https://dongshanpi.com/DongshanPi-One/05-GetSourceCode/
(二)上电连接
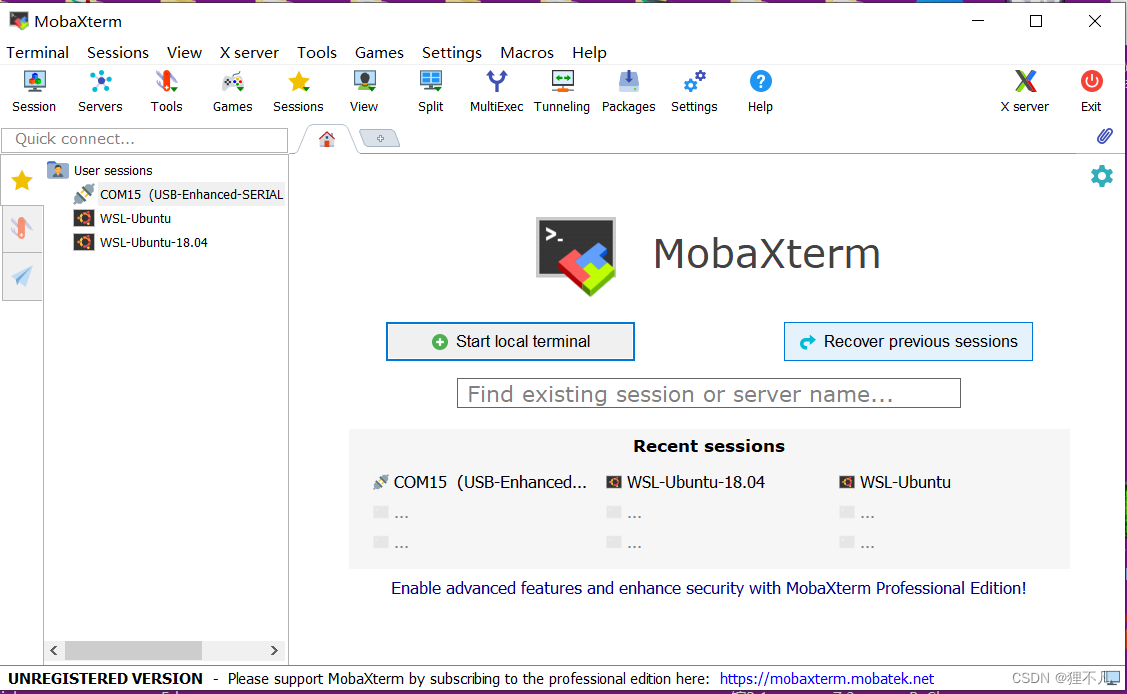
1. 安装 MobaXterm
在连接电脑前,需要安装MobaXterm串口访问软件,可以到https://mobaxterm.mobatek.net/ 下载安装。
2. 使用Type-C线连接板子一电脑
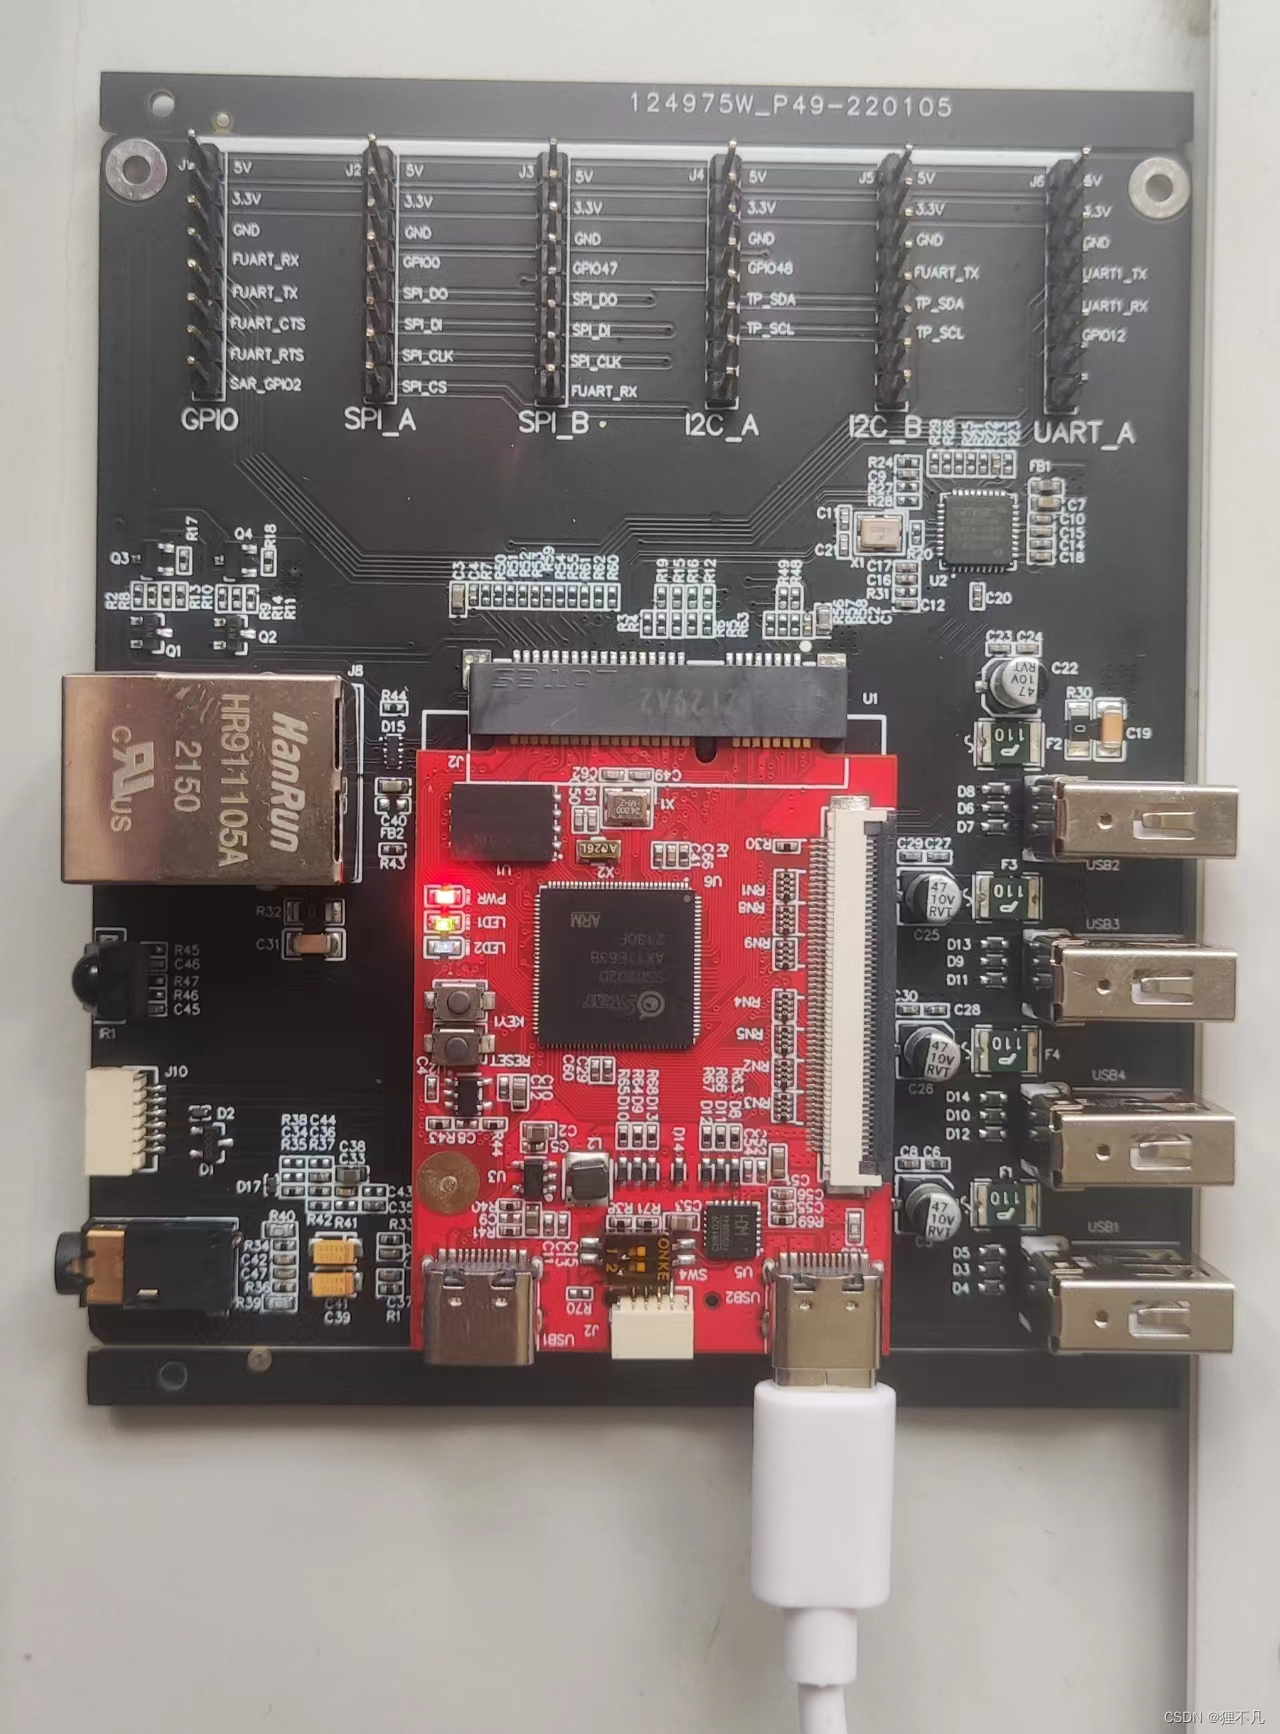
3.使用Mobaxterm登录串口
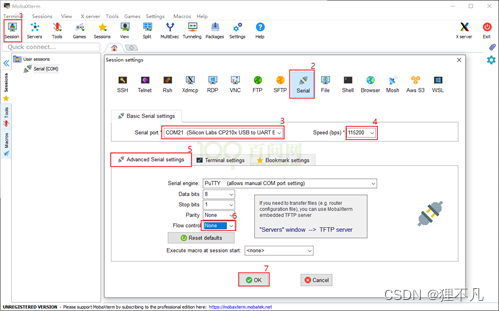
打开MobaXterm,点击左上角的“Session”,在弹出的界面选中“Serial”,如下图所示选择端口号(前面设备管理器显示的端口号COM21)、波特率(Speed 115200)、流控(Flow Control: none),最后点击“OK”即可。步骤如下图所示。 注意:流控(Flow Control)一定要选择none,否则你将无法在MobaXterm中向串口输入数据 连接
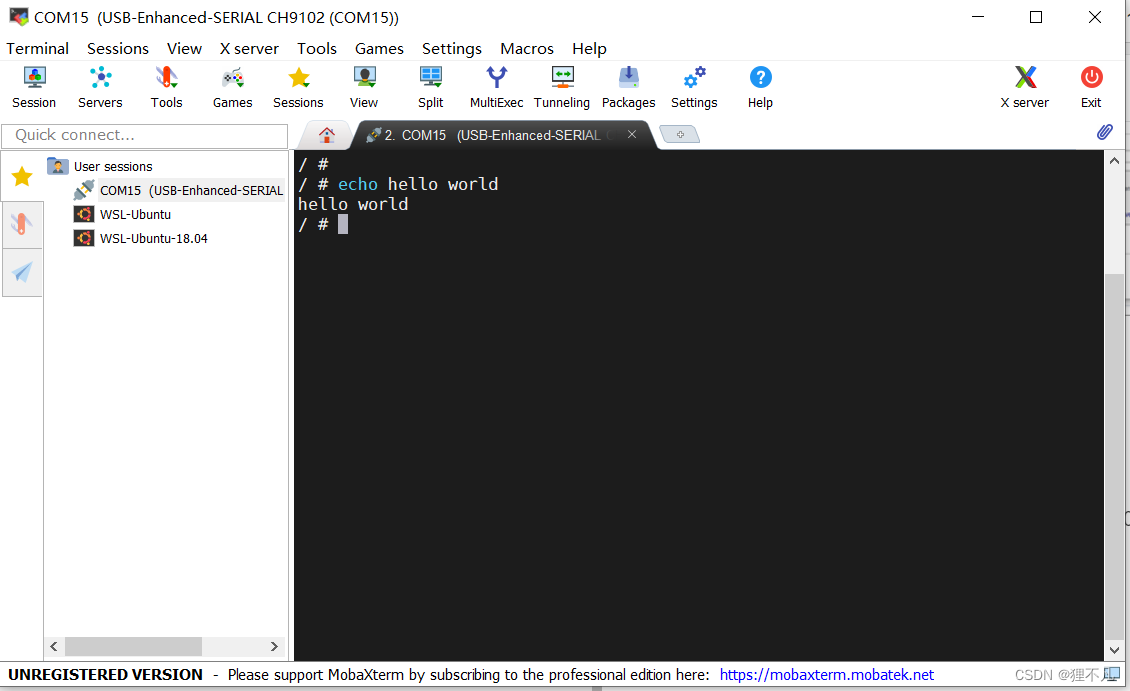
4.成功界面
5.ubuntu minicom 连接开发板
直接参考:ubuntu minicom使用USB串口连接shell(ubuntu下的xshell)
//安装
sudo apt-get install minicom
//修改serial串口
sudo minicom -s
//我的电脑ubuntu18.04,串口号是
/dev/ttyACM0
- 1
- 2
- 3
- 4
- 5
- 6
(三)ubuntu 交叉环境配置
在进行环境配置之前,需要有一个ubuntu18.04的系统环境,可以用VMWARE来跑双系统,也可以安装win10下的ubuntu18.04子系统,我这里使用的是win10的ubuntu子系统。
配置win10 ubuntu子系统 可以参考 https://blog.csdn.net/liangzc1124/article/details/108952232
参考
1.安装编译需要的lib & tool
book@100ask:~$ sudo apt-get install libc6-dev-i386
book@100ask:~$ sudo apt-get install lib32z1 lib32ncurses5
book@100ask:~$ sudo apt-get install libuuid1:i386
book@100ask:~$ sudo apt-get install cmake
book@100ask:~$ sudo apt-get install libncurses5-dev libncursesw5-dev
book@100ask:~$ sudo apt install bc
book@100ask:~$ sudo apt-get install xz-utils
book@100ask:~$ sudo apt-get install automake
book@100ask:~$ sudo apt-get install libtool
book@100ask:~$ sudo apt-get install libevdev-dev
book@100ask:~$ sudo apt-get install pkg-config
book@100ask:~$ sudo apt-get install openssh-server
book@100ask:~$ sudo apt-get install repo
//改sh为bash
book@100ask:~$  sudo rm /bin/sh
book@100ask:~$  sudo ln -s /bin/bash /bin/sh
- 1
- 2
- 3
- 4
- 5
- 6
- 7
- 8
- 9
- 10
- 11
- 12
- 13
- 14
- 15
- 16
2.获取源码
book@100ask:~$ git clone https://e.coding.net/codebug8/repo.git
book@100ask:~$ mkdir DongshanPiOne-TAKOYAKI  && cd  DongshanPiOne-TAKOYAKI
book@100ask:~/DongshanPiOne-TAKOYAKI$ ../repo/repo init -u  https://gitee.com/weidongshan/manifests.git -b linux-sdk -m  SSD202D/dongshanpi-one_takoyaki_dlc00v030.xml --no-repo-verify
book@100ask:~/DongshanPiOne-TAKOYAKI$ ../repo/repo sync -j4
- 1
- 2
- 3
- 4
3.添加环境变量
//打开环境变量文件
book@100ask:~$ vim  ~/.bashrc
//在行尾添加或修改,加上下面几行:
export ARCH=arm
export CROSS_COMPILE=arm-linux-gnueabihf-
export PATH=$PATH:/home/book/DongshanPiOne-TAKOYAKI/gcc-arm-8.2-2018.08-x86_64-arm-linux-gnueabihf/bin
//执行 source ~/.bashrc 命令使其生效
source ~/.bashrc
- 1
- 2
- 3
- 4
- 5
- 6
- 7
- 8
4.测试编译环境
book@100ask:~$ arm-linux-gnueabihf-gcc -v
Using built-in specs.
COLLECT_GCC=arm-linux-gnueabihf-gcc
COLLECT_LTO_WRAPPER=/home/book/DongshanPiOne-TAKOYAKI/gcc-arm-8.2-2018.08-x86_64-arm-linux-gnueabihf/bin/../libexec/gcc/arm-linux-gnueabihf/8.2.1/lto-wrapper
Target: arm-linux-gnueabihf
Configured with: /tmp/dgboter/bbs/bc-b1-2-11--rhe6x86_64/buildbot/rhe6x86_64--arm-linux-gnueabihf/build/src/gcc/configure --target=arm-linux-gnueabihf --prefix= --with-sysroot=/arm-linux-gnueabihf/libc --with-build-sysroot=/tmp/dgboter/bbs/bc-b1-2-11--rhe6x86_64/buildbot/rhe6x86_64--arm-linux-gnueabihf/build/build-arm-linux-gnueabihf/install//arm-linux-gnueabihf/libc --enable-gnu-indirect-function --enable-shared --disable-libssp --disable-libmudflap --disable-libsanitizer --enable-checking=release --enable-languages=c,c++,fortran --with-gmp=/tmp/dgboter/bbs/bc-b1-2-11--rhe6x86_64/buildbot/rhe6x86_64--arm-linux-gnueabihf/build/build-arm-linux-gnueabihf/host-tools --with-mpfr=/tmp/dgboter/bbs/bc-b1-2-11--rhe6x86_64/buildbot/rhe6x86_64--arm-linux-gnueabihf/build/build-arm-linux-gnueabihf/host-tools --with-mpc=/tmp/dgboter/bbs/bc-b1-2-11--rhe6x86_64/buildbot/rhe6x86_64--arm-linux-gnueabihf/build/build-arm-linux-gnueabihf/host-tools --with-isl=/tmp/dgboter/bbs/bc-b1-2-11--rhe6x86_64/buildbot/rhe6x86_64--arm-linux-gnueabihf/build/build-arm-linux-gnueabihf/host-tools --with-arch=armv7-a --with-fpu=neon --with-float=hard --with-arch=armv7-a --with-pkgversion='GNU Toolchain for the A-profile Architecture 8.2-2018-08 (arm-rel-8.23)'
Thread model: posix
gcc version 8.2.1 20180802 (GNU Toolchain for the A-profile Architecture 8.2-2018-08 (arm-rel-8.23))
book@100ask:~$
- 1
- 2
- 3
- 4
- 5
- 6
- 7
- 8
- 9
(四)通过网线连接板子和电脑
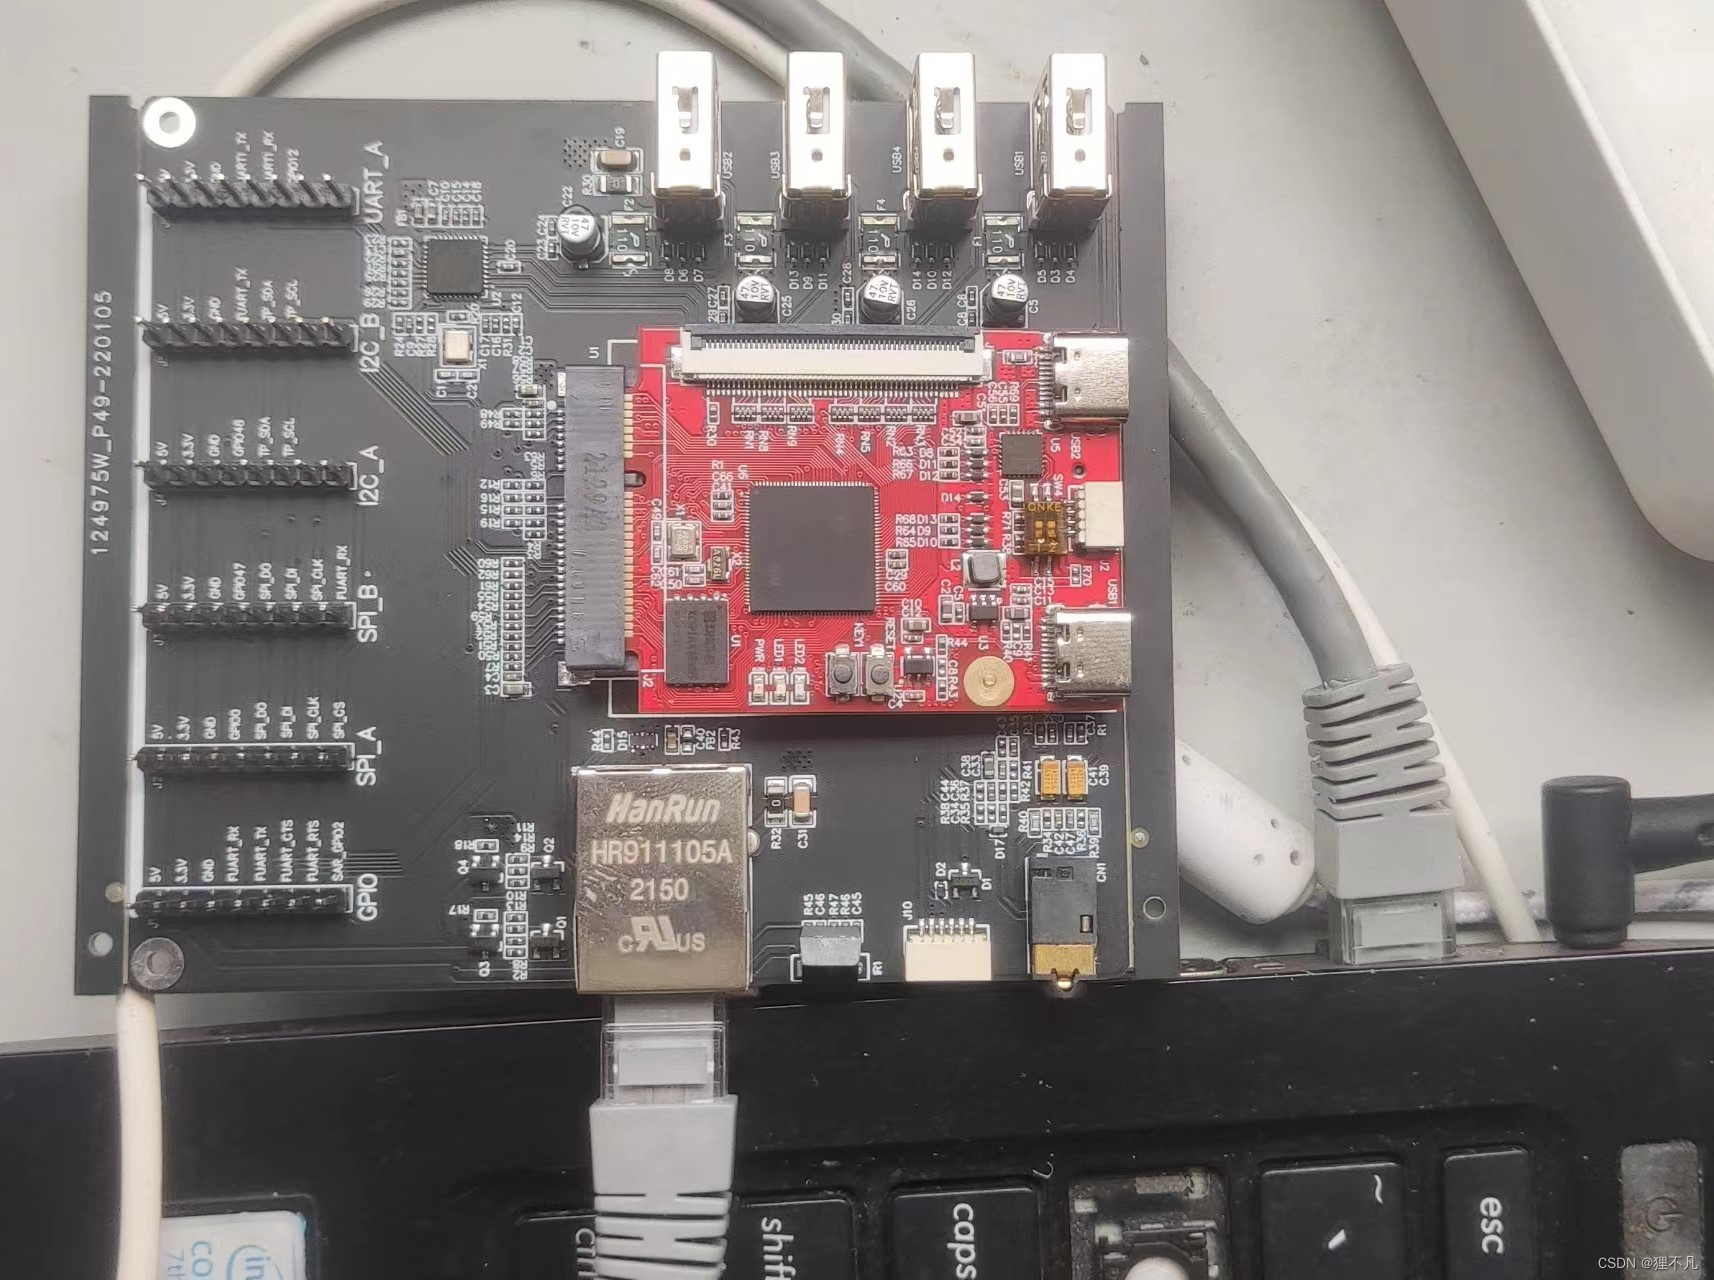
1.接线
若你的电脑有RJ45接口,可以用两头RJ45接口的将板子连接电脑,若没有,可以使用USB转RJ45接口来连接电脑。
2.设置windows 路由 IP
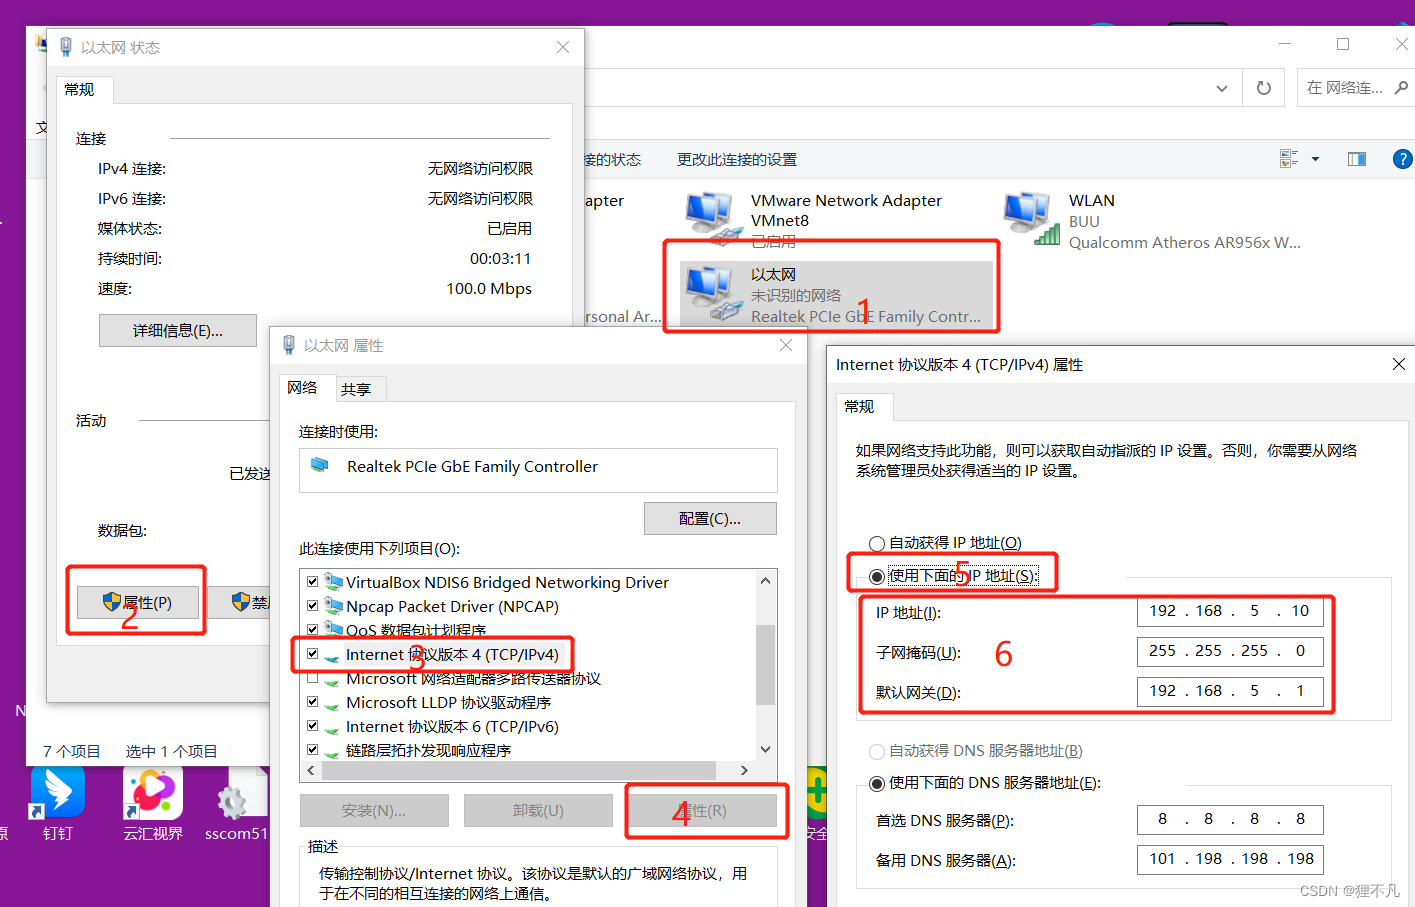
ubuntu&windows:192.168.5.10
板子:192.168.5.10
物理连接到板子后,在windows上查看网络连接,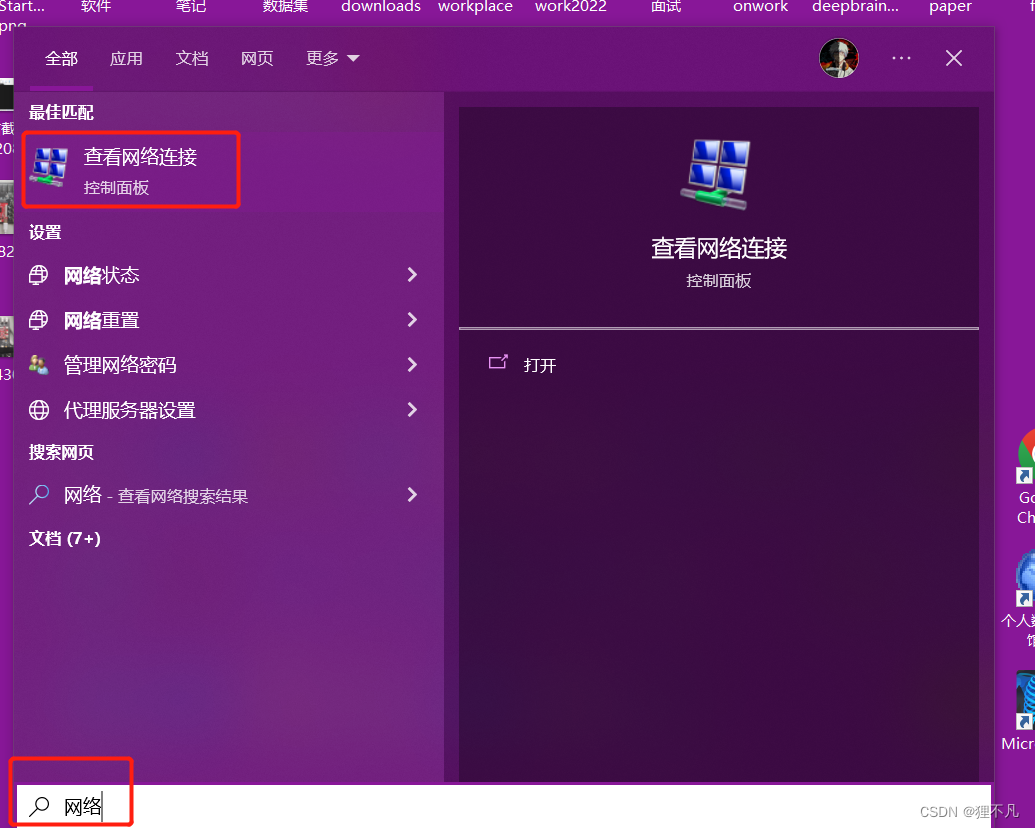
右键,点击状态,然后按下图顺序,设置IP,mask
3.设置板子路由 IP
通过MobaXterm 连接板子,通过下面命令设置IP
//设置
ifconfig eth0 192.168.5.9
//测试
ifconfig
- 1
- 2
- 3
- 4

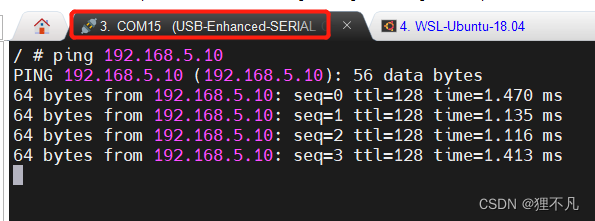
4.测试网络连通状态
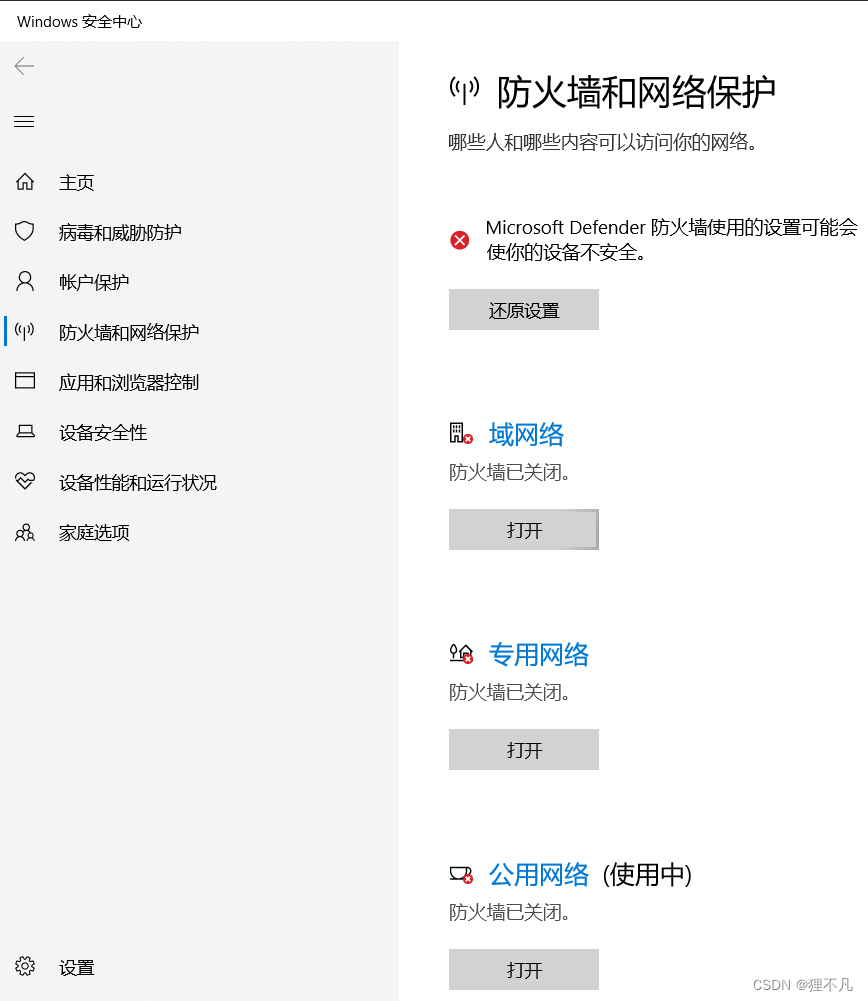
在测试之前需要保证,防火墙是关闭的
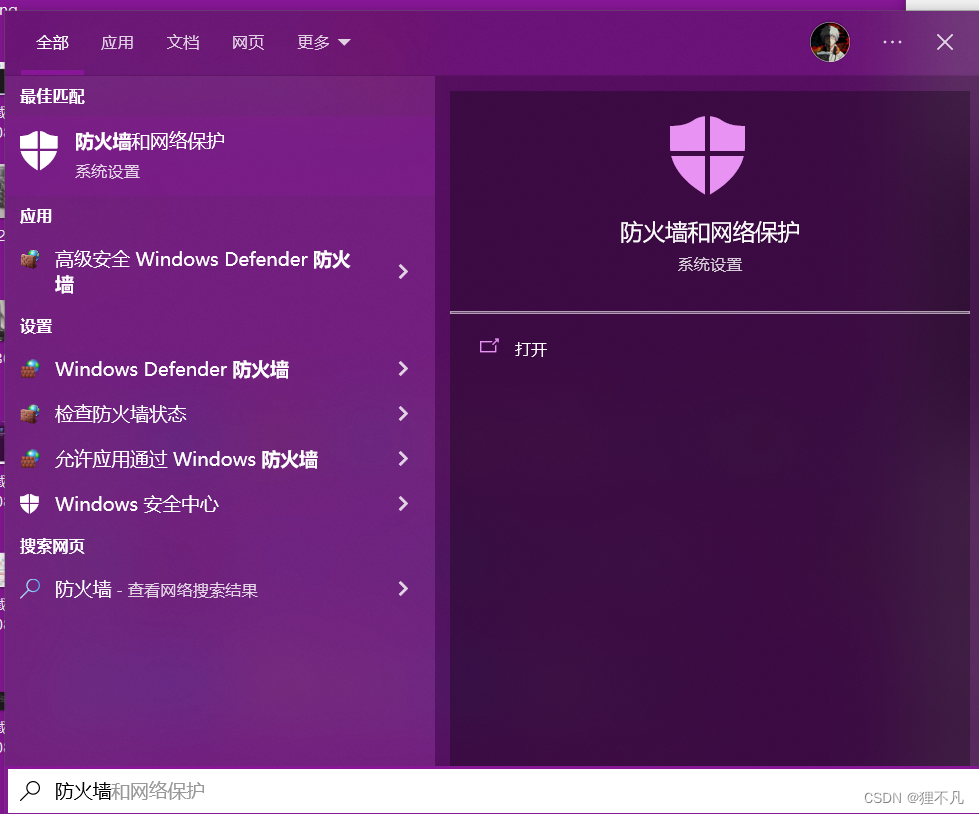
在板子上输入命令:ping 192.168.5.10
在ubuntu上输入命令:ping 192.168.5.9

(五)安装TFTP
1.ubuntu 端
//安装软件
sudo apt-get install tftp-hpa tftpd-hpa
//然后,创建 TFTP 服务器工作目录,并打开 TFTP 服务配置文件,如下:
mkdir -p /home/book/tftpboot
sudo chmod 777 /home/book/tftpboot
sudo vim /etc/default/tftpd-hpa
//在配置文件/etc/default/tftpd-hpa 中,添加以下字段:
TFTP_DIRECTORY="/home/book/tftpboot"
TFTP_OPTIONS="-l -c -s"
//最后,重启 TFTP 服务:
sudo service tftpd-hpa restart
//查看 tftp 服务是否在运行,运行如下命令,即可查看是否在后台运行。
ps -aux | grep "tftp"
- 1
- 2
- 3
- 4
- 5
- 6
- 7
- 8
- 9
- 10
- 11
- 12
- 13
2.板子端 文件上传下载
//嵌入式开发板下载 ubuntu端的
tftp -g -r hello 192.168.5.10

//嵌入式开发板发送
tftp -p -l note.txt 192.168.5.10
- 1
- 2
- 3
- 4
- 5


(六)helloworld
1.编译hello.c
/*hello.c*/
/* 执行命令: ./hello weidongshan
 * argc = 2
 * argv[0] = ./hello
 * argv[1] = weidongshan
 */
#include <stdio.h>
int main(int argc, char **argv)
{
        if (argc >= 2)
                printf("Hello, %s!\n", argv[1]);
        else
                printf("Hello, world!\n");
        return 0;
}
- 1
- 2
- 3
- 4
- 5
- 6
- 7
- 8
- 9
- 10
- 11
- 12
- 13
- 14
- 15
- 16
- 17
2.ubuntu 测试编译
gcc hello.c -o hello
./hello lingcb
- 1
- 2

3.交叉编译
//交叉编译
arm-linux-gnueabihf-gcc hello.c -o hello
//移动到ubuntu tftp服务器根目录/home/book/tftpboot
cp hello /home/book/tftpboot
ls /home/book/tftpboot
- 1
- 2
- 3
- 4
- 5

4.板子通过tftp获取编译后的程序
/home # tftp -g -r hello 192.168.5.10
hello                100% |*******************************| 12052   0:00:00 ETA
/home # chmod 777 ./hello
/home # ./hello
Hello, world!
- 1
- 2
- 3
- 4
- 5

结语
终于是完成了入门,这些资料主要是参考韦东山老师的视频,文档等资料的,有看不懂的,可以到B站搜索,韦东山linux嵌入式应用。下面是一些资料
【1】嵌入式Linux应用开发完全手册_韦东山全系列视频文档全集V2.4 链接:https://pan.baidu.com/s/1qS0Mo5YVS43wYGZdWq1MmA?pwd=w23p 提取码:w23p
【2】嵌入式Linux教程_韦东山手把手教你嵌入式Linux快速入门到精通https://www.bilibili.com/video/BV1w4411B7a4?spm_id_from=333.337.search-card.all.click
【3】东山Pi壹号-开发板官方文档 https://dongshanpi.com/DongshanPi-One/01-BoardIntroduction/


