- 1解决微信小程序报[ app.json 文件内容错误] app.json app.json 未找到,未找到入口 app.json 文件,或者文件读取失败,请检查后重新编译。小程序app.json报错_dist/dev/mp-weixin/app.json: 根据 project.config.jso
- 2Java视频文件上传_java上传视频
- 3如何在一台计算机上使用两个网络,两台计算机如何共享Internet,并且只有一个宽带接口并且不想购买无线路由器,请使用桥接功能...
- 4Linux命令(82)之wget_linux wget
- 5跨域的理解(axios)_axios跨域
- 6android studio两个窗口,Android Studio多个项目窗口怎么切换?
- 7山西对口升学计算机考哪些学校,计算机类专业山西中等职业学校对口升学考试大纲.doc...
- 8【计算机视觉】OpenCV 4高级编程与项目实战(Python版)【3】:色彩空间_opencv4计算机视觉:pyhon
- 9FreeRTOS调度性能测试(线程切换耗时测试)_freertos 性能测试
- 10计算机视觉数据集_机器视觉用于行李箱训练的样本数据集
Lab3:基于VS Code的Linux内核调试环境搭建以及start_kernel跟踪分析
赞
踩
编译内核
- 安装开发工具
sudo apt install build-essential

sudo apt install qemu # install QEMU#作为一个虚拟机

sudo apt install libncurses5-dev bison flex libssl-dev libelf-dev
- 1
- 2
- 3
- 4
- 5
- 解压源码:
tar -xvf linux-5.4.34.tar - 配置内核
make defconfig # Default configuration is based on 'x86_64_defconfig'
make menuconfig# 打开debug相关选项
- 1
- 2
  Kernel hacking  --->

  Compile-time checks and compiler options  --->

   [*] Compile the kernel with debug info

   [*]   Provide GDB scripts for kernel debugging

 [*] Kernel debugging
- 1
- 2
- 3
- 4
- 5
- 6
- 7
- 8
- 9
#关闭KASLR(随机地址),否则会导致打断点失败。这样调试器就可以跟踪到源代码,之所以设置随机地址为了防止黑客攻击:
  Processor type and features ---->

  [ ] Randomize the address of the kernel image (KASLR)
- 1
- 2
- 3
- 编译内核
make -j$(nproc) # nproc gives the number of CPU cores/threads available
# 测试一下内核能不能正常加载运行,因为没有文件系统最终会kernel panic
qemu-system-x86_64 -kernel arch/x86/boot/bzImage
- 1
- 2
- 3

制作根文件
- 上传busybox-1.32.0.tar.bz2
- 解压:
tar -jxvf busybox-1.32.0.tar.bz2 - 切目录
- 配置文件:
make menuconfig
Settings —>
[*] Build static binary (no shared libs)静态编译
- 编译并安装:
make -j6 && make install - 制作内存根文件镜像:
- 文件目录
cd /home/song/workdir/linux-5.4.34

mkdir rootfs

cd rootfs

cp /home/song/workdir/busybox-1.32.0/_install/* ./ -rf

mkdir dev proc sys home

sudo cp -a /dev/{null,console,tty,tty1,tty2,tty3,tty4} dev/
- 1
- 2
- 3
- 4
- 5
- 6
- 7
- 8
- 9
- 10
- 11
- 准备init文件
#!/bin/sh
mount -t proc none /proc
mount -t sysfs none /sys
echo "Welcome Songlw'OS!"
echo "--------------------"
cd home
/bin/sh
- 1
- 2
- 3
- 4
- 5
- 6
- 7
- 添加权限:
chmod +x init - 打包成为镜像文件:
find . -print0 | cpio --null -ov --format=newc | gzip -9 > ../rootfs.cpio.gz - 执行
cd /home/song/workdir/linux-5.4.34
qemu-system-x86_64 -kernel ./arch/x86/boot/bzImage -initrd rootfs.cpio.gz
- 1
- 2
执行了init文件,输出Welcome Songlw’OS!
使用gdb调试
- 执行:
qemu-system-x86_64 -kernel ./arch/x86/boot/bzImage -initrd rootfs.cpio.gz -S -s
#其中-S意思是Stopped,-s为gdb提供一个调试端口tcp:1234。
- 1
- 2
- 打开另一个终端,输入命令:
gdb vmlinux - 进行gdb调试:
(gdb) target remote:1234 //这是通过之前预留的tcp:1234建立连接
(gdb) b start_kernel //这是设置了第一个断点
c、bt、list、next、step… //具体查看gdb的命令
配置VScode调试
-
安装插件:插件C/C++ Intellisense和C/C++ Themes、GDB Debug,还需要使用如下命令安装GNU Global。
sudo apt install global. -
在Linux目录执行命令:
python3 ./scripts/gen_compile_commands.py生成 compile_commands.json 文件帮助 Intellisense 正常提示(包括头文件和宏定义等)。 -
打开linux-5.4.34文件夹
!](https://img-blog.csdnimg.cn/073114e03dbe4d559c9d61ee93d89d37.png#pic_center) -
配置.vscode

-
开始调试

-
start_kernel。我们看到了0号进程init_task被设置整个系统的第一个进程(0进程是手工创建的,其他进程都是0号进程创建的)在内核引导时,init_task会被创建并启动,它是所有其他进程的起点。start_kernel会继续执行一些初始化操作,包括初始化各种重要的数据结构、驱动程序、中断处理程序等。在这个阶段,内核会建立好一些必要的核心数据结构,如物理内存管理器、虚拟内存管理器,以及进程调度器等。start_kernel的结尾arch_call_reset_init(),这个点开这个函数的定义是执行了reset_init()函数,因此我们再设置一个函数断点"reset_init"。

-
reset_init:调用了kernel_thread创建一个新的内核线程
-
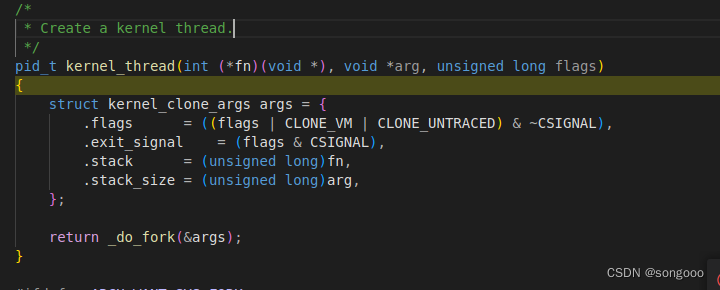
kernel_thread创建一个新的内核线程,发现kernel_thread函数是通过_do_fork函数来创建进程的。

-
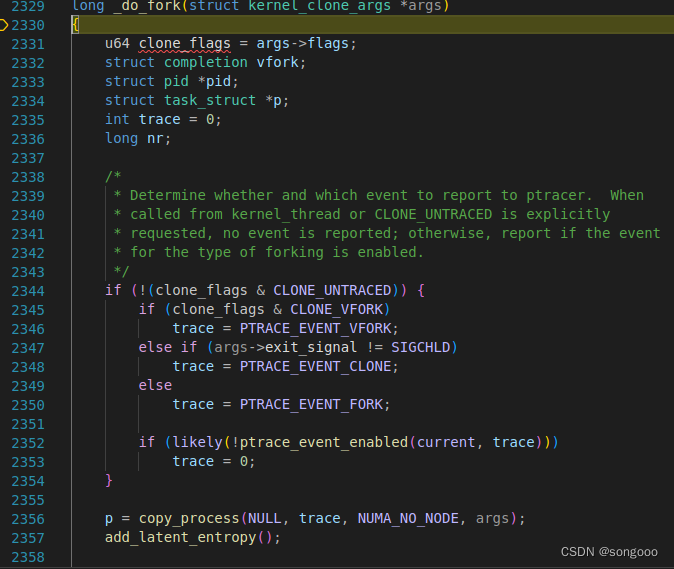
_do_fork函数主要完成了调用copy_process()复制父进程、调用wake_up_new_task将子进程加入就绪队列等待调度执行等。

-
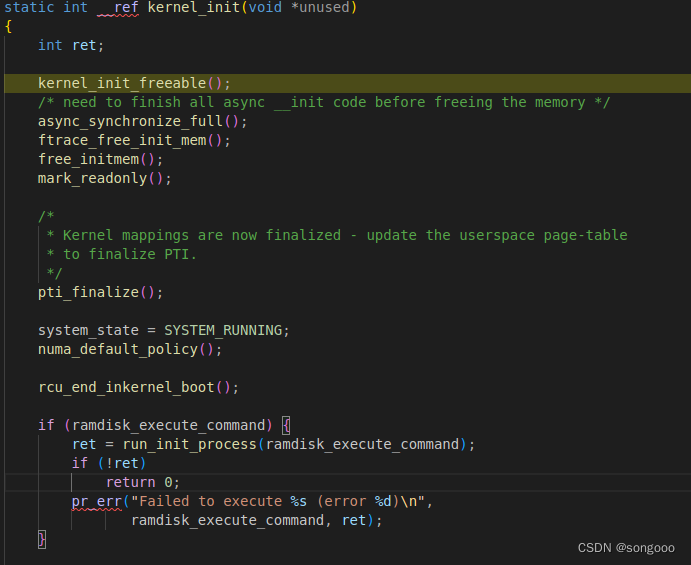
kernel_init:在新线程(进程)中运行kernel_init()函数, 点开kernel_init()函数,可以看出,在这个里面调用了run_init_process函数。一共有三个if,其中前两个点开ramdisk_execute_command和execute_command
ramdisk_execute_command 可以通过 uboot 在环境变量中指定。execute_command也是一个全局的 char 指针变量,值也可以通过u-boot 传递。
所以这两个没有值就按顺序再尝试跳转到/sbin/init、/etc/init、/bin/init、/bin/sh去启动用户空间的init程序。而run_init_process函数则使用了do_execve函数

参考文章
- https://blog.csdn.net/double113217/article/details/129614177
- 课程PPT


