
热门标签
热门文章
- 1使用Android adb命令来启动Android应用程序_adb start --es简书
- 2常用的编程语言有哪些_常用开发语言
- 3一文解决Flutter中使用TextField遇到的各种疑难杂症_flutter_keyboard_visibility引入原生不起作用
- 4Ubuntu20.04卸载clion_,ubuntu,clion 卸载
- 5WorkManager详解--使用WorkManager编写小说阅读器_workmanager getworkinfobyidlivedata
- 6proe 导航选项卡怎么隐藏_解锁 Prism 8 新功能 | 更加平稳的导航
- 7mysql COLLATE=utf8mb4_unicode_ci_collate utf8mb4_unicode_ci
- 8Centos 8 搭建samba文件共享服务(超详细)_centos8 修改samba配置文件
- 9使用manifestPlaceholders
- 10封装请求拦截器、响应拦截器原理
当前位置: article > 正文
axios在vue3+ts中的环境中使用_vue3+ts 中使用axios
作者:2023面试高手 | 2024-03-22 05:44:51
赞
踩
vue3+ts 中使用axios
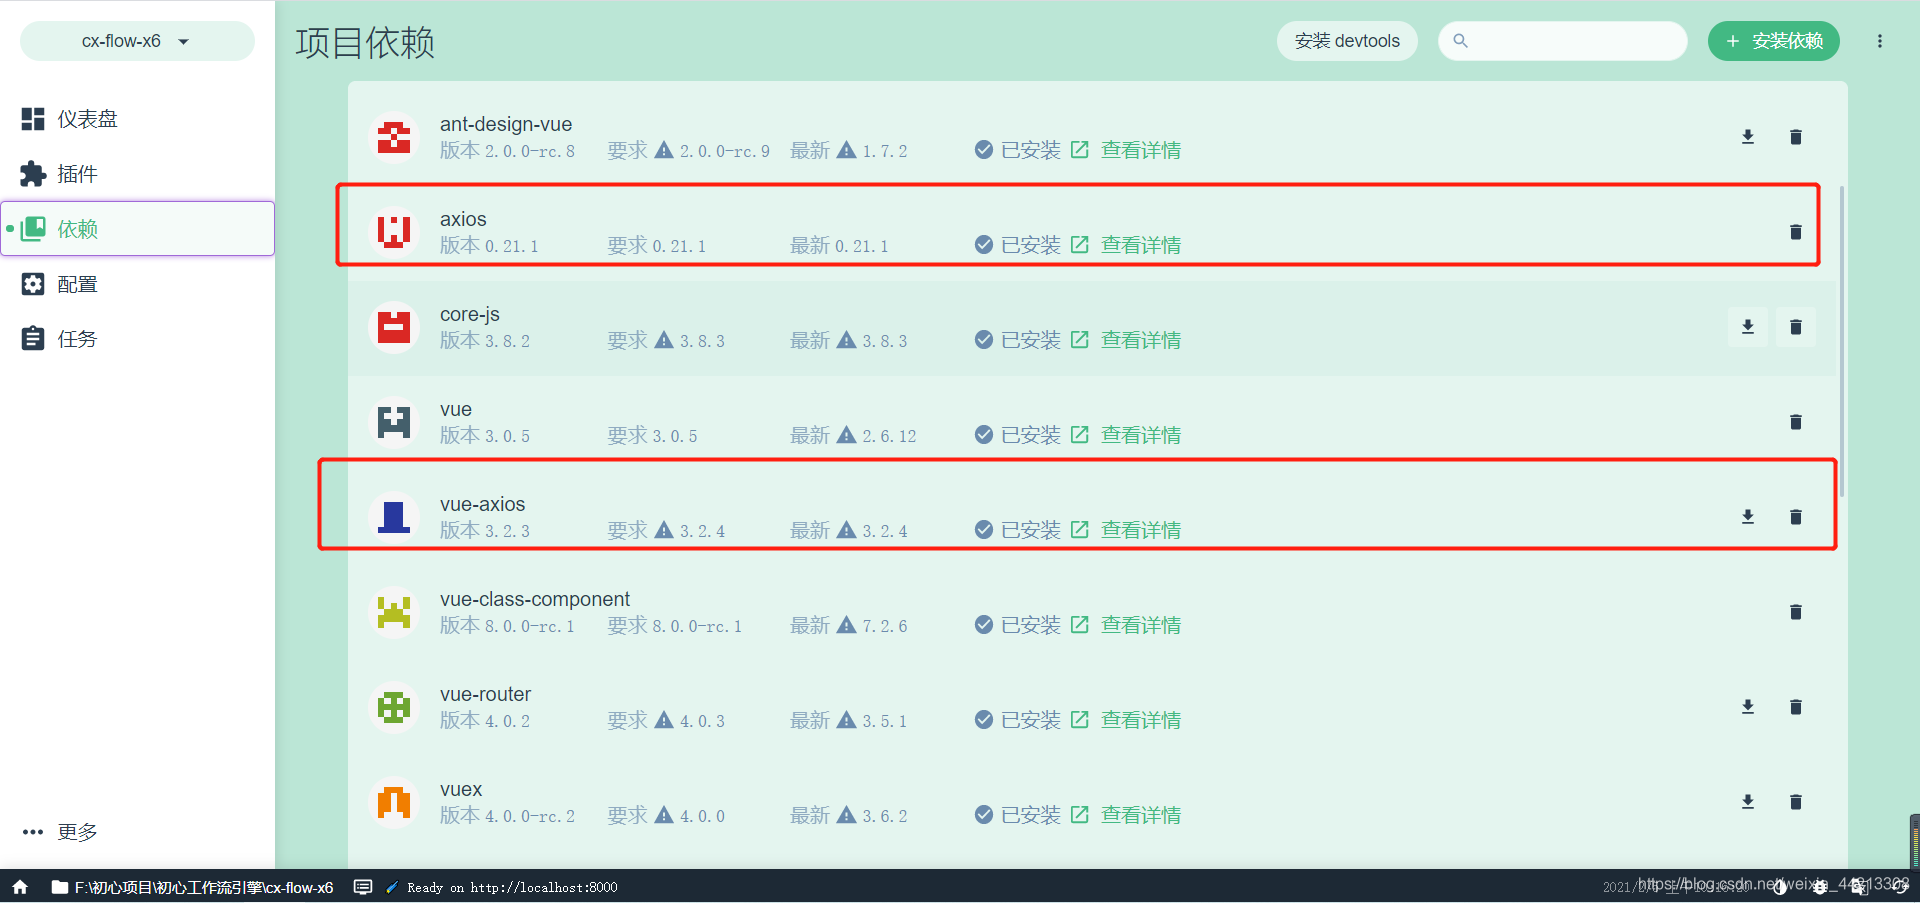
1、安装依赖:
命令行:vue ui ;打开该项目,引入相应的axios和vue-axios

2、编写reauest.ts
- import axios, {AxiosInstance, AxiosRequestConfig, AxiosResponse} from 'axios';
- import {message, notification} from 'ant-design-vue';
-
- export class Request {
- public static axiosInstance: AxiosInstance;
-
- // constructor() {
- // // 创建axios实例
- // this.axiosInstance = axios.create({timeout: 1000 * 12});
- // // 初始化拦截器
- // this.initInterceptors();
- // }
-
- public static init() {
- // 创建axios实例
- this.axiosInstance = axios.create({
- baseURL: '/api',
- timeout: 6000
- });
- // 初始化拦截器
- this.initInterceptors();
- return axios;
- }
-
- // 为了让http.ts中获取初始化好的axios实例
- // public getInterceptors() {
- // return this.axiosInstance;
- // }
-
-
-
- // 初始化拦截器
- public static initInterceptors() {
- // 设置post请求头
- this.axiosInstance.defaults.headers.post['Content-Type'] = 'application/x-www-form-urlencoded';
- /**
- * 请求拦截器
- * 每次请求前,如果存在token则在请求头中携带token
- */
- this.axiosInstance.interceptors.request.use(
- (config: AxiosRequestConfig) => {
-
- // const token = Vue.ls.get(ACCESS_TOKEN)
- // if (token) {
- // config.headers['Authorization'] = 'Bearer ' + token
- // }
-
- // 登录流程控制中,根据本地是否存在token判断用户的登录情况
- // 但是即使token存在,也有可能token是过期的,所以在每次的请求头中携带token
- // 后台根据携带的token判断用户的登录情况,并返回给我们对应的状态码
- // if (config.headers.isJwt) {
- const token = localStorage.getItem('ACCESS_TOKEN');
- if (token) {
- config.headers.Authorization = 'Bearer ' + token;
- }
- // }
- return config;
- },
- (error: any) => {
- console.log(error);
- },
- );
-
-
- // 响应拦截器
- this.axiosInstance.interceptors.response.use(
- // 请求成功
- (response: AxiosResponse) => {
- // if (res.headers.authorization) {
- // localStorage.setItem('id_token', res.headers.authorization);
- // } else {
- // if (res.data && res.data.token) {
- // localStorage.setItem('id_token', res.data.token);
- // }
- // }
-
- if (response.status === 200) {
- // return Promise.resolve(response.data);
- return response;
- } else {
- Request.errorHandle(response);
- // return Promise.reject(response.data);
- return response;
- }
- },
- // 请求失败
- (error: any) => {
- const {response} = error;
- if (response) {
- // 请求已发出,但是不在2xx的范围
- Request.errorHandle(response);
- return Promise.reject(response.data);
- } else {
- // 处理断网的情况
- // eg:请求超时或断网时,更新state的network状态
- // network状态在app.vue中控制着一个全局的断网提示组件的显示隐藏
- // 关于断网组件中的刷新重新获取数据,会在断网组件中说明
- message.warn('网络连接异常,请稍后再试!');
- }
- });
- }
-
-
- /**
- * http握手错误
- * @param res 响应回调,根据不同响应进行不同操作
- */
- private static errorHandle(res: any) {
- // 状态码判断
- switch (res.status) {
- case 401:
- break;
- case 403:
- break;
- case 404:
- message.warn('请求的资源不存在');
- break;
- default:
- message.warn('连接错误');
- }
- }
-
-
- }

3、main.ts中引入axios和request
- import { createApp } from 'vue'
- import App from './App.vue'
-
- import router from './router'
- import store from './store'
-
- import Antd from 'ant-design-vue'
- import 'ant-design-vue/dist/antd.css'
- // import { HttpService } from "@/utils/http";
-
- // import { VueAxios } from './utils/request'
- // import axios from 'axios'
- import { Request } from '@/utils/request';
- import VueAxios from 'vue-axios'
-
-
- const app = createApp(App as any)
- // app.config.productionTip = false
-
- app
- .use(store)
- .use(router)
- .use(Antd)
- .use(VueAxios, Request.init())
- .mount('#app')
4、编写接口
- import { Request } from '@/utils/request';
-
-
- export function login (parameter: any) {
- return Request.axiosInstance({
- url: '/cxLogin',
- method: 'post',
- data: parameter
- })
- }
5、vue文件中使用
- <template>
- <div class="login-container">
- <div class="content">
- <a-card title="欢迎登陆CX工作流设计器" style="width: 100%;height: 100%">
- <a-form :model="loginForm" @submit="handleSubmit"><!--@submit.native.prevent-->
- <a-form-item>
- <a-input v-model:value="loginForm.account" placeholder="account" style="width: 350px" >
- <template #prefix><UserOutlined style="color:rgba(0,0,0,.25)"/></template>
- </a-input>
- </a-form-item>
- <a-form-item>
- <a-input v-model:value="loginForm.password" type="password" placeholder="Password" style="width: 350px">
- <template #prefix><LockOutlined style="color:rgba(0,0,0,.25)"/></template>
- </a-input>
- </a-form-item>
- <a-form-item>
- <a-button type="primary" html-type="submit" :disabled="loginForm.account === '' || loginForm.password === ''" style="width: 350px">
- 登陆
- </a-button>
- </a-form-item>
- </a-form>
- </a-card>
- </div>
- </div>
- </template>
-
- <script lang="ts">
- import '../../reset.less'
- import '../../global.css'
- import { defineComponent, reactive } from "vue";
- import { UserOutlined, LockOutlined } from '@ant-design/icons-vue';
- import { login } from '@/api/modular/auth'
-
- import { useRouter } from 'vue-router'
-
- export default defineComponent({
- name: "index",
- components: {
- UserOutlined,
- LockOutlined,
- },
- setup(){
- const loginForm = reactive({
- account: '',
- password:''
- })
- const router = useRouter()
-
- const handleSubmit = (e: Event)=> {
- const param = {
- account: loginForm.account,
- password: loginForm.password
- }
- login(param).then(response => {
- const res: any = response.data
- if(res.code === 200){
- localStorage.setItem('ACCESS_TOKEN', res.data);
- router.push("/flow")
- }
- })
- }
- return{
- loginForm,
- handleSubmit
- }
- }
- })
- </script>
-
- <style lang="less" scoped>
- /* 背景 */
- .login-container {
- position: absolute;
- width: 100%;
- height: 100%;
- background: url("../../assets/cool-background.png");
- .content {
- position: absolute;
- width:400px;
- height:300px;
- left:50%;
- top:50%;
- margin-left:-200px;
- margin-top:-150px;
-
- border-radius: 10px;
- background: #f6efef;
- box-shadow: 5px 5px 10px #626060,
- -2px -2px 2px #de18ff;
- }
- }
-
-
- </style>
声明:本文内容由网友自发贡献,不代表【wpsshop博客】立场,版权归原作者所有,本站不承担相应法律责任。如您发现有侵权的内容,请联系我们。转载请注明出处:https://www.wpsshop.cn/w/2023面试高手/article/detail/285661
推荐阅读
相关标签

