热门标签
热门文章
- 1pytorch_pretrained_bert库报错: Model name ‘pretrained\chinese_L-12_H-768_A-12‘ was not found in model
- 2关于监控摄像头小程序直播使用流程及主要应用_雄迈摄像头如何在微信小程序使用
- 3面试题:Java虚拟机JVM的组成
- 4python+离散小波变换+不同系数的波形_librosa 小波
- 5XSS一-WEB攻防-XSS跨站&反射型&存储型&DOM型&标签闭合&输入输出&JS代码解析
- 6CentOS 安装Cursor --- Draft
- 7机器学习领域中各学派划分——符号主义、频率主义、贝叶斯主义、连接主义核心思想和理论_符号主义与连接主义的优势与缺陷分别是什么
- 8curl 通过代理服务器访问外网的接口_curl通过代理访问接口
- 9Nvidia Jetson AGX Xavier 安装 Swin-Transformer-Object-Detection_mmcv-full jetson
- 10SSE通信方式 使用流信息向浏览器推送信息_浏览器如何查看到sse返回的信息内容
当前位置: article > 正文
k8s helm的安装与简单使用_kubectl install helm
作者:2023面试高手 | 2024-03-30 08:09:09
赞
踩
kubectl install helm
基本概念
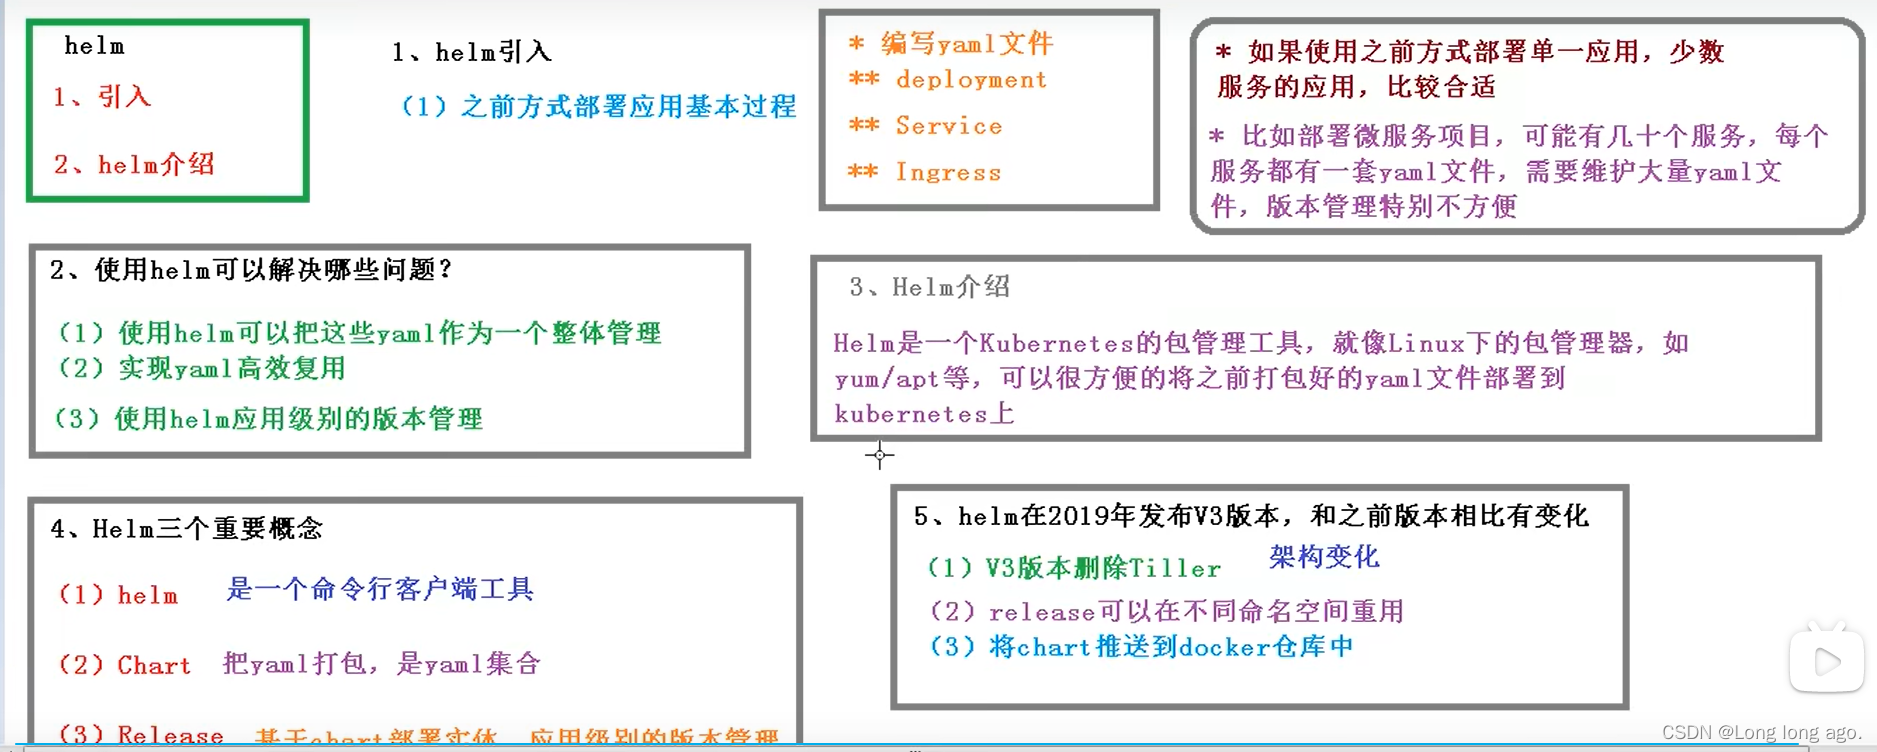
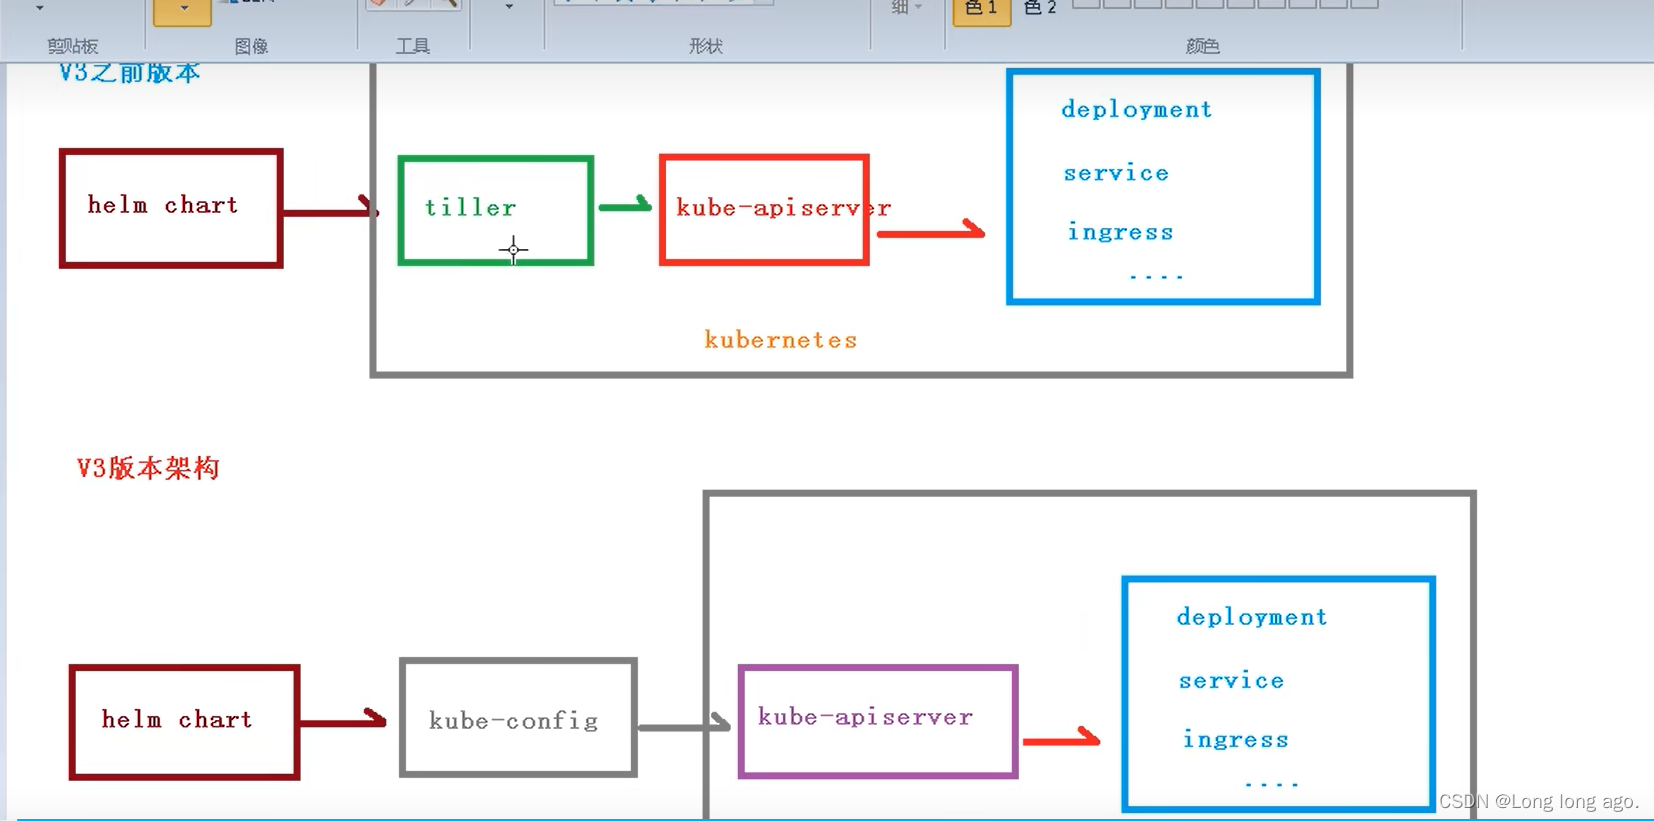
1、安装
1.1 、获取安装包
wget https://get.helm.sh/helm-v3.9.4-linux-amd64.tar.gz
- 1
1.2、解压压缩包
tar -zvxf helm-v3.9.4-linux-amd64.tar.gz
- 1
1.3、创建软连接
ln -s /解压地址/linux-amd64/helm /usr/local/bin/helm
- 1
1.4、查看版本
helm -version
- 1

2、配置仓库
helm repo add stable http://mirror.azure.cn/kubernetes/charts
- 1
helm repo add aliyun https://kubernetes.oss-cn-hangzhou.aliyuncs.com/charts
- 1
更新
helm repo update
- 1
2.1、查看仓库配置
helm repo list
- 1

搜索引用命令
helm search repo stable
- 1
2.2、删除仓库
helm repo remove aliyun
- 1
3、安装应用
先查看有什么版本

3.1 安装应用
helm install 你想起的名字 stable/weave-scope
- 1

3.2、查看安装列表
helm list
- 1

3.3、查看安装状态
helm status 你起的应用名称
- 1
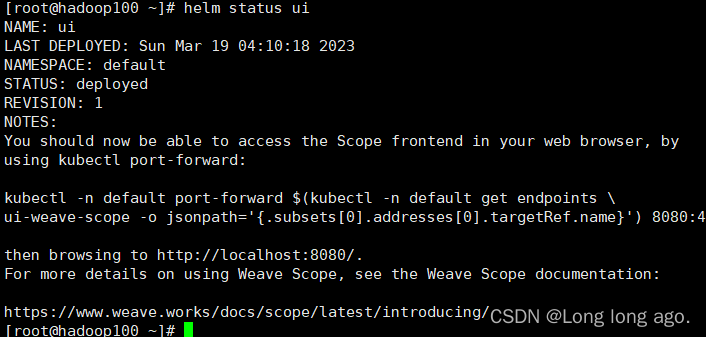
查看pods
查看对外暴露端口,发现并没有对外暴露

4、修改配置 使helm安装的配置自动暴露端口
kubectl edit svc ui-weave-scope
- 1

修改前
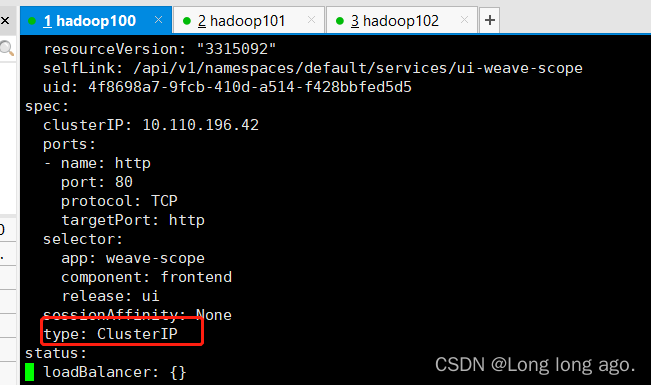
修改后
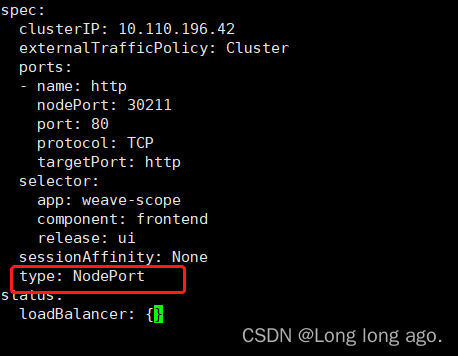
修改后查询svc发现已经自动暴露端口

5、创建自己chart
helm create mychat
- 1

5.1mychat文件夹的内容

5.2 文件夹解析
Chart.yaml 当前chart属性配置
templates 里面是自己的配置模板配置文件,可以删除里面的内容 rm -rf /templates路径/*
values.yaml 里面是配置公共变量的
5.3 创建名字叫web2的nginx 的配置文件deployment.yaml
kubectl create deployment web2 --image=nginx --dry-run -o yaml > deployment.yaml
- 1

创建services文件
kubectl expose deployment web2 --port=80 --target-port=80 --type=NodePort --dry-run -o yaml > service.yaml
- 1
这里可能会创建不出来 可以先创建web2的应用,再执行这个命令,然后再删除

5.4 安装mychat
helm install web2 /root/mychat
- 1

如果报错
Error: cannot re-use a name that is still in use
- 1
可以查

删除后再重新安装
helm -n 《namespace》delete 《name》
- 1
5.5 应用升级
当修改了配置升级应用
helm upgrade 《应用名》 /chart路径/
- 1

5.6 配置公告变量
vim values.yaml
- 1
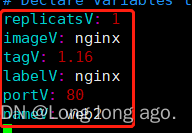
5.7 修改deployment.yaml和services.yaml
{{ .Values.定义的变量名称}}
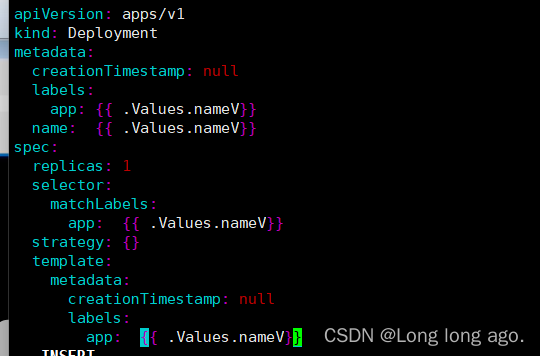
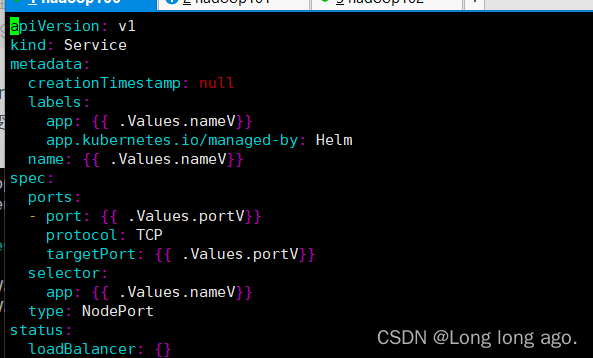
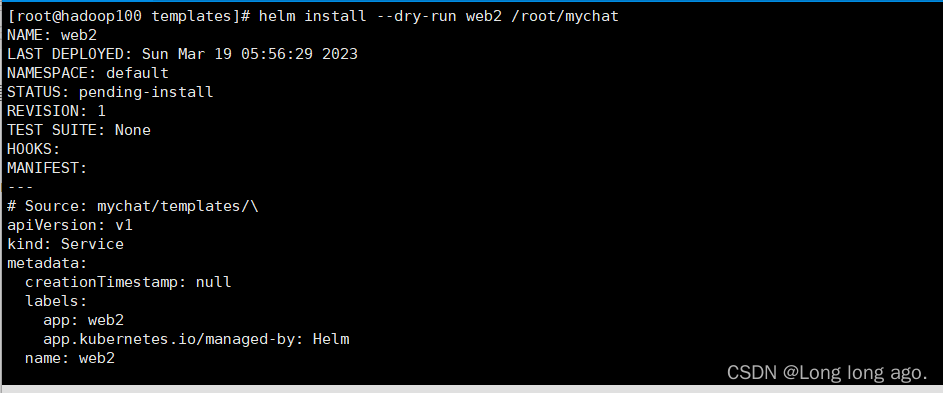
5.8 查看模板是不是正常,有没有引用公共变量
helm install --dry-run web2 /root/mychat
- 1
5.9 更新服务
helm upgrade web2 /root/mychat
- 1
成功,完结撒花

声明:本文内容由网友自发贡献,不代表【wpsshop博客】立场,版权归原作者所有,本站不承担相应法律责任。如您发现有侵权的内容,请联系我们。转载请注明出处:https://www.wpsshop.cn/w/2023面试高手/article/detail/339762
推荐阅读
相关标签


