热门标签
热门文章
- 1【Java】JDK1.8 HashMap源码,put源码详细讲解
- 2(微信小程序毕业设计)餐饮外卖系统(附源码+论文)_微店.餐饮外卖小程序代码
- 3【微信小程序】JS逻辑交互_微信小程序的js文件是什么
- 4acwing2060. 奶牛选美
- 56G显存玩转130亿参数大模型,仅需13行命令,RTX2060用户发来贺电
- 6有人云物联网DTU设备数据通过HTTP推送到PHP的接收源码(未完成,求帮助)_网关dtu显示thinkphp
- 7卫星、无人机平台的多光谱数据在地质、土壤调查和农业等需要用什么?_土壤光谱csdn
- 8统信UOS建立本地源_uos 搭建软件源
- 9git报错 error: cannot lock ref ‘refs/remotes/origin/master‘: unable to resolve reference ‘refs/remote
- 10简介高效的 CV 入门指南: 100 行实现 ConvNext 图像分类
当前位置: article > 正文
发布vue项目、nginx配置及问题场景_vue hash nginx配置
作者:2023面试高手 | 2024-04-27 10:26:25
赞
踩
vue hash nginx配置
问题场景(hash模式,目前只研究了hash)
- 想一个nginx部署多个文件目录
- 想增加后缀(比如:app端和web端同时配置在nginx中根据后缀不同走不同的文件路径)
- 登录成功刷新或者退出登录不是404就是跳转错误
- 本地和服务器区分,本地不加后缀,服务器加后缀,每次发布都要改配置,怎么样一次改动,两种场景都自动生效
- 刷新报错,样式问题,各种404等等
hash配置完后登录或者退出要么跳不过去,要么404,问题解决过程
还有有一种更好的、快捷的方式,就是将后缀配置的环境变量中,如下
// 配置在环境env中: VUE_APP_PATH = '/manage/'
 publicPath: process.env.VUE_APP_PATH,
  // publicPath : process.env.NODE_ENV === 'production' ? './' : '/',
- 1
- 2
- 3
还是下面改动的方式,只是不需要应用全局变量文件了,只需要在改动的地方加process.env.VUE_APP_PATH
举个例子login.vue就可以这样改(减少了引用和判断这一操作)
this.$router.push({ path: this.redirect || process.env.VUE_APP_PATH }).catch(()=>{});
- 1
1. 全局(settings.js[src目录下])配置文件增加
publicPath: '/manage/'
- 1
2. 修改退出登录或者登录时的返回路径(目前改了四处Navbar.vue、request.js、login.vue、vue.config.js)
Navbar.vue
// 引入配置
const defaultSettings = require('../../settings.js')
// 将原来 location.href = '/' 替换
location.href = (process.env.NODE_ENV === 'production' ? defaultSettings.publicPath : '/');
- 1
- 2
- 3
- 4
request.js 与上面的步骤一样
const defaultSettings = require('../settings.js')
 location.href = (process.env.NODE_ENV === 'production' ? defaultSettings.publicPath : '/');
- 1
- 2
login.vue 与上面有一点不一样注意:(location.href = this.redirect || “/”;)替换
const defaultSettings = require('../settings.js')
// 替换为如下
this.$router.push({ path: this.redirect || (process.env.NODE_ENV === 'production' ? defaultSettings.publicPath : '/' ) }).catch(()=>{});
- 1
- 2
- 3
vue.config.js
const defaultSettings = require('./src/settings.js')
// 增加
publicPath: process.env.NODE_ENV === "production" ?  defaultSettings.publicPath : "/",
- 1
- 2
- 3
3. nginx配置
        location /gather {
            proxy_pass http://127.0.0.1:8087/gather;
            index  index.html index.htm index.jsp;
        }

		 location /prod-api/ {
           proxy_pass http://127.0.0.1:8087/gather/;
        }

		location /manage/ {
          alias d:/gather/java/gatherManage/;
		  try_files $uri $uri/ /index.html;
        }

		 location @router {
			rewrite ^.*$ /index.html last;
		}
- 1
- 2
- 3
- 4
- 5
- 6
- 7
- 8
- 9
- 10
- 11
- 12
- 13
- 14
- 15
- 16
- 17
- 18
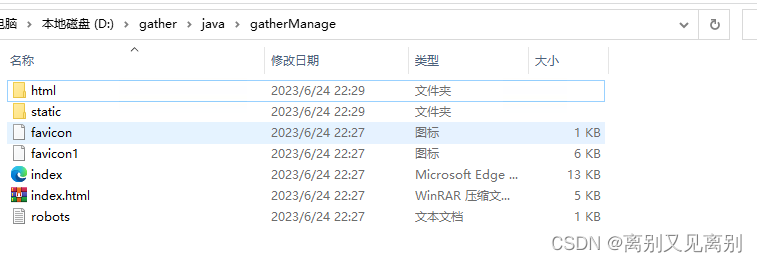
4 文件目录

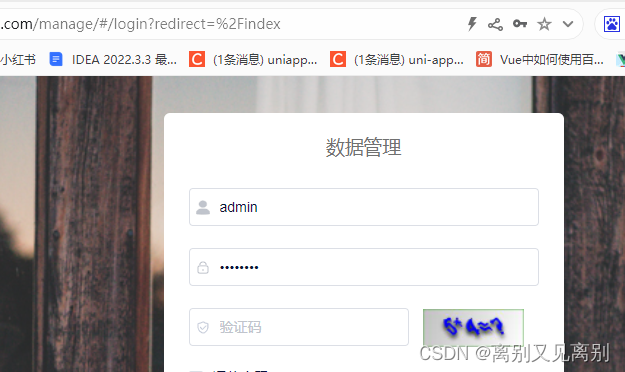
5.效果
1. 本地

2 服务器

知识点补充
反向代理实例说明:
如果 proxy_pass 后缀加了/,最后访问时,会去除匹配字符 /prod-api/
	# 没测试
	 location /prod-api {
           proxy_pass http://127.0.0.1:8087/;
      }
      # 已测
      location /prod-api/ {
        proxy_pass http://127.0.0.1:8087/;
      }
- 1
- 2
- 3
- 4
- 5
- 6
- 7
- 8
http://test.com/prod-api/test 会被转化为 http://127.0.0.1:8087/test
如果没有加/,就不会去除/prod-api/
	# 已测
	 location /prod-api/ {
           proxy_pass http://127.0.0.1:8087;
     }
      location /prod-api {
           proxy_pass http://127.0.0.1:8087;
      }
- 1
- 2
- 3
- 4
- 5
- 6
- 7
http://test.com/prod-api/test 会被转化为 http://127.0.0.1:8087/test/prod-api/test
2. 正向代理
如果 location配置的加了/就是目录不加就是固定文件
    location /test/login.png {
        root d:/gather/java/gatherManage/;
        index index.html;
        try_files $uri $uri/ /index.html last;
    }
- 1
- 2
- 3
- 4
- 5
访问 /test/login.png 会被代理成 d:/gather/java/gatherManage/test/login.png
    location /test/ {
        root d:/gather/java/gatherManage/;
        index index.html;
        try_files $uri $uri/ /index.html last;
    }
- 1
- 2
- 3
- 4
- 5
此时就是访问 /test/目录下
如果使用alias,不使用root也有一点区别,匹配字符会被替换
		location /manage/ {
          alias d:/gather/java/gatherManage/;
		  try_files $uri $uri/ /index.html;
        }
- 1
- 2
- 3
- 4
- 5
/manage/test.js 会被代理为 d:/gather/java/gatherManage/test.js
声明:本文内容由网友自发贡献,不代表【wpsshop博客】立场,版权归原作者所有,本站不承担相应法律责任。如您发现有侵权的内容,请联系我们。转载请注明出处:https://www.wpsshop.cn/w/2023面试高手/article/detail/496249
推荐阅读
相关标签


