热门标签
热门文章
- 1【论文阅读】VDBFusion: Flexible and Efficient TSDF Integration of Range Sensor Data
- 2C语言旋转数组_c语言装数组的数组
- 3Python 爬取天猫 iPhone8plus 销售数据_爬取手机销售数据
- 4LeetCode189 向右移动K位 数组_力扣数组右移k位
- 5Baidu Comate智能代码助手-高效代码编程体验_百度的智能编码助手comate的知识库具体如何使用
- 6服务跑不起来 java.net.SocketException: Permission denied
- 7【Linux】进程间通信——管道_进程管道linux
- 8java.sql.SQLSyntaxErrorException: Unknown column ‘name‘ in ‘where clause‘_error querying database. cause: java.sql.sqlsyntax
- 9有没有xd了解杭州三维通信公司的,这家公司咋样?
- 10AgentScope
当前位置: article > 正文
教你如何自定义 Github 首页_设置github主页
作者:2023面试高手 | 2024-05-16 00:36:08
赞
踩
设置github主页
一、创建自定义首页仓库
若要自定义首页,首先需要创建一个与你 Github ID 同名的仓库
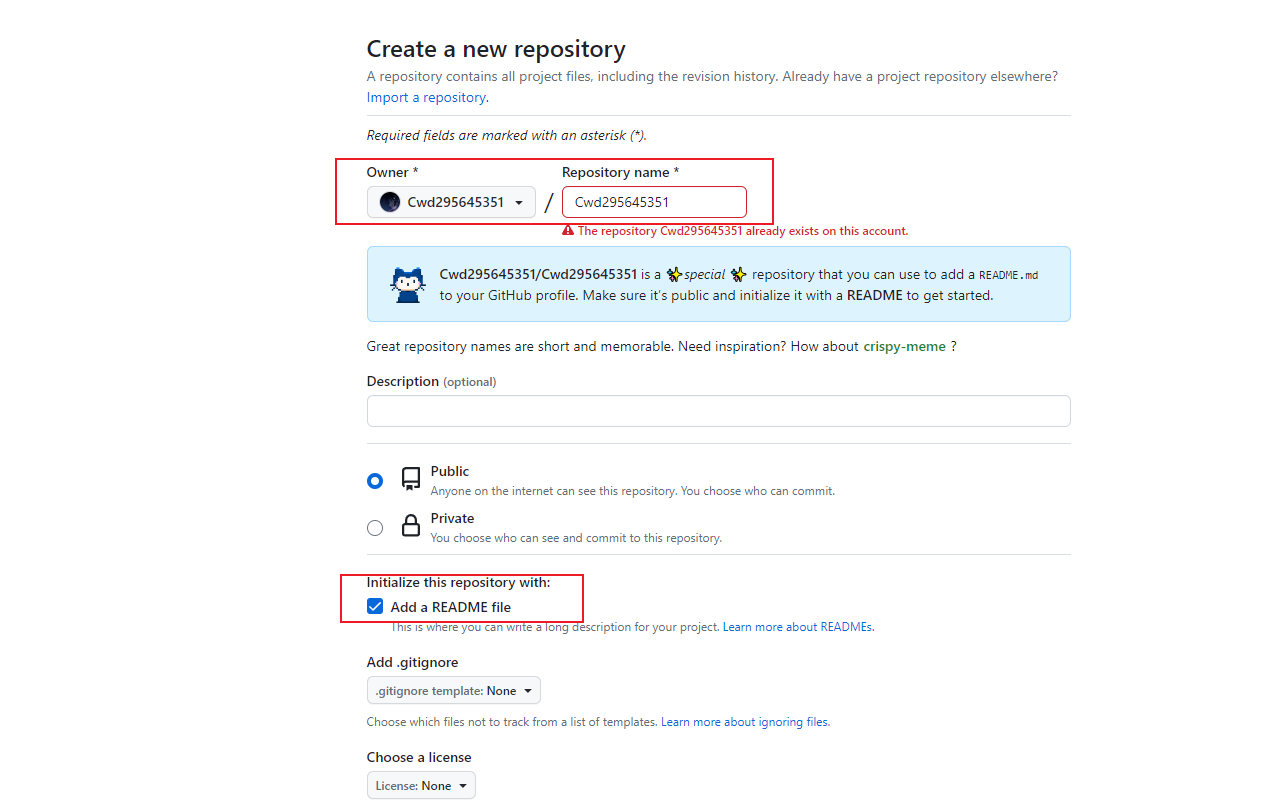
创建完成后就可以开始为你的首页添加一些有趣的内容了,代码格式可以是 markdown 语法,也可以是 HTML 语法,但 HTML 的扩展性更强一点,因此笔者使用的是 HTML 语法
二、GitHub Readme Stats(Github 统计信息)
github-readme-stats 插件可以显示你的 github 的所有的 Stars、Commits 和 Issues 等信息:
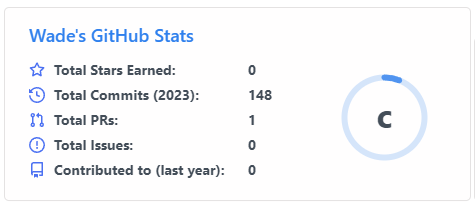
使用方法如下,直接将我的 Github ID 换成你自己的即可使用
<div align="center">
  <img src="https://github-readme-stats.vercel.app/api?username=Cwd295645351&show_icons=true&theme=transparent" />
</div>
- 1
- 2
- 3
如果不喜欢白色,还可以换成其它的主题色,官网目前支持的主题色有 dark, radical, merko, gruvbox, tokyonight, onedark, cobalt, synthwave, highcontrast, dracula,只需要将 theme 参数内容换成自己想要的风格即可。
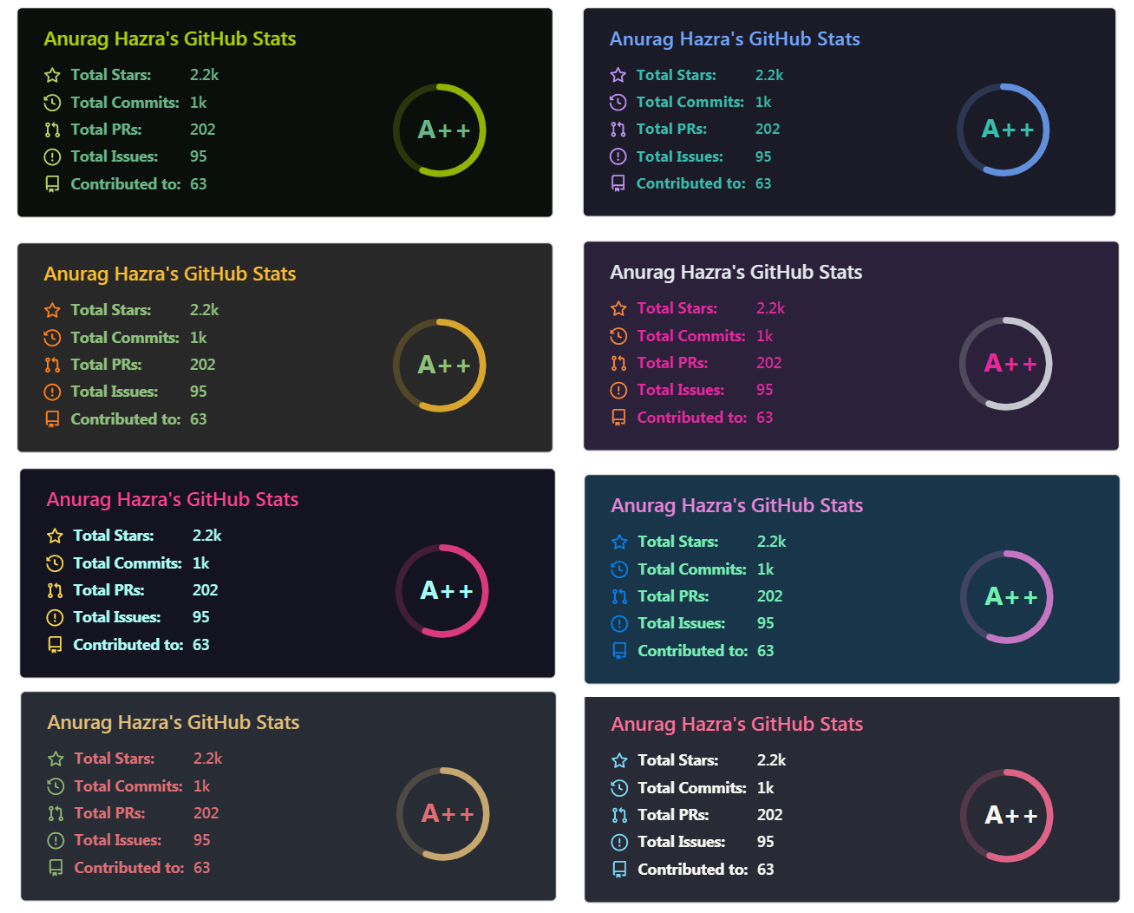
此外,这个还能统计你最常用的语言排名
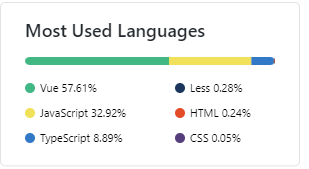
使用方法如下, 同样将我的 Github ID 换成你的即可
<div align="center">
  <img src="https://github-readme-stats.vercel.app/api/top-langs/?username=Cwd295645351&layout=compact&langs_count=6&text_color=000&icon_color=fff&theme=graywhite" />
</div>
- 1
- 2
- 3
三、Shields(图标)
shields 可以生成高质量的徽章图标,并应用于你的首页中,使用徽章可以简单明了地展示你想要表达的内容,例如你所使用的技术栈,或者你的博客访问数等等。

<span >
  <img alt="Static Badge" src="https://img.shields.io/badge/Vue-%2342b883?style=flat-square&logo=Vue&logoColor=%23fff">
  <img alt="Static Badge" src="https://img.shields.io/badge/TypeScript-%230072b3?style=flat-square&logo=TypeScript&logoColor=%23fff">
  <img src="https://img.shields.io/badge/-JavaScript-F7DF1E?style=flat-square&logo=javascript&logoColor=white" />
  <img src="https://img.shields.io/badge/-HTML5-E34F26?style=flat-square&logo=html5&logoColor=white" />
  <img src="https://img.shields.io/badge/-CSS3-1572B6?style=flat-square&logo=css3" />
  <img alt="Static Badge" src="https://img.shields.io/badge/Webpack-%230072b3?style=flat-square&logo=webpack&logoColor=%23fff">
  <img alt="Static Badge" src="https://img.shields.io/badge/Vite-%239a60fe?style=flat-square&logo=vite&logoColor=%23fff">
  <img alt="Static Badge" src="https://img.shields.io/badge/Sass-%23c66394?style=flat-square&logo=Sass&logoColor=%23fff">
  <img alt="Static Badge" src="https://img.shields.io/badge/Visual_Studio_Code-007ACC?style=flat-square&logo=Visual-Studio-Code&logoColor=white">
  <img alt="Static Badge" src="https://img.shields.io/badge/Git-F05032?style=flat-square&logo=Git&logoColor=white">
</span>
- 1
- 2
- 3
- 4
- 5
- 6
- 7
- 8
- 9
- 10
- 11
- 12
四、动态打字效果

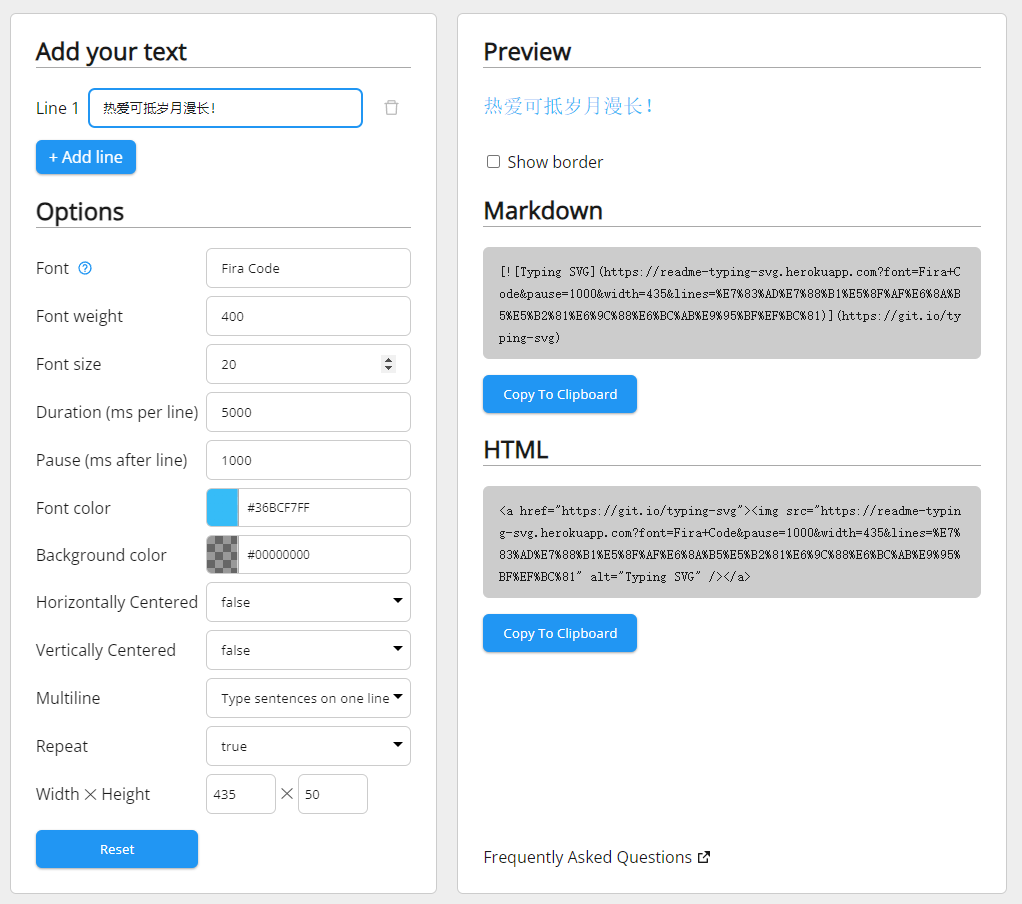
Readme Typing SVG 可以实现动态打字效果,官网上面可以调节各种样式效果,之后再将右侧的内容复制出来即可,也可直接复制我的代码.
<div align="center">
<a href="https://blog.sunguoqi.com/">
<img src="https://readme-typing-svg.demolab.com?font=Fira+Code&pause=1000&color=024EF7&width=435&lines=热爱可抵岁月漫长!;让正确的事情持续发生!¢er=true&size=27" alt="Typing SVG" />
</a>
</div>
- 1
- 2
- 3
- 4
- 5
五、后续
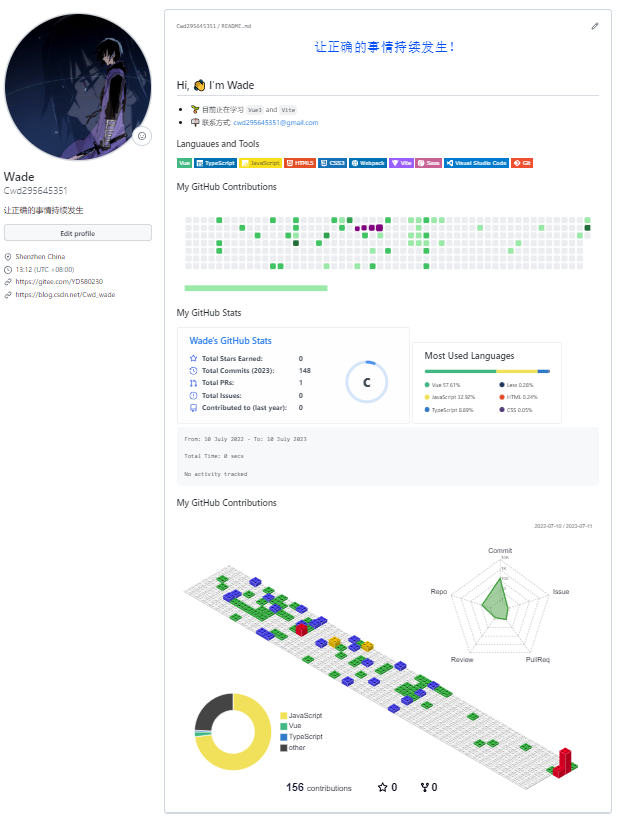
本次教程的内容,大部分都是可以直接复制代码并修改对应的 Github ID 进行展示,但是也有一部分内容是需要通过 Github Actions 去实现,后面的教程会写到如何通过 Github Actions 去实现贪吃蛇效果、代码提交三维可视化等更加酷炫的效果。最后分享一下笔者的仓库
声明:本文内容由网友自发贡献,不代表【wpsshop博客】立场,版权归原作者所有,本站不承担相应法律责任。如您发现有侵权的内容,请联系我们。转载请注明出处:https://www.wpsshop.cn/w/2023面试高手/article/detail/575803
推荐阅读
相关标签


